Objective
Design a mold around the stock and tooling that you'll be using, mill it (rough cut + three-axis finish cut) and use it to cast parts
Introduction
Molding and Casting techniques are used to produce different parts in the industry.
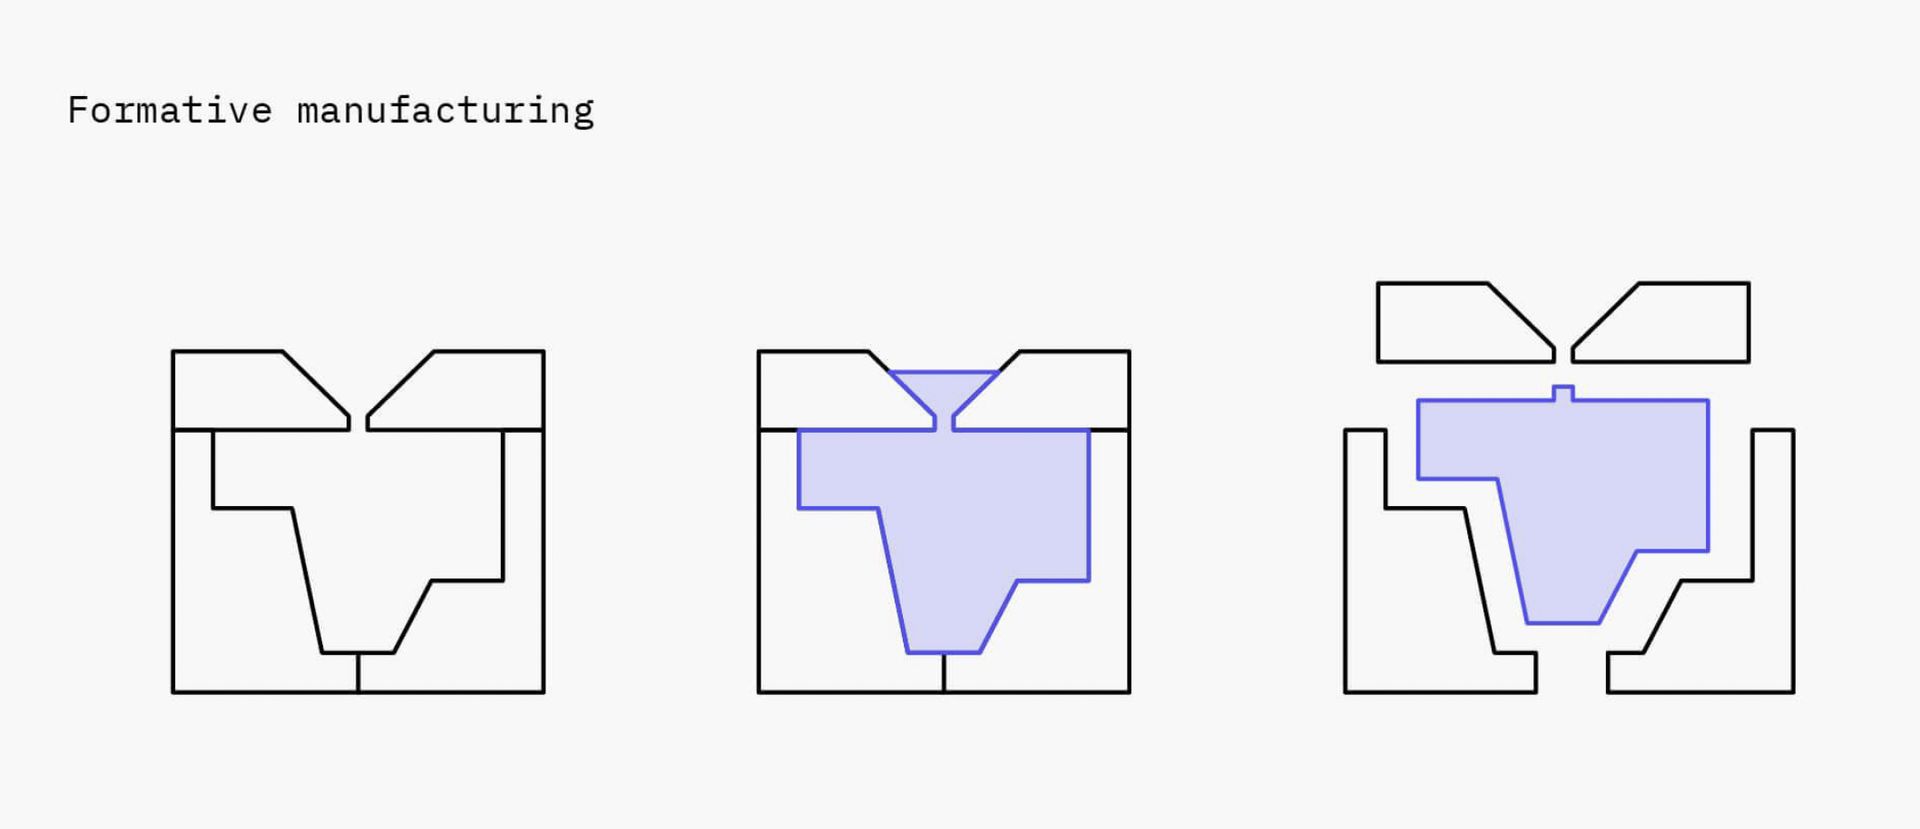
It comes under the category of Formative Manufacturing. The main advantage of this technique is that parts can be mass produced on a larger scale hence the overall product could be produced cheaply.
The downside is that production becomes costly if the quantity isn't above a certain threshold level. Hence driving up the cost for low quantity products.
The image shown below is the process of formative manufacturing.
Safety first
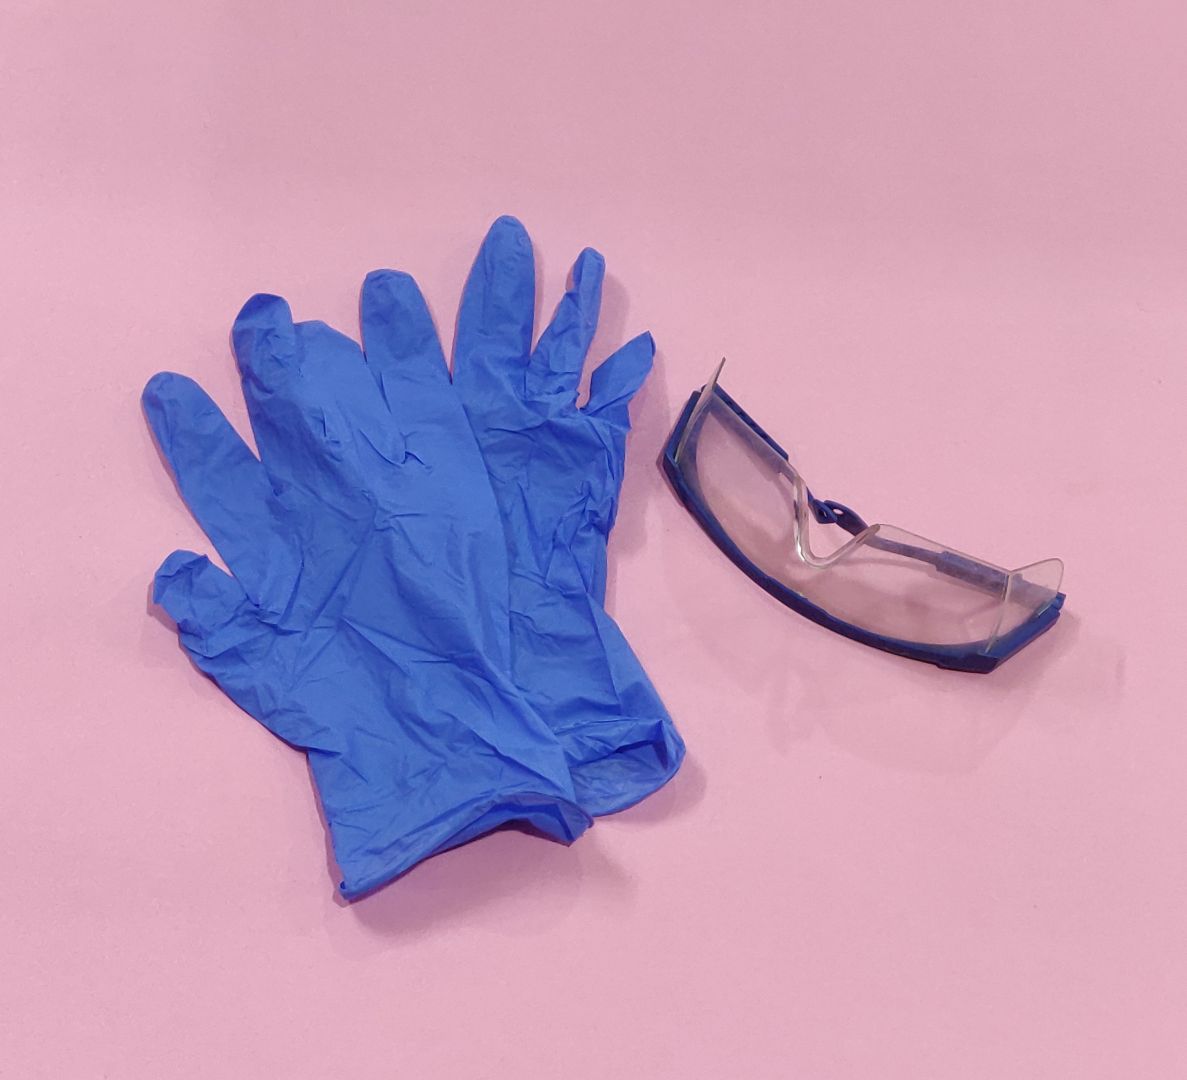
In molding and casting week we are going to deal with some less corrosive chemicals but they are harmfull for the body so safety first. Safety gears like glove and safety glasses are a must.
Initially I recommend everyone who works on a casting material to check the Safety DataSheet of the material before using the chemical
Machining
The process of creating a mold requires to produce a work piece of a hard material like wood.
There are various materials that are used to create a work piece of our own choice
Example:- Machinable wax, MDF, SoftWood etc but every material has its own quirks and limitations.
Like Machinable wax is reusable or Softwood can be used for multiple cycles of casting etc. For this reason I chose MDF.
Reason for MDF
The main reason to choose MDF as a material for workpiece was that machine time that was required for milling on an SRM-20.
SRM-20 can mill both MDF and Machinable Wax but had some issues and error that I couldn't resolve we were also limited to the machining time of our workpiece. Plus alot of students also did their machining on SRM-20 instead of the NUMAC wood Millling Machine which was not explored.
I wanted to standout of the crowd by mastering the techniques to operate or work on a NUMAC.
The machining time on a wood milling machine was just half of that compared to SRM-20.
I want to take the workpiece with me so that it can showed as a reference to designing new molds in the future. I even want to show this technique in my business so that people can learn about this technique and MDF is always used over there.
Limitations in using MDF
The main limitation to using MDF is that it is not reusable and machining is a bit difficult compared to machinable wax. MDF while machining and milling gives out a pungent smell which is similar to laser cutting acrylic. This makes alot of people uncomfortable.
It is a bit more difficult to clean MDF using a Vaccuum cleaner due to huge dust build up on the milling surface. The milling surface has to cleaned regularly at constant intervals.
(SDS) Safety Datasheet of Hydrostone Gypsum Cement
The SDS of Gympsum cement could be found here.
The Safety Datasheet is a piece of information that must be read before handling Hydrostone. It has all the precautionary instructions are given. I would recommend anyone handling hydrostone to check the SDS first and then use the material.
A SDS containd crucial information like Material handling, First Aid Measures, Disposal considerations etc. in
The image below shows the Precautionary statement and harzardous info.
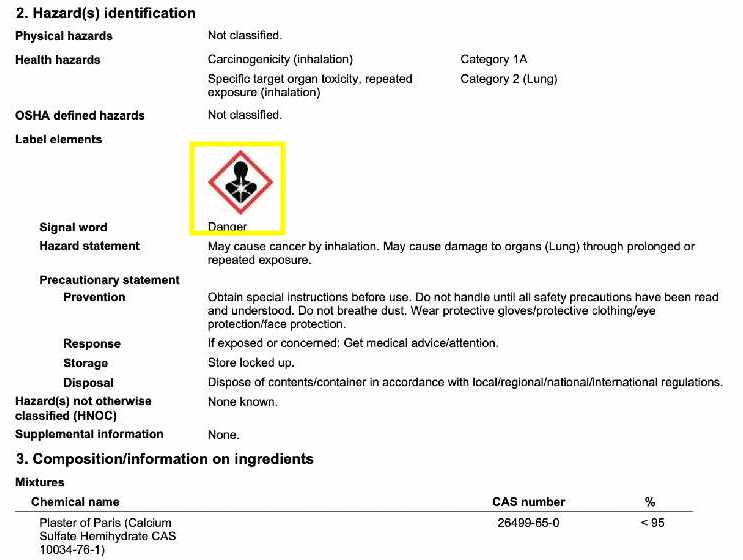
First Aid Measures are crucial pieces of information that can be followed if a mishap happen while using the material.
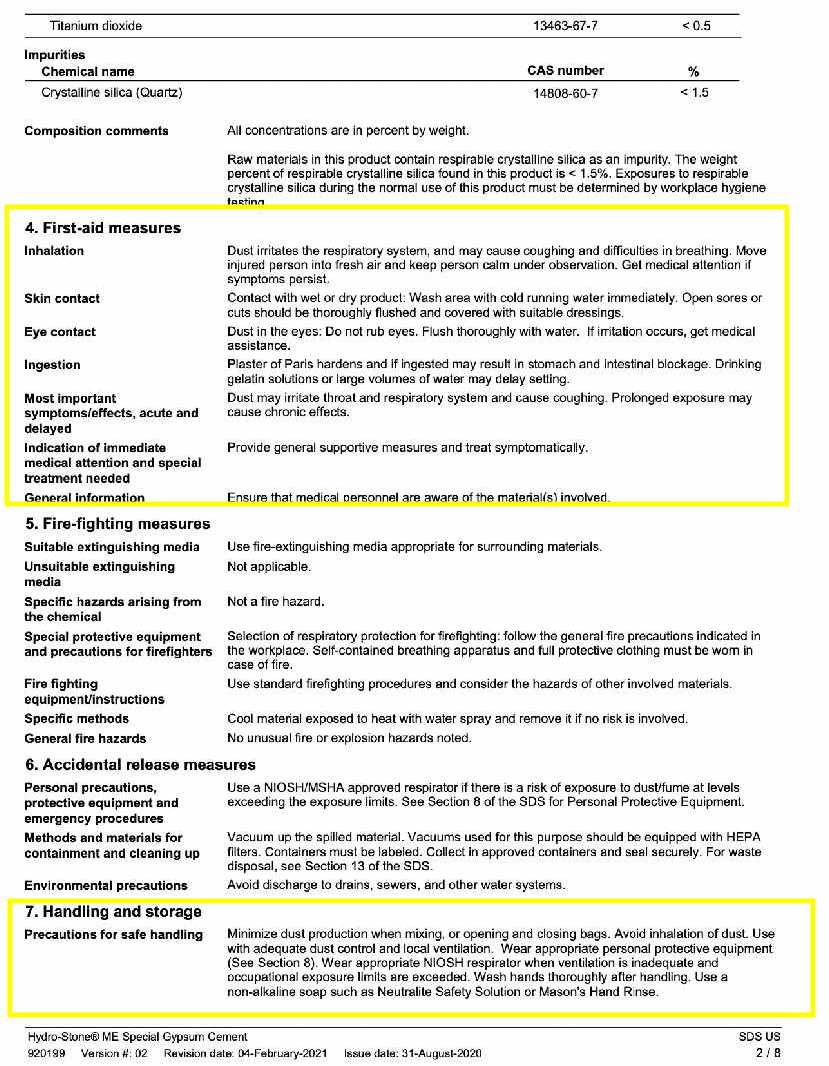
As mentioned above SDS also has Disposal considerations and Ecological information. It basically means that after we use the casting how should we handle the material, some questions like
Is it harmfull for the environment?
What is safest way to dispose the casting material?
Is it harmfull when mixed with water?
Are answered through this section.
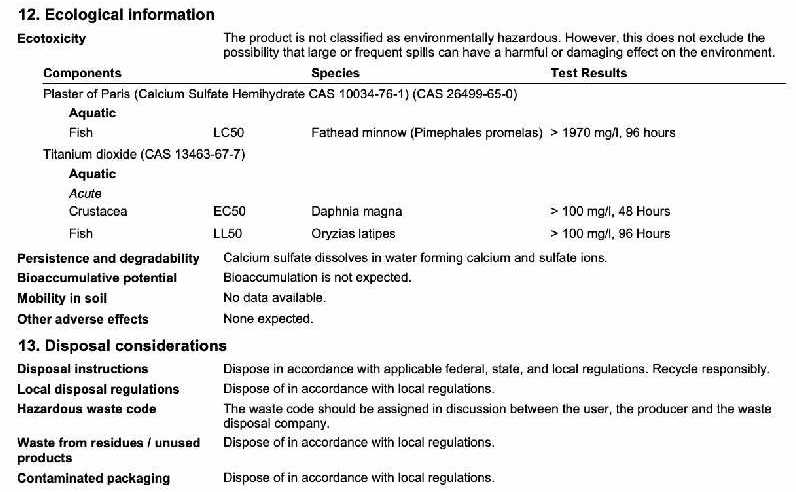
To get an overview of the safety of a casting material there are different ratings used by countries around the world. USG Hydrostone has a NFPA rating that give the overall serverity of the material. You can see the NFPA rating shown below.
Softwares that I Used
Fusion 360
Artwork
NC studio
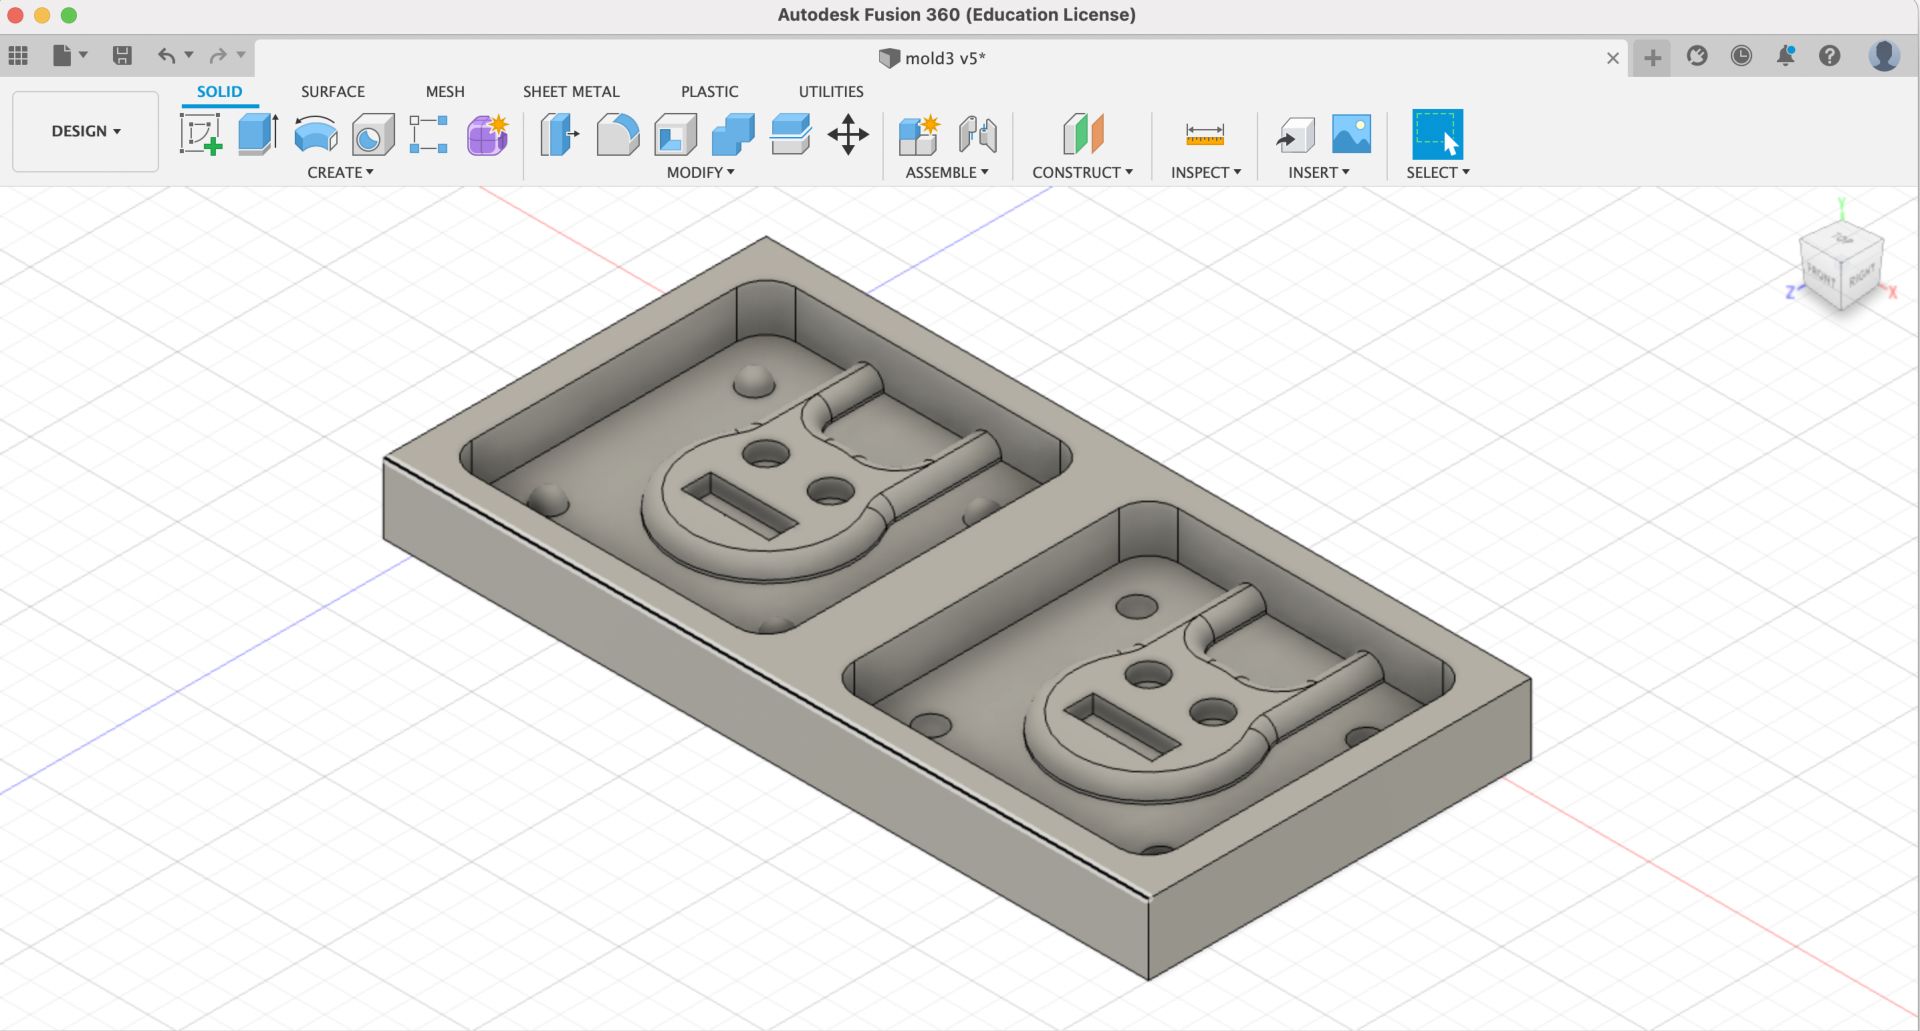
Glimpse of the design in Fusion 360
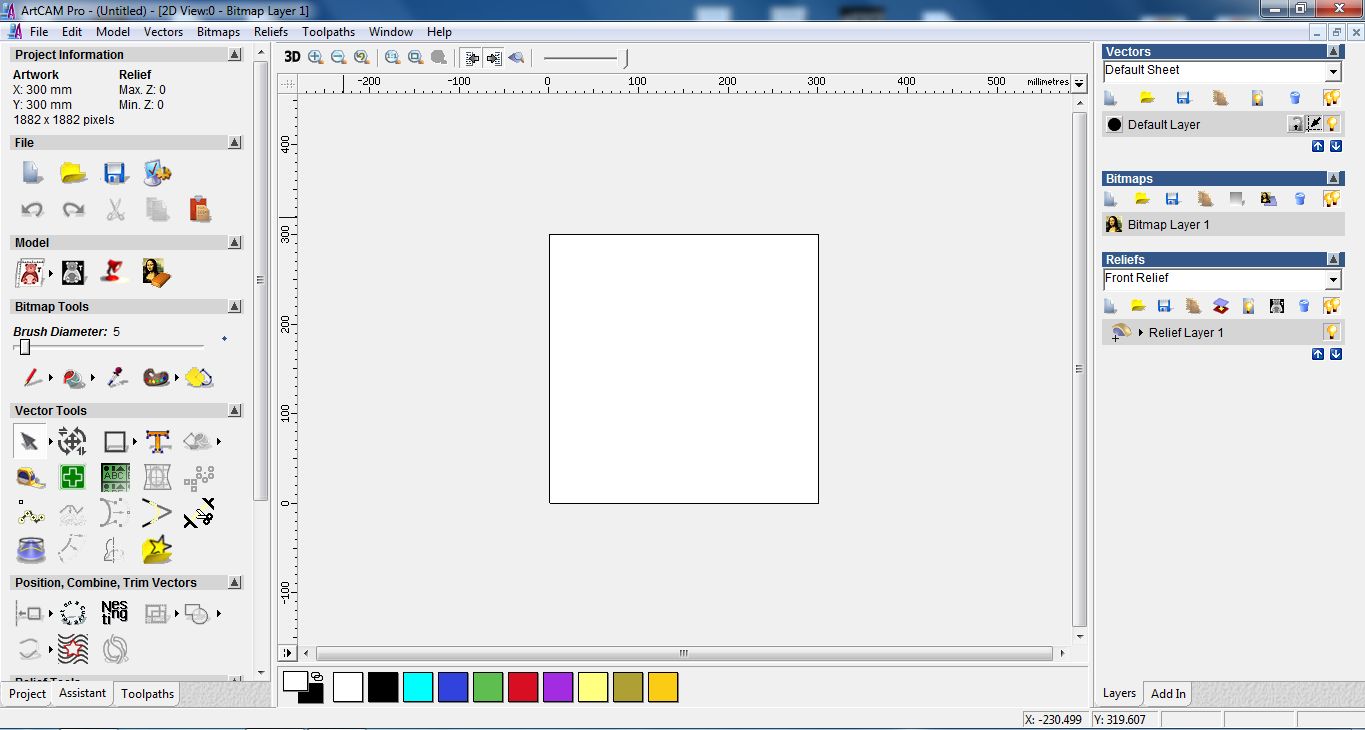
Screenshots of ArtCAM and NC studio
How its made
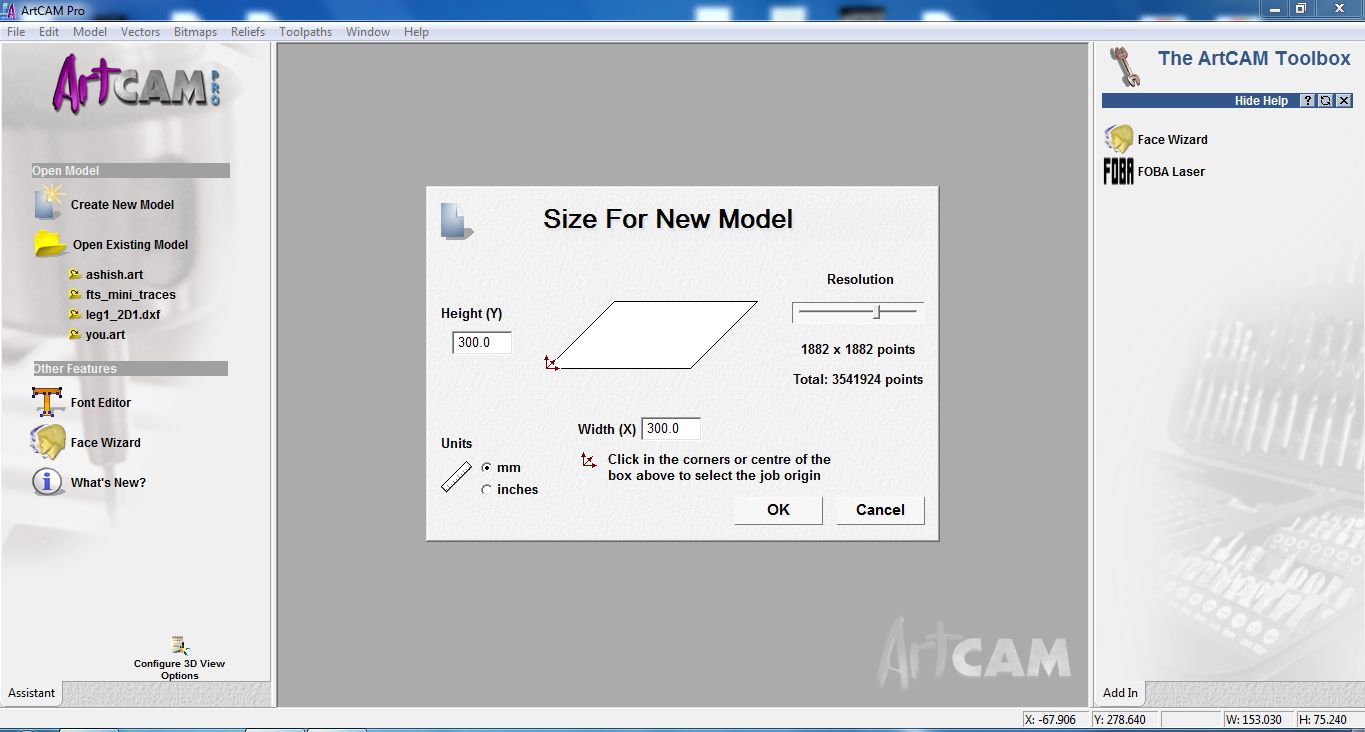 The first step in ArtCAM is to create a new design file and set the size of the new model.
We gave it as 300mmx300mm according to the bed size.
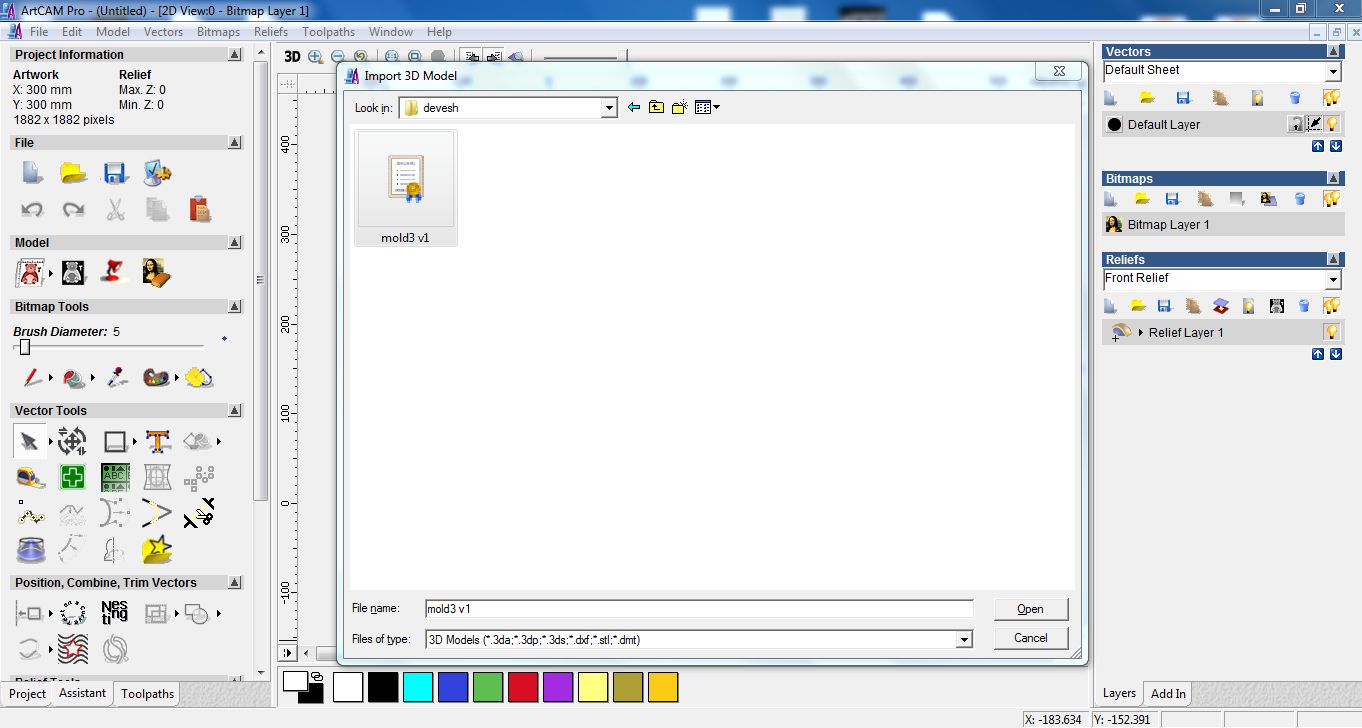
Importing the .STL File
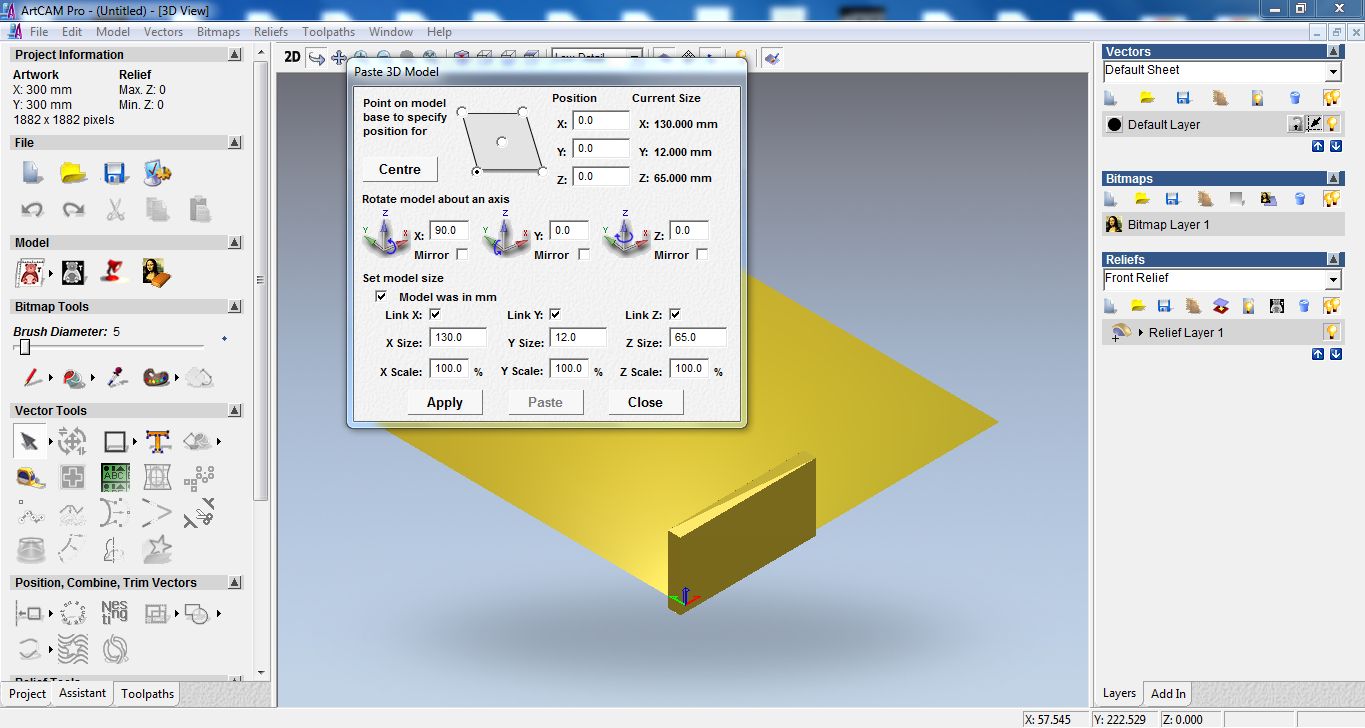 Pasting the model and setting the origin
NC Studio
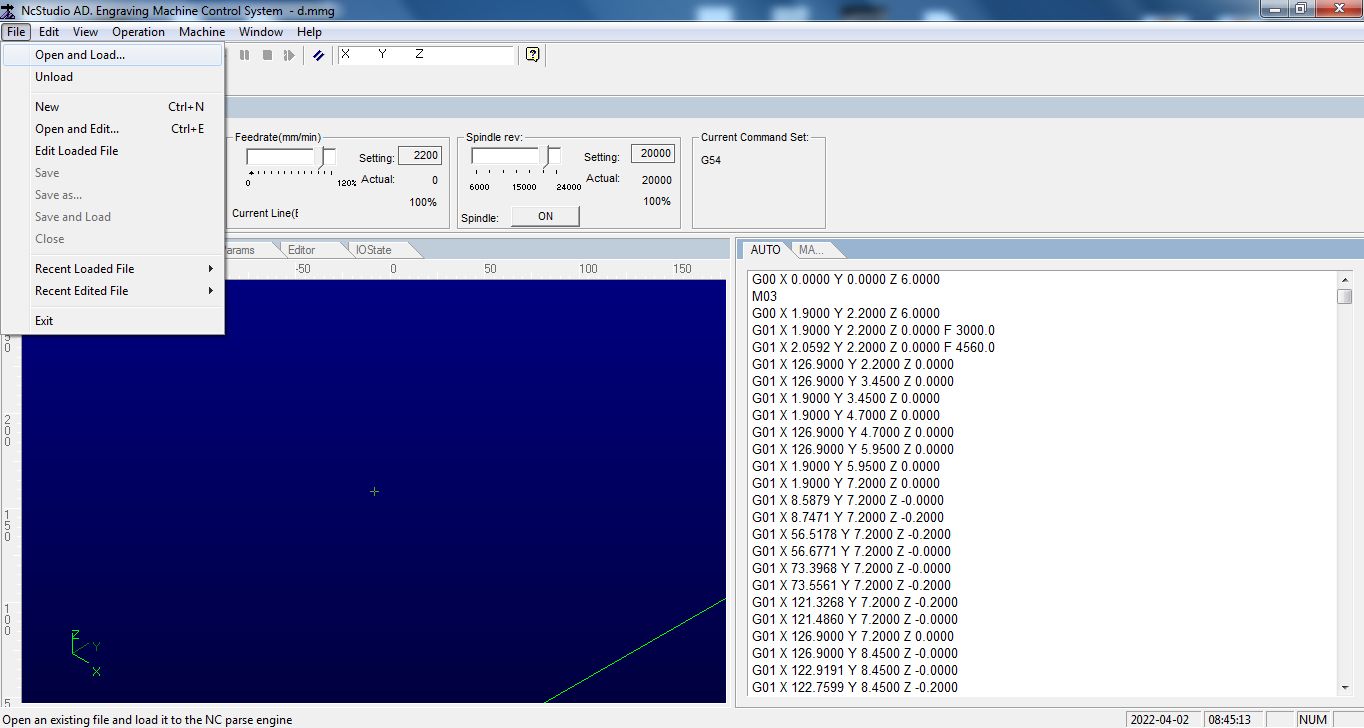 Open and load the .mmg file to NC Studio
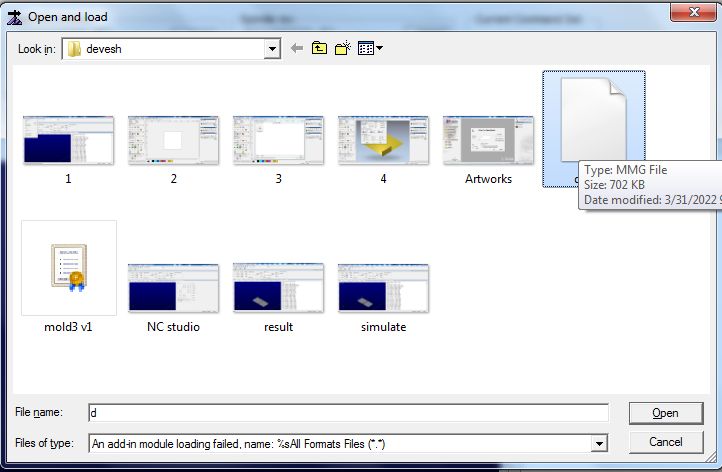 Choose the mmg file from the directory that you have saved from.
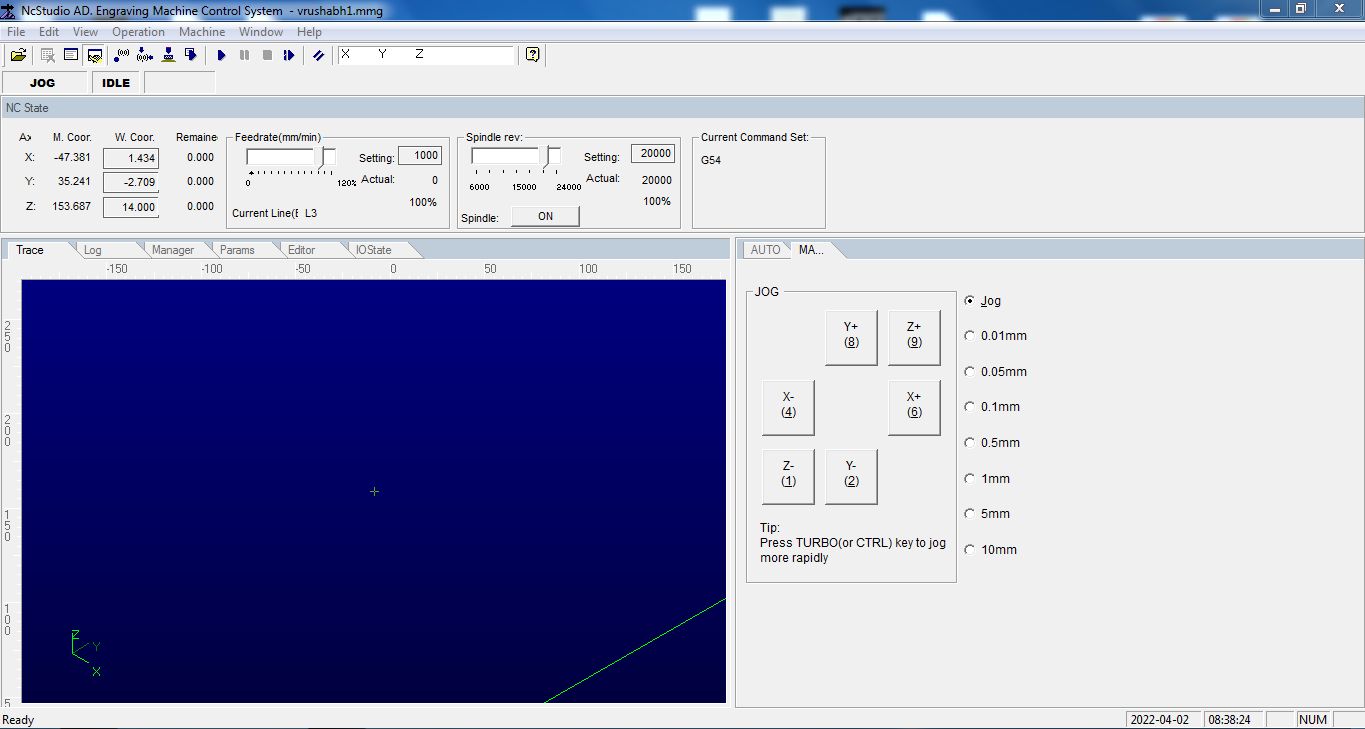 Jog--> Continuos motion use the XYZ axis buttons to jog the endmill to the desired position of the bed here in my case it is the marking that I drawn on the MDF block.
 Set the origin by clicking the X,Y,Z value here its shown in a black bordered box.
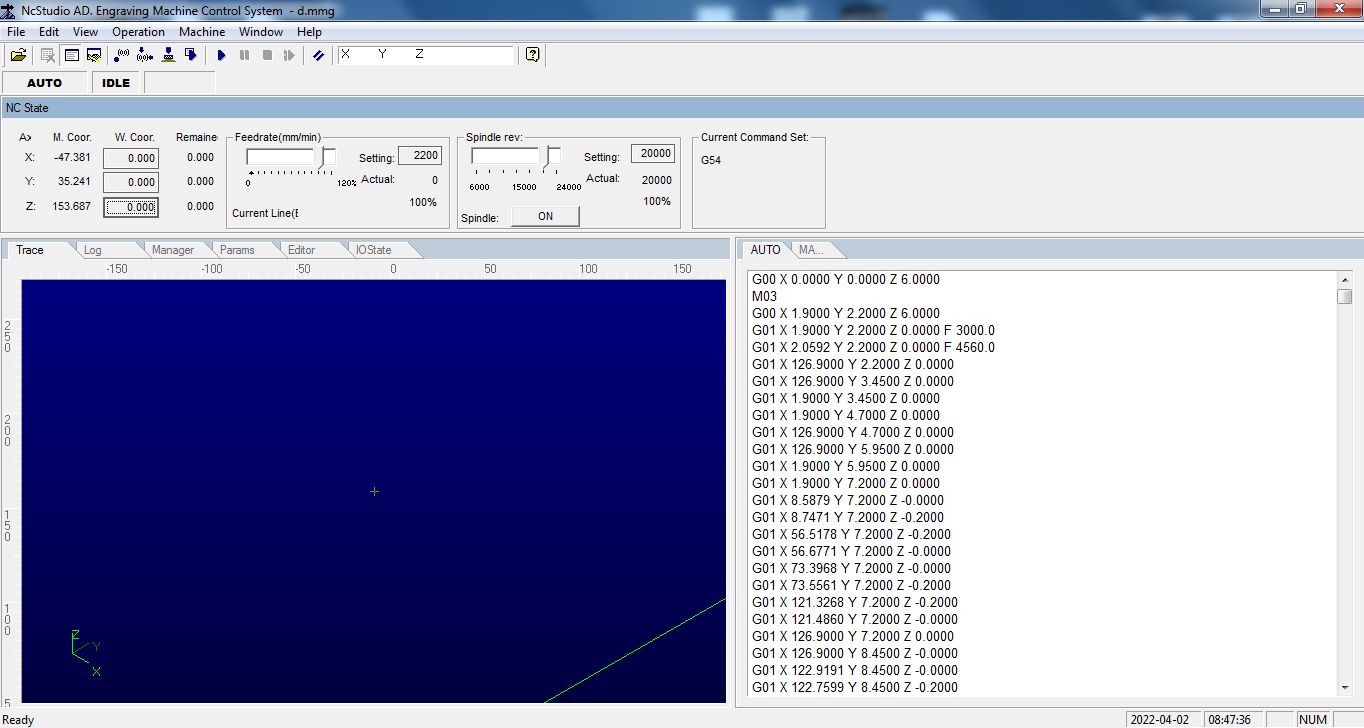
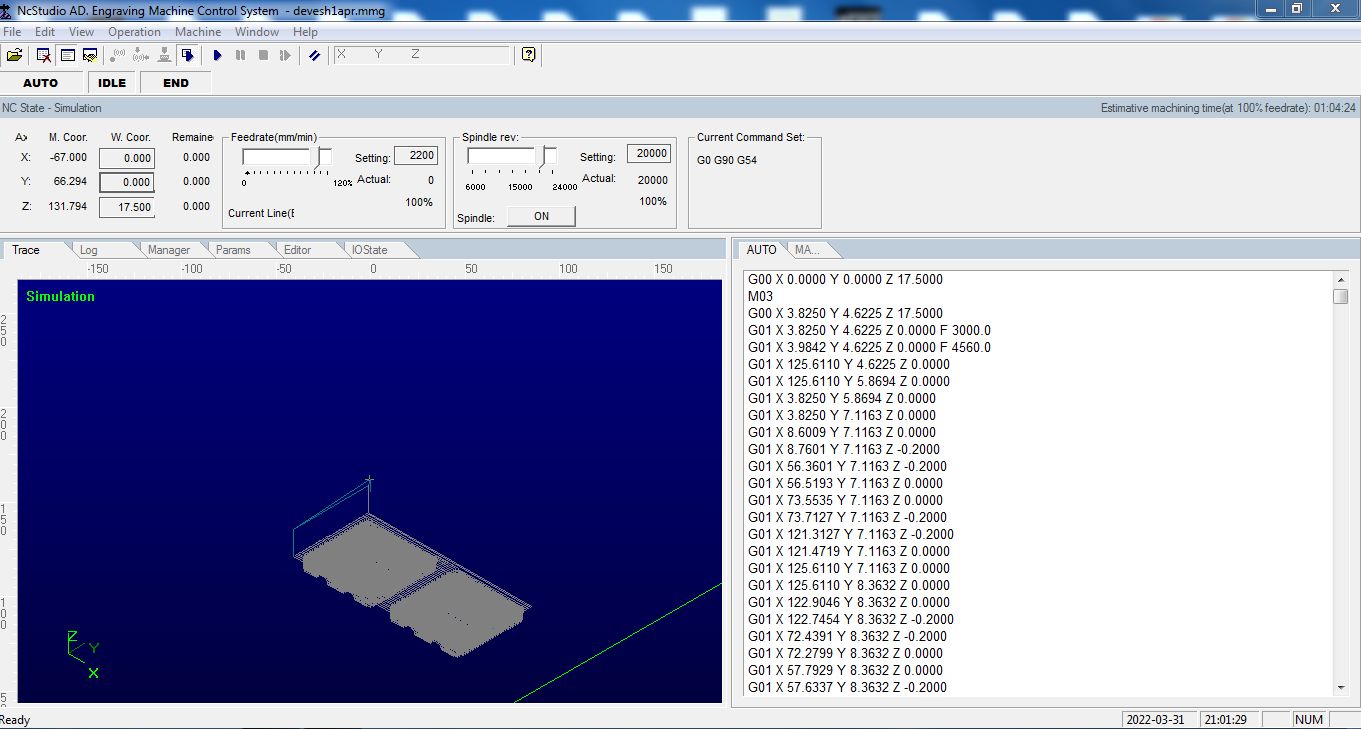 Clicking the simulate button to get an EMT
Finally click the play button the start the milling process.
Tools Used
In our lab we saw different types of end mills out of which we used the most was a 3mm flat end mill.
The flat end mill is usually used for rough cut or milling purposes. Flat endmills don't mill smoother surfaces and thats the reason we use ball endmills.
Ball end mills are used for finishing the surfaces with some finer details.
In my assignment I didn't use the ball end mill but had did see the work first hand one of my mates used the ball endmill to finish his work and it was gorgeous.
Here are the pictures below of a 3mm Flat and ball endmills.
 Flat-end 3mm
 Ball-end 1.5mm
My Experiences
This week we were limited to machining time. For me to design a mold in this assignment was a challenge. There were some technical terms that I wasn't happy with also eg:- Offsets.
Offsets are a pain some times and depends on the endmills diameter though sounds simple but has a fair share of error to it. Even of an endmill is labelled with a diameter of 3mm it could vary between a rage of 2.95 to 3.15mm this was a challenge everytime when we tried to mill something. So accounting for the offset in the design is one.
Secondly Feed rate if given wrongly we could damage the bit and the machine with it. Keep this at default if you don't know there is a different world for this term alone. While I was trying out milling on the SRM I failed multiple times and the culprit was feed rate.
Weekly assignment
Create a mold
For producing a workpiece I thought of designing a smilie like cookie.
It would be easy to design and could make the cut to the fabacademy requirements. But had some design issues with the previous fabspace coin that I designed.
Different steps and initial set up on the Numac milling machine.
There are different steps involved for millind a mold I would try to cover the best that I can but not all of it.
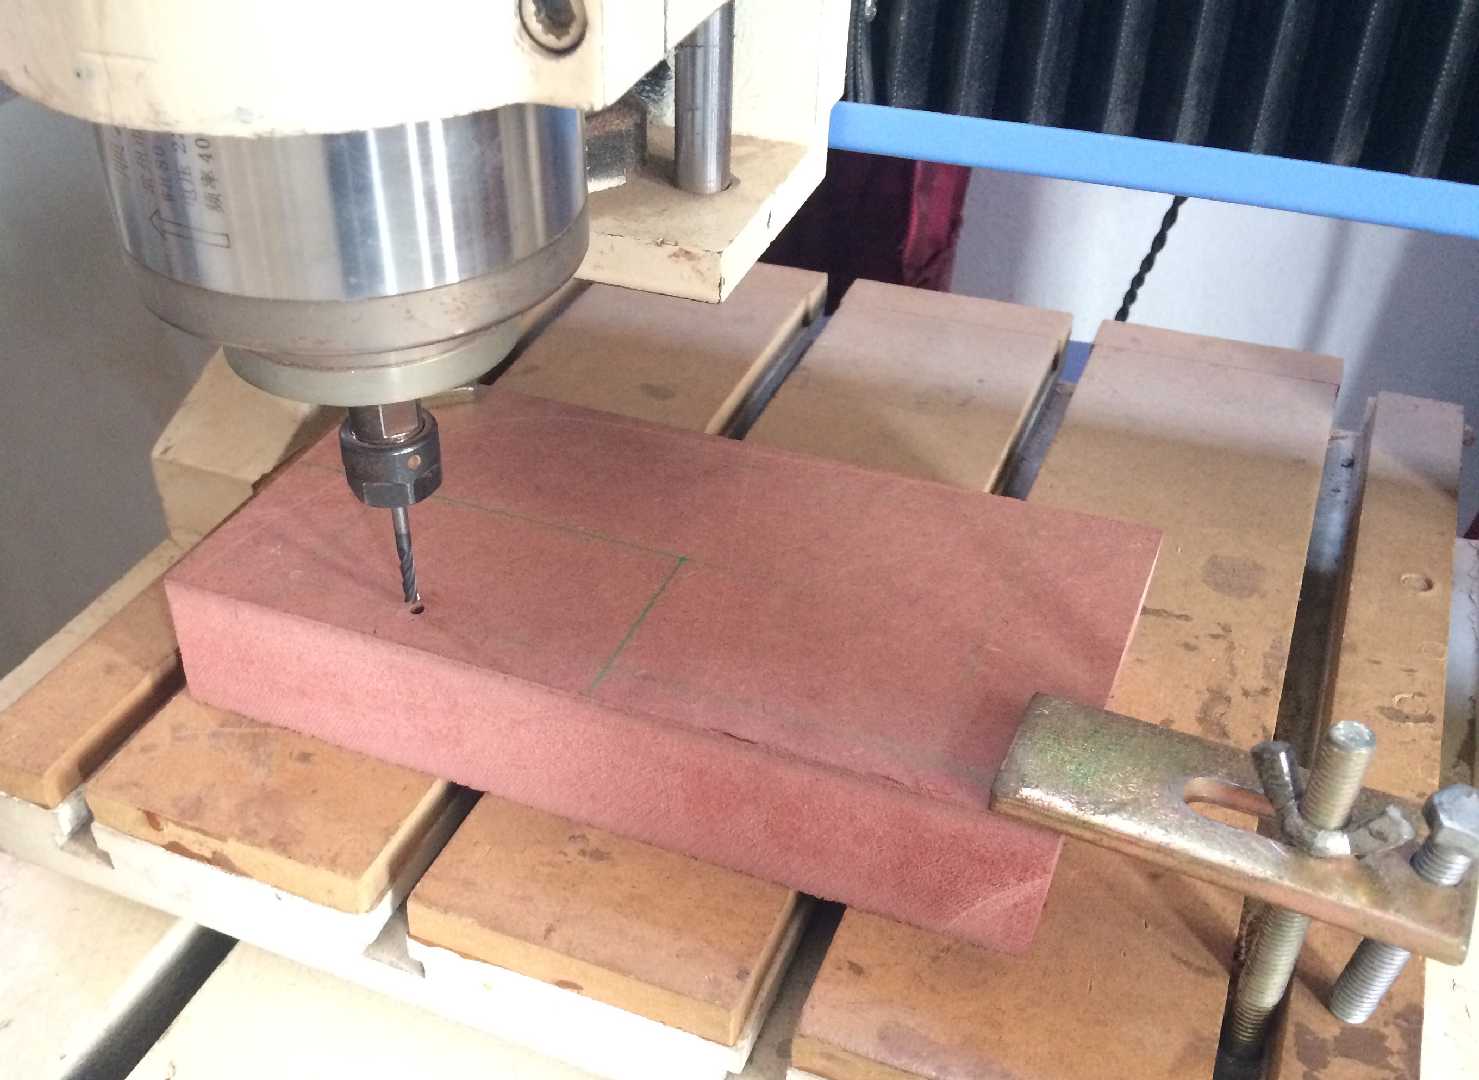
First we have to setup our MDF block on the workbench and mark the block properly for a better understaning of where our mold is gonna be milled. This helps us imagine how can we optimise the size of the mold to create a workpiece.
Secondly clamp down the corners of the MDF block to the work bench. Remember to check the marking if you have drwan an on the MDF block. The milling bit should not travel outside of the markings. Otherwise chance occur that the bit could break by hitting the clamps.
Third use the necessary software that are given above to control the machine and generate the Gcode.
Surfacing
Surfacing is a Process in which we use the milling machine to create an even surface on the material we are about to work. This is the most time consuming process among the others. For mahinable wax surfacing the block is required since we obtained some uneven layer of wax.
Surfacing gives perfect layers and finishes to mill. An image shown below depicts surfacing on softwood.
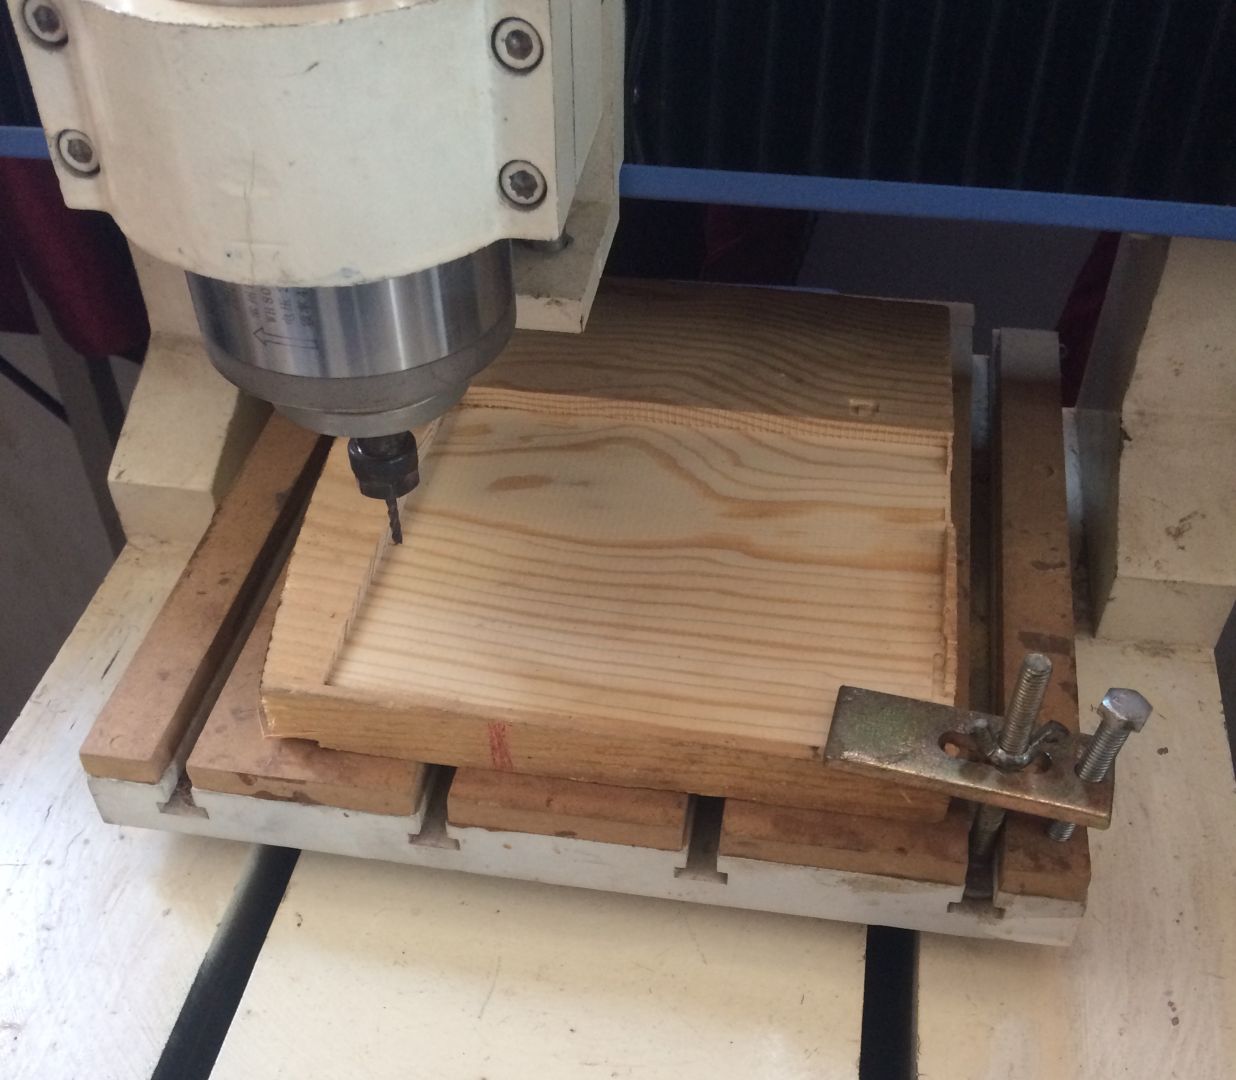
Roughing
Roughing or Rough cut is a process where we use the milling machine to perform a rougher mill of our design.
In Numac we used a process called machine relief which is similar to roughing.
Roughing gives the proper shape of the design on to the MDF stock that we have.
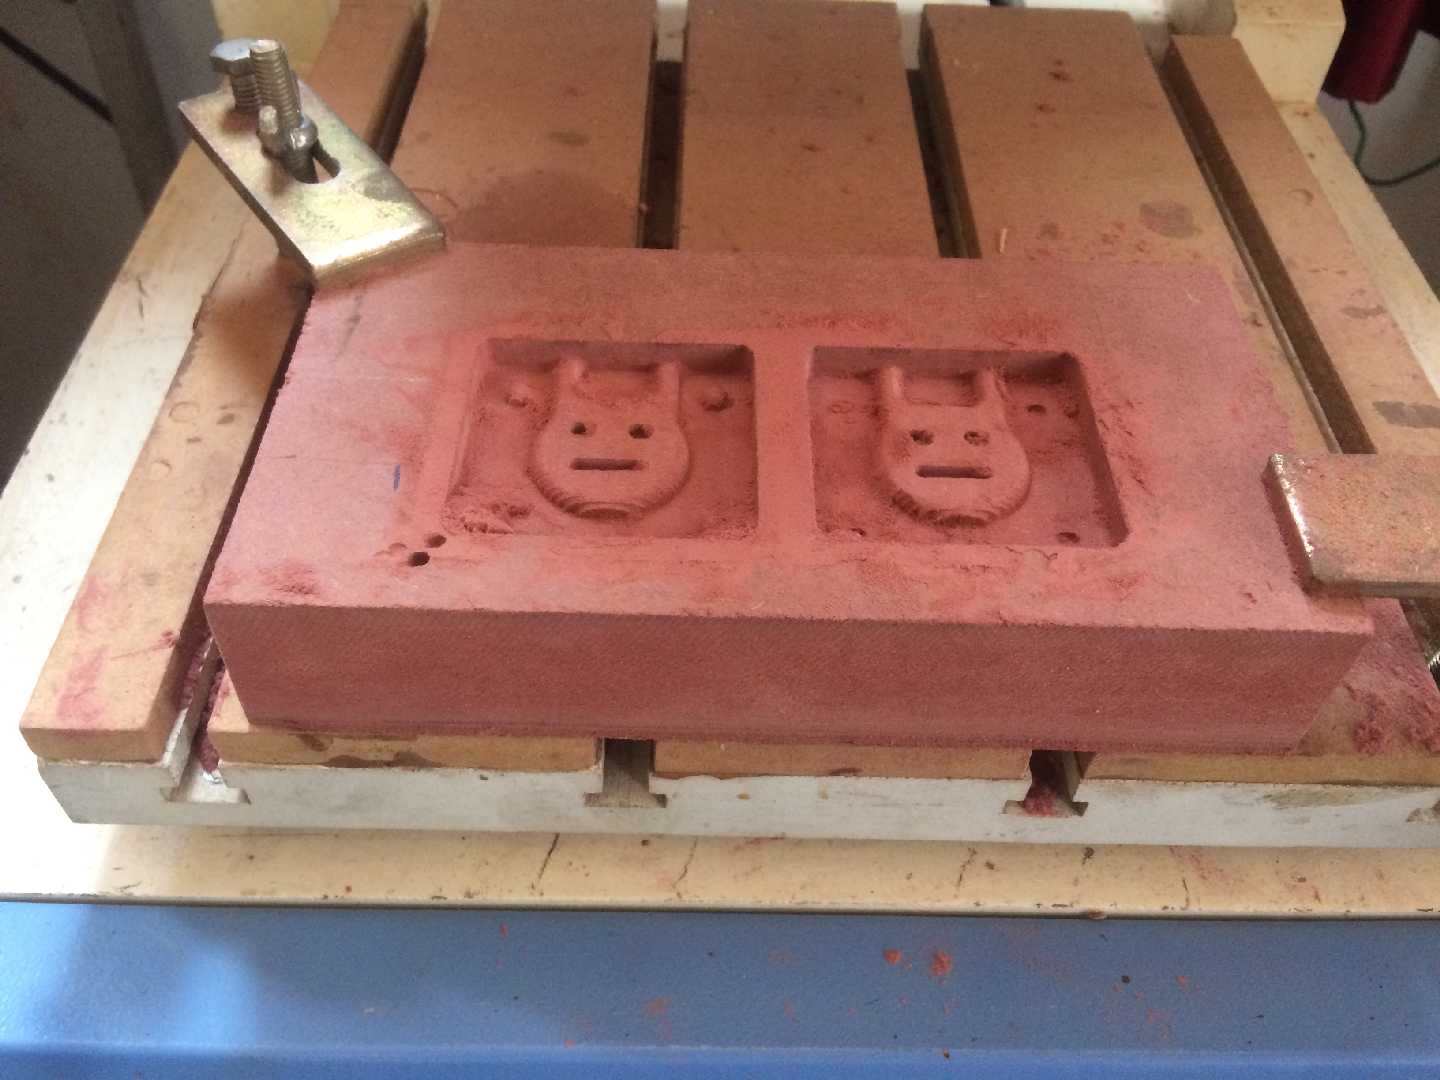
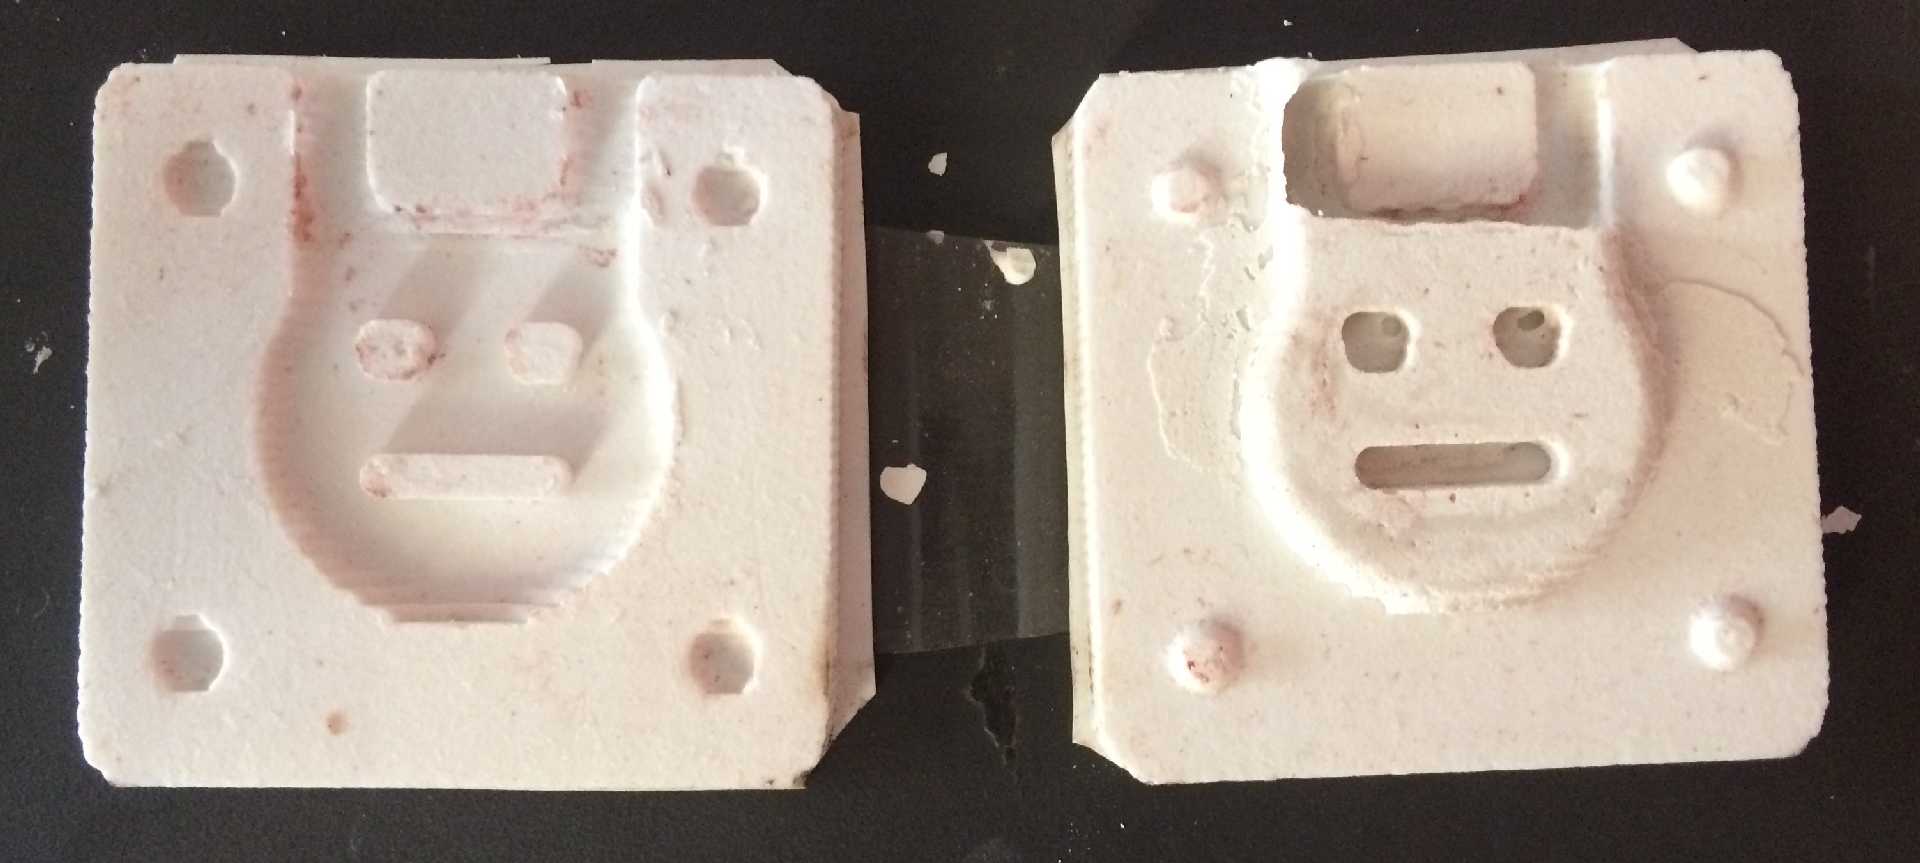
An image showing a rough cut in the Numac
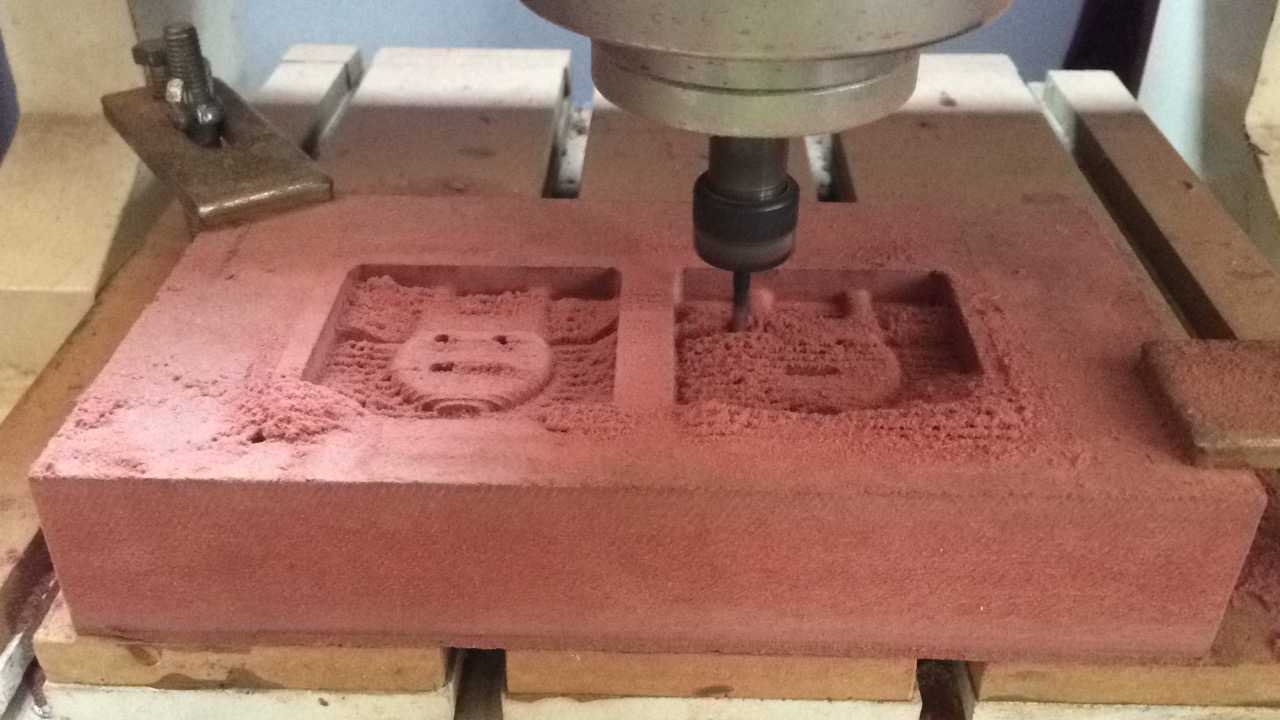
Finishing
Finishing is used to get the finer details of the mold. Finishing is an optional process if the details are good on the rough cut then the user might not have to perform finishing.
Ususally finishing is done using a ball end because of the smoother depth acquired by the process.Smoother edges and champfers are obtained using a ball end mill.
For the mold that I created I didn't use a finishing process since the details on rough cut were more than satisfactory.
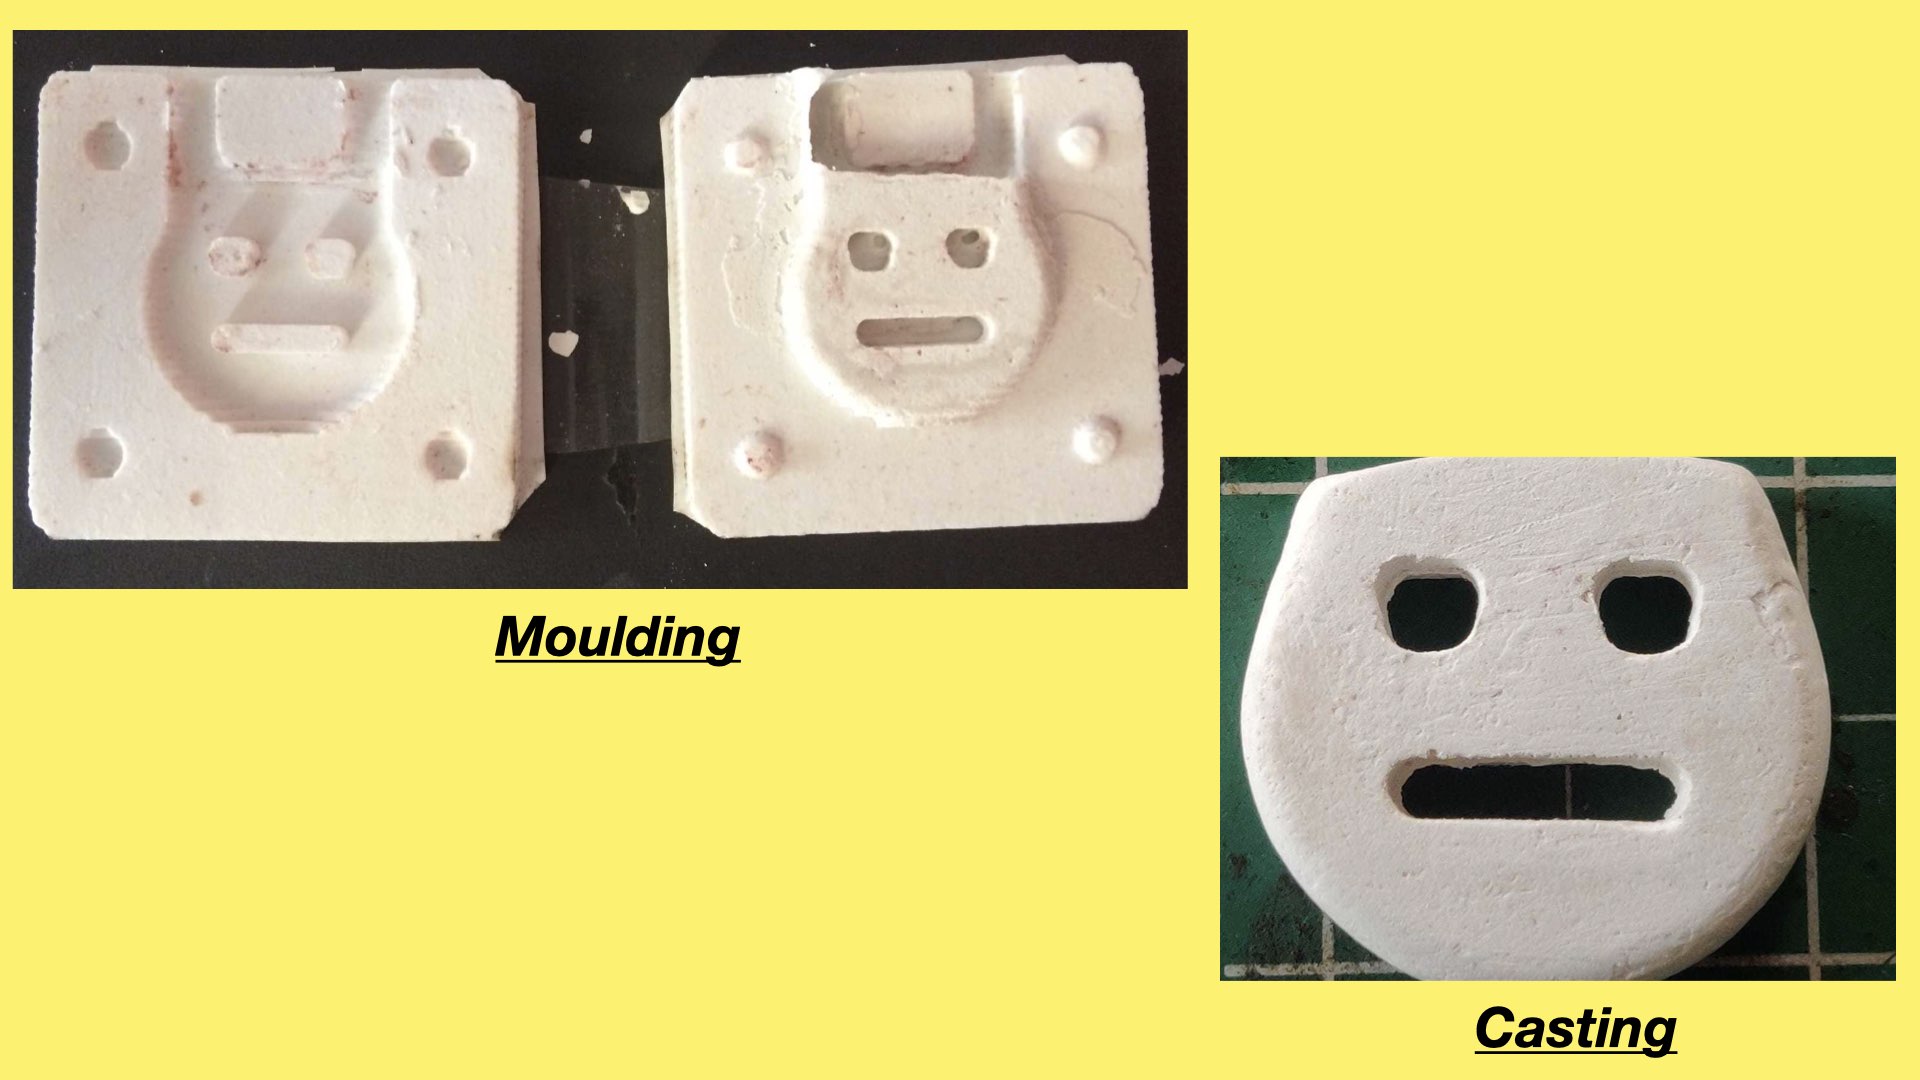
The final result of the process is depicted in the image below.
A bit of clean up
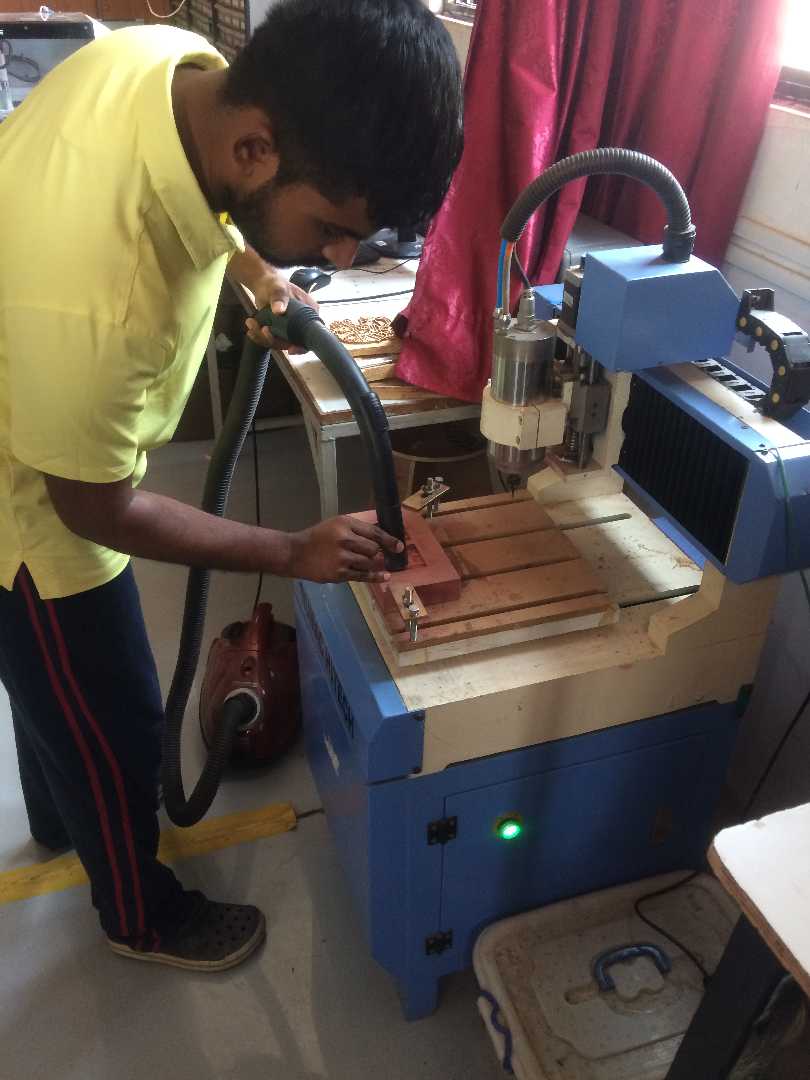
During and after the milling process I had to do some clean up of the workpiece on reguar intervals the reason was that MDF gives out a dust or saw dust like (I don't know the exact term) thing which isn't good for the environment.
Secondly I was a bit curious and axious how the workpiece would turn out.
Here is picture of me cleaning the dust using a vacuum cleaner.
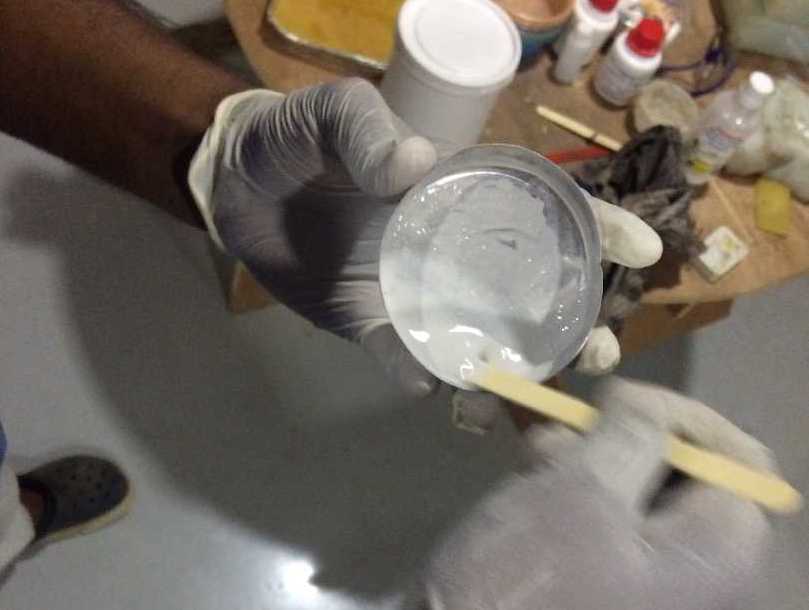
Usage of Silicone Rubber
After milling the workpiece we use silicon rubber to create a negative mold. This is usually done so that we can create a softer but a bit durable mold that dosen't loose its shape for sometime.
Eventually this helps us to create a cavity into which we can pour our casting material like gypsum cement.
Silicon rubber as the name suggests is soft and flexible material it is used in mold for capturing finer details of our workpiece.
Some of its advantages are listed below.
Silicone Rubber is highly heat resistant and has better chemical stability.
It is resistant to cold temperatures and has high compressibility and elasticity.
Silicone rubber has outstanding oil resistance at high temperatures.
Has high tensile and tear strength.
These are some images that depict the usage of silicon rubber for making the mold below.
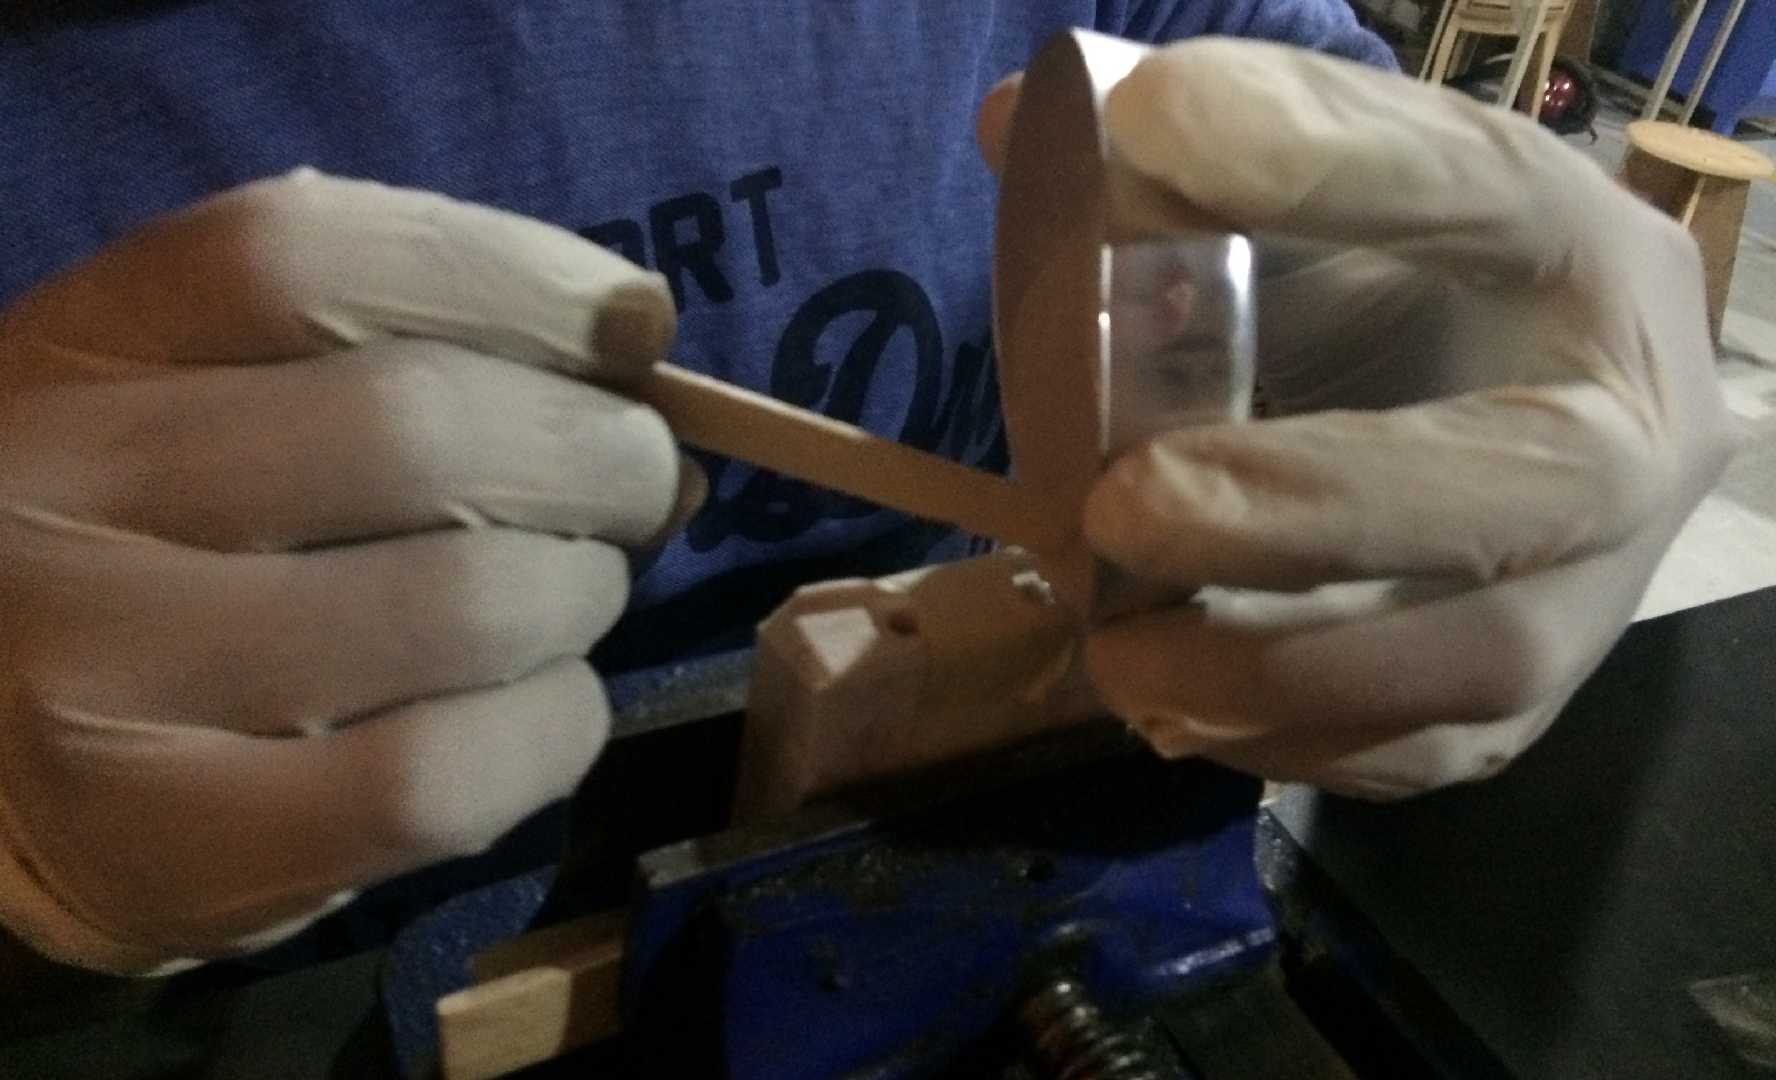
The first and foremost step is to apply petroleum jelly onto the workpiece that we milled this allows the rubber to stick to the workpiece and at the same time helps in removing the silicon rubber after its got an impression of the workpiece eventually creating a mold.
_result.jpg) A look of the worpiece after the application of petroleum jelly
A look of the worpiece after the application of petroleum jelly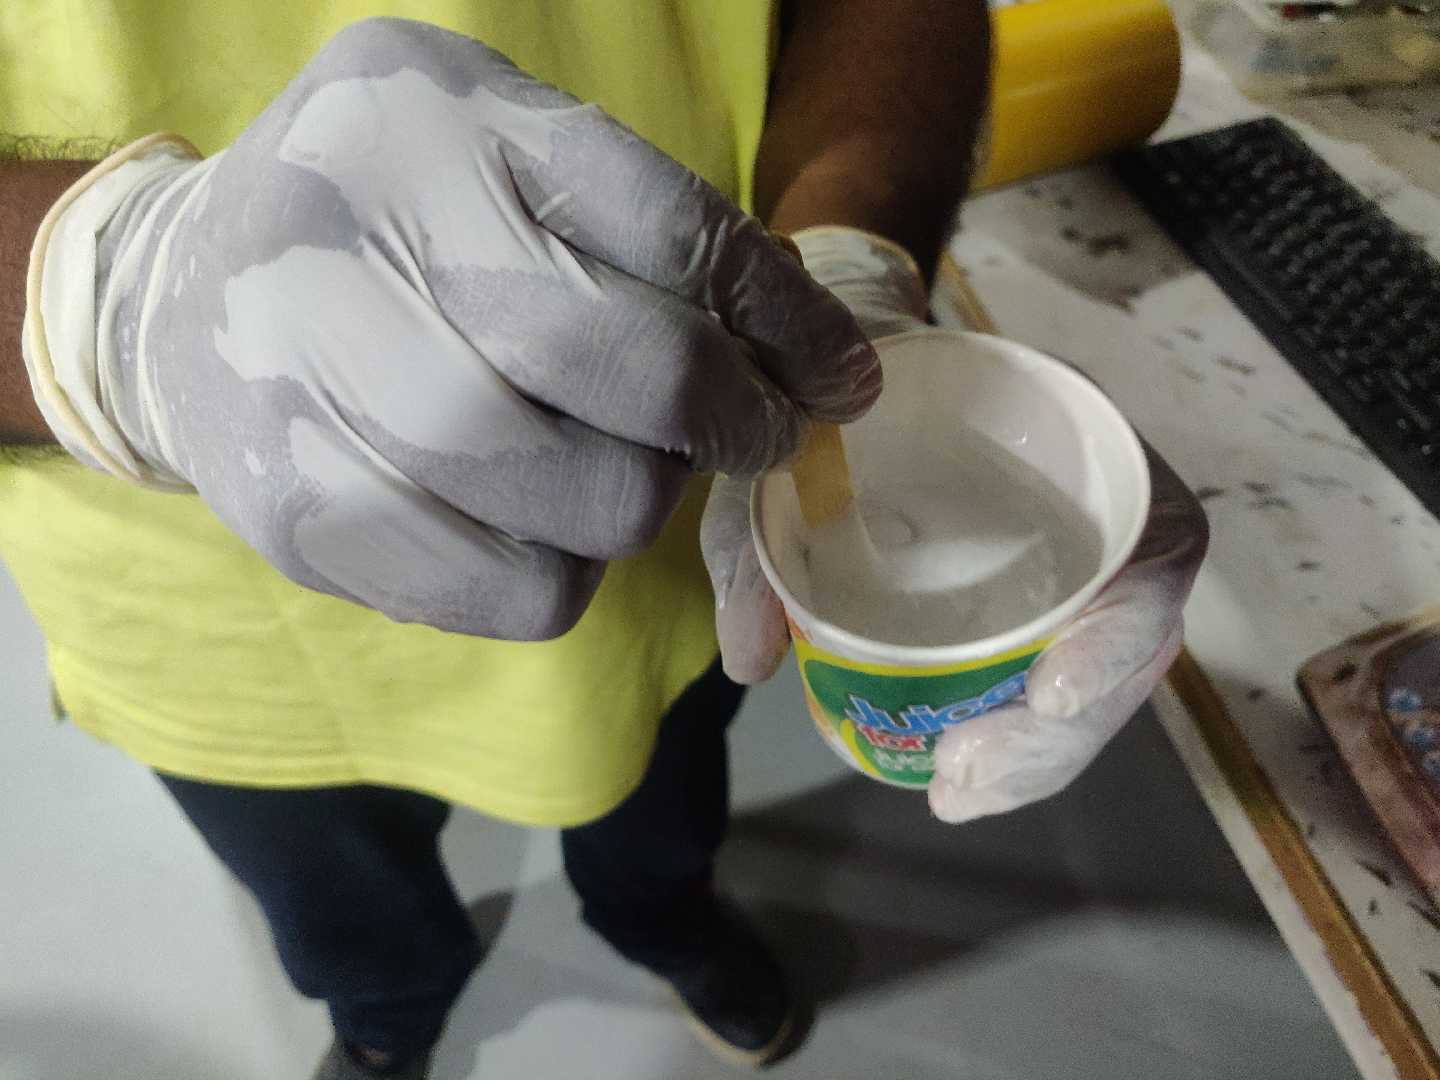 Stiring and mixing silicon rubber after adding Part A and Part B
 While pouring Silicon rubber we should pour the solution slowly like a thin stran and ensure that no air bubbles are forming on the surface.
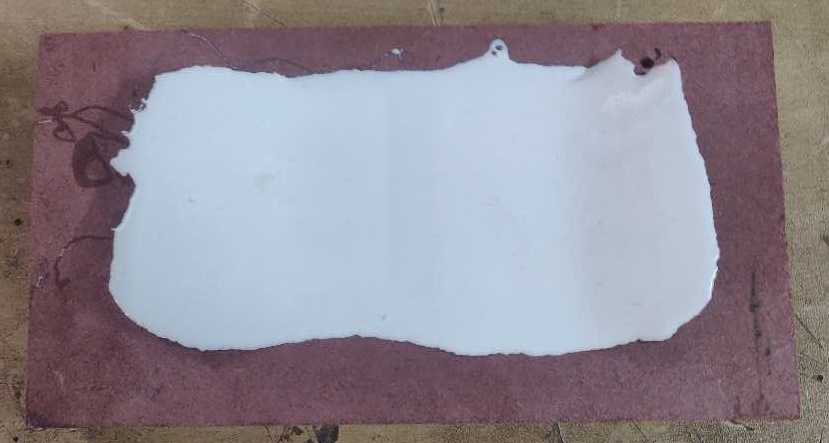 After pouring the whole solution into the mold it would look like this.
After all the pain and joy our mold is ready after a couple of hours.
 The picture showing a casted part depics the silicon rubber mold.
The setup to cast the part
After creating the rubber mold I had the first think of a way to setup the bench to cast the simile that I was expecting so I used a mini-vice that would allow me steadily hold the rubber mold in one piece while pouring casting material.
 A picture of the setup,me pouring the casting material(hydrostone)
Most of the details for hydrostone is given in the group assignmnet.
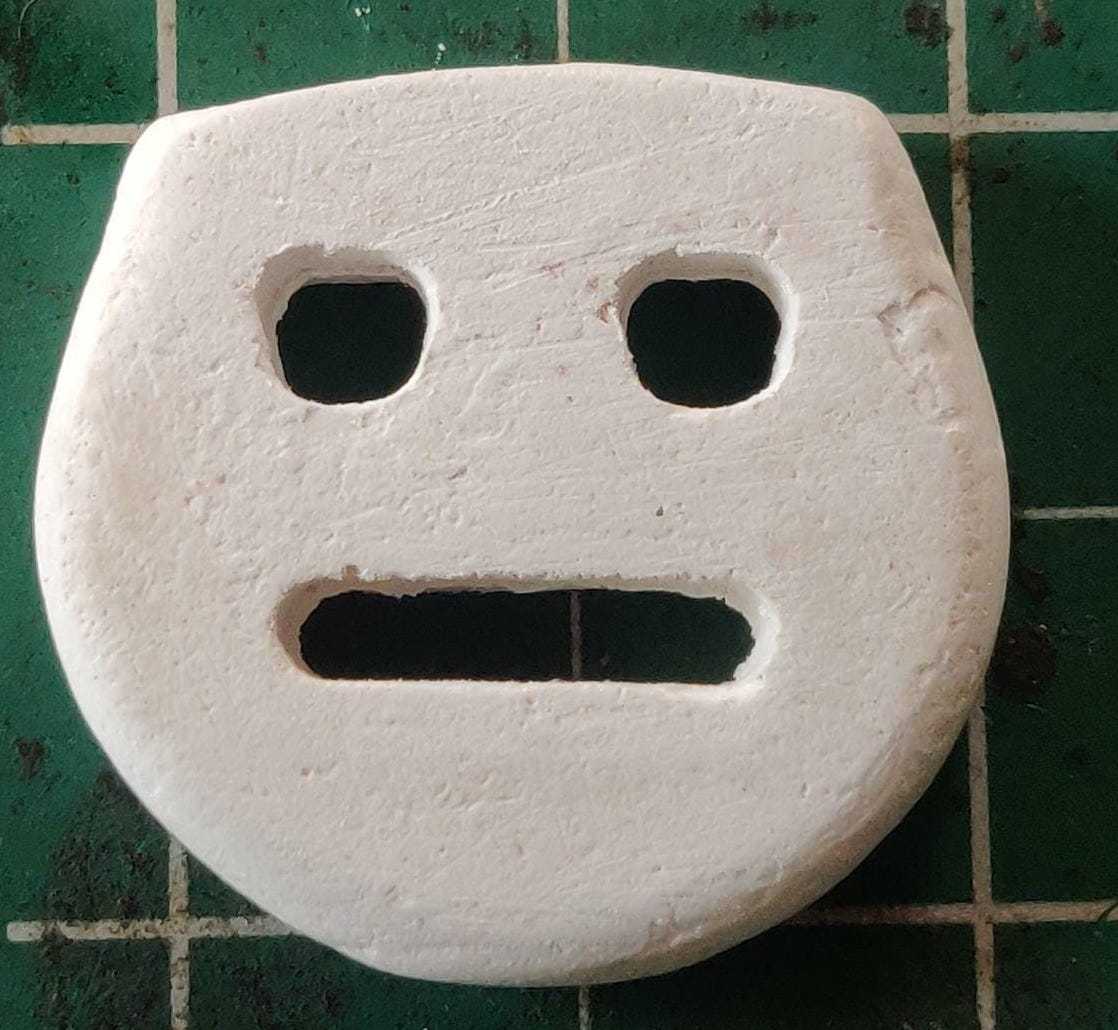
Final result of the casting is shown below.
Group Assignment
Experiment with Hydro Stone Gypsum Cement
For the group assignment I chose Hydro Stone as a casting material and worked on it.
It was a great experience to cast in gypsum cement.
Casting something in Hydrostone has its perks and limitations especially when handeling the material. Hydrostone is a powder like substance equally compared with cement. Its used by sculpturers and artist because of its ability to capture finner details of the work piece or the cast.
There are safety procedures in place for handeling the substace due to its corrosive nature on the skin and lungs. Precautonary instructions is a must to be followed.
If you have respiratory disease then I would reccomend you to wear a mask and then proceed. The usage is simple and drying time is also optimum. My castings took only 24 hr to dry and be ready.
 Source:- USG website
Precautionary instruction
These are the precautionary measures that you should take before handling hydrostone.
First where proper safety equipment.
Safety equipment like mask and gloves are mandatory for handling gypsum cement especially with people with respiratory problems.
Place gypsum cement in a cold and dry storage keeping gypsum cement in a moist environment spoils the substance.
Use a mixing tool to mix the substace with liquids.
The Mixing Ratio
The ration for mixing the cement is 100:65 i.e If 100g of gypsum cement is taken then we have use 65g of water to be mixed to make the substance.
The ratio could vary for some instances. With me I had some issues while mixing so I went with some arbitary values while mixing.
Mixing the substance properly decides the amount of time the cement is going to take for drying.
Last I would like to say that we should use hydrostone only when there is a need of finer details of the caste that we are making.
Design files
I'm leaving a link to my original design file here
Download files

Fabspace by Devesh S Nair is licensed under a Creative Commons Attribution-NonCommercial 4.0 International License.