Objective
Make (design+mill+assemble) something big (~meter-scale)
Introduction
In this week we were introduced with a CNC machine called shopbot which is an automated router that can route or cut thicker plyboards and mdfs. It has a bed size of 2400mm x 1200mm. The CNC machine works on the basis of gcodes but has has a specific file extension called .spb.
Problems that I encountered
We observed the shopbot buddy at College of Engineering Pune. The CNC Lab at the Pune facility was magnificent and is well equiped with different types of machines,one of them was shopbot. According to the group task we had to observe the functioning,safety guides for operating the machine. Intially we had to calculate the kerf of the machine which was a challenge on itself. We even ecountered different kinds of errors relating to ramp values,ranges and units. Setting the origins is also a bit tedeaous task. Duely remember that the machine at COEP was a bit old and had past its service life. Unfotunately the 3mm bit that we were using to cut materials also broke due to misconfiguration in the system.
Softwares that I Used
Fusion 360
Partworks
Shopbot 3.0
Shopbot
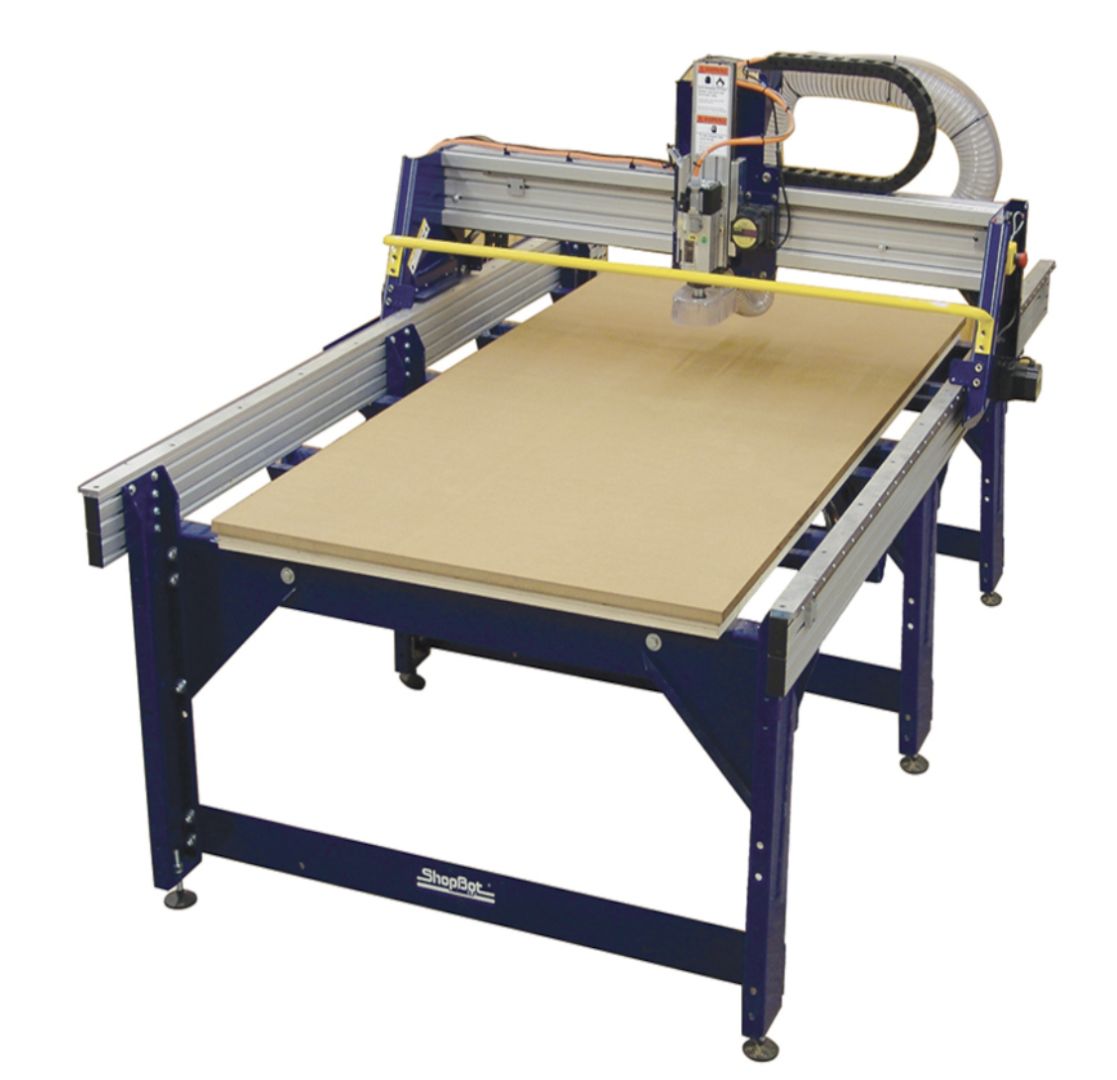
At COEP we worked on a shopbot machine which is an automated cnc router I'm giving all the details for machine below.
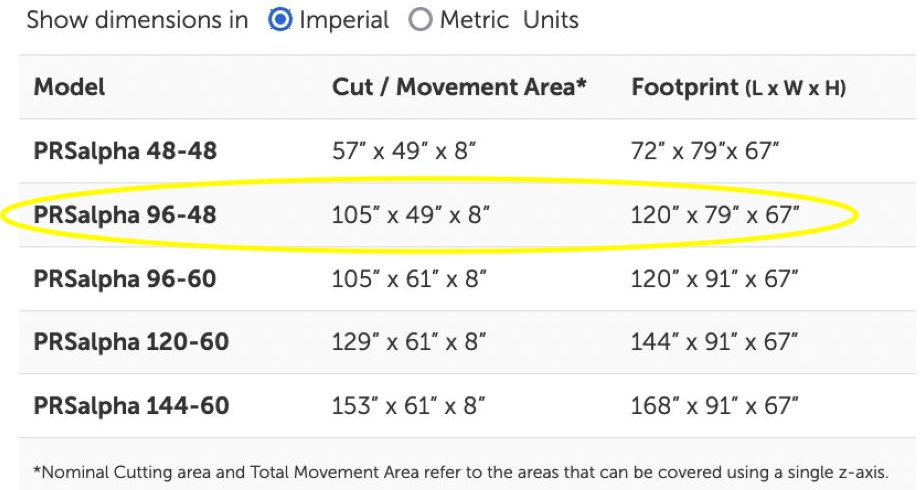
Dimension and Feature
The image below shows the dimensions
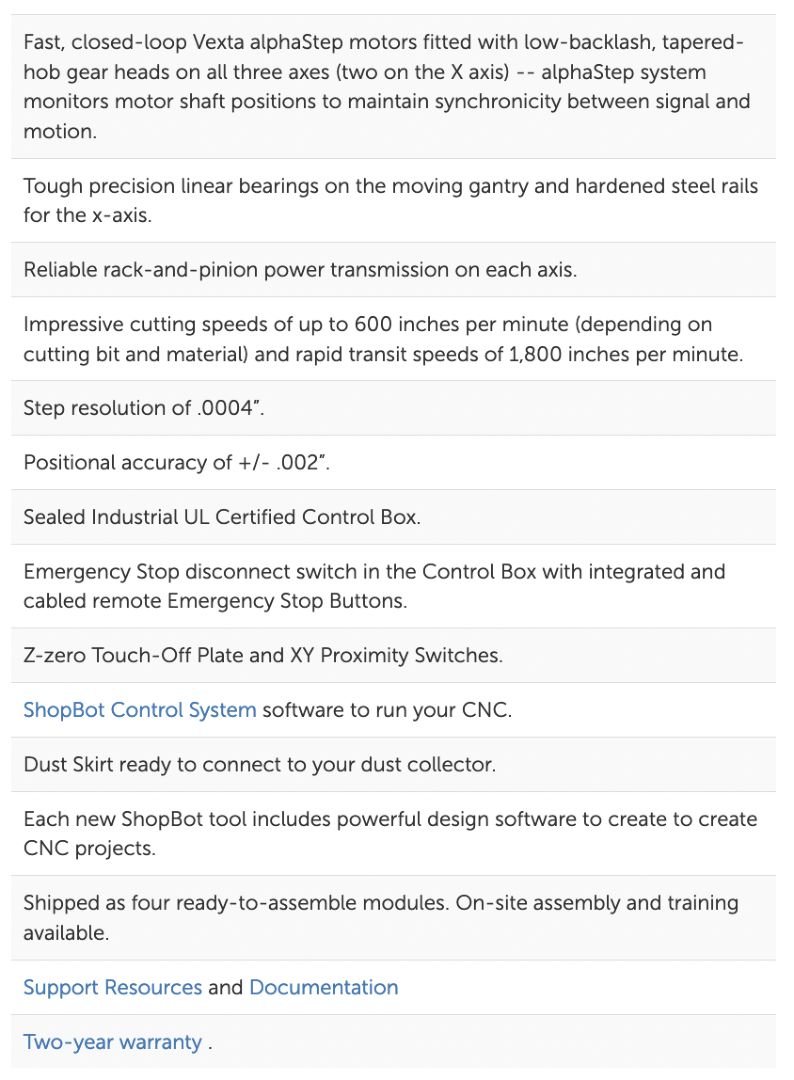
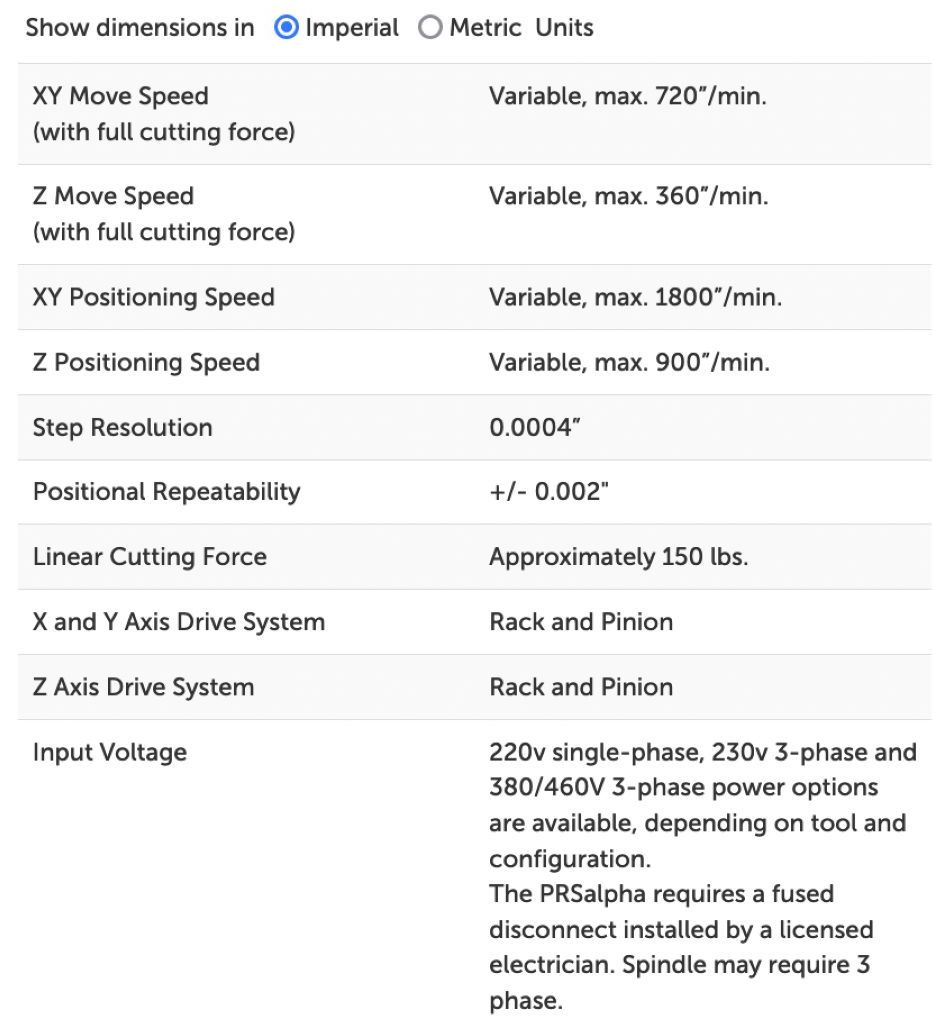
Specification
The image below shows the specs of Shopbot
Safety Instructions
Wear safety gears before using the shopbot. Safety gears include Safety glasses, Ear plugs etc.
Pay attention to the surroundings
Proceed with caution
Let an experienced personel be with you all the times during the assignment
My Experiences
In this section I will explain all the working and the things that I performed at COEP while carrying out the work on the shopbot.
First of all this was one the most scariest assignments that I have performed in the span of the course.
Second, for a beginner handling the shopbot is bit difficult only for the first week if you don't have confidence in yourself accompany yourself with a friend or two so that you can get help.
Third, learn things and procedures quickly and be very hands on with the machine. I would say be greedy while handling the machine if you get enough experience then only let the system go of from your hands.
Fourth, try a test run of your cut because of this you could be sure where the and all the tool will perform a cut,bore etc.
Fifth, know the software inside out it help better document about the software otherwise you are bound to forget thing
A quote that could be most appropriate
"Tell me and I will forget, show me and I may remeber; involve me and I will understand but document me or I will be lost."
Designing the object (something big)
For this part of the project I used Fusion 360 to design a table. Before that I did some exploring in our campus and eventually found out the a table was needed at our lab and took it up as an assignment.
The finished product will be put to good use then. I explored the place again to account for the space then and came up with some wired dimensions then I discussed with my instructor about the same and changed somethings.
Eventually we ended up on a hand sketch which was changed multiple times sorry I couldn't document this at that time of the day.
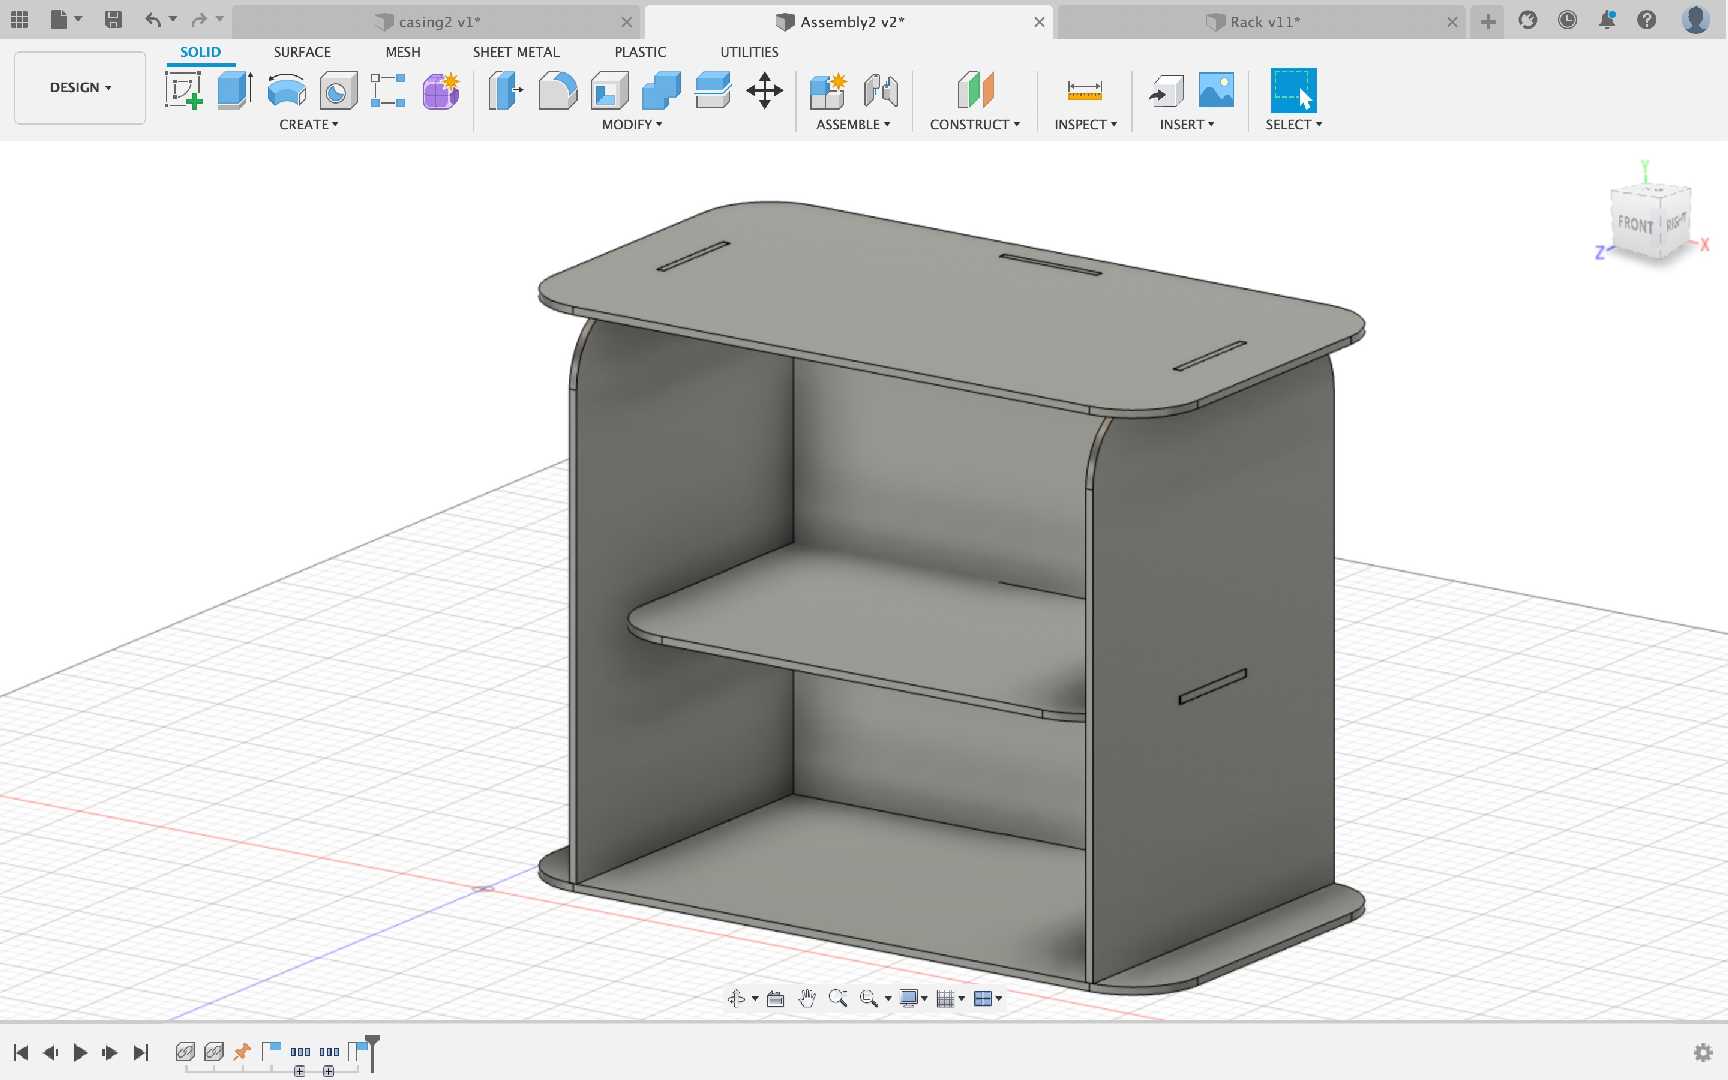
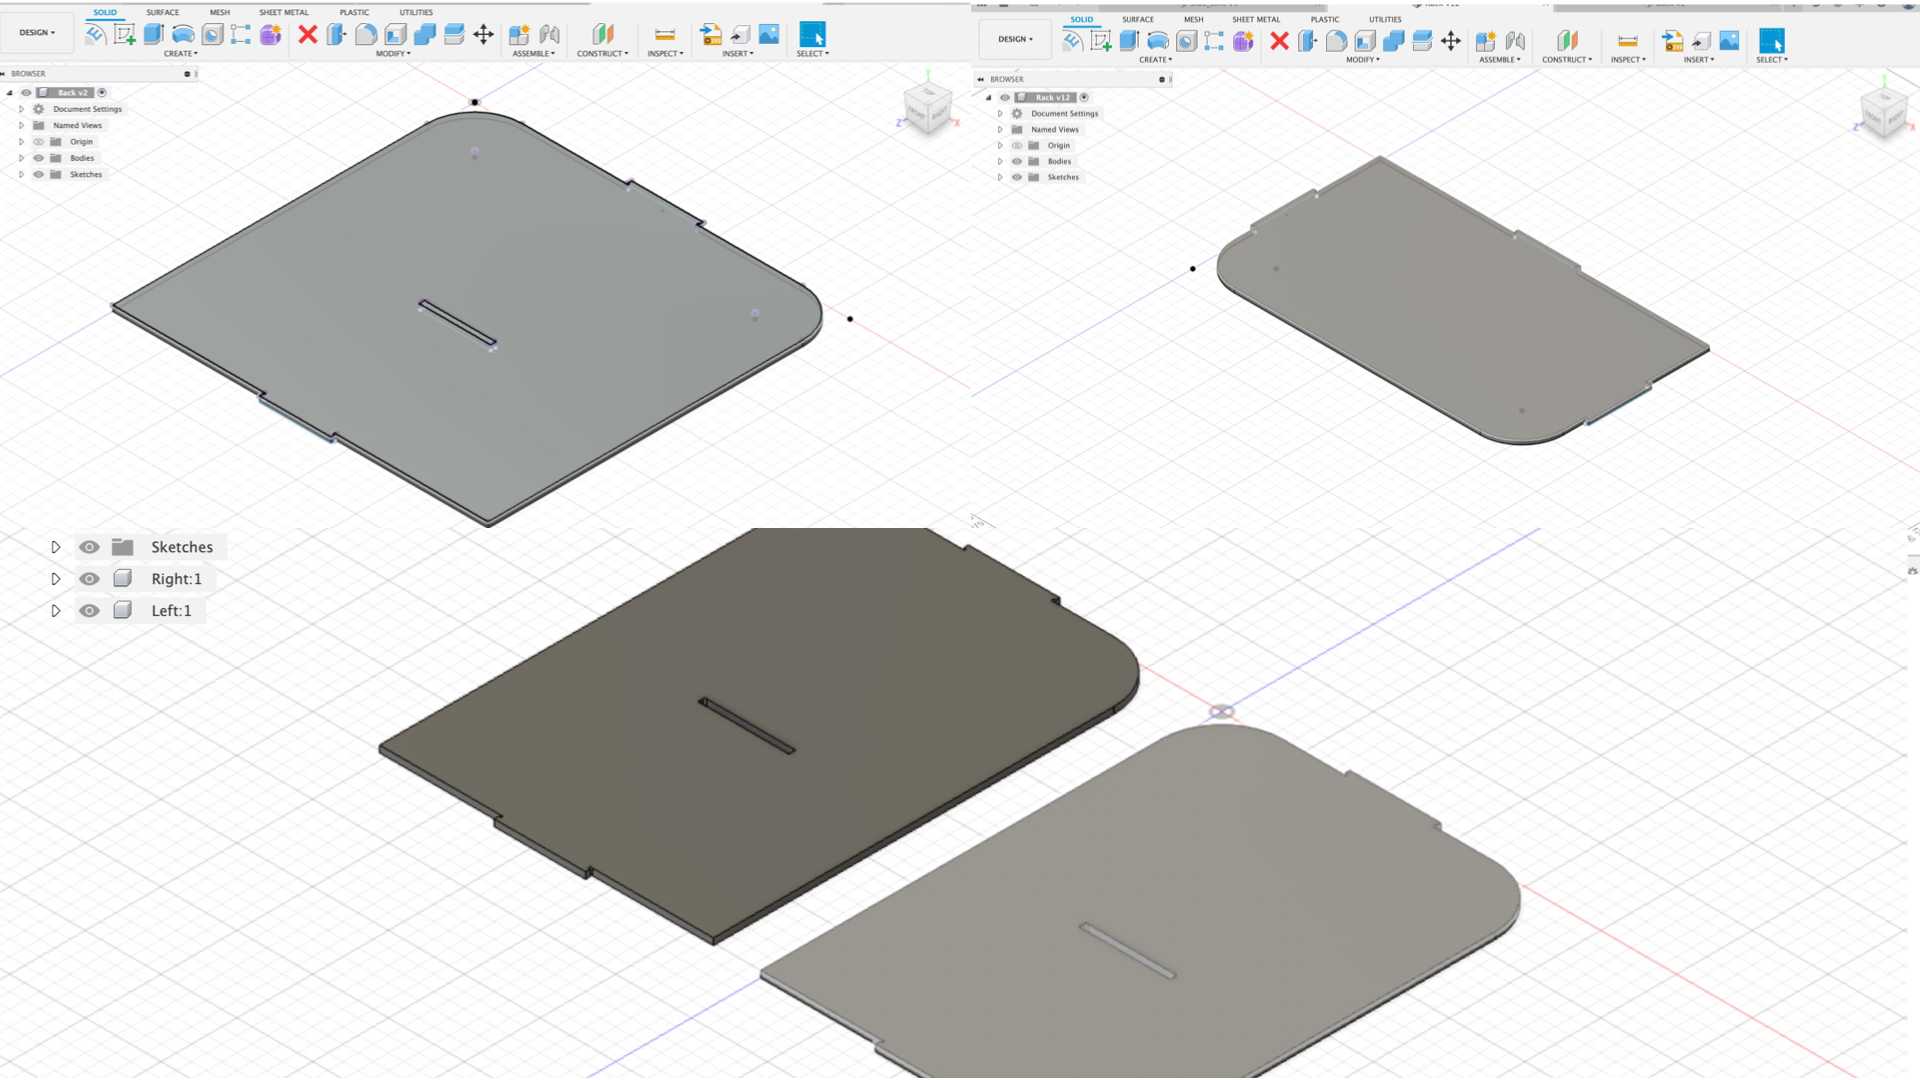
Then I used Fusion 360 to design symmetrical objects, this decision helped me save alot of time eventually therefore I created all the parts separately in fusion 360 and then assembled them.
The assembly of the table is shown below.
The original design files will be linked below.
Design in parametric
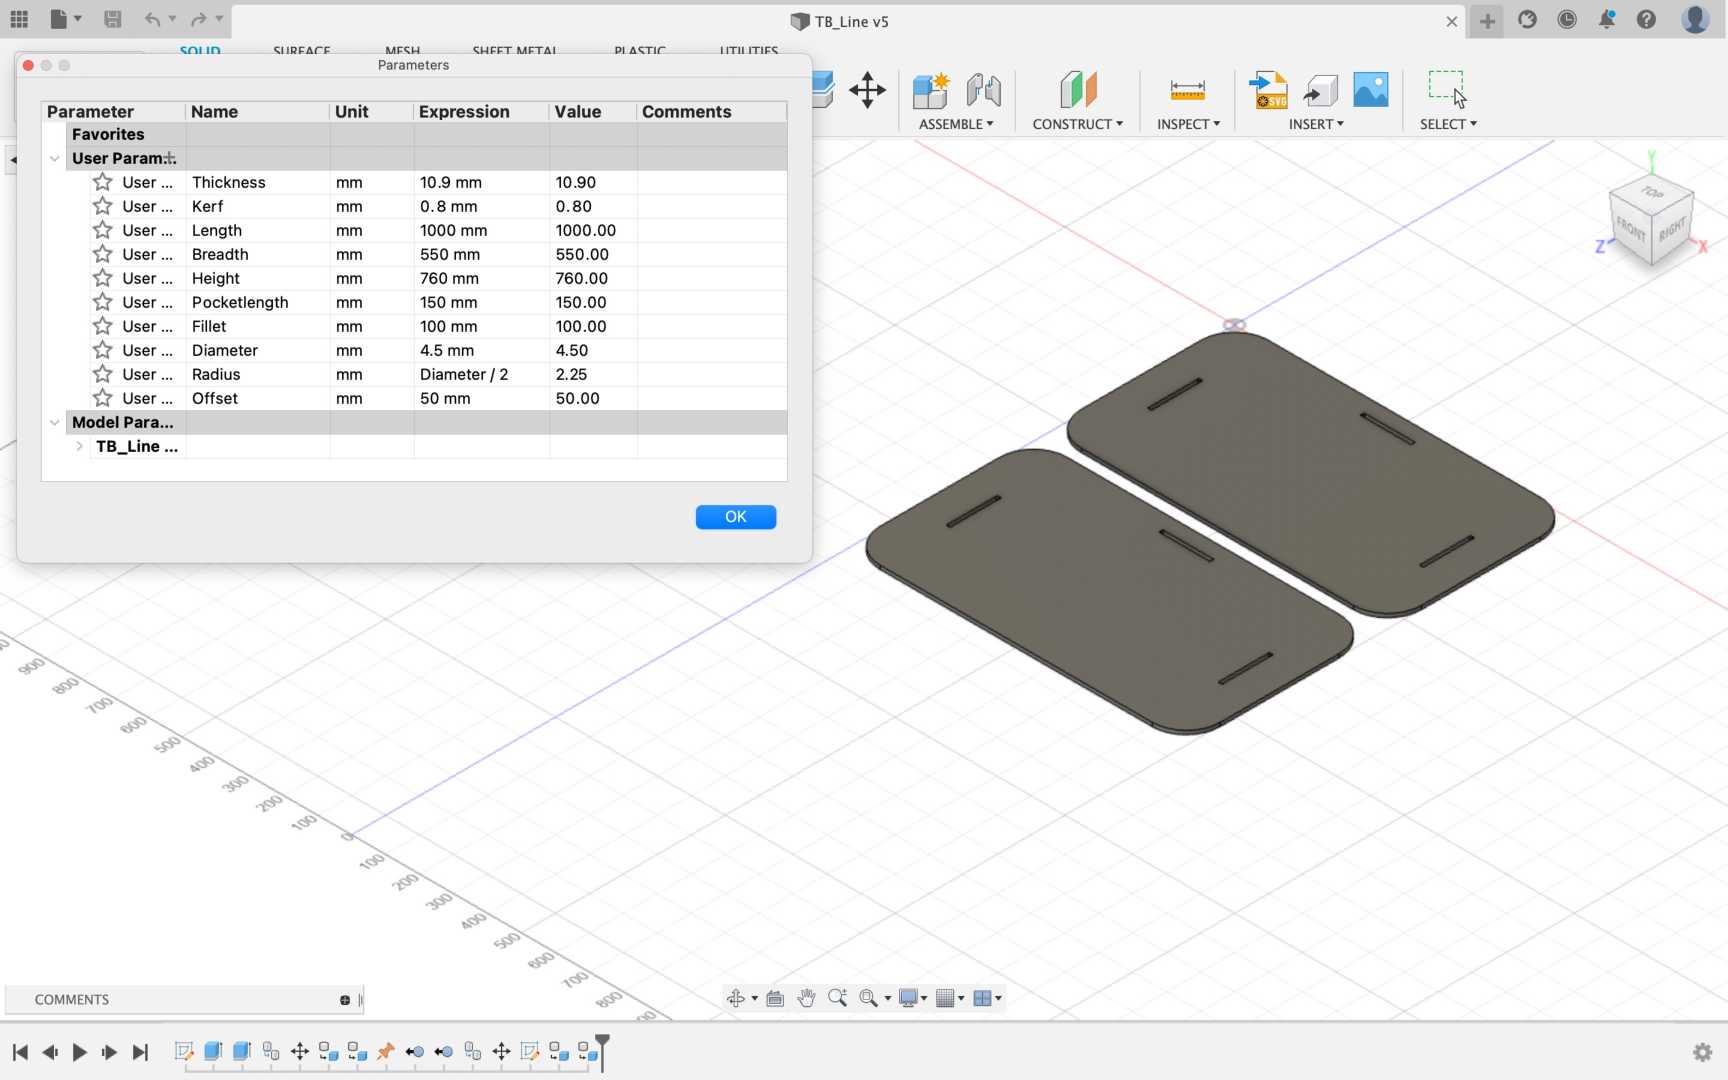
While designing the parts for the table I designed the parts in multiple files and all of which followed a parametric design concept from the beginning.
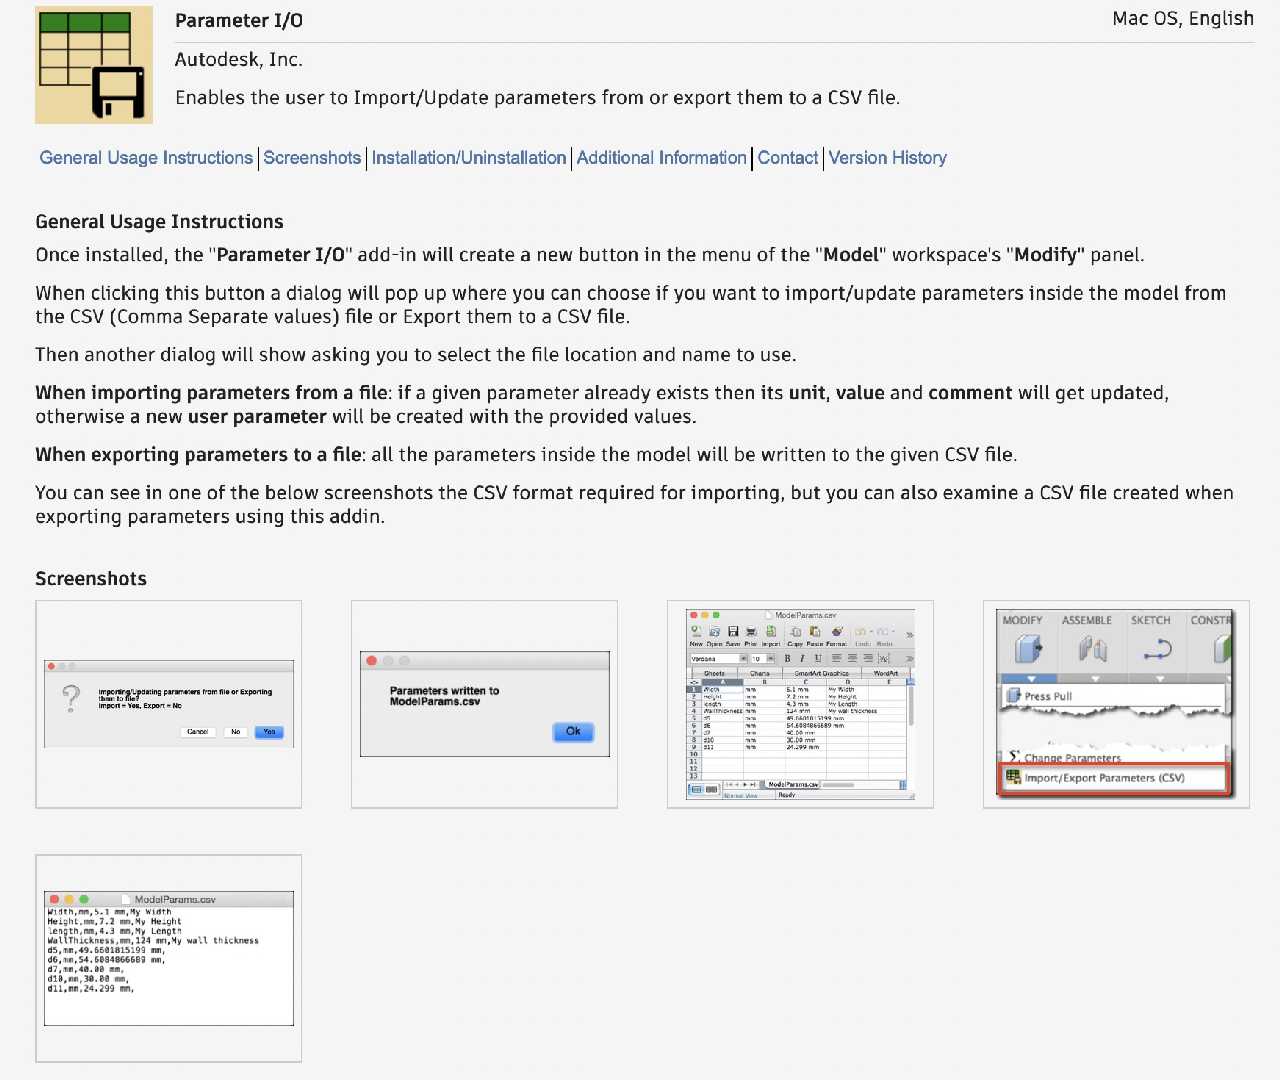
In Fusion 360 there is an extension that can be used to copy all the user defined parameters to a CSV file.
This file can be imported into other designs while designing different parts of the same product.
The issue is that this is an extension instead of a feature in Fusion360.
I will be leaving the link to the webpage of this extension over here so that you can take a look of this extension.
I would recommend that people who use fusion 360 must have an extension like this its crucial.
A shot of the webpage is given below for an idea.
Creating toolpaths.
For creating toolpaths for the table I used Vcarve (formally known as Partworks) a software used by shopbot to create toolpath.
First export your design files to DXF file if you don't know how to do it in Fusion 360 then check the video below for the same.
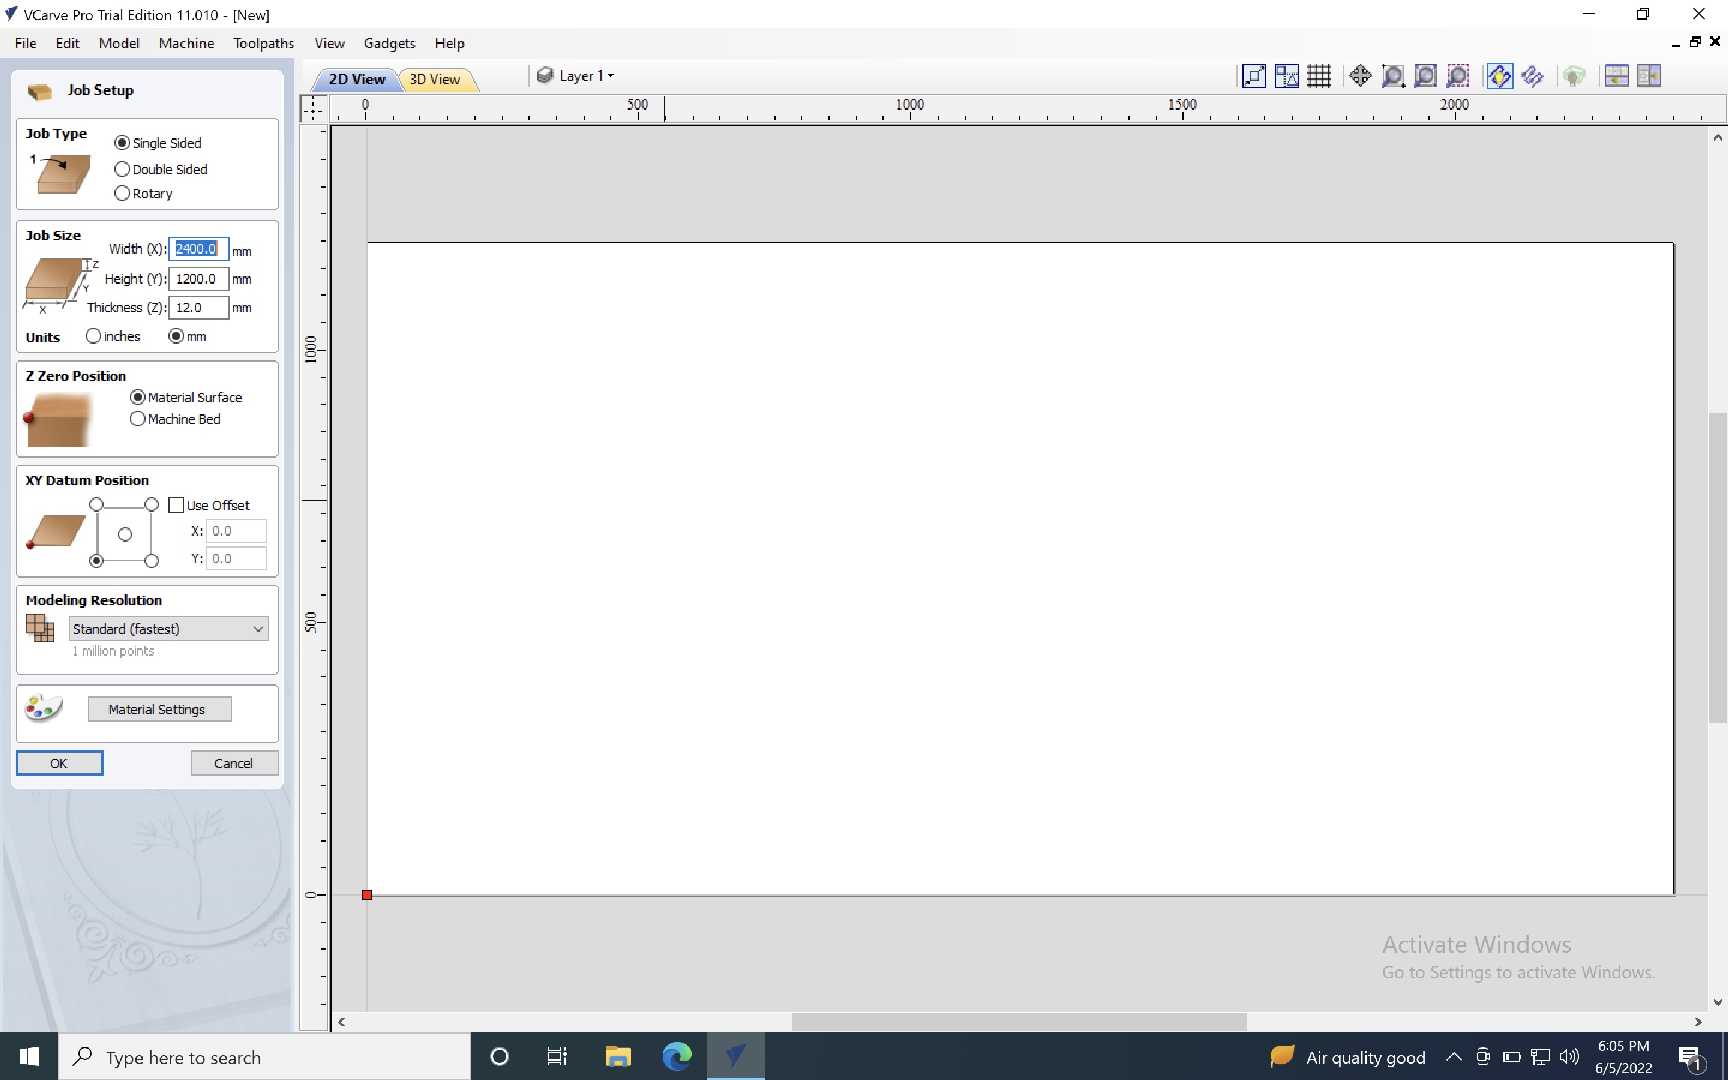
Then Open Vcarve or Partworks and Create a new setup
Then set the job size.
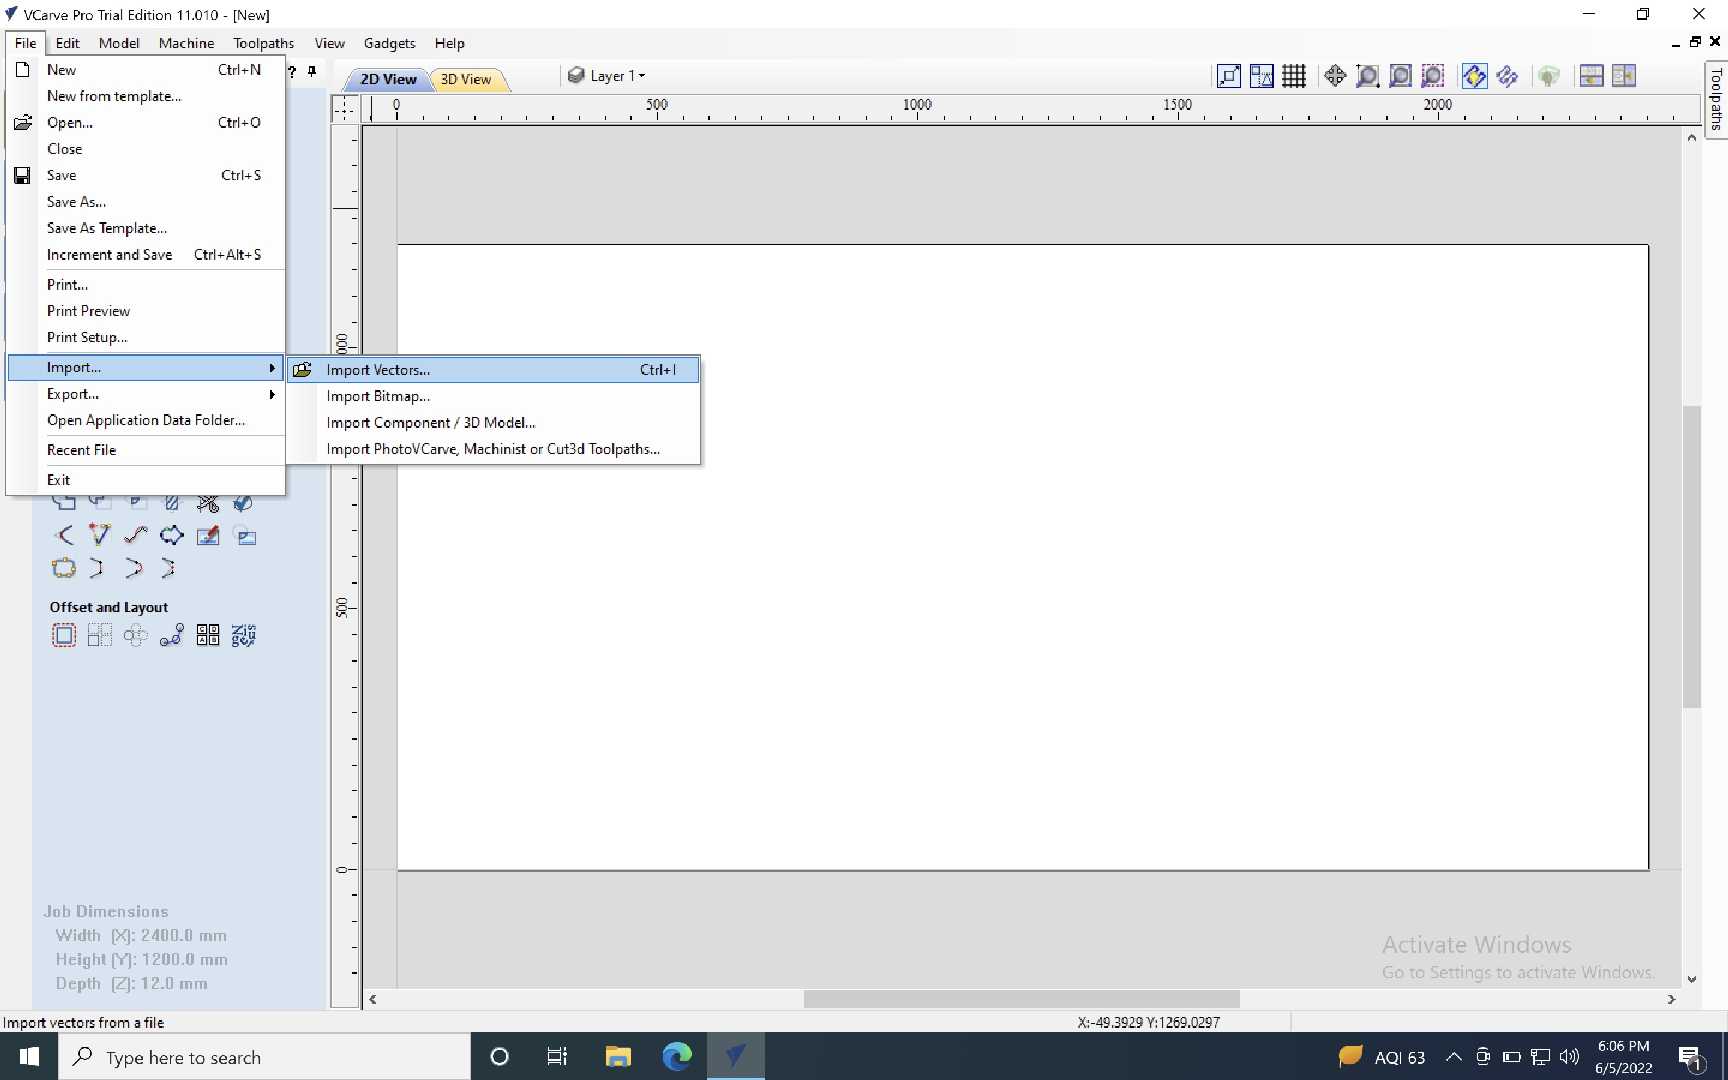
Import the DXFs to the 2D plane.
Arrange the dxf since the job size is given with the consideration of the size of plywood.
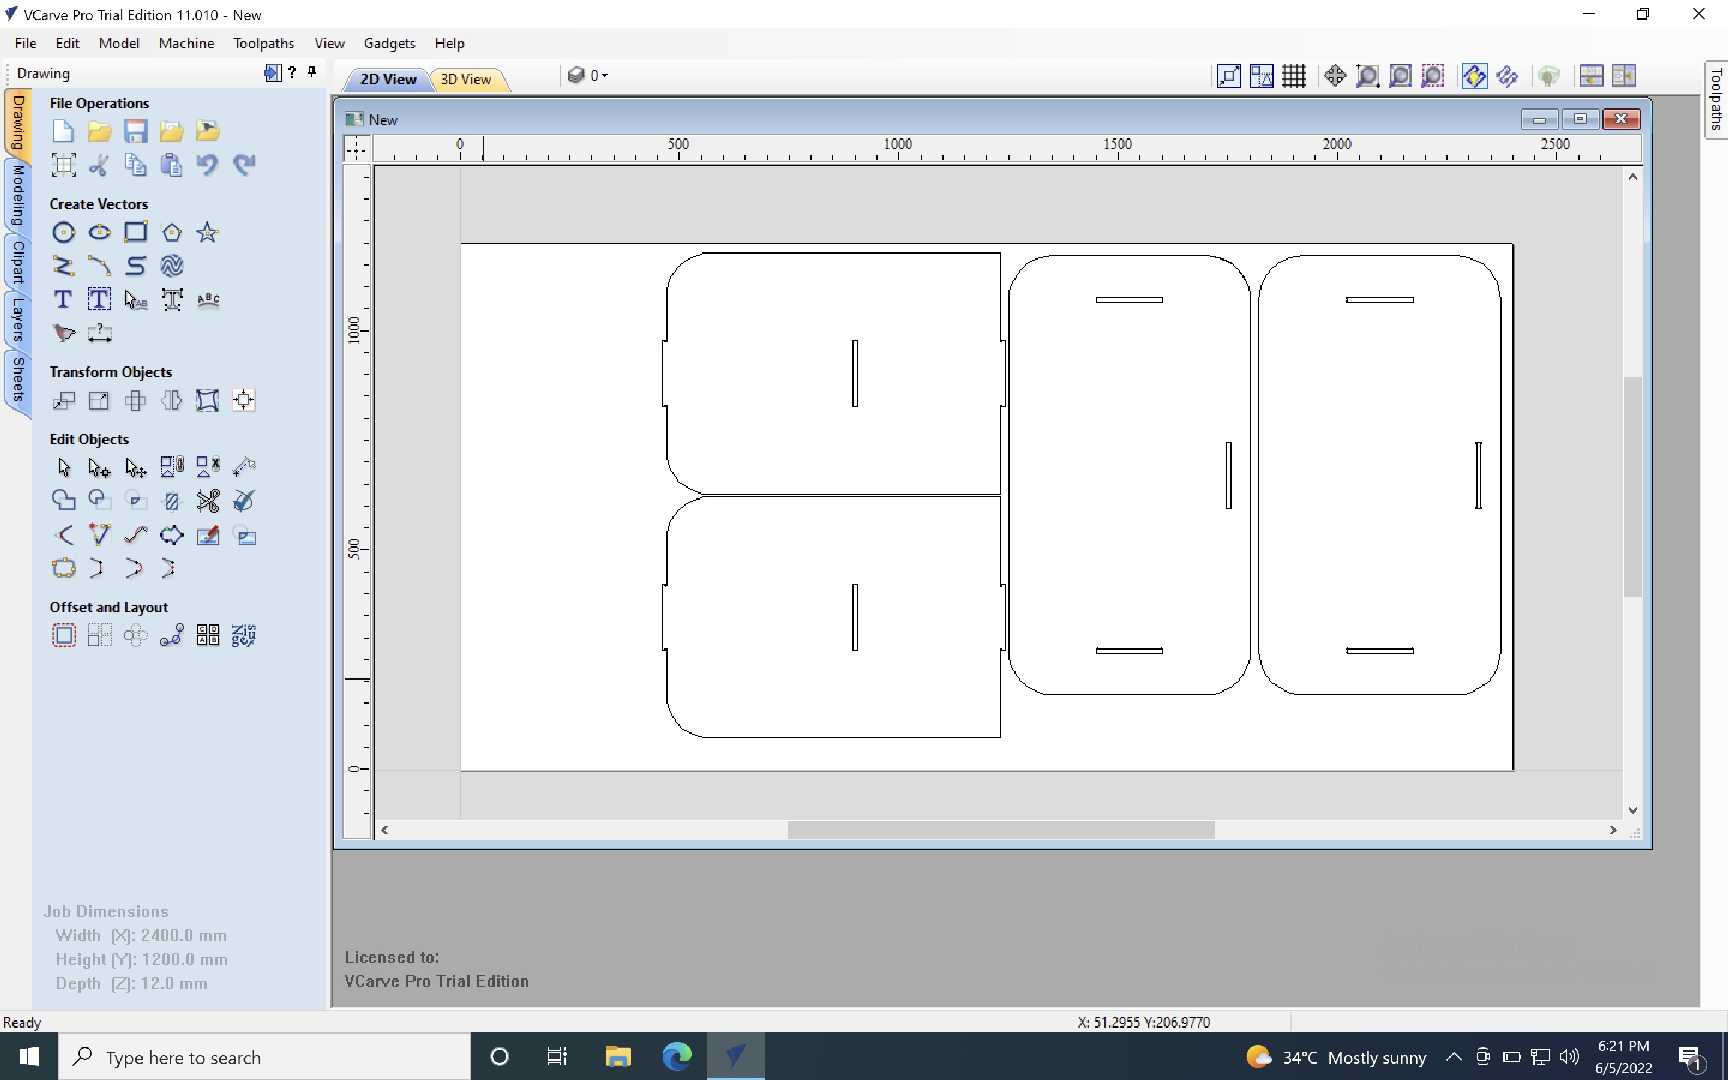
Create a toolpath by clicking the "Toolpath" tab on the right handside.

In machine vectors choose outside first. Do remember to select the outter vectors of the imported files. Check the above image for reference.
Then select the desired tool profile that you are going to use for milling. Remember to give cut depth as 13mm since we are using a 12mm plywood and we have to be sure that the cutting is properly done.
If you get any warning baseed on the cut depth just click OK.
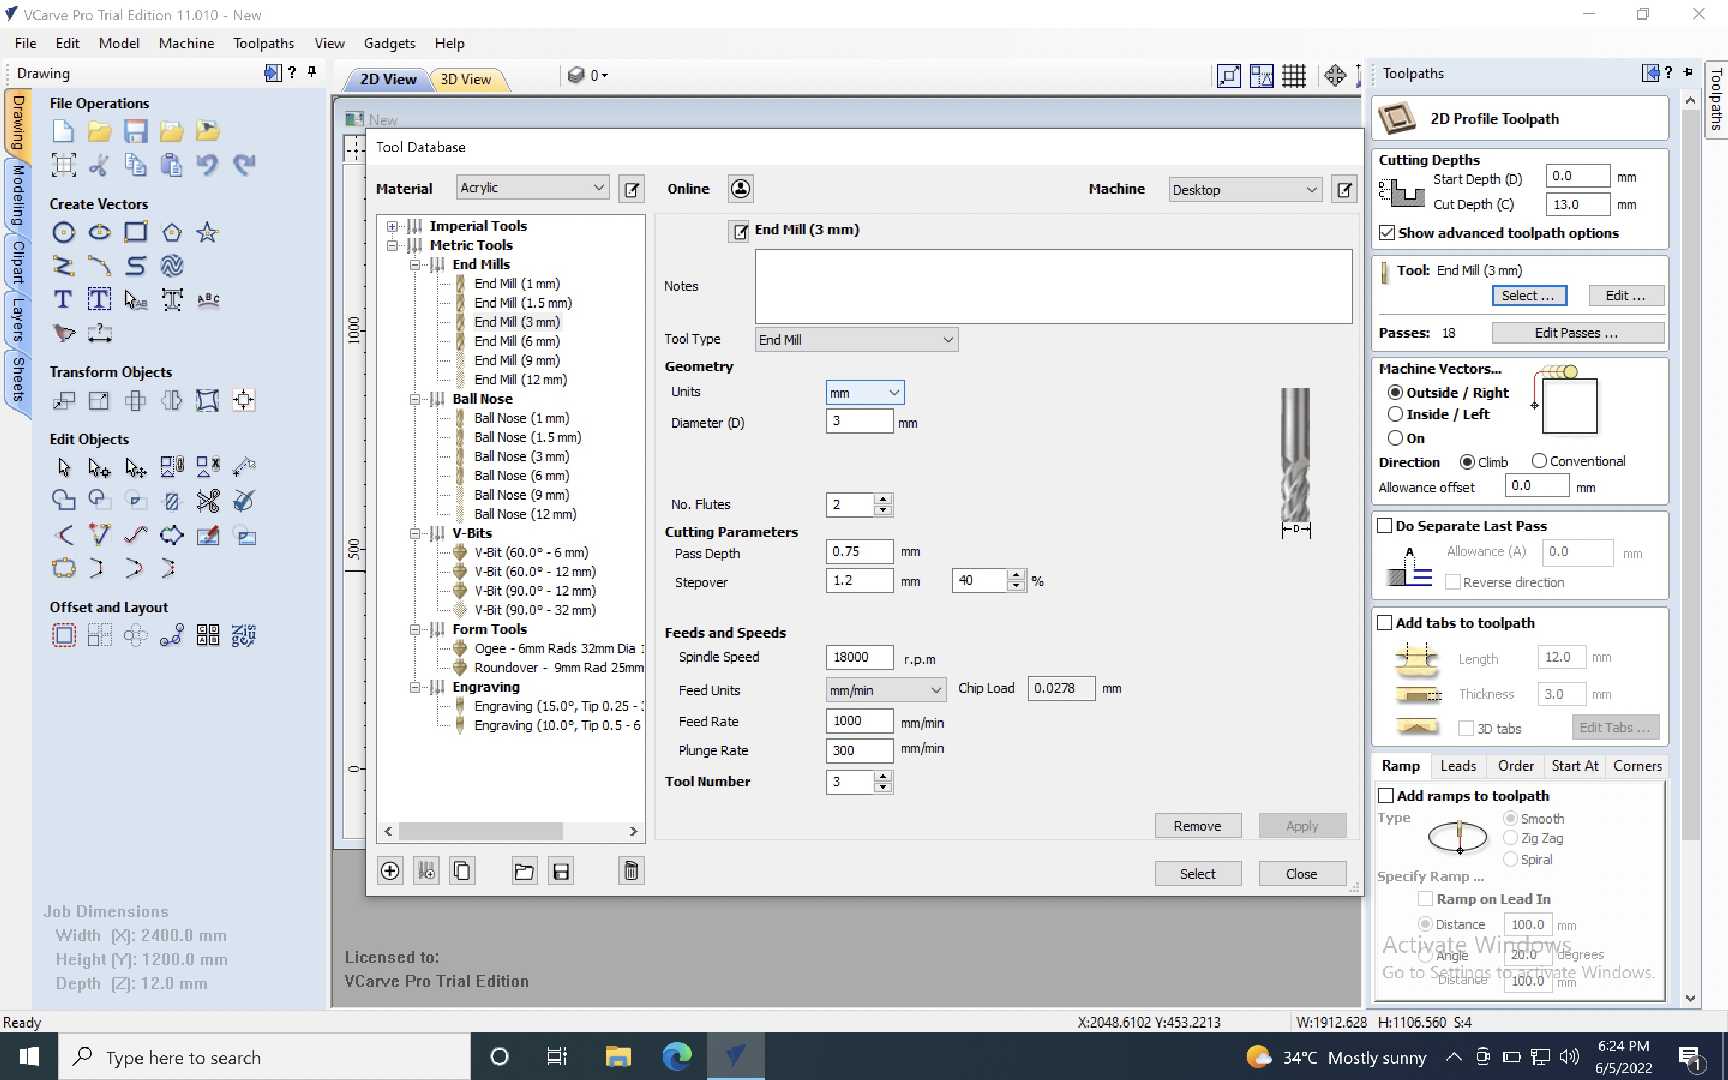
Save the tool path as outter_toolpath.
Then repeat the machine vetors step now by choosing the inner paths and generate an innercut_toolpath.
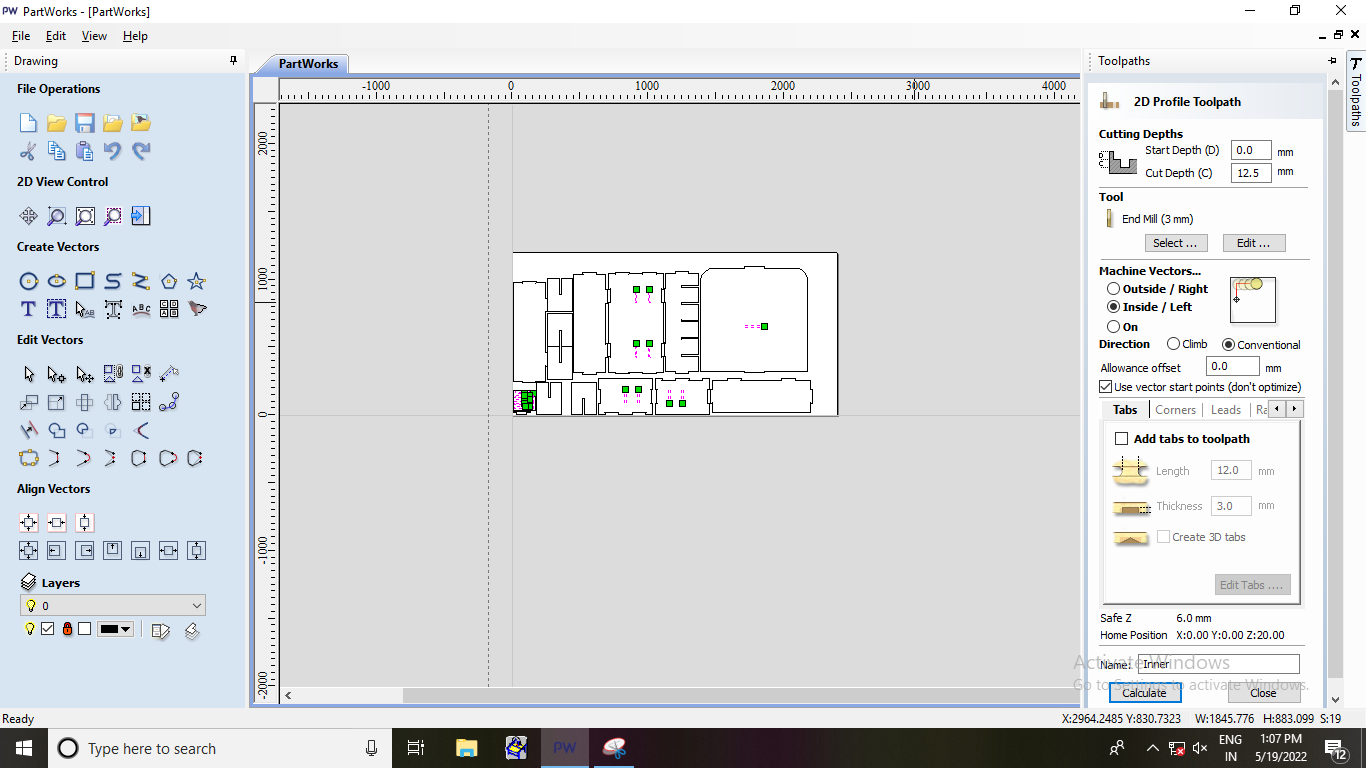
Save the toolpaths remember to uncheck all the files and then save them separately. Otherwise the machine will do all the cuts in a single file.
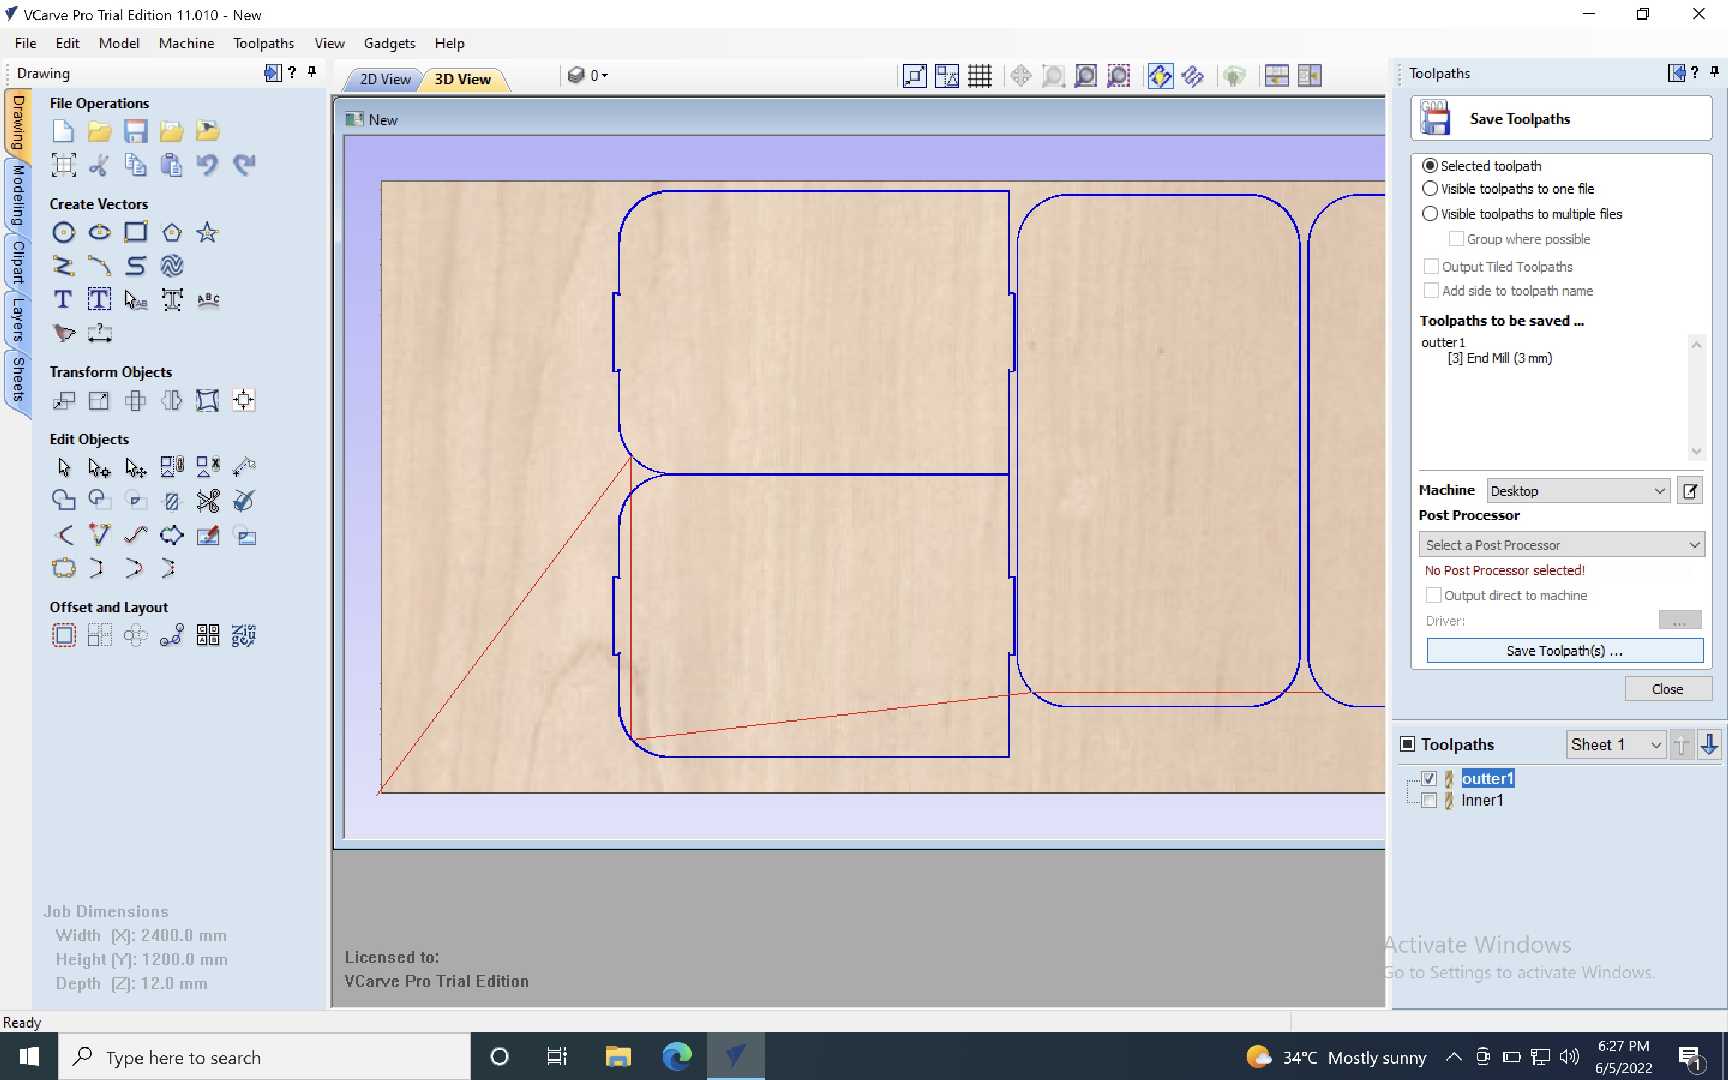
The toolpath must be saved in .spb format its basically the gcode version of shopbot.
Like that the toolpaths are created.
Making something big
To create something big on a shopbot first we have to prepare the machine.
We have the clean the machine to start with.
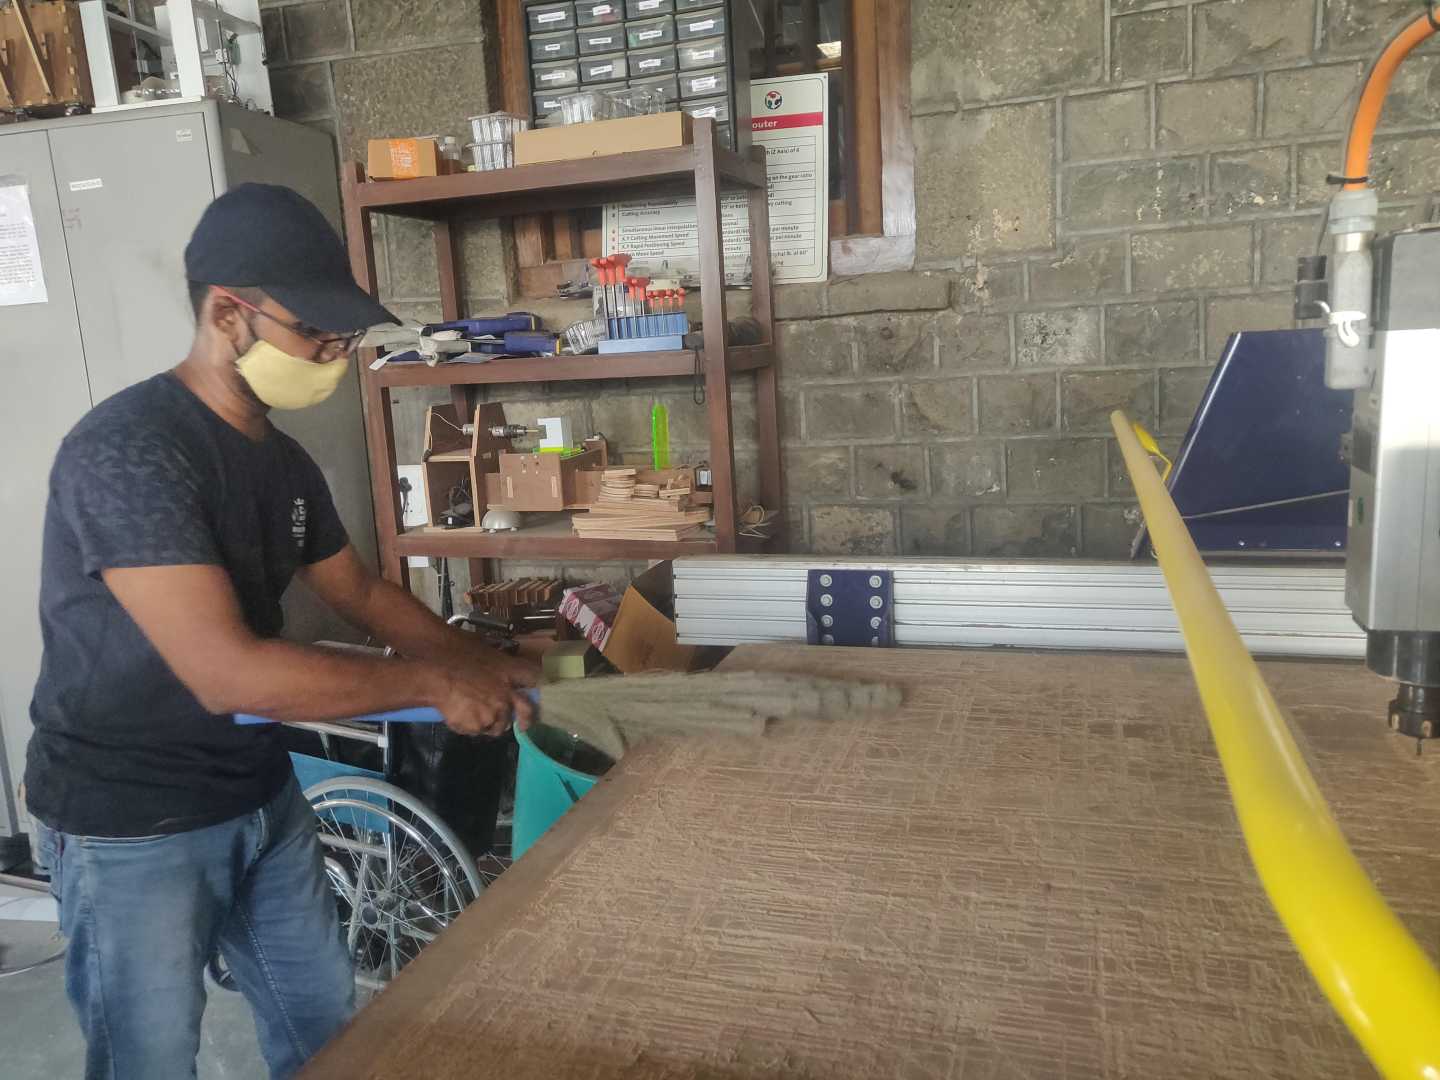
Then follow the safety Instructions
Do some safety check and after that place the plywood on the machine.
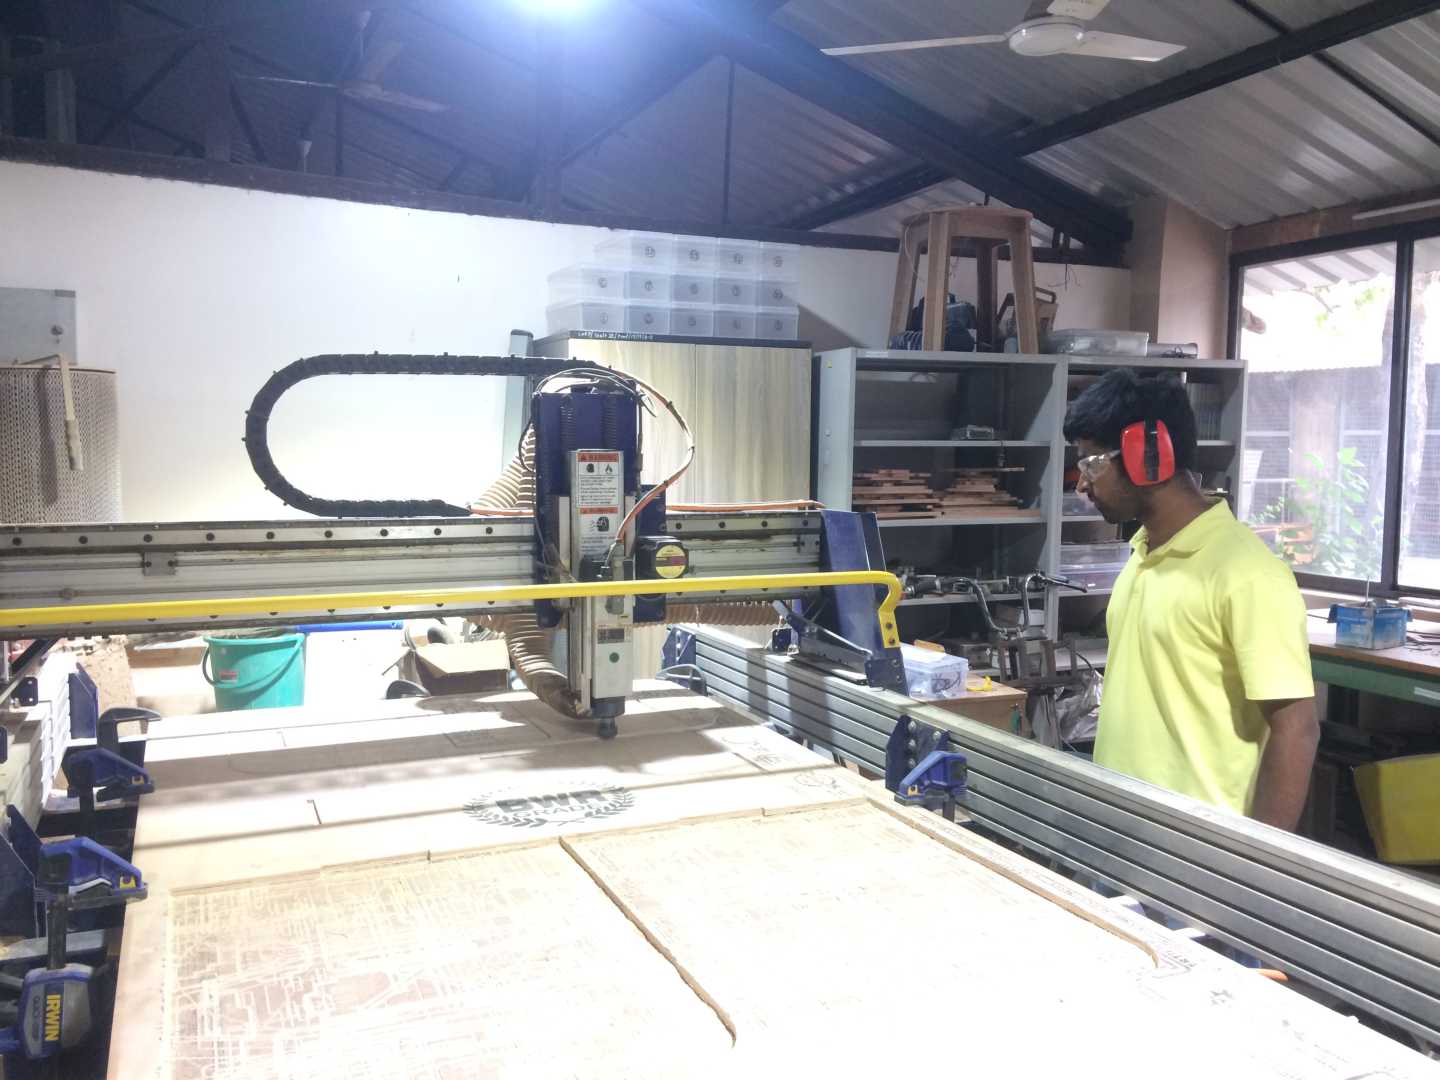
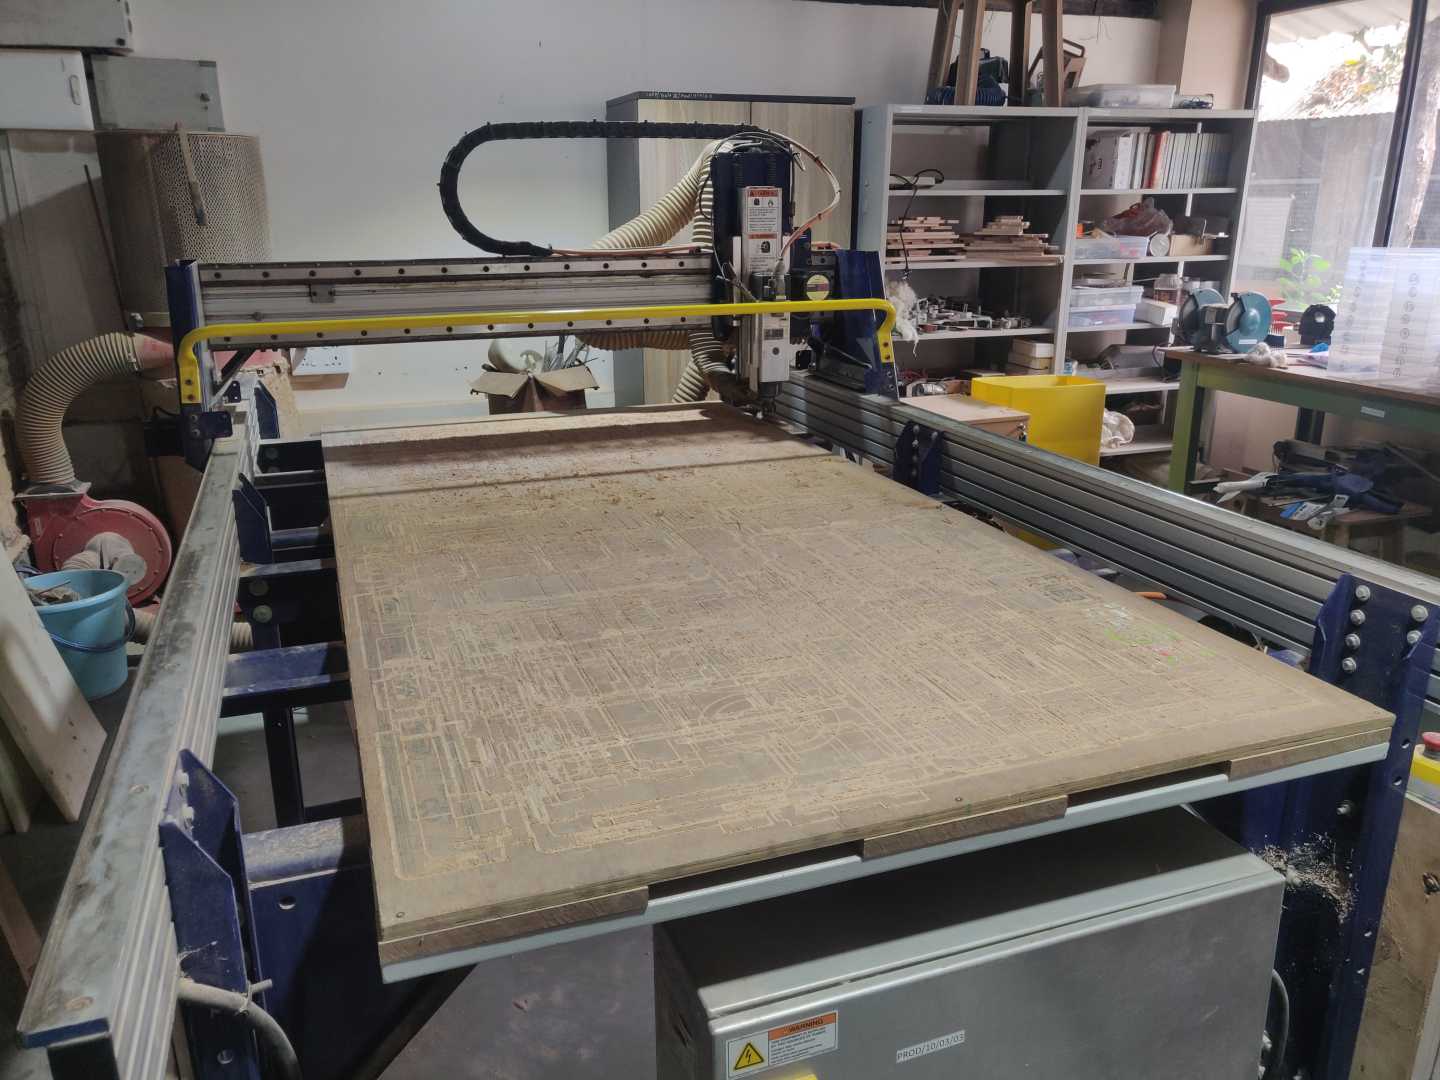 Alook of the machine after cleaning
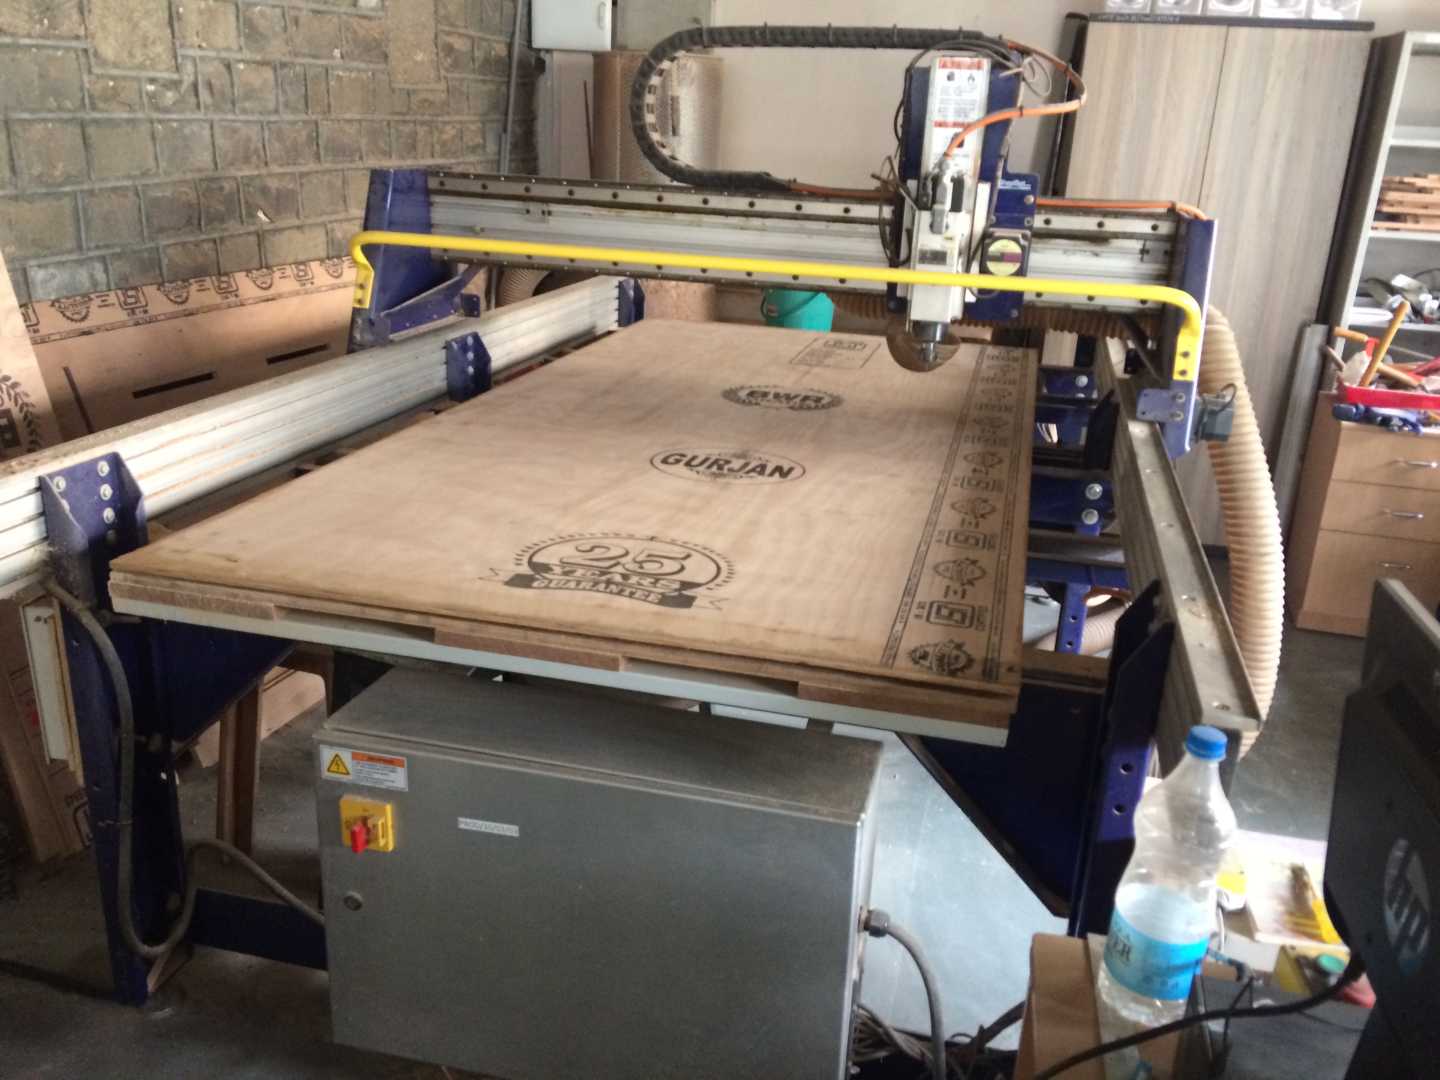
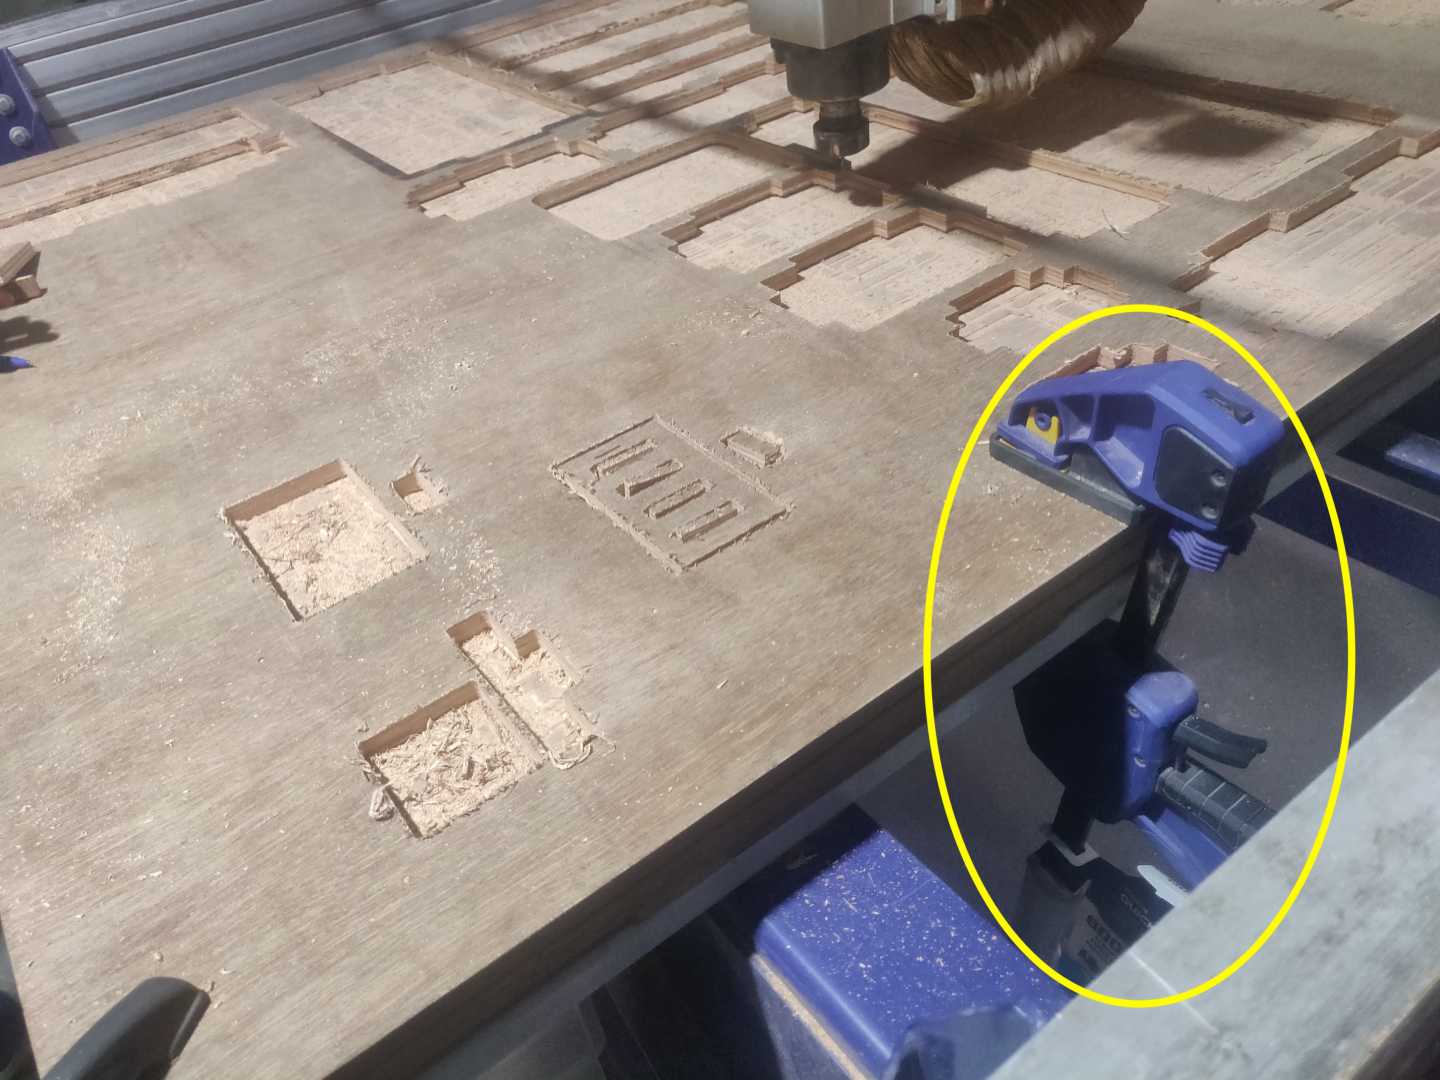
Press down the plywood with clamps/fixings so that it holds in place.
Then check the chuck whether you are working with the desired tool. Below is an image of changing the end mill.
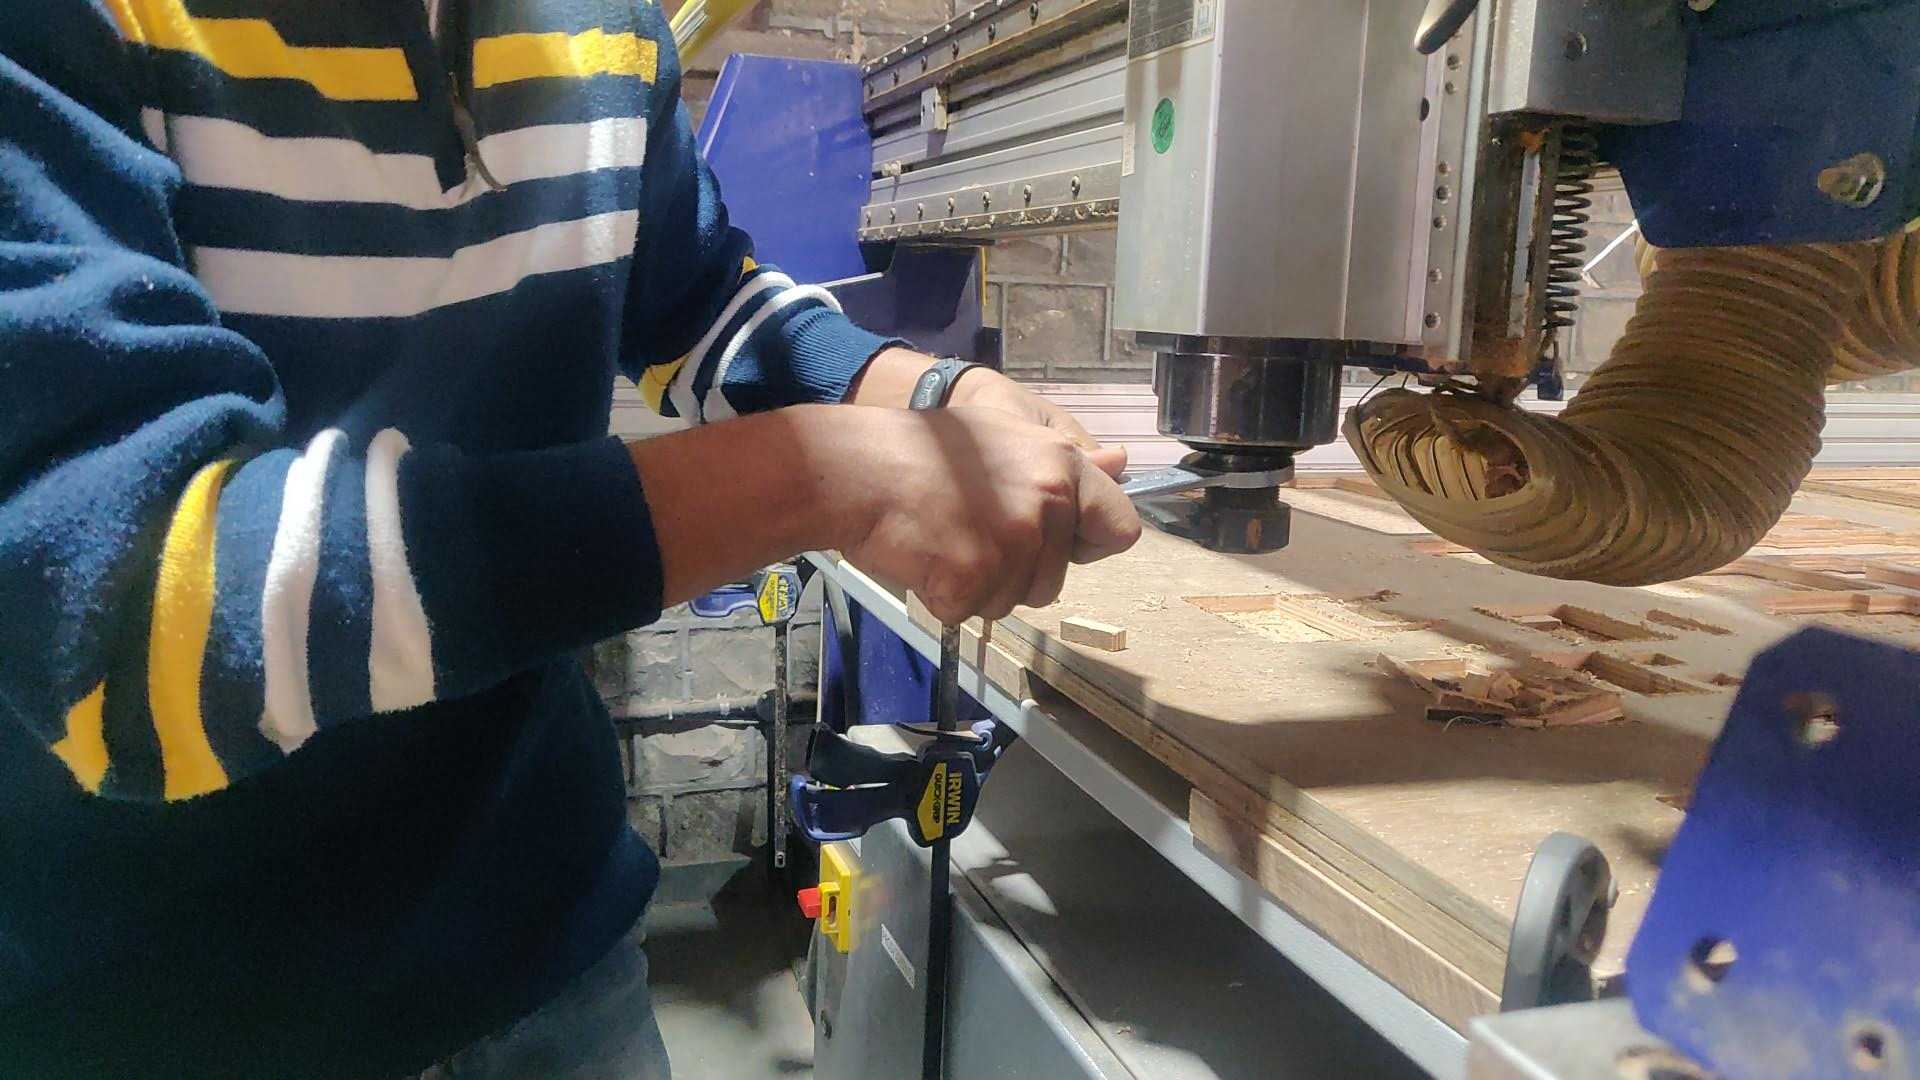
After checking the tool you are ready to operate the machine.
Check the power supply to the machine and the stop switches.
Check for the emergency stops also.
note:- Do a test run first and then use the desired tool for the particular job that you would like to cut.
Video
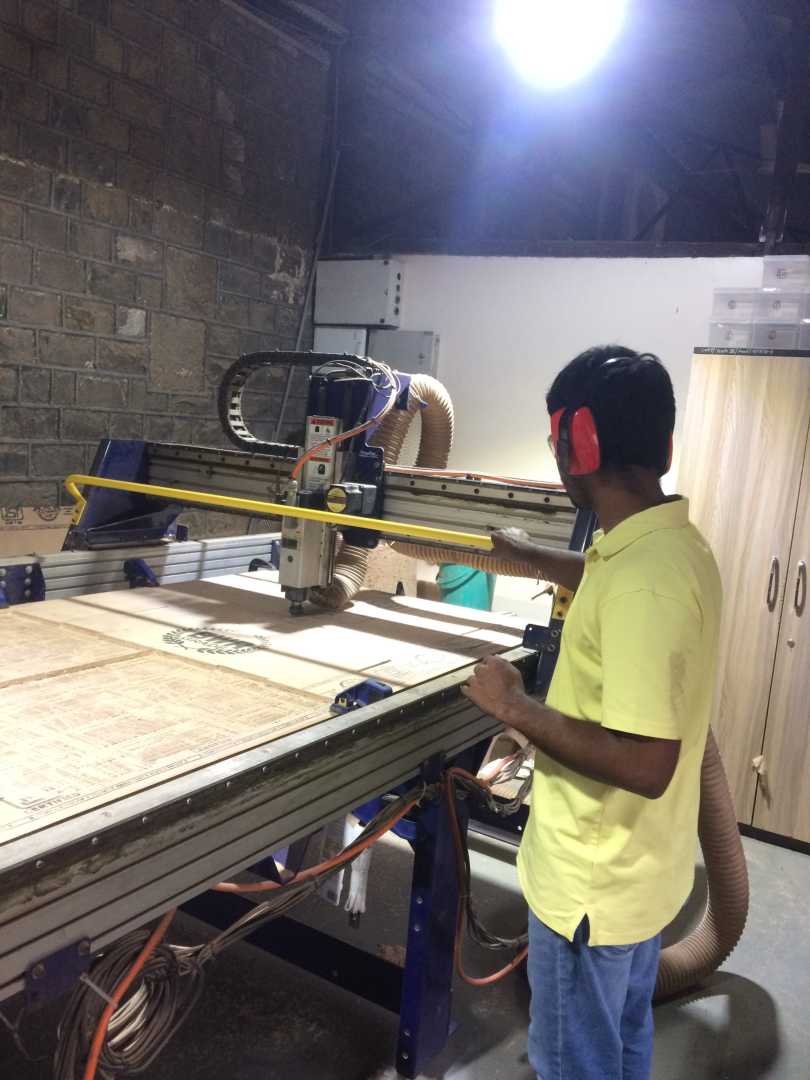
Video of performimg an inner and an outter Cut
Some picture of me working at the lab.
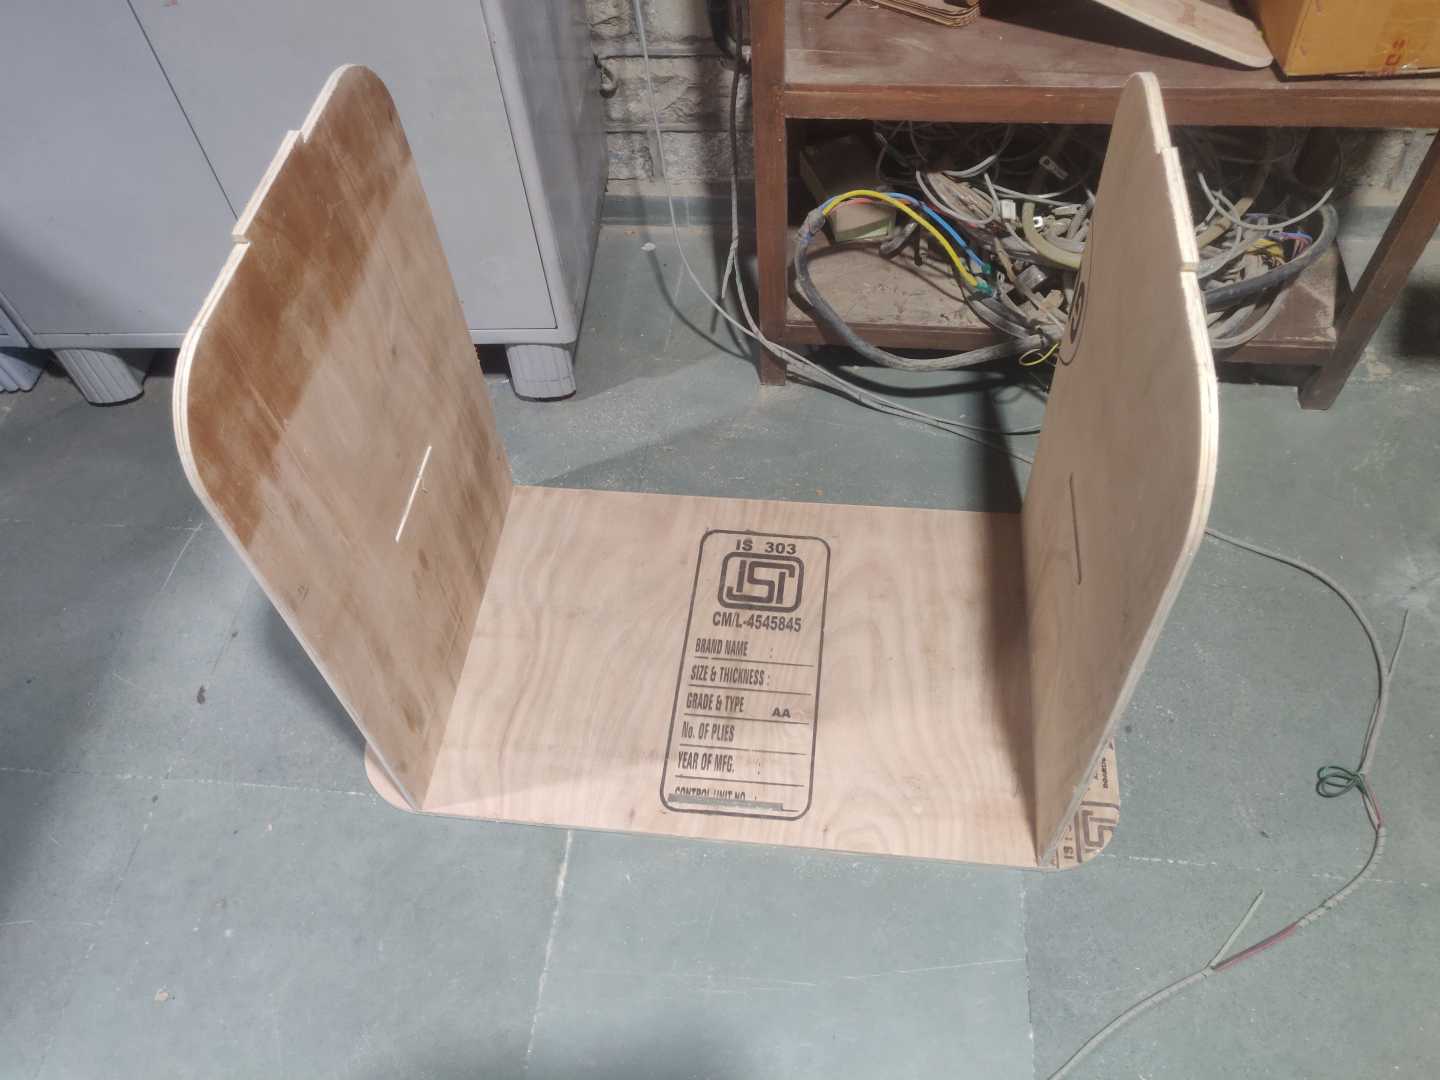
A bit of partial assembly of the table since I couldn't all the parts in time.
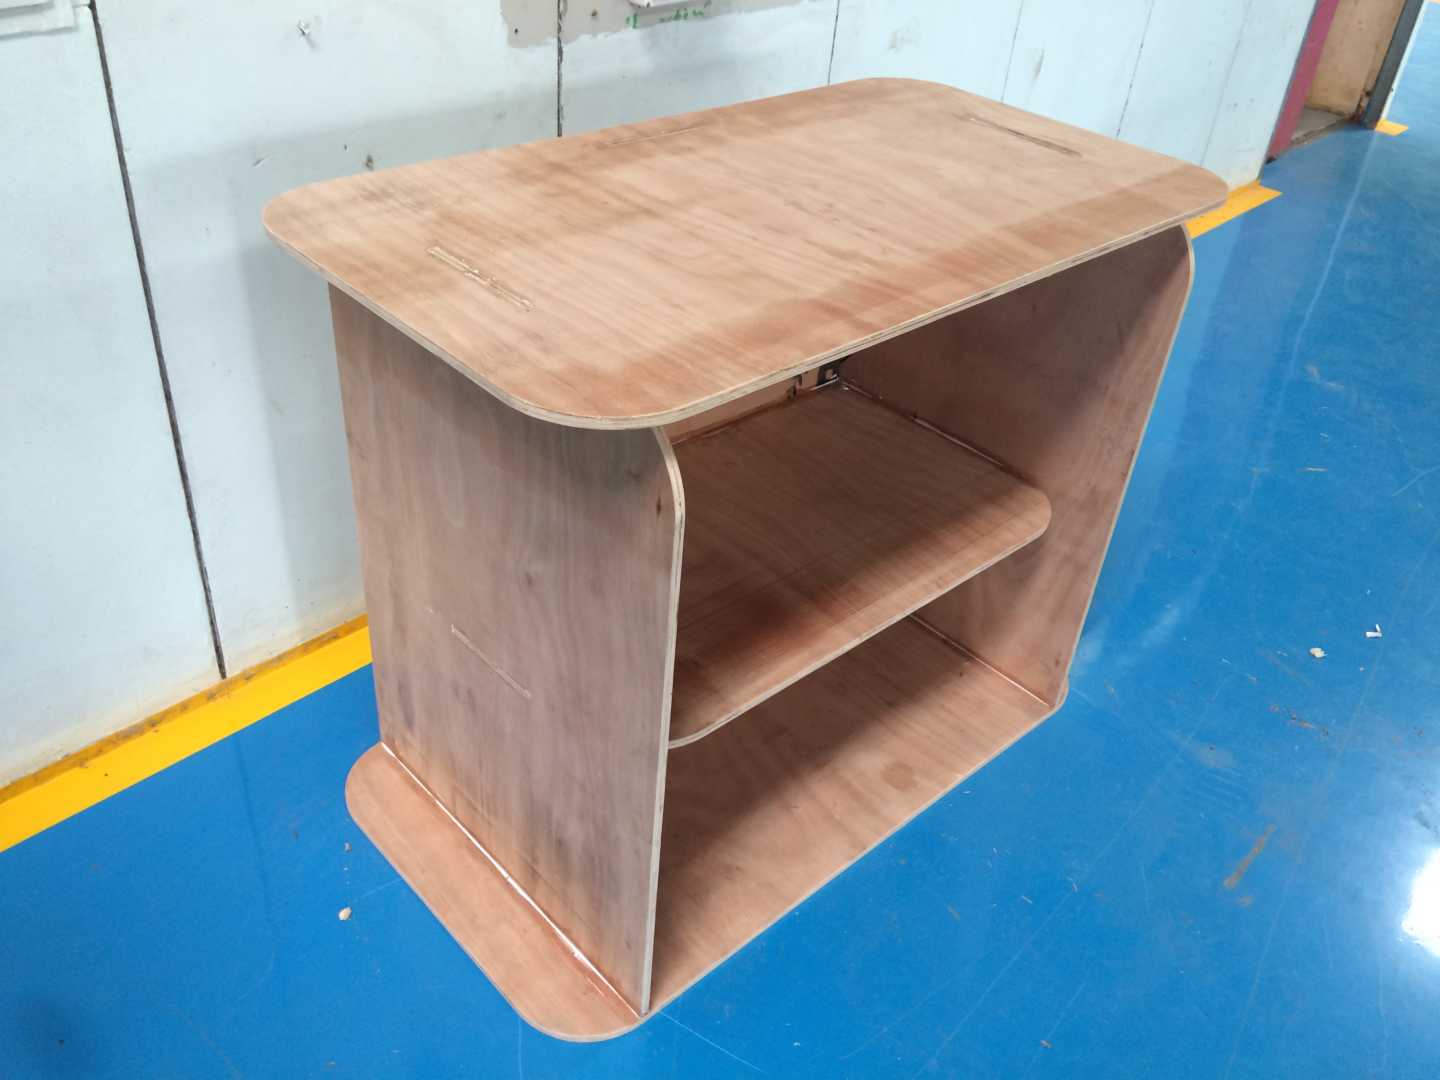
The table finally after assembly
Group Assignment
During our group assignemnt we learnt the safety procedures to be followed then test out the machine and explored the tools that were available in the lab.
Vcarve software was used to generate the toolpaths etc. For more details please visit the page by clicking here.
Problems that I faced and fixed them
The main problems that I faced while doing this assignment was a lack of hands on experience. I wasn't confident enough at first
Then I practiced on Vcarve. After being familiar with the software.
I asked the lab instructor to show me to reset the machine.
Most of the errors were solved when the machine was reset. Its very important to learn how to reset the machine. I would recommend to write this down at number 2 spot in the bucket list.
Turn on the dust collector even before the machine starts to cut/mill otherwise the premises will be dusty.
Read all the instructions first then try your hands on shopbot because gives majority of the solutions.
Original design files
I'm leaving my original design files download link is here.
Acknowledgement
I would like to thank alot of people who helped me coplete this assignment.
There were alot of hurdles for me while doing this assignment.
I would like to thank you my Instructor Mr.Suhas Labde who helped me design and give some insight on the designs that I made.
I'm greatfull to Vipul a student at COEP who is pursuing is Masters at COEP he was the one who hleped me with the idea to cut the parts properly.
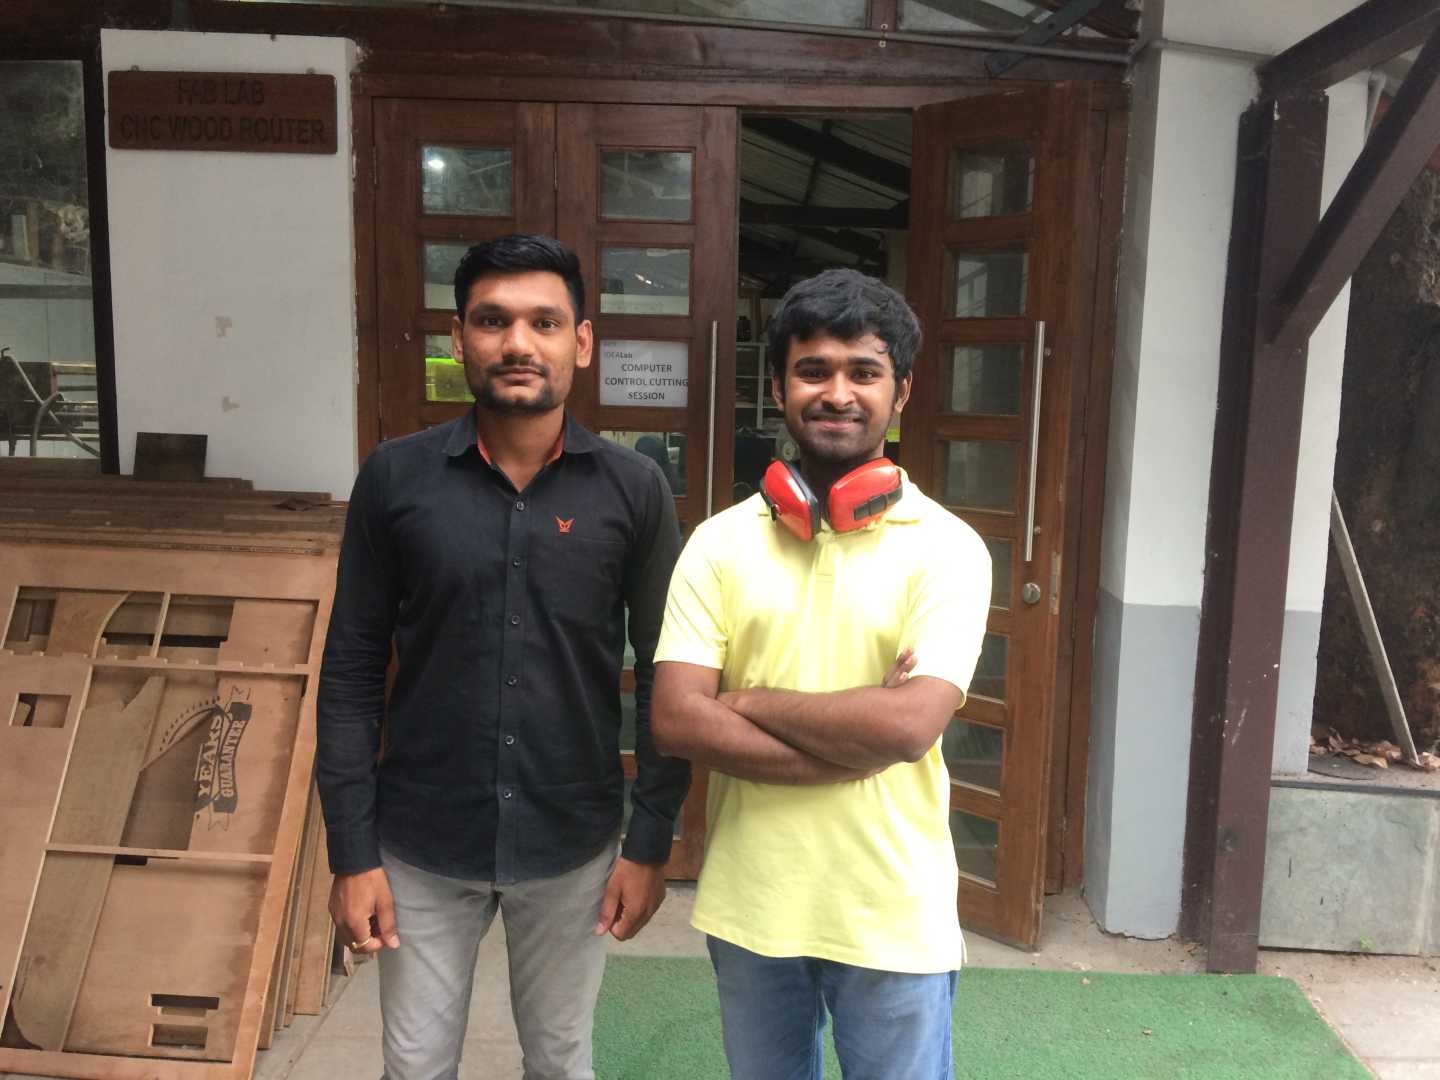 An image of me and Vipul at COEP.
Secondly the IBT students at Vigyan Ashram who helped me out to assemble the table in a proper manner.
Hats Off! a great project to work on.

Fabspace by Devesh S Nair is licensed under a Creative Commons Attribution-NonCommercial 4.0 International License.