Computer Controlled Cutting
Group Assignment:
Characterize your laser cutter's focus, power, speed, rate, cutoff, and joint clearance.
Document your work on the group work page and reflect on your individual page what you learned.
Individual tasks:
Design, laser cut, and document a push-fit parametric construction kit, which can be assembled in multiple ways. account for laser cutter cutting
Cut something on the vinyl cutter.
Learning outcomes
Demonstrate and describe parametric 2D modeling processes
Identify and explain the processes involved in the use of the laser cutter.
Develop, evaluate and build the parametric construction kit.
Identify and explain the processes involved in using the vinyl cutter.
Should the following questions have been answered?
- Linked to group task page
- He explained how he parametrically designed his files
- Documented how you made your press fit kit
- He documented how he made his vinyl cut
- Included your original design files
- Include your hero photos
There are two assignments this week: one group and the other personal. The theme developed is that of computer controlled cutting.
As a group we work in the FabLab of the Universidad Continental. We characterize the laser cutter. We designed a parametrically adjustable press fit kit. We design and carry out the practice of cutting the logo that represents the final project on vinyl. Finally, we document all the work carried out during two days extensively with text, photos, screenshots and videos that we will upload to YouTube.
Group assingment
Work team: Timoteo Calderon Letona and Jorge Chevarría Mar
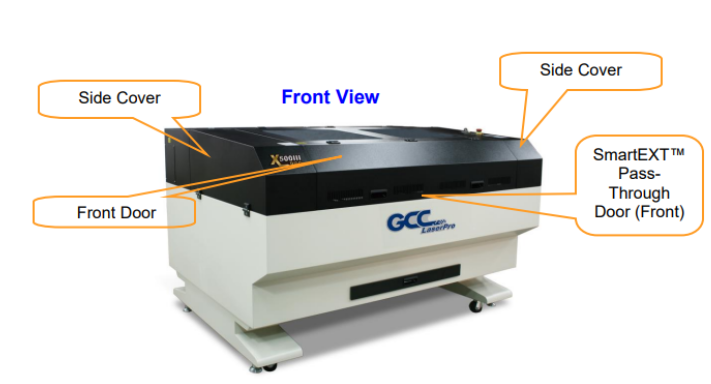
For this group assignment we were asked to characterize the lasercutter machines in the FabLab Continental University to test the cutting and dimension settings for different materials. In the FabLab Continental we use the laser cutter: CO2 laser cutting machine X500III.
CO2 laser cutting machine X500III
DESCRIPCIÓN GENERAL DE GCC:
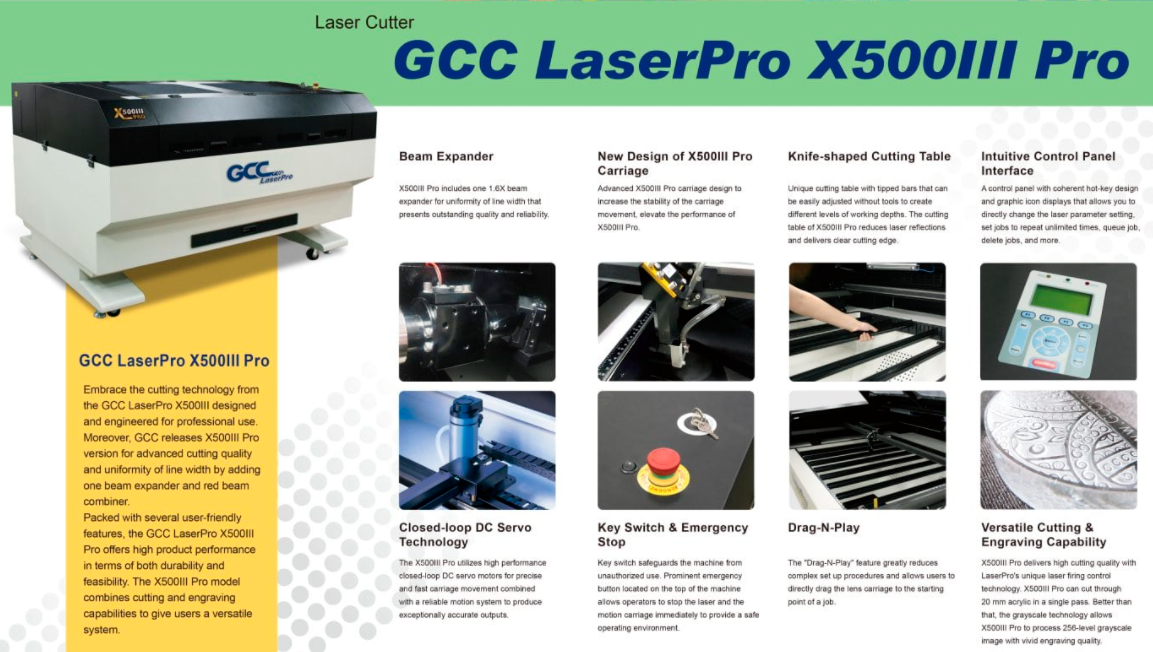
Under the slogan "Innovation with a human touch" GCC was founded in 1989, is a global manufacturing company that produces a wide range of quality products, including cutting plotters, laser engravers, laser markers, laser cutters, inkjet printers, UV curing ink and digital finishing equipment for various applications such as signage and advertising, personalization and identification, gifts and promotions, apparel and electronics Headquartered in Taiwan through a worldwide network of authorized distributors and branches in the United States, Europe and China, GCC is committed to persistently pursuing the goal of providing the best possible performance in technologies, services and solutions to meet customer needs.
The machine we used in the lab was the GCC LaserPro X500III X-series designed for professional use. Equipped with various user-friendly features, the GCC LaserPro X500III offers high work performance in durability and practicality. The X500III model combines cutting and engraving capabilities, offering users a very versatile system.
CARACTERÍSTICAS

Technical specifications:

We can visit: https://www.procad.cl/view_prod/668/5/LaserPro%20X500III to better see the description of the equipment.
The parameters that we can adjust depend on the type of work that we want to carry out (engraving or cutting), in addition to the material that we are going to use.
We can download the controller driver from the internet to use it as if it were a paper printer to which we are already accustomed, obviously with the special configurations for this machine, which we have to practice to have a good command of this equipment.
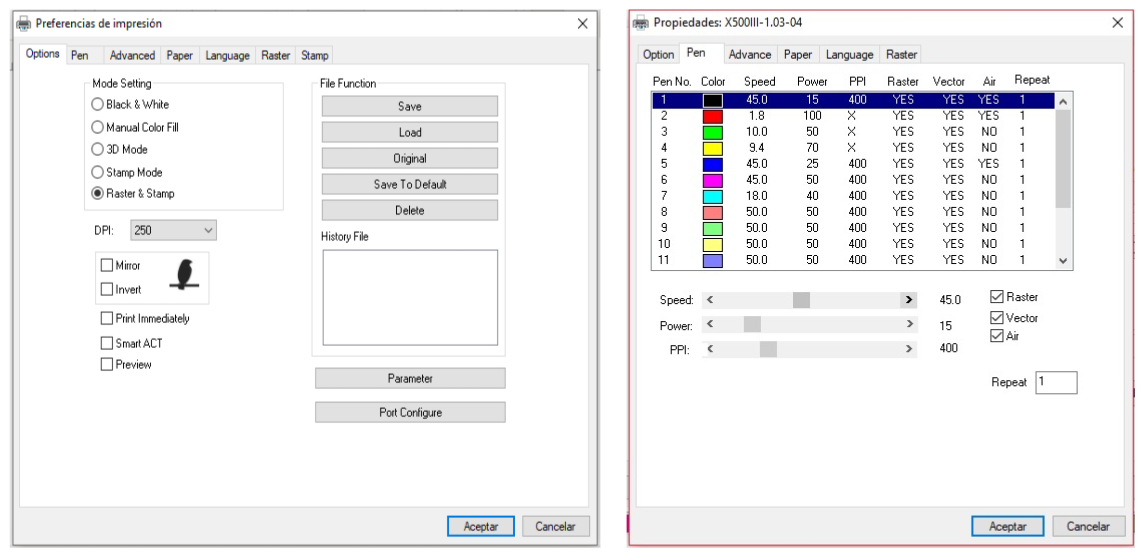
Once the installation of the driver and our model or application that we want to engrave and/or cut have been completed, we have to configure the sections that will be engraved and the parts or sections that will be cut. For this, we go to the print section and select the name of the laser machine. , we give preferences to configure and we see the following window.

In this window we select the type of engraving, the points and other properties which we have to practice to see the best results for the required application, in addition to the fact that the configuration is very intuitive.
The section that we use the most and we must practice is the second tab "PEN" in which through the selection of colors we can indicate how much power and speed will be used when engraving or cutting the material used, as we already mentioned this configuration It is intuitive and takes a lot of practice to master.
Below we will show a list of the main parameters for the Laser Pro X500 III machine according to the work we have developed.
We can find the product brochure, the driver and the user manual at the following address:https://www.gccworld.com/download.php?act=view&id=40.
Practice 01:
We develop a table to be able to determine the power and speed that we require in a certain material. First we design our table in AutoCAD and then we send it to the required software in the FabLab of the Continental University, which in this case is Corel Draw, for the cuts of the material we normally select the red color and for a reasonable engraving we select the blue color.
Now we configure the colors of the "PEN" table with different powers and speeds to know the power and speed necessary to cut the material according to its thickness, in our case it is 3mm MDF.
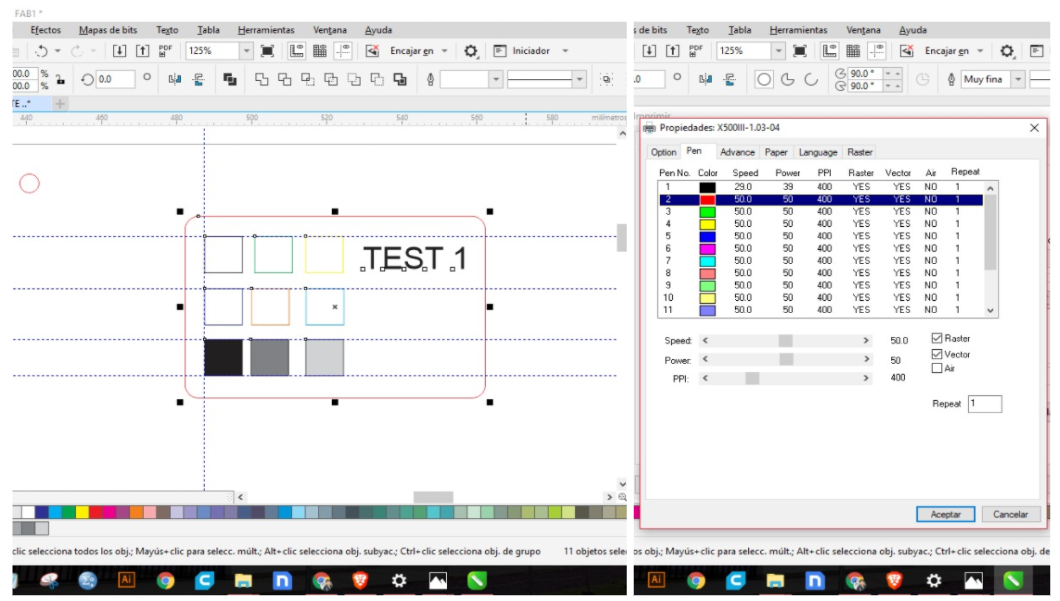
We also work on the logo of our institute from our image, we vectorize it and prepare it to be able to engrave it and cut the border, in addition to integrating it into our subsequent works.
![]()
We prepare our material and develop the cutting and engraving of our test 01 and the logo of the institution.

Practice 02:
We developed a comb in AutoCAD and saved it in .dxf format to be able to determine the thickness of the cut that the laser beam occupies for both 3mm and 5mm MDF.
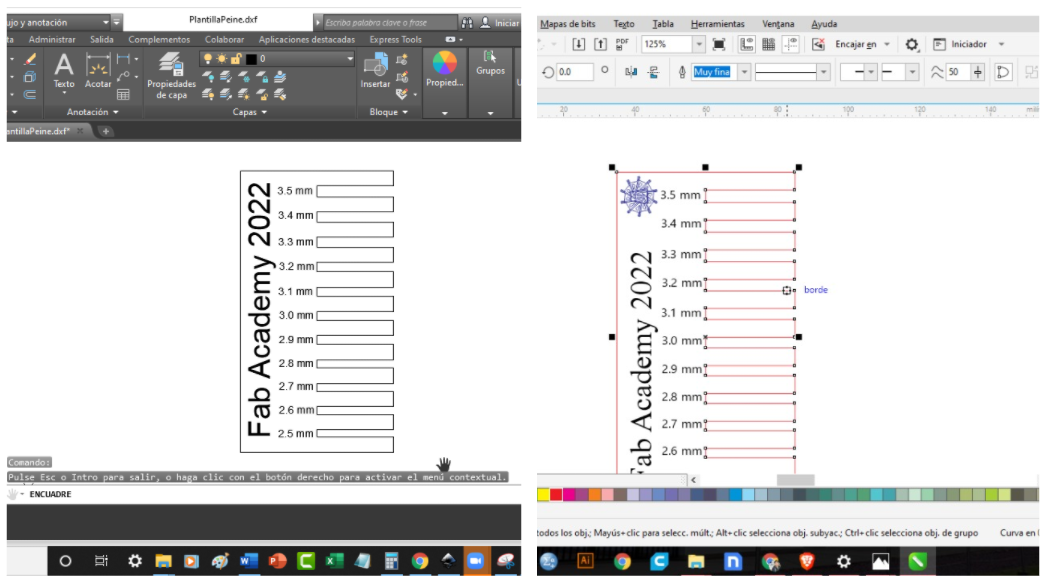
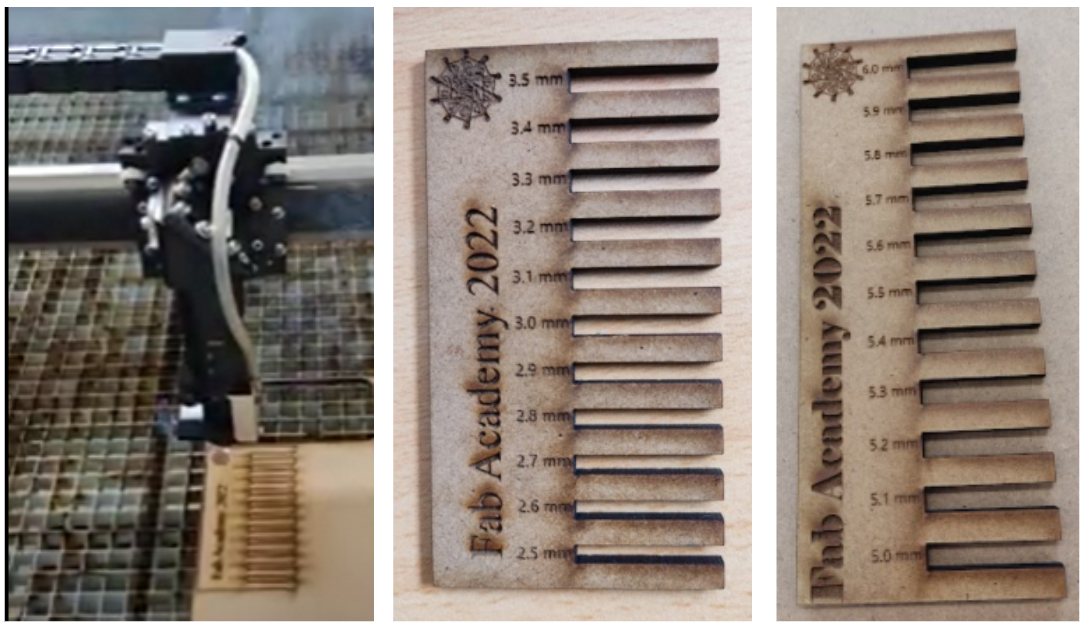
We took measurements with the vernier and discovered that the measurement that the laser beam occupies is 0.15 mm, in all the measurements that we made it had that difference with the measurement that it should be, in the image an opening of 3.3 mm is being measured but as see in the image is 3.45 mm.

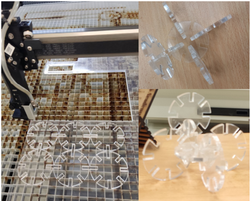
Practice 03:
Before starting with the parametric cut in acrylic, we do a cleaning maintenance to the lenses of the machine to remove the carbon that is impregnated and we have a laser light with good power. We design the model and cut it on the laser machine.

We cut the model and gave it different shapes.
GROUP WORK TEAM: Timoteo Calderón Letona and Jorge Chevarría Mar.
Practice 04:
Develop the model in .dxf format from AutoCAD of a 3mm MDF box to be assembled without pure pressure glue.
Ahora sí es el momento de realizar los cambios no hay otra justificación