Normally, most electronic equipment has sensors or input devices, either by contact or remotely.
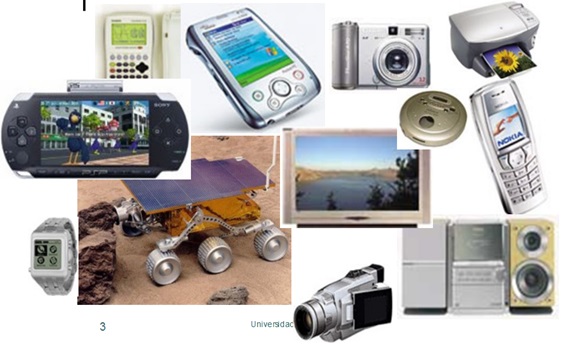
In this opportunity we will use the sensors that we intend to use in our final project to learn how to handle them, differentiating the analog levels and the digital signals of the sensors.
As our brain does with different signals from our environment, which we detect through our senses.
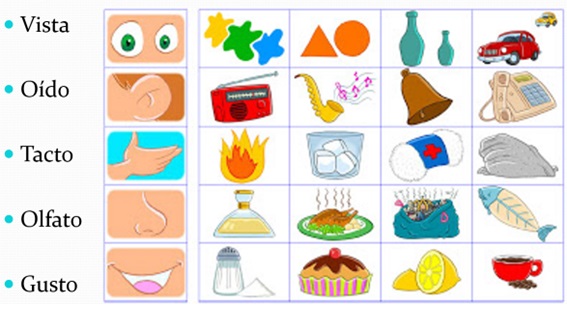
In the same way, some electronic cards were generated in order to know their environment such as the senses of humans, where microcontrollers or microprocessors or similar circuits are used.
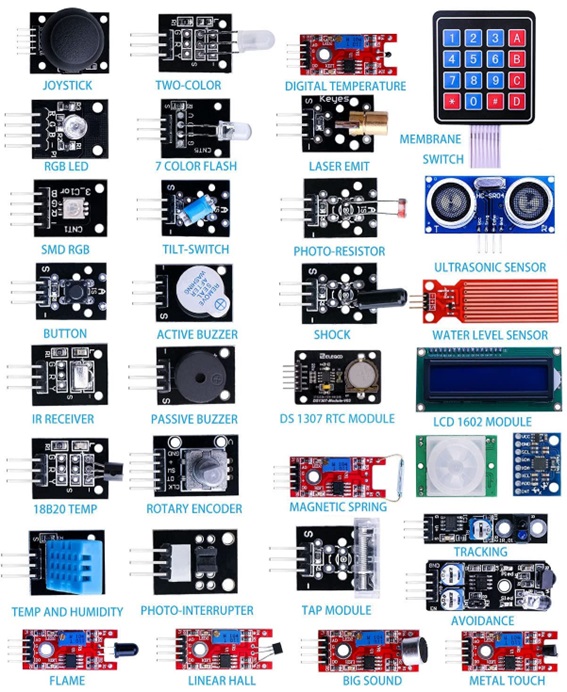
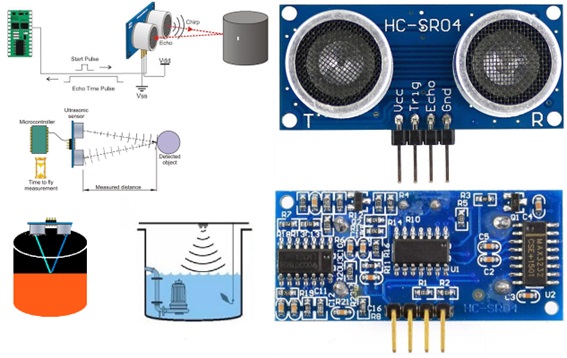
We will start with object detection with the HC-SR04 module.
The HC-SR04 is an ultrasonic distance sensor capable of detecting objects and calculating the distance within a range of 2 to 450 cm (without electronic noise). The sensor works by ultrasound and contains all the electronics in charge of making the measurement. Its use is as simple as sending the start pulse and measuring the return pulse width. Very small in size, the HC-SR04 stands out for its low consumption, high precision and low price, which is why it is replacing Polaroid sensors in the latest robots. Easy to use and program with development boards.
Characteristics
Supply voltage: 5 Vdc
Dimensions: 45*20*15mm
Working frequency: 40KHz
Quiescent current: < 2mA
Working current: 15mA
Accuracy: +- 3mm
Opening angle: 15°
Maximum range: 4.5m
Minimum range: 2.0 cm
Minimum duration of the TRIG trigger pulse (TTL level): 10 μS.
Output ECO pulse duration (TTL level): 100-25000 μS.
Minimum waiting time between a measurement and the start of another 20 mS. (50ms recommended)
Connection pins:
VDC (+5V DC)
TRIG (Ultrasonic Trigger)
ECHO (Ultrasound reception)
GND (Ground: 0V)
Distance (m) = {(Time between Trig and Echo) * (Sound Velocity 340 m/s)}/2
With this ultrasonic sensor we will measure the distance to the liquid. We must know the container to know how much it fits and what measurement is obtained when it is full. We will do the same when the container is empty, this is called calibration.
By the percentage of liquid that remains in the container we can obtain the equivalent in liters or percentage of filling.
We will program it based on Visualino and then we will use the Arduino IDE to program our board.
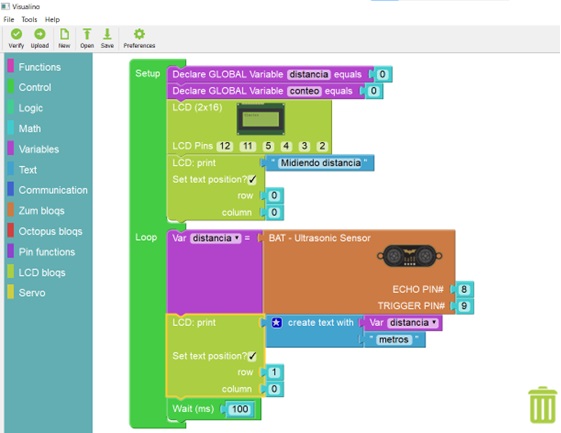
Program:
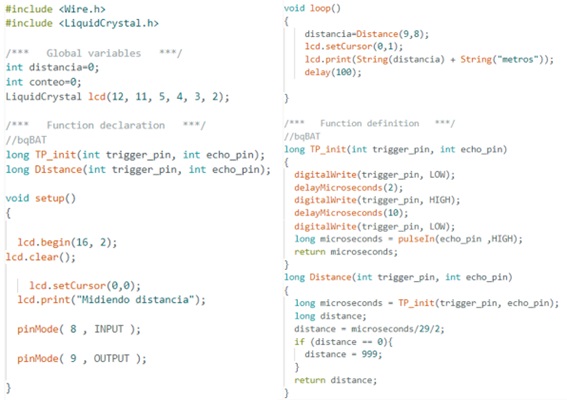
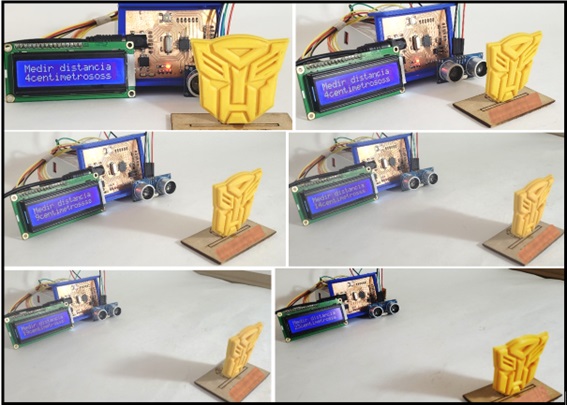
Here the test run.
Now we will work with the humidity sensor
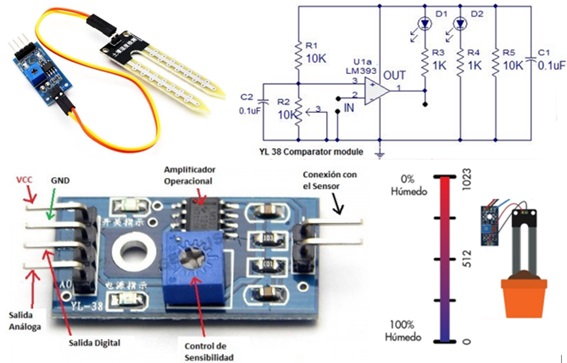
It uses the two YL38 probes to pass current through the soil, and the comparator module reads the resistance to get the moisture level.
More water makes the soil conduct electricity more easily (less resistance), while dry soil is a poor conductor of electricity (more resistance) The YL module has a potentiometer with which you can adjust the sensitivity of the threshold of the digital output to activate a relay (for example, to activate an irrigation solenoid valve) or to be read by a microcontroller. In addition, the YL module has a POWER and OUT LED (activates when the threshold is exceeded) and an analog output that can be used with the ADC of any microcontroller.
Applications:
Soil moisture monitoring
Gardening
flood alarm
Detection of maximum level in a tank
Characteristics
Input voltage: 3.3 – 5 VC
Output voltage: 0~4.2V
Current: 35mA
VCC: Supply voltage
GND: Ground
A0: Analog output that delivers a voltage proportional to humidity. It can be measured directly from an analog port on a microcontroller, with Arduino, CI, etc.
D0: digital output; This module allows you to adjust when the logic level on this output goes from low to high using the potentiometer.
YL-38 Dimensions: 30 x 16mm
We will create an application to work with our card, where we will show the humidity value on the lcd, the analog value of pin A0 is read and stored in the humidity variable, but since the values it delivers are within the range of 0 to 1023 we change the scale by means of the MAP command, the command PercentageHumidity = map (humidity, 0, 1023, 100, 0); Modify that scale. Lastly, we show the humidity value as a percentage and it will be updated every 200 milliseconds.
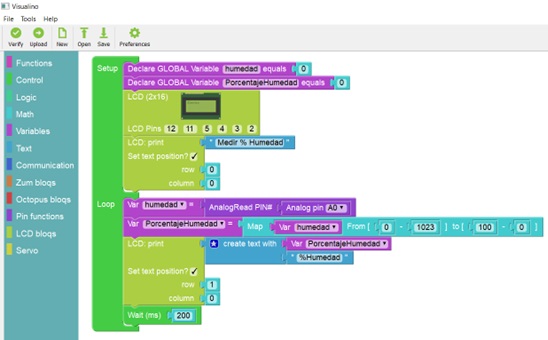
Program
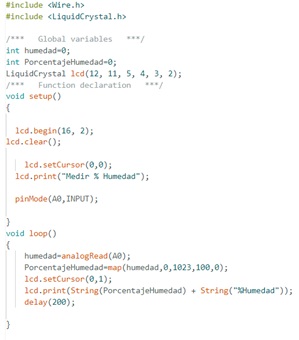
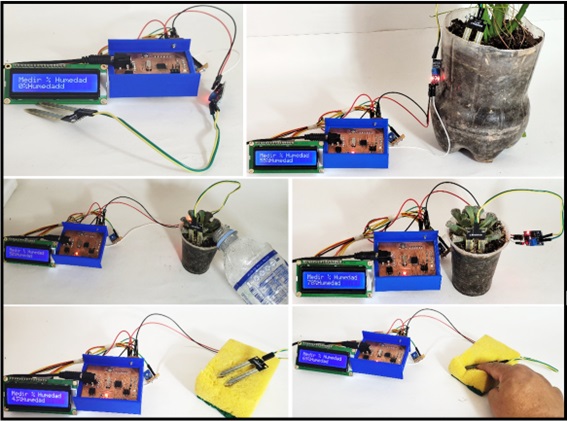
It is tested and it came out very well. At the end I tried with a sponge because I remembered that by the same principle we measure the humidity of the grains and the humidity of the wood.
created with
Best Free Website Builder .