Individual project (design + mill + assemble)
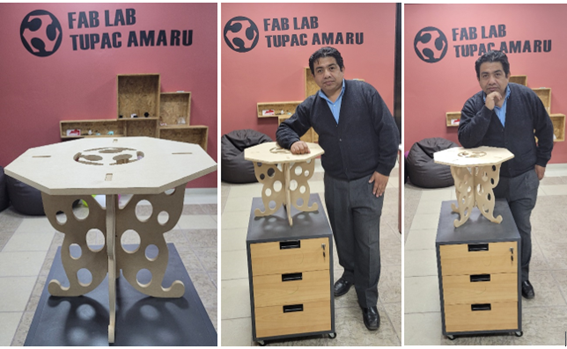
For this assignment I started to see models that could be replicated and I found this coffee table which I want to cut. First we generate our base figure from a butterfly.
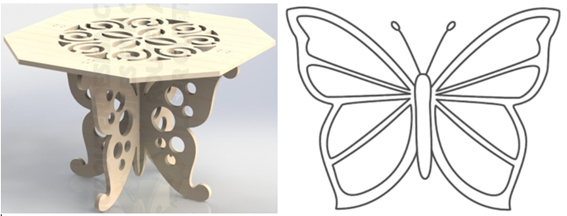
We vectorized the figure of the butterfly in Inkscape to save time and we give it the necessary touches to make it look like the one we saw in the initial image. It will be the base that will act as the legs of the table and we will do the same for the other section.

To make the cover we do it by vectorizing the FabLab logo.
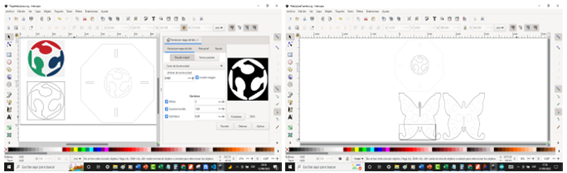
I transferred it to FreeCAD to give me an idea of how it would look and adjust some details such as thickening the intersection that the butterflies will have.

Now we prepare for machining. We consider the milling cutter to be 6mm with about 10,000 rpm and a feed rate of 2,000 mm/s, in addition, the feed rate will be every 15 mm.
We will follow the next steps to get the Gcode from FreeCAD to cut the material.
1. Once the 3D object is finished, normally in the PART DESIGN stage, we go to the PATH stage.
2. We generate a project with the CREATE THE WORK PATH OF THE OBJECT tool, which will open a window where we specify the MODEL, which is the body that is the object to work with. The template we consider none (none).
3. A window will open on the left in OUTPUT, we have to give it a name with an extension. gcode and the address where it will be saved; in PROCESSOR choose GRBL and in ARGUMENTS leave free for now (suggestion –precision 3).
4. In TOOLS, fill in feedrate characteristics such as mm/min for both Z and X and Y, we give Accept
5. We will see that a JOB machine job will appear and within it we will specify the characteristics of the tool by double-clicking it.
6. When the window on the left side opens, fill in the characteristics of the tool (TOOL) and we accept it (OK).
7. We carry out the first operation, for this we select PROFILE BASED ON EDGES, it generates a profile based on an edge, in the window that appears the heights are selected automatically.
8. In DEPTHS place the thickness of the material or depth of engraving, the depth below the material and the advance of each path.
9. For the faces we will use PROFILE BASED ON FACE OR FACES to fill in the depth properties in addition to the OPERATION properties, for example if the cut is inside or outside.
10. Once finished, first we select JOB, then we click on POSTPROCESS THE SELECTED JOB to export to a file with the extension. gcode to then send to the CNC machine.
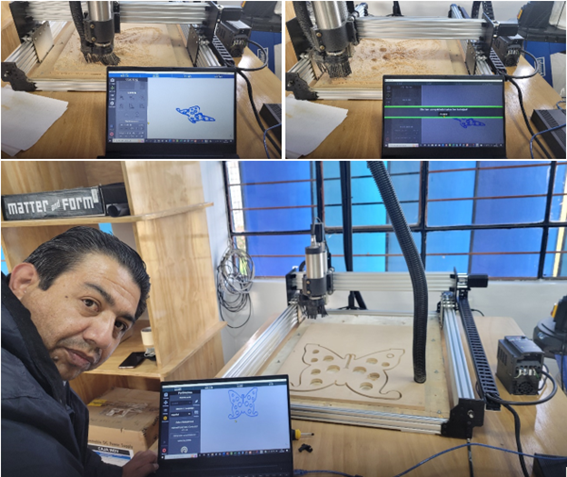
Once we have our Gcode for the Mill, we open the Nomapanel software and load our models and start the cut.

Now we will cut the lid.

To finish we put it together and it stayed like this.
created with
Best Free Website Builder .