8. Computer Controlled Machining
# Goal:
Design and assemble a big wooden object.
# Tasks:
1- Design a prototype for a bookshelf using Fusion 360 and the Trotec speedy 360 laser cutter.
2- Cut and assemble the actual design using VCarve Pro software and the ShopBot machine.
# Procedures:
In previous weeks, I learned about 3d designing using the Fusion 360 software. So, this week I chose to design a modern bookshelf utilizing that exact software. At the beginning of the week, engineer Hashim gave us a session about the used tools, machine operation, and safety instructions. Also, he recommended that we watch an example video about this week's task. I started by making several versions of the bookshelf's design. Then, I laser cut it in Medium Density Fiberboard (MDF) sheet. To create the prototype, I assembled the cut parts. After that, I used the VCarved Pro to determine the cutting settings on the ShopBot machine. To build the full-scale bookshelf, I cut the design on the wood and assembled it.
a. Desiging:
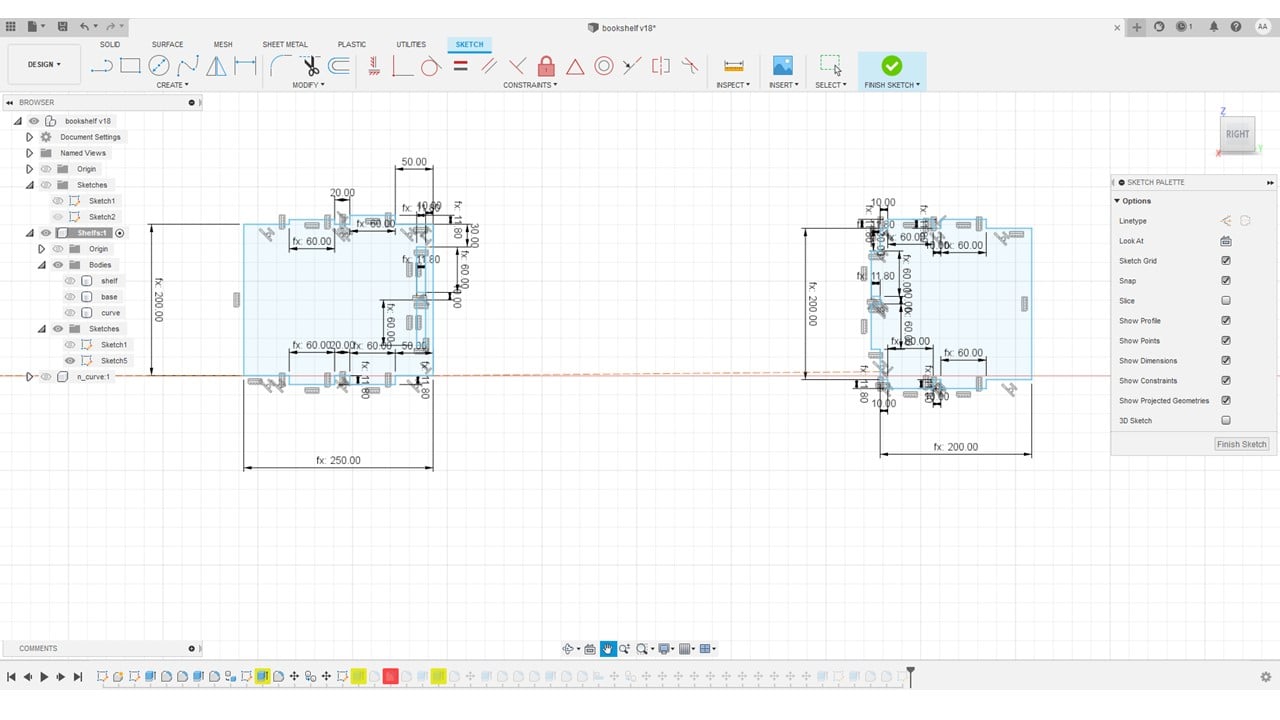
I chose to design a modern storage stand consisting of three main parts: base, side holders, and shelves. I started by entering 11 parameters, as shown below.

To create the base, I sketched a rectangle and extruded it. Then, I added four slots to fix the two side holders.

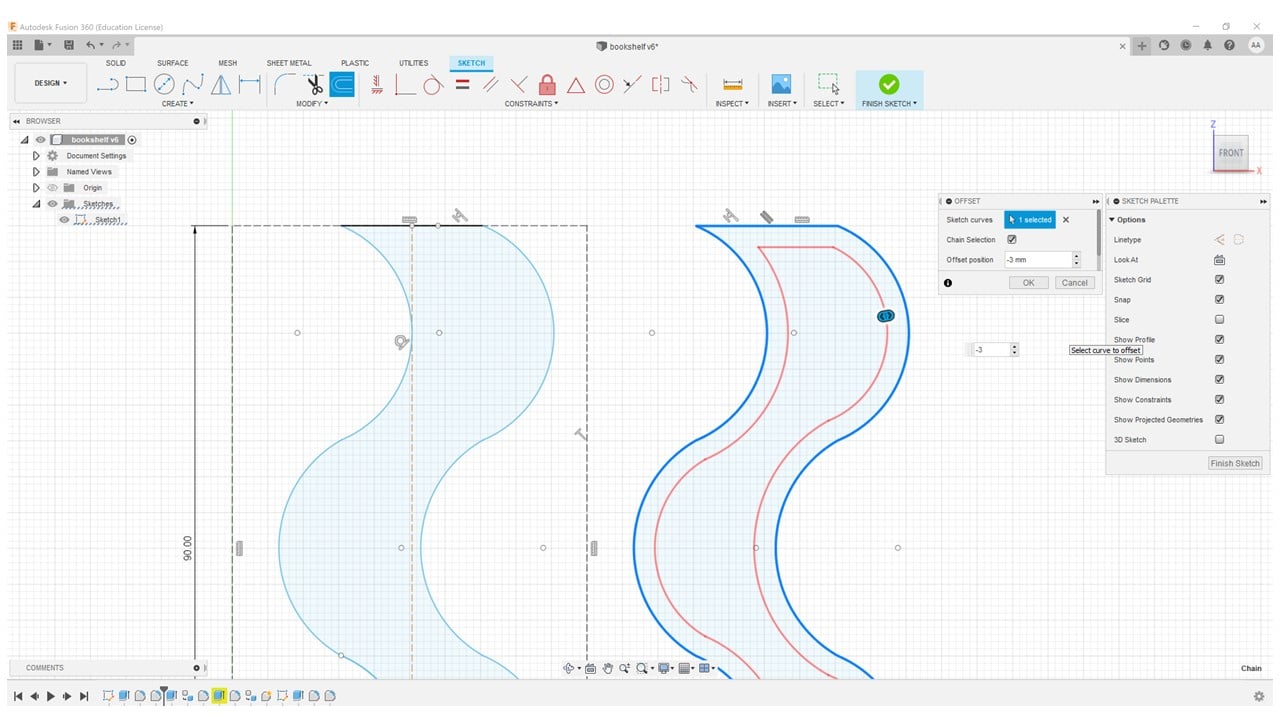
To create the side holders, I started by sketching acres and connected them as shown below. After that, I used the "Offset" tool to create a smaller version of the drawn sketch of the holder. Then, I made two slots to assemble the holder and the base. Moreover, I made four slots for the shelves.

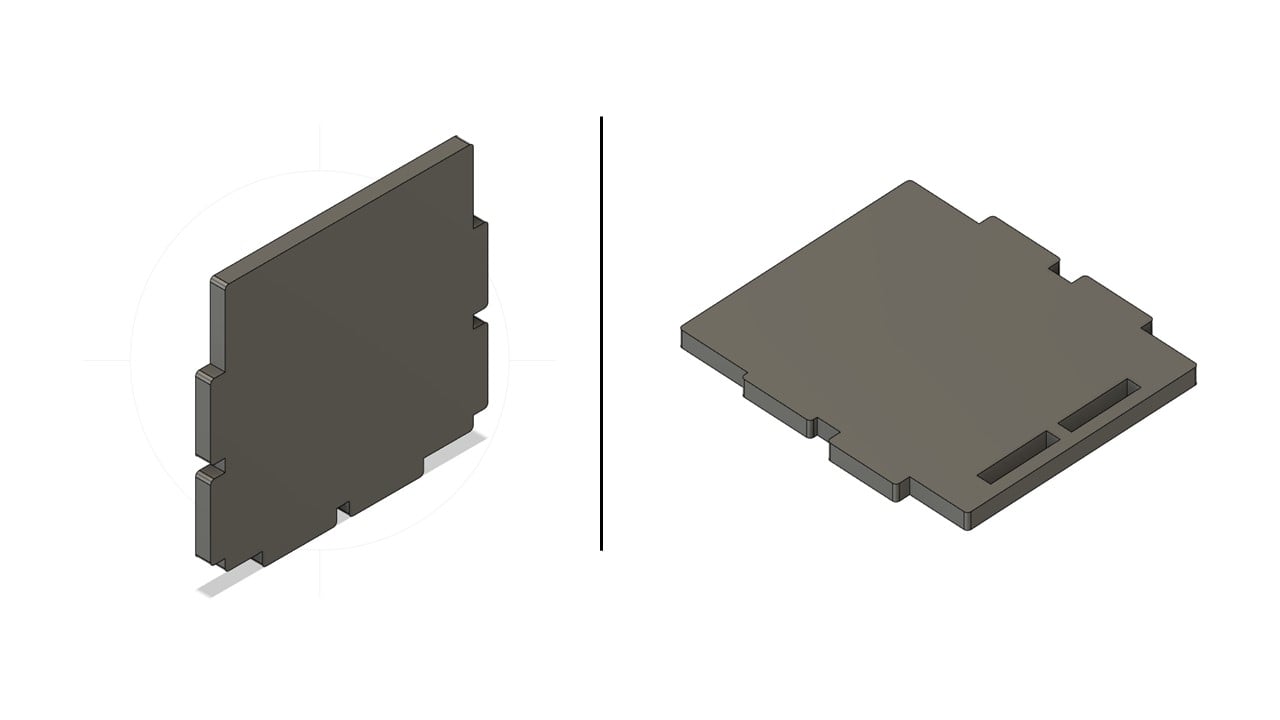
The last parts are the shelves. I created a two-part shelf with six slots in each part.
b. Prototype:
In this part, the goal is to create a prototype of the actual design. To do so, I used CorelDraw software and the Speedy laser cutter. I started by importing the design files from Fusion 360 in CorelDraw. Then, I kept changing the slot dimensions, as a percentage, to 12.12 mm or the thickness of the used MDF sheet. This size reduction was done to keep the dimensions of the prototype bookshelf proportionally similar to the actual design. After that, I right-clicked on the parts to change the "Outline Width" to "Hairline". Then, I right-clicked on the red color shown in the color sidebar to change the parts' outer borders to red. Then, I saved this file to a USB and used the computer next to the Speedy laser cutter to set the printing setting for the used material " MDF wood " using "Material Template Setup".

After the printing process is completed, I allowed the printer to cool down for a few minutes before removing the parts. Then, I assembled the parts to get the prototype shown below.

c. Full-sized Cutting and Assembly:
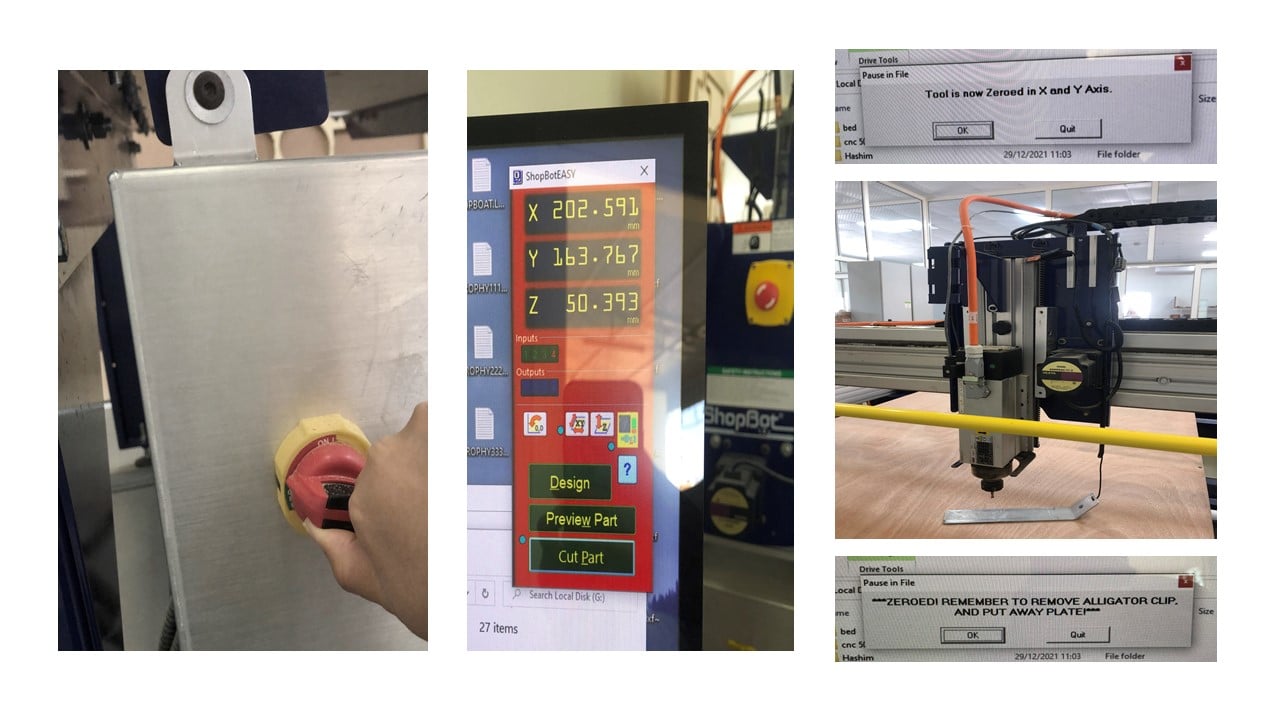
I started this process by wearing a lab coat, safety goggles, mask and gloves. Then, I operated the machine by rotating the red knob after fixing a new plywood sheet using a drill. After that, I used the "ShopBotEASY" software to zero the X, Y, and Z-axis. For the X and Y-axis, selecting the zero point was done by moving the gearbox using the keyboard arrows. However, the zero Z-axis was adjusted using an alligator clip and plate.
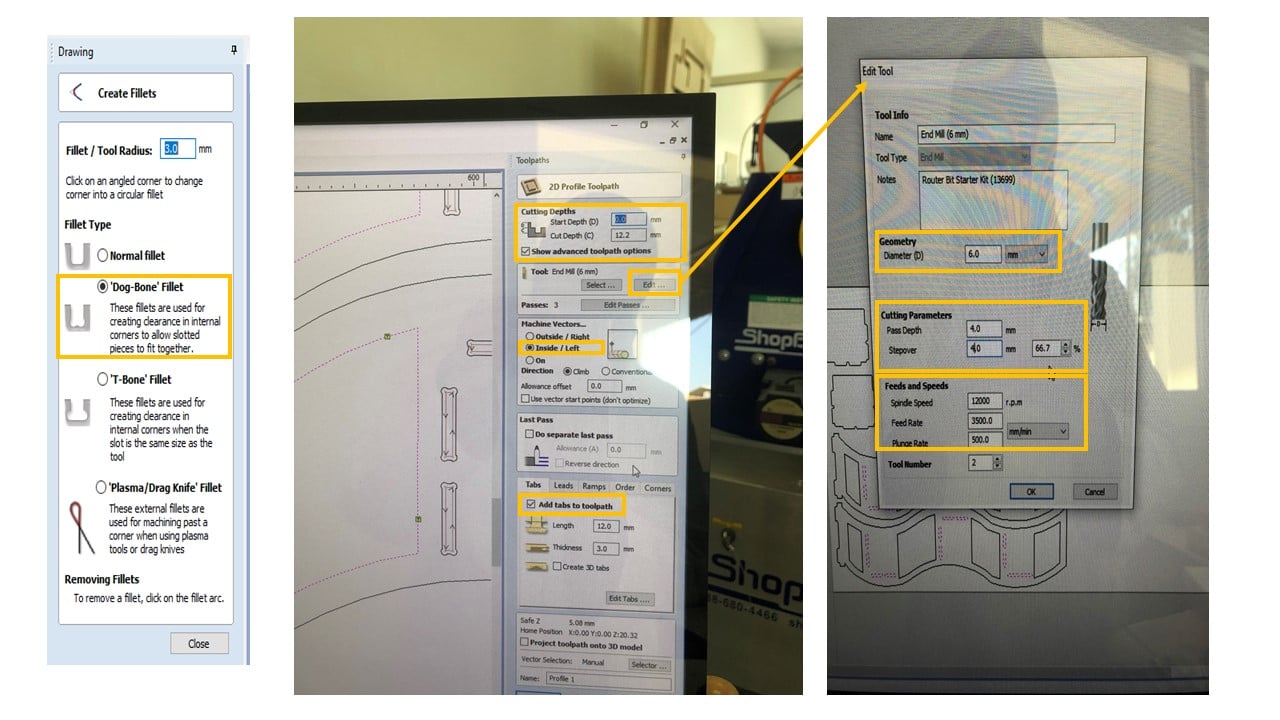
Using the VCarve Pro software, I entered the dimensions of the sheet. Then, I imported the design files (.dxf) and organized them to minimize huge spacing in the plywood sheet. After that, I added a "Dog-bone" fillet on each inner corner of the design. I selected all the slots and added a profile toolpath. I adjusted the cut depth to 12.2 mm. Then, I edited the geometry, speed, and cutting parameters of the tool used. After that, I selected the machine vectors and added tabs. Tabs are used to facilitate removing the parts. Then, I clicked on "Calculate".
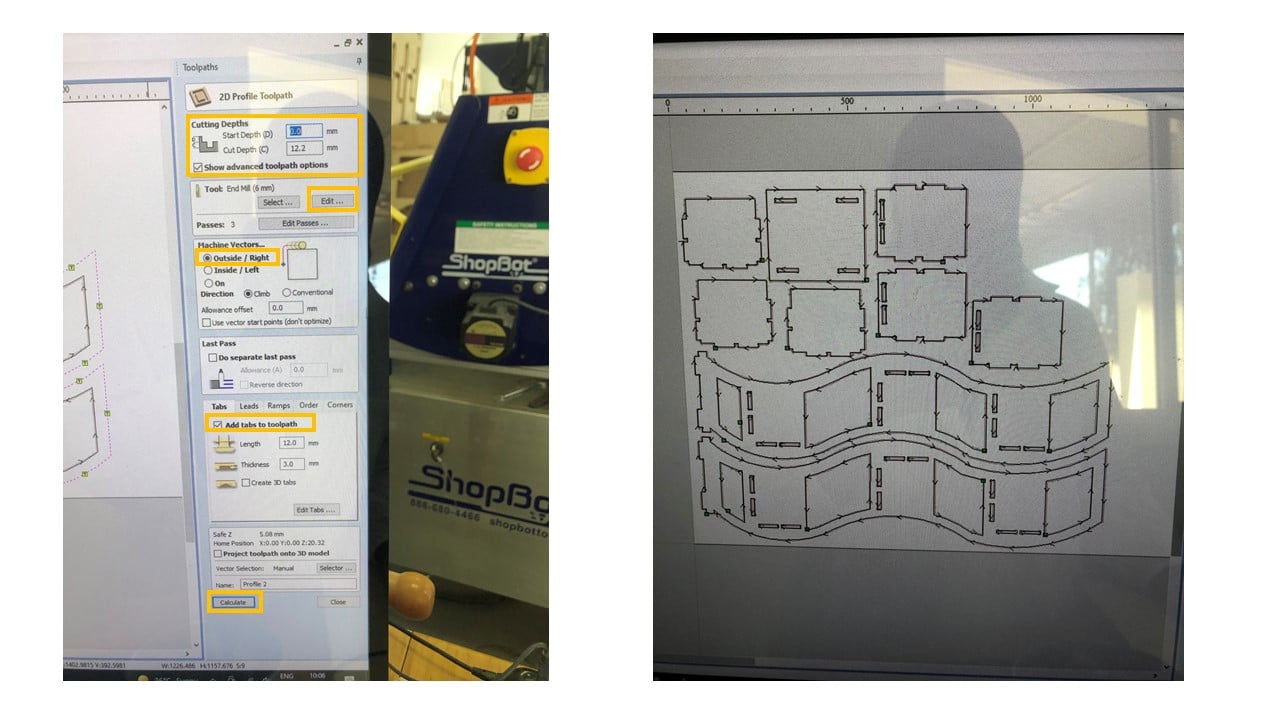
I repeat the previous profile toolpath steps for the rest of the design, by changing the machine vectors to "Outside/Right".
I started the cutting process by switching the interlock knob to "Engaged". Then, I clicked on the "Start" button on the ShopBotEASY software. After that, I clicked on the "Start" button on the controller and stood behind a glass door for safety purposes.

After the cutting process was completed, I waited for five minutes to avoid inhaling the wood particles in the air. Then, I removed the parts and smoothed them using a sander.

After assemble the parts, the final result is shown below.

Group Assignment
The link of the group assignment page is here.
# Goal:
To examine the corner fitting of the ShopBot machine.
# Tasks:
1- Design the fitting parts using Fusion 360.
2- Cut the designed parts using the VCarve Pro software and the ShopBot machine.
3- Trials to connect the parts.
# Procedures:
I chose to examine the fitting feature for the ShopBot machine. I designed four pieces using Fusion 360, where three are female and a single male. The male piece has a 40 mm pocket while the females have 39.6, 39.8, and 40 mm. I set the following cutting settings in the VCarved software to cut 12 mm plywood.


The female with a 40 mm pocket fits the male piece perfectly, as shown below.

# Challenges:
I did face two main challenges. The first was during soldering, where the copper traces ribbed off the board, so I fabricated another PCB. The second challenge was during the programming process, my laptop could not identify my FabTinyISP, so I changed the used laptop.
# Files:
1- Bookshelf Design
2- Group Assignment
3- Bookshelf-base
4- Bookshelf-shelf part1
5- Bookshelf-shelf part2
6- Bookshelf-curve