6. 3D Scanning and Printing
# Goal:
Learn briefly about 3D printing and 3D scanning.
# Tasks:
1- Create a 3D design using Fusion 360 software and then print it using Ultimaker 3D printer.
2- Scan a 3D object using software.
# Procedures:
In the pre-fab academy course, we had a brief introduction to 3D printing. Also, the engineer taught us how to use an Ultimaker 3D printer and the advantages of using 3D printers. This week, we had two parts. The first is to produce a 3D design and print it. While the second is to 3D scan an object.
a. 3D Printing:
Additive manufacturing or three-dimensional printing is the manufacturing process of physical objects from a digital design. This is done by laying down thin layers of the desired material. As an advantage, 3D printing allows building complex shapes. In this part, I designed and printed a vase using Fusion 360, Ultimaker Cura software, and Ultimaker 3D printer.
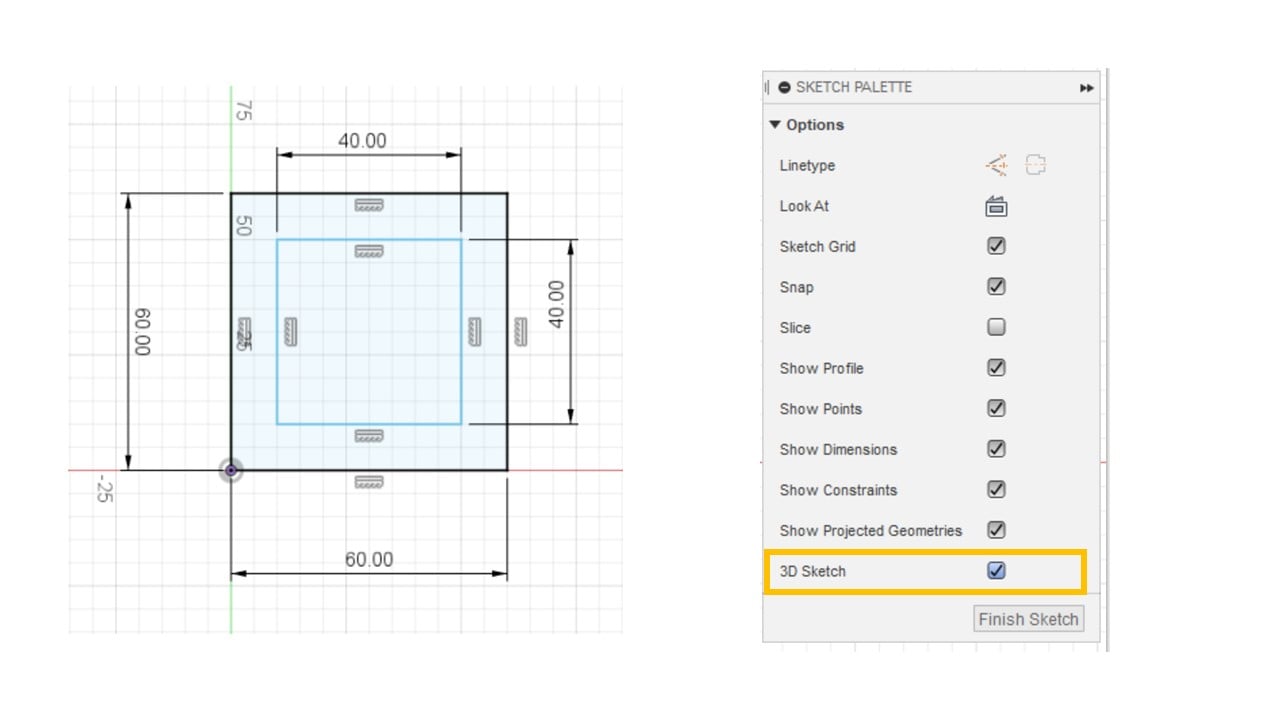
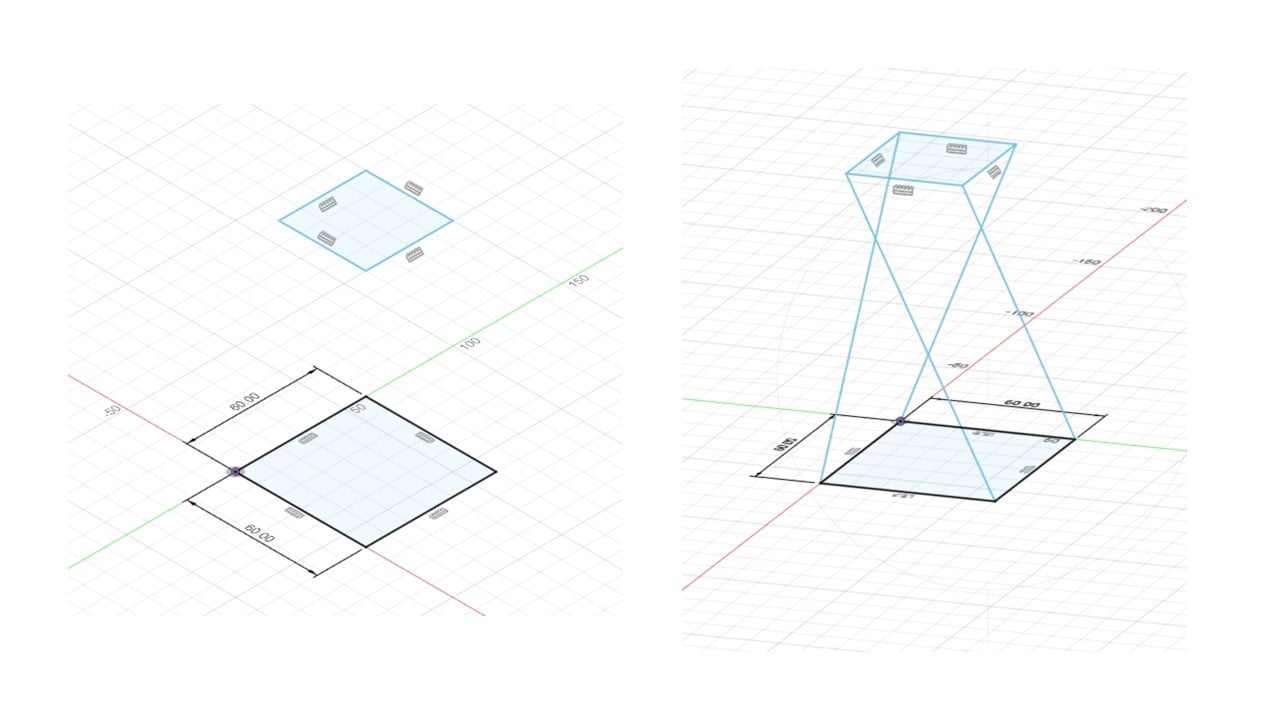
I started by drawing two squares. The large square has a side length of 60 mm, while the small square side is 40 mm. Then, I transferred the sketch to 3D to elevate the smaller square. After that, I connected the corners as shown below.
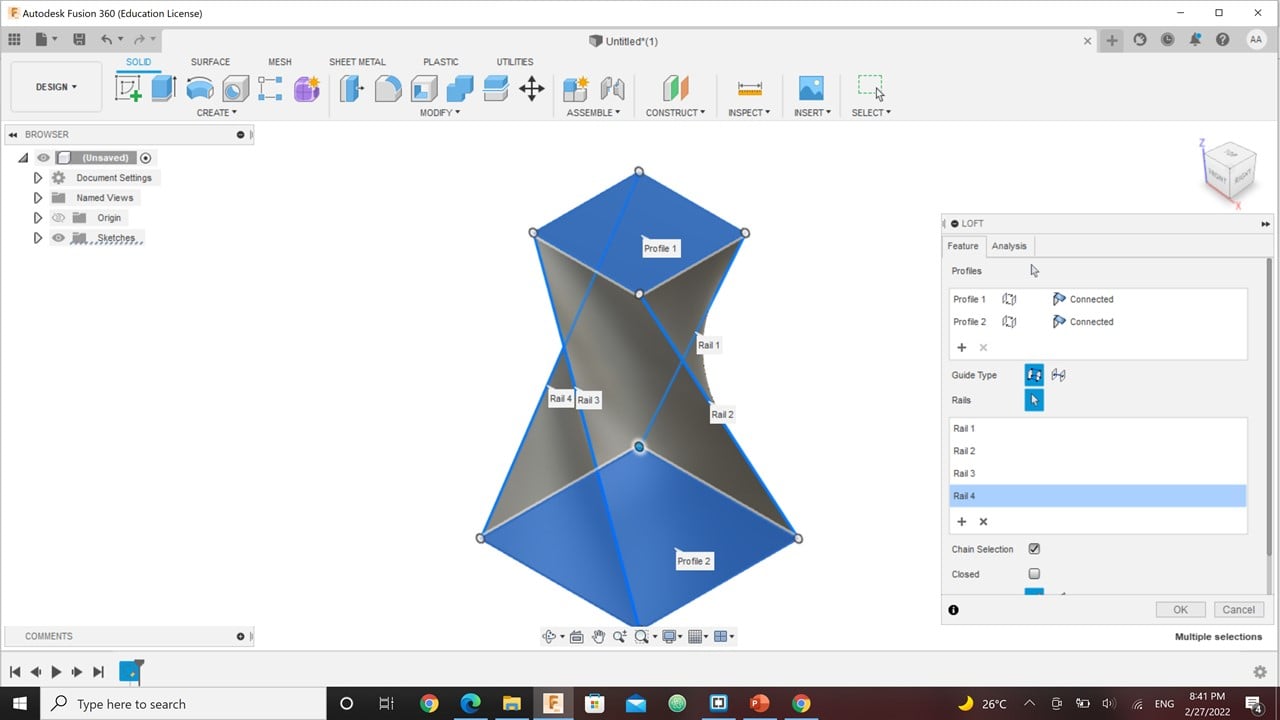
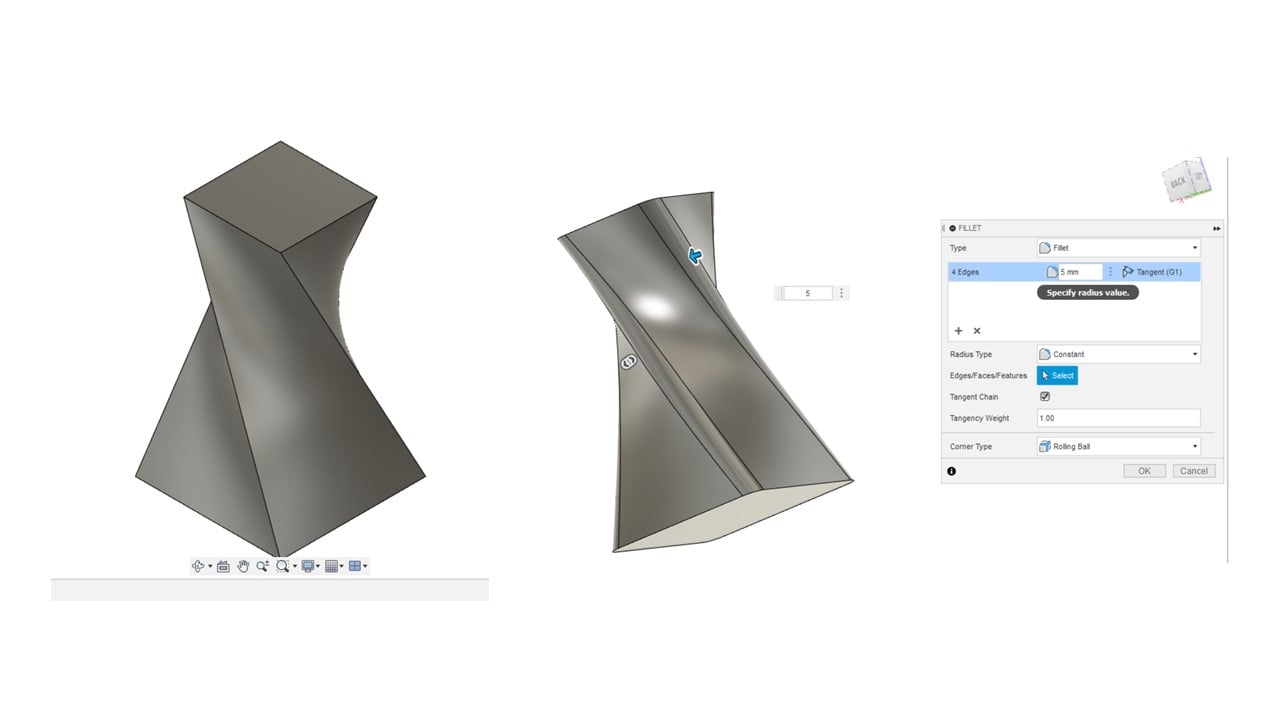
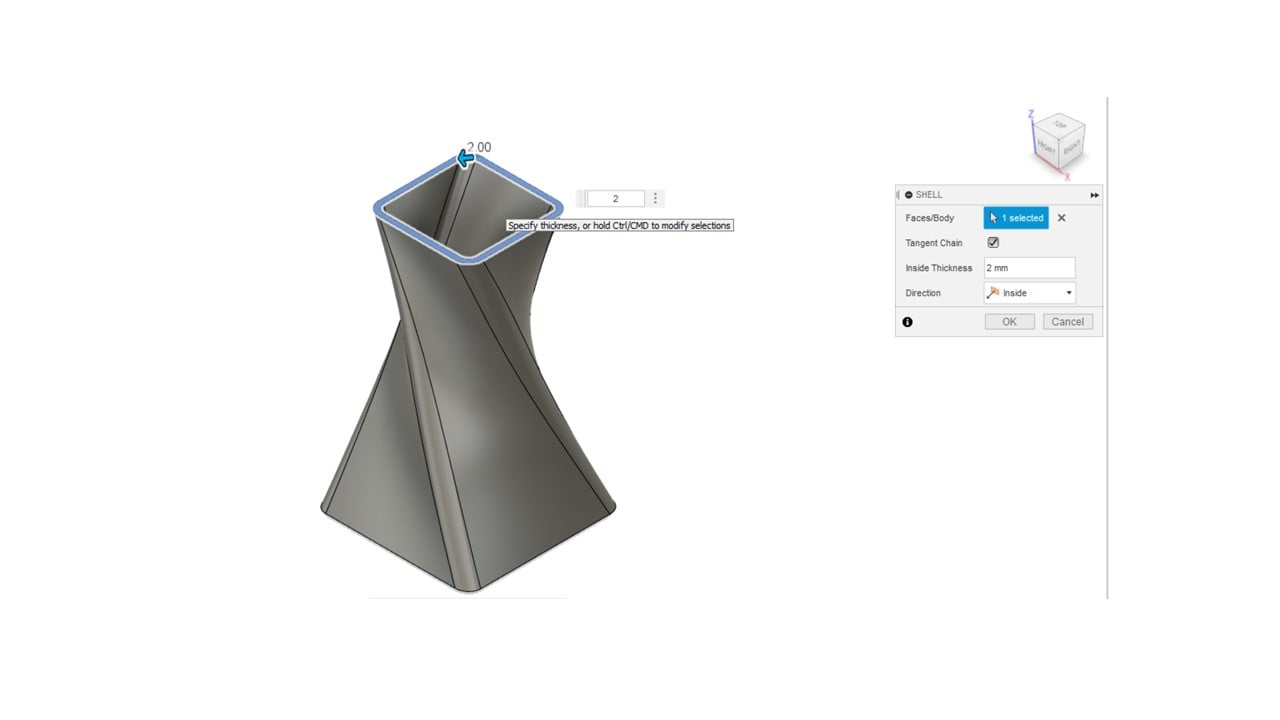
To create the vase body, I used the "Loft" tool and selected the squares as the profiles and the connectors as the rails. Then, I used the "Fillet" tool to smoothen out the edges of the vase. Moreover, I used the "Shell" tool to create the hollow shape of the vase.
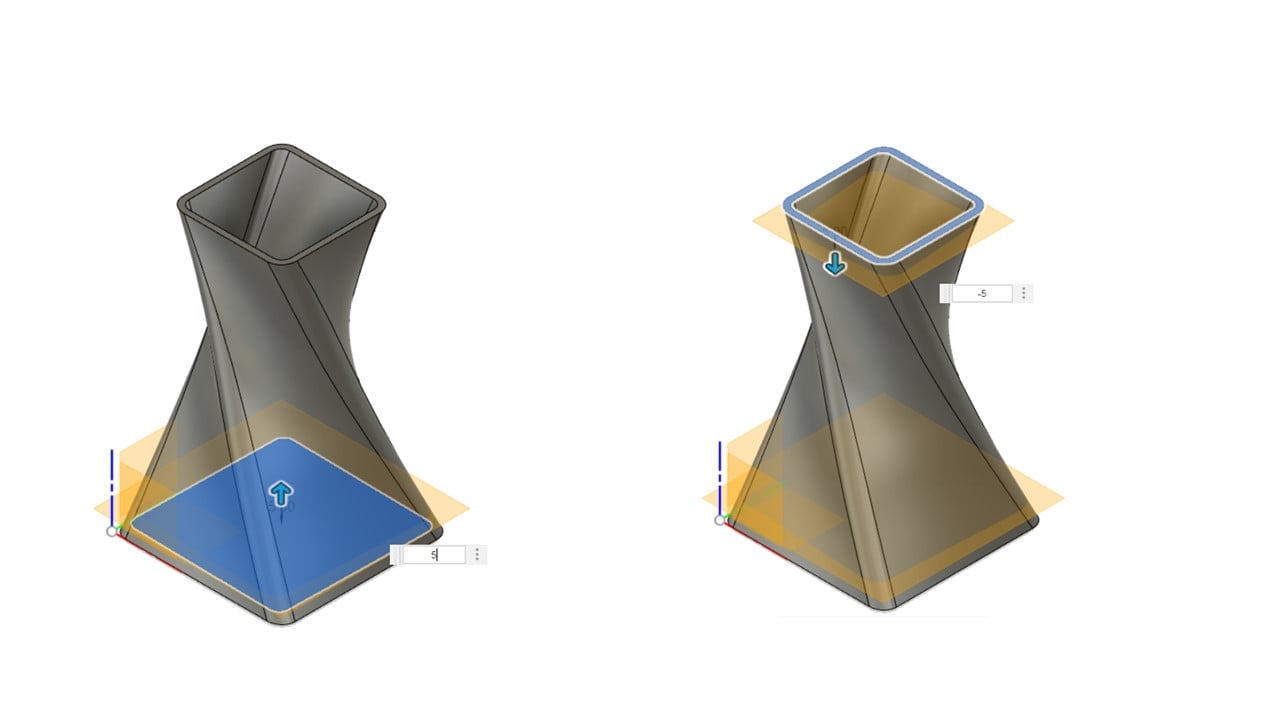
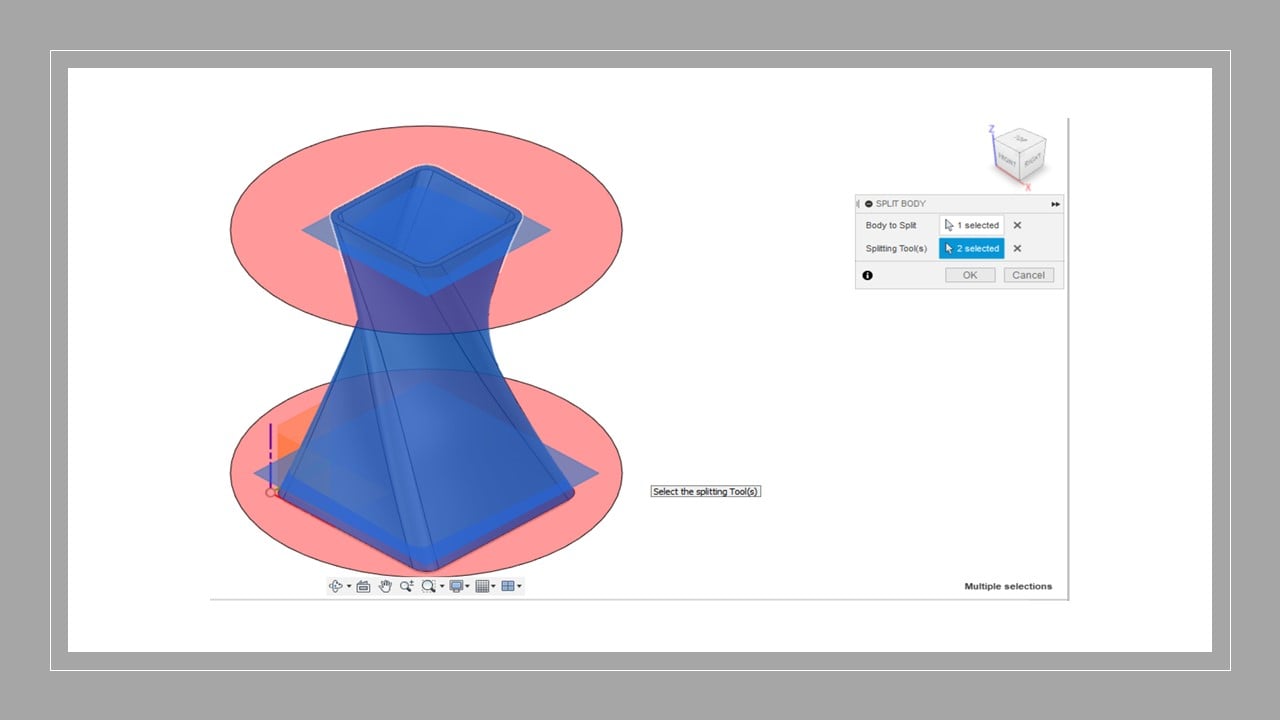
To split the body into three parts, I constructed two offset planes and used the "Split Body" tool. These parts are the top, middle, and base.
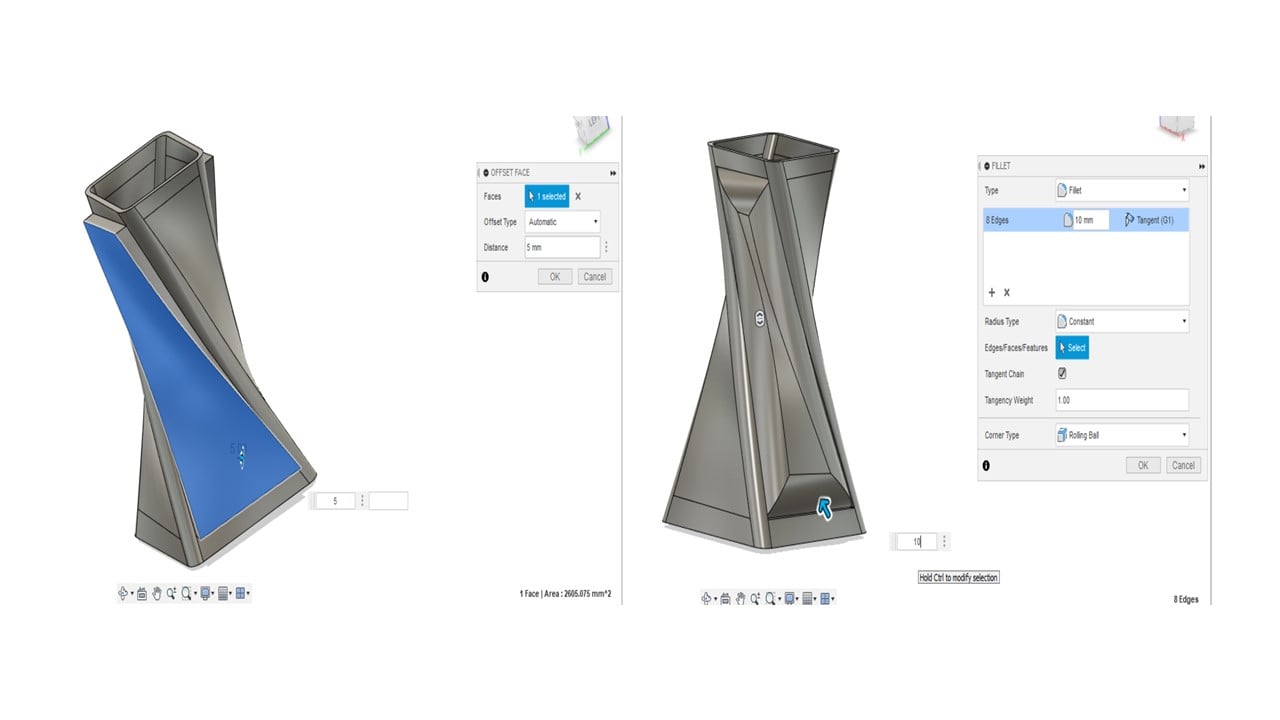
After that, I utilized the "Offset Face" tool to shift two sides by 5 mm and the "Fillet" tool for two sides. Then, I created three holes in the other two sides. To increase the complexity of the design, I replicated the design, reduced the size of the replica, and combined them using the "Move/Copy" "Scale" and "Combined" tools.
This vase cannot be created by a 3-axis CNC machine because of the change in the horizontal cross section area with through out the height of the vase. Moreover, the tilted feature of the vase make it difficult to produce.

Before starting the 3D printing process, I utilize Ultimaker Cura software to set the printing parameters. Firstly, I adjusted the layer length to 0.2 mm. Secondly, I selected the infill pattern to be triangles with 20% density. Thirdly, I adjusted the printing speed to 70 mm/s. Finally, I enabled a prime blob. After that, I clicked on "Slice" and saved the ".Gcode" file in a USB.


I ensured that the preferred material is inserted in the tube of "Extruder 1". The desired material is purple PLA. Then, I clicked on "Print" and chose the design file to start the printing process. I waited for the build plate to heat up. Then, the printing process started, and it took around 4 hours to end. After that, I allowed the printer to cool down before removing the printed object. I noticed that the holes were not executed as designed. This could be because the walls are thin.

b. 3D Scanning:
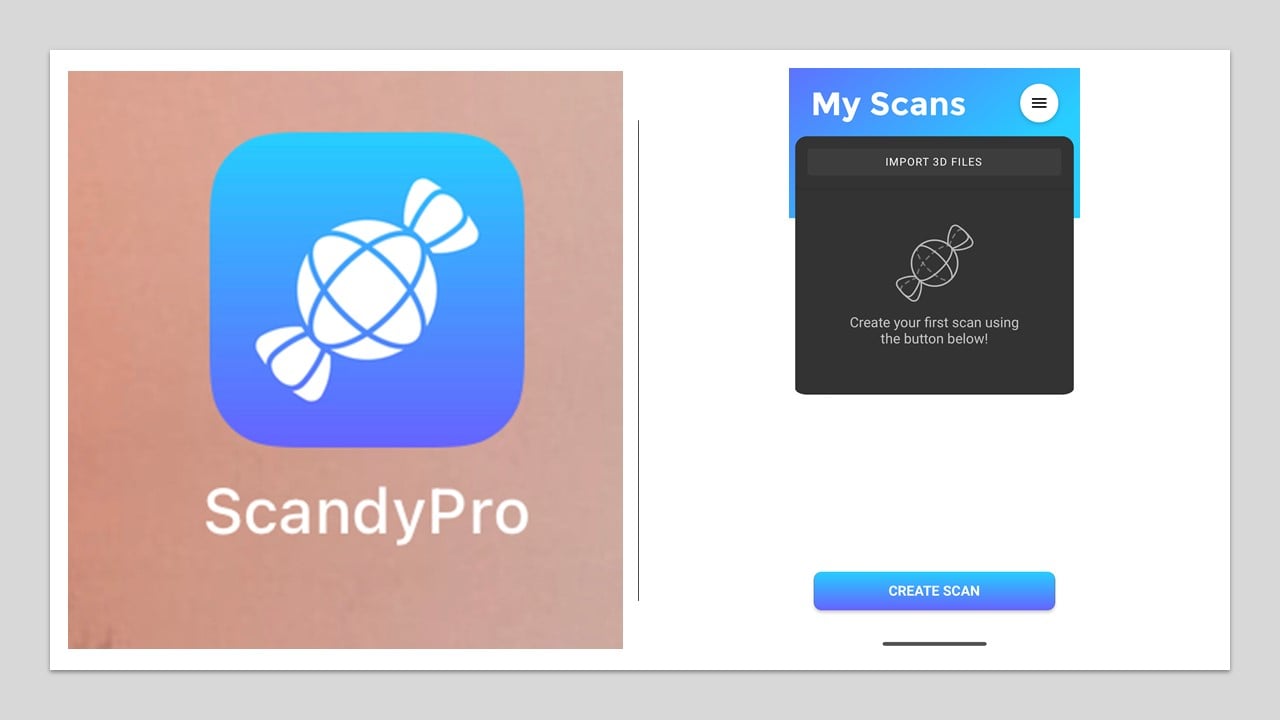
3D scanning is an examining process used to collect data about an object and digitally replicate it. 3D scanning can be a faster and easier technique to create a 3D model for 3D printing. In this part, I chose to scan a candle using my iPhone. I tried two apps, ScandyPro and Polycam.
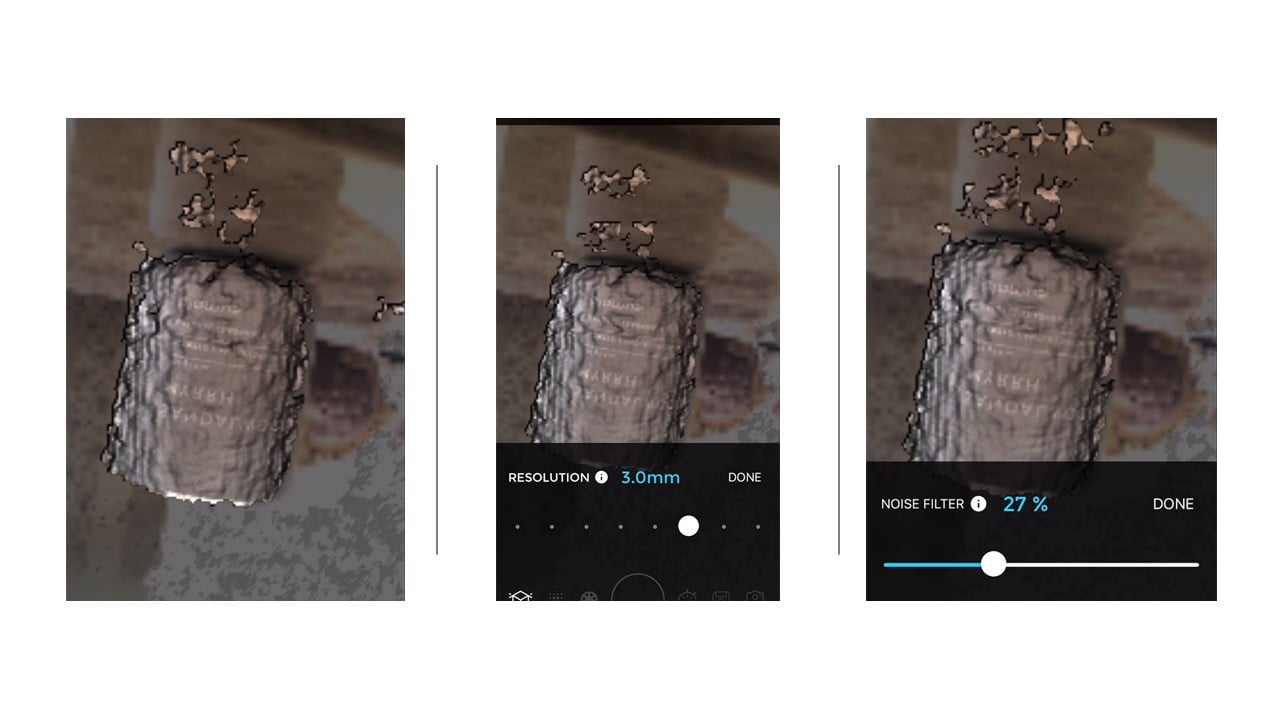
The first app I tried was ScandyPro. This app is free and easy to use on iPhone. To start, I clicked on "Create Scan". Then, I changed the scanning settings. I adjusted the resolution to 3 mm and the noise filter to 27%.
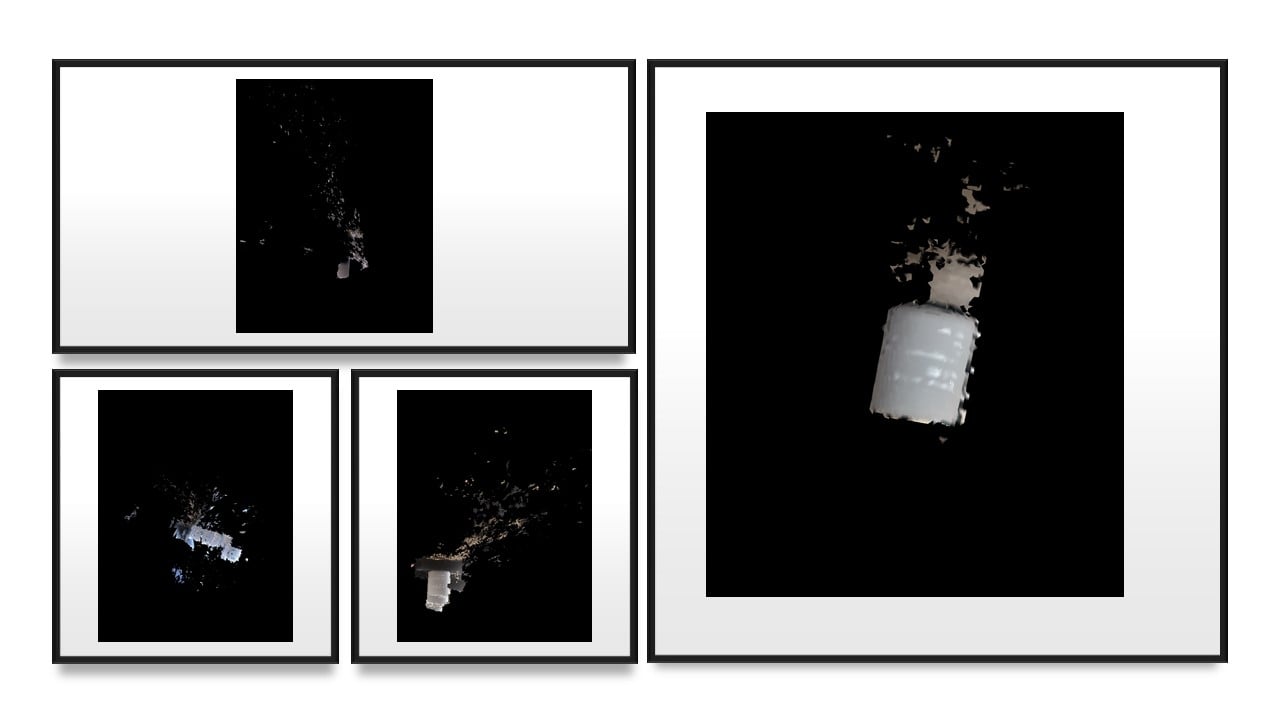
To conduct the scanning, I used a camera tripod to set my iPhone. Also, I used a magazine to rotate the candle. The results of four different trials as shown below. I was not able to scan the candle clearly.
I switched the app to Polycam. I started by taking photos of the candle as I rotated it. Then, I selected the details to be medium, and I enabled the object masking. After that, I pressed on the "Upload and Process" to process the photos and achieve a scan video.
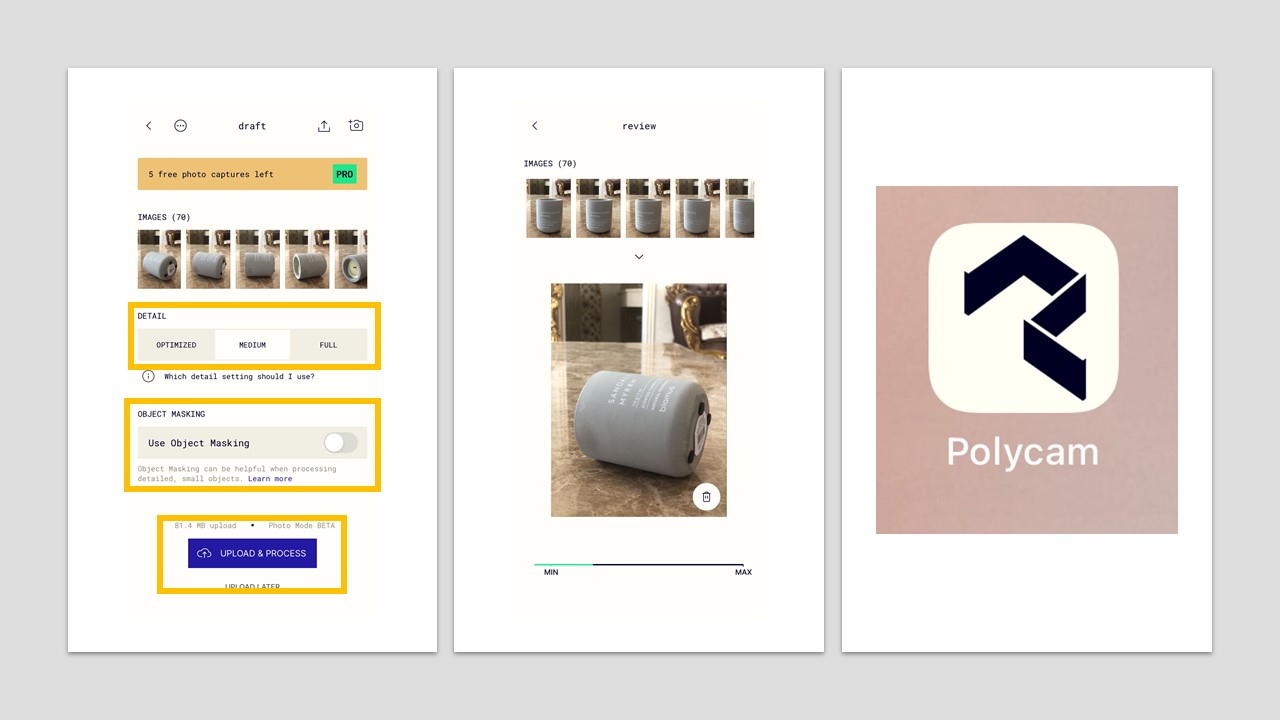
I switched the app to Polycam. I started by taking photos of the candle as I rotated it. Then, I selected the details to be medium, and I enabled the object masking. After that, I pressed on the "Upload and Process" to process the photos and achieve a scan video. The video is not accurate, but it gives a good overview.
Group Assignment
The link of the group assignment page is here.
# Goal:
Test several design rules on the Ultimaker 3 Extended 3D printer.
# Tasks:
1- Prepare and Preview two 3D printing design rules using Ultimaker Cura software.
2- Printing the design rules using an Ultimaker 3D printer.
# Procedures:
I chose two design rules, wall thickness, and bridging, to define the limitations of the Ultimaker 3D printer. In the beginning, I downloaded the design rules from FabAcademy website as (.stl) files.
a. Bridging:
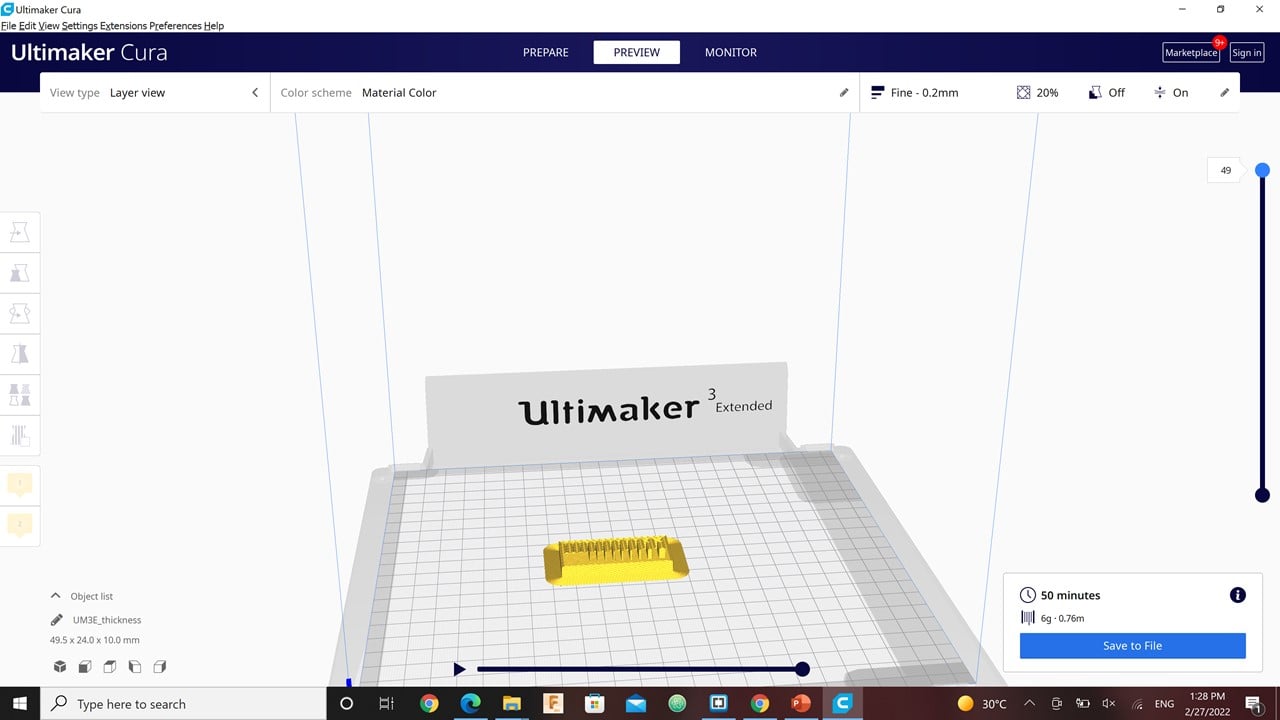
I opened the bridging (.stl) file in Ultimaker Cura software. I used the icons on the left sidebar to move, rotate and scale the object.
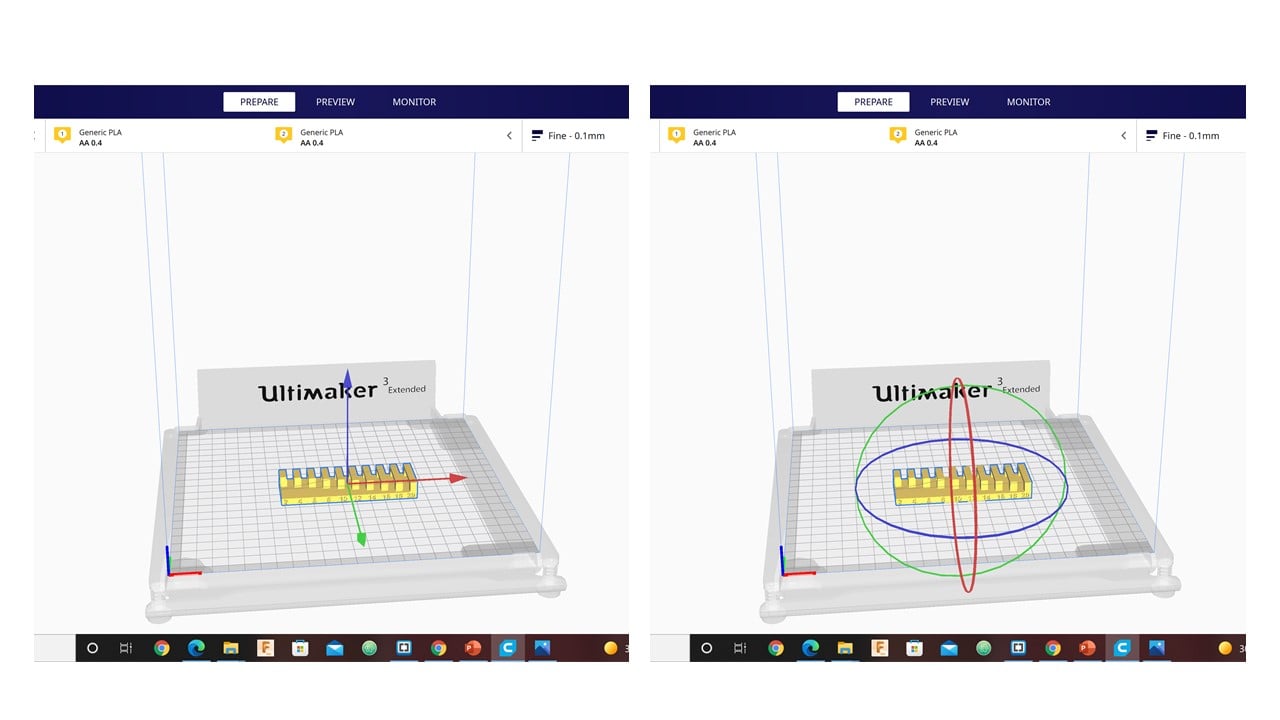
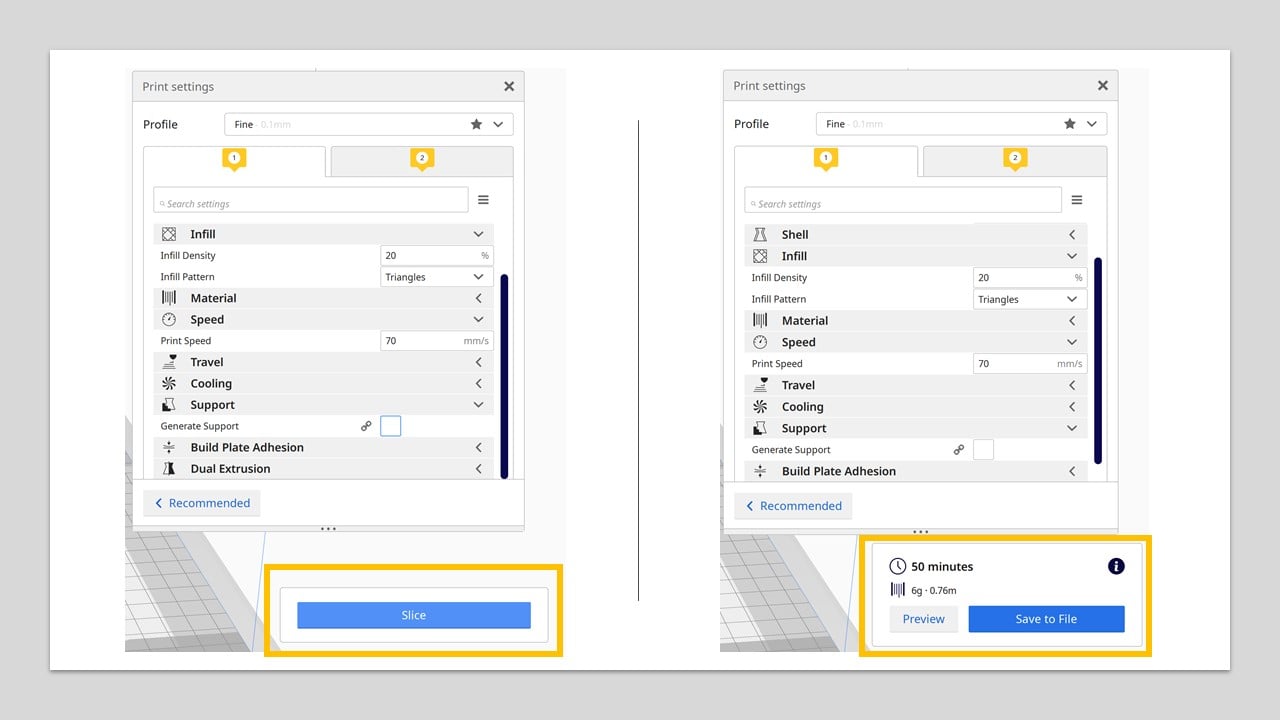
Then, I pressed on "Prepare" to adjust the printing settings. Firstly, I set the layer length to 0.2 mm. Secondly, I selected the infill pattern to be triangles with 20% density. Thirdly, I adjusted the printing speed to 70 mm/s. Finally, I enabled a prime blob.
Then, I clicked on slice and preview to know exactly how the layers will be build-up by the printer. After selecting the printing settings, I saved the file to disk in the format (.Gcode).


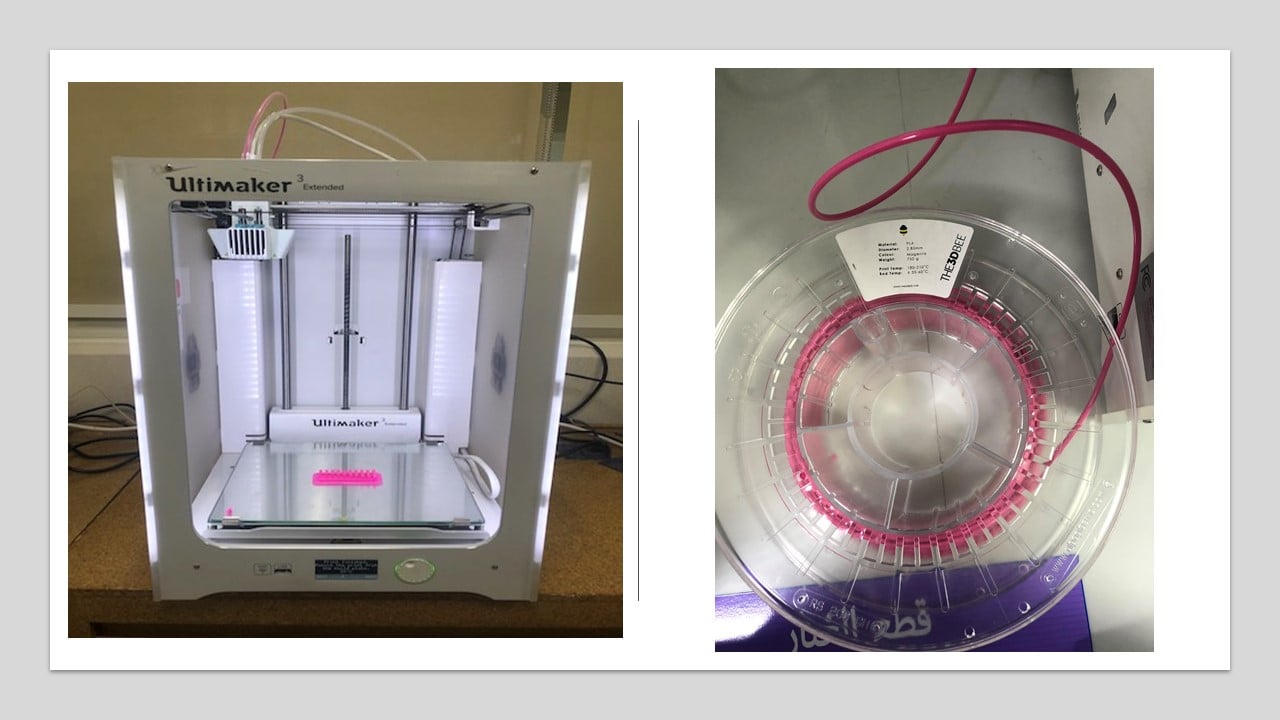
To start the printing process, I ensured that the desired material is connected to the printer. I selected the desired material as a pink PLA. Then, I clicked on confirm and chose the design file to start the printing process.
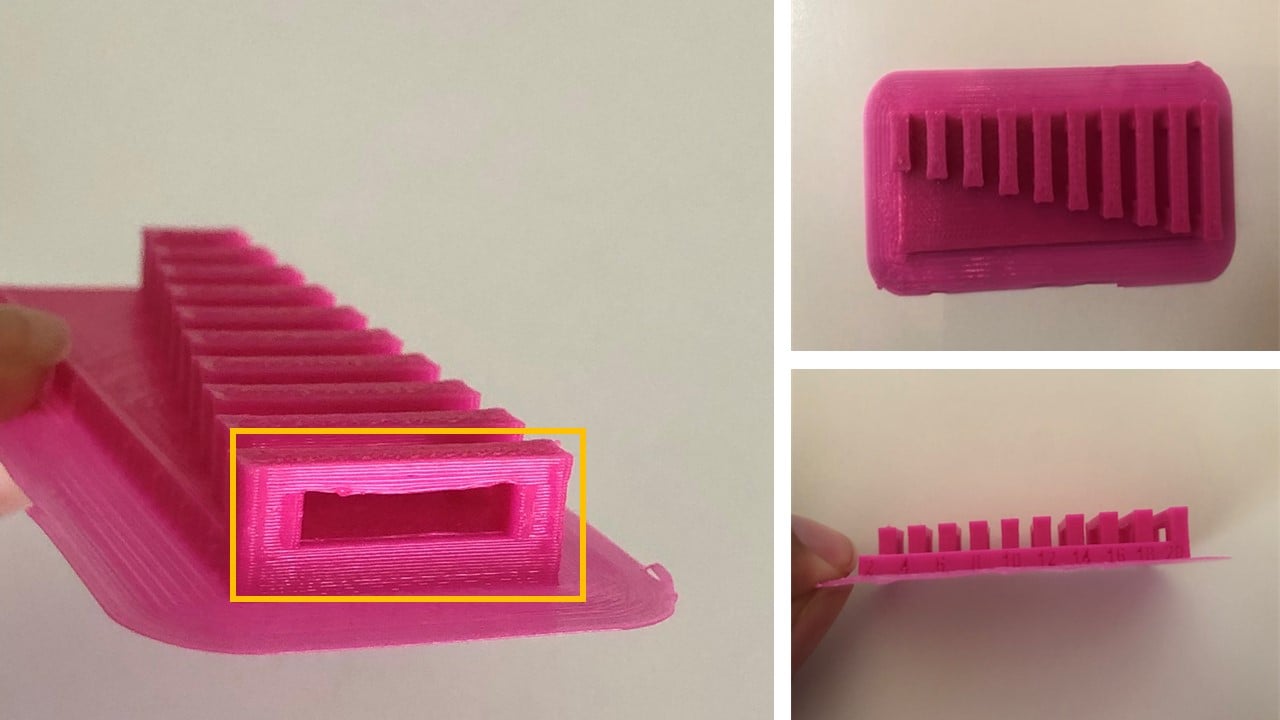
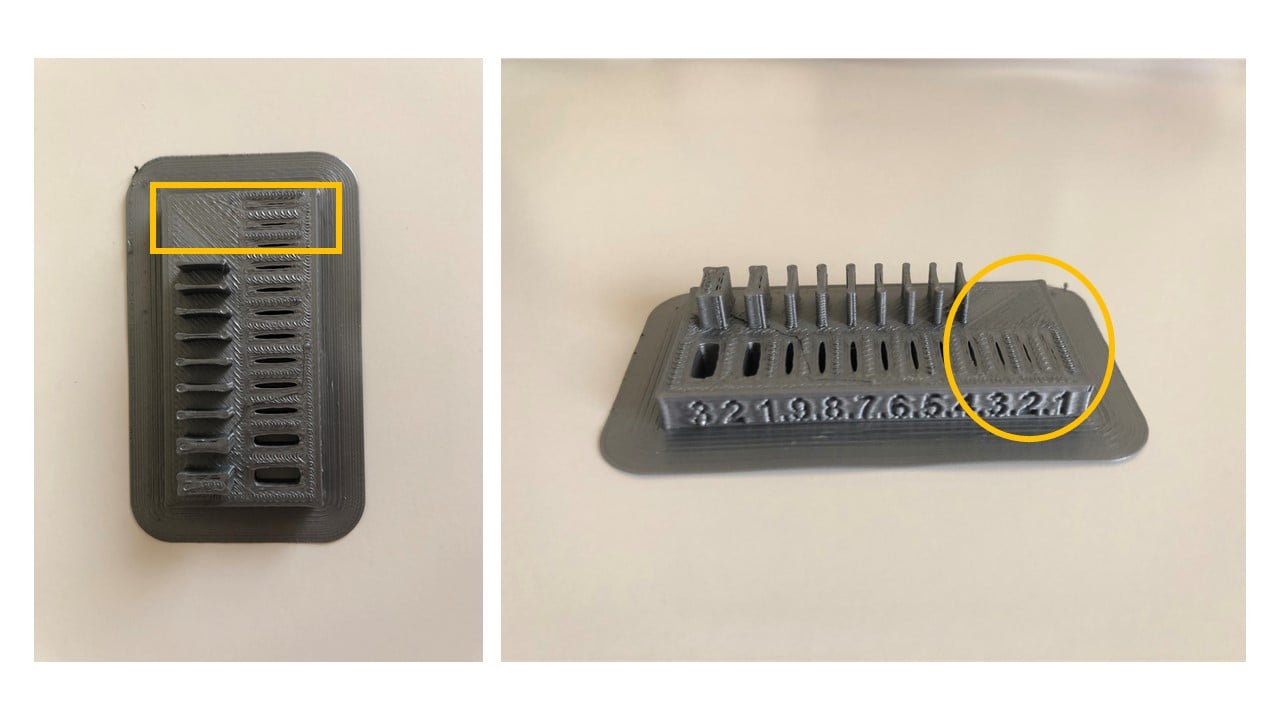
After the completion of the printing process, I allowed the printer to cool down for a few minutes before I removed the design. I noticed that the 18 and 20 mm bridges were slightly curved outwards from the middle.
b. Wall Thickness:
I started by opening the wall thickness (.stl) file in Ultimaker Cura software and adjusting the object in the printing area.

I adjusted the printing setting similar to the bridging design rule. Then, I clicked on slice and preview to view the layers. After that, I saved the file to disk in the format (.Gcode).
In the printing process, I changed the used material by clicking on material, then material 1, then change. After that, removed the old material, Pink PLA, and replaced it with the new one, Grey PLA. Then, I clicked on confirm and chose the design file to start the printing process.

After the completion of the printing process, I allowed the printer to cool down for a few minutes before I removed the design. I noticed that the 3D printer is unable to produce any wall or gap with a thickness less than 0.4 mm.
# Challenges:
I did not face any major challenges because I have previous experience in using Cura software and Ultimaker 3D printer.
# Files:
1- G-code Thickness
2- G-code Bridging
3- Vase 3D Design
4- G-code Vase
5- Vase STL