5. 3D Scanning and printing
WEEK 5
This week’s assignments are:
- To Test the design rules for your 3D printer (Group Assignment added HERE)
- To Design and 3D print an object(small, few cm, limited by printer time) that could not be made subtractively
- To 3D scan an object(and optionally print it)
3D Printing

PRUSA i3
I have always been amused of 3D Printers and have always wanted to use one and so here was my chance not just print anything but to learn about 3D Printing
3D printing is an additive method of manufacturing for making 3 dimensional models. 3D printing can be used to serve various purposes like prototyping, making small scale models for architecural mock ups etc., Due to the slow printing process of 3D printers they aren’t used for mass production manufacturing processes
3D Printer Tests
Since different 3D printers have different size nozzles and various other features its important to know what design rules and parameters to follow while designing and printing using a 3D printer. No worries this is a one time procedure and once done ideally note down the dos and donts so we can use these while designing itself
So we downloaded a test file from thingiverse which came with a numerous amount of tests such as overhang, hole test, bridge test, diameter test, support test etc
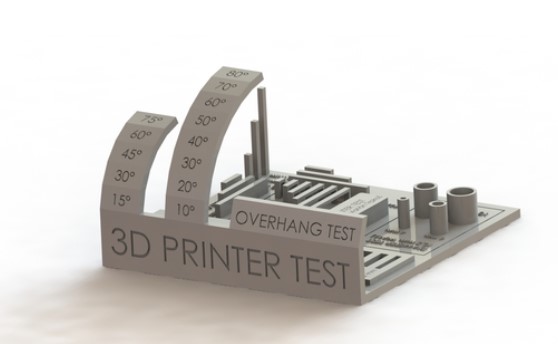
We also downloaded the clearance.stl test
![]()
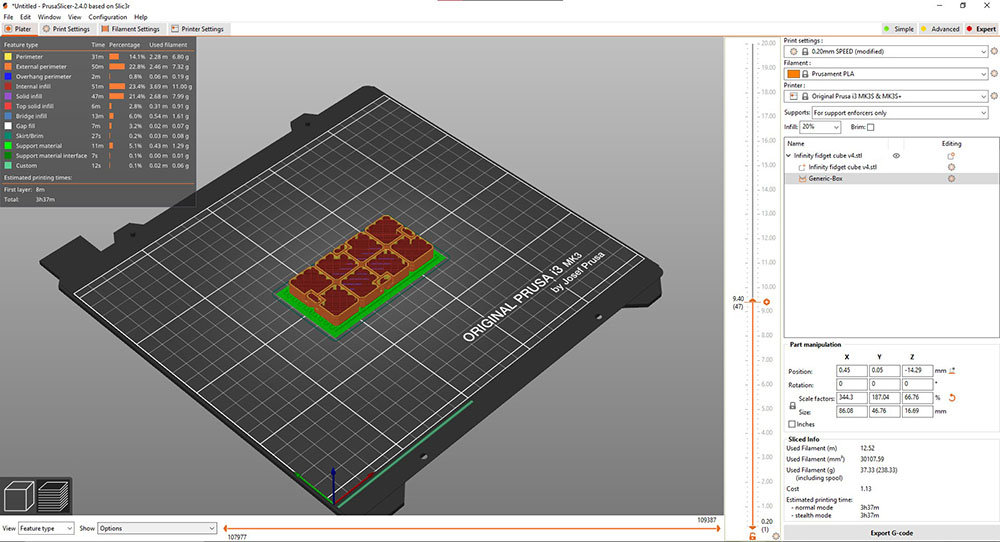
Now we bring these .stl files into the slicer through which we generate the CAM file(“.gcode”) to feed the machine. A slicer basically converts our 3D model into 2D Layers as 3D printers print layer by layer by a given layer height
Since we are using a Prusa 3D Printer we used PrusaSlicer 2.3.3 from prusa3d.com
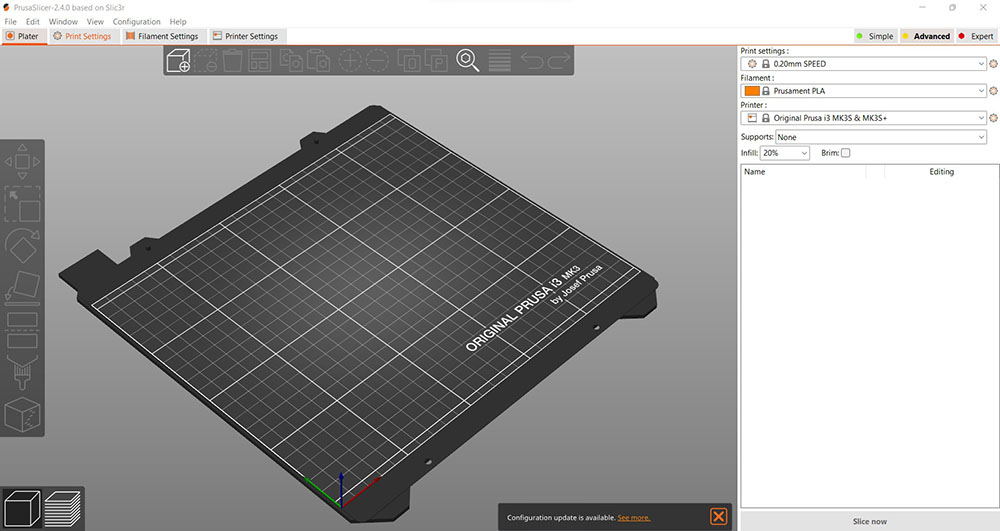
Firstly we imported the models into PrusaSlicer
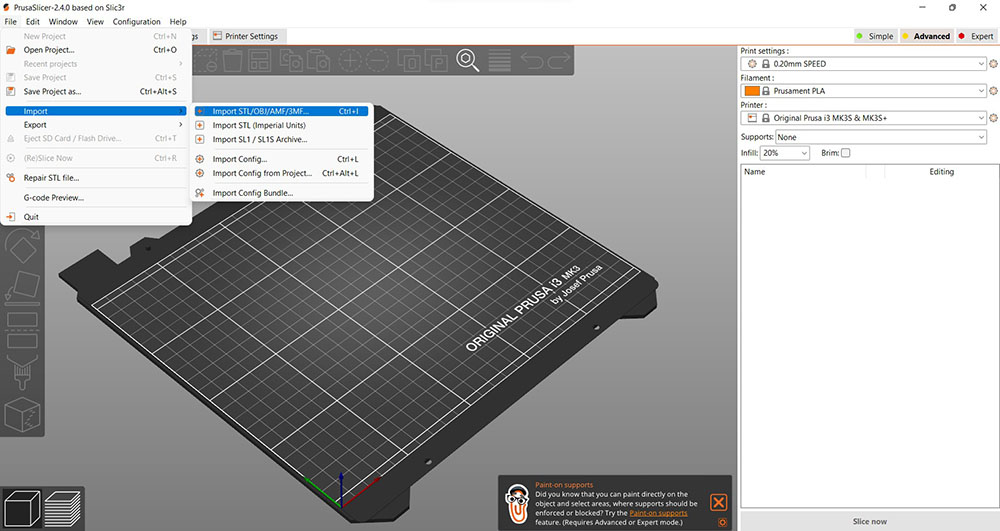

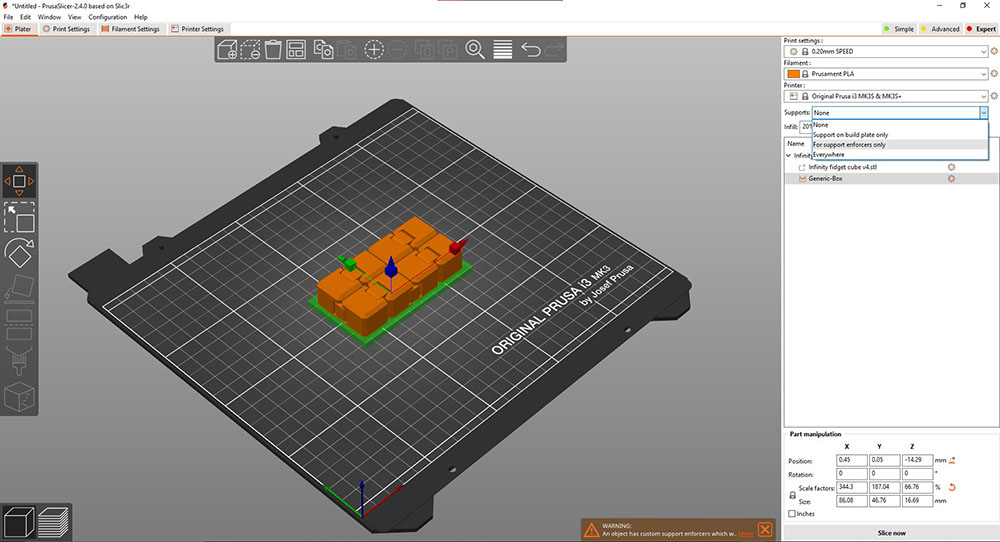
Then we added and placed supports to the clearance test and then select “For support enforcers only” under the “Supports:” drop-down menu

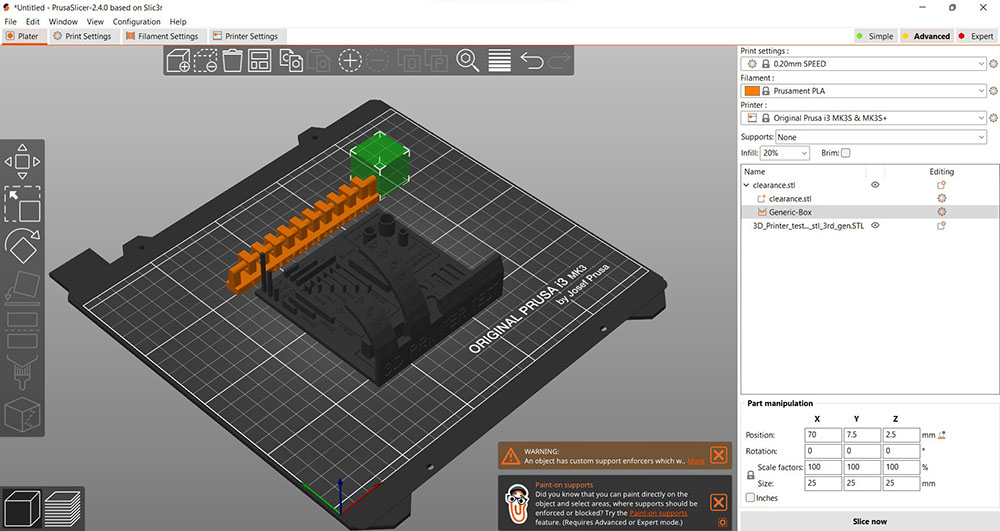
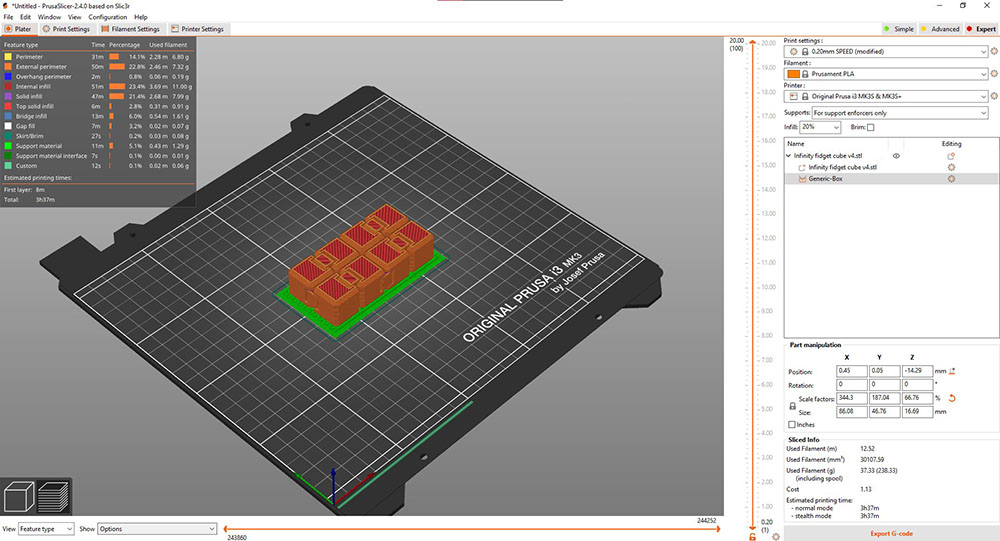
Then we set the printer, gave the print settings as “0.20mm SPEED” and Infill to 20% and finally hit “Slice now”
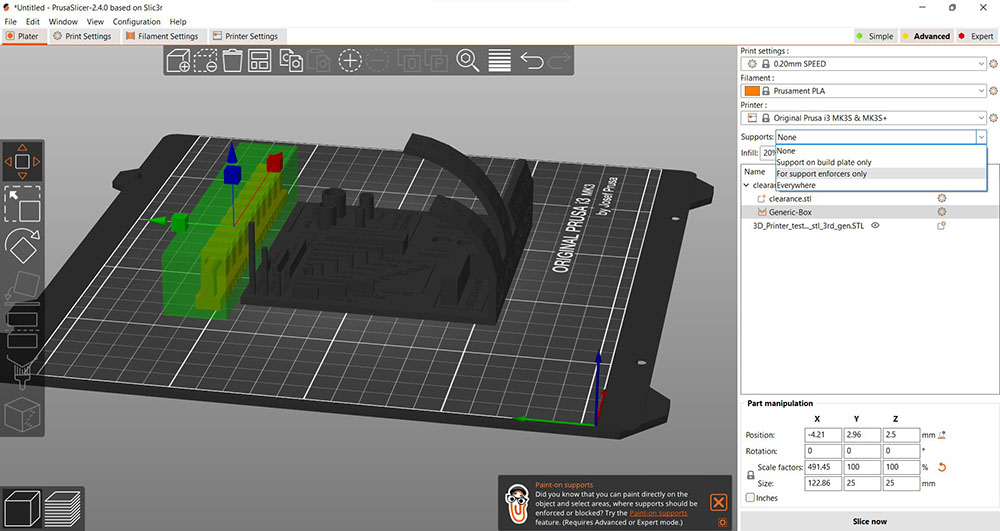
Once we are good to go we can Hit “Export G-code” copy it to the SD card and we all set to print

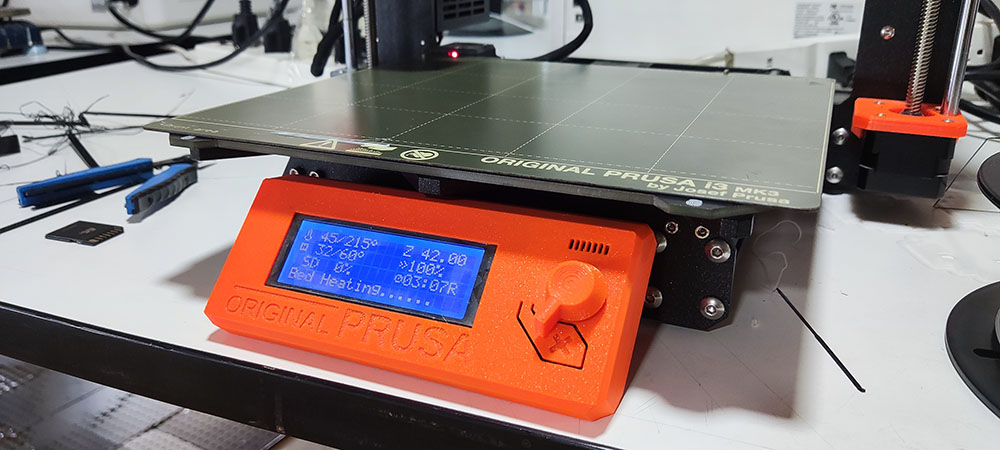
Loading Filament into the 3D Priner
We begin by selecting “unload” in the “menu” of the 3D printer and we wait till the nozzle tip to heat up in oreder to loosen any filament stuck inside the nozzle. Once the nozzle tip is heated up we can easily pull out any previous filament. We can then place the filament role on the filament stand and take one end and slide it into the nozzle tip which will then begin autoloading.
(Note: If the tip of the filament is deformed give it a trim with a plyer before loading it into the nozzle)
The nozzle pushes out any previous filament which was stuck within the nozzle and once our new filament is being extruded the machine will ask whether the given filament colour is correct for which we can select “Yes” (if not we can select “No” until the right filament is extruded).
We can then insert our SD Card and select our file using the scrolling wheel

The printer takes a minute or two to heat the printing bed and once heated it starts to caliberate and then start printing
 Bed Heating…
Caliberation…
Result
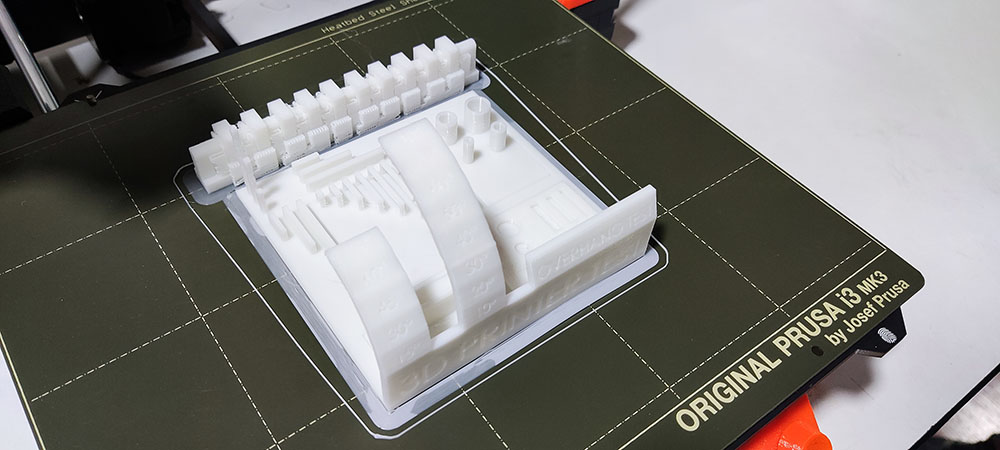
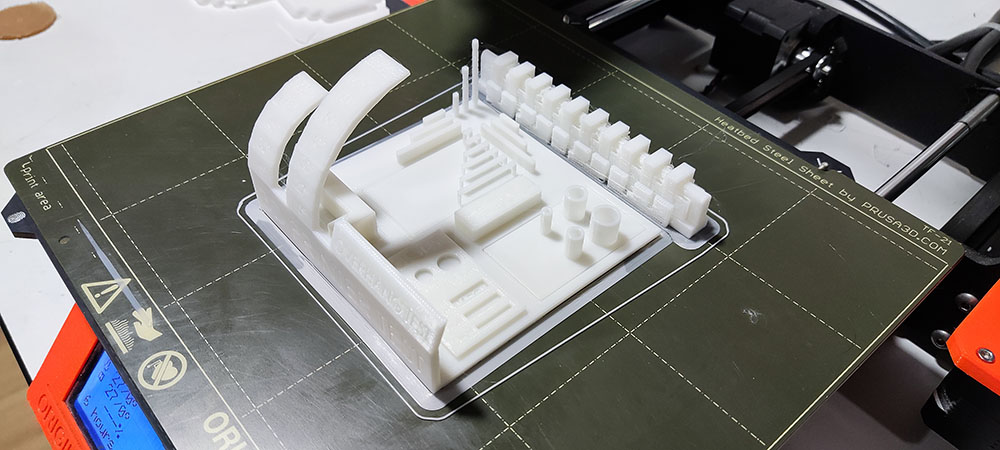
We noticed:
- That an overhang of (amount) and higher must be avoided as we can see spaghetti formation
- We can bridge upto 25mm without any support
- That the Maximum tower height for the printer is 20mm
- Hole test, diameter test(1mm wall thickness) was successful
- We can have a clearance of up to 0.20mm
Now that we have learnt the designing rules of the printer its time to design and print something
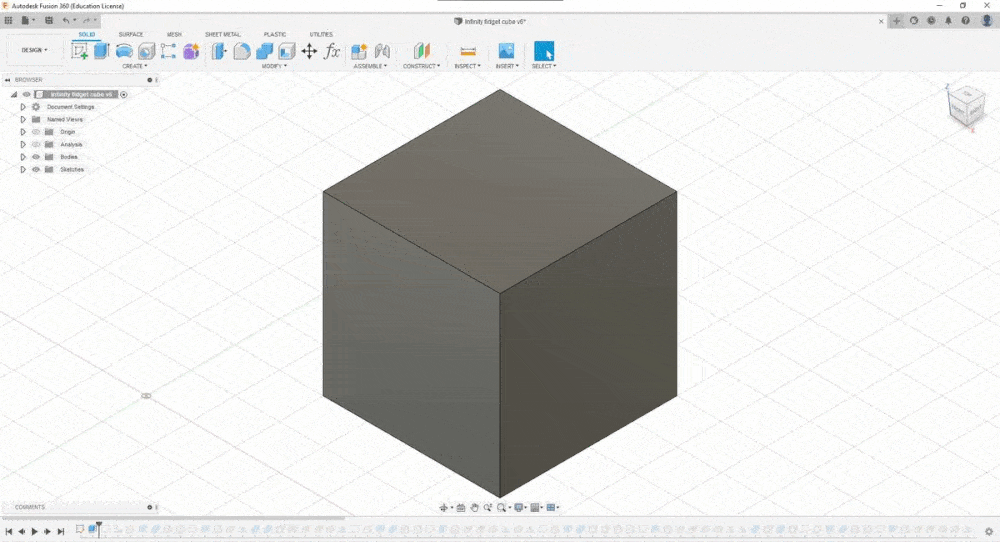
THE FIDGET INFINITY CUBE
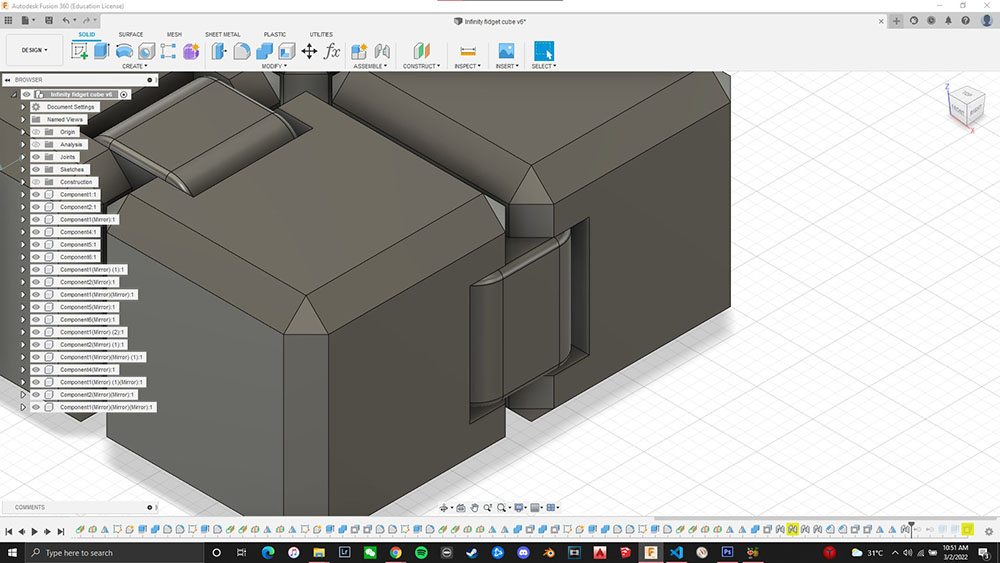
Through the past few weeks I have gotten a hang of Fusion360 and so decided to make my model in it
Deciding what to do was the most difficult part and I ended up finalising this design that I felt was amazing which popped up on my Instagram feed
“THE FIDGET INFINITY CUBE”
Since I was obsessed with the parametric form of designing I added a single parameter and designed everything based on that by making everything divisible to it
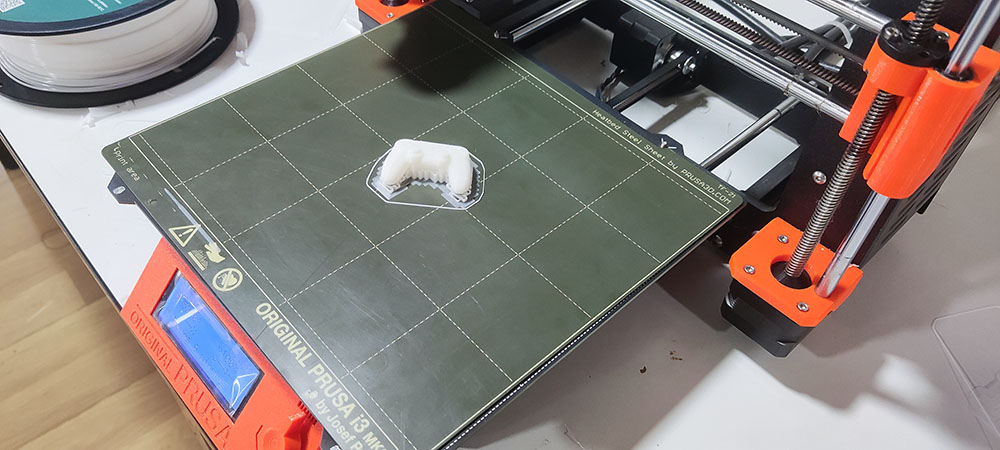
Once my design was ready I exported it into .stl and imported it into PrusaSlicer and just to be 100% sure added a base support just incase


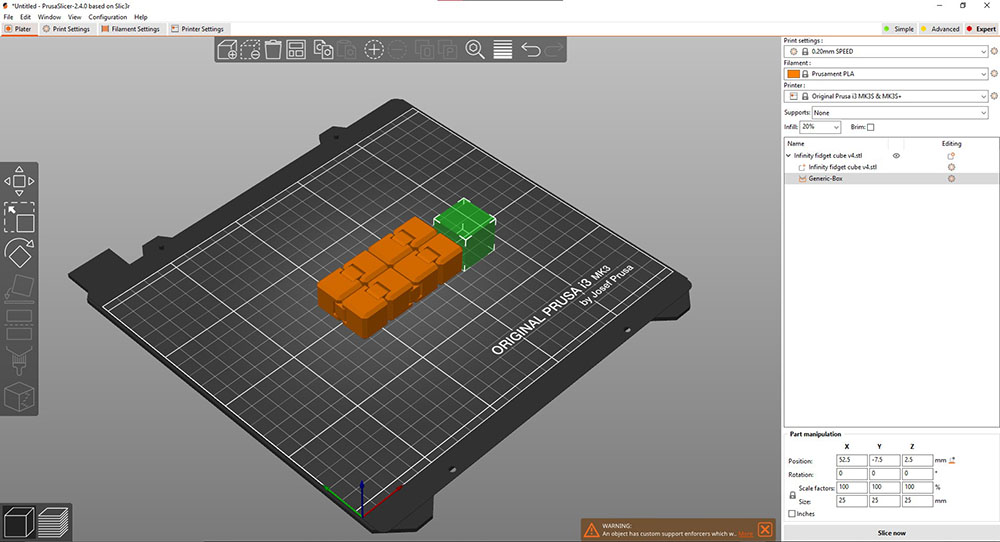


Once I inspected the layers It was good to print
 Printing in-progress
Once the 3d print was complete I realised a major design flaw that I had added an extra 2 links that restricted the movement of the cube and I had to get those two links removed from the design
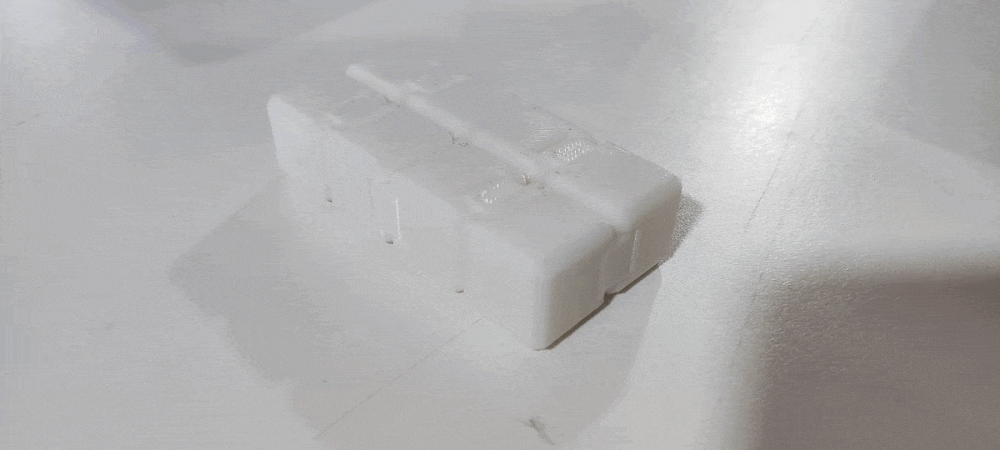 3DPrinted product…
 Design error
Once I removed those 2 links I printed it again and this time it was successful
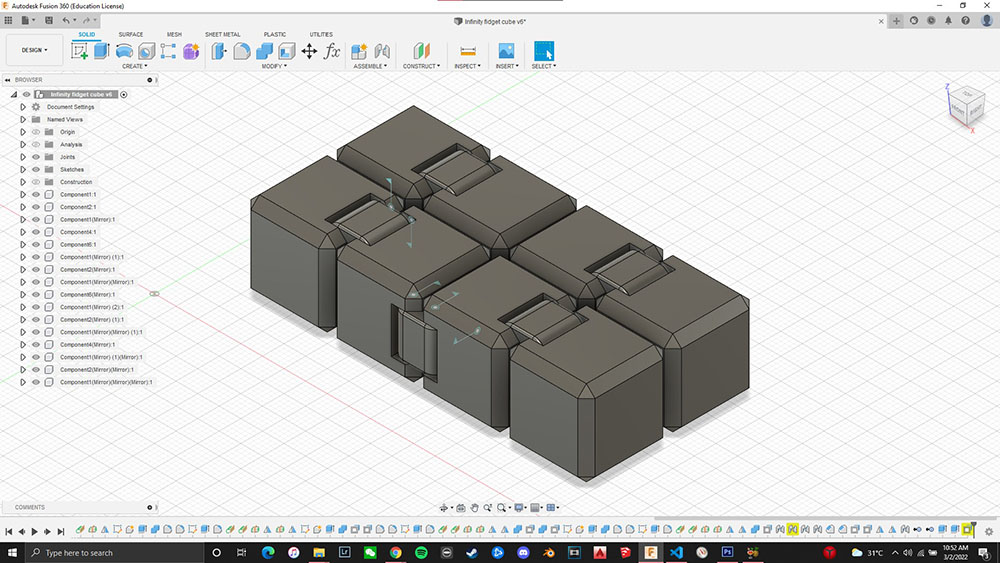 Design changed
3D Scanning
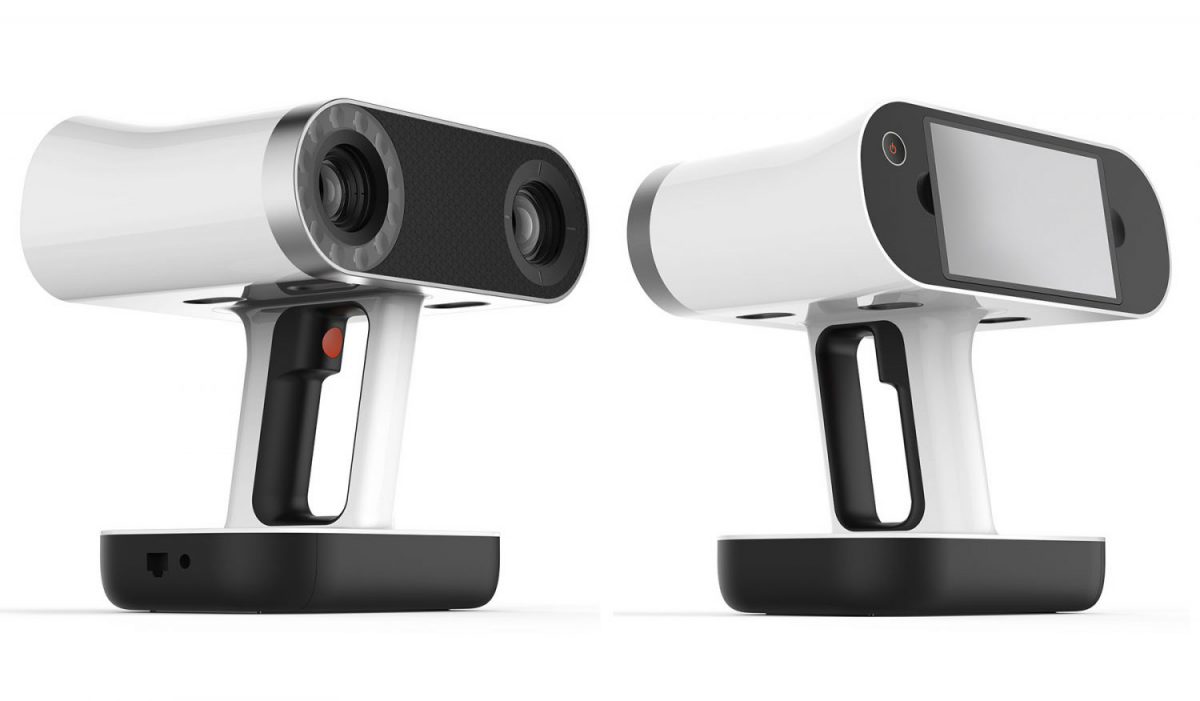 Artec Leo
3D Scanning was very new to me and I was more than excited to learn how to 3D scan items
3D Scanning as the name suggests is basically being able scan objects in a 3D space using cameras, LidAR sensors etc., and we used Artec Leo, which is a handheld scanner
The scanning process is pretty basic as its got the same poin and shoot method
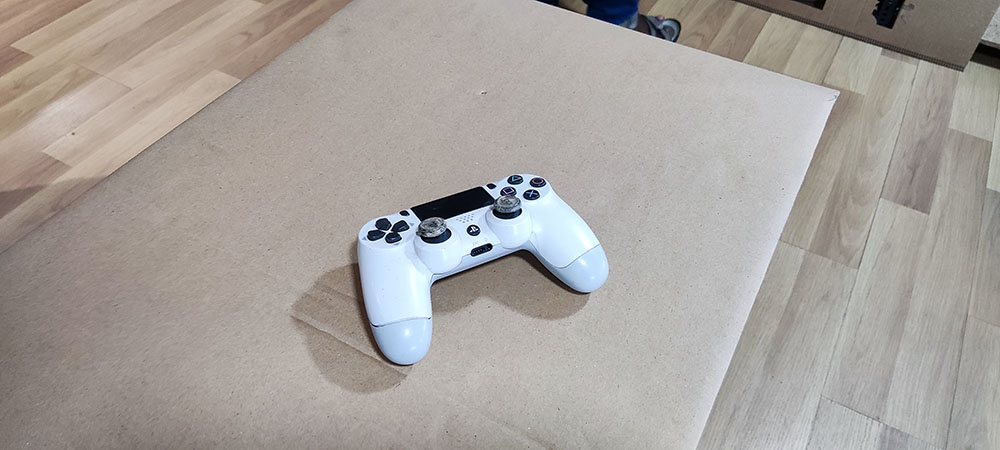
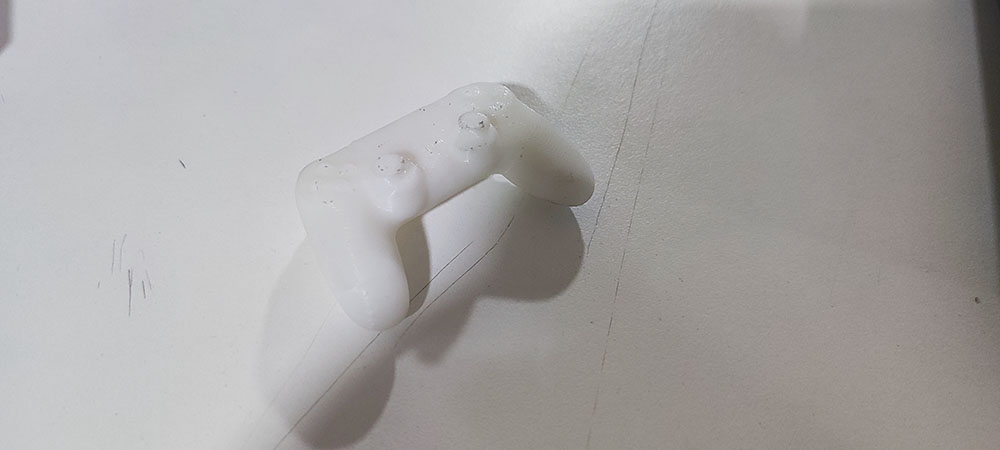
I used my old broken DualShock4 Controller to scan as you need a surfaces without high gloss reflections as the laser wont be able to capture through high reflective faces
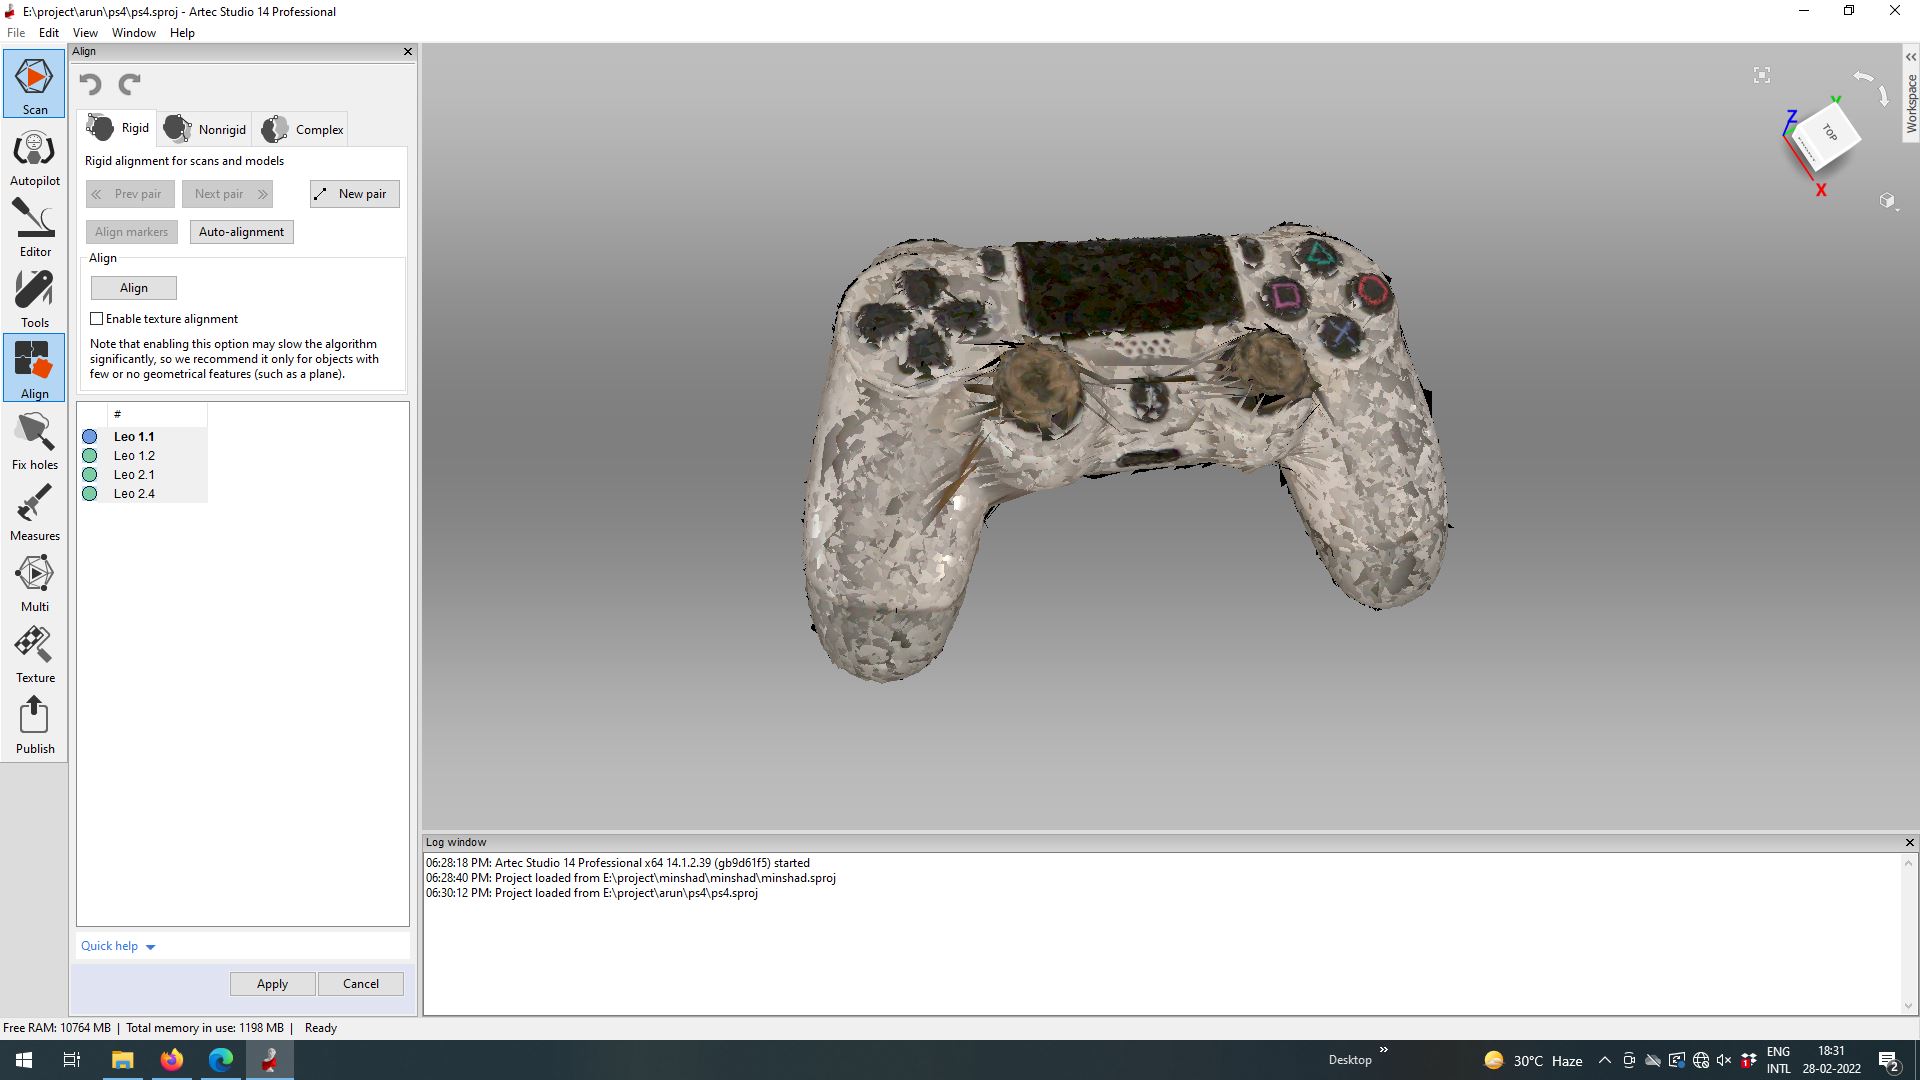
We can see our progress in the display so we know where to give more attention while scanning
Once my scan was complete, we used Artec Studio to convert our scan into a model. We will have to clean up and align the scan for best results and once we do that we can export it into .stl
 Before clean up…
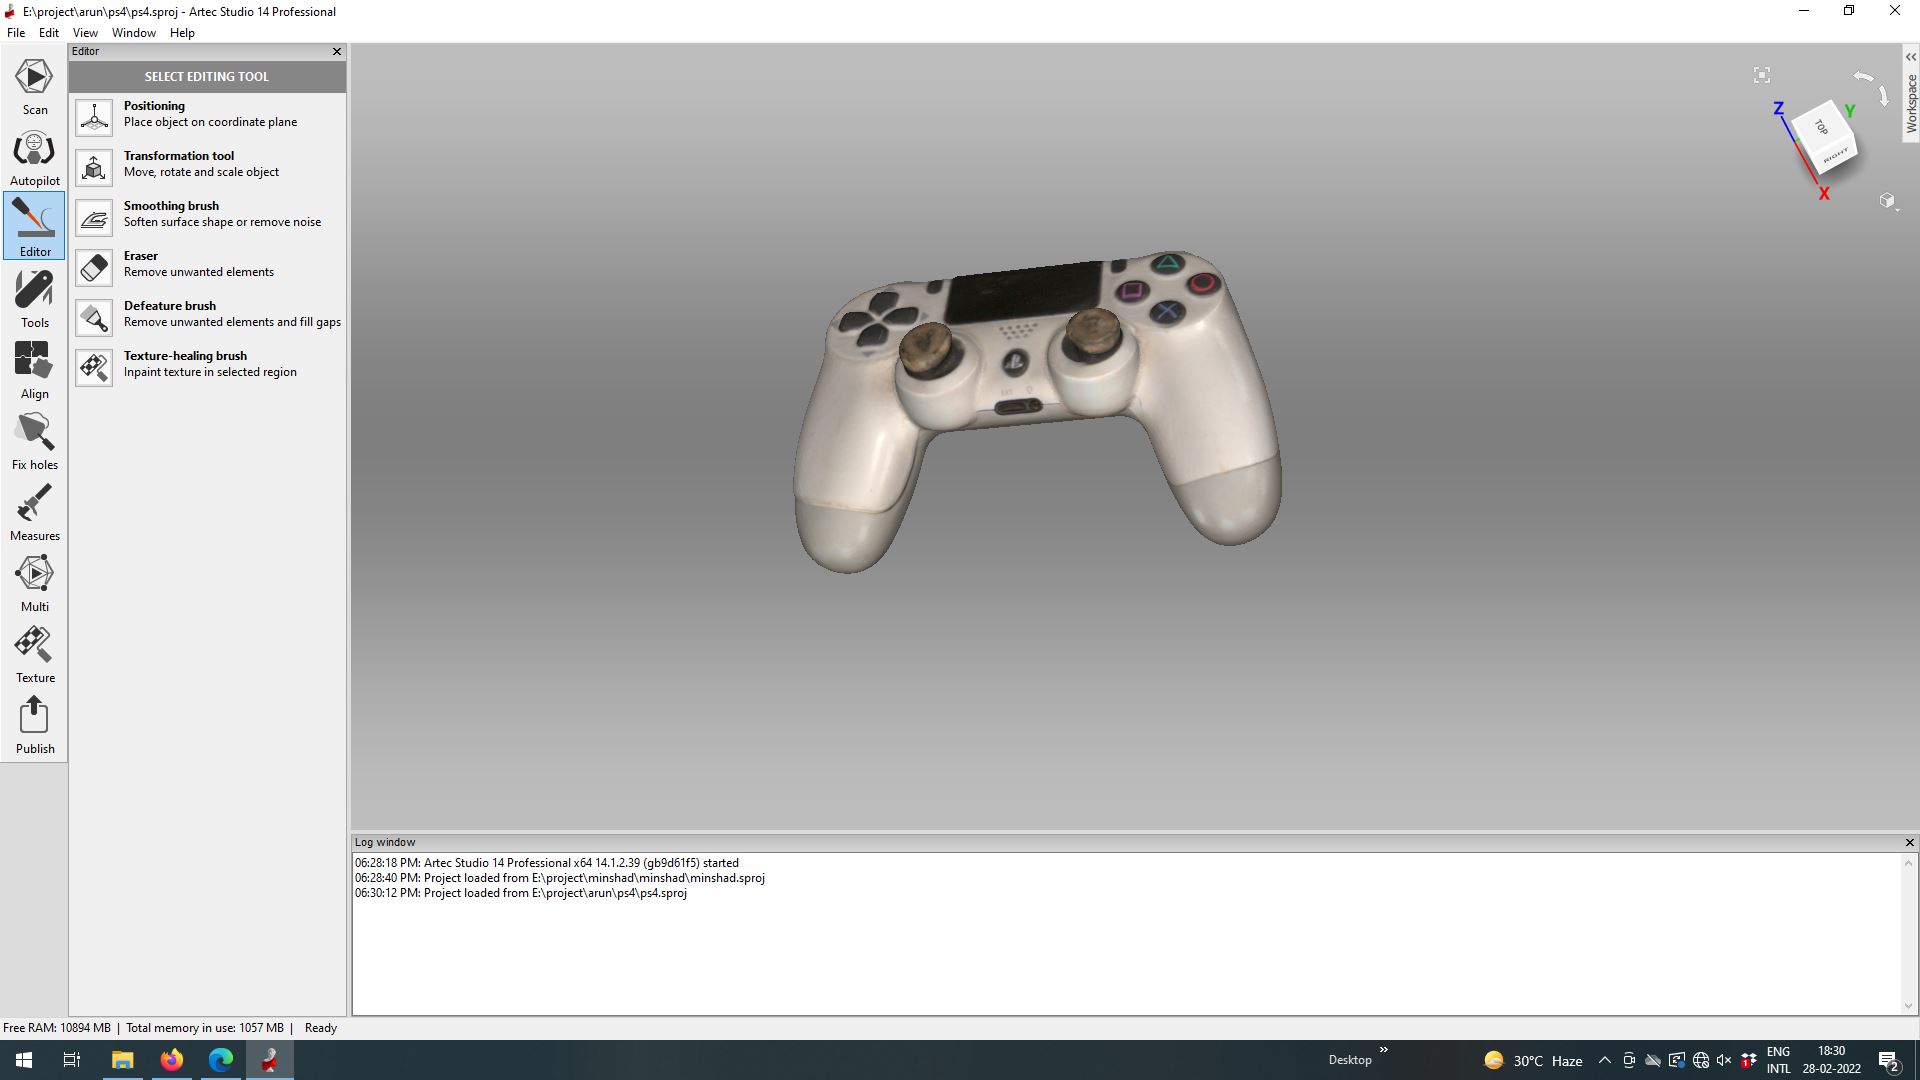 After clean up…
 Post print…
 After removing the supports…