5. Electronics production
Instruction
Group Assignment
Individual Assignment
- make an in-circuit programmer that includes a microcontroller:
- extra credit: customize the design
- mill and stuff the PCB
- test it to verify that it works
- extra credit: try other PCB processes
What I did in Week4
- Set up milling environment → Group Assignment
- PCB Test production → Group Assignment
- Make and Produce in-circuit programmer → In this page
Make In-Circuit Programmer : hello.D11C.serial.5V.1.1
• Mill in-circuit programmer for AVR-1

In-circuit Programmer :


convert path from svg file by mods


import to gSender and Start to engrave the PBC board

Mill the interior and outline in the same way

Complete

Make Adapter board : Serial UPDI-3
Adapter board :
hello.serial-UPDI.3.traces.png
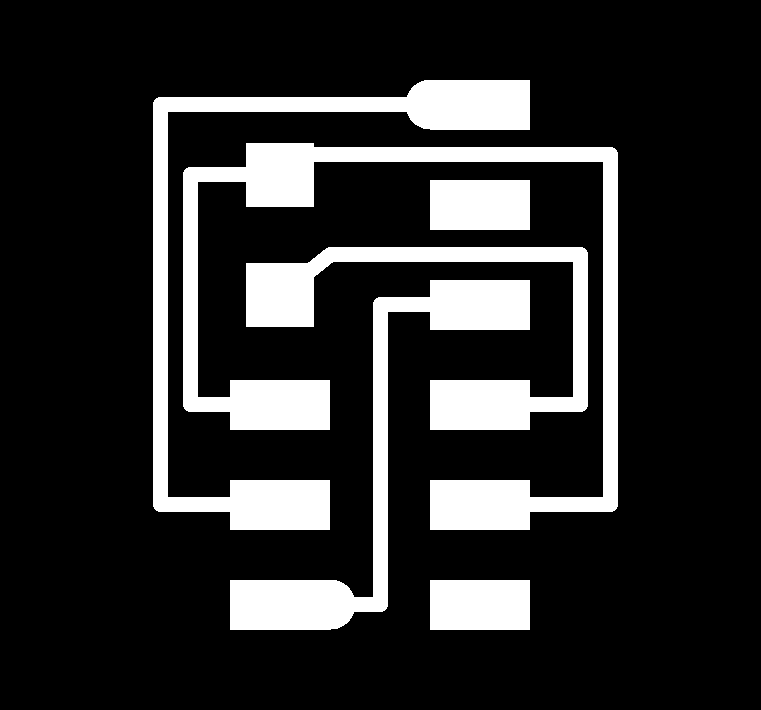
hello.serial-UPDI.3.interior.png


In the same as the in-circuit board, mods → gSender → Mill.
Complete

Soldering boards
Collecting the parts of in-circuit programmer and adapter board
- hello.D11C.serial.5V.1.1
- serial-UPDI 3


Soldering

Complete
- In circuit Board : hello.D11C.serial.5V.1.1
- Adaptor board : serial-UPDI 3


Set up programming environment
Reference Kannai site
Install Raspberry Pi manager
Download Raspberry Pi Imager

Install Ubuntu to micro SD
other general purpose os > ubuntu > ubuntsu server 21.10(R Pi2/3/4/400)

SSH
- Find IP address by LanScan
ssh ubuntsu@192.168.1.158

pass: raspberry
-
connect Xiao to USB of Raspberry Pi
-
connect SAMD usbc 11 serial to USB of Raspberry Pi to be able to edit Raspberry pi
Install edbg
edbg enables the user to debug the target device without an external debugger.
installed edbg

$ sudo ./edbg -l

Set up Seeed Xiao as DAPLink
Install the DAPLink Arduino Libraries (Mac/PC)
- Seeed_Arduino_DAPLink -> Code -> Download ZIP -> Seeed_Arduino_DAPLink-master .zip
- Open the Arduino IDE, and click sketch -> Include Library -> Add .ZIP Library, and choose Downloads/Seeed_Arduino_DAPLink-master.zip
Install the Adafruit_TinyUSB_Arduino Library
- Adafruit TinyUSB Library for Arduino -> Code -> Download ZIP -> Adafruit_TinyUSB_Arduino-master.zip
- Open the Arduino IDE, and click sketch -> Include Library -> Add .ZIP Library, and choose Downloads/Adafruit_TinyUSB_Arduino-master.zip
Setup Xiao in Arduino
- Preference -> Additional Boards Manager URLs
https://files.seeedstudio.com/arduino/package_seeeduino_boards_index.json - Tool -> Boards -> Boards manager -> Search
Xiao - Install
Seeed SAMD Boards

Open the sketch
- Unzip Seeed_Arduino_DAPLink-master.zip
- Open Seeed_Arduino_DAPLink-master/examples/simple_daplink/simple_daplink.ino
Upload the sketch to Xiao
-
connect PC and seeeduino xiao
-
set usb stack as tyny usb
-
set port to xiao
-
Click Upload(compile)
-
However, error message was displayed

- Downgrade tiny usb library to 0.10.5

- try to compile again
→done
- Upload the sketch to Xiao
- LEDs on Xiao one green -> two blue
Burn Bootloader
your PC —(WiFi, SSH)—> Pi4—(USB)—> Xiao—(jumper wiers)—> hello.D11C.serial.5V.1.1_board


download sam_ba_Generic_D11C14A_SAMD11C14A.bin
$ sudo ./edbg -b -t samd11 -epv -f sam_ba_Generic_D11C14A_SAMD11C14A.bin -s 0
【writing the boot loader using SAMD with the number 0 writing machine.】

$ lsusb

Done. Now that the bootloader has been written, we can confirm that SAMD is recognized by the Raspy as a device, and SAMD is ready to write USB - Serial. Recognized in ubuntu
On mac terminal
After that, Connect SAMD to Mac and check if samd is recognized in mac

Upload SAMD11Cserial into hello.D11C.serial.5V.1.1
Download SAMD11Cserial
Code -> Download ZIP
% cd Downloads
% unzip SAMD11C_serial-main.zip
% ls
SAMD11C_serial-main.zip
SAMD11C_serial-main
% cd SAMD11C_serial-main
% ls
SAMD11C_serial
SAMD21E_serial
% cd SAMD11C_serial
% ls
SAMD11C_serial.ino
% open .
Double click to open it in Arduino
Setup
File -> PreferencesAdditional Board Manager URLs: https://www.mattairtech.com/software/arduino/package_MattairTech_index.json
Boards Manager
Tools -> Board -> Board Manager
to find mattairtech SAM D|L|C core for Arduino

Upload
Program 3216 board
- your PC —(USB)—> D11C.serial—>UPDI_Adapter—>3216_board
References : Arduino IDE
Add File -> PreferencesAdditional Board Manager URLs:
http://drazzy.com/package_drazzy.com_index.json
Boards Manager

Set the preference

Connect : Mac - [USB - serial] - [serial-updi] - updi programmer

Upload
Blink test
Compile and test
reference: Program AVR 1-seriese from UPDI
file > example >basic>blink

- Connect the UPDI board to Breadboard ( LED, R )

- Setting as “mega tiny core”

Completed.
What I learn in this week
[Group + Individual Assignment]
- Since this was my complete first experience with electronic circuit design, I still don’t understand the significance of each step-by-step operation.
- However, I was impressed that I was able to build the base from scratch, solder the microcomputer, write the program, and light the LEDs!
- I want to deepen my understanding of the meaning of each component and the content of the design through my own input.
file
hello.D11C.serial.5V.1.1.traces.png
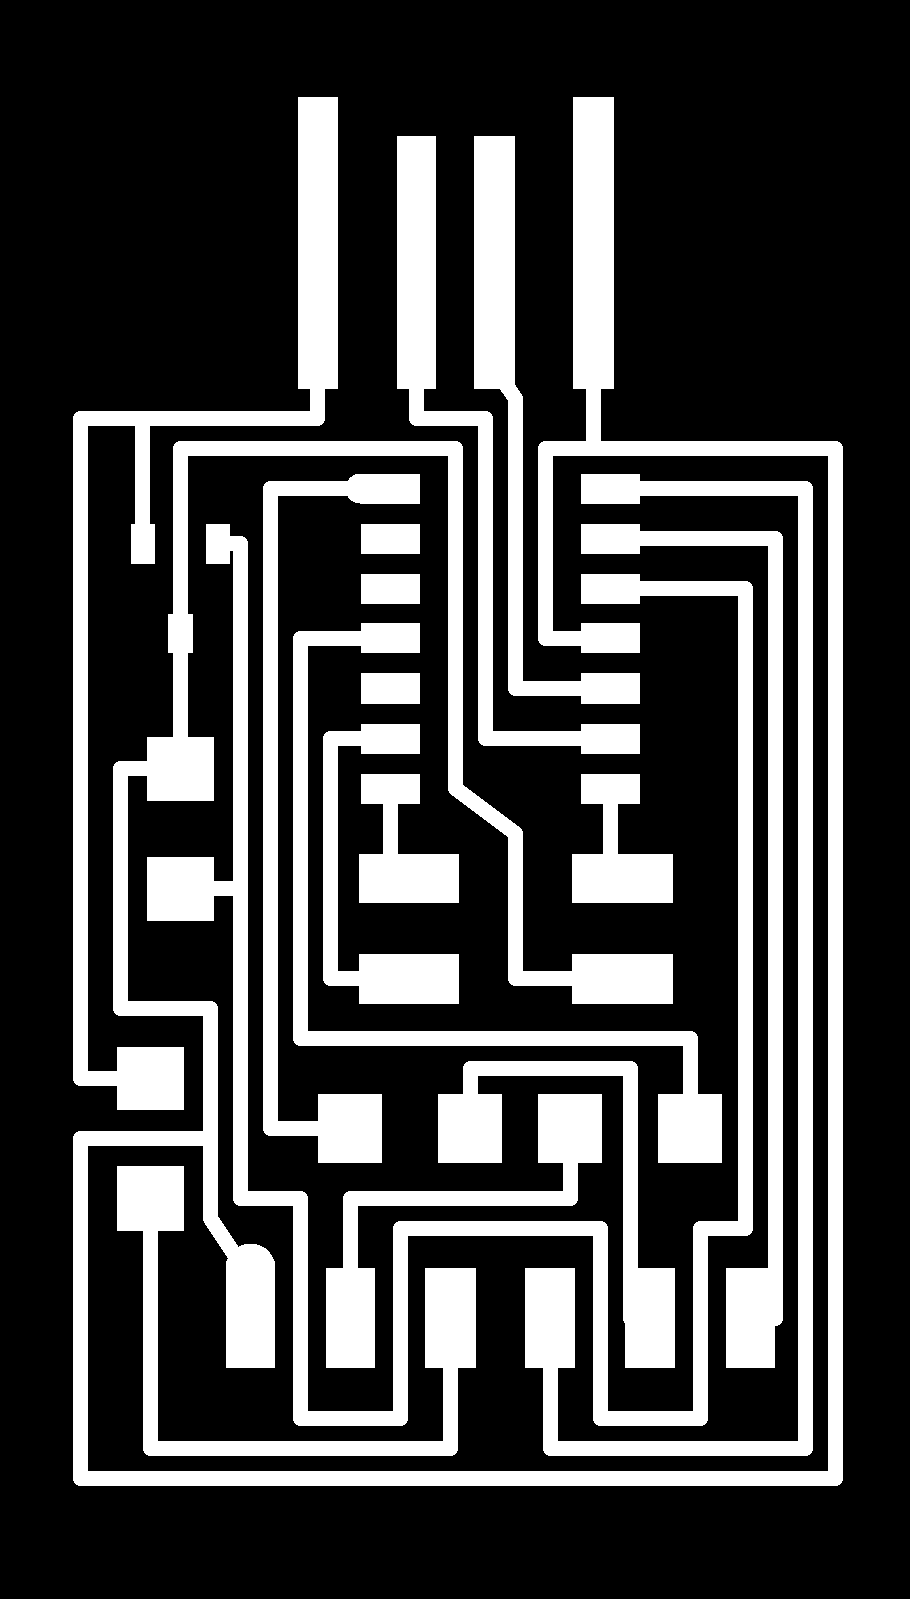
hello.D11C.serial.5V.1.1.interior.png
Acknowledgement
Mr.Tamiya and Ms.Kamei as supportive instructors in Fablab Kannai
and YOU!