Molding and Casting
-
***GROUP ASSIGNMENT***
Workflow
Designing the positive 3D model:
- Simple geometry preferred.
- Dimensions not bigger than the wax block.
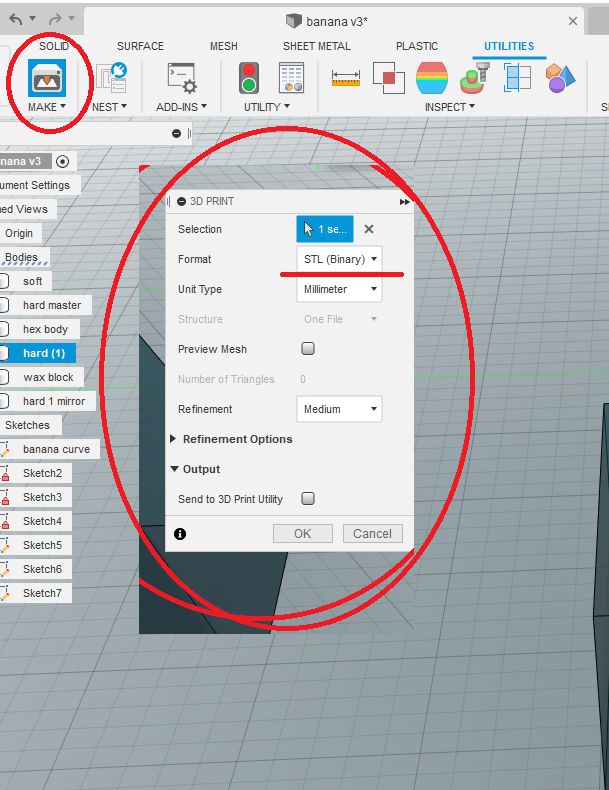
- Export as STL.
Preparing the wax block for Milling:
- Load the STL file into SRP Player
- Make sure the dimensions are correct.
- Generate the roughing and finishing tool paths.
- Fix the wax block on the bed of the SRM-20 with double sided tape.
- Install the proper millbit, zero the X/Y and Z axis.
- Run the roughing file.
- Change the millbit and zero the Z axis again.
- Run the Finishing file.
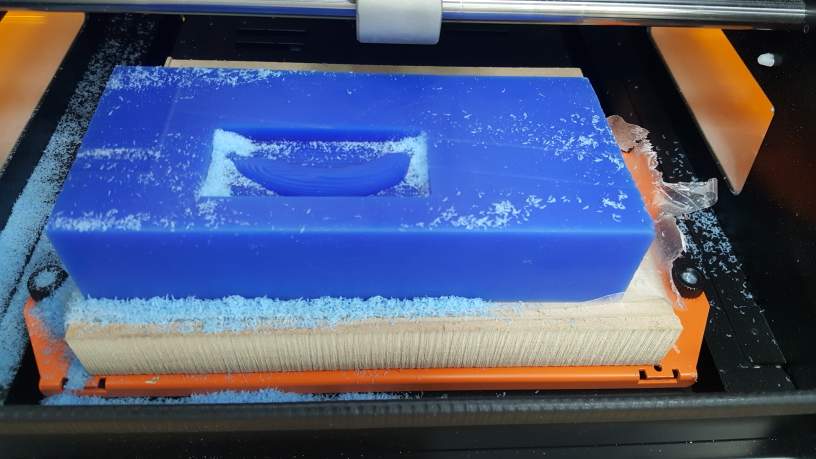
- Extract the positive wax mold.
Creating the silicon mold
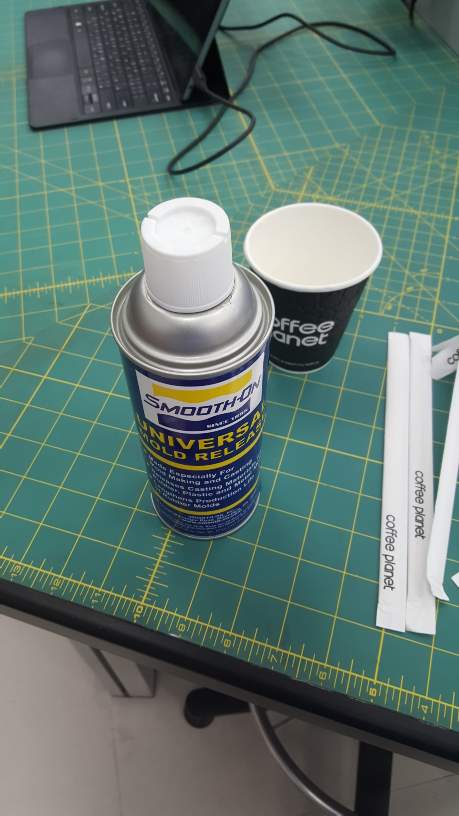
- Spray a releasing agent on the positive wax mold.
- Shake the silicon A and B bottles for a minutes before opening them.
- Pour equal amounts by volume of A and B, each into a separate cup.
- Pour the two cups together and shake and stir for about 3 to 4 minutes.
- Pour the mixture on the wax positive and let it cure for 4 hours.
- Extract the silicon mold.
Casting using the silicon mold:
- Spray a releasing agent on the silicon mold.
- Use a weight scale to measure the correct ratio of A and B, it was 115A : 100B according to the technical sheet.
- Mix the correct amount and shake quickly, the mixture harden within a minute so pour it on the mold before that.
- Wait 10 minutes for the material to cure.
- Extract the cast.
Designing the mold
I will design a 3D model in Fusion360 to be a positive for creating a silicon mold, there are a number of limitations to take into consideration when designing a model to be the mold positive, these include:
- The model should have no undercuts.
- the more detailed the model is the longer the milling process will take.
- Try to avoid putting thin walls that could break easily.
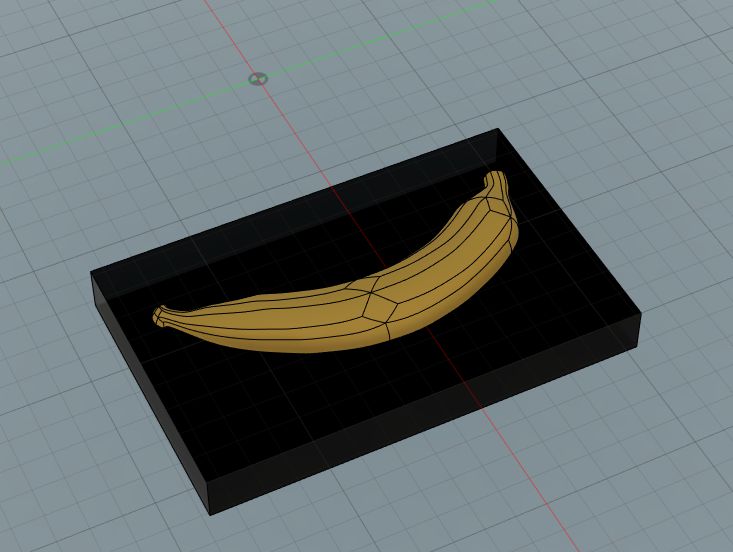
I decided on designing a banana, first I drew the outline of a banana shape using the 2D sketching tools.
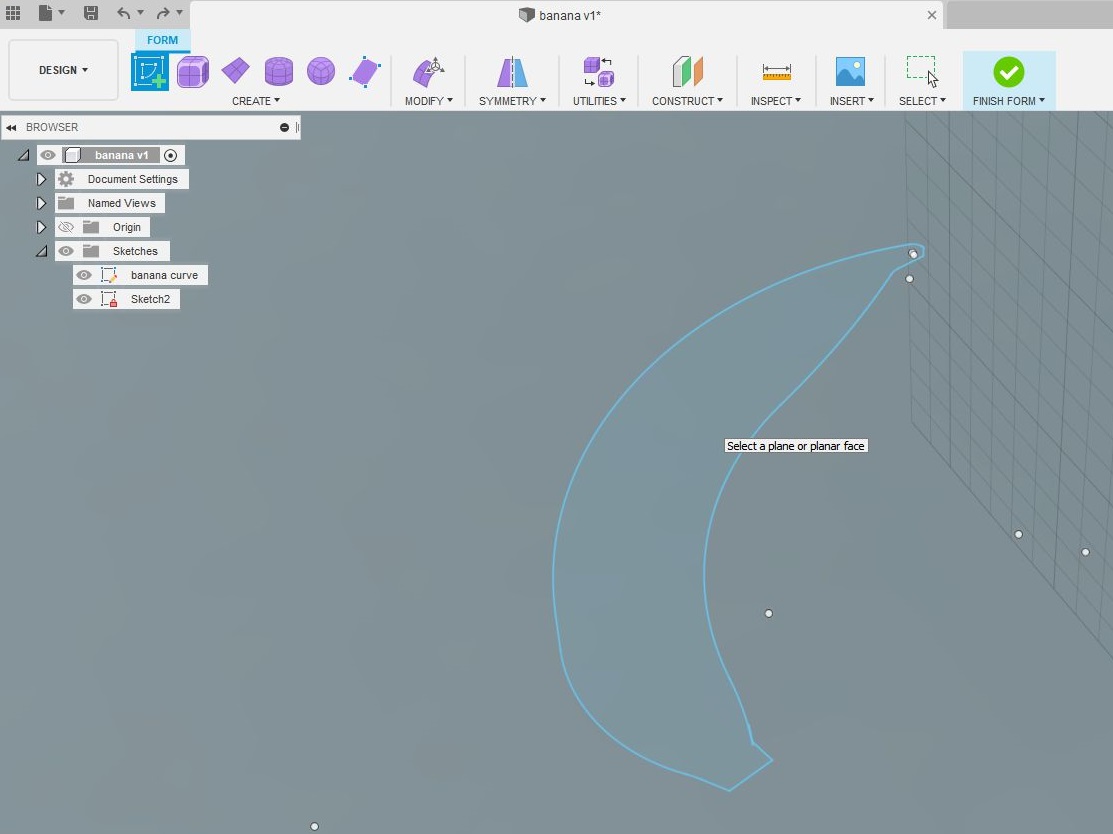
Then using the Form tools I edited a basic shape by pulling its faces to match with the banana sketch.
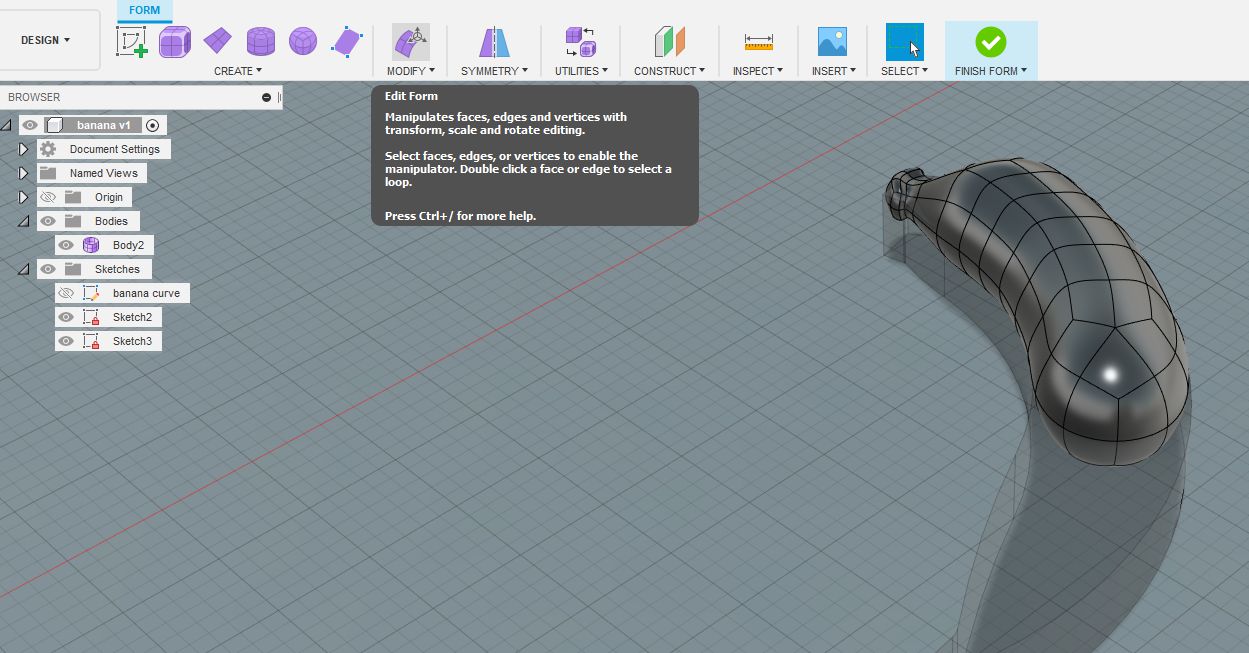
With the Edit Form tool, while holding the Alt key, a new geometry will be added each time you drag select a geometry in the shape, this allows designing organic shapes like the banana.
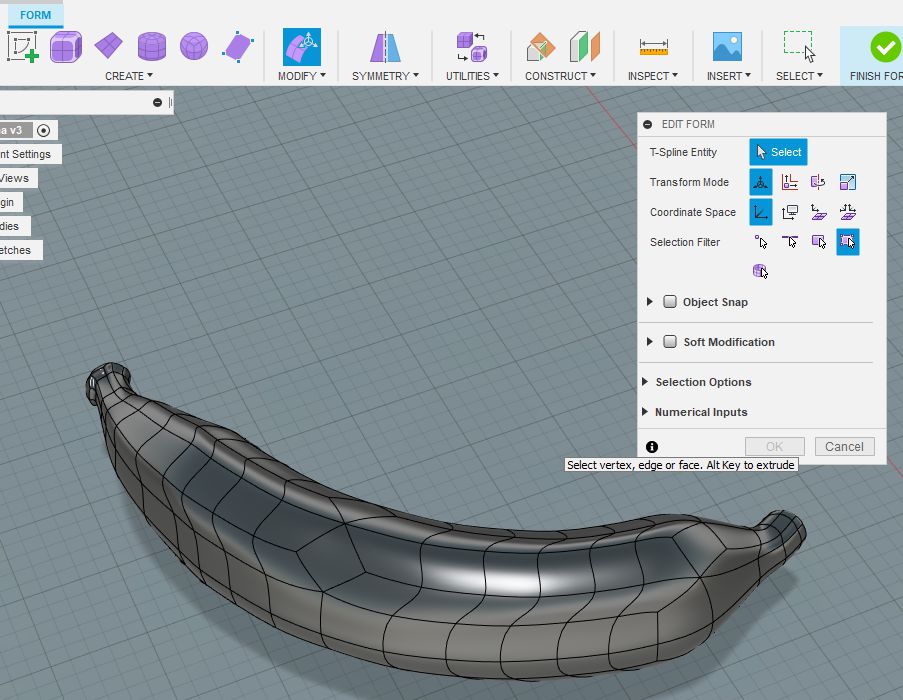
I finished up the design and scaled it to fit on a wax block.
Now export the model as STL.
Preparing the the model for milling
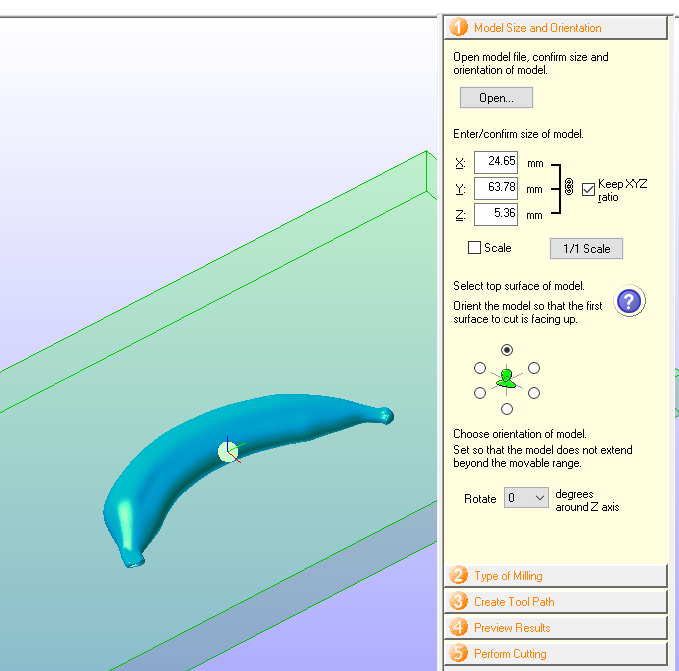
Open the STL file inside SRP Player, this software is simple and easy to use , follow the steps outlined on the side panel.
First set the model size and orientation.
Next select the milling type and geometry.
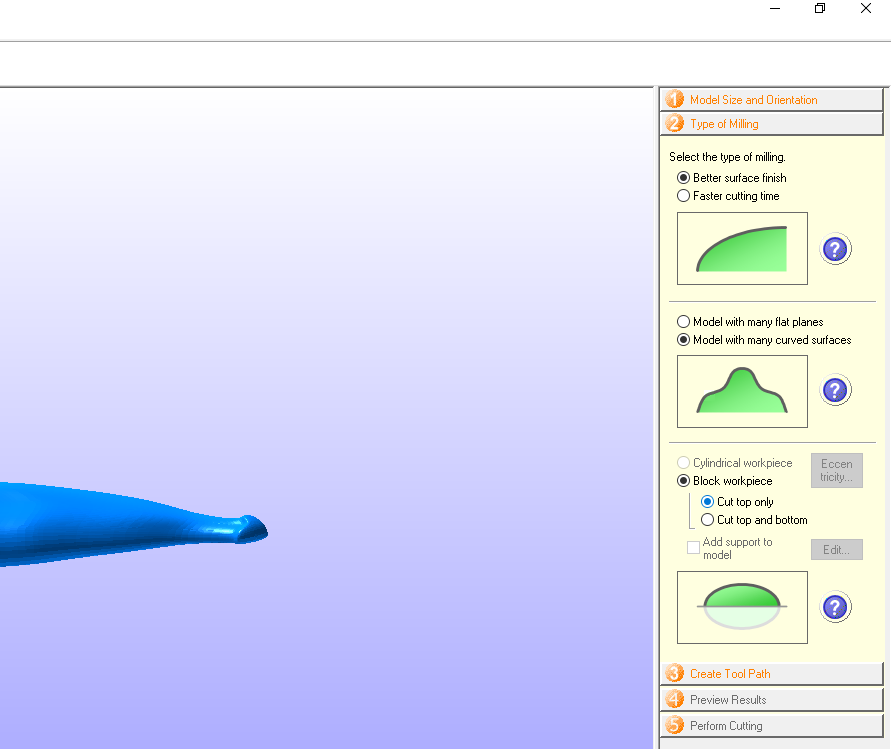
Choose the material, insert its dimensions and create the toolpath.
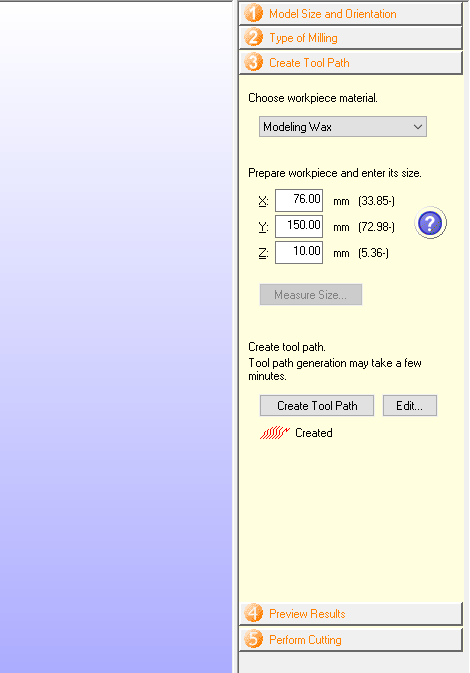
Edit the tool path if you want to change the millbit used for roughing or finishing.
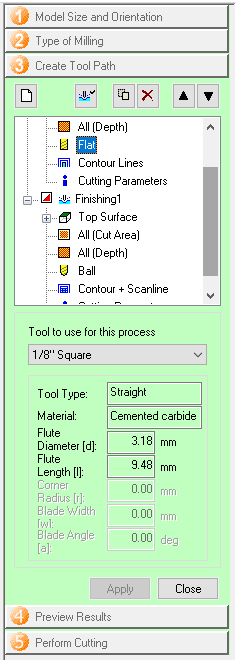
I used 1/8 Square for Roughing and 1/32 Ball Nose for finishing, after that you can preview the milling process.

Finally to export the RML file for milling, go to perform cutting, and output file.
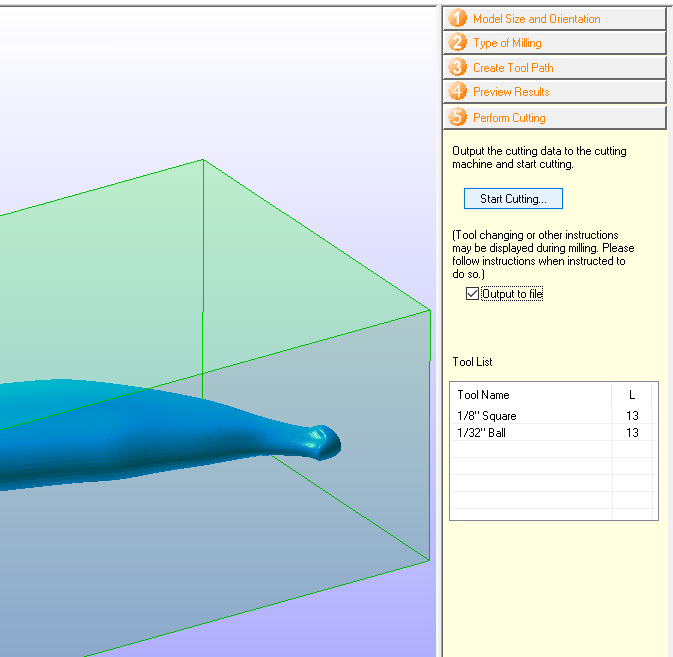
Now mill the file, start with the roughing toolpath, when it's done change the tool and start the finishing tool path.
Creating the silicon mold:
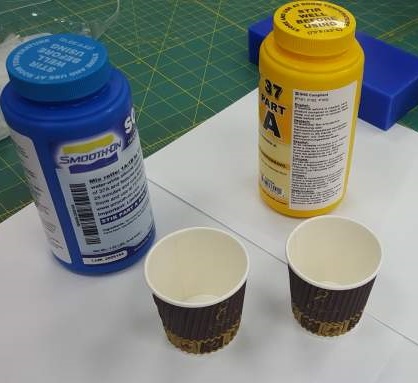
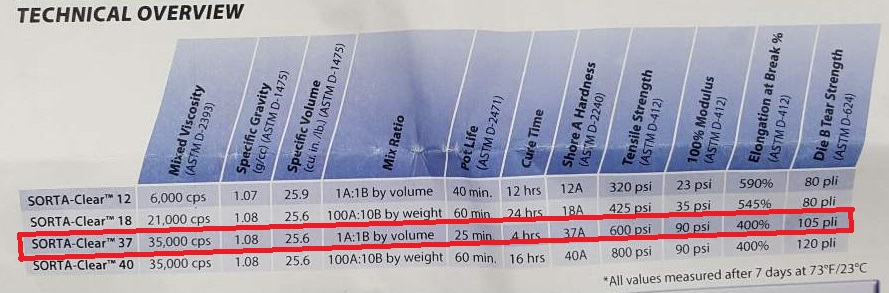
The material I used is the SMOOTH-ON SORTA-ClearTM 37 .

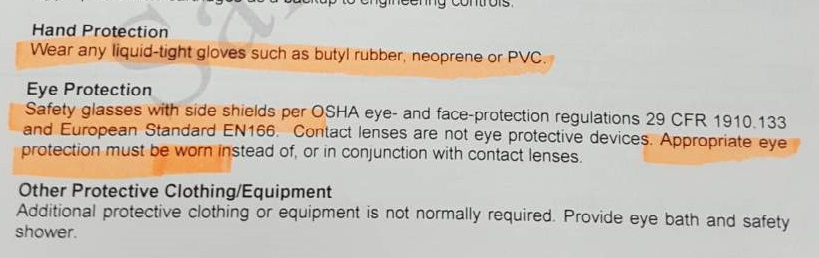
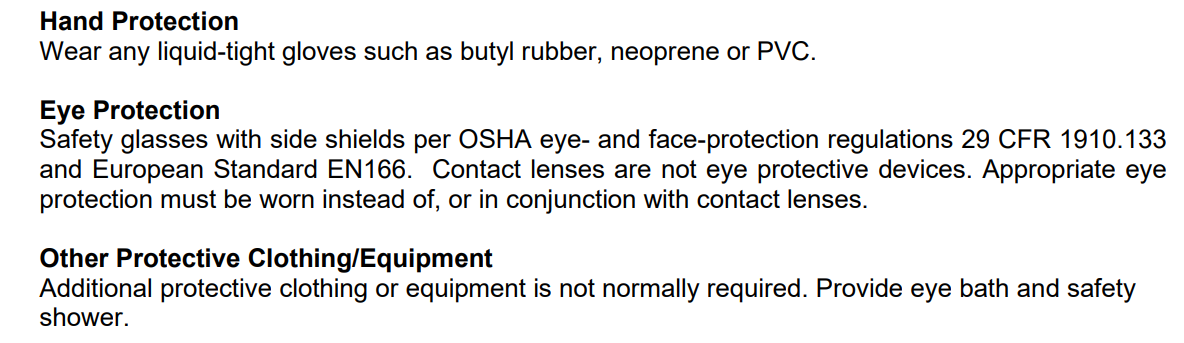
Reading through the specification sheet, the safety equipment needed is gloves and eye protection.
The way to use it is to mix an equal volume of liquid A and liquid B, I used coffee cups for this process.
This same material was used by last year's students and the material have partially solidified and is extremely thick and viscous pouring it out of the jar and mixing it took considerable time and effort.
Spray the wax with the release agent before pouring the silicon mix on the positive mold.
Now pour the mixture and wait for it to cure, it should take 4 hours according to the specification sheet.
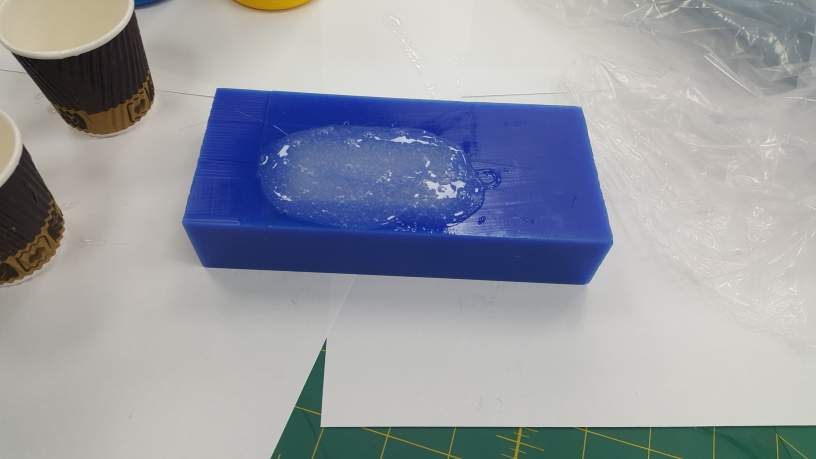
The next day I extracted the silicon mould.
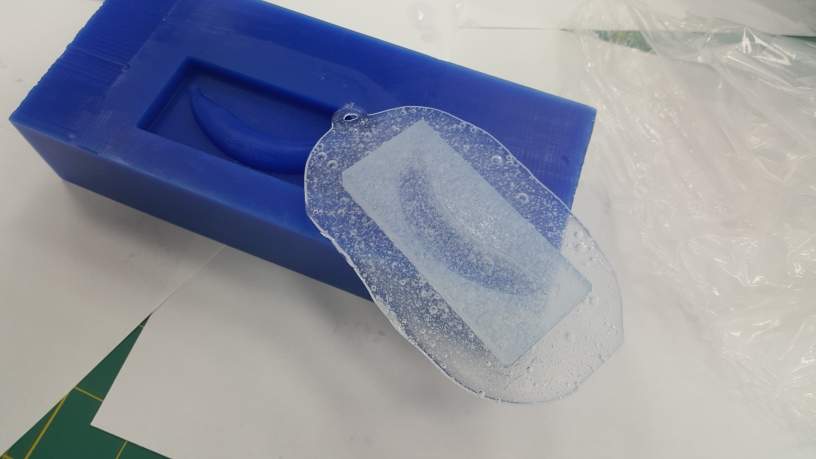
Casting
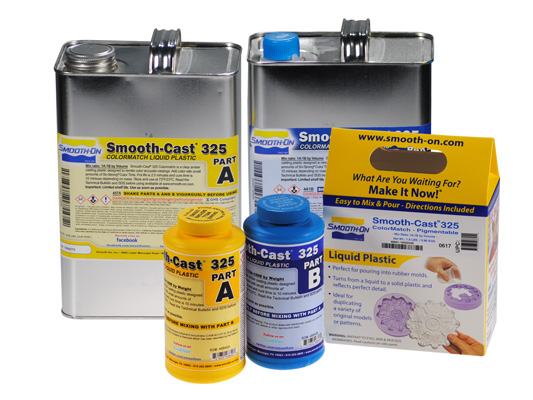
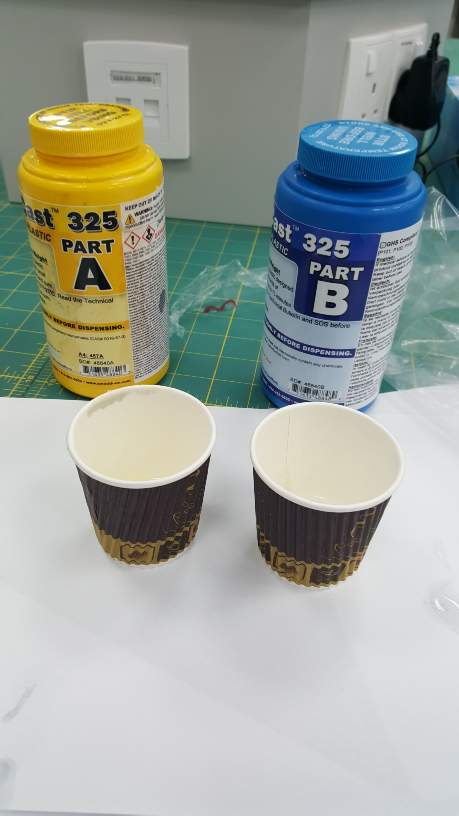
The material I will use for casting is the Smooth-Cast™ 325, the safety sheet mentions that the gear to be used is goggles and water proof latex gloves, exactly the same as the silicon material.
Compared to the silicon material, this plastic material cures in just 10 minutes according to the specification sheet.
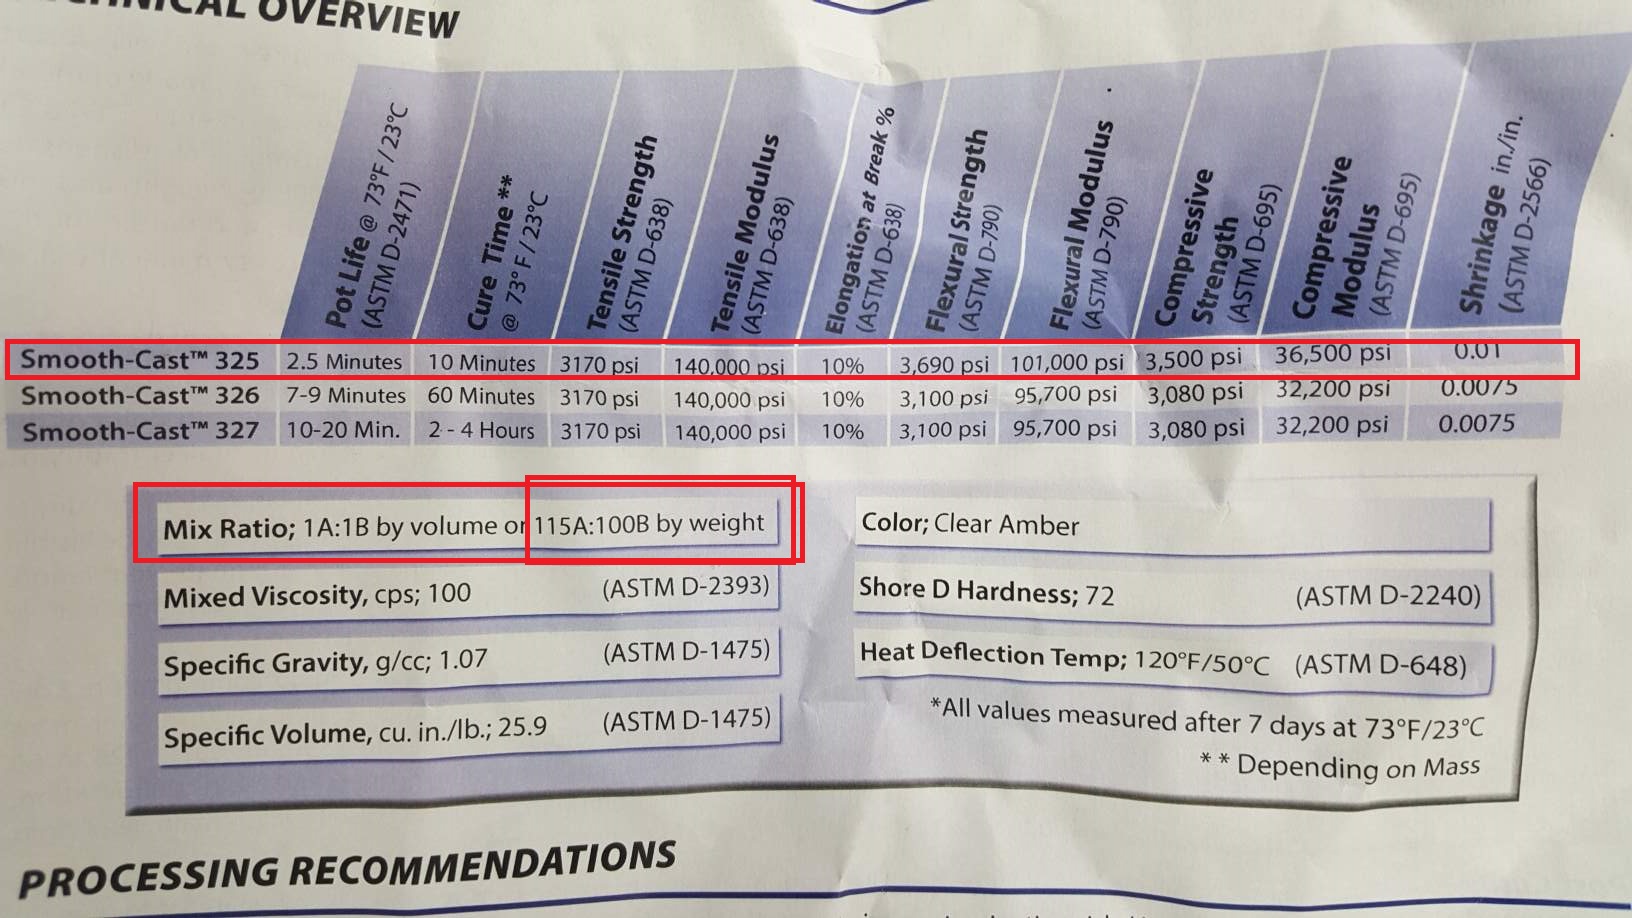
It also mentions that the material should be mixed by a weight ratio of 115A:100B, so I used a scale to measure the correct weights. I measured 7g of compound B.
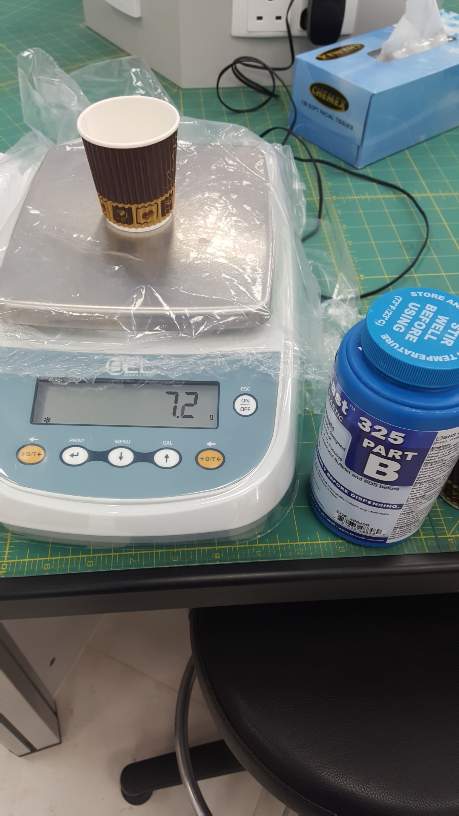
multiply 7 by 1.15 which is equal to 8g, which is the weight we should use for compound A.
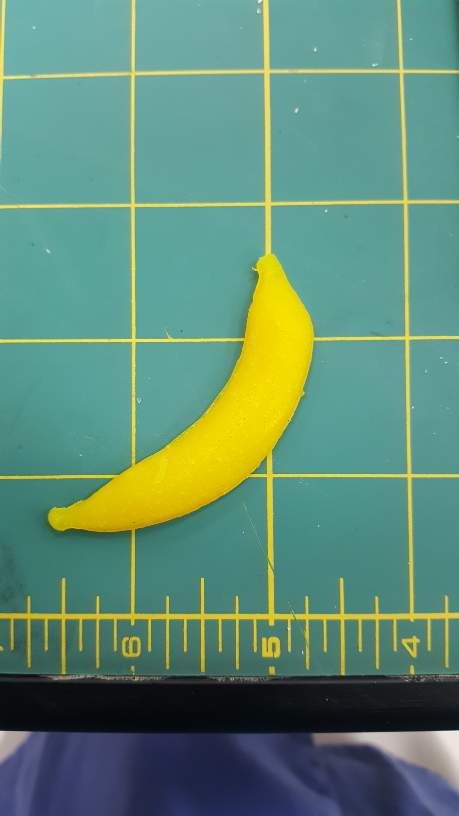
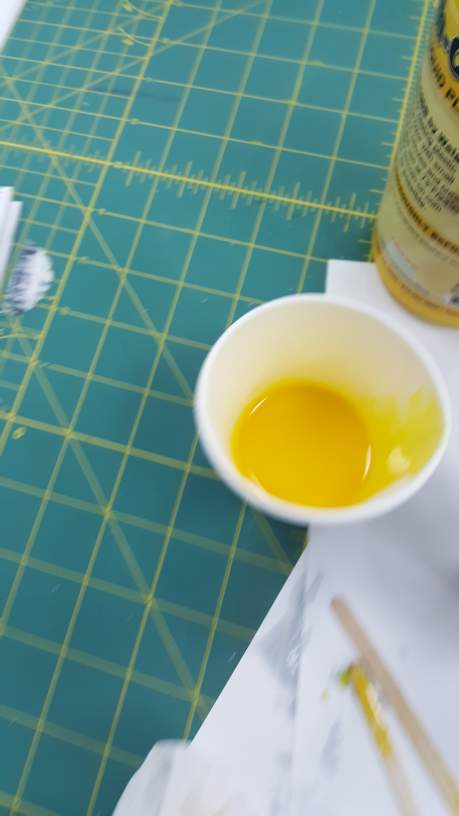
One additional step I made before mixing is I added a yellow pigment to compound B and mixed it, this way the model casted should have a yellow color.
Now mix the A and B compounds together, don't spend a lot of time in this process since the compounds cure quickly, before pouring on the mold make sure to spray the release agent the mold.
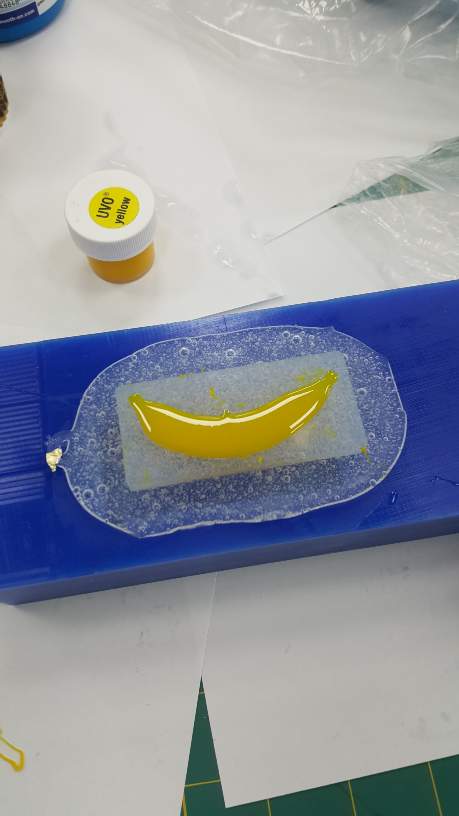
After 10 minutes, the banana is ready for harvesting.