CNC Machining
Complete your lab's safety training and Test runout, alignment, speeds, feeds, and toolpaths for your machine.
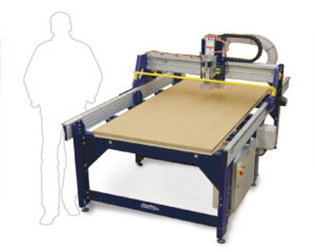
CNC Machine: Characterization
Machine factory specifications:
 |
|
|---|
Safety Rules:
Inside the Shopbot cabin always:
DO
 |
|
|---|
DON'T
- Use scarfs, earrings, collars, nothing pendant
- Put your hands inside the work bed when the machine is working
- Use the machine alone, always with an instructor present
- Use the machine tired, in a hurry, ill or in a bad mood
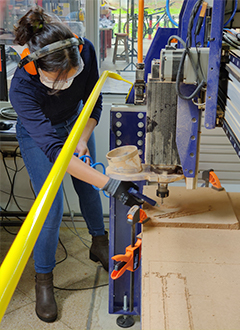
Steps to run our Shopbot
Before machining:
- Set your stock in the work bed by using screws (one in each corner of the stock)
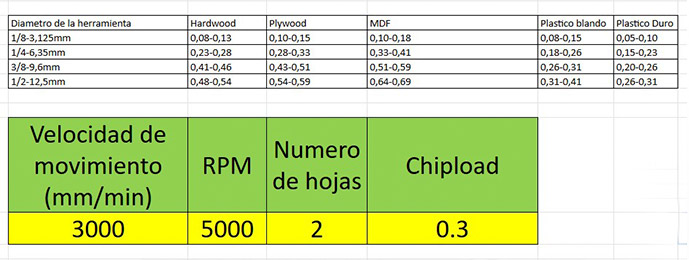
- Verify the speed and feed for the end mill and material you’re going to use using this table
- Turn on the compressor (switch up and handle in a vertical position)

- Set your end mill by taking the wrench off of the machine. To do it, turn the red button and key (turn them off) and remove the wrench.

- Put the wrench in its original position and turn the red button and key on again.
- Open shopbot 3 and press reset. You should hear a “click” noise that indicates machine is ready.
- Set XYZ origin by opening “shopbot3” software. In order to set Z put the iron bar under the end mill and the tweezer pressing it, then press the button #1 then press button #2 and move the end mill in X and Y position you want to be XandY origin and press zero axis and select X and Y (not Z because this is already set). Use the work table as Z axis, not the surface of your stock.

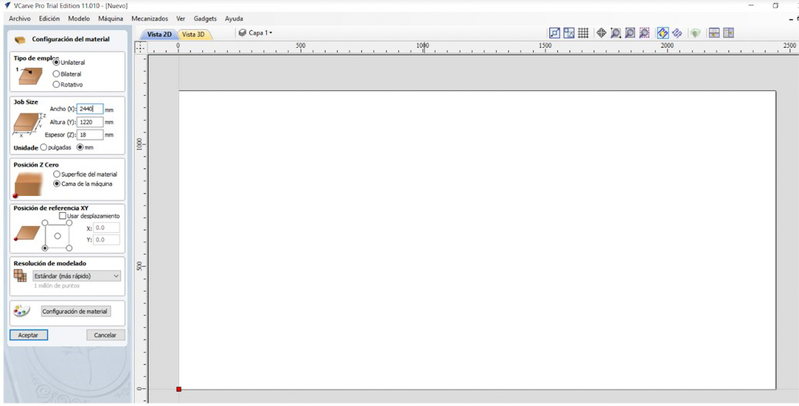
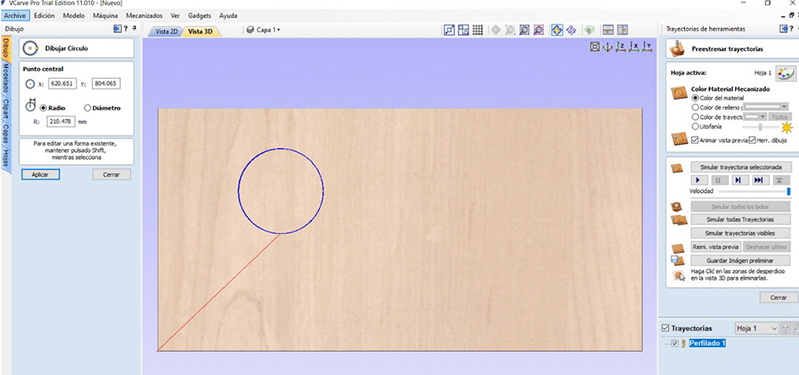
- Open Vcarve pro and set the size of your available stock.
- Use machine bed as Z cero axis.
- Load your dxf file in Vcarve software.
- Set the work you want to do:
- Select the machining work (cut, engrave, hole, etc).
- Set the depth of the work (if it is cutting it should be the depth of your stock).
- Select your end mill, speed, RPM (using the chip load parameters. We used 6000 mm/min and 10.000 RPM for a ¼ end mill with 2 flutes) and edit the amount of passes in order to do so. (proportionally to the diameter of your mill, if your mill is 6,7mm and your stock is 18mm the best is to cut it using 3 passes.
- Define the trajectory of your end mill, (on the line, outside or inside depending on your design)
- Add tabs to hold the pieces down while they are being cutting
- Press “calculate” and see the final job in 3d, then simulate the job by pressing play.
- Save the work trajectory generated.
- Open Shopbot3 and press cut part and select your file
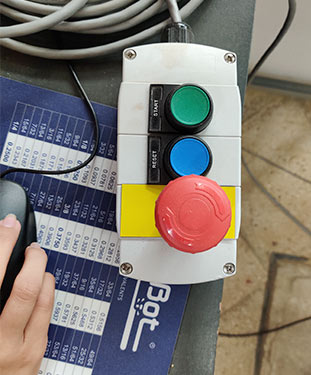
- Press the start button (spindle should start rotating), then press ok (the end mill should start moving). Your work will be in process. Before starting your work directly in your stock, is a good to practice to simulate it in the air, by changing the Z axis manually (write 30mm instead of cero) and play the job, if you see everything is fine stop the job by pressing the red button or the space bar in your keyboard. and starting the process all over again.
While the machine is working:
- Be there, don’t leave the machine alone, press the red button or the space bar in the keyboard if anything is acting suspiciously
- Be in a safe distance from the machine, don’t put your hands in
After the work is done
- Clean the area using the vacuum machine
- Remove your pieces using gloves
- Remove the stock left
Feeds vs Speeds
- Feedrate: The distance the spindle moves relative to the time it takes to move along the workpiece. Units are distance / time, usually in/min or mm/min.
- Spindle Speed: The rotational speed of the spindle. Units are revolutions per minute or RPM.
On one hand, if the feedrate is fast and the spindle speed is too slow, the end mill will break under the lateral pressure.
On the other hand, if the feedrate is slow and the spindle speed is faster than it needs to be, there will be little risk of breaking the end mill, but the job will take longer than it needs to
Direction
It refers to the direction of the spindle’s travel in relation to the rotation of the end mill. Spindle rotates clockwise.
- Conventional milling: End mill contacts the stock on the left side of the tool. This means that the chip size effectively starts at zero and increases towards the end of the rotation. This generally yields the best results in terms of finish quality and accuracy.
- Climb milling: End mill contacts the stock on the opposite side, meaning the chip size starts at the maximum and tapers to zero at the end of the rotation. This puts more strain on the tool and can decrease accuracy if the stock deflects.
Cut Direction
- Downcut: The cutting edge pushes the material down as it cuts. This end mill results in a very clean top surface. But since the chip are pushed downs down, they tend to get compressed, which can result in burning and sticking when cutting plywood.
- Upcut: The cutting edge of the flute is oriented up against the material so the chips are ejected, preventing burning. When cutting all the way through, it results in a clean cut on the bottom of the material, but also has a tendency to lift the material up.
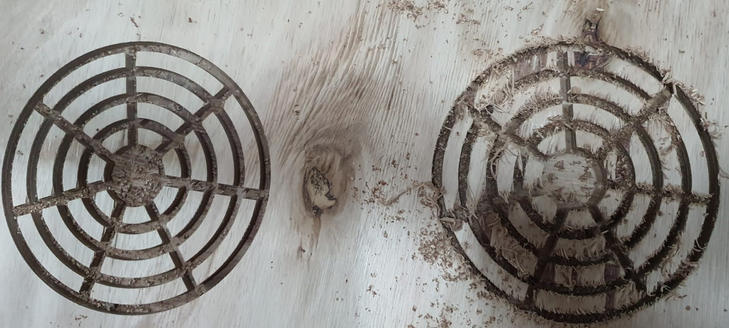
After some tests, we found that the following values are suitable for working on a 18mm plywood sheet:
- SPEED: 6.000 mm/min
- RPM: 10.000
- End mill: 1/4 (6.721 mm) with 2 flutes
- Trajectory: conventional, down cut
- Offset: depending on your design
