Task to be carried out this weekGroup Assignment
Action Plan
| Date | Work Allocation |
| 16th March | Lecture on Molding and Casting by Prof. Neil |
| 23rd March | Demo and lecture on week's assignment by the local instructor(Take-san) |
| 24th March | Making my mold design on fusion 360 |
| 25th March | Milling the design on SRM-20 machine |
| 26th March | Making negative mold using silicon |
| 27th March | Casting |
| 28th March | Documentation |
What is Molding and Casting?
Molding is one of the five core processes involved in rubber and plastic manufacturing, alongside casting, forming, machining, and additive manufacturing.
It involves shaping a liquid or malleable raw material by using a fixed frame commonly known as either a mold or a matrix.
The mold is usually derived form the initial design or design of the final object.
A molding process uses pressure and heat to fill the cavity of a mold, a rigid frame also known as a matrix. The raw material, typically a pliable one like plastic, glass, or ceramic, is kept under pressure until it solidifies or vulcanizes (i.e., begins to harden)
A mold is a counterpart to a cast. The very common bi-valve molding process uses two molds, one for each half of the object. Molding is generally used to reproduce multiple uniform copies of the final product.
Types of Moling Process
Casting is a manufacturing process in which a liquid material is usually poured into a mold, which contains a hollow cavity of the desired shape, and then allowed to solidify. The solidified part is also known as a casting, which is ejected or broken out of the mold to complete the process. Casting materials are usually metals or various time setting materials that cure after mixing two or more components together; examples are epoxy, concrete, plaster and clay. Casting is most often used for making complex shapes that would be otherwise difficult or uneconomical to make by other methods. Heavy equipment like machine tool beds, ships' propellers, etc. can be cast easily in the required size, rather than fabricating by joining several small pieces.
Making the mold design using Fusion 360
For this week's assignment, as an individual assignment I had to create a mold design, mill it then caste to produce the designed product.
Initially, my plan was to create a mold for the refractory brick that I was going to use in my final project. However, I found that the wax for making the silicon mold was quire small.
The height od the wax was only 30mm and for my brick mold, I need a 100mm-120mm mold. Hence, I eventually dropped the idea and planed to make the mold for my bricks using wood.
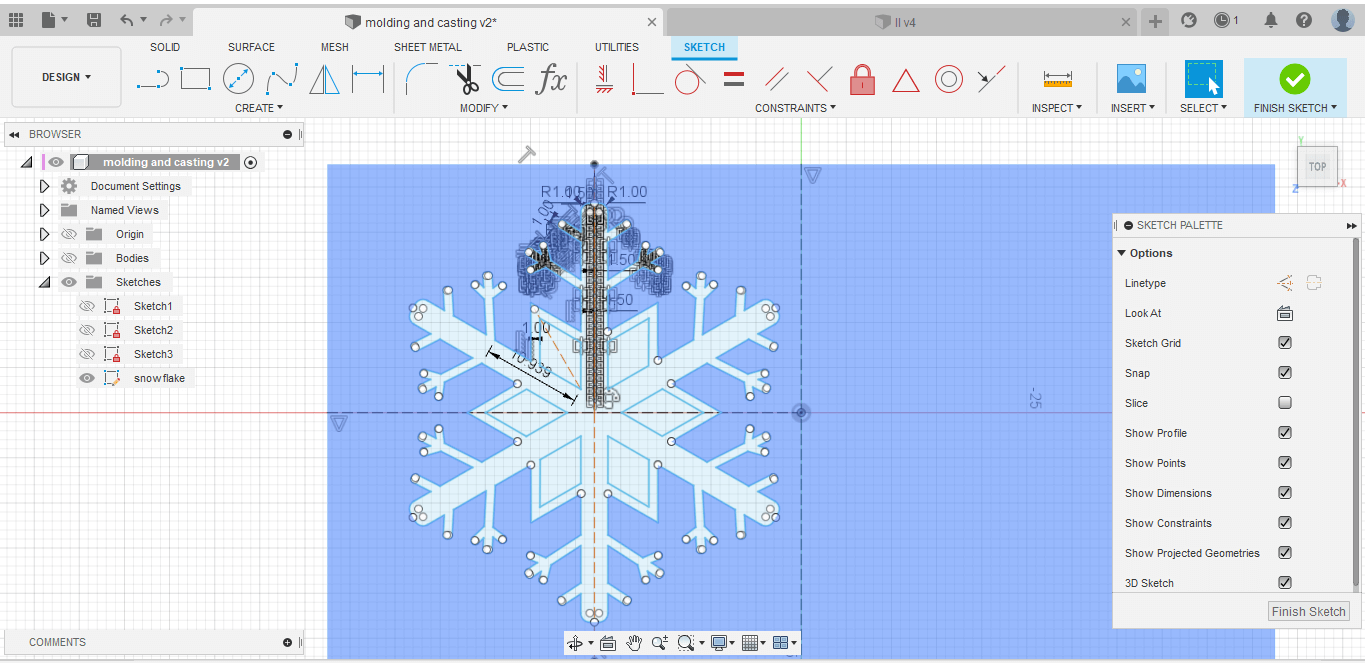
Instead for the week I made two simple designs. The first one was a snow flake. I really like the movie "Frozen" and I have always wanted a snowflake necklace. Thus, I designed a snowflake.
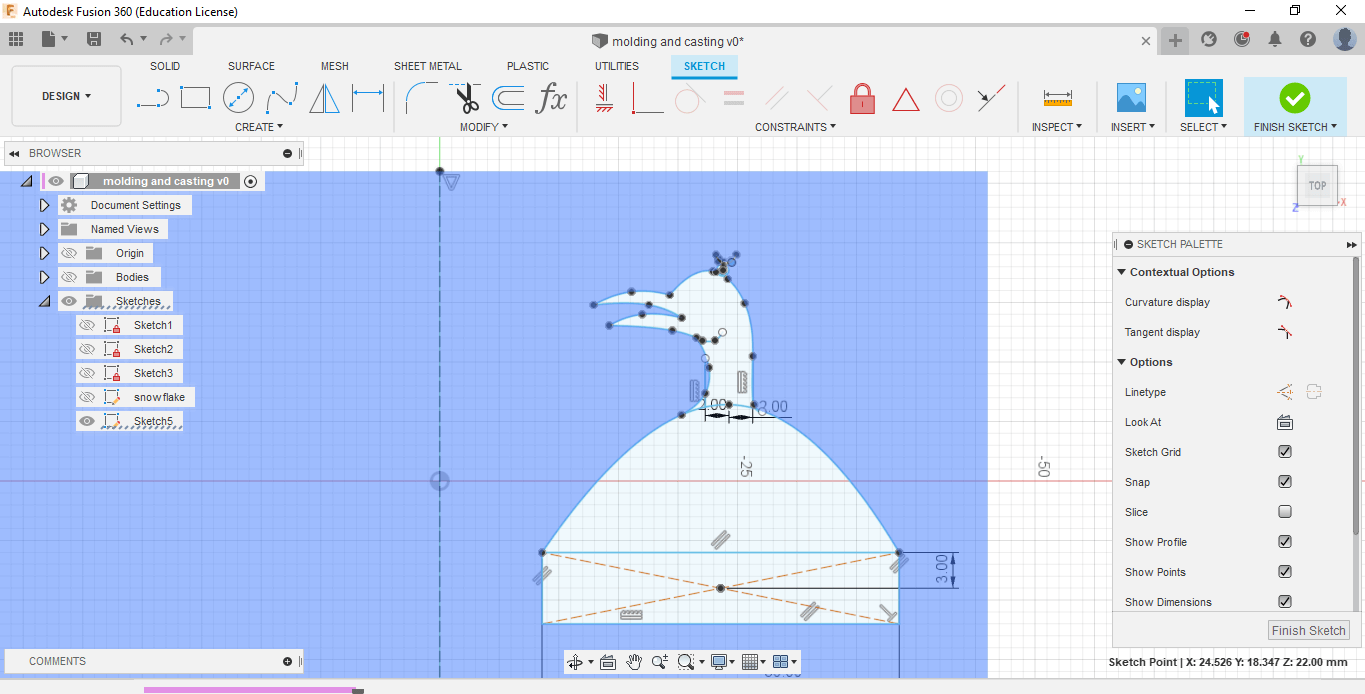
For the second design, I created the a design for the "Raven Crown" which is the crown worn by the king in my country. I tried import SVG of the crown into Fusion 360 but becaue the design had different components,
it caused issues when I tried to extrude. So, finally I decided to had draw the design.
For making the design of the raven crwon, I used the splice tool. I looked for a stensil online and tried to recreate that design. I also made some detailings on the lower part of the crown.
For creating the snowfalke design, I created the design of oneside of a branch. Then I mirrored the design and used circular design tool to complete the snow flake design. The process is as shown below.
Finally I extruded the design and the final design was as shown below. As a slast step, I exported the .stl file of the design
Milling
Once the design was finalized, I exported the .stl file. The next step was to mill the design on the wax using Roland SRM-20 Machine. Our instructor cut the wax abd distributed to us. The dimensions of the wax I received were 150*70mm.
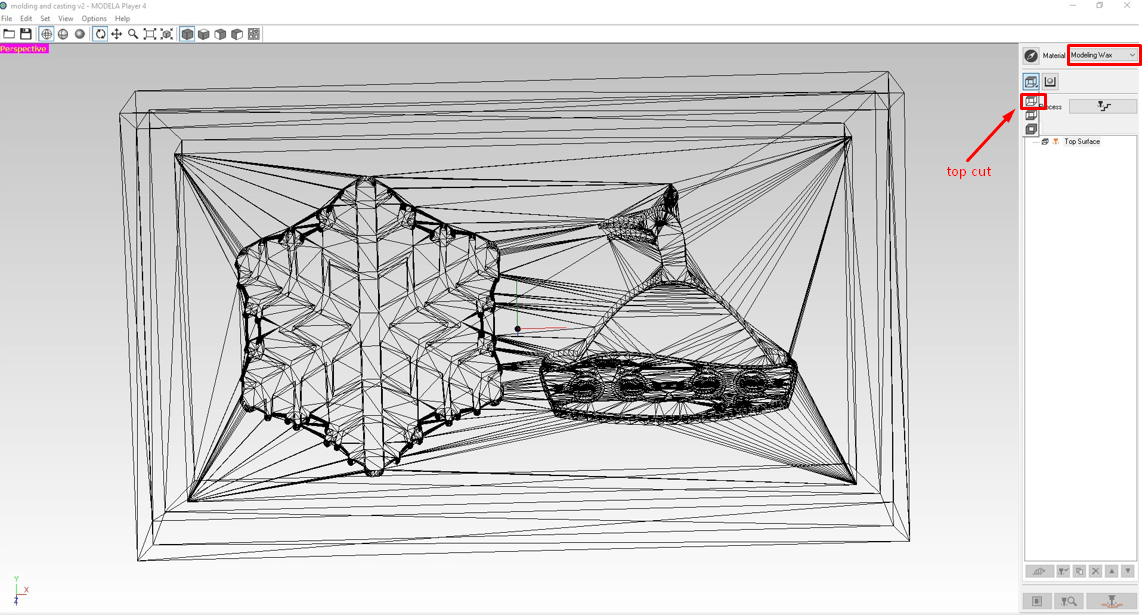
Before, I began with the milling process, I imported the .stl file into the Modela player to create the path for roughing and finishing toolpath.
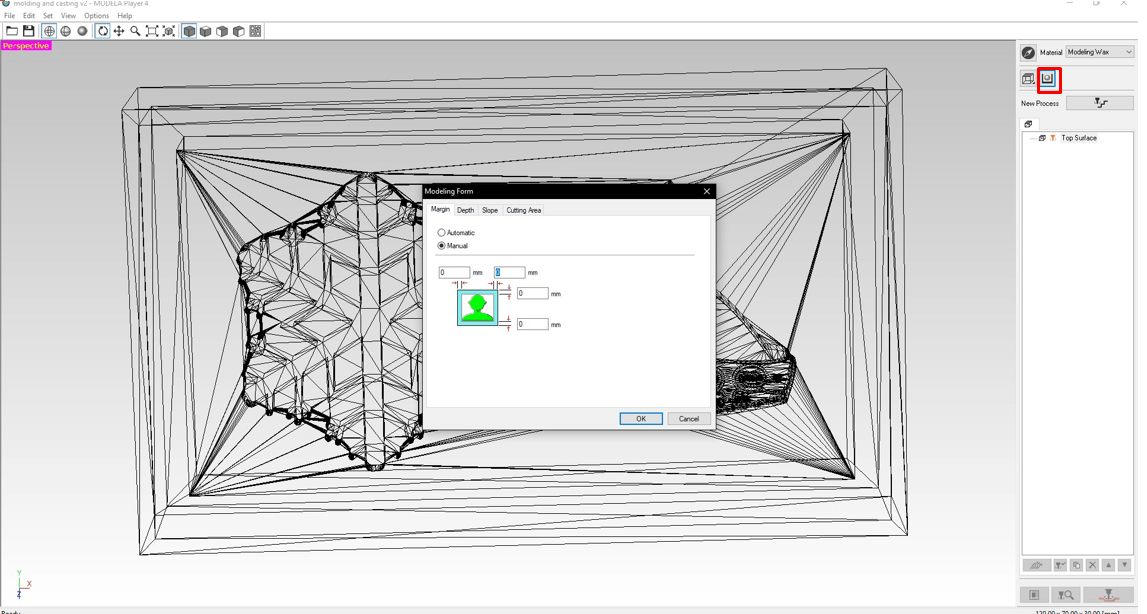
First we have to select the material. Select 'WAX' in materials. Select the top cut orientation.
Next click on the modelling form. Since I have already kept edges in my model, I kept all the margin values as ZERO.
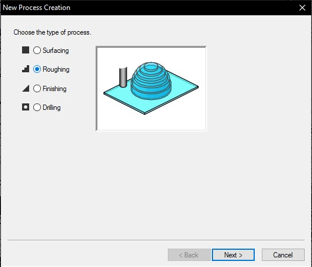
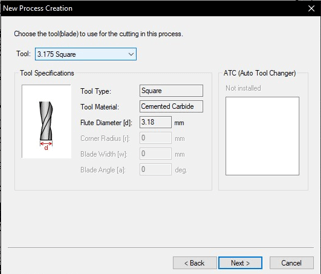
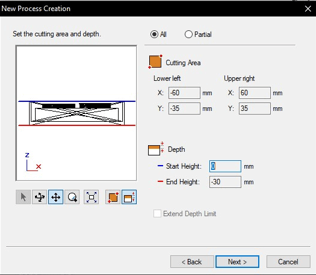
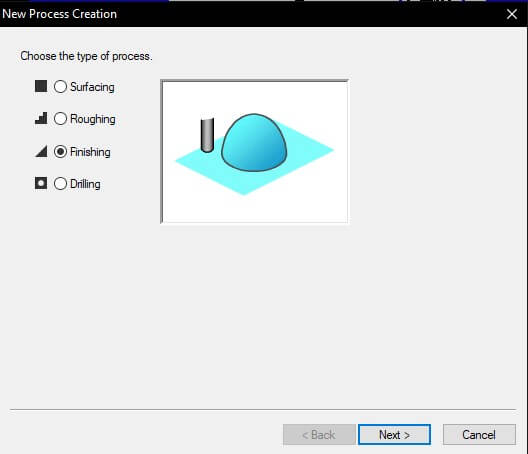
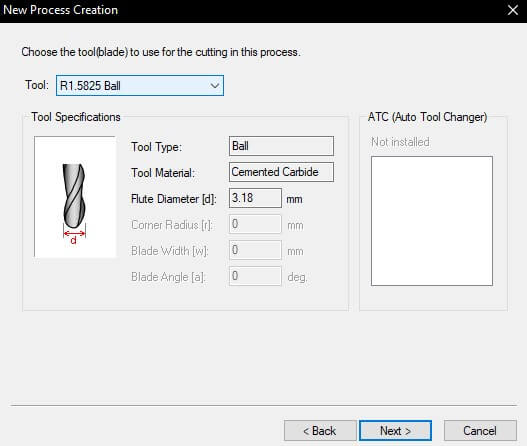
Next I created a new process and selected roughing. Then I set the settings as shown in the images below. I selected the 3.175 square bit as the roughing tool.
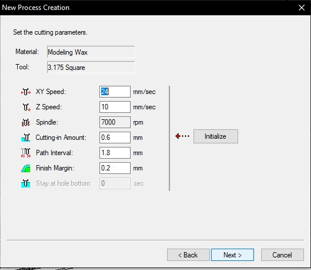
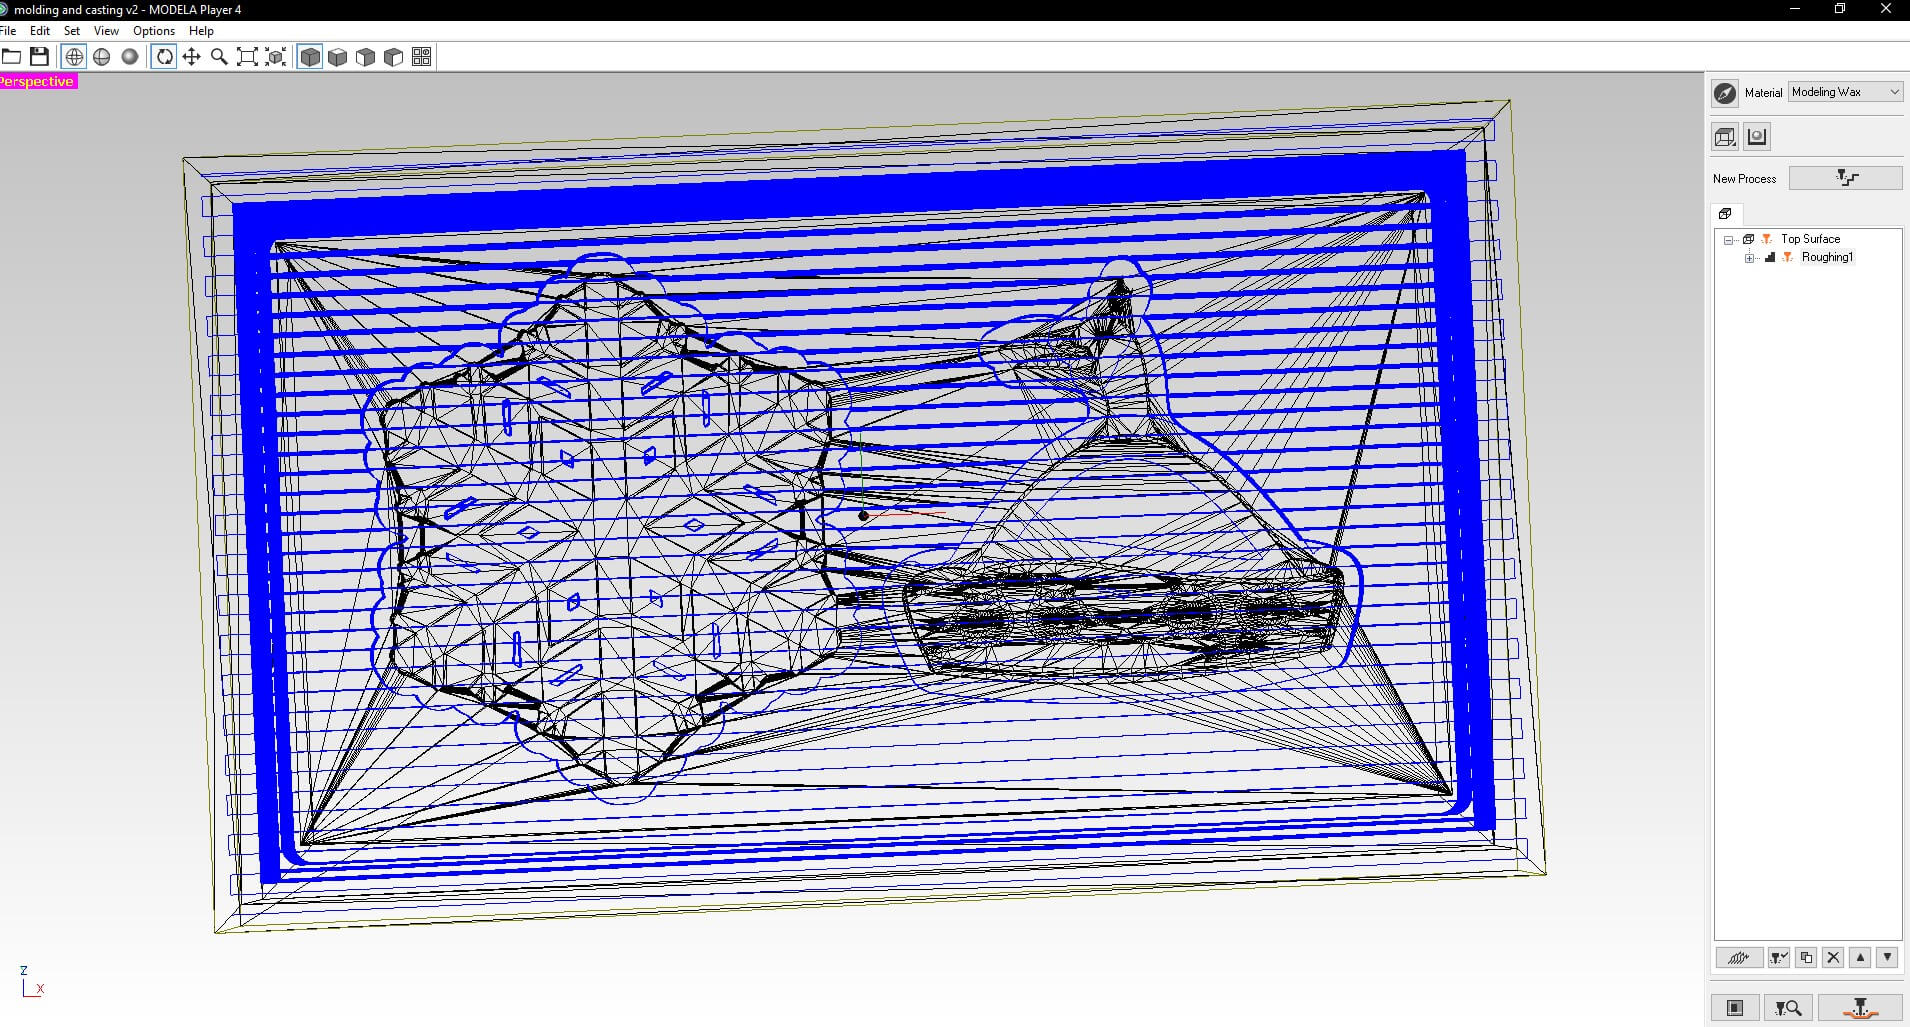
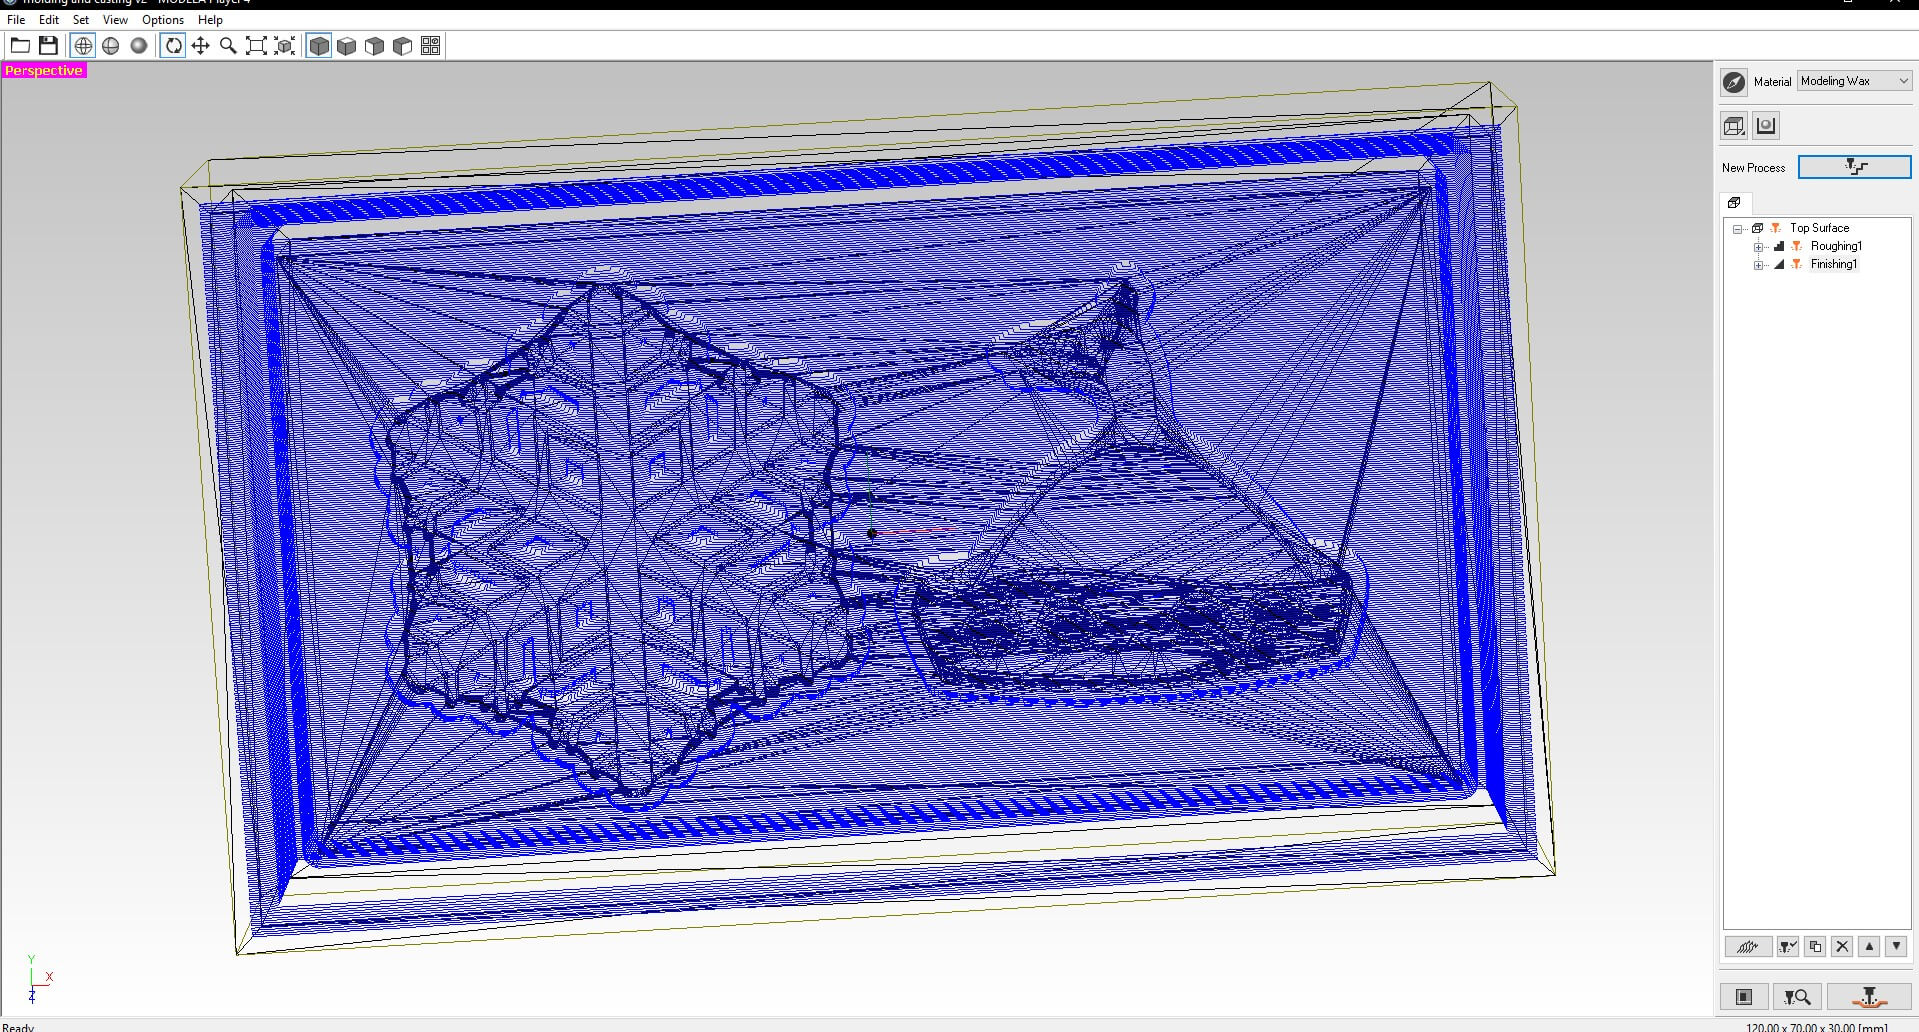
On clicking finish, the tool path for roughing is calculated. The roughing tool path is as shown below
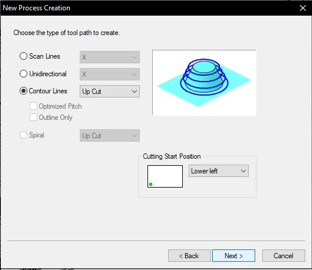
Next I created a new process for the finishing cut. I clicked on new process again and the following setups were made.
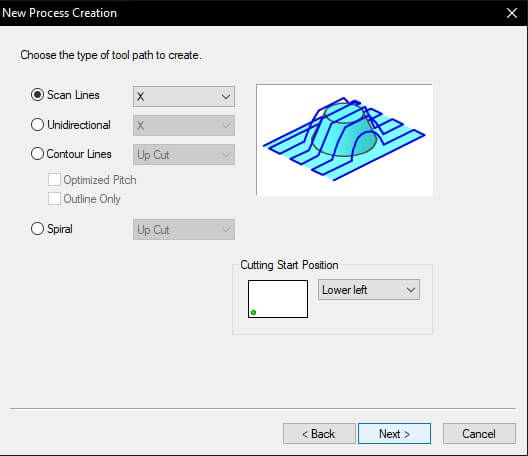

The finishing tool path came as shown below.
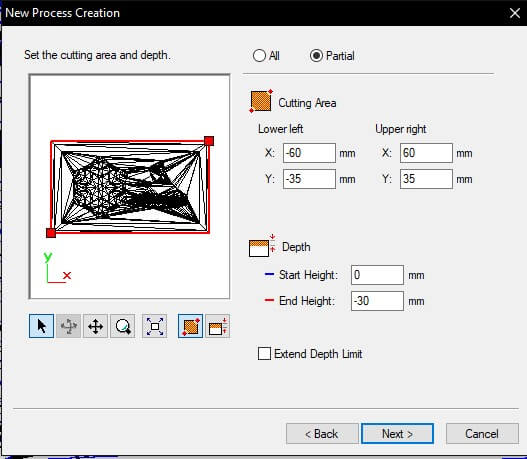
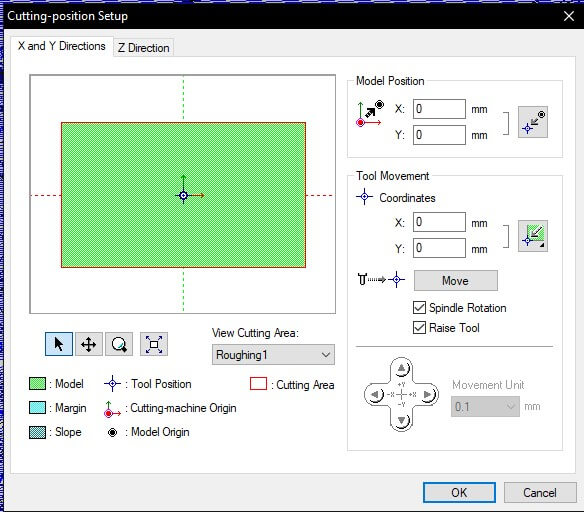
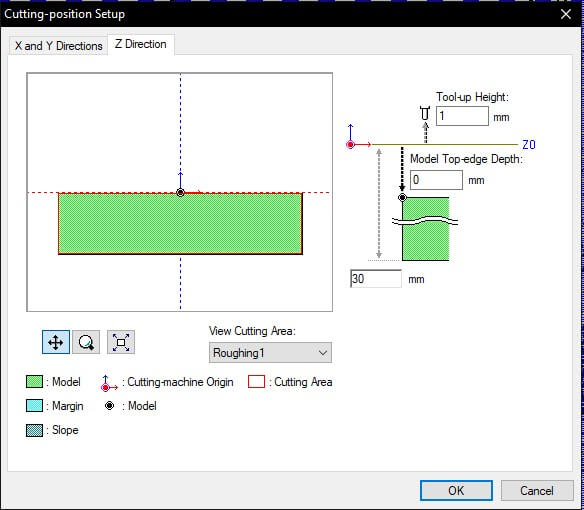
Next I set up the cutting position. Since I have depth specified on my model, I kept all the x-y-z positions as ZERO.
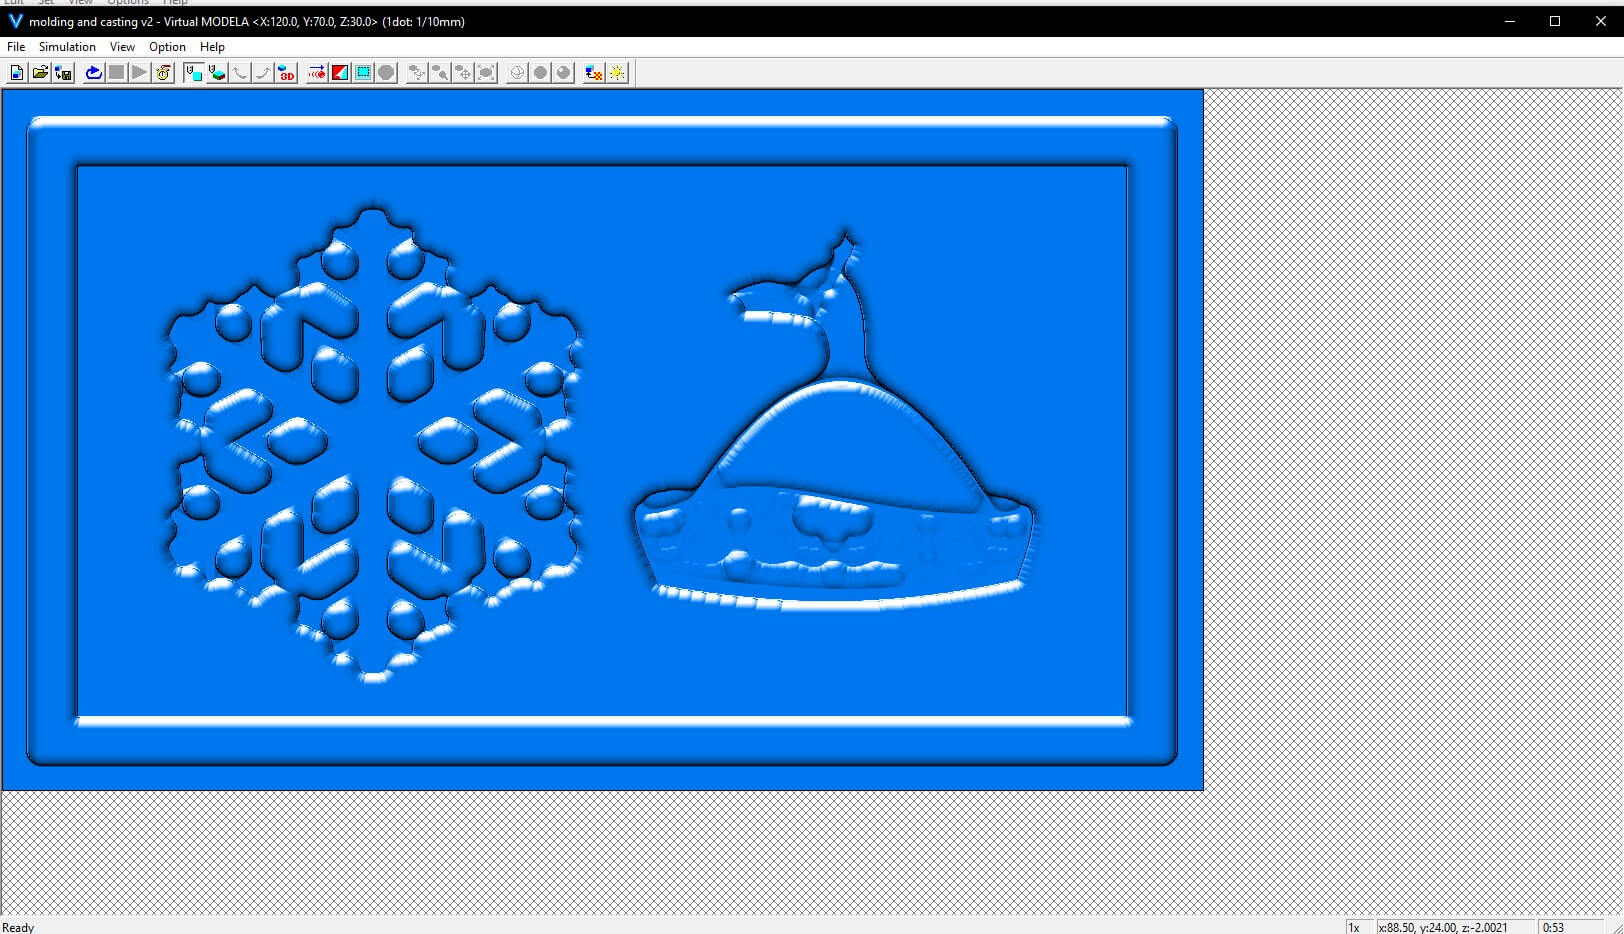
The preview of the final cut was as shown below.
The final step is to save both the tool paths and then open it in the vpanel of SMR-20. I followed the same steps followed during the pcb milling week.
Sart the milling with roughing first and then follow with finishing to get a clean cut.
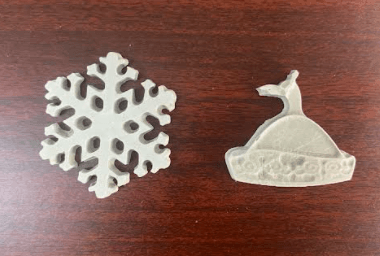
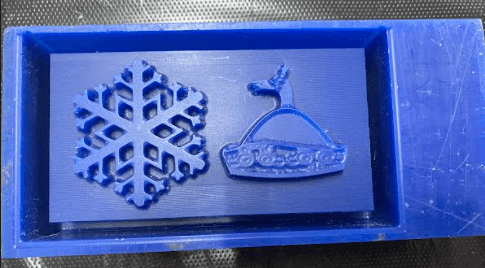
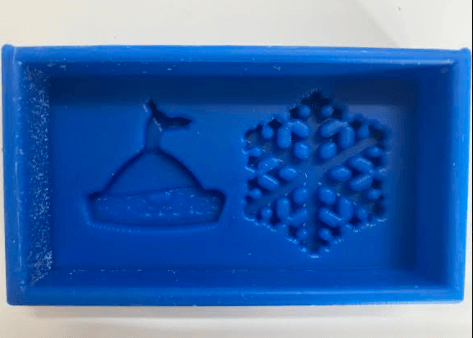
Once the milling is completed, I took out the wax block and removed the wax powder using a brush. The final milled design was as shown below.
Creating a negative mold.
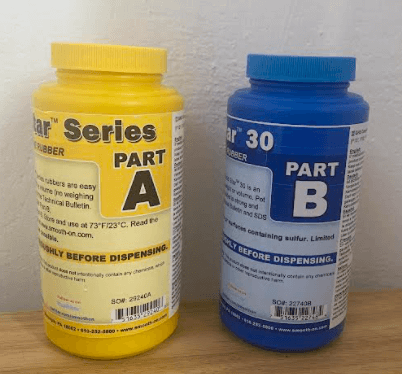
We use a silicon material to create the negative mold of the design. The silicon material that I used was the platinum silicon rubber from the smooth-on company. There are 2 parts for the silicon rubber namely, Part A and Part B. We mix the two parts in the ratio of 1:1 by volume. When mixing, I was told to ensure to mix throughly and carefully to avoid as many bubbles as possible.
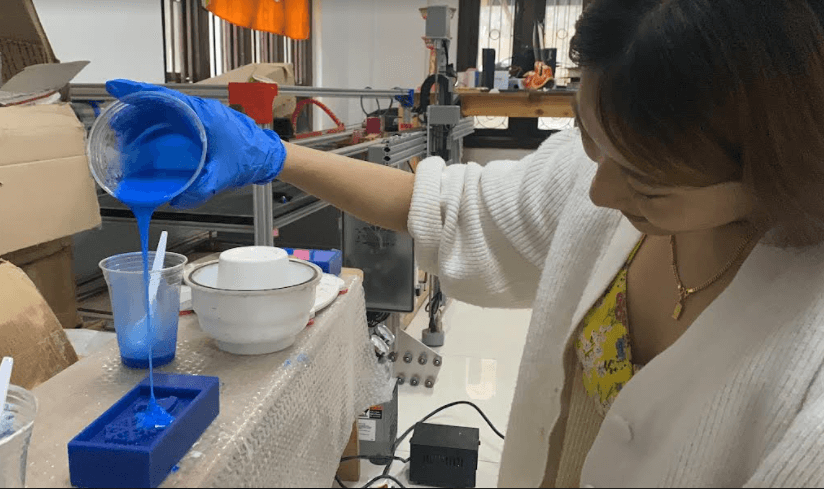
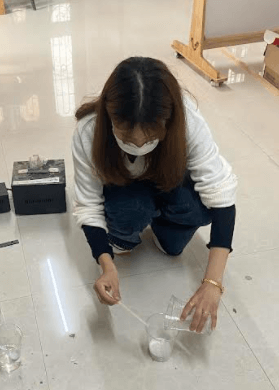
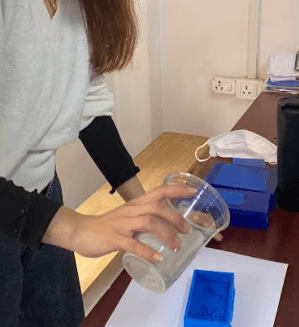
Once the mixture was made, I poured the silicon into my mould. I pour it in from a high distance, such that a thin stream is poured in. This ensures that less air bubbles are created in the silicon mold. Then I tapped the wax mold to remove air bubbles form the silicon
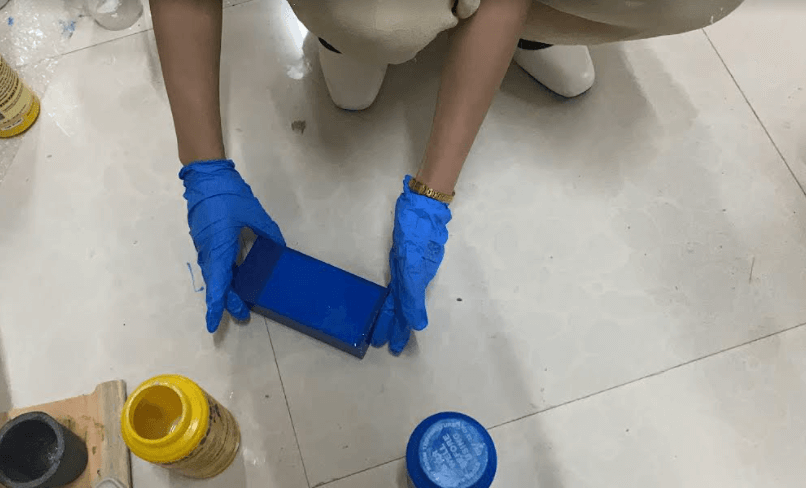
I then let it dry over night. The next day, I tried to remove the negative mold from the wax but I had difficulty in removing it. I checked online and found that I could immerse the wax in hot water to easily remove the silicon but it didn't work for me. I then tries to remove it using a thin chisal but while I was trying to remove the mold one of the sides broke. It was a mis-hap but somehow ut made taking out the negative mold much easier.
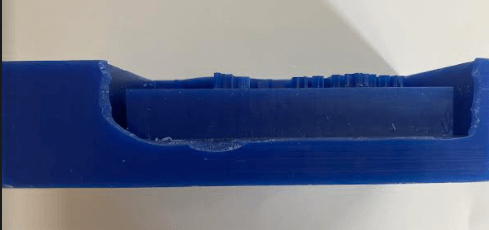
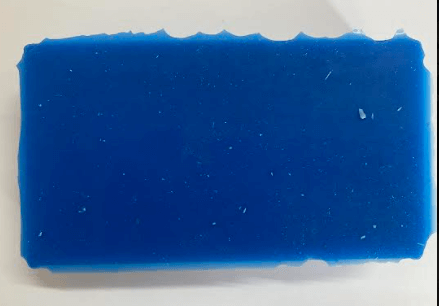
The final negative silicon mold came out as shown in the picture below.
Casiting using Hydrostone
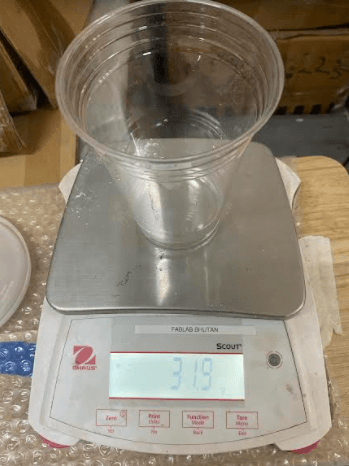
For casting my design, I used hydrostone mixture. Hydrostoneis among the hardest and strongest plaster available and is most commonly used in tooling and art object applications. It is a wear-resistant material and is designed for casting detail and strength and is 40 to 50 percent harder as compared to other casting plasters. The hydrostone powder to water ratio that I used to create the hydrostone mixture as 100:32 by weight.

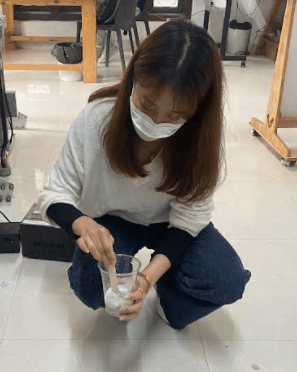
I then poured the mixture into my silicon mold in a similar to way as that of when I poured the silicon into the wax mold. Then I left it to set for about 2 hours.
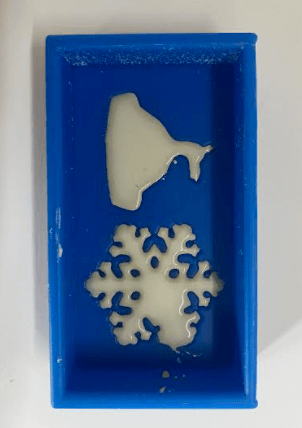
After 2 hours, I took out the set hydrostone object and it came out quite nice.