
Molding and Casting
Group Assignment
Group Assignment:
review the safety data sheets for each of your molding and casting materials,
then make and compare test casts with each of them
extra credit: try other molding and casting processes
The group work that our group has done can be seen here
Individual Assignment:
design a mold around the stock and tooling that you'll be using,
mill it (rough cut + three-axis finish cut),
and use it to cast parts
extra credit: use more then two mold parts
Mold Design
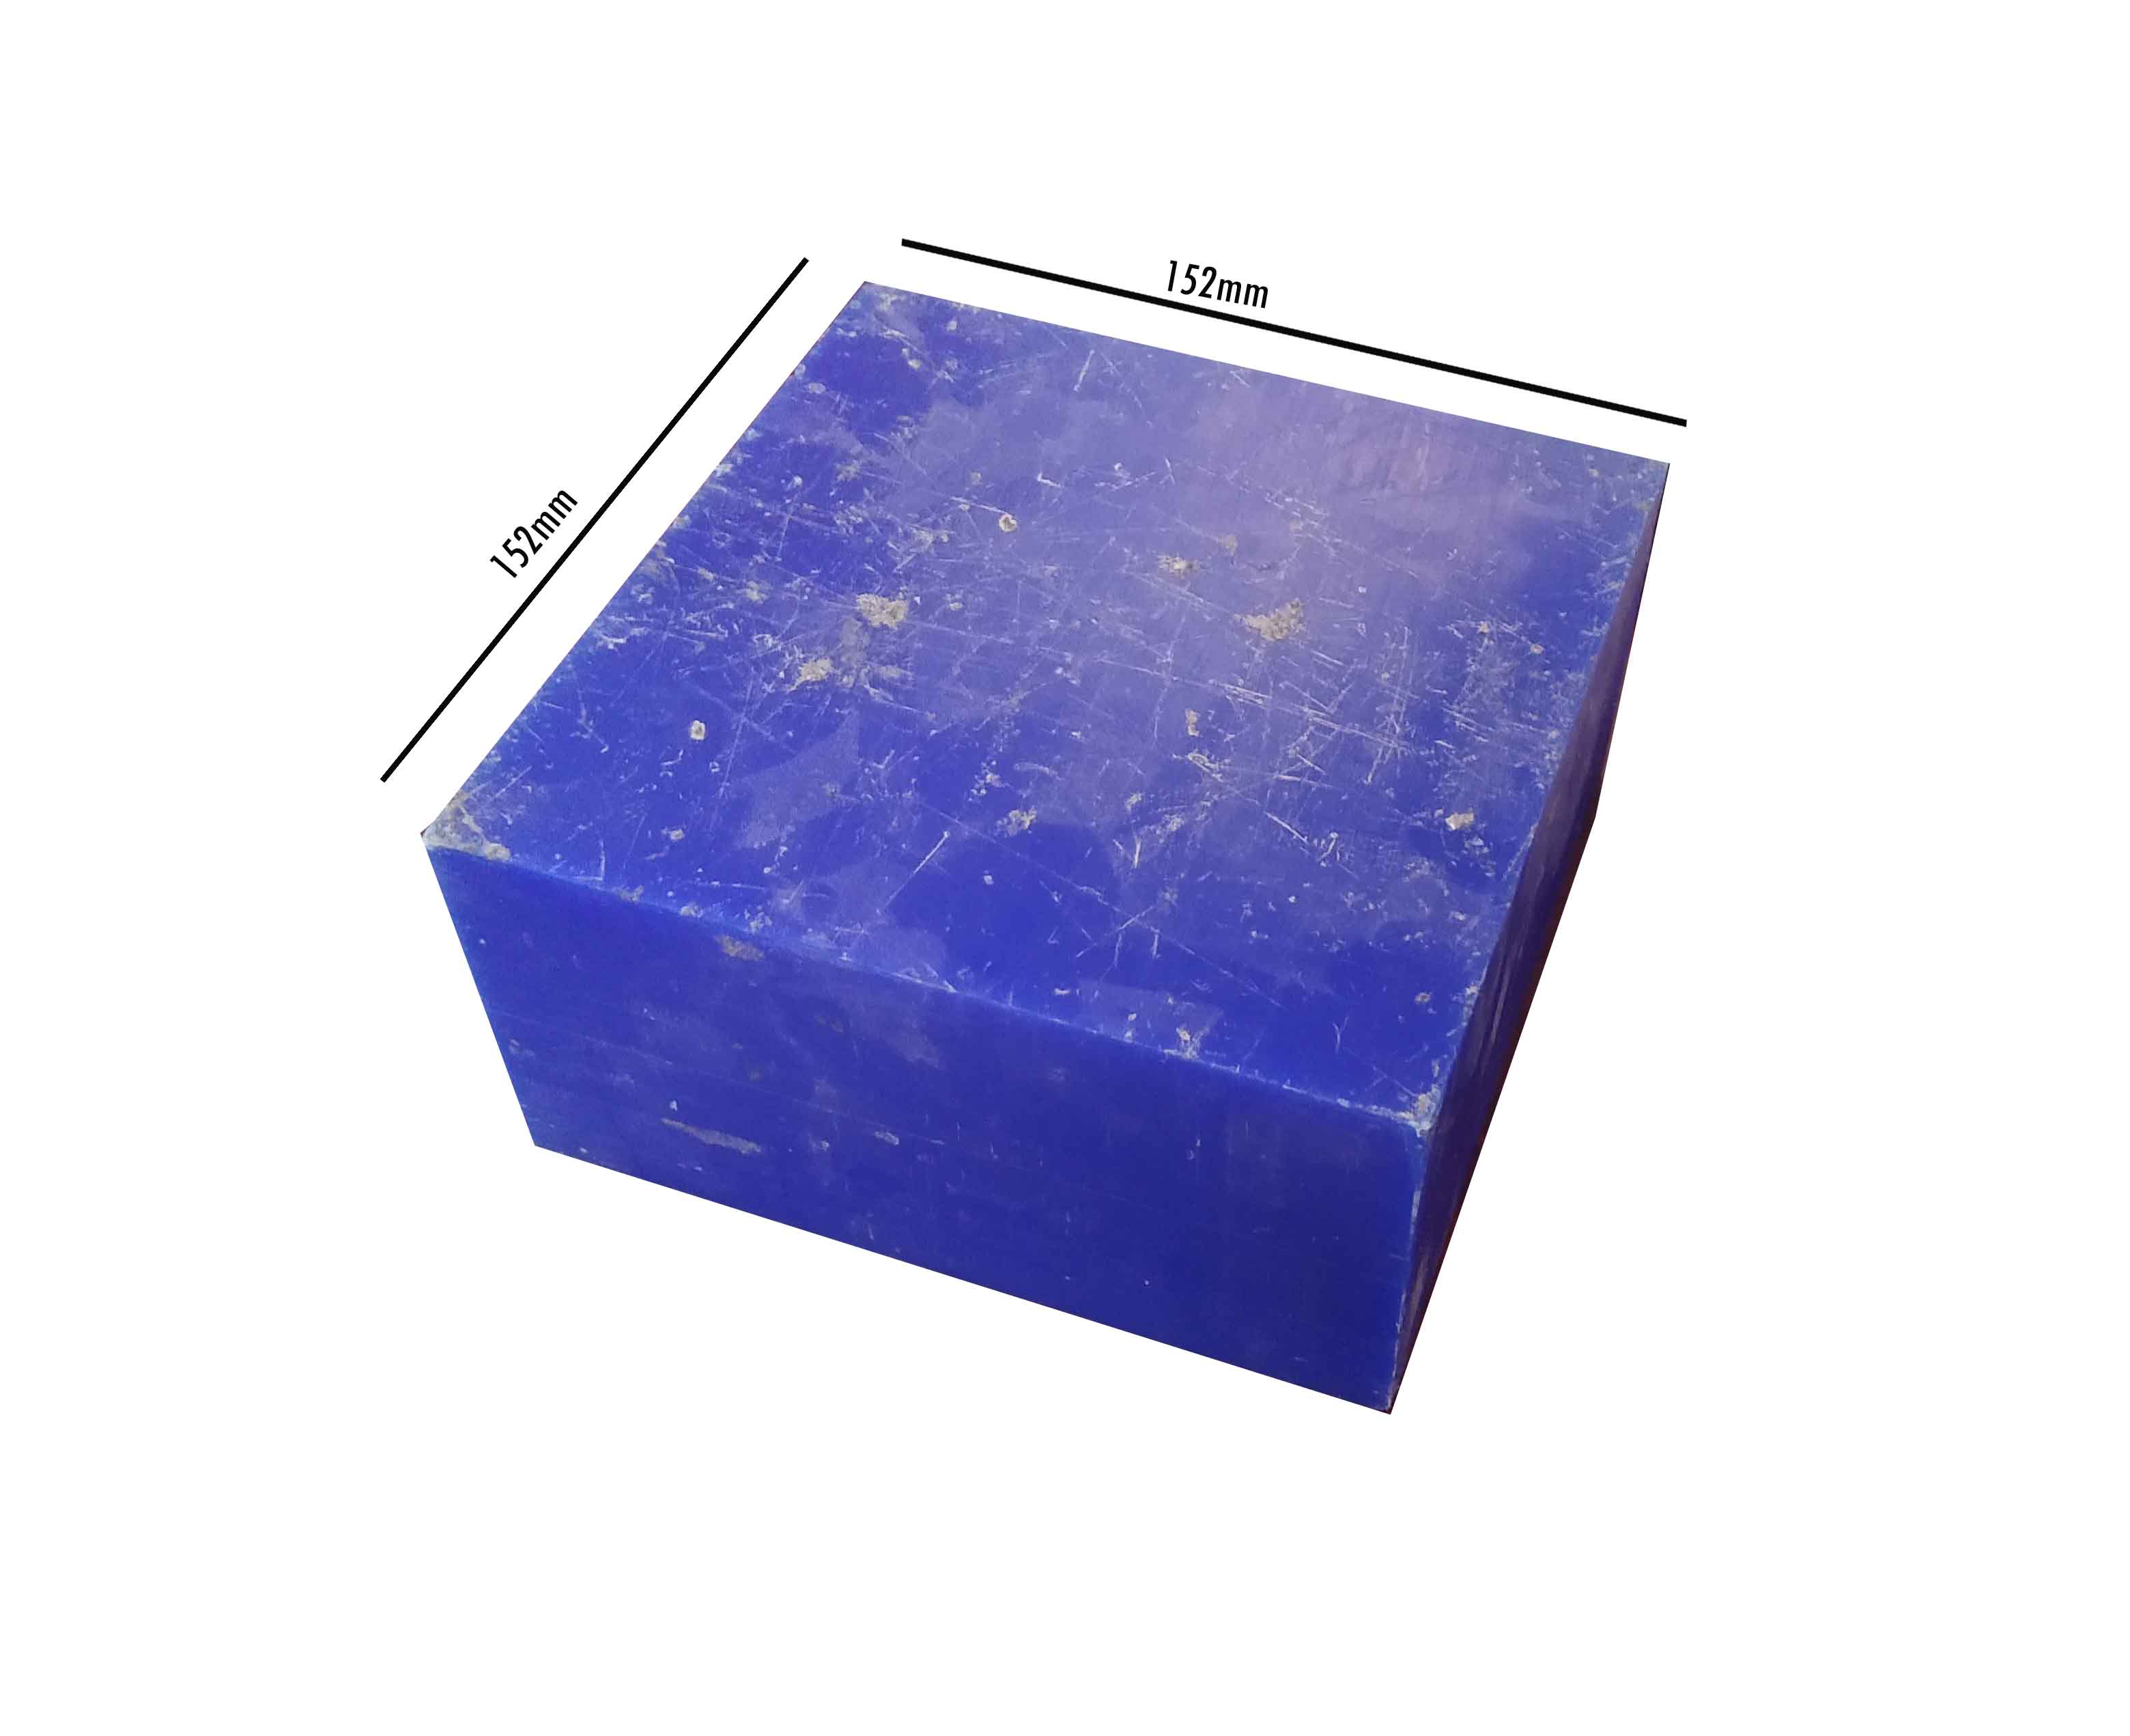
I was given a block of wax which is 152X152X73mm. I have to design something which will fit in this.
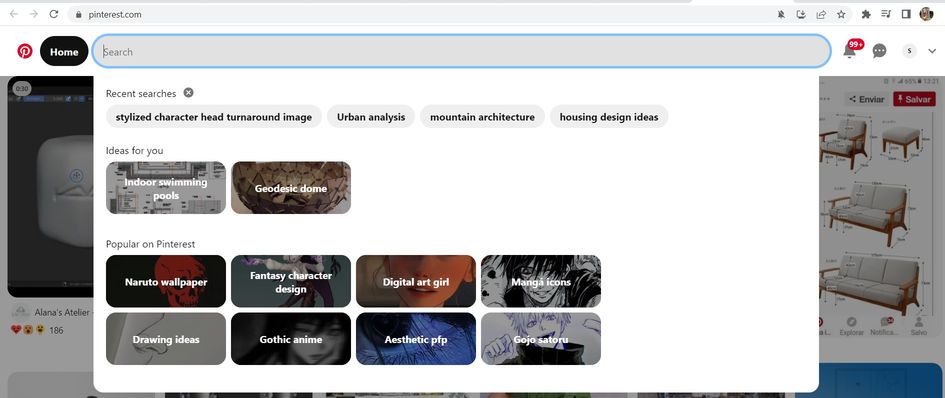
To make the things little interesting I first tried to design a mold of batman using Blender. I I search for a stylized character turn-around image in pinterest.com
I downloaded the a good quality image of batman by cdnb.artstation.com from this site which was done by Julen Urrutia. I als referred a YouTube Tutorial by CG Dream
However, since I am trying the blender as a beginner, I was not able to make a significant progress in this venture.
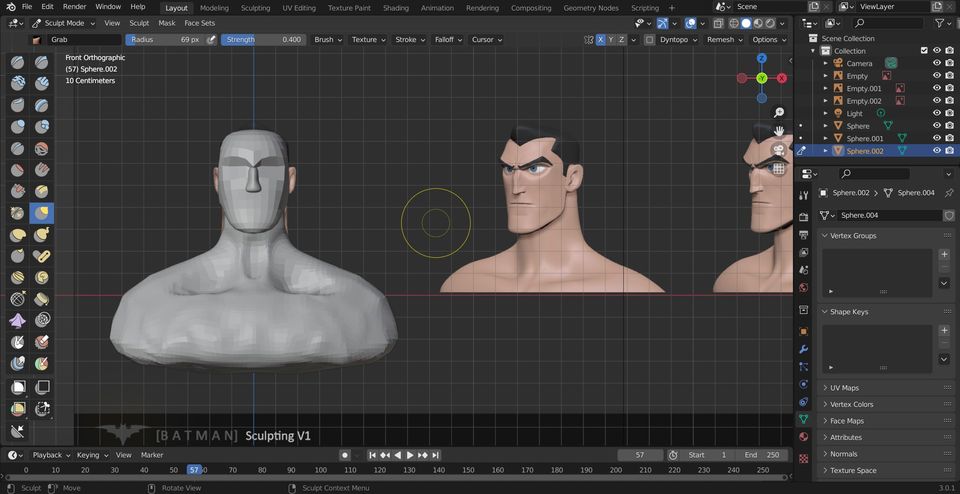
Therefore, I have to give up after so many attempts to make it perfect. May be someday, I can perfect on this. My works are also hindered by the practical assignments of previous weeks like Computer Controlled MAching and 3D Scanning and printing. Therefore, I ditched this idea of batman sculpt. I will try some traditional designs just like many of my colleagues.
I downloaded the traditional sculpture and inserted it as a canvas in fusion 360. Open Fusion 360 ---> Go to Insert ---> Canvas and Go to the file you have saved.
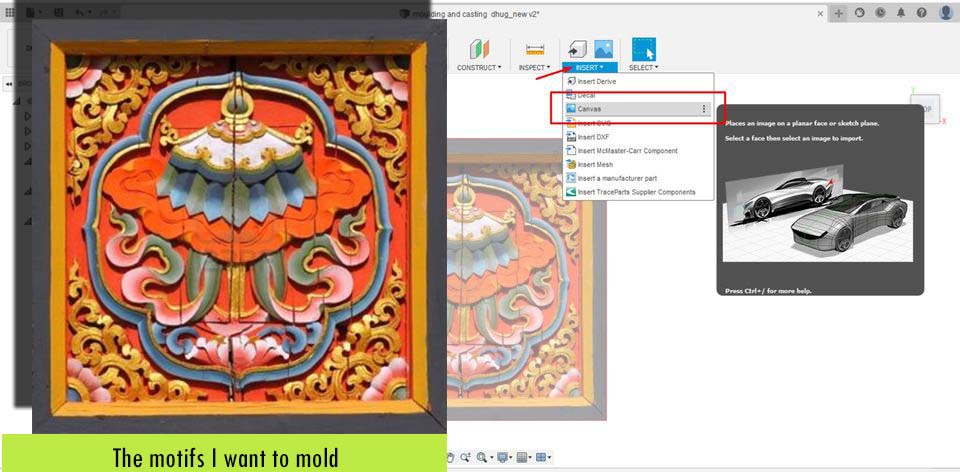
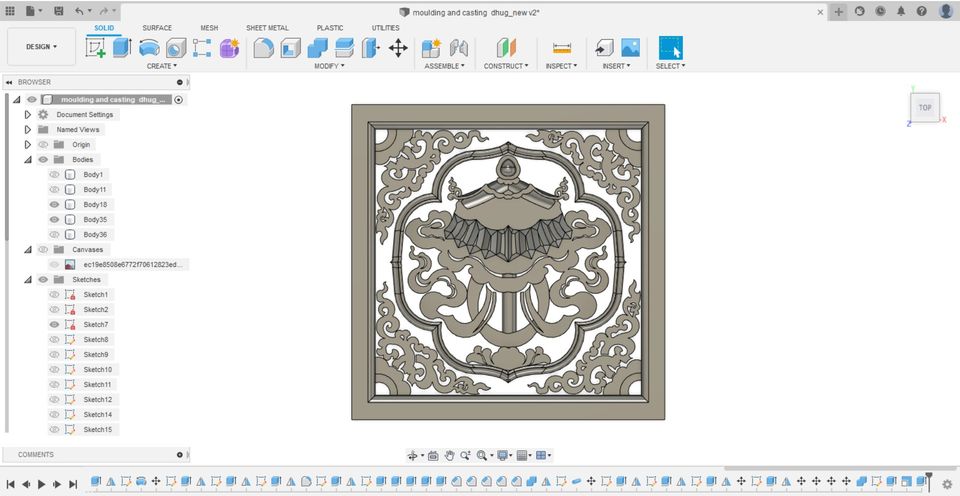
Since, I don't have much idea on the sculpting in Fusion 360, I modeled it using the design mode only. I traced the images, done patterns and mirror command to achieve the desired outcome. Quite long but interesting process.
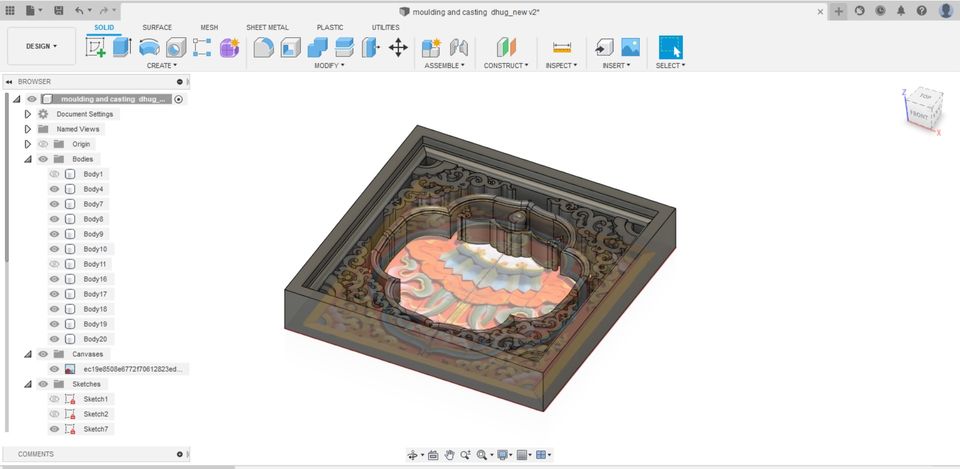
Finally, I was able to achieve this much.
For now, I have not been able to mold my design as the lab has only one machine it has been engaged by other colleagues. I hope to complete soon.
Please find my model here.
Creating a Toolpath with Modela Player 4
Finally, I was able to mill my design with the wax block in the SRM-20 milling machine.
I converted my final design to .stl format and you can download the file from here (2.99mb)
I emailed the file to a desktop where SRM-20 machine is connected. There, for the
purpose of molding and casting, we have installed Modela player 4, you can also find the details of it
here. The software allows you to
create:
1. Surfaces
2. Roughing
3. Finishing
and 4. Drilling
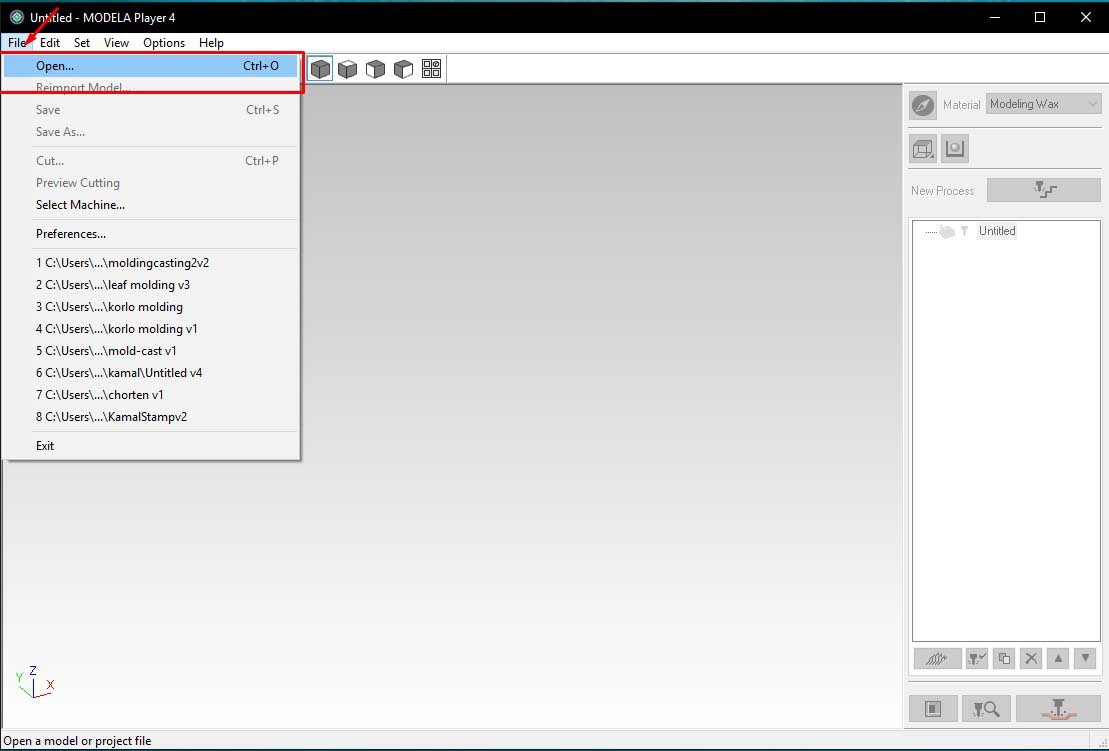
To use the software to make a toolpath for my design file which is in .stl format:
--->Open the softare by double clicking on it.
---> Go to files ---> select your file.
After importing your files, make sure that you have selected material as a Modeling wax. Select the
model windows and select --->top, and in the modeling form, I kept the offset as 5mm all around
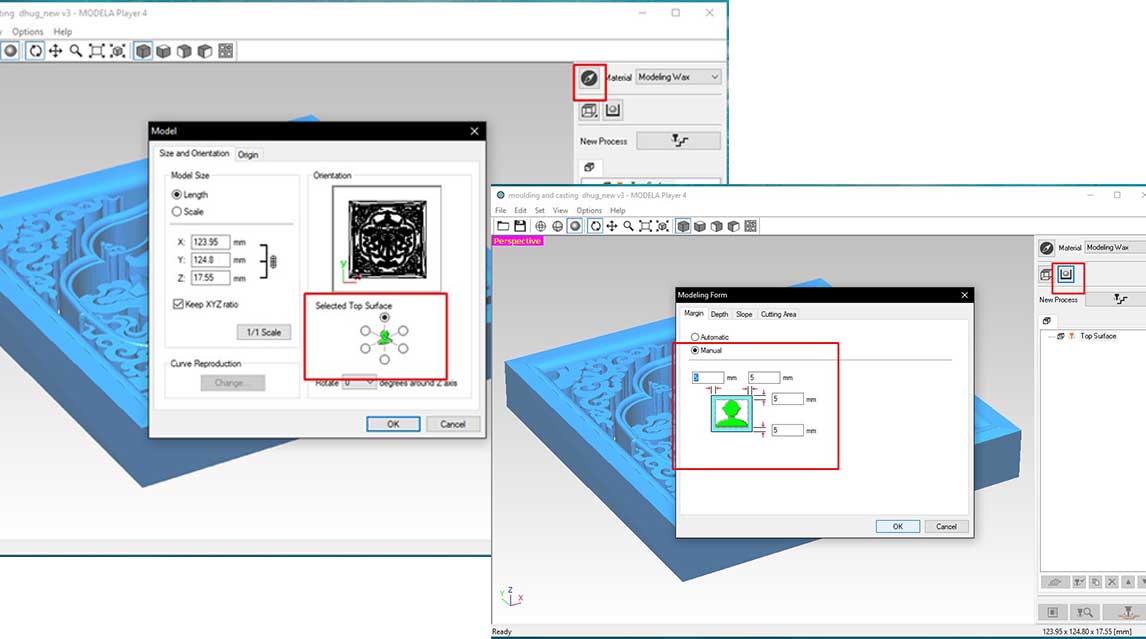 after that, choose --->New Process (highlighted).
Now the "New Process Creation" windows will pop up. From here choose --->roughing.
after that, choose --->New Process (highlighted).
Now the "New Process Creation" windows will pop up. From here choose --->roughing.

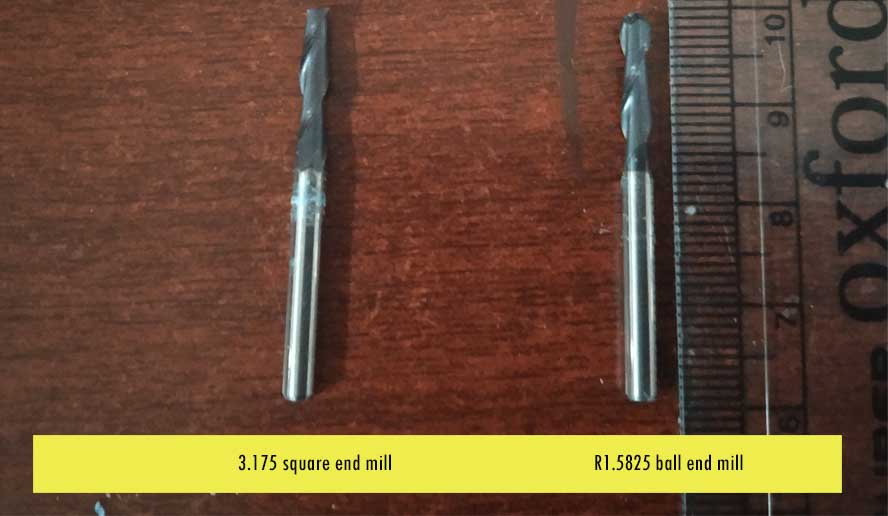
Next, select "top" as the ---cutting surface and choose the tools/blade as --->3.175 square and ---> go next.
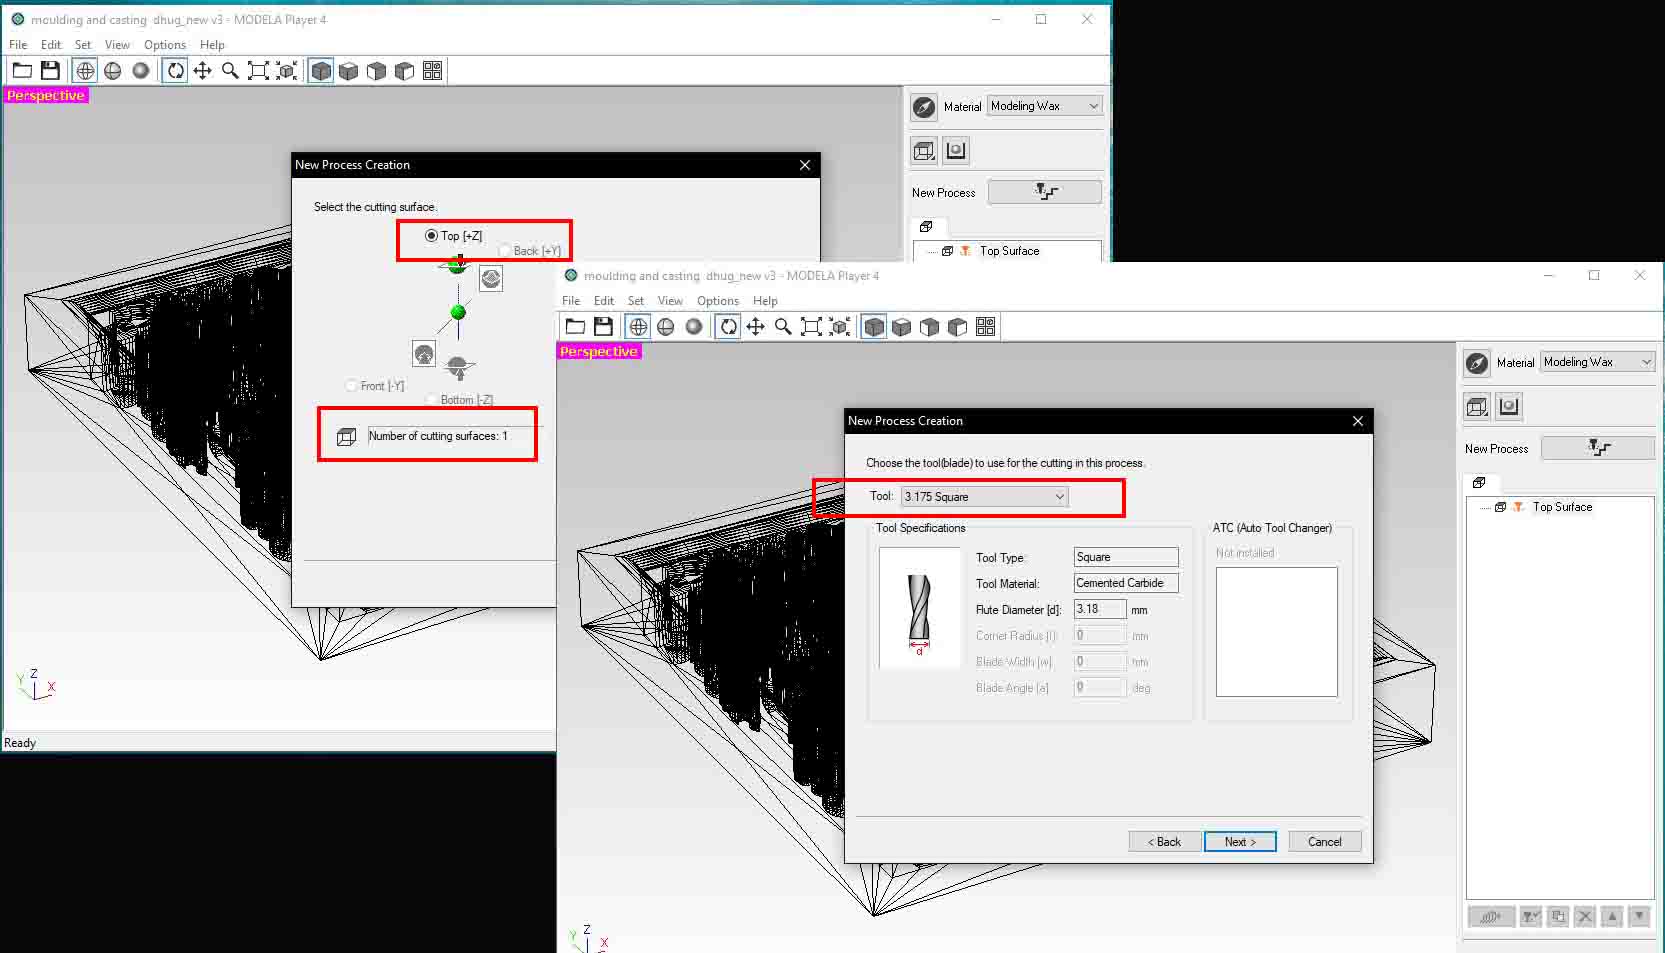
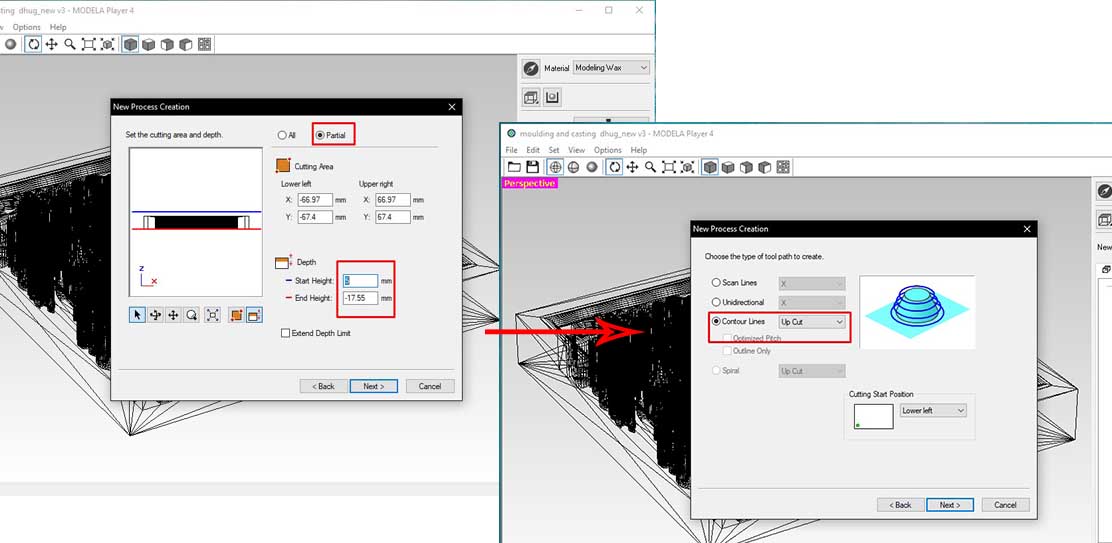
On "Cutting area and depth" choose select --->partial and set the --->start height at 5mm.
and keep other parameters same.
Next, In the "Type of toolpath to create" windows, choose Contour lines. This is because we want
to create a rough contours for now.
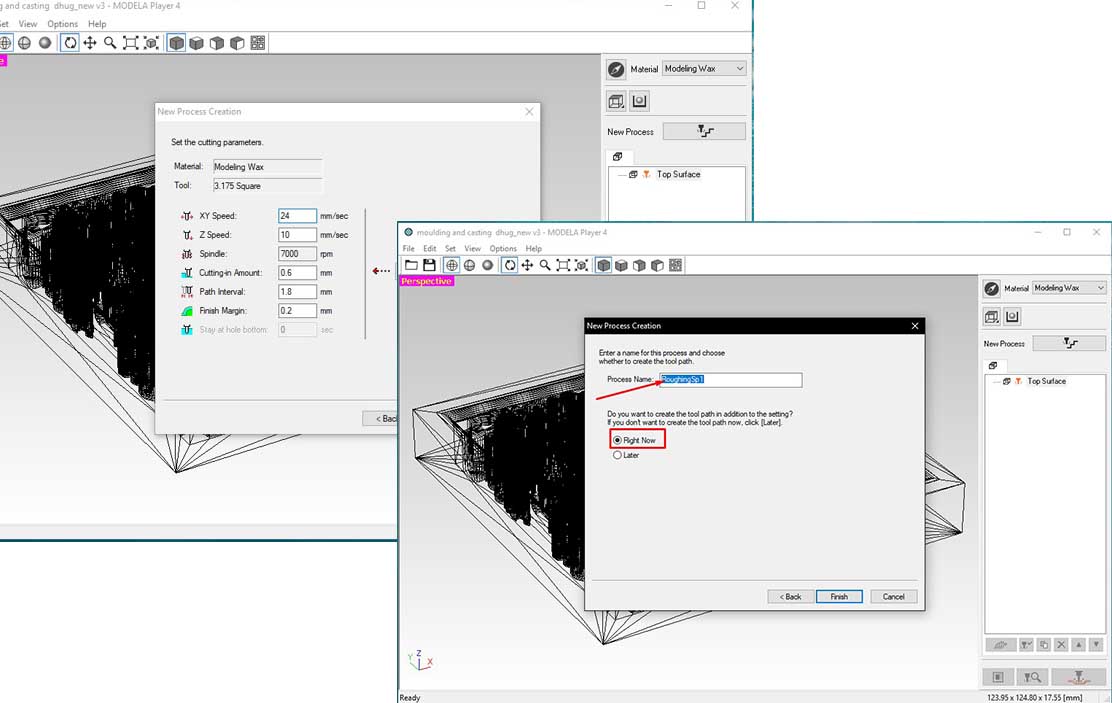
I did not change the cutting parameters. I kept it same. After that, I chose a name for my rough contour file.
Our next mission is to create a Finish toolpath. In order to do that, again go to --New process and Choose tool R1.5825 ball . This is to set the tool as a ball end mill of the said size.
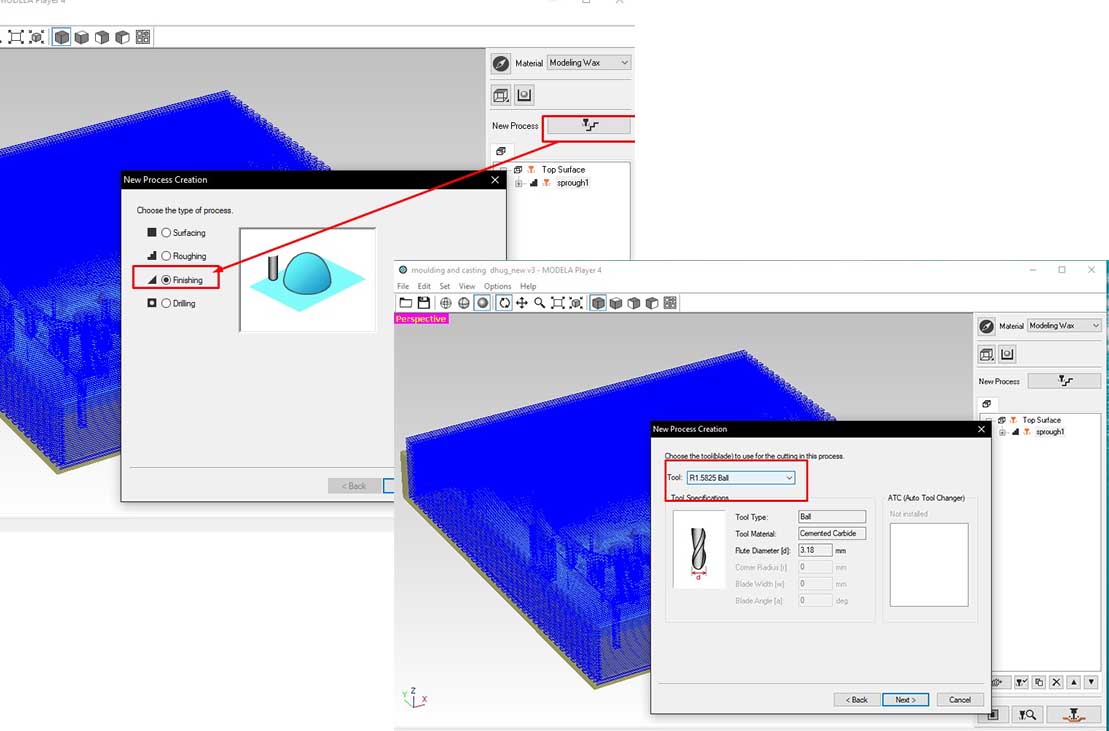
Now we need the type of path as Scanning to create a finsih. The software generates a cutting parameters, so don't change any parameters there unless you are really familiar with it. I am not, therefore, I trusted the generated parameters. (haha)
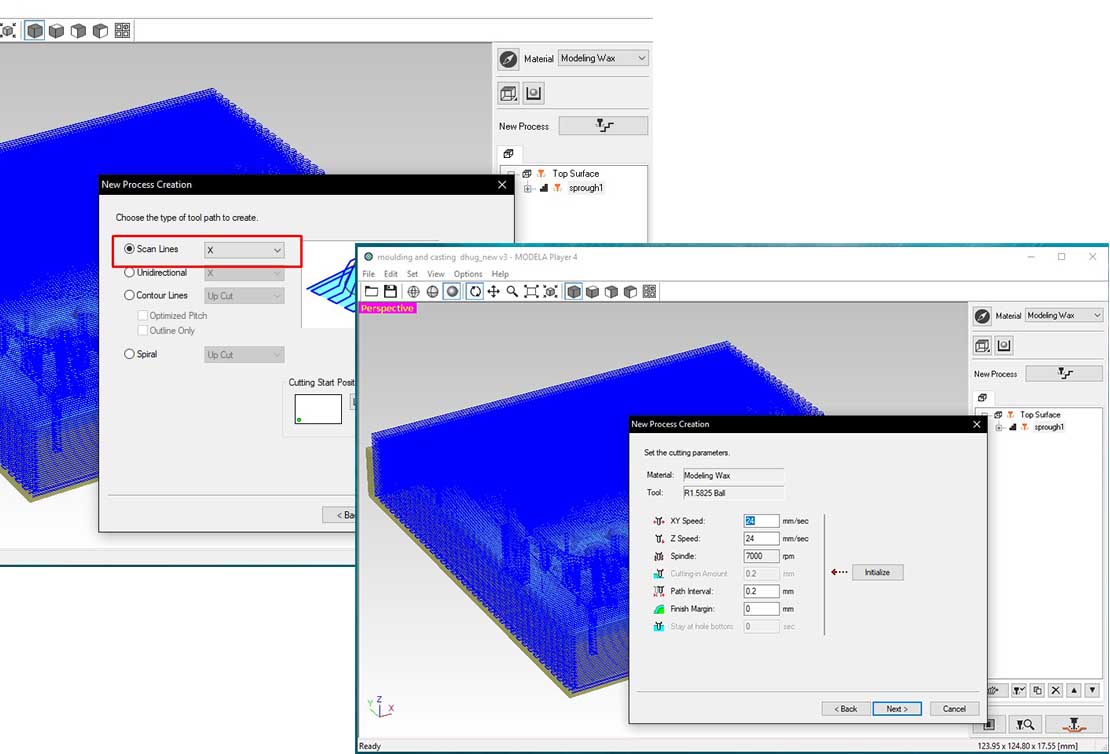
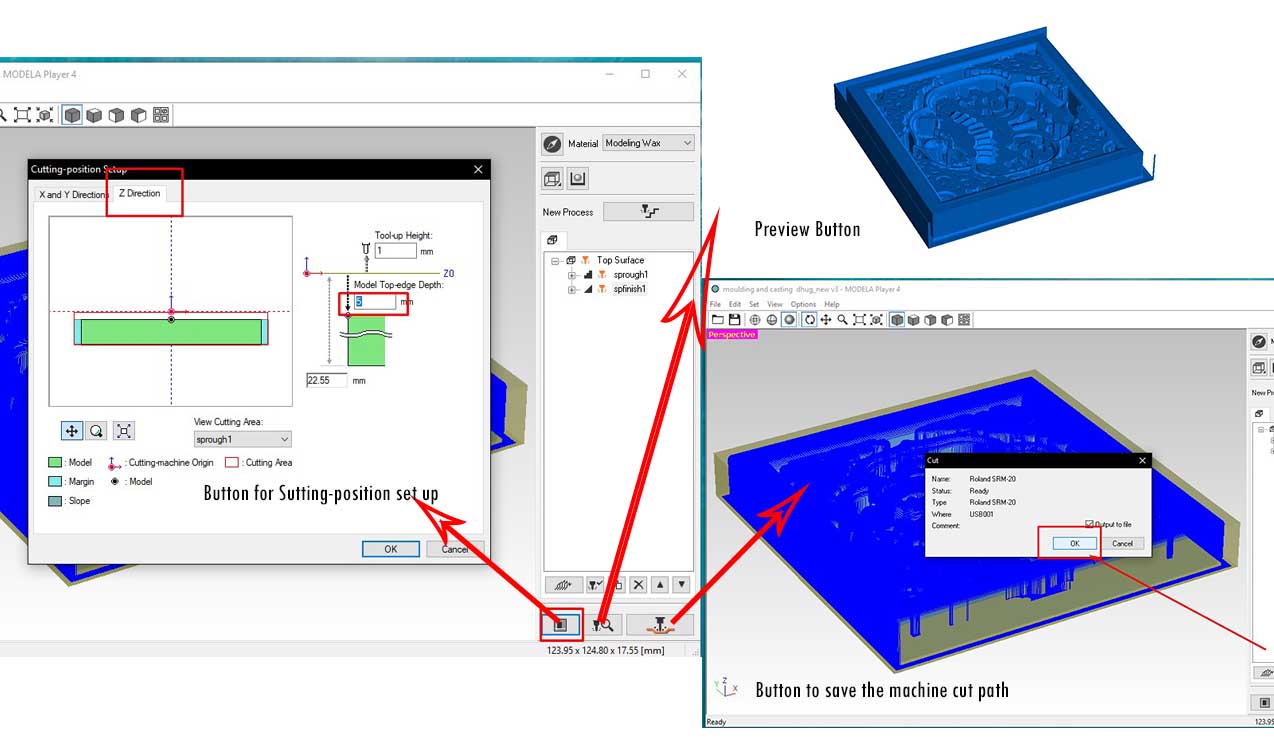
In the final process, we look at the cut previews and also set up the final cutting positions. I gave the parameters for Model top-edge Depth as 5mm. The files saved will be in .prn files.
Milling in SRM-20
As discussed many weeks ago, we use Vpanel for SRM-20 cutting the designs on the wax using SRM-20 milling machine. Before milling or giving the .prn files to the SRM-20 machines, you need to modify your wax to perfectly get the zeros. For this, we have to set up the zero in the center of the model.
For this purpose, we have to find the center of our model wax. I made 2 diagonal lines on my model as shown below:
I successfully milled the rough surface with 3.175 square endmill. It took about 4 hours. After that, I changed the endmill
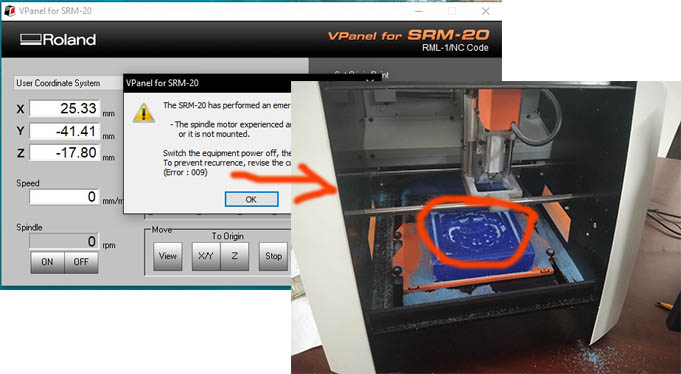
the endmill to R1.5825 ball, and started milling the my model. However, due to complicaetd patterns and small holes, my motor started giving problems and milling started giving errors
with a message The SRM-20 has performed an emergency stop.
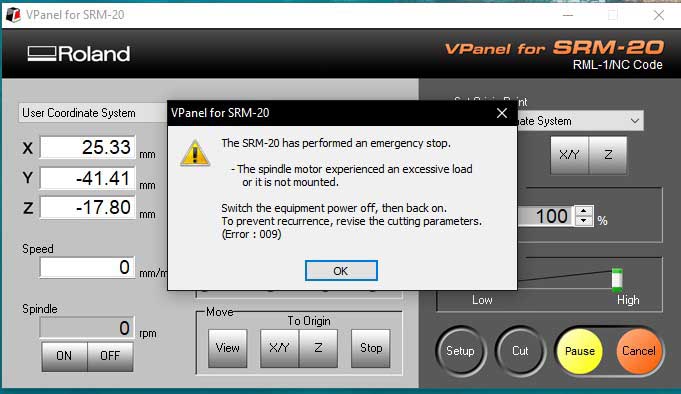
It is quite frustrating as it kept on happening and I have to create 11 finish files for this.
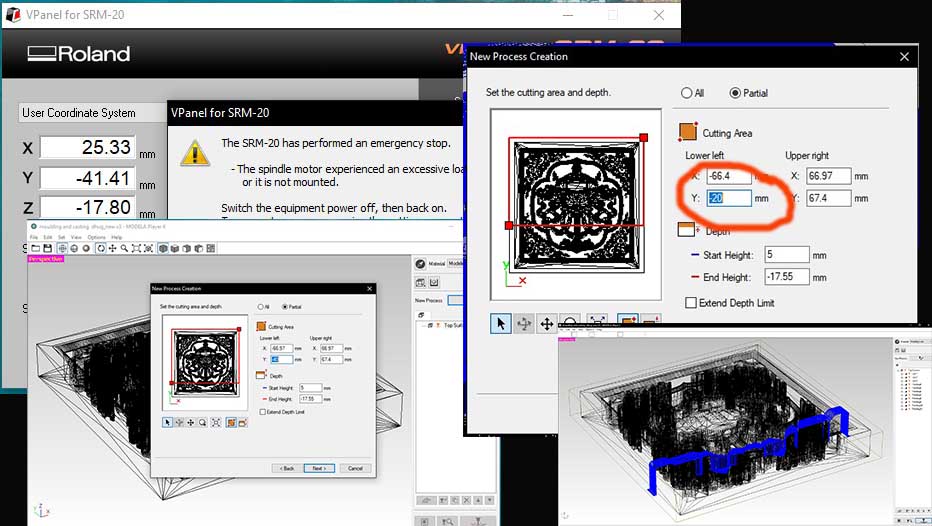
 After much discussion with my friends,
I have to define the toolpath again and again giving different cutting areas in modela player as shown below:
After much discussion with my friends,
I have to define the toolpath again and again giving different cutting areas in modela player as shown below:
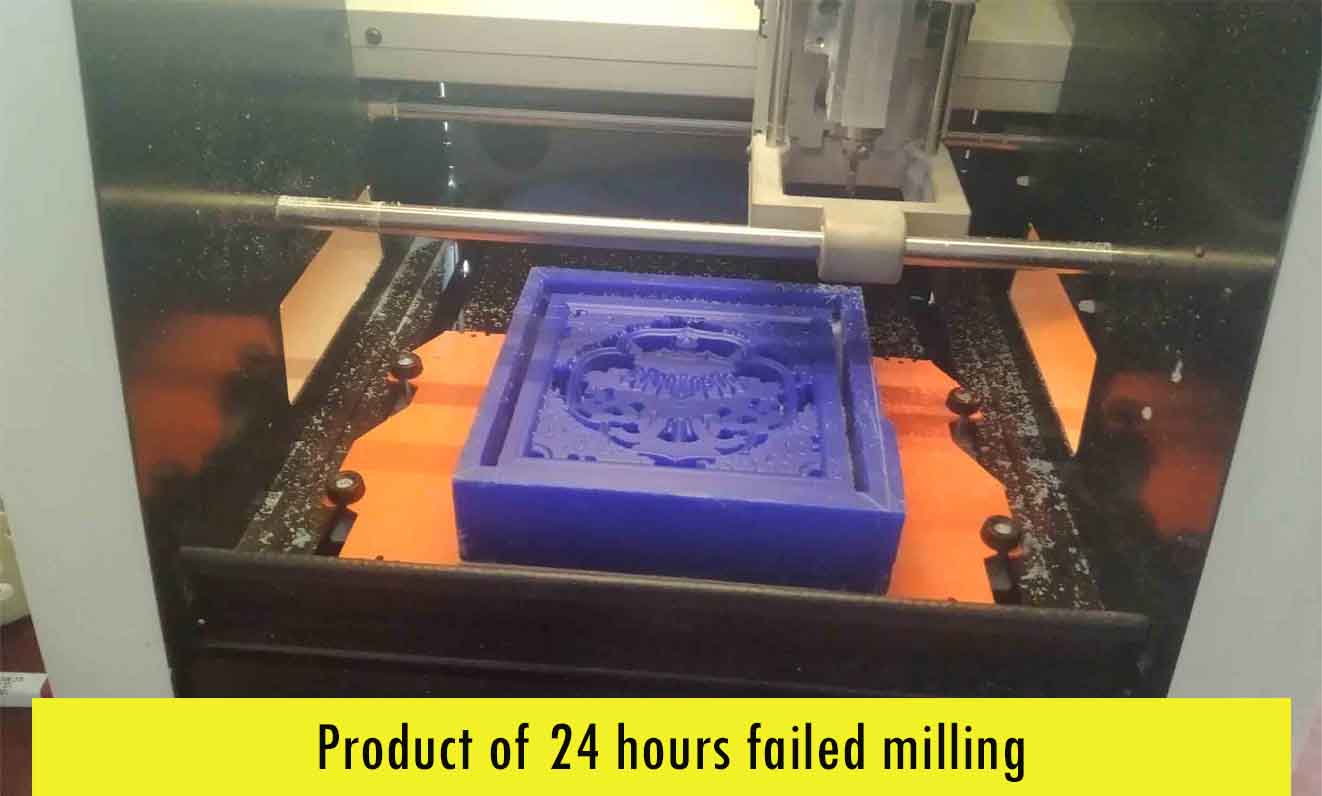
Finally, I was ablt to get the milling done after about 24 hours. Pheww!!! It was so irritating but rewarding at last.
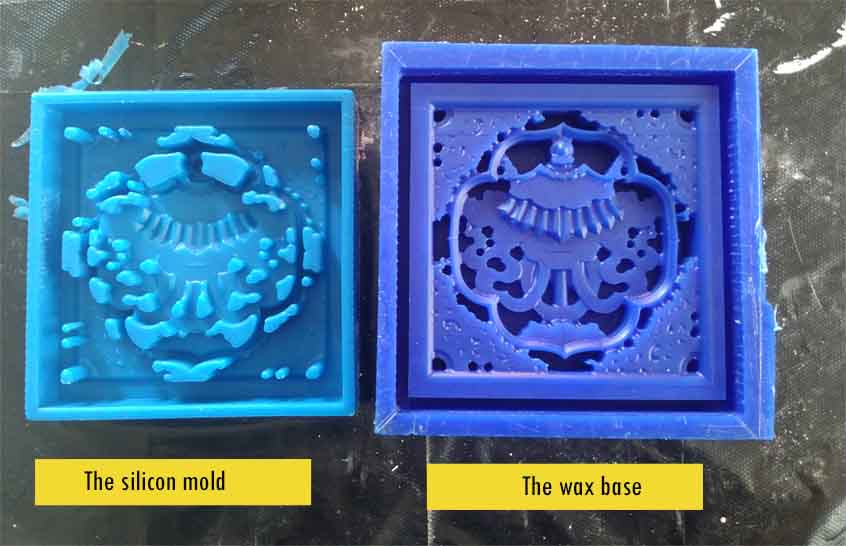
Molding and Casting
We have Mold Star Platinum Silicon rubber for making mold and hydrostone for casting. We have already discussed about this materials in a group work earlier.
In order to make a mold,
1. eqaul volume of part A and Part B of silicon.
2. Put a the solutions into one container and steer the solution untill a minimal amount of bubbles can be seen.
3. Pour the solution into the wax in a very thin liquid. Make sure it is poured very carefull to avoid air hubbles.
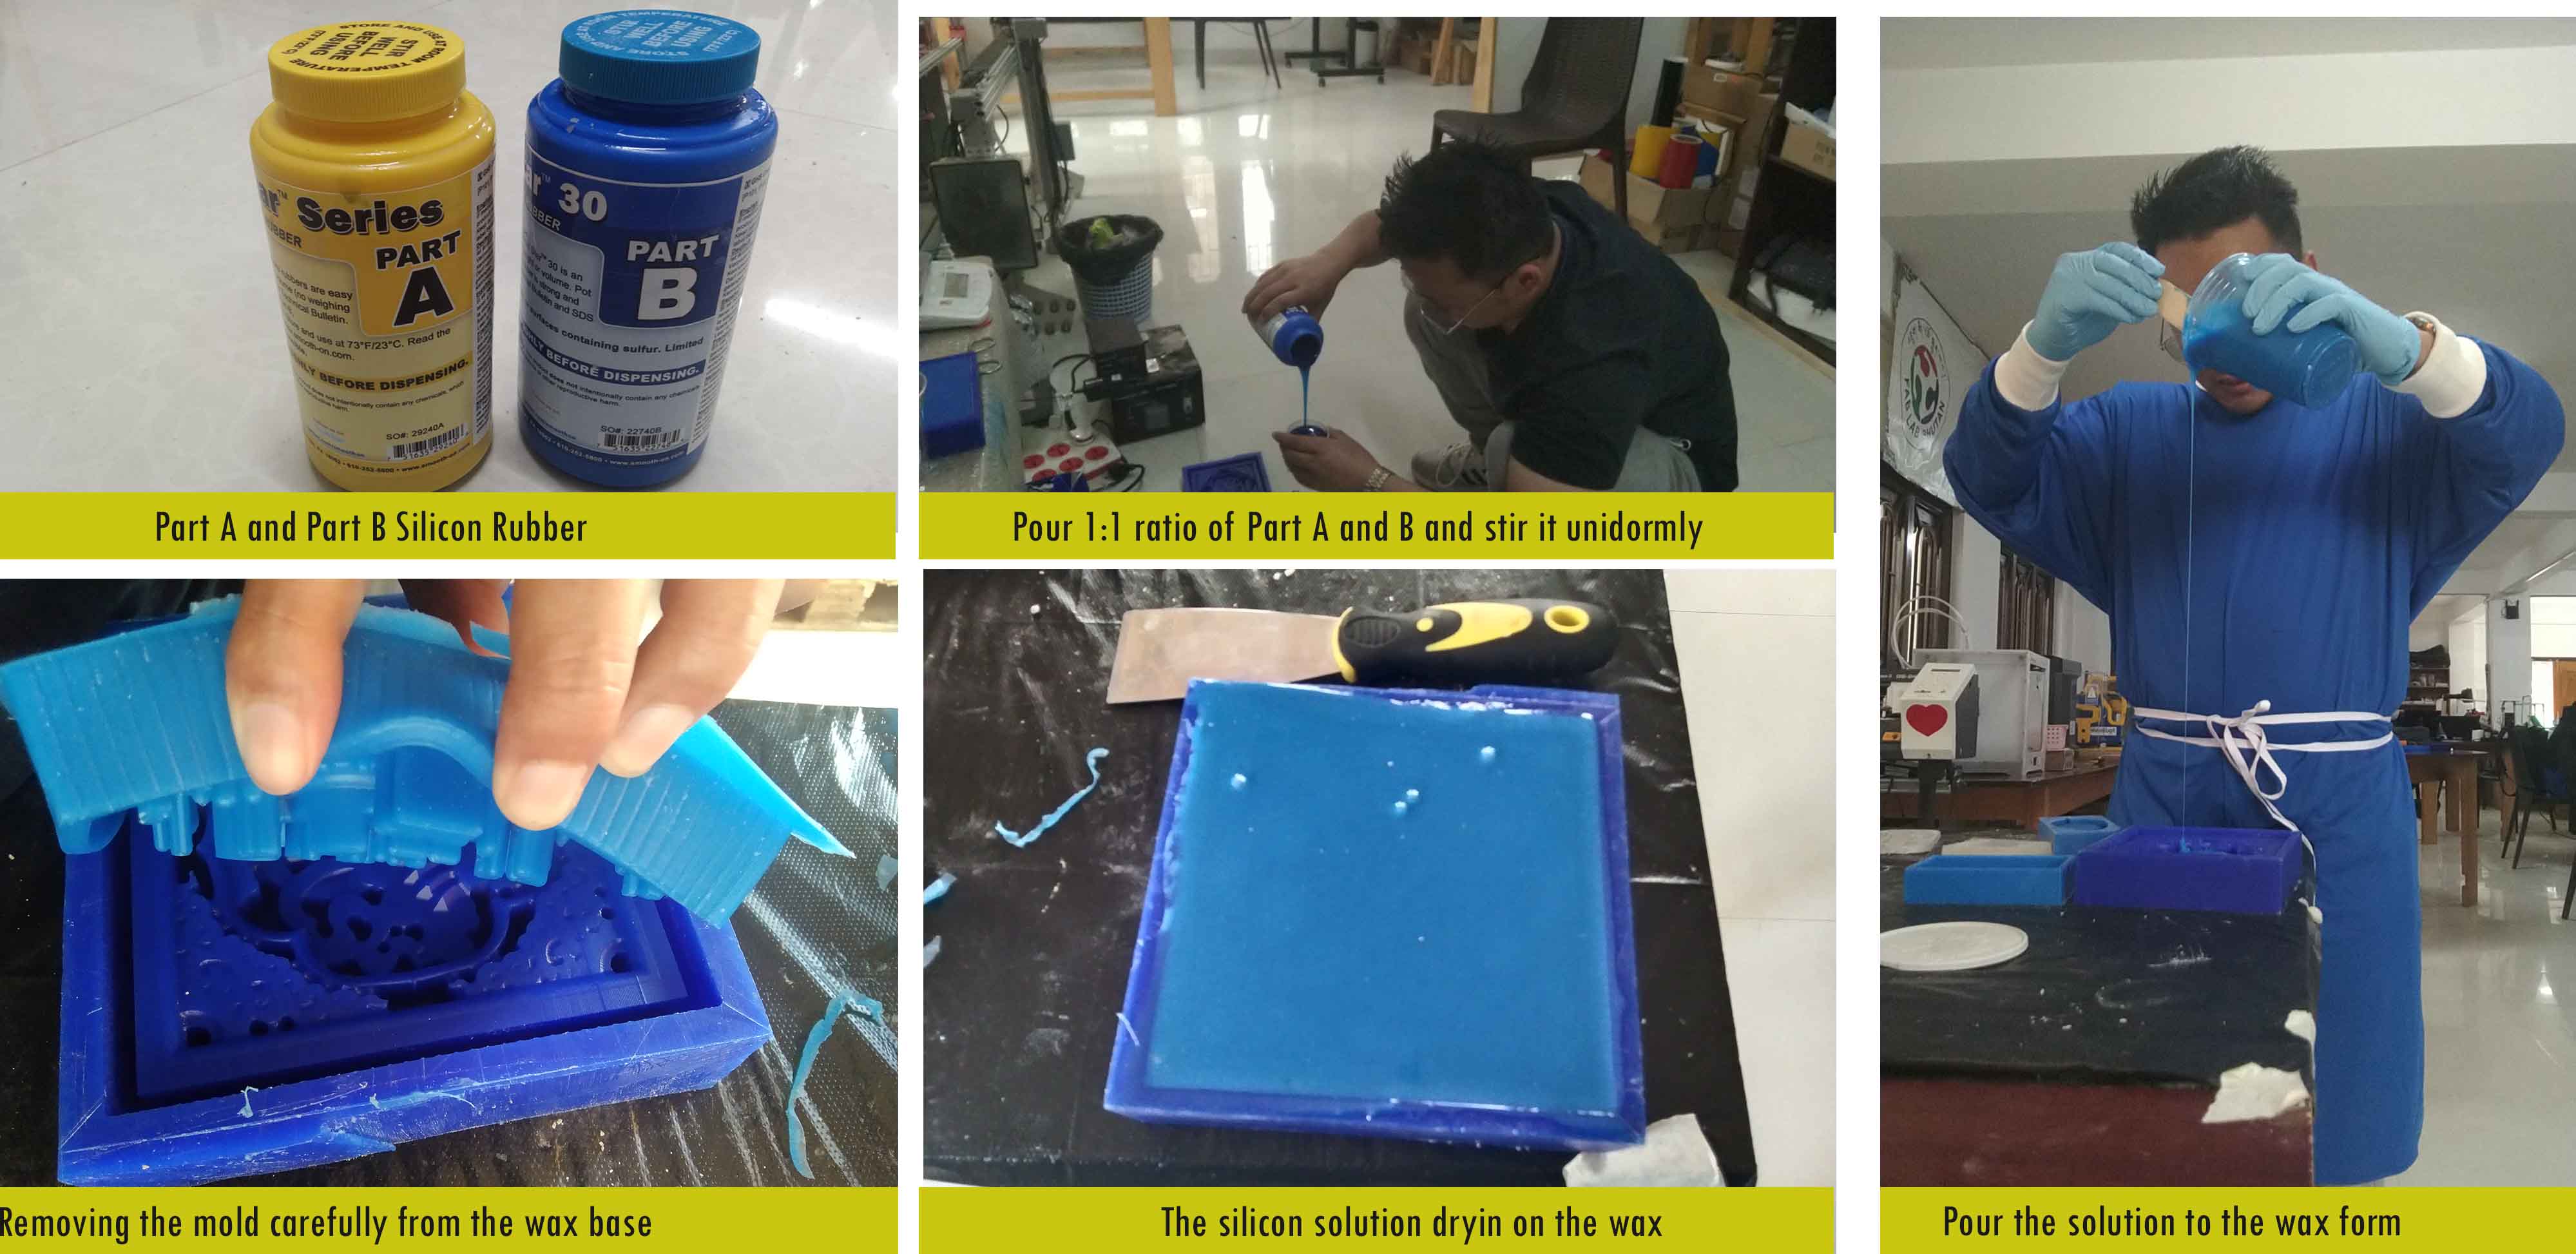
4. After that, remove the mold from the wax very carefully. I need to remove it very carefully because, I have a very minute details and I don't want to destroy those.
I tried casting my design on it finally. Pheww what a journey. For that, I mixed about 150g of hydrostone.
As discussed in the group assignment, for perfect casting, we need to mix with a 30% of water. Therefore
I poured 45g of water.
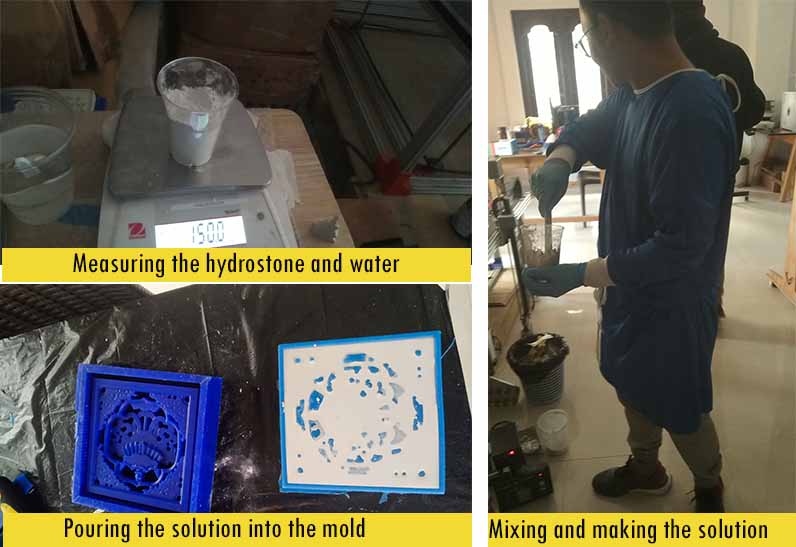
Then, I poured the solution into my mold and let it cast it for about 2 hours. I liked the product of my hardwork.

My journey can be seen here: