Week 08. Embedded Programming
Group assignment
- Compare the performance and development workflows for other architectures
- Document your work (in a group or individually)
Individual assignments
- Read the datasheet for the microcontroller you are programming
- Program the board you have made to do something, with as many different programming languages and programming environments as possible.
Have you
- linked to the group assignment page ✓
- Documented what you learned from reading a microcontroller datasheet.✓
- Programmed your board✓
- Described the programming process/es you used ✓
- Included your source code✓
- Included a short ‘hero video’ of your board✓
Group Assignment
Here is the link to the group assigment page.
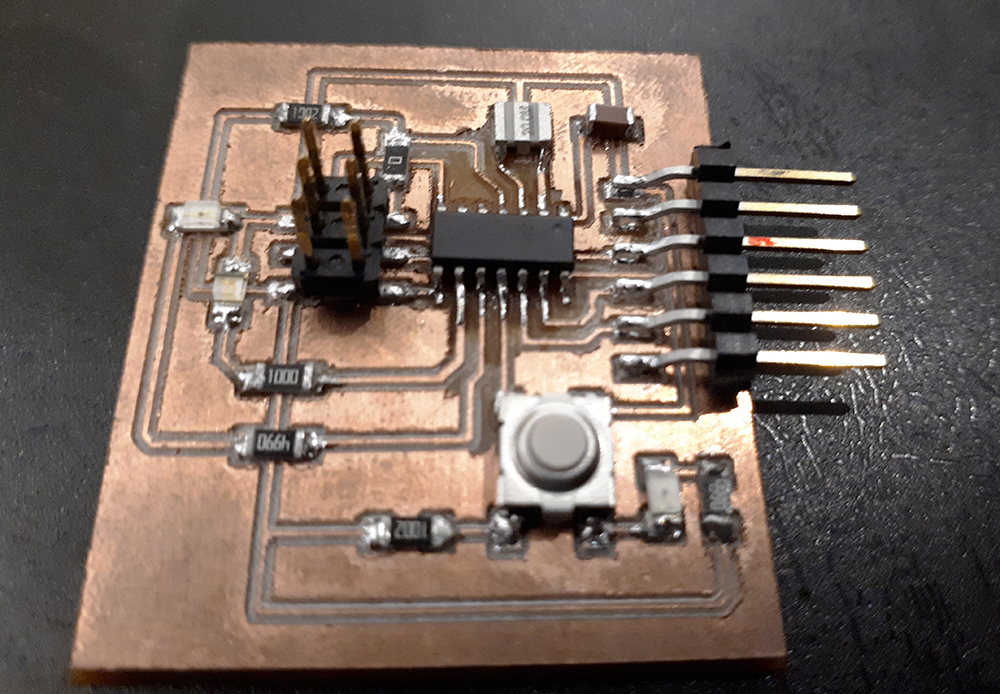
The board I made can be found in week 4 page were are deatils and the original files.
Reading a microcontroller datasheet
I used the Attiny44A in this Hello World board. You can find the datasheet here.
The first two pages are important information about the characteristics of the Attiny for example, in the fisrst line we can read "low-power CMOS 8-bit microcontrollers based on the AVR® enhanced RISC architecture." information thah gives us a general view of this microcontroller. Then there are the features it have for example:
- Endurance: 100,000 Write/Erase Cycles
- One 8-bit and One 16-bit Timer/Counter with Two PWM Channels, Each
- In-System Programmable via SPI Port
- Operating Voltage: 1.8 – 5.5V
- Industrial Temperature Range: -40°C to +85°C
With this information I can have a criteria to decide if the microcontroller have the requiements I need for a project but if we are looking for more specific information we can proceed to the index wich is in page 3. First at all I find the "Pin Descriptions" where is a description of the PORT A and PORT B so we can know wich kind of capabilities each ports have. I think with this information will be enough to choose if the microcontroller it's a good choice, at least, for a basic project as a Hello World Board.
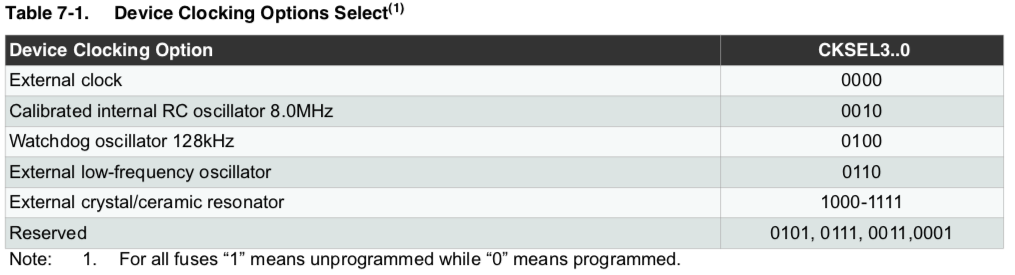
An important part to see in the data sheet are the Clock Subsystems. Almost all modern microcontrollers have internal oscilators wich allows them to work with timing aplications, from communication protocols, PWM signals, and more. This internal oscilator can be cofigured and also tuned and this is important to know because if we want to use an external oscillator we also have to tell this information to the micro by burning fuses. The fuses to clock configuration can be foun in the following table from the datasheet.
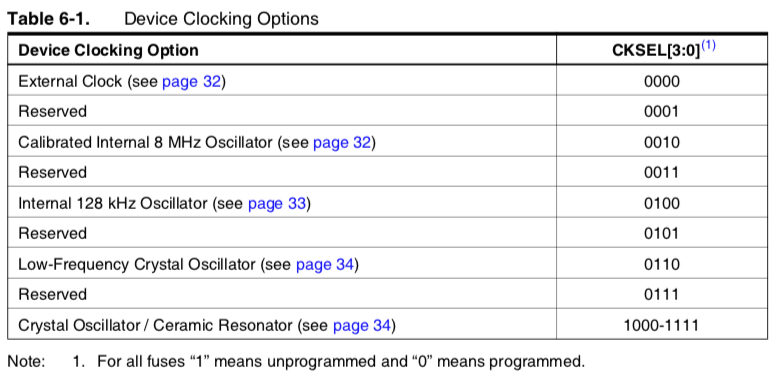
So to use an external clock have to see the frequency range in the table below and according to that as I use a 20MHz so have to use CKSEL=1110 as you can see in the table below.
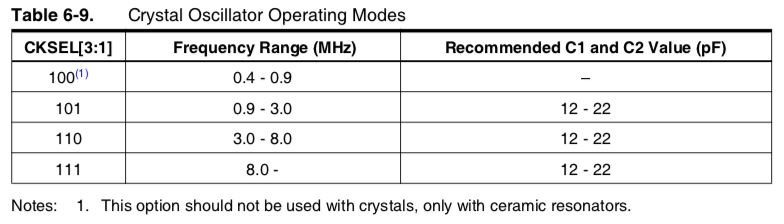
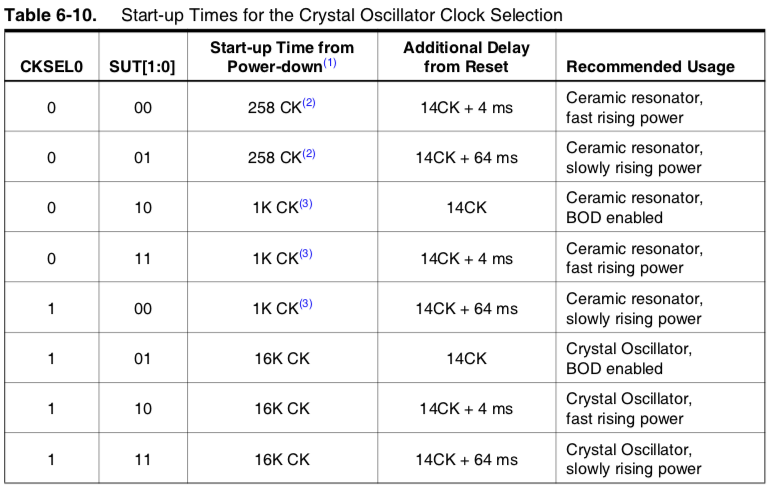
And then the operating mode of the oscillator it's also important. This configuration have to be done as the table below show according the necessities. For example to reduce power consumption should use a slowly rising power option but depending on the application could be needed or prefered a fast rising power mode.
It's very imporant read the datasheet to know the real frequency of the clock running in the microcontroller we want to use, for example in the Attiny 44 there is an important message that I read after trying serial comunnication and give me some problems I will describe later in Board programming, so here is the real frequency of the microcontroller I'm using.

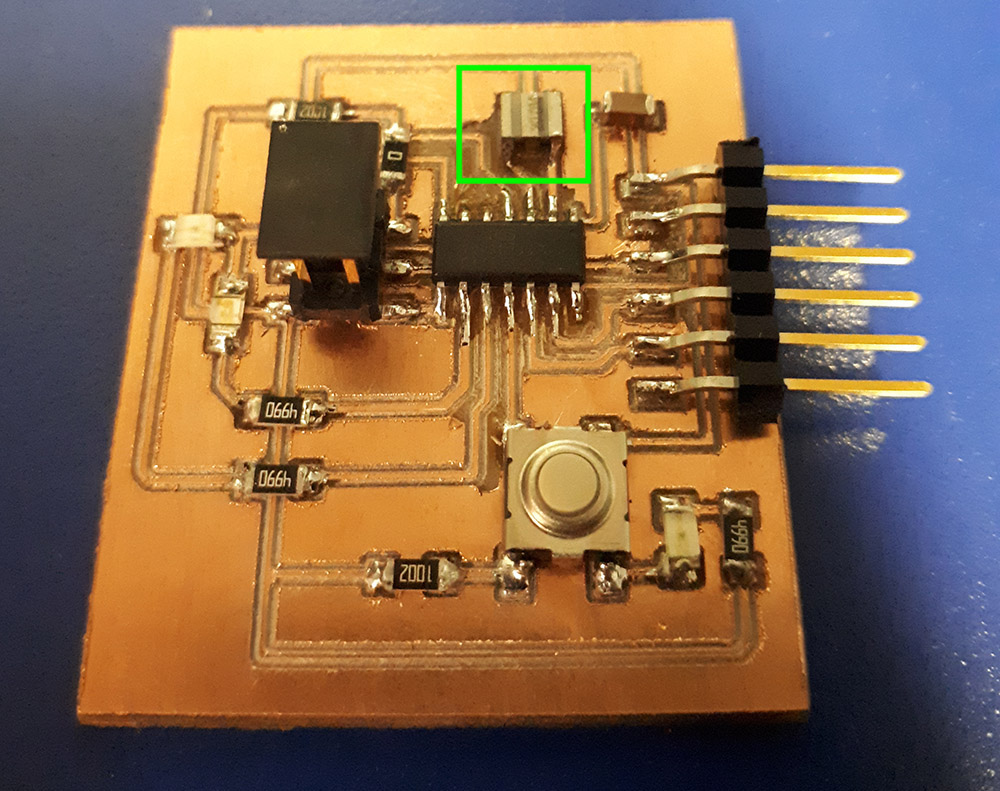
Also in this table are the clocking options we can use. In my case external crystal/ceramic resonator.
Board Programming
I put two leds in this board to make a blinking led while the other can be activated pressing the button. To program the ATtiny44 I use the USBtinyprogrammer did it in week 4 and Arduino IDE. The following information is the steps to do it.
An important thing to know is that I did not need to upload the bootloader to upload the code to the HelloWorld board so I will skip this part. First you have to download the ATtiny Microcontrollers library, to do it use this link where you will find the libraries and the instructions to do it.
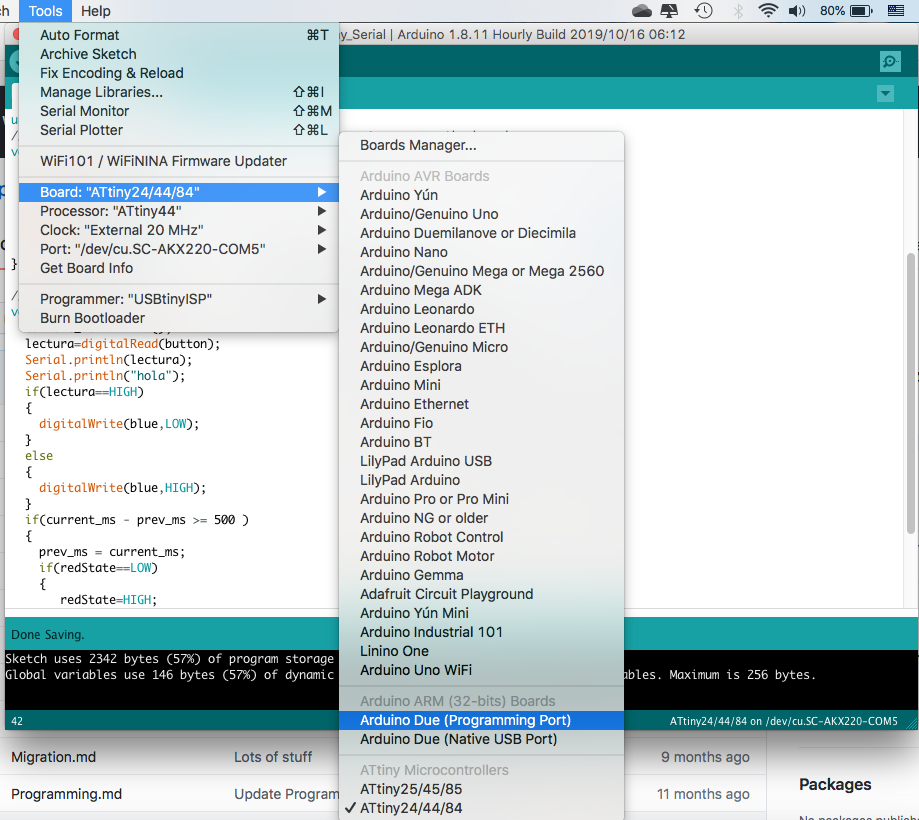
Once you have the configuration as the image above, please notice that the clock you use depends on two things:
- If you have an external crystal/ceramic resonator.
- If you have burn the fuses to use an external crystal/ceramic resonator.
So if you haven't burn the fuses that means that you are using the internal resonator. I notice this because the blinking timing was not the expecting miliseconds and also because the serial comunnication was not right. Be sure you are setting the right clock in arduino IDE to make things work as expected.
So then you should press the upload button and after waiting some time have the code upload to your board, if you have an error message you have to find wich element it's caussing the problem. I recomend to check some things:
- Firts check the setting in Arduino IDE are correct, the PORT where your programmer is connected have to be selected
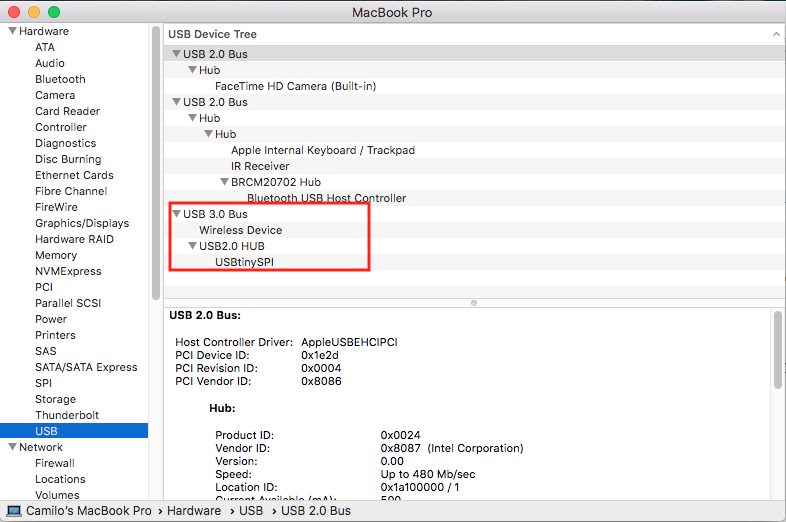
- mac OS users should also verify if the device is being reconized clicking on About this mac --> System Report
- Be sure the programmer works well, even a loose USB connection can cause the problem.
- Verify the ISP connection is correct.
- Verify the cables you are using are good.
- Check your board, this include soldering, right design, right components, continuity and so on.
- Try to discard items so you reduce the possible problems list.
- If you are sure you can program other board with the same programmer and the same enviorment and also check your board and think it's okay you should replace your micro, it could be setting wrong fuses and now it's not enable to communicate anymore until you do a fuse reset.
The program I did is a Blink wothout delay. The delay instruction make the microcontroller stop "thinking" while the delay time is going on. That means it can't perform any other action as read sensors, communicate or anything. For this reason you can use this code that replace the delay() and allows the micro keep working on other instructions. In this case I use a blinking LED and whe you press the button another led turns on, but also I decide to try the serial communication in the same code.
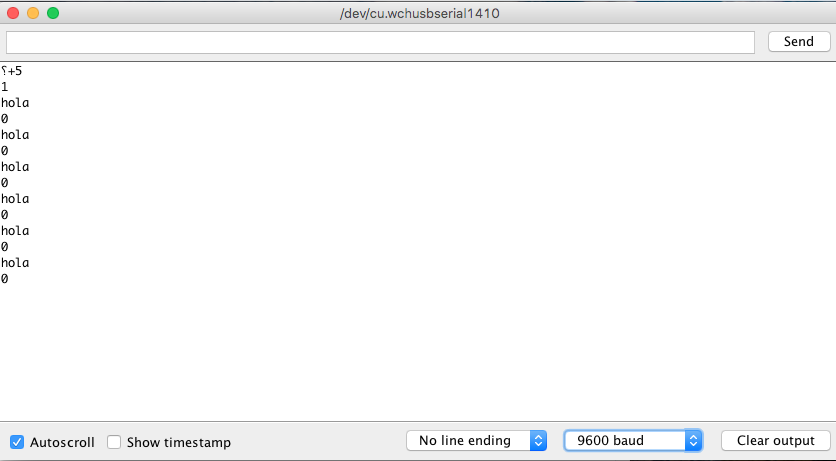
Now on purpose of serial communication. This is how it looks when the baud rate/ clock setting is not correct.

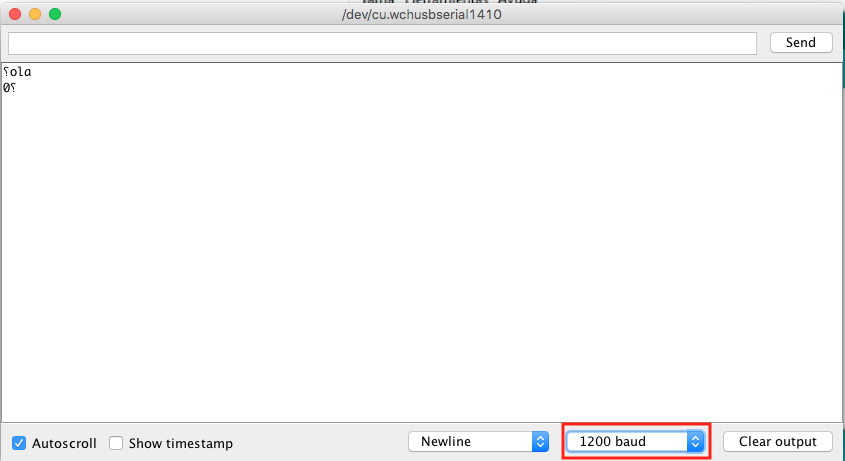
As you can see the baud rate on Serial.begin it's not the same as the Serial Monitor on Arduino IDE but it should be, also the symbols are not correct. Here is where I read the clock information in the datasheet I wrote before in this page. So changing the clock to: 1Mhz internal clock in arduino IDE it kind of work but still with problems.
Here I decide to burn the fuses to use the external 20Mhz ceramic oscilator integrated in my board.

Then try again the communication. Change in Arduino IDE to external 20Mhz clock upload the program and check.
The communication are being stablished in the corect baud rate, in the first line there is some noise, that noise could be cause because I'm usig the arduino as a bridge to connect with serial to the computer, that is not the problem, the problem could be the horrible cables in the connection.
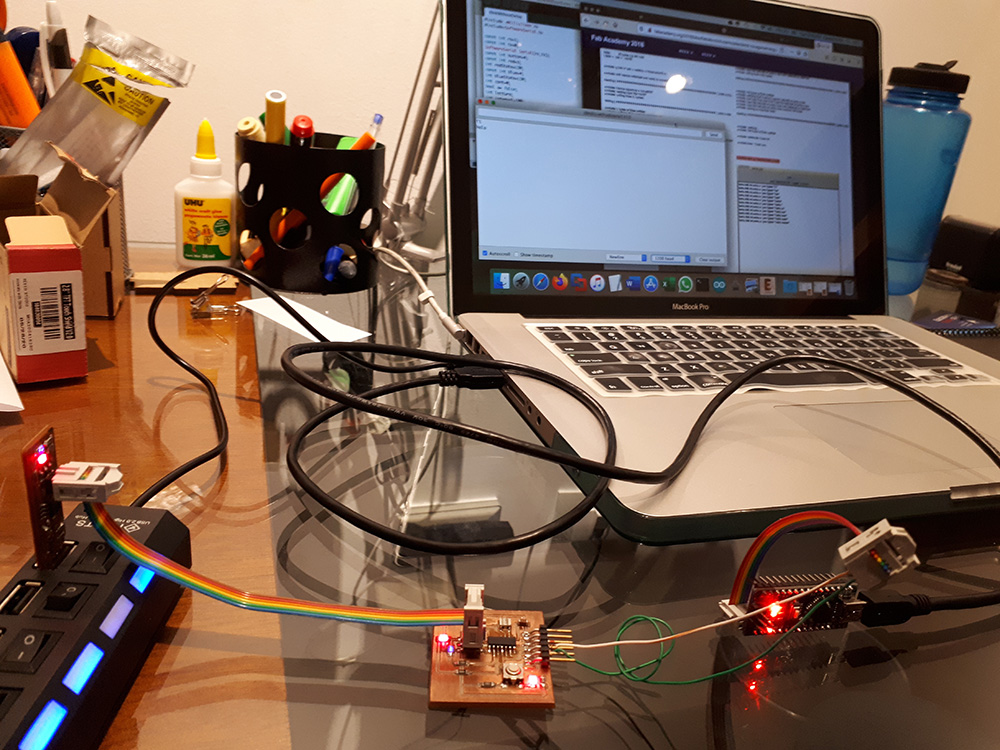
This time I didn't have female wires so I have to use that wires and I think that can be the problem.
Hello World
Now the results I talked about earlier with the blinking without delay.
This example can be very usefull on a lot of projects, you can learn more obout it searching the explanation of the blinking without delay to more details, and of course you will find the original files at the end of this page.
About this week
In this week I learn to search for problems because I coul not program my board and after several tries and test I find the Attiny44 was not working so I had to replace it, I prefer to leave this part here in the end because in the upper part people can find something like a tutorial and advice of the problems with no longer documentation. I also learn about the fuses to use an external clock and using Arduino IdE to program no using the bootloader. I learned a lot so in the next assigments I will be more wise.