INTERFACE & APPLICATION PROGRAMMING
This week I learned how to make a computer interface to control devices on my circuit board.
The assignment "guidelines":
- Compare as many tool options as possible (in groups)
- Write an application that interfaces a user with an input and/or output device that you made
Group Work
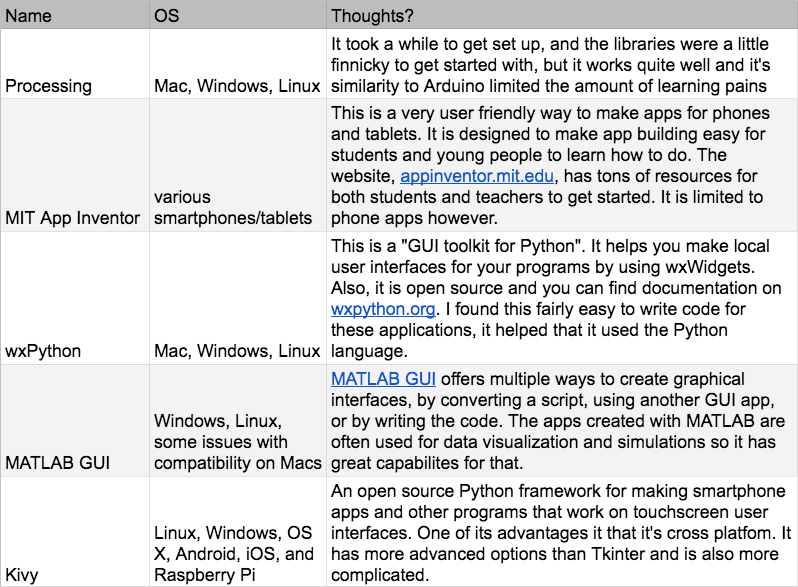
In our groups, we compared programming options for making applications. This can look like many different things, like apps on your phone or computer, but really they are just programs that you run that help you do a task. Here are some interface and application options that we checked out. As someone new to programming apps, I used Tkinter for most of this week's work. I found it fairly clear to use, with all of the features that I needed to make a simple GUI on my computer.
During the Thursday lab time, we also got an introduction to this week's assignment. Our first task was to make an LED on a board light up when we pressed a button on a computer interface. There were two parts to programming this; coding the Arduino to receive a message via serial connection and turn the light on or off based on that information, and writing a Python code to make a GUI window pop up on the computer screen with buttons that sends those serial messages.
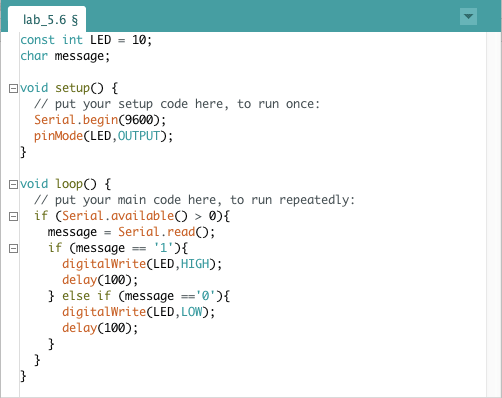
First thing the do, was write the Arduino code and test it by sending a message in the Serial Monitor. This was generally the same code as last week's group test with the networking "sending" device with Serial.read(). If the data received is '1', the light turns on, if it's '0' it turns off.
Next, I set up Python and serial on my computer using the command line. Python was already installed, however when I tried using a serial function I got an error message:
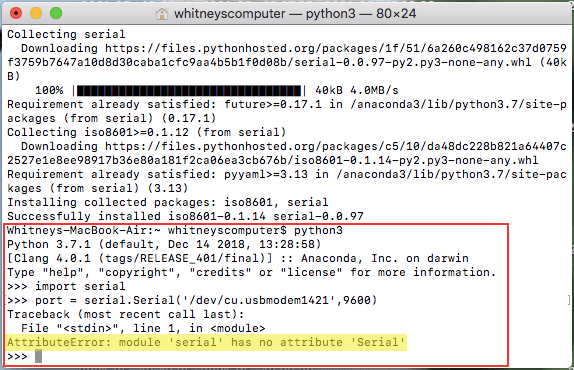
So, there was an issue with the serial attribute, and also with the version of Python I was using. I had some help troubleshooting this and in the end what worked was uninstalling both 'serial' and 'pyserial', then reinstalling only 'pyserial', and running the code in python.

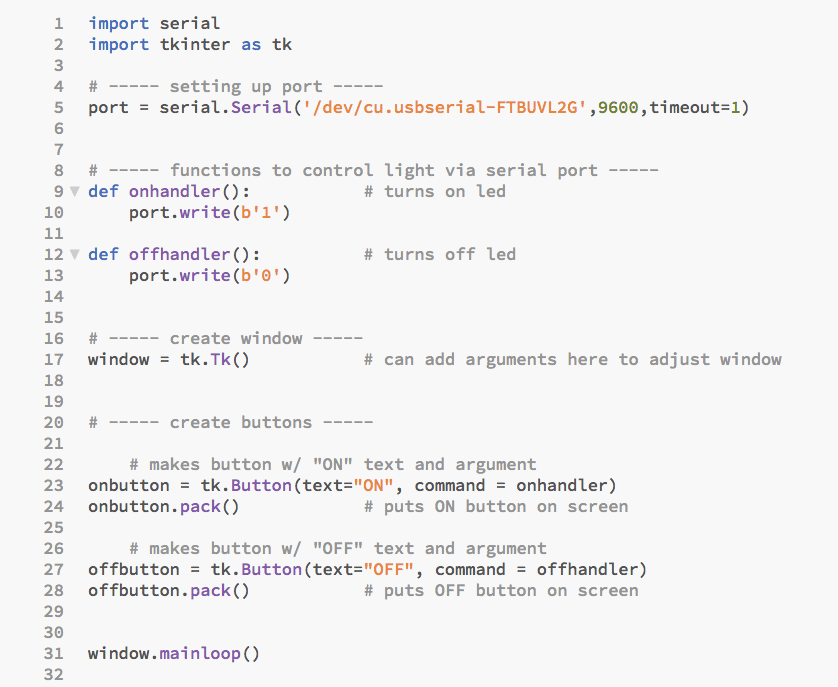
This was the python code to control the LED. Serial and Tkinter are imported in the beginning. Then, we set up the serial port recognition ("/dev/..." text is the ID of the specific FTDI to UBS cable I'm using). After that, the 'onhandler' and 'offhandler' functions each write a single character to serial. Next, we made a Tkinter window with buttons. Those ON and OFF buttons call specific functions that send either a 1 or 0 to serial.
To run my code, I navigated to the directory where my python code was stored, and entered this into the command line:
$ python lab_GUI_control.py
Once again, my group was using an Arduino Uno to test the app making process. When we entered the code in the command line, a window popped up with the ON and OFF buttons. Here you can see us controlling the LED via the computer interface.
Arduino Code
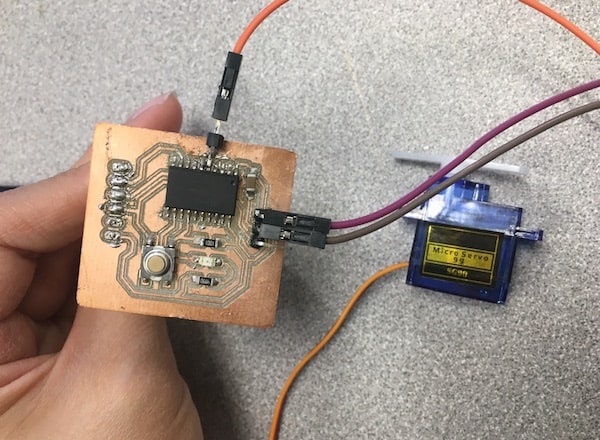
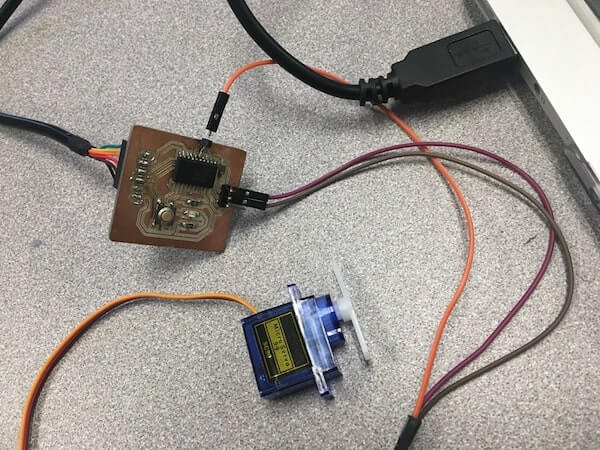
For my own project this week, I decided to try working with servo motors. I had various problems with my boards, connecting to UPDI and serial. Ultimately, I ended up modifying a board that I made in Week 7. This shows how I hooked up my micro servo motor to GND, power, and data.
Below is the code to control my device. I'm using a servo library, with which I attach the servo to a pin number. Depending on the serial message, I tell the servo to go to a certain angle. Right now, I've given it 3 pre-chosen angles; 45, 90, 180.
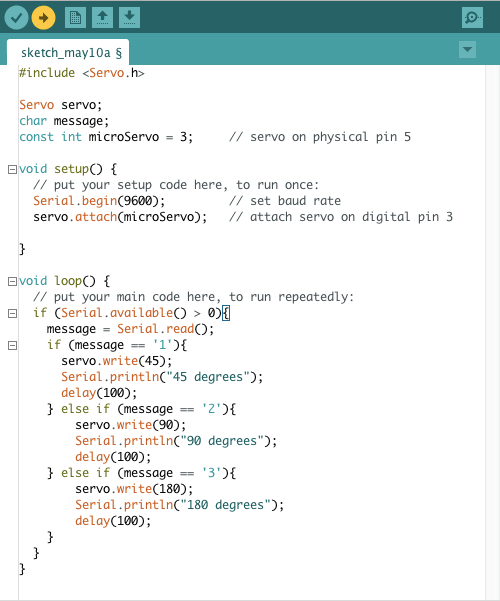
I tested my code in the Serial Monitor. This was really helpful because sometimes I didn't know if it was my serial connection or the servo that wasn't working. Here is a clip of a servo test. You can see that my program is printing a line of text to the monitor every time that the arm moves.
Python Code
Next, I wrote a Python program to make a graphical user interface (GUI) to control the servo with. Given that the Arduino sketch had certain serial inputs corresponding to specific angles, I created functions in the Python code that each wrote a different input to the serial port. After that, I made a simple Tkinter window with button features, labeled accordingly to their angles. When pressed, the buttons call one of the pre-defined functions. Also, the .pack() command simply places the button in the window and .mainloop() runs the program continuously until the user closes the window.
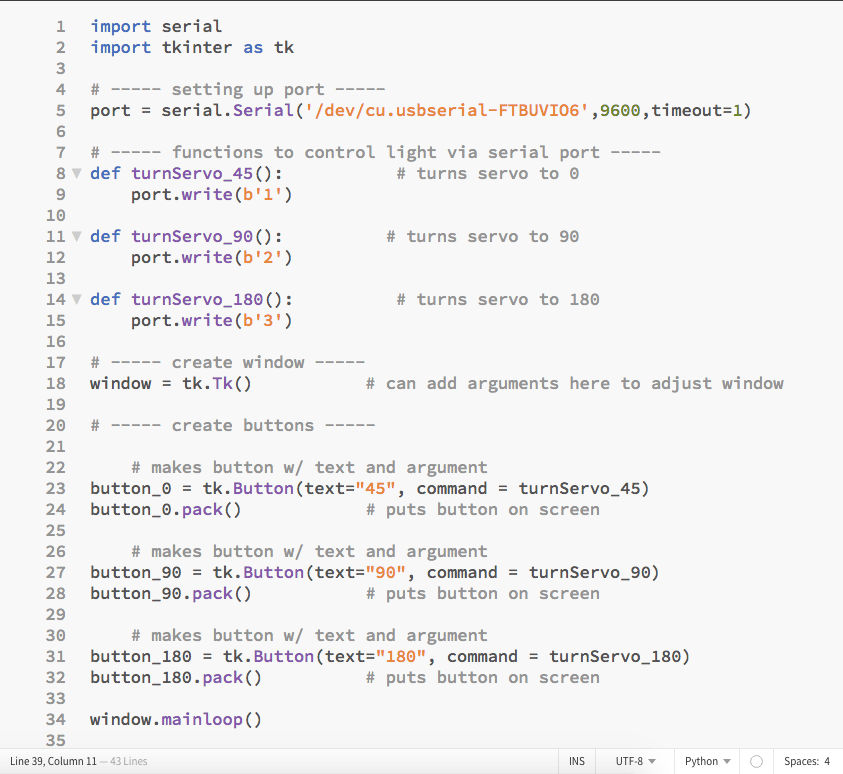
In the computer terminal, I navigated to the directory where my Python program was stored and ran it.
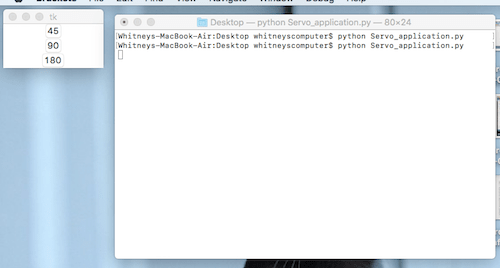
Here is my code in action! To build on this program, my next step could be to edit the codes to make an option to move the motor one step at a time in either direction, or have user input for a specific angle.
Resources
Design Files
Updated: March 18, 2021