ELECTRONICS PRODUCTION
This week I learned how to manufacture and program a PCB from scratch.
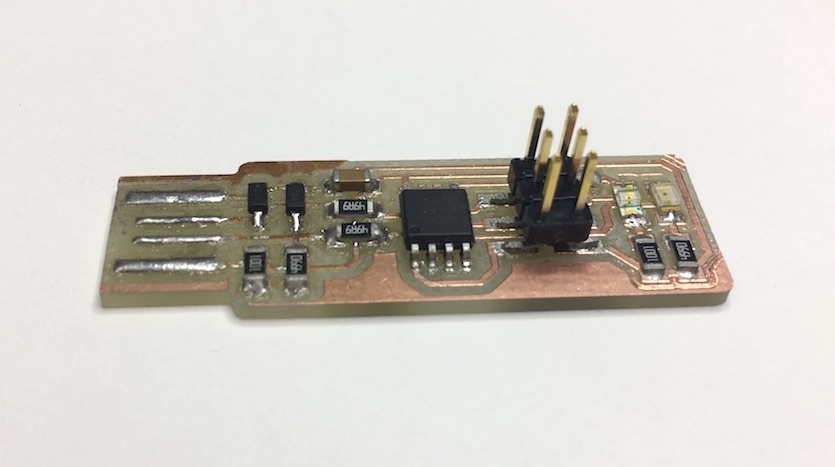
This was the first week in Fab Academy where I did something completely new! I've never milled or soldered a circuit board before, so I learned lots of new techniques. Electronics is going to be a big component of this class, so this week was all about fabricating the PCBs (printed circuit boards), and in the weeks to come we'll learn how to use them in more interesting ways.
Our assignment came in two parts:
- Characterize the design rules for your PCB production process: document feeds, speeds, plunge rate, depth of cut (traces and outline) and tooling.
- Make an in-circuit programmer by milling and stuffing the PCB, test it.
Group Work
In team "Come on Eileen", we used the line test PNG files provided to test the capability of our Lab's Roland SRM-20 mill. The top half shows how well the bit can cut around objects, with increasingly smaller sections being subtracted. The bottom half tests how thin the tracing lines can get, with the smallest being .001 inches.

After preparing the .rml files in MODS and setting up the Roland with these settings, we milled the line test, and this is what we came out with. (See below in "PCB Fabrication" for more info on MODS and Roland set up).
| Speed | Cut depth | End mill | |
|---|---|---|---|
| Traces: | 4 mm/s | 0.004 in | 1/32" carbide ball nose |
| Cutout: | 4 mm/s | .024 in | 1/32" carbide |
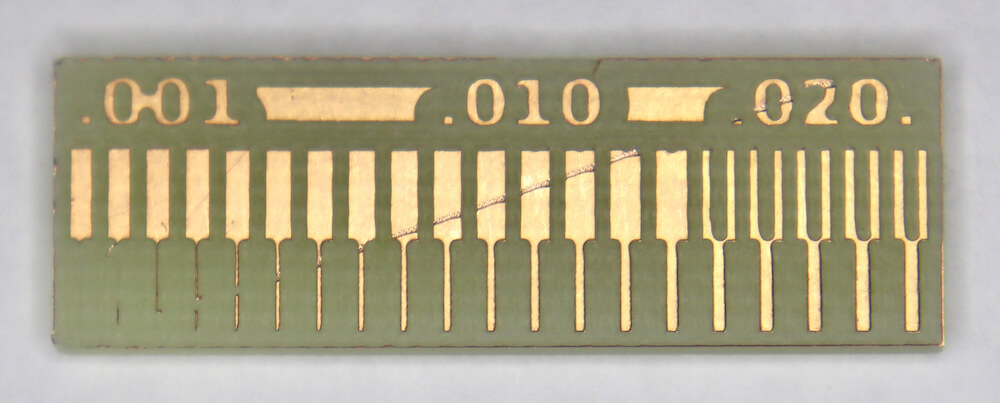
The outline cut perfectly, but as you can see not all of the interior tracings were milled. Since we had a 1/32" end mill, it was too thick to do most of the in between cuts. There also wasn't enough precision to make all of the lines on the bottom. The smallest line it could cut ok was 0.021 mm, the fifth from the left. In addition, a lot of the interior corners were rounded.
In my group, we also learned about these settings for machining processes:
- Feed Rate: the distance the end mill travels along the bed during one spindle rotation.
- Spindle Speed: how fast the spindle rotates. This is measured in revolutions per minute (RPM)
- Plunge Rate: the initial speed at which the bit is moved down into the material. The rate is specifically the initial speed since the hardness of the material, the bit, and many other factors can affect the bits movement along the z-axis during the cut.
- Depth of Cut: how deep into a material the end mill cuts in each pass. In other words, if you set the z origin to the top of the material, the depth of cut is the vertical distance between the origin and the end mill during that first pass.
- Tooling: the process of designing and manufacturing components necessary to manufacture things down the line (i.e. a mold, jigs, fixtures, etc).
The Roland SRM-20 also has certain specifications:
| Cutting Material | PC board, acrylic, poly acetate, ABS, chemical wood, modeling wax, and foam |
|---|---|
| Material size | 9.14 (X) x 6.17 (Y) x 5.15 (Z) inches, maximum 4.4 lbs |
| Mechanical Resolution | 0.0000393 inches/step |
| Software | 0.000039 inches/step (RML-1), 0.000039 inches/step (NC code) |
| Operating Speed | 0.24 – 70.87 inch/min |
| Spindle Rotation Speed | Adjustable 3,000 – 7,000 rpm |
As a note, RML stands for Roland Machine Language, and it has a different form than NC, or Numerical Control code. Both give commands to the mill on how to move and both can be read by the Roland SRM-20. However, RML use a different set of commands that can only be used by Roland machines.
PCB Fabrication
In Neil's lecture, he talked about several methods of PCB fabrication, for instance, etching and machining. With etching there are a variety of health and safety issues with the waste it produces. Machining, on the other hand, is relatively safe and better for the environment, and it's a bit more versatile as you can cut and make holes with a mill. Given this, we'll be machining our PCBs.
PCBs also come in several different forms. Surface mount PCBs have their components soldered to pads that are connected by vias, all of which serve as electrical conductors. Through-hole mounts have holes drilled in their boards, into which the component leads are stuck through and are soldered down. I'll be making surface mount devices in this class.
Here is an overveiw of my process:

CAD
Typically, a circuit is designed in a CAD program, like Eagle, but for the purpose of this assignment I used a circuit design from the 5.2. FabTinyISP_english Tutorials page, under "PCB Fabrication". There are two files I need, one is the design for the traces of the circuit, and the other is the outline of the board's edges. These design files are separated because they require different settings and end mill bits that I will have to switch out during the milling process. I downloaded the designs as PNG files.


MODS
MODS is a customizable CAM platform made to meet the needs for many different kinds of fabrication equipment. Click HERE to go to MODS. This is where I inputed the machine settings and generated a Roland mill file (.rml) which are the direct instructions that will control the machine. I referenced another Fab Tutorial, MODS for PCB'S to learn how to use this program. When you open up MODS in a browser, you get a blank workspace. Here you can add and edit different modules to create a program or use a ready-made server program. To get the precompiled program for the Roland mill, I right clicked and navigated through these tabs:
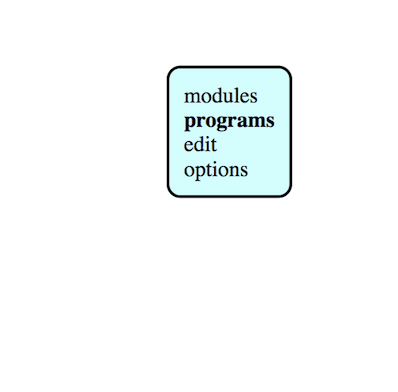
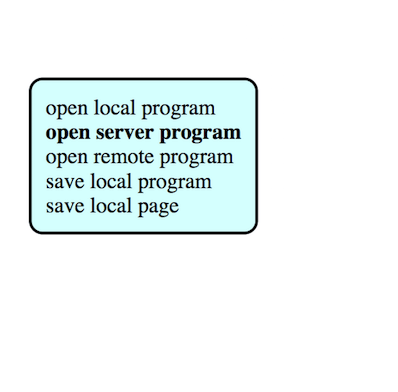
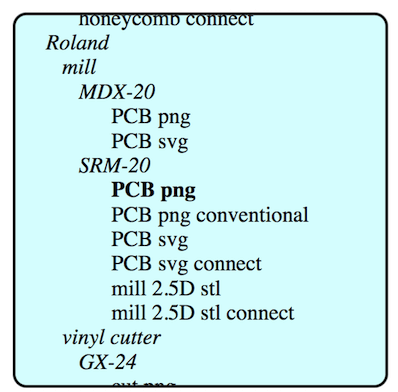
SMR-20 is the type of Roland mill we have in our Lab, so I chose the "PCB png" option from there. That pulled up a program with a ton of modules.
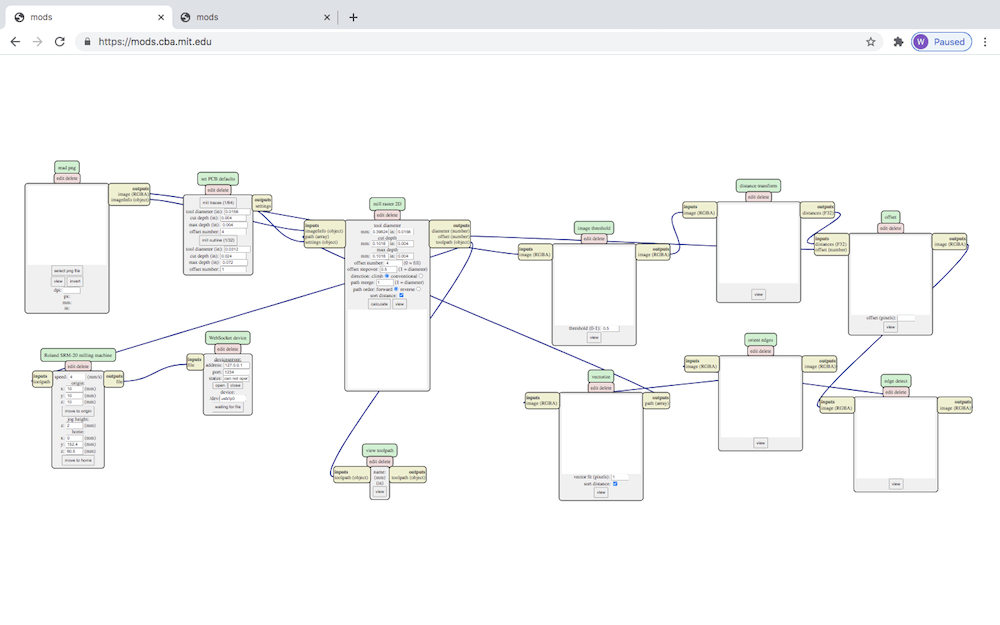
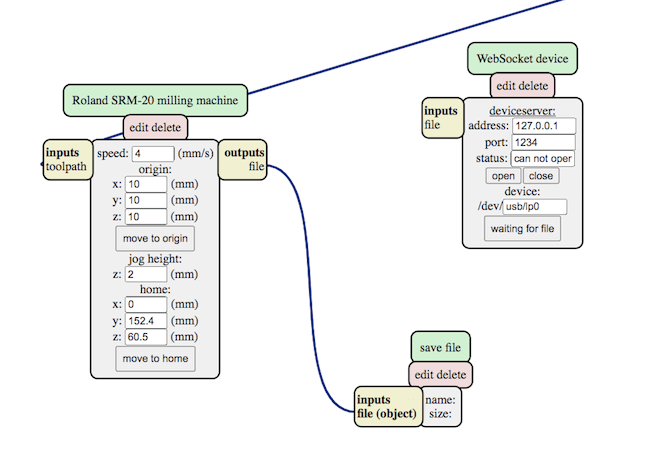
This part was confusing at first. I had no idea what any of these modules did or why they were connected. But, once I got started, I realized I only had to worry about this section on the left.
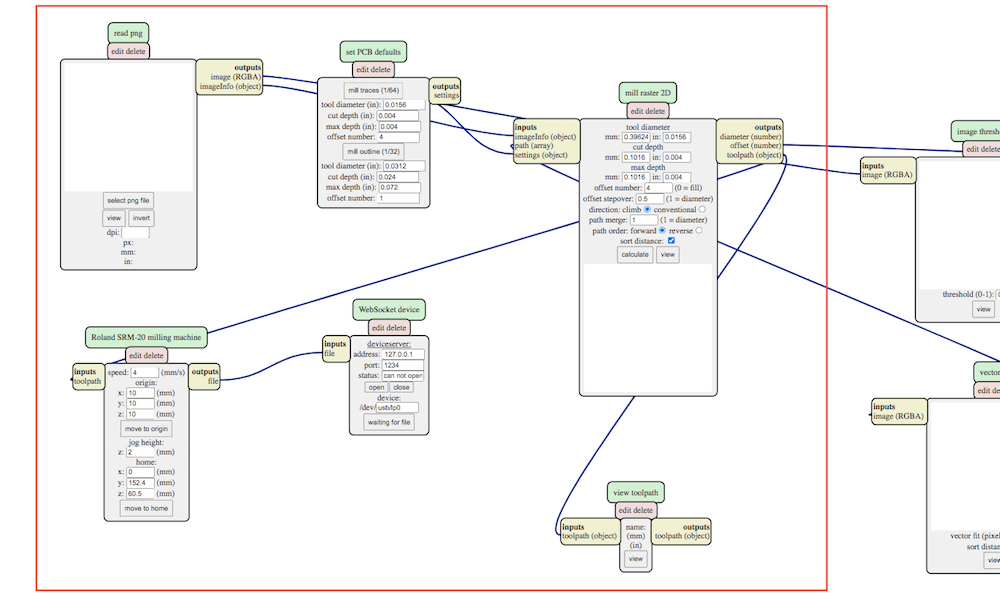
The next thing I wanted to do was edit the program so that it saved my output file to my computer instead of sending it to the Roland machine.
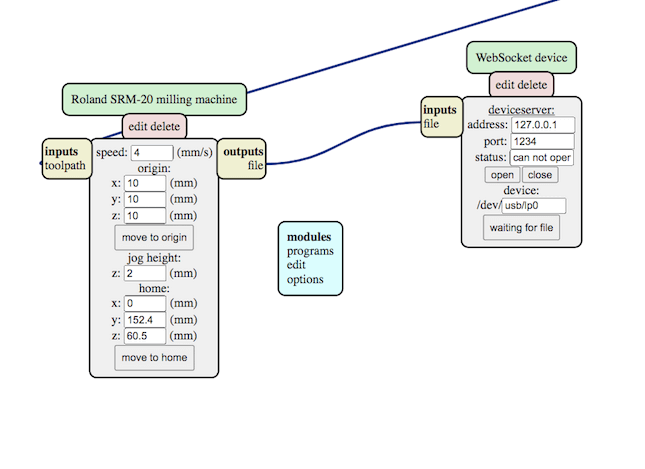
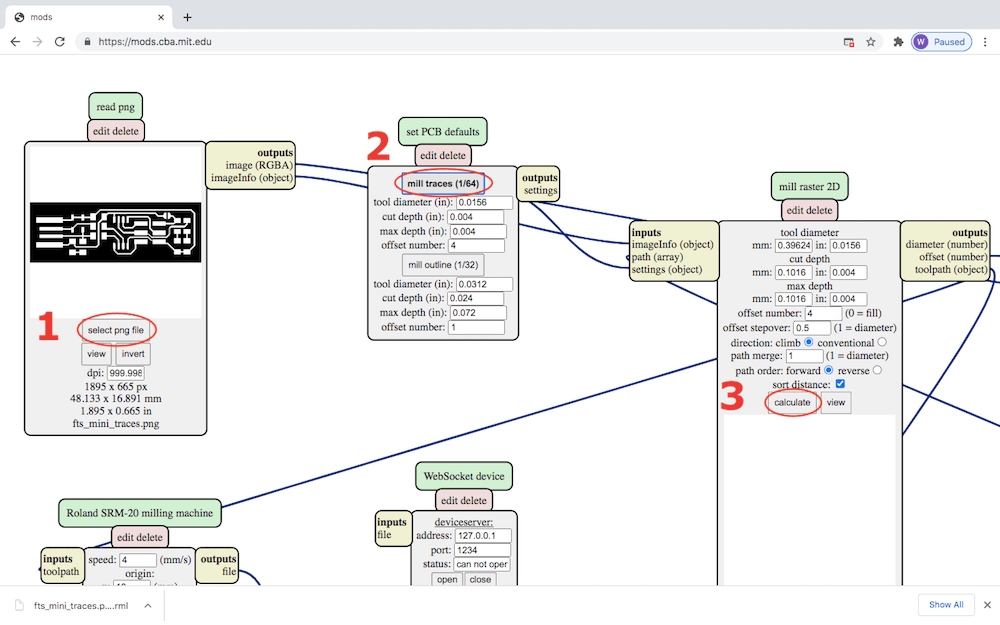
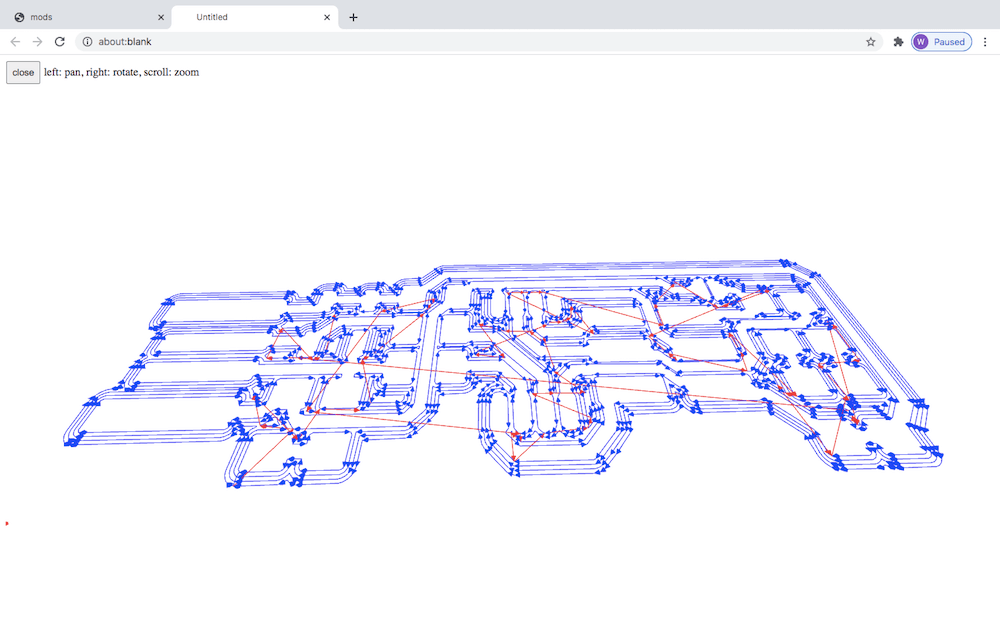
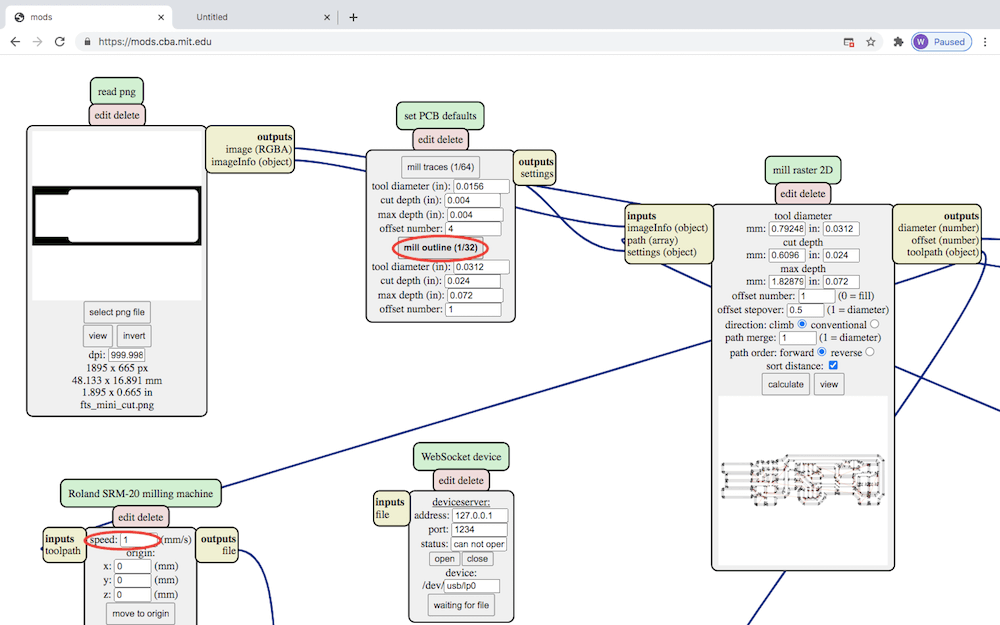
Now that my program is set up to save a .rml file to my computer, I can bring in one of the CAD circuits. First, I selected the traces.png file. Next, I chose "mill traces (1/64)". Then, I calculated it That automatically opened up a 3D vector path simulation.
Then, if I go down to the "Roland SRM-20 milling machine" module, I can edit the speed, jog height, origin, and home values. Speed is important because the wrong settings can easily break an end mill. I used the settings recommended in the Fab Tutorials. After that I re-calculated and that automatically downloaded my .rml file.
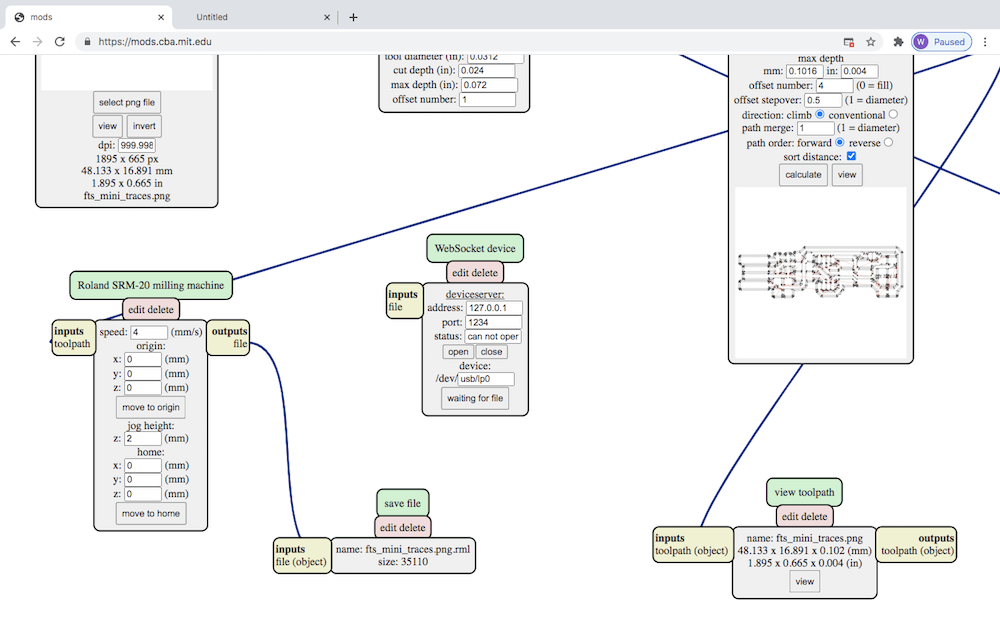
I used the same MODS setup to create the CAM file for the outline, except I chose "mill outline (1/32)" and changed the speed to 1 mm/s.
Roland Milling
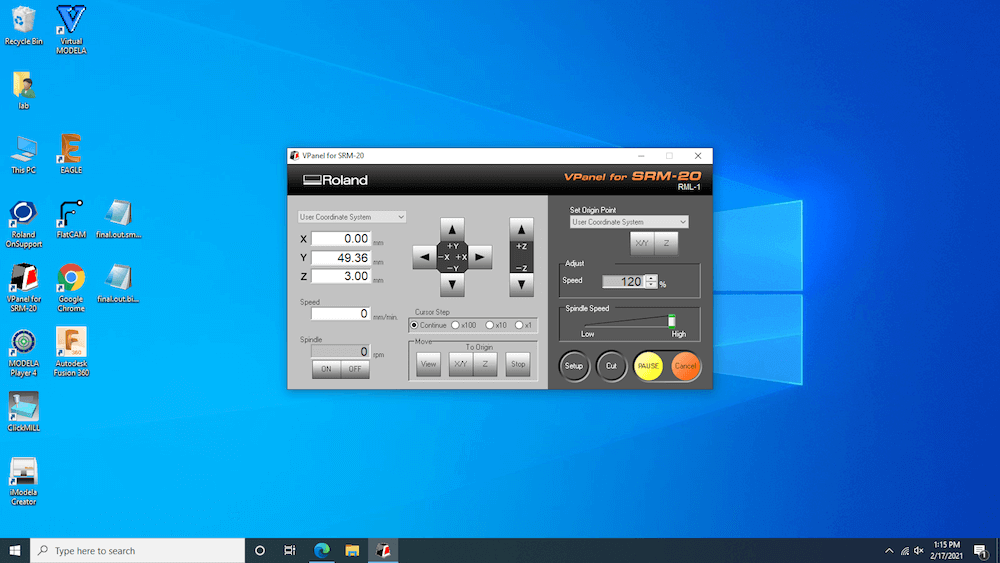
To operate the mill, we have a program called VPanel for SRM-20.
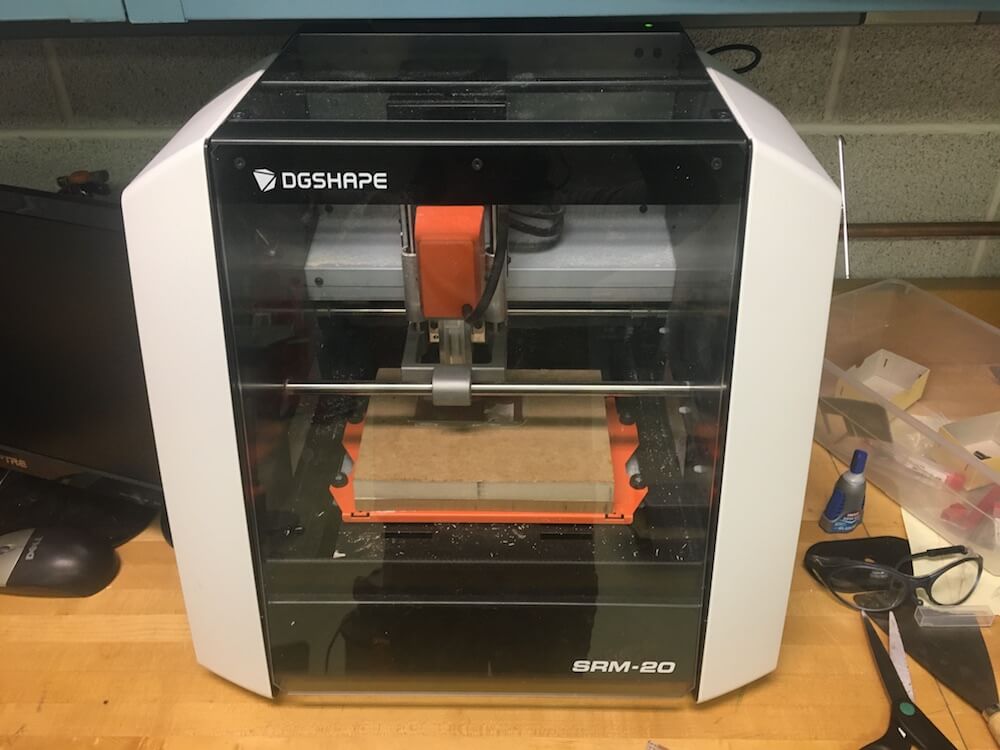
To set up the machine we need to secure the material to the workspace. I'm using a copper and fiberglass laminate for the circuit board material, and I just secured that with double sided tape. Notice how I have some material in between the circuit board and orange bed. This is sacrificial layer is to protect the machine bed from getting cut.
Next, I inserted the end mill. There are many types of end mills that work better for one job or another, and depending on the depth of cut, I can change the size of the hole they make. In addition, they get worn down over time, so that affects their performance as well. I used two different end mills for the traces and cutout. A 1/32" carbide ball nose for the traces and a 1/32" carbide end mill for the outline.
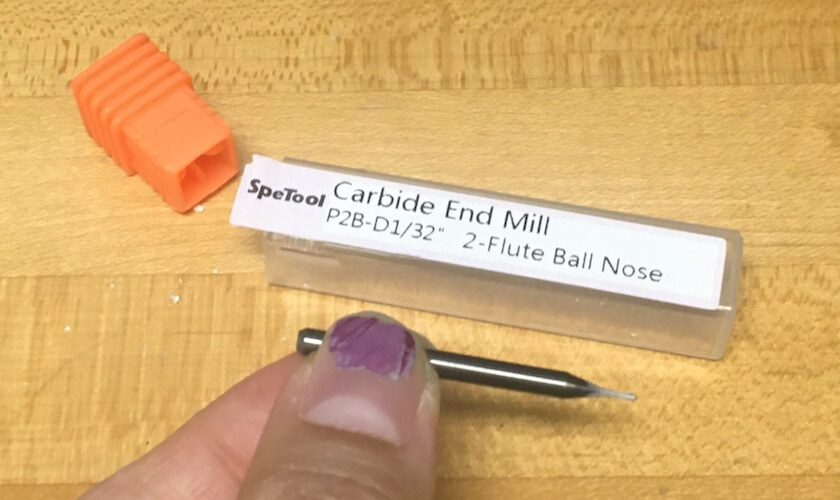
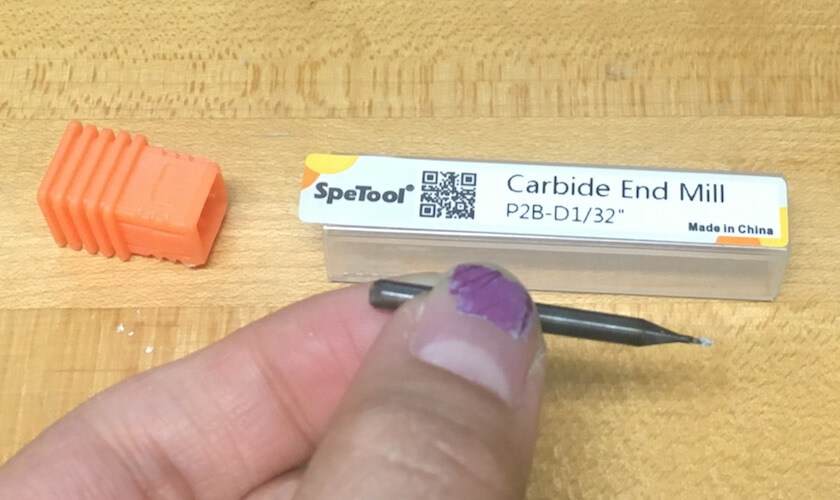
Whenever we're machining something, on the desktop mill or CNC router, we do the cutouts last to keep the material from becoming unstable. So, first I inserted the ball nose end mill (for the traces) and tightened the set screw.
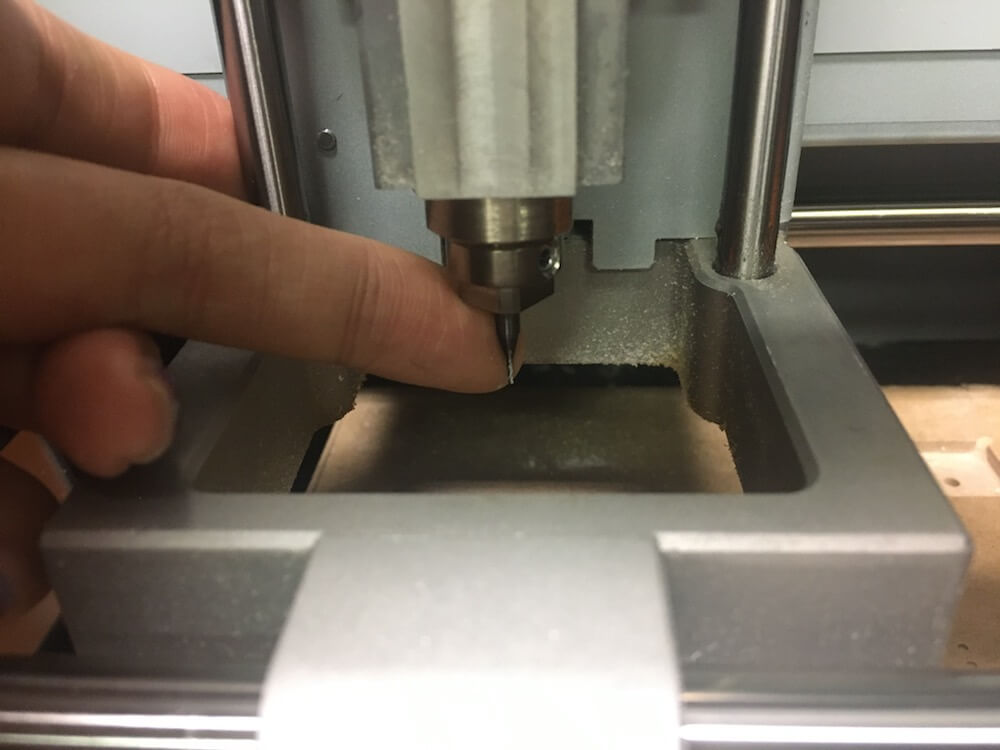
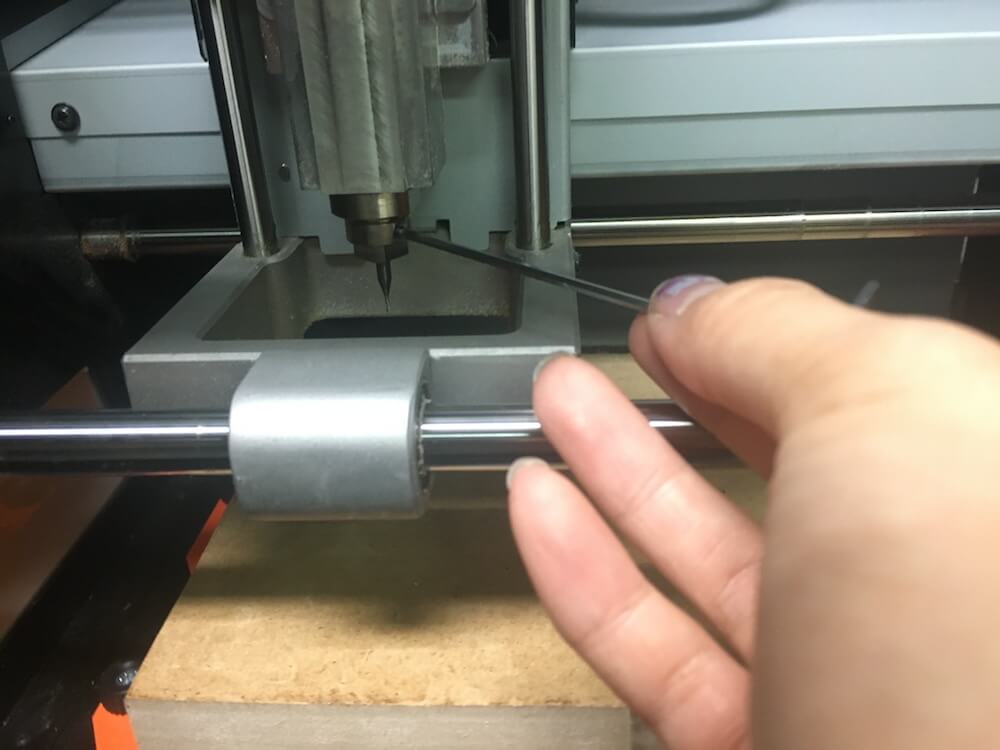
Then, I used the controls on VPanel to move the spindle to roughly the center area of the place I was cutting. Here, I slowly lowered the z-axis. Since it's really hard to use the controls to place the end mill exactly to the surface, after I lowered it a few millimeters away, I loosened the set screw to drop it to the table, lowered the Z axis again so about 10% of the shaft was showing, and then re-tightened it. After all that, I was able to set the Z origin to zero on VPanel. Once I moved the X and Y, and set their origin points too, I was able to start the job. On the control panel, I went to "Cut" and added my traces file, then began the job by clicking "Output".
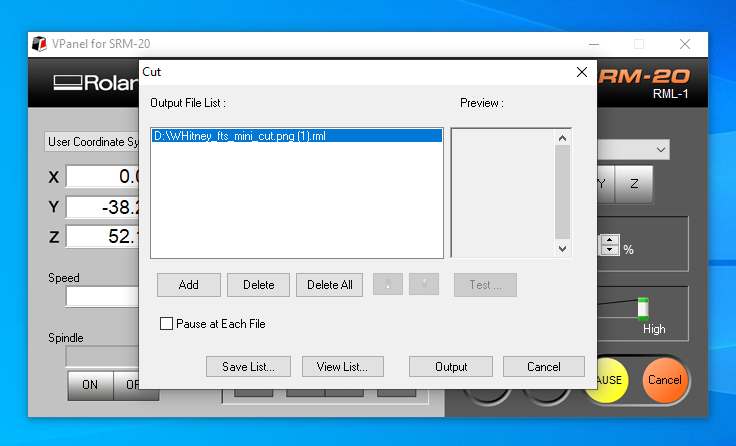

After that, without resetting any of the origin points, I changed the end mill to the 1/32" carbide bit and selected my cutout file. I found that the first time I did the outline it didn't cut all the way through, probably because I didn't tighten the set screw enough, but when I tried again it worked.
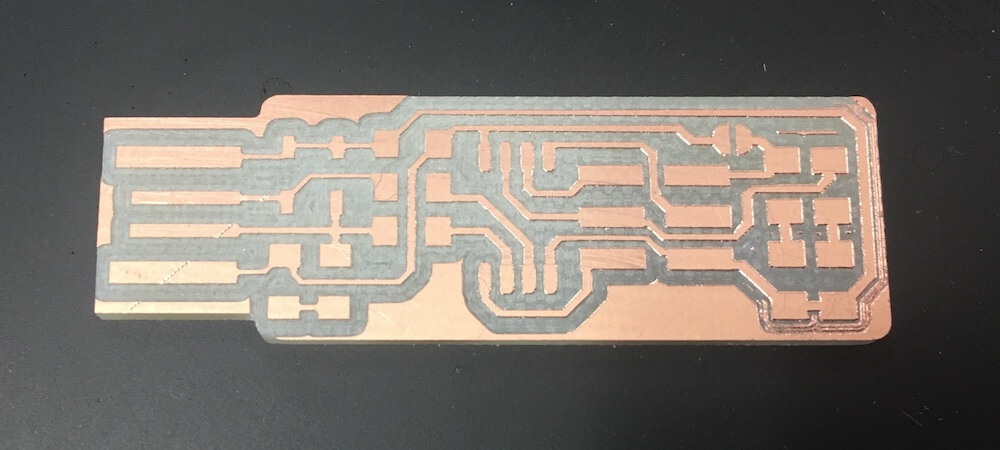
My circuit board came out well, except for one section on the far right where not all of the area around the tracing was removed. We think this is because the bed or underlay is slightly unlevel.
Soldering
After I milled the PCB, I added the components--this is called stuffing the board. Here is a list of the tools and electronic components that I used to make the FabTinyISP:
| Components | Quantity |
|---|---|
| ATtiny45 | 1 |
| 1kΩ resistors | 2 |
| 499Ω resistors | 2 |
| 49Ω resistors | 2 |
| 3.3v zener diodes | 2 |
| red LED | 1 |
| green LED | 1 |
| 100nF capacitor | 1 |
| 2x3 pin header | 1 |
Tools
- solder paste
- heat gun
- tweezers
- clamps
- multimeter
- X-Acto knife
- soldering iron
- desoldering braid
I referred to these diagrams from the Fab Tutorials site to show me where to put each component and how to orient them.
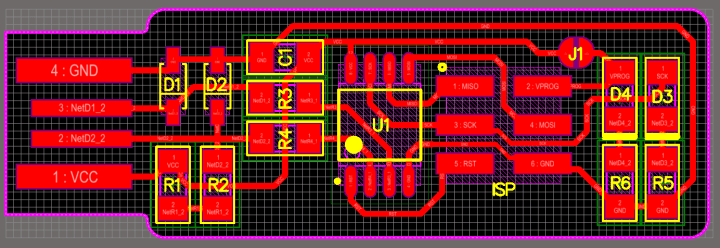
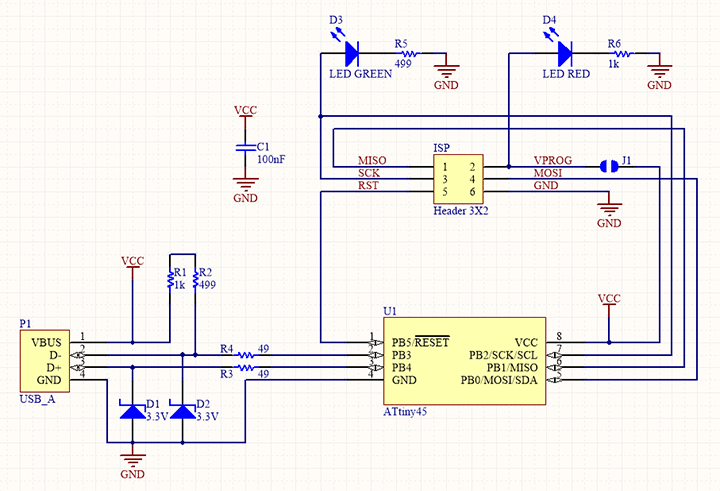
To attach the components, you can use either solder wire or paste. For my board, I used unleaded solder paste. First, I squeezed out some solder onto two connecting pads.
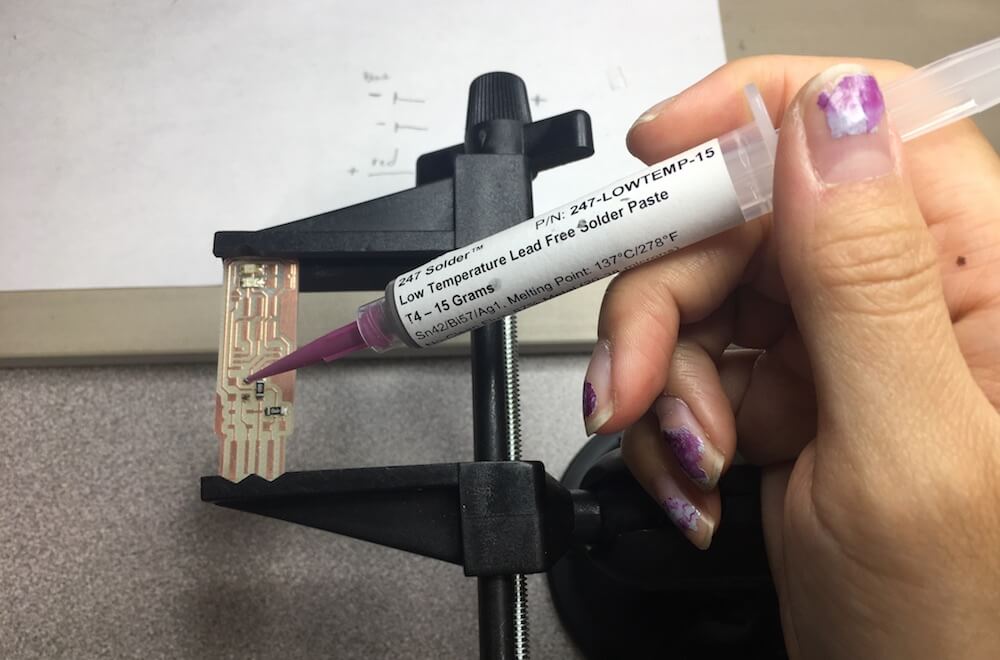

Then I gently placed the component on the pads, with tweezers, and used a heat gun to activate the solder paste. Notice the difference before and after using the heat gun. This part was pretty cool, watching the solder instantly go from grey to silver and getting pulled toward the other metals.
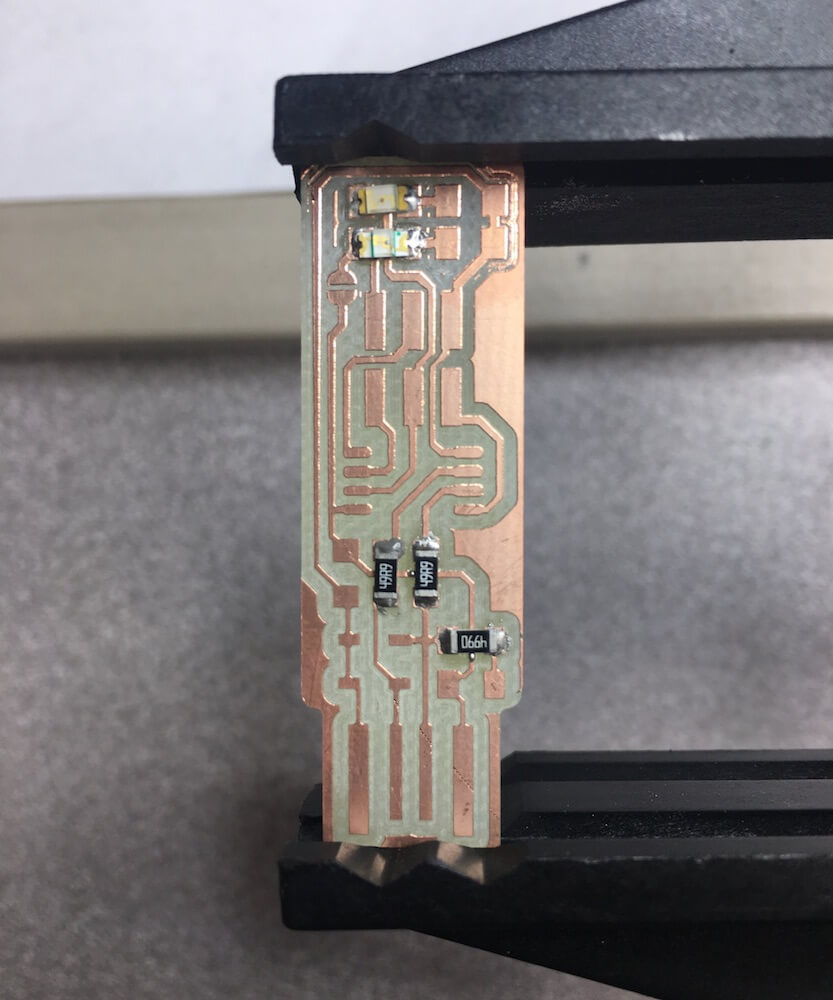
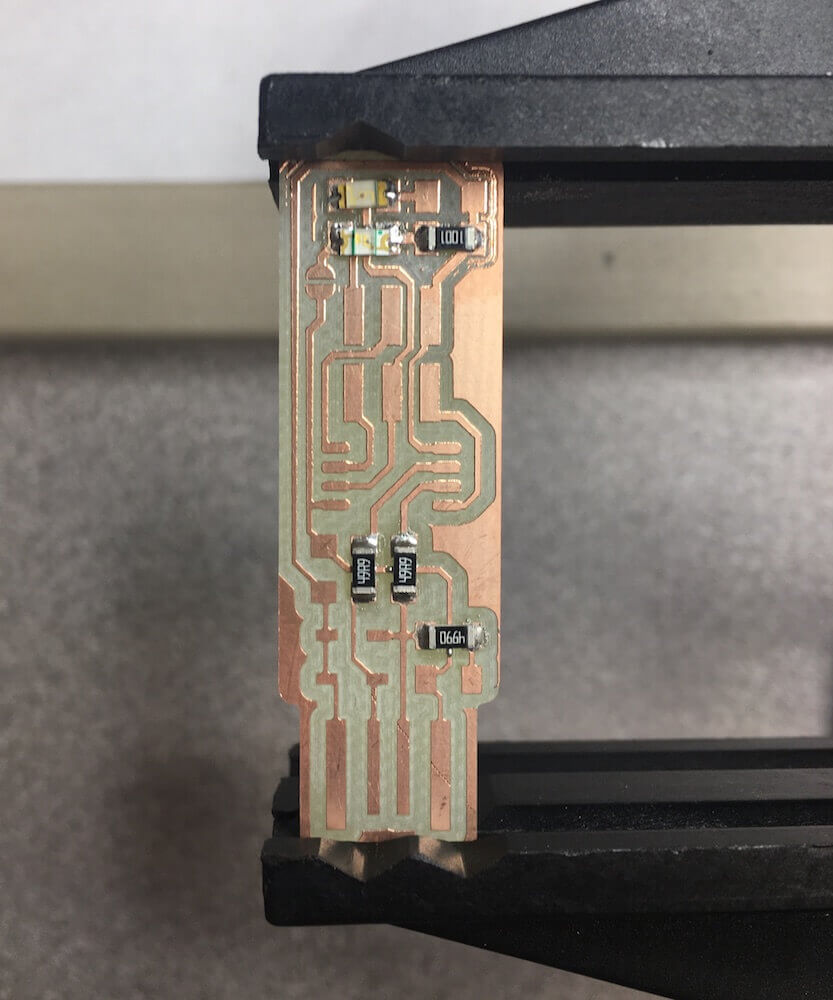
I continued this soldering process until I placed all of the components. After each addition, I used a multimeter to check the continuity, making sure the solder only connected pads where I wanted it to.
Most of the items, such as the resistors and capacitor, did not require a special orientation. The ones that did have a direction had markings. The diodes and LEDs, for instance, had lines and arrows toward the cathode side that had to be facing the same way as the arrows in the circuit diagram.
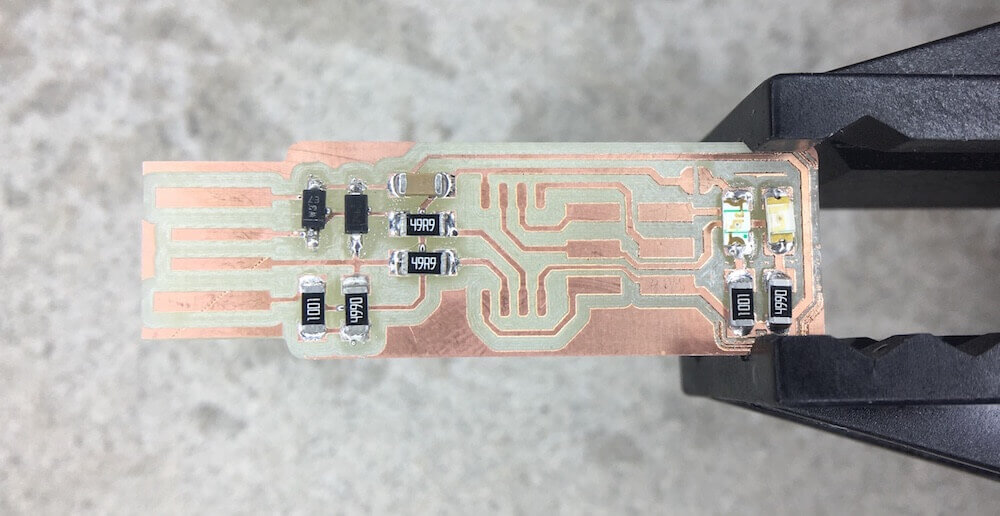
The ATtiny 45 has a circle near its 1st lead which, according to the diagram goes in the lower left-hand corner. For components that had more than two solder joints, I attached them by securing the opposite leads first, then going back to do the rest.
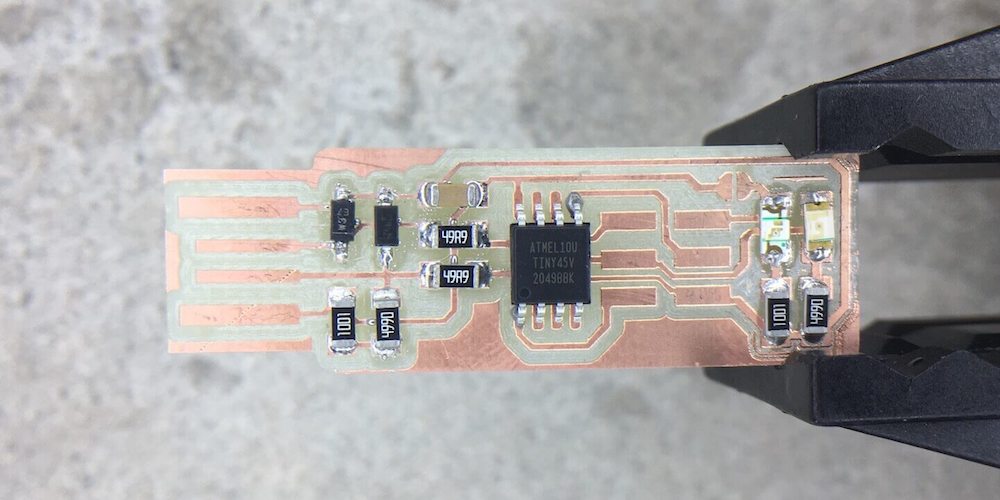
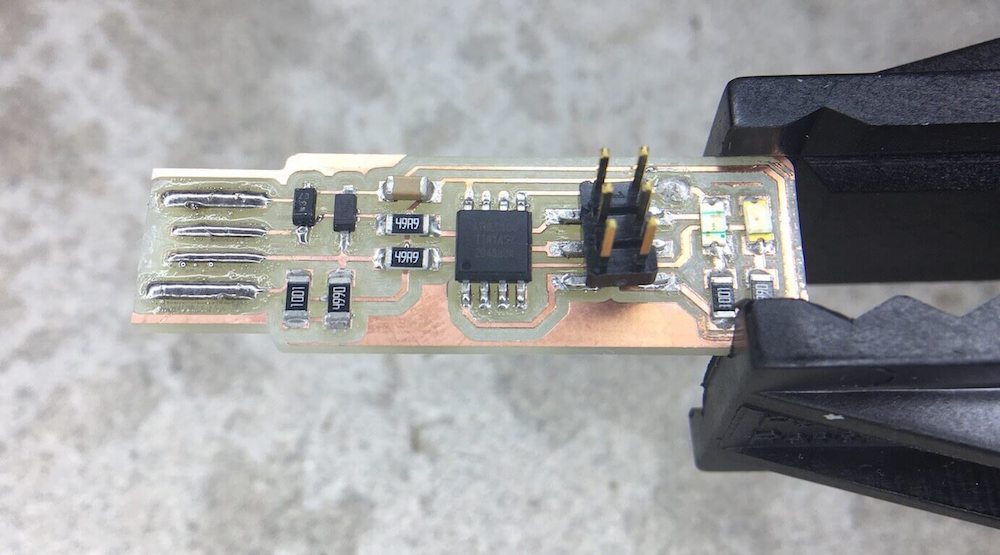
I soldered the pin header last, since it was the largest. Once I had all of my components on the board, I made a solder joint at the point J1. That bridge is for the board to use while it's being programmed. Later, I'll de-solder that joint when I wish to program someone else's board. I also had to scratch off the small copper rectangle on the left hand side. Lastly, since this board will plug into a USB port, I built up the trace lines on the left with solder so that they could make better contact inside the USB port.
Programming and Debugging
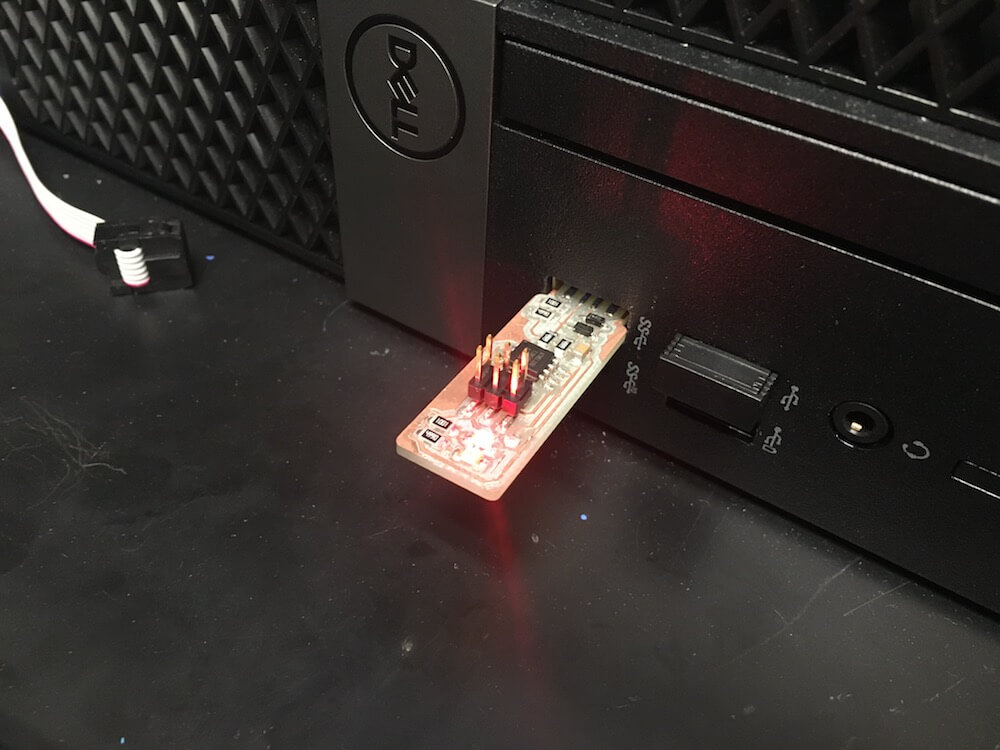
This was the hard part. Before plugging the FabTinyISP into a computer, I checked for short circuits by touching the red and black ends of the multimeter on the power and ground respectively. Then when I plugged it into the computer, it didn't start smoking so that was good.
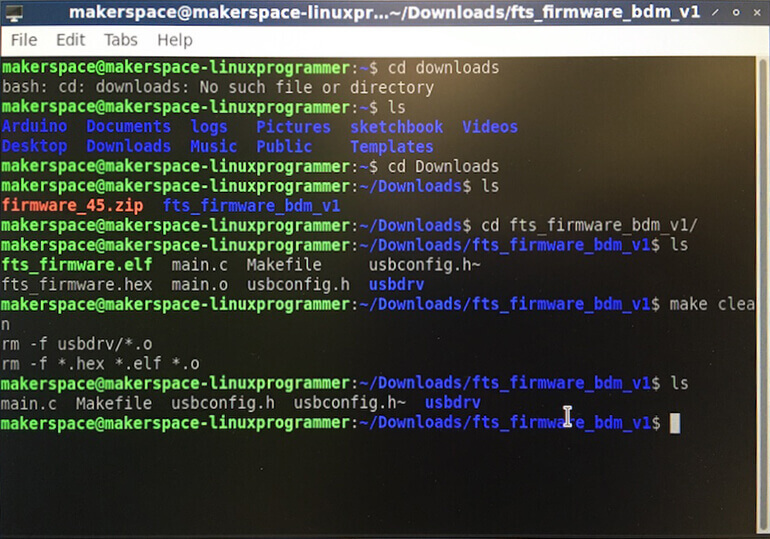
In the terminal, I opened up the firmware source code (this was previously downloaded from the Fab Tutorials site). Since other students were using the same downloaded firmware and computer in the Lab to program their boards, I needed to clean the directory from other people's work before I began.
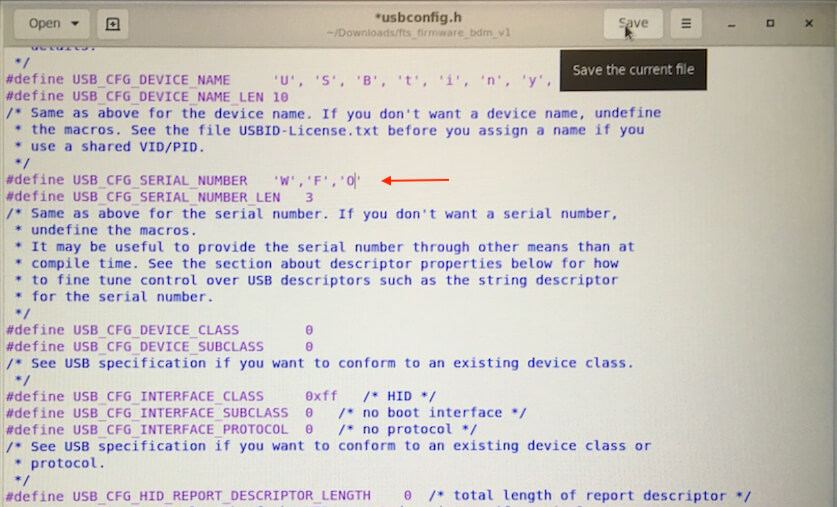
Then, I added my name to the board's serial number by editing the usbconfig.h file.
After that, I flashed the firmware source code onto my board. To do this I needed a secondary programmer device, so I connected my board to Prof. Goodman's, while making sure all of the pins and jumper wires were aligned in the same way. I plugged both boards into the computer.
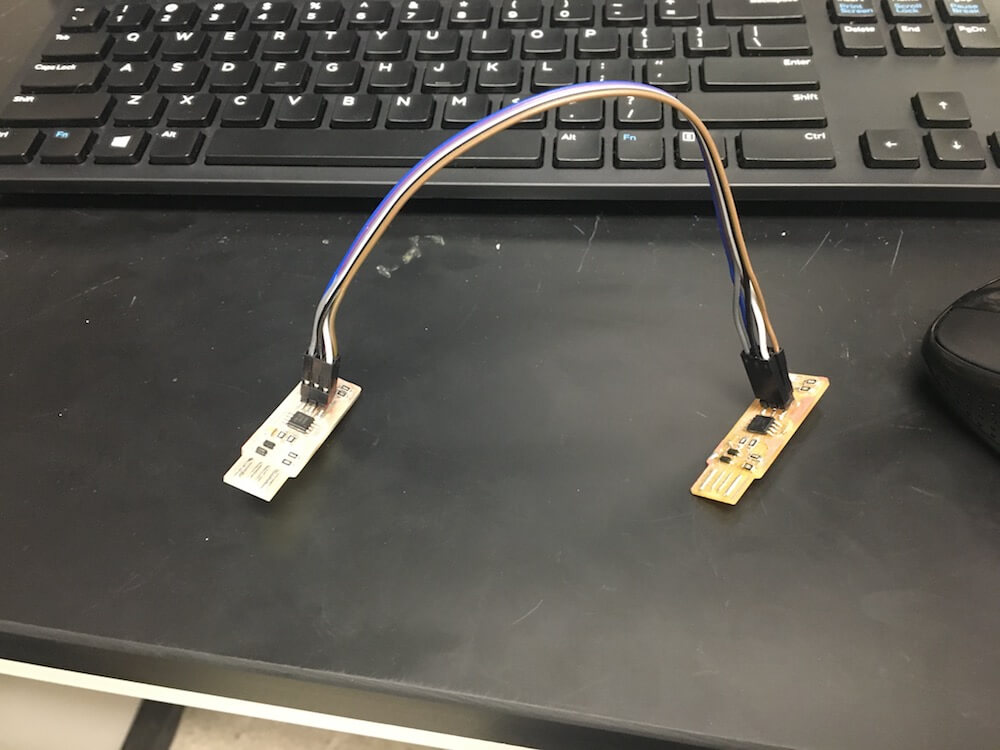
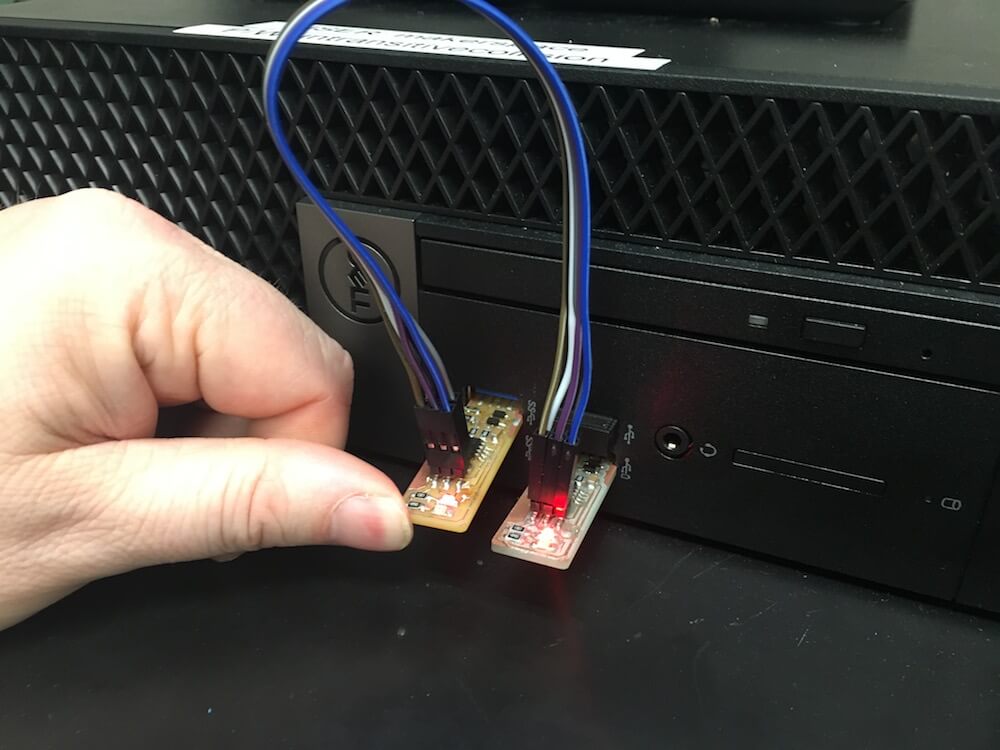
Depending on the type of programmer device, I would have needed to edit the document called Makefile in the source code, but by default it is set to recognize a usbtiny as the programmer, which is what I have with Goodman's board. In the terminal, I typed "make flash" to send the firmware to my device. This gave an error message the first time, but I flashed it again and it appeared to work (except it didn't and I found that out later).
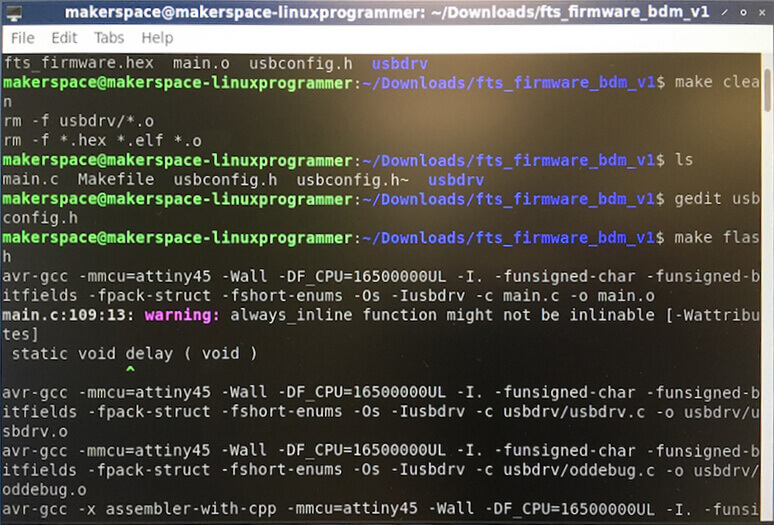
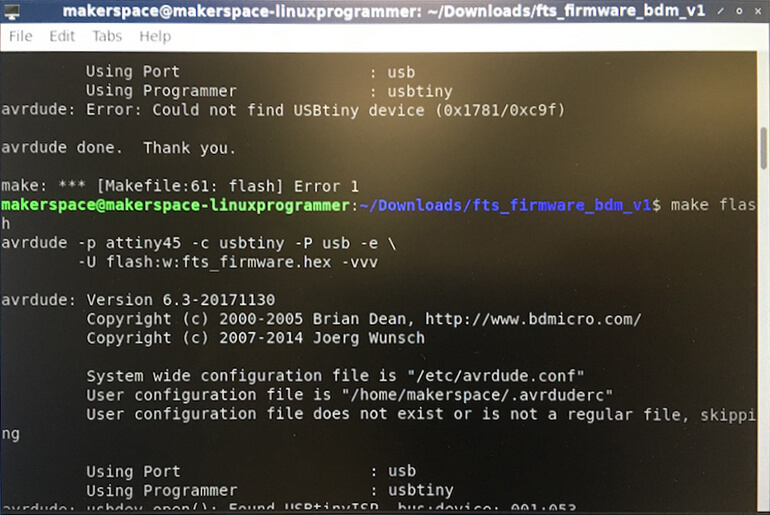
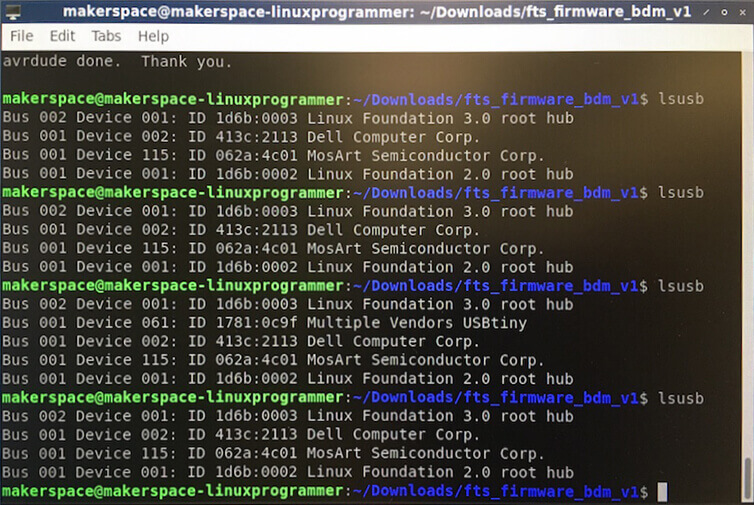
Once I did the "make flash", I tried to check if my board could function as a USB. Essentially, I wanted to see if the computer would recognize my device at all before I permanently changed it to make it unprogrammable. So, I unplugged both boards from the computer and disconnected Goodman's board from mine. Then, I re-inserted my board alone. To see if the computer could read my board as a USB, I typed "lsusb" into the terminal. This is where things went wrong.
The computer would not recognize my USB. In the image below, I tried the "lsusb" command a few times to get a reading that said, "Multiple Vendors USBtiny". (The third attempt that worked was from when I switched my device out for Goodman's.)
Debugging
I tried so many different things to fix this issue. First, I tried angling the board another way inside the port and added more solder to the USB connector. Professor Goodman helped me check my board visually, and with a multimeter, to see if there were any bad connections, but it all seemed fine. The red LED was working, so we knew it wasn't an issue with the power supply. Prof. Goodman suggested that it might be an issue with the zener diodes, which seemed reasonable. Even though the diodes were facing the right way, I remembered when soldering, one of them had very crooked leads, so I figured that might have been a broken one.
I went back to the soldering station to remove the potentially problematic zener diode. Using the tweezers, I held up my circuit board by that one component and let the heat gun melt the solder until the board dropped away. That left me with clumps of hardened solder on the two pads where I needed to add a new diode. I tried using the desoldering pump, but I was foolish and used the heat gun instead of the solder iron to heat up the component. When I released the pump to suck up the solder, it knocked half of my components off the board. So, I re-soldered all of the components to the left of the ATtiny 45. This time I used the solder iron to heat up specific bits of solder and gently wiped them up with de-soldering braid or paper towels.
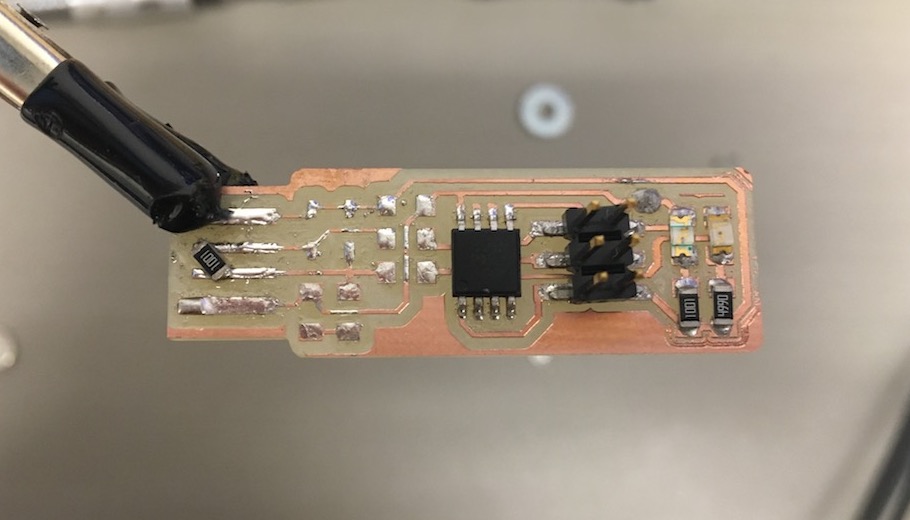
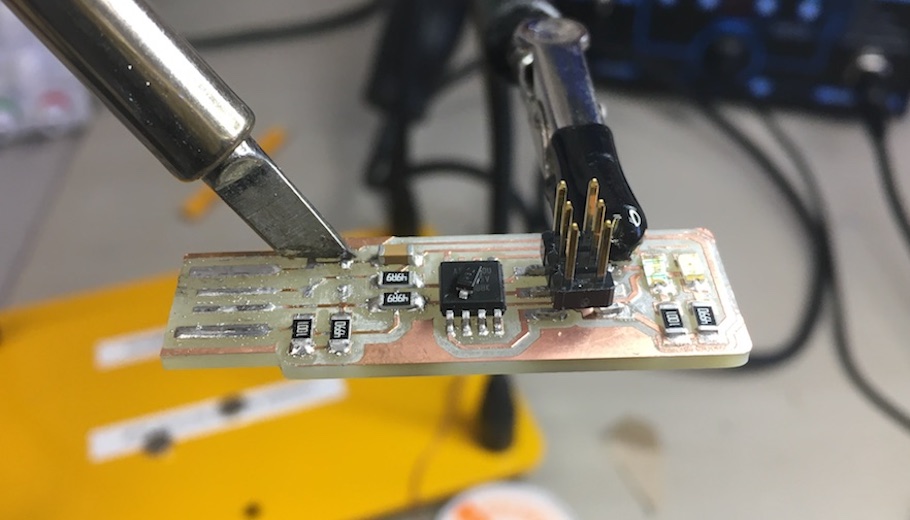
After I re-attached those components, I went back to the Linux computer and typed in "lsusb", but it still didn't work. Apparently, this was a problem that about half the class had. We think it was an issue with the firmware in the programmer board (one that we were all sharing) that never got fused so someone accidentally did a "make flash" on it and re-wrote the code. This probably meant that back when I did the "make flash" command to my board, it looked like it worked but it actually didn't.
So, I with a fixed programmer board, I did the "make flash" command again, and then "make fuses", and "make rstdisbl" (reset disable) to make the changes permanent.


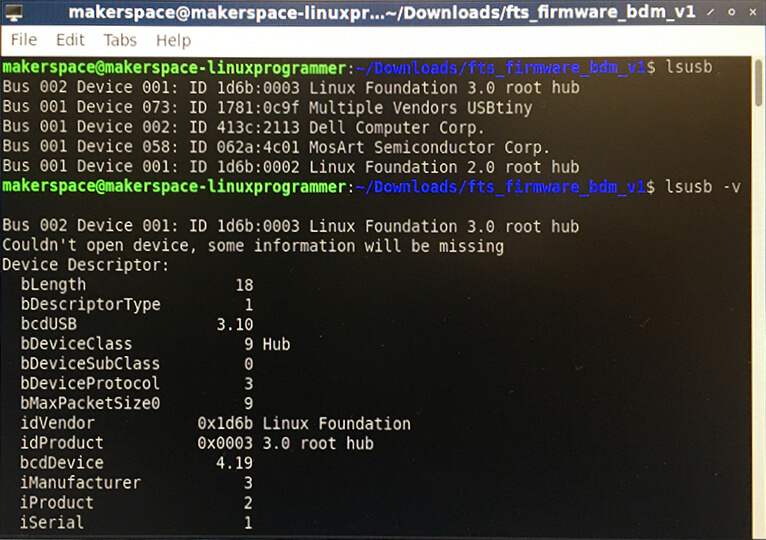
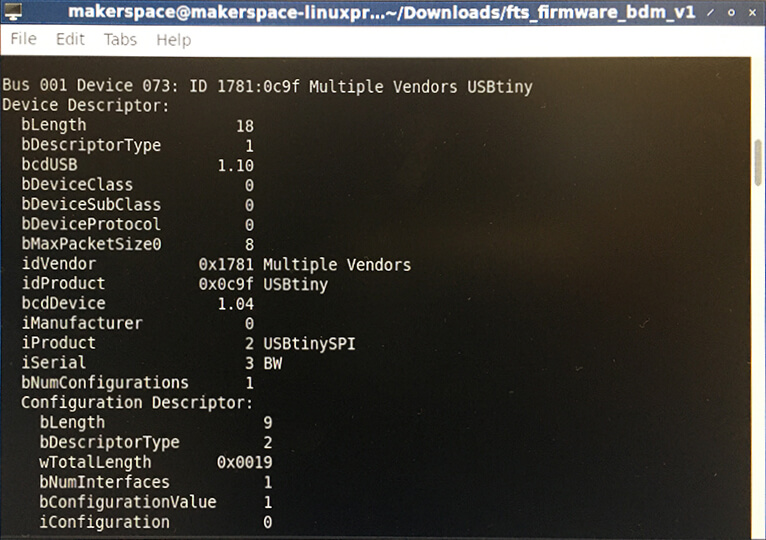
Then, whenever I pulled up the list of USB items, my device appeared under "Multiple Vendors USBtiny". Now, I have a working circuit board that cannot be re-programmed. The last thing I had to do was de-solder the jumper.

This introduction to making PCBs taught me a lot. While making the FabTinyISP, I learned how to use the Roland mill and how to stuff and program a board. It's a very meticulous process, especially the soldering, but those skills will come in useful again. In Week 07: Electronics Design, we'll go into more detail on how circuit boards work and how to design them.
Resources
- 5.2 FabTinyISP_english
- 5.1 MODS for PCB´S | MODS website: mods.cba.mit.edu
- 5.5 PCBs with SRM-20 | Info on the Roland Mill SRM-20
- FabTinyISP source code to download: firmware_45.zip
Design Files
Updated: February 24, 2021