Fifth week is creative week,In this week we have design 3 diamentional objects by using 3D printer.We have used 3D printer.we test different 3d design parameters. We have used fracktory s/w for G-code generation, which can convert our 3D design file in the programming laguage, which will be understood by the machine. Also, we have scanned 3D objects by 3D scanner using Sense s/w. Print the scan object by 3D printer.
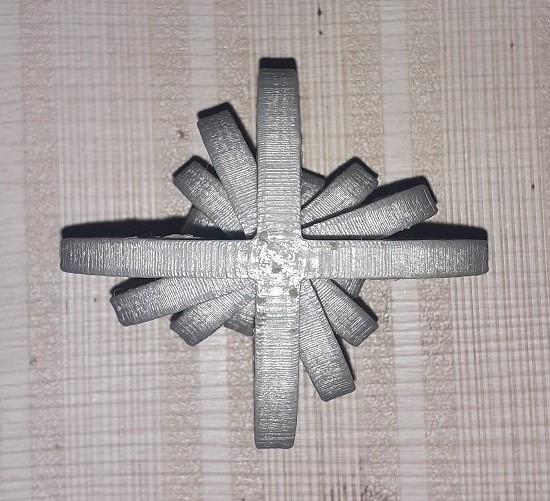
Hero shot.
Assignment-5
3D Scanning and Printing
OBJECTIVES
Group assignment
- Test the design rules for your printer
- Document your work and explain what are the limits of your printer(s) (in a group or individually)
Individual assignments
- Design and 3D print an object that could not be easily made subtractively
- 3D scan an object, try to prepare it for printing (and optionally print it)
About Group Assignment
In group assignment we have to check design rules for 3D printer Fracktal work (Julia Extended). For that different test patterns are given in the 3D printing and scanning assignment.We downloaded all test patterns and printed it with some controlled parameters.
Test Result
As a part of group assignment I have studied the clearance parameter for 3D printer in our Fab lab.
Clearance test show that, if the clearance between the two surfaces is in the range 1mm to 0.6 mm object wobbled. If the clearance between the two surfaces is in the range 0.5mm to 0.3 mm object moves without wobbled where as for the clearance 0.2 mm to 0.1mm object fixed with the surface.
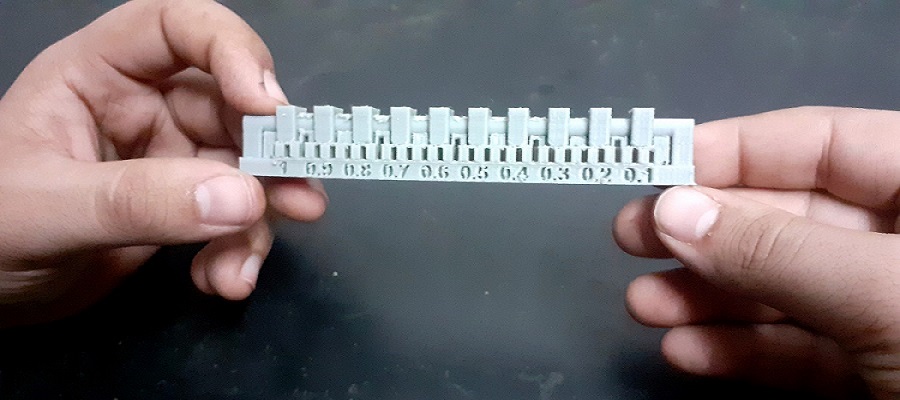
Clearance Test Object with support
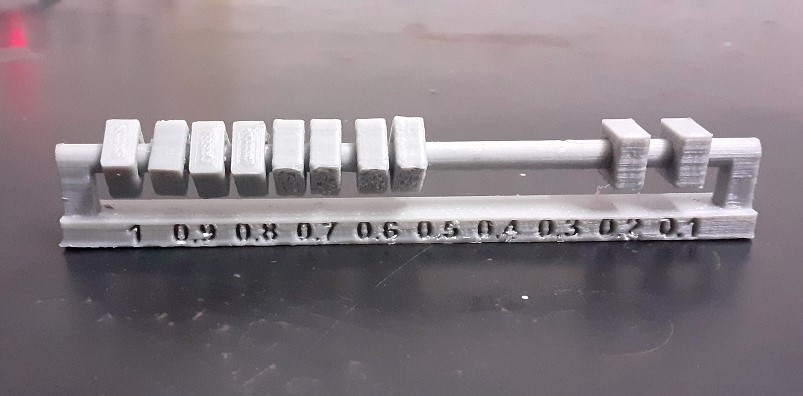
Clearance Test Object
Summary
From the test it is clear that clearance between two surfaces is in between 0.5mm to 0.3 mm, gives the expected movement.
Individual assignment on 3D Scanning and Printing
3D printing or additive manufacturing is a process of making three dimensional solid objects from a digital file. The creation of a 3D printed object is achieved using additive processes. In an additive process an object is created by laying down successive layers of material until the object is created. Each of these layers can be seen as a thinly sliced horizontal cross-section of the eventual object. 3D printing is the opposite of subtractive manufacturing which is cutting out / hollowing out a piece of metal or plastic with for instance a milling machine. 3D printing enables you to produce complex shapes using less material than traditional manufacturing methods. (Source:3D printing)
The work flow for the assignment is given below.
- About Fracktal works
- Additive and subtractive method
- 3D print design using Rhino.6
- Use of Fracktory S/W
- Object Printing
About Fracktal works
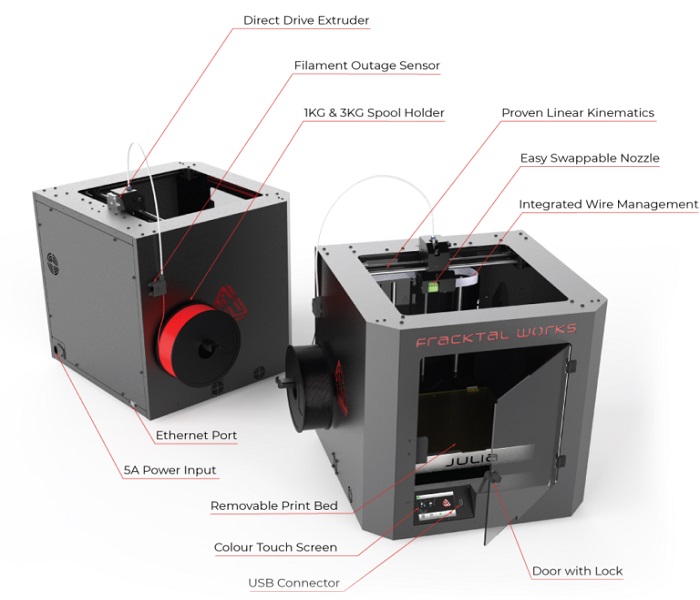
Specifications
- Bed Size:250 mm x 250 mm x 300 mm
- Print Technology: Fused Deposition Modelling (FDM)
- Filament Diameter: 1.75mm
- Nozzle Diameter: 0.4mm
- Nozzle Temperatures:Upto 240 °C
- Bed Temperature: Upto 110 °C
- Compatible Materials:ABS, PLA, Tough PLA, PLA+, PETg, PVA, PVA+,BVOH,Polycarbonate, Nylon 12*, Carbon Fiber Nylon*, Carbon Fiber PLA
- Supported File Types: STL, OBJ
- File Transfer :USB Pen Drive, WIFI, LAN
Additive and subtractive method
Additive method
Additive method is actually a synonym for 3D printing and/or any process by which 3D objects are constructed by successively depositing material in layers such that it becomes a predesigned shape.
Subtractive method
Subtractive method is a process by which 3D objects are constructed by successively cutting material away from a solid block of material. Subtractive process can be done by manually cutting the material but is most typically done with a CNC Machine.
3D print design using Rhino.6
- Open the Rhino.6
- Select new file
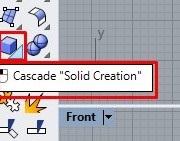
- Goto the Top view
- Left click on cascade “Solid creation”
- Left click on “tube”
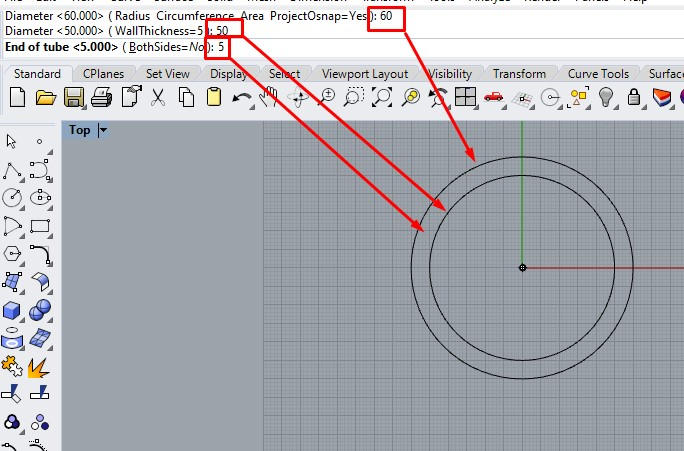
- Enter the dimension of the ring.
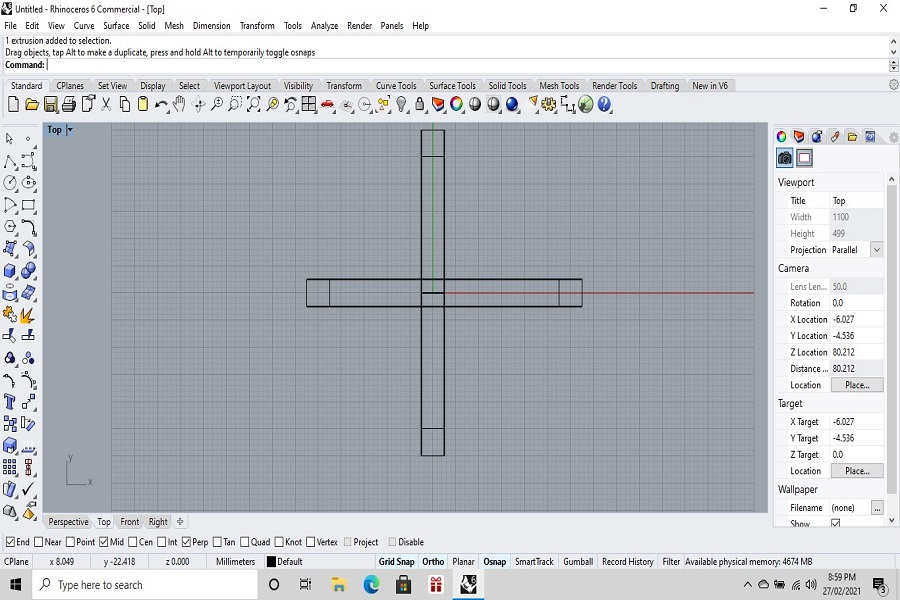
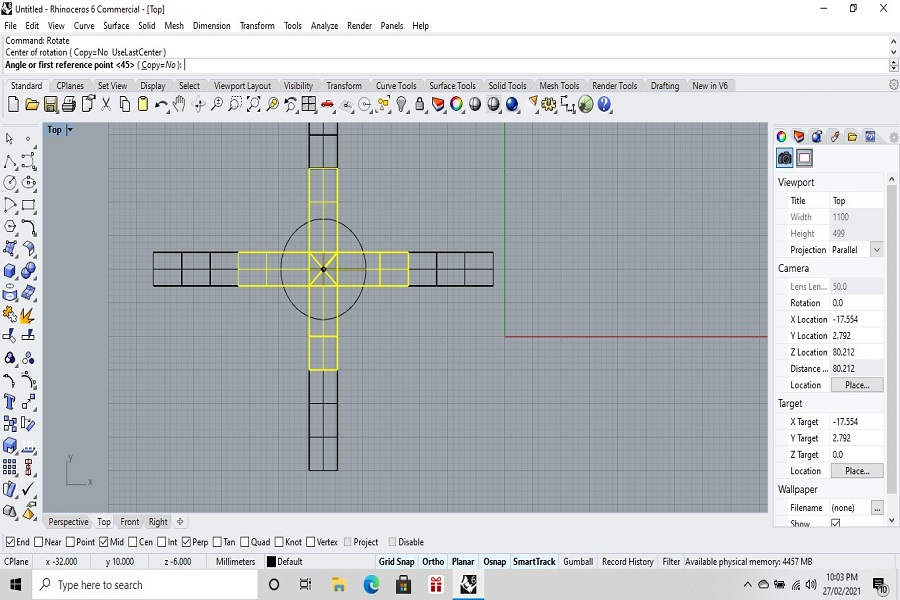
- Copy an object and rotate it in 90⁰ through the center.
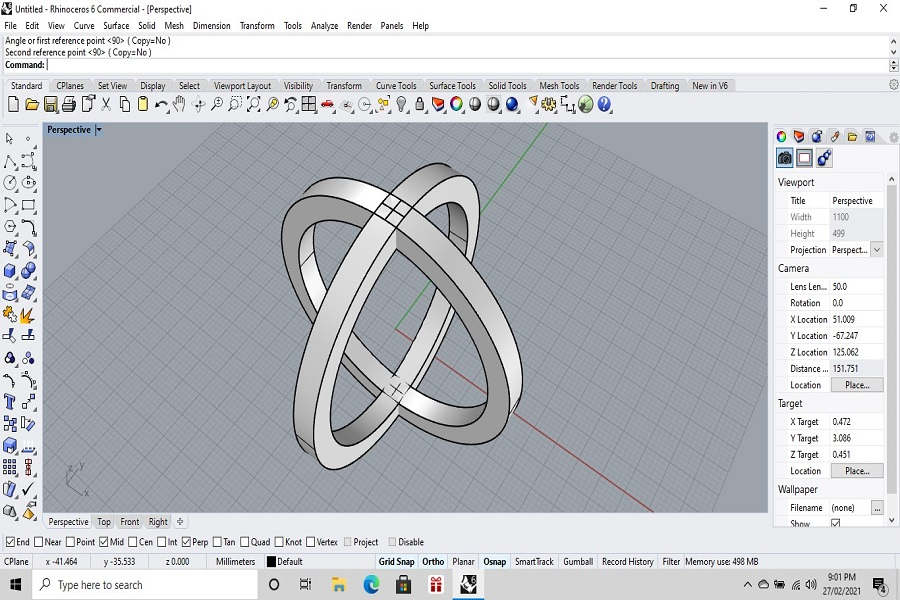
- Select both the object and group in with Boolean union command.
- Similarly create different rings of different diameters
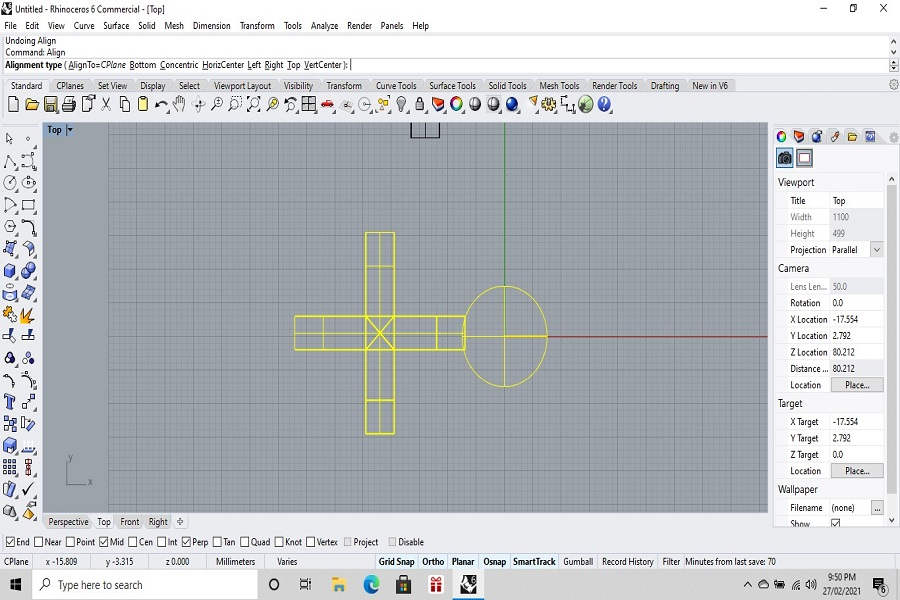
- Create small sphere and align at the center with Align command.
- Align all the objects with alignment type concentric.
- select each object and rotate it with particular angle by Rotate command along center point.
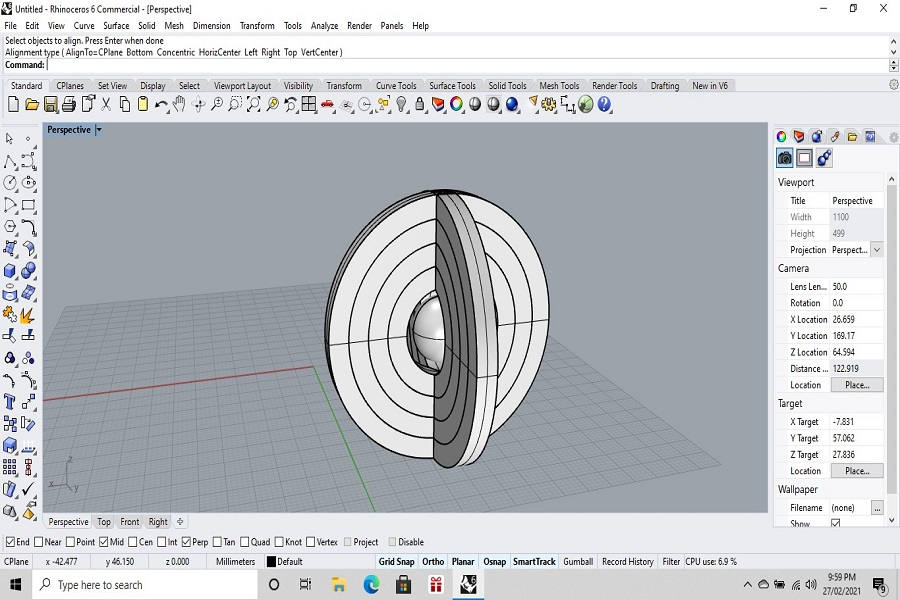
- different views of the objct
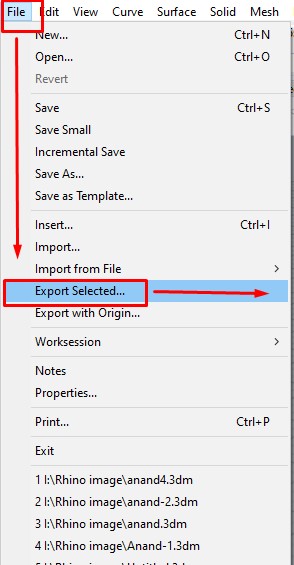
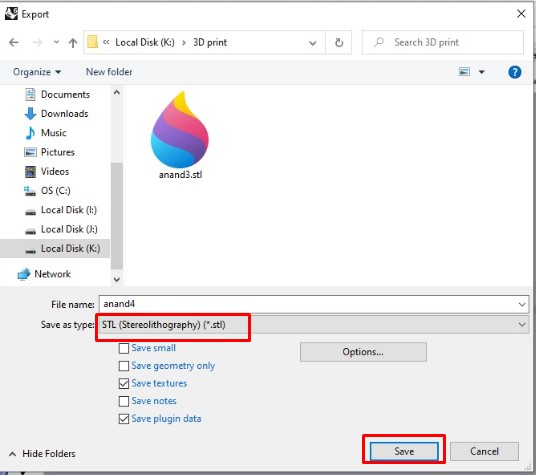
- Once the object is ready ,select the object goto file menu click on Export selected.
- Enter the file name and select save type *.stl, click on save button.
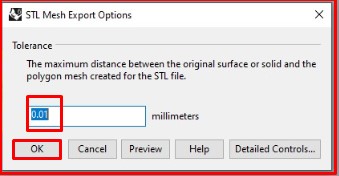
- Enter tolerance 0.01mm (default), click ok
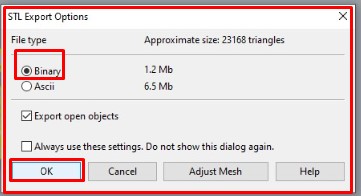
- Select file type Binary, click ok.Rhino file is converted into stl file.


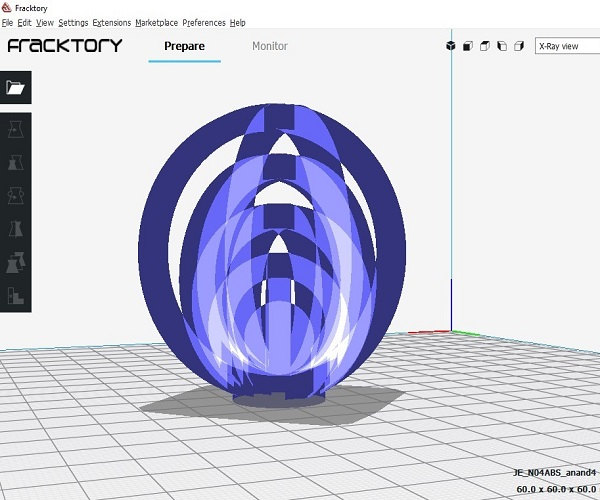
Use of Fracktory S/W
Fracktory S/W its open source s/w. It convert stl file in to G-code.for 3d printing machine required only G-code.
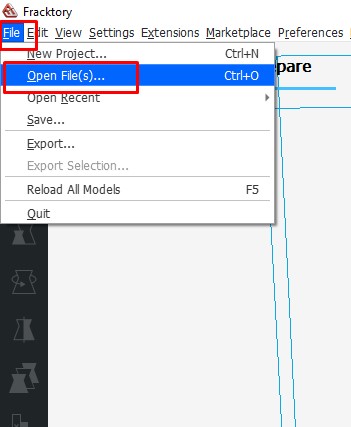
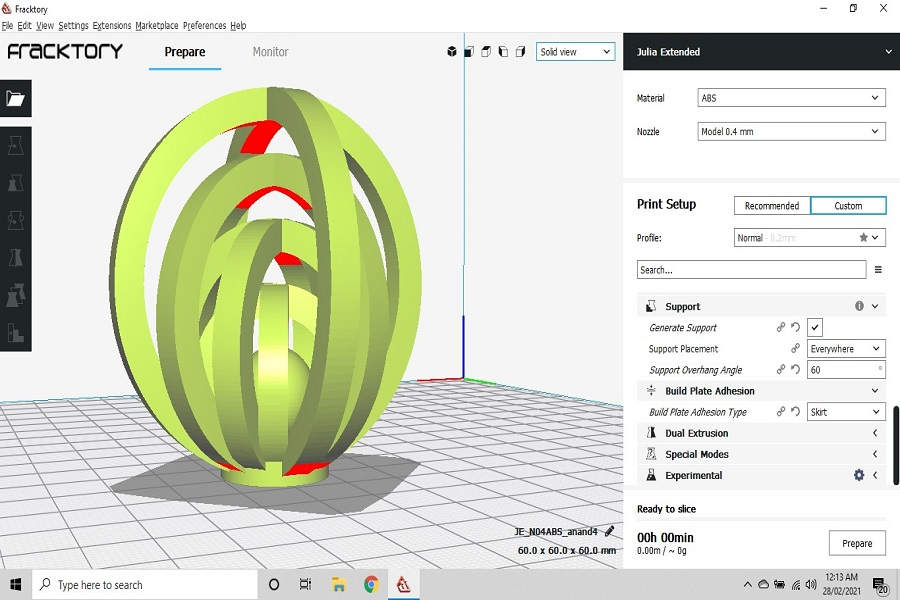
- Import the stl file.
- Imported object were shown in image
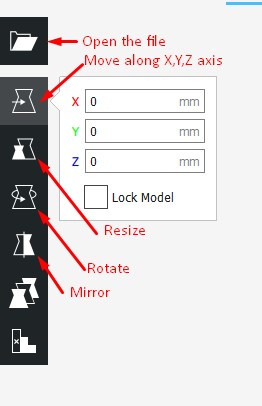
- Set the different parmeters like move,scale etc for placing design perfectly on the surface.
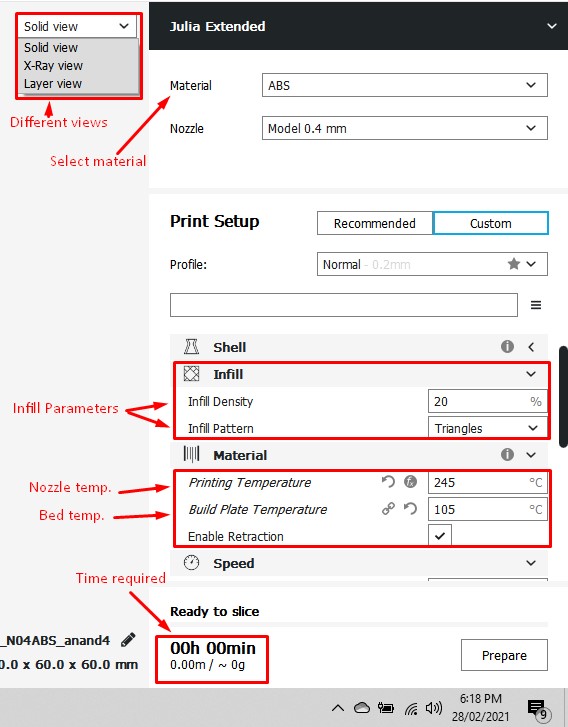
- Select material type ABS,PLA etc,we select ABS material.
- Select infill density 20%,infill pattern Tringle etc as shown in image.
- with all this parameter and different view of object.
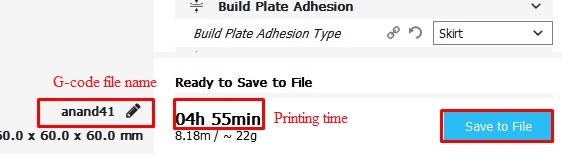
- Click on Prepare,Slicing were started.G-code file were generated with printing time.save the file.
- The G-code file png image


Object Printing by 3D Printer
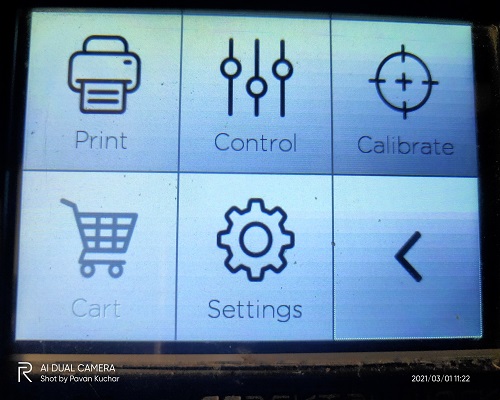
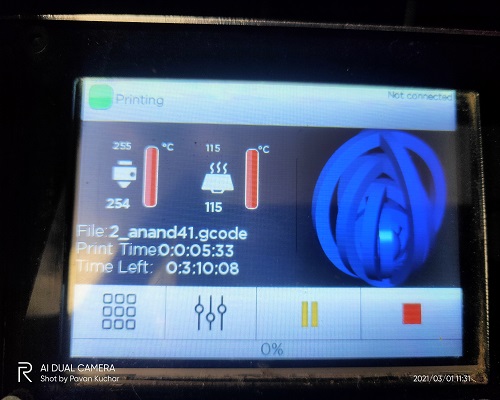
- Turn the printer on. for smooth printing go through the followings.
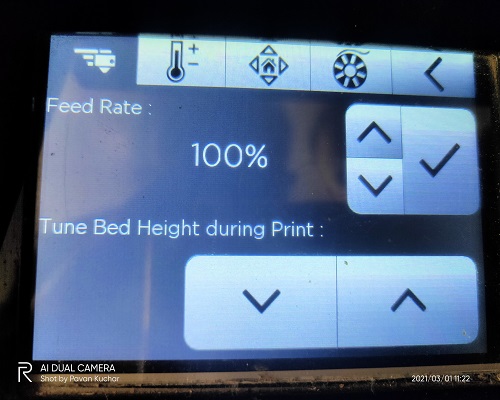
- Controll panel of 3D printer.
- Go to control,Check the feed rate of Nozzle
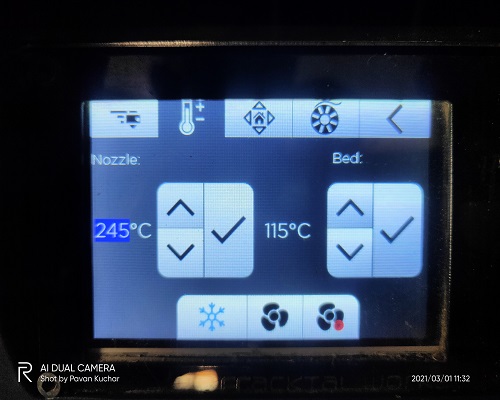
- temperature of Nozzle and bed
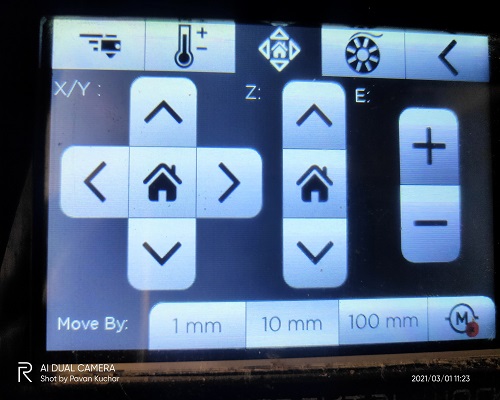
- Home position of Nozzle and bed
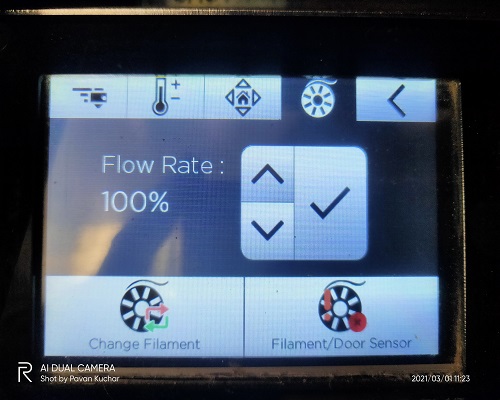
- Set the flow rate,filament
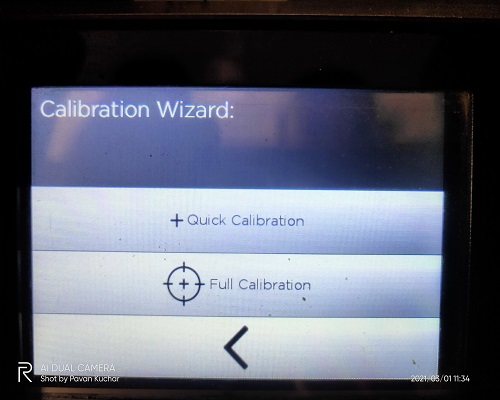
- Goto calibrate ,wizard for calibrating bed.
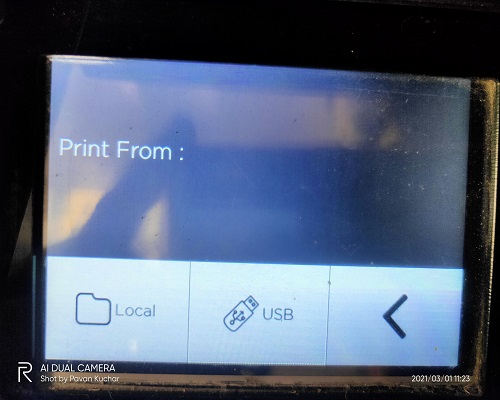
- Goto Print select print from
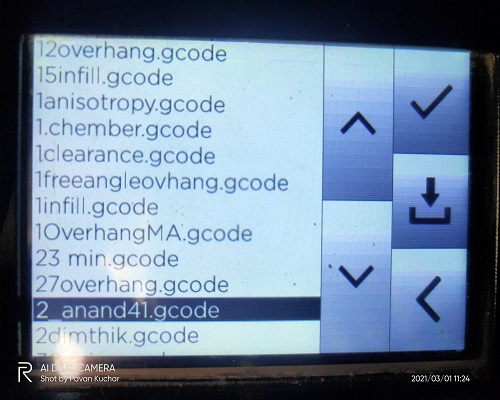
- Select file from the list
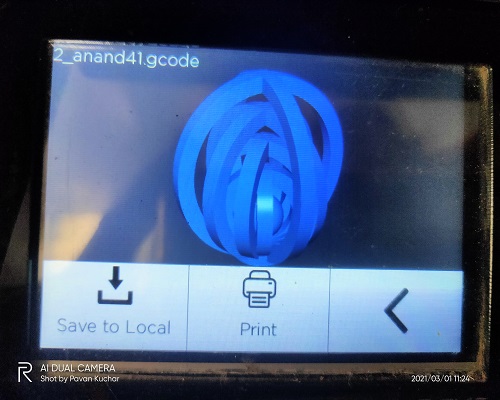
- select file from list save it in local or print it.
- Start the printing.
- Object printing on going
- Finally 3D printed object is ready
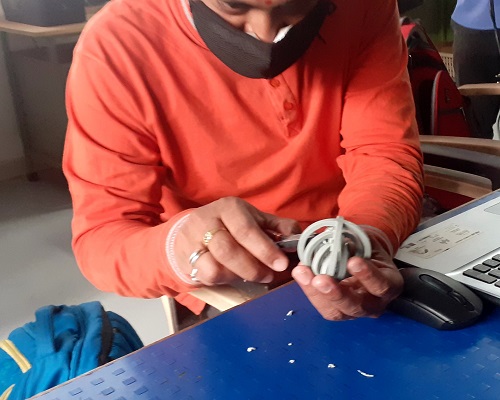
- Removing all the supports carefully
- Object is ready


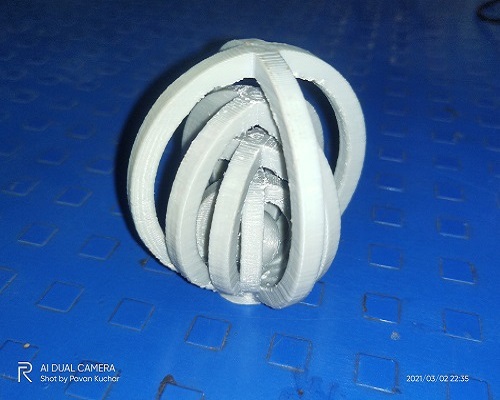
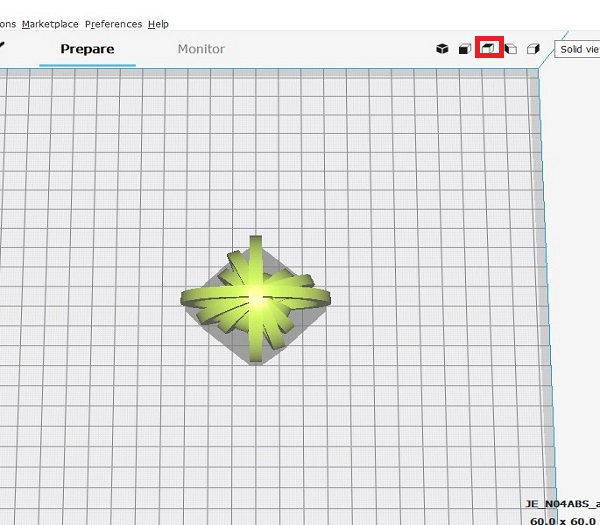
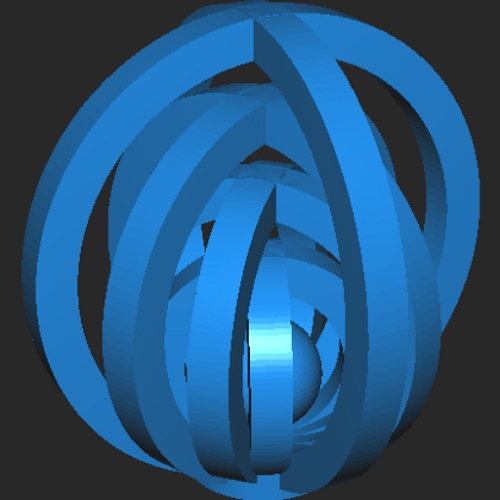
Top view of an object
Why this object can not be made by "Subtractive method"
This object consist of internally connected rings,overhangs and mainly intenal moving object(Ball).Due to this it can not be made by subtractive method.
3D Scanning
3D scanning is the process of analyzing a real-world object or environment to collect data on its shape and possibly its appearance (e.g. colour). The collected data can then be used to construct digital 3D models.(Wikipedia)
- About 3D Sense
- Scan the object
- Used of Fracktory S/W
- Object Printing
About 3D Sense
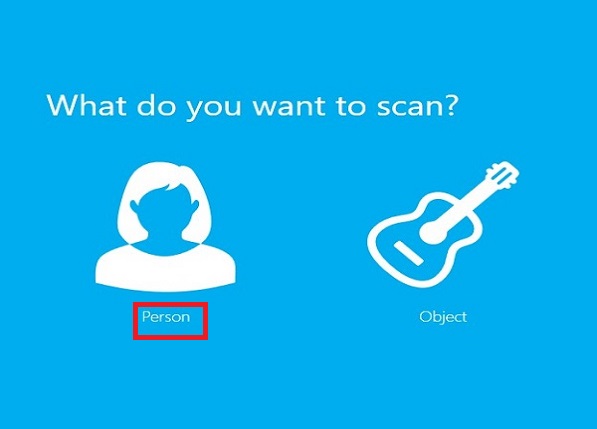
For scanning we used 3D sense software.This software is open source.We can download it from internet.for scanning always connect scanner to computer.By using this we can scan person or object.If you want to scan person ,click on person .In this software we can solidify our object or we can change color.Save file in .obj format.
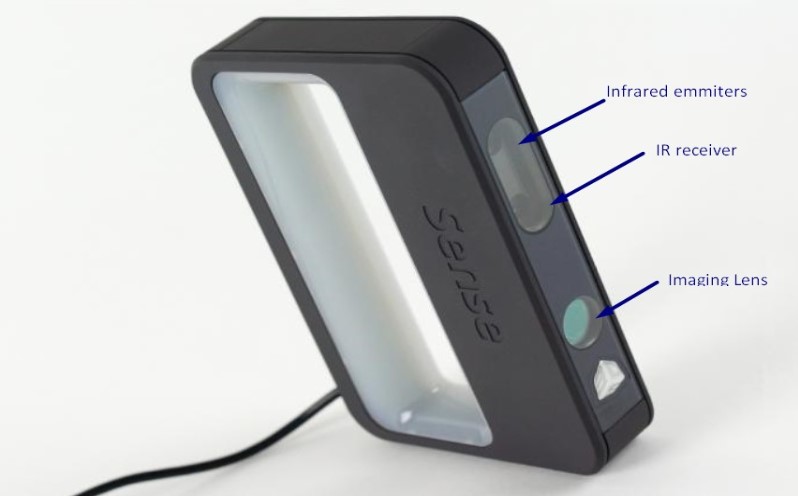
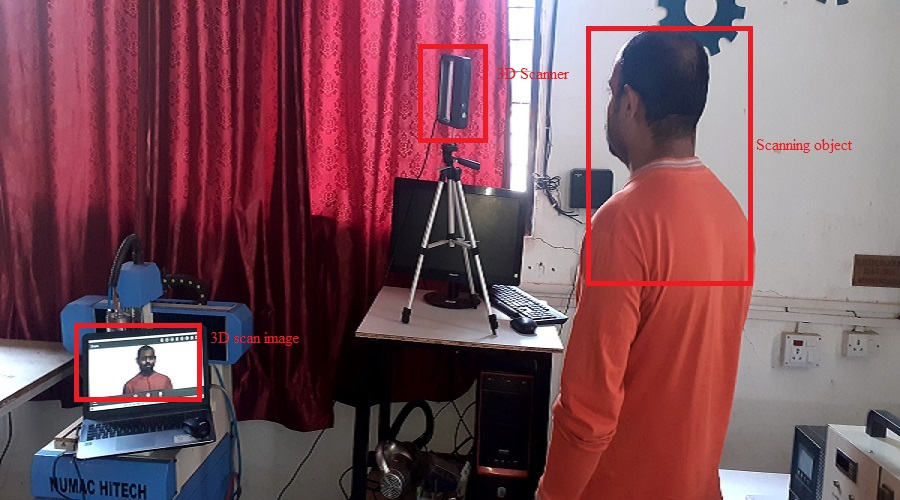
3D Sense Scanner
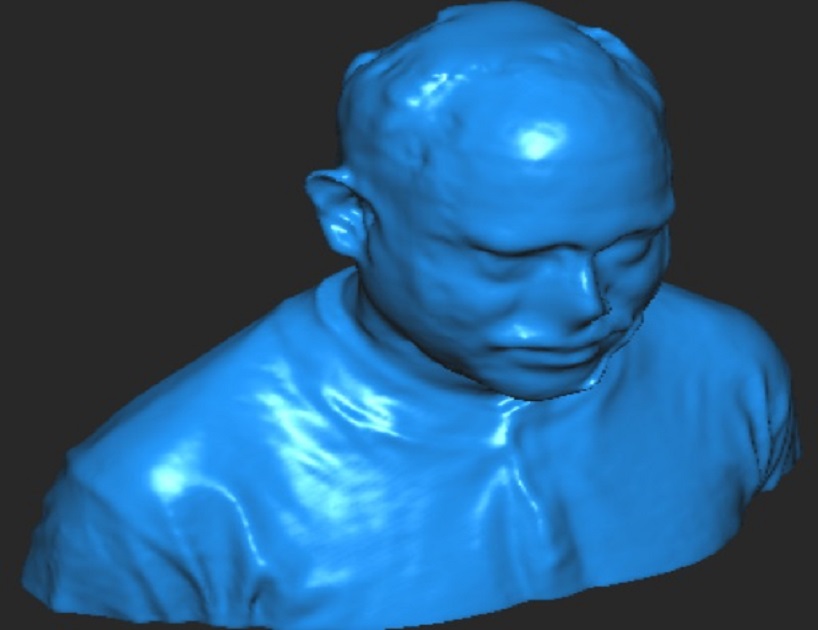
Scan the object
Start scanning the object through sense 3D scanner ,rotate the object 360 degree smoothly (otherwise object loss will display the error lost tracking) with the fixed position of scanner.once the scanning is completed save the file in .obj format.
- Open the Sense software.
- Click on what you want to scan.
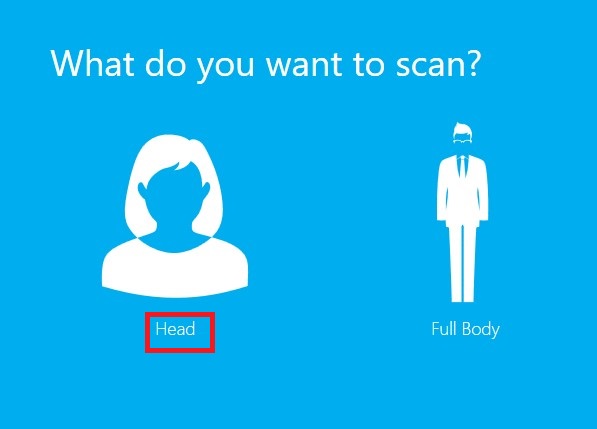
- select head or full body.
- Set up for csanning.
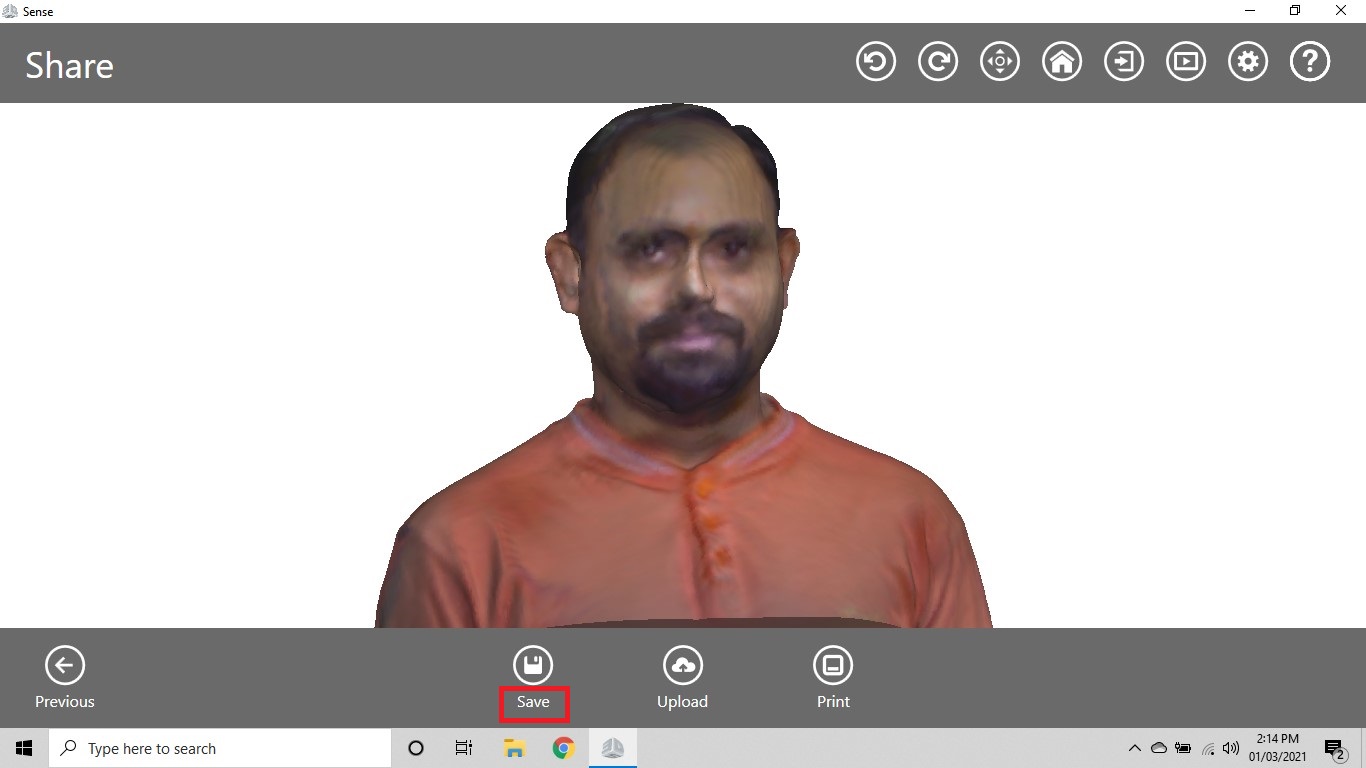
- Once the scanning is compled you can edit the scan image and save it in .obj format.
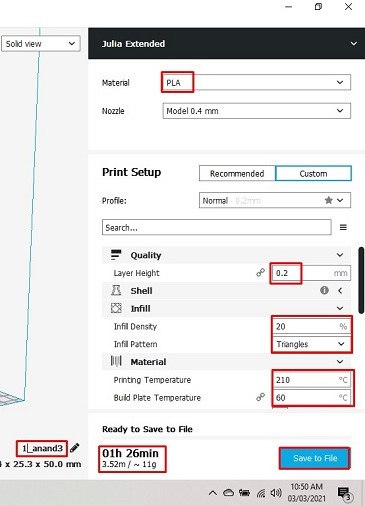
Used of Fracktory s/w
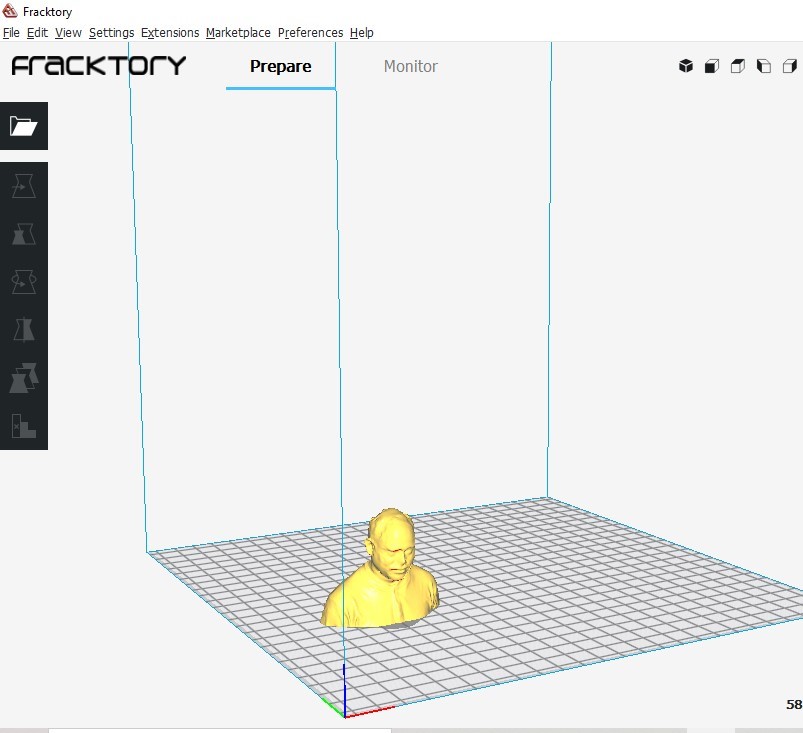
- Import the file in Fracktory s/w.
- Set the required parameters like material,infll, bed and nozzle temp.etc
- Imported object in Fracktory s/w
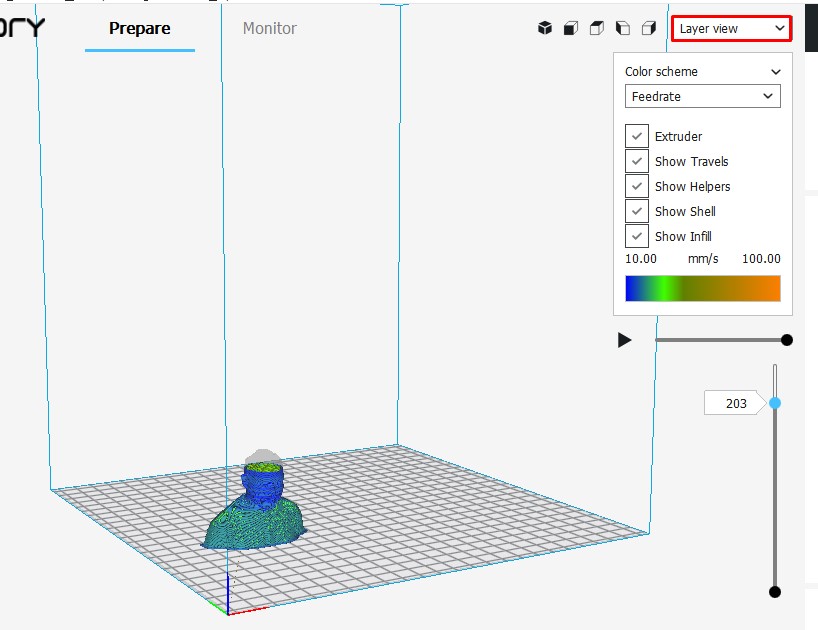
- the layer view of object after slicing
- G-code png image.
Object Printing by 3D Printer
- Check the bed leveling properly.
- Select G-code design file.
- Start the print command
ADVANTAGES & DISADVANTAGES OF 3D PRINTING
- We can print even complex object design using 3D printer.
- Create prototype in couple of hours which increase the designing process speed.
- Basic material used for 3D printing is plastics thus the object printed by this one are much lighter than traditional one.
- Reduces the quantity of waste materials created during the production process.
ADVANTAGES
- Since the dimensions integrated into 3D printers is relatively small, which restricting the part sizes .
- Though its new technology it offen reqquires trial and error method when creating parts on a 3D printer.
- Very few materials are available for printing in 3D printing technology
DISADVANTAGES
Learning Outcomes
- I tested the clearence test for the our lab 3D printer.
- Understand the difference between Additive and substractive mentod.
- Design the additive object in Rhino.
- Used the Fracktory software for G-code generation.
- Print the object using 3D printer.
- Used the 3D sense scanner for scanning the object.
Downloads
- Original files of 3D printed Object
- Original files of 3D Scanned Object
- Rhino design file.
- Download Original files of 3D printing object.
- Download Original files of 3D Scanning object.
SAMS-Smart Azolla Multiplier System by Anand S. Tale is licensed under CC BY-SA 4.0![]()
![]()
![]()