Assignment-5
3D Scanning and Printing
Fifth week is creative week,In this week we have design 3 diamentional objects by using 3D printer.We have used 3D printer.we test different 3d design parameters. We have used fracktory s/w for G-code generation, which can convert our 3D design file in the programming laguage, which will be understood by the machine. Also, we have scanned 3D objects by 3D scanner using Sense s/w. Print the scan object by 3D printer.
OBJECTIVES
Group assignment
- Test the design rules for your printer
- Document your work and explain what are the limits of your printer(s) (in a group or individually)
Individual assignments
- Design and 3D print an object that could not be easily made subtractively
- 3D scan an object, try to prepare it for printing (and optionally print it)
Learning outcomes
- Described the process of milling, stuffing, de-bugging and programming.
- Demonstrate correct workflows and identify areas for improvement if required
About Group Assignment
In group assignment we have to check design rules for 3D printer Fracktal work (Julia Extended). For that different test patterns are given in the 3D printing and scanning assignment.We downloaded all test patterns and printed it with some controlled parameters.
Different test patterns are
- overhang
- clearance unsupported,
- angle
- overhang
- bridging
- wall thickness
- dimensions
- anisotropy
- surface finish
- infill
supports,
Common Parameters set in Fracktory s/w
- Material used for 3D Printing: ABS (Acrylonitrile Butadiene Styrene)
- Nozzle diameter: 0.4 mm.
- Profile: 0.2 mm (Normal)
- Layer Height: 0.2 mm
- Wall Thickness: 1.2 mm
- Wall Line Count: 3 (as the Nozzle diameter is 0.4 mm So, 0.4 x 3 = 1.2)
- Top and Bottom Thickness: 0.8 mm
- Top Layers: 4
- Generate Support: was disabled so the Support overhang angle and Placement was also disabled automatically
- Build Plate Adhesion: Skirt instead of Brim and Raft
About Fracktal works(3D Printer)
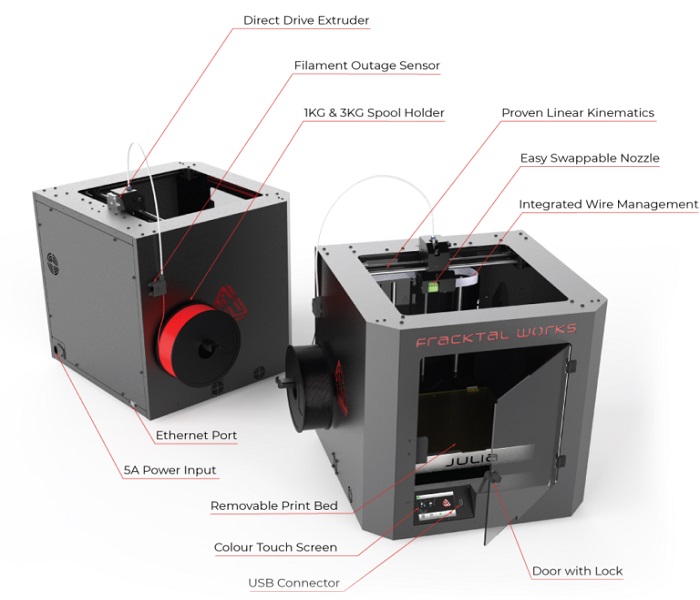
Specifications
- Bed Size:250 mm x 250 mm x 300 mm
- Print Technology: Fused Deposition Modelling (FDM)
- Filament Diameter: 1.75mm
- Nozzle Diameter: 0.4mm
- Nozzle Temperatures:Upto 240 °C
- Bed Temperature: Upto 110 °C
- Compatible Materials:ABS, PLA, Tough PLA, PLA+, PETg, PVA, PVA+,BVOH,Polycarbonate, Nylon 12*, Carbon Fiber Nylon*, Carbon Fiber PLA
- Supported File Types: STL, OBJ
- File Transfer :USB Pen Drive, WIFI, LAN
Test Result
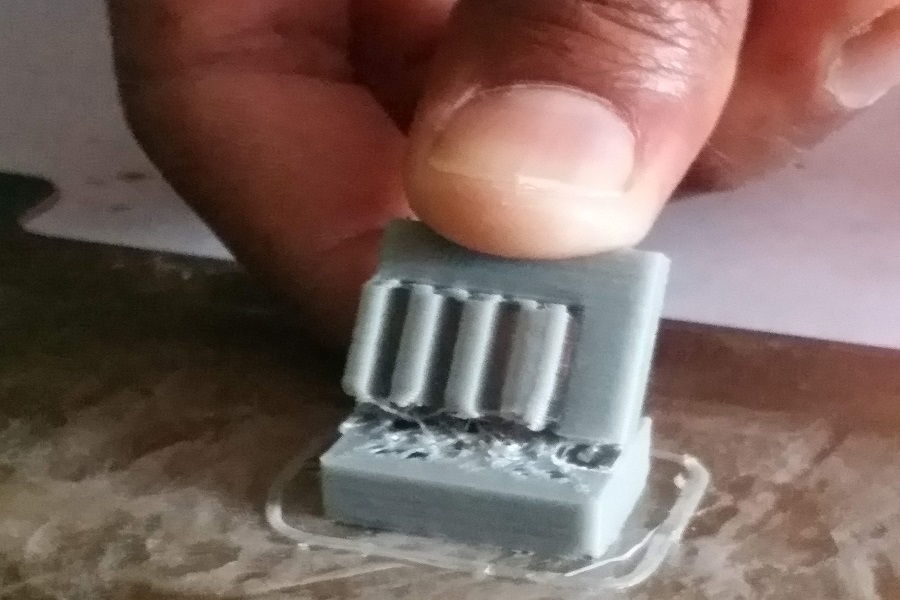
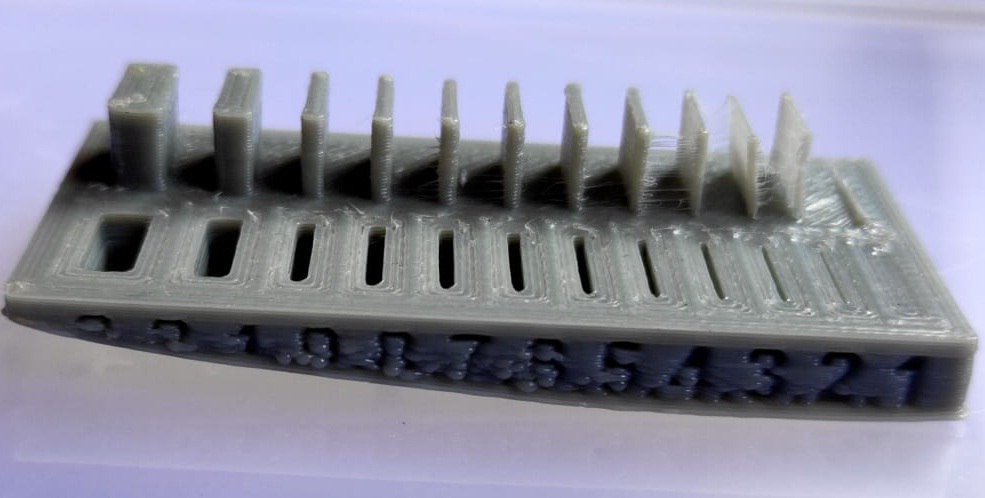
As a part of group assignment I(Anand) have studied the clearance parameter for 3D printer in our Fab lab.
Clearance test show that, if the clearance between the two surfaces is in the range 1mm to 0.6 mm object wobbled. If the clearance between the two surfaces is in the range 0.5mm to 0.3 mm object moves without wobbled where as for the clearance 0.2 mm to 0.1mm object fixed with the surface.
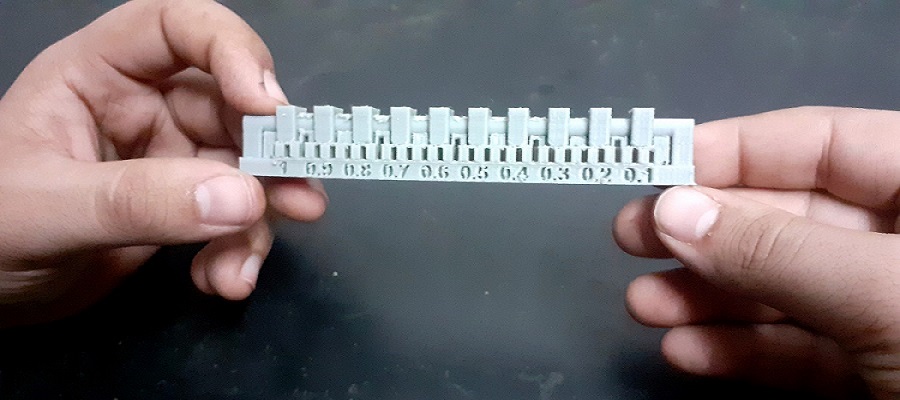
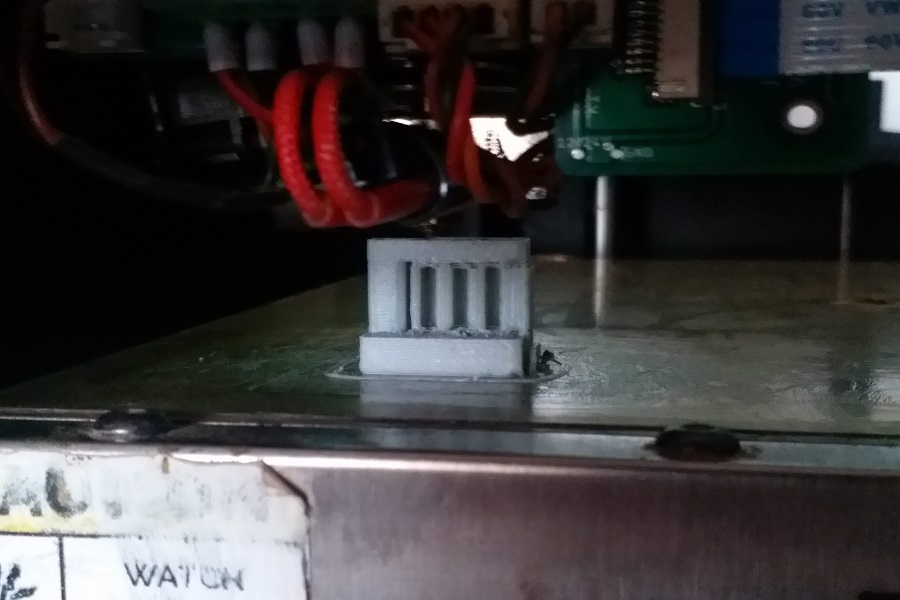
Clearance test object with support
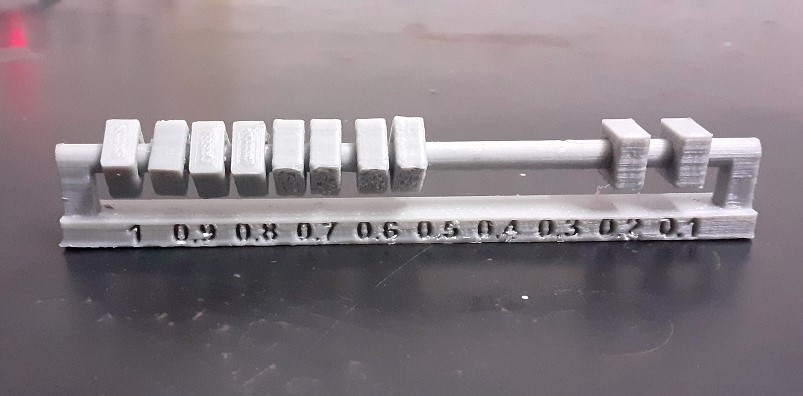
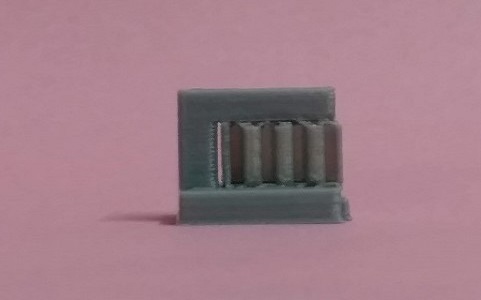
Clearance test object without support
Summary
From the test it is clear that clearance between two surfaces is in between 0.5mm to 0.3 mm, gives the expected movement.
So for the first test print, we chose the overhand with supports file to test. We loaded the part in our printer’s slicer, Fraktory, which is derived from Ultimaker’s Cura.
- Infill Density: 10%
- Infill Pattern: Triangles
- Print Speed: 60 mm/sec
- Cooling: Off
- Top Layers: 4
- Supports: Everywhere
We used the following parameters:
With this, we started the print, and since we were using ABS as the filament material, we applied some PVA glue to the bed surface to improve adhesion.
And this was the resulting print:
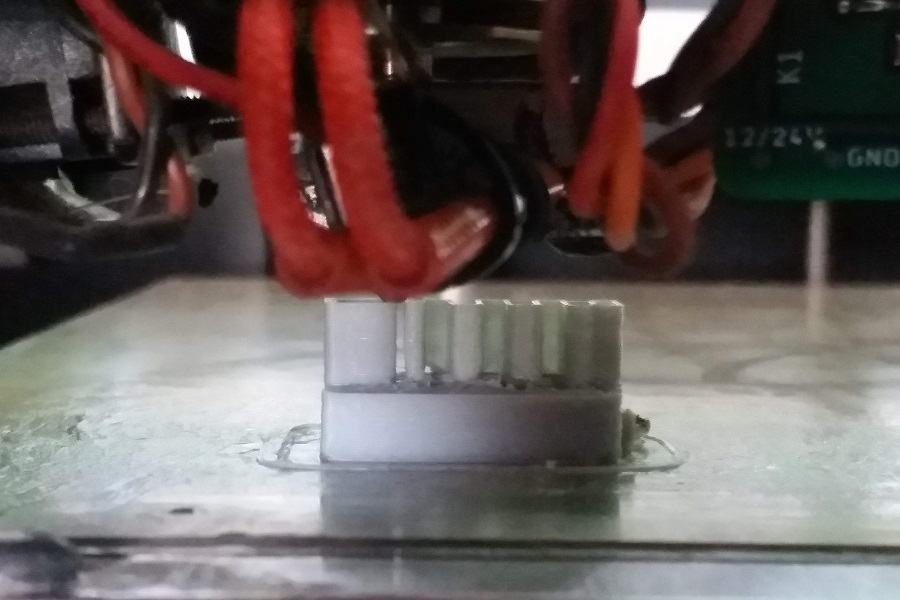
The Issue:
After the print completed, we tried removing the part from the build surface, but since the infill density was so low, and the layer height was set to 0.2mm, this resulted in the part breaking into two before it came off of the bed. We also had too much glue on the bed which resulted in too much adhesion.
- Cleaned the bed thoroughly with acetone and applied a fresh thin layer of glue
- Changed the infill density to 20% And after making those changes, we got a successful overhang test print with an easy to remove support structure.
After learning from our mistakes, we took the following steps to solve the issue:
Overhang test object with support
After 3D printing the angles file, the angles from 90 to 60 degree were printed without flaw. The lesser angles has some flaws like lumps at the bottom (majorly for the angles from zero-0 degrees to 20 degrees); little slicing (from angles 20 to 50 degrees.)
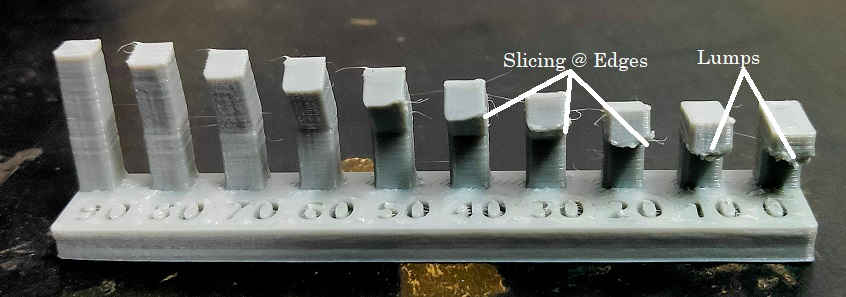
Angle test object
Summary
It could be concluded that, with the above mentioned parameters of 3D printing on fractal works Julia Extended machine
- The overhangs of the angles 90 to 60 degrees could be printed without any flaw.
- The overhangs of the angles 50 to 20 degrees show the slicing of the edges with less lumps of the ABS material hanging at the bottom.
- The overhangs of the angles 20 to zero-0 degrees show the lumps of the material hanging at the bottom and little slicing of the edges.
After 3D printing the Overhangs file, all the 10 overhangs had the flaws and could not be printed properly.
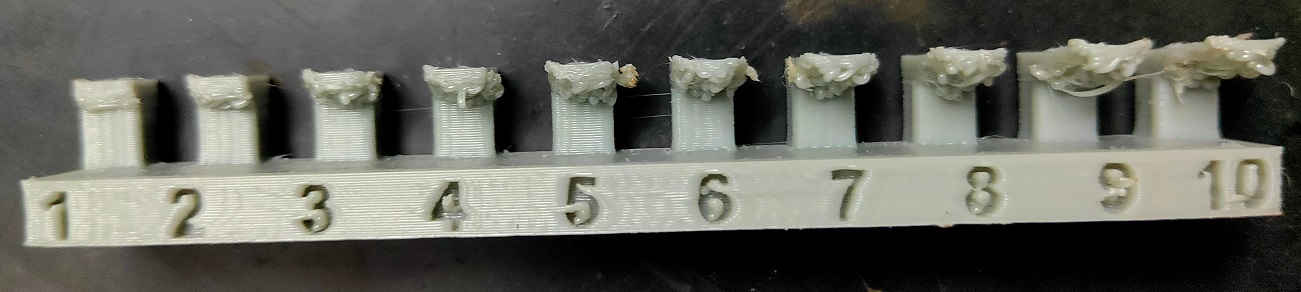
Overhangs test object
Summary
It could be concluded that, with the above mentioned parameters of 3D printing on fractal works Julia Extended machine all the overhangs of the angles zero-0 could not be printed as designed. The top layer is not printed fully. The printing is tapered from the center to the outer edge.Also, the lumps are hanging at the bootom of all the Overhangs.
In 3D Printing wall thick is nothing but the distance between surface of your model and its opposite sheer surface.Wall thickness is defined as the minimum thickness your model should have at any time. It’s important that every surface of your 3D model has been assigned a wall thickness.
Wall thickness test object