Group assignment
(Link)For this week's group assignment, we have to test the design rules and limits of our printer in the lab (Ultimaker 3) my part was to test the surface finish.
Step1:download Ultimaker Cura
Step2: I downloaded the design file from the Fabacademy website (surface-finish)
Step3:set the print setting using ultimaker cura program the main setting that effect the surface finish is layer height so I will try to change this attribute
Step4:3D prints the models
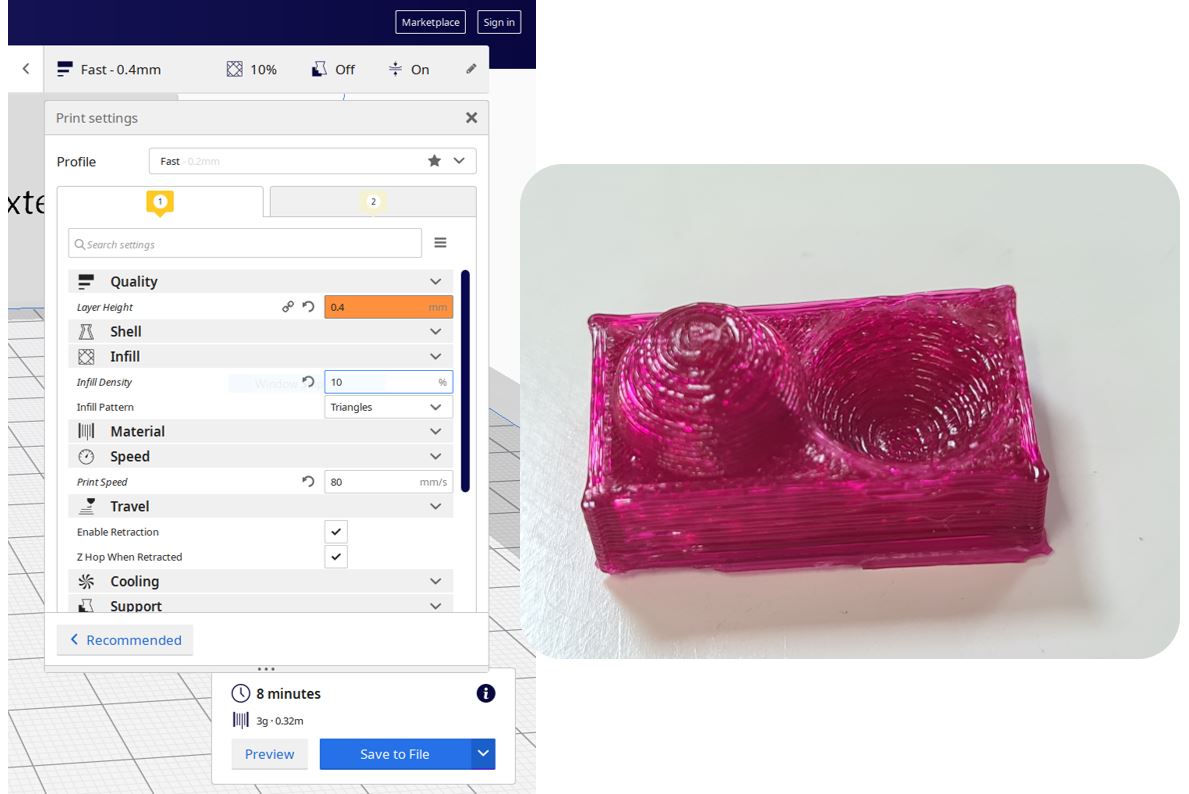
Test model pink: Layer Height= 0.4mm, infill density=10%
Finding > Test model pink: lower resolution & quality but fast printing (8 min)
Test model blue: Layer Height= 0.2mm, infill density=20%
Finding > Test model blue: higher resolution & quality but slower printing (36 min)
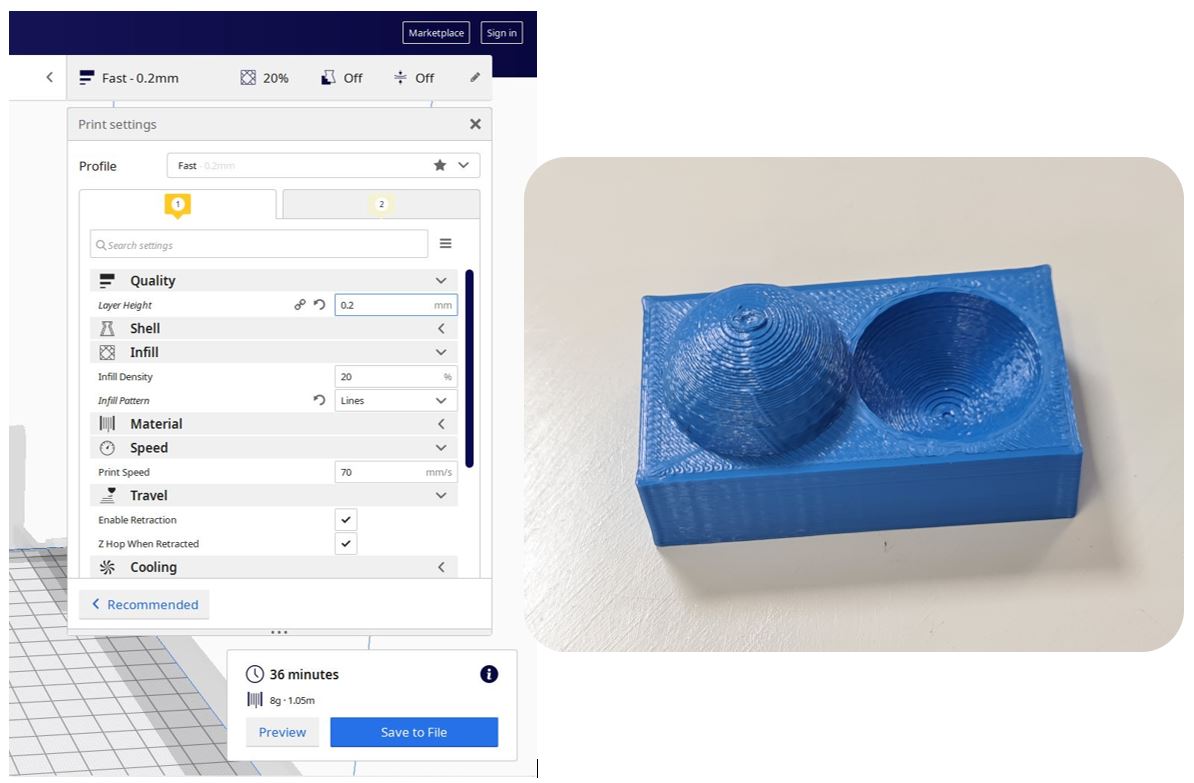
to sum it up, it is advisable to use Layer Height= 0.2mm for better quality surface finish & I will be using this for my future 3D printing even if it takes longer but worth it.
Individual assignment
3D SCAN
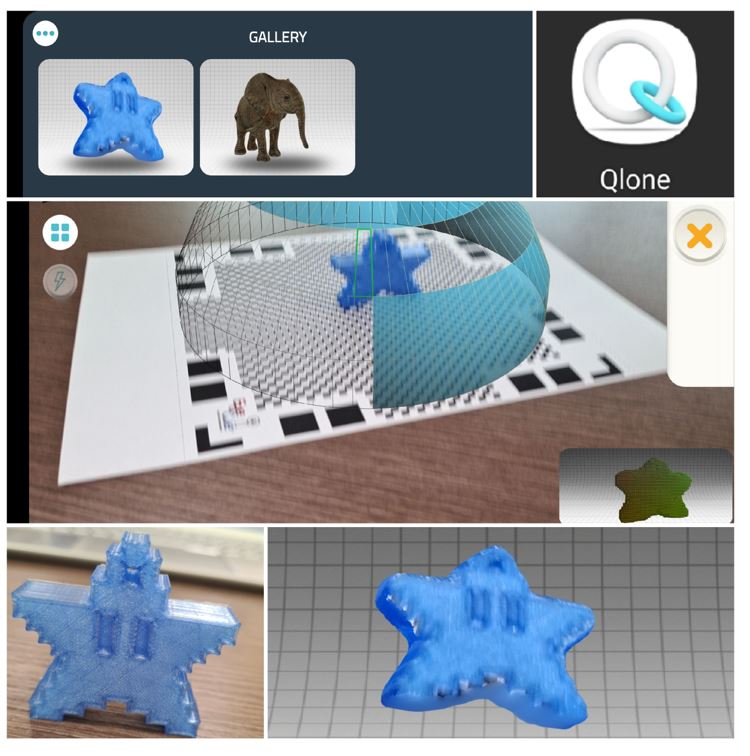
3D scanning part was challenging because we didn’t use professional equipment instead, I used my mobile (Samsung galaxy s20+) I download several app as shown below. From my experience with these apps there are big opportunity to improve these technology in the near future.
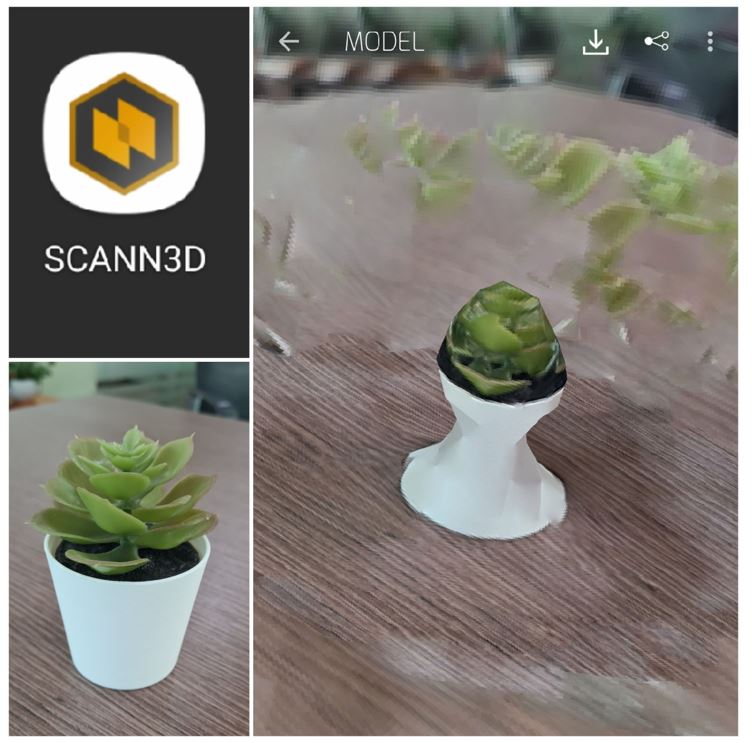
SCANN 3D:
It makes the 3d model by taking multiple images moving around the object then combine it. I tested it on the blue star but the result was “failure” as shown below because the item was reflective.
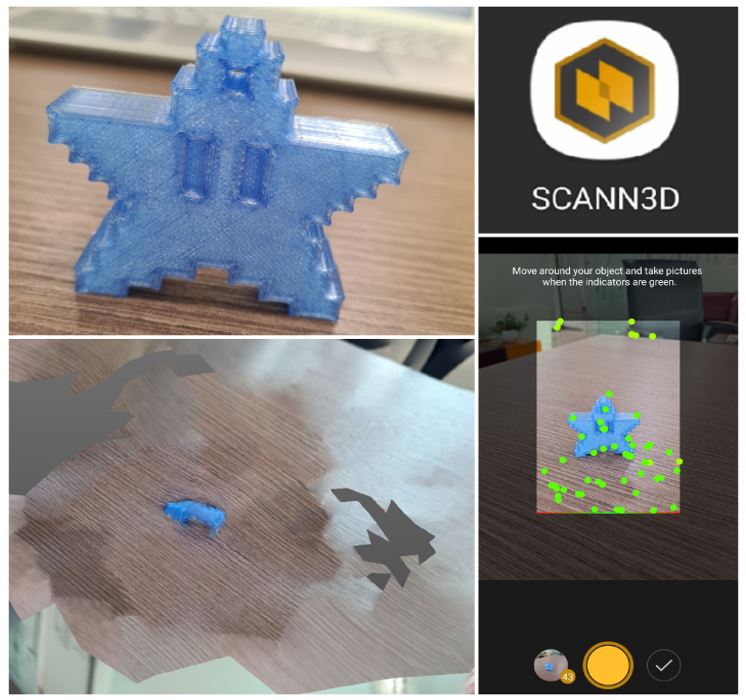
I decide to give this app a second chance so I chose a textured vivid item to make better models the result was better than the previous one but wasn’t to my acceptable stander so I tried another app
Qlone:
Then I download Qlone app, the result was much better than the previous app but this app required an AR mat to be placed underneath the object to be scanned which minimize the options & the sizes of items that can be scanned also it is headache to place the mat underneath items whenever we want to scan an item.
3D PRINT
The 3D printing part consist of three main steps:
1. Design
2. Slicing
3. Printing
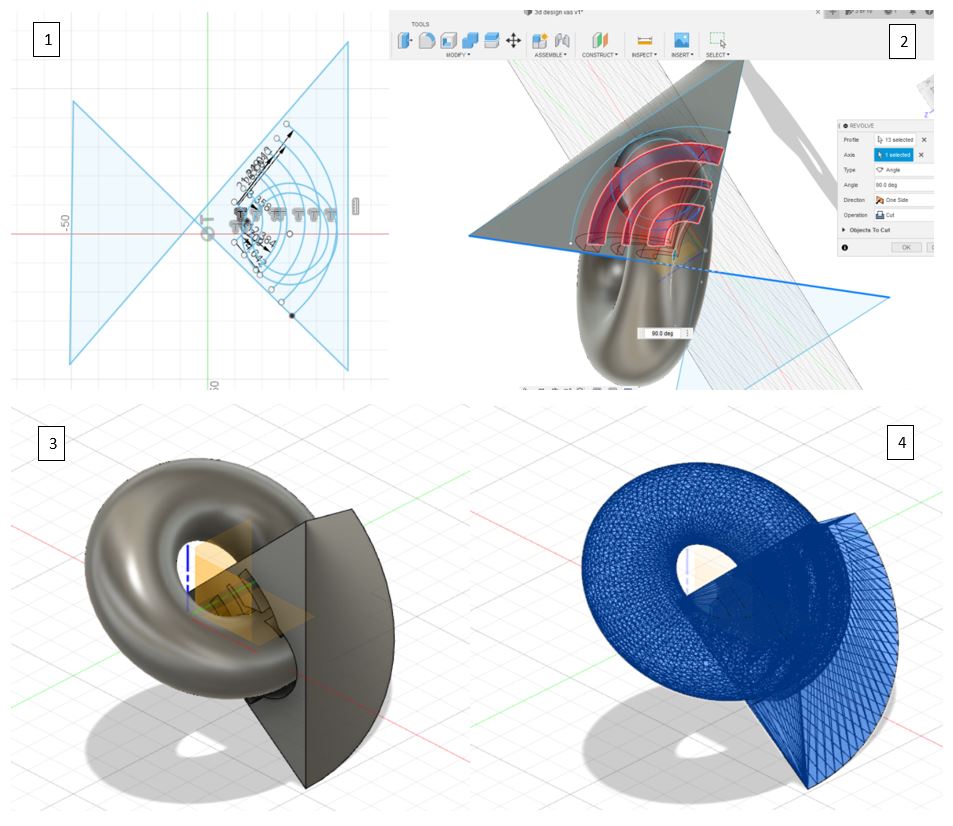
Step1: Design the 3D model
I used fusion360 to design my 3D model it was abstract model I didn’t see it anywhere it was from my creative mind I wanted to design an item that look as fixed object but it moves. Then I exported as .stl file.
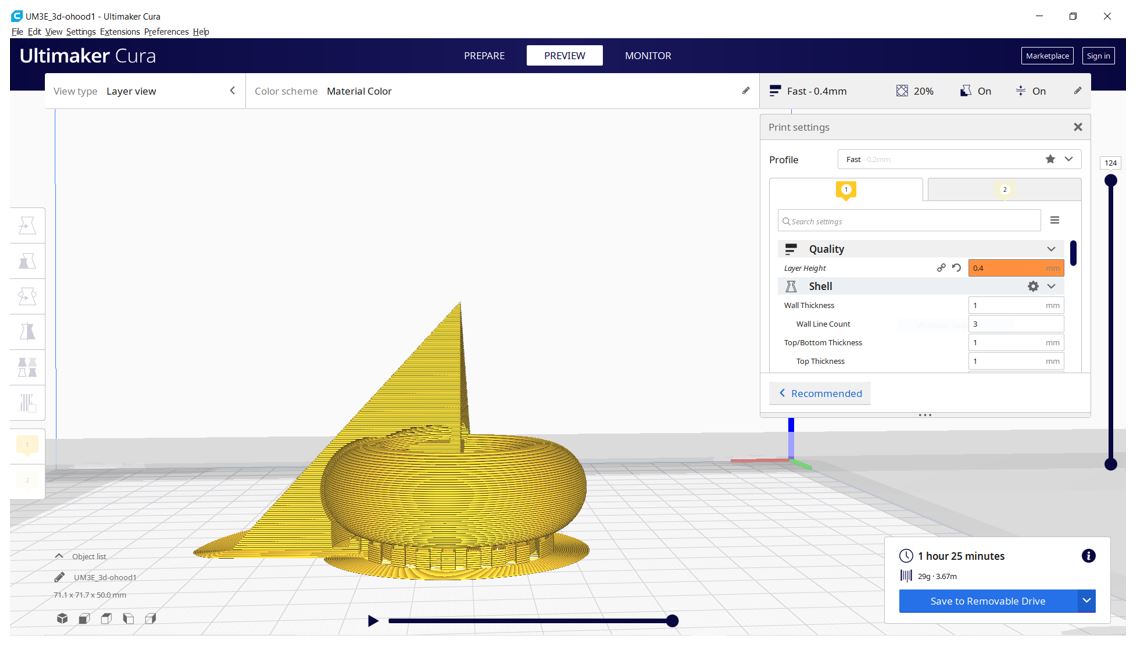
Step2: Slicing the 3D model
Open the stl file in Ultimaker Cura to Slice the 3D model I change some of the setting to ensure that my model is small, few cm3, limited by printer time. Then save it as (.gcode) in external drive
Layer Height= 0.4mm
Infill density= 20%
Print speed= 70mm/s
Enable retraction
Enable z hop when retracted
Support placement= touching buildplate
Support overhange angle= 80
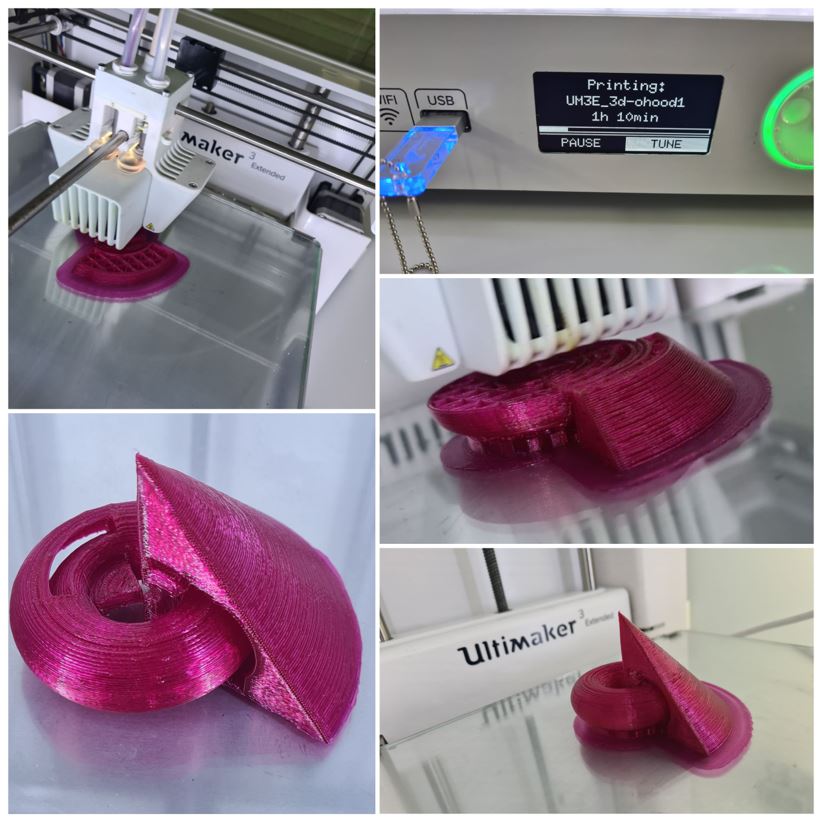
Step3: Printing the 3D model
Using Ultimaker 3 I lunched the printing process. The result was a success but I can improve it more by decreasing the Layer Height however it will take longer printing hours.
A video of my 3D printed model showing the moving part
To navigate the model you can use the below preview