Group assignment (Link)
the machine: trotec speedy 400 LASER Cutter
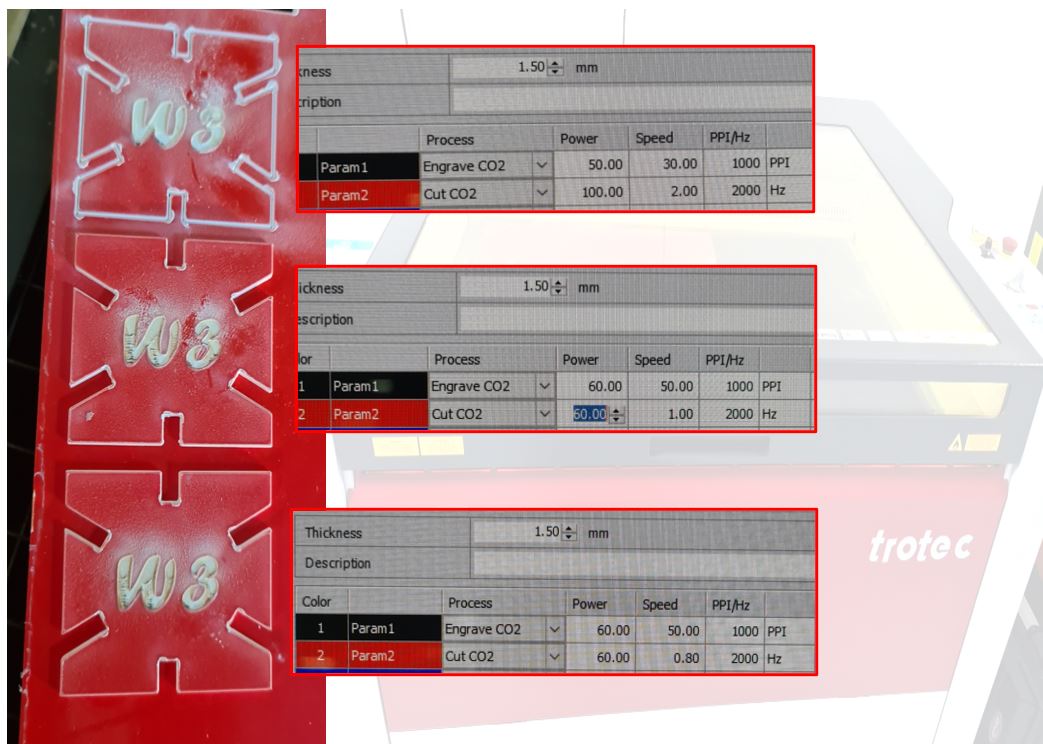
For the group assignment I selected red microsurface plastic 1.50mm
Kerf measurement
Kerf is decided by material properties and thickness, the focal distance of the lens and therefore the gas used while cutting. you can use the following methods:
the average kerf for that material and material thickness is measure by Dividing the gap by 5. The result as following
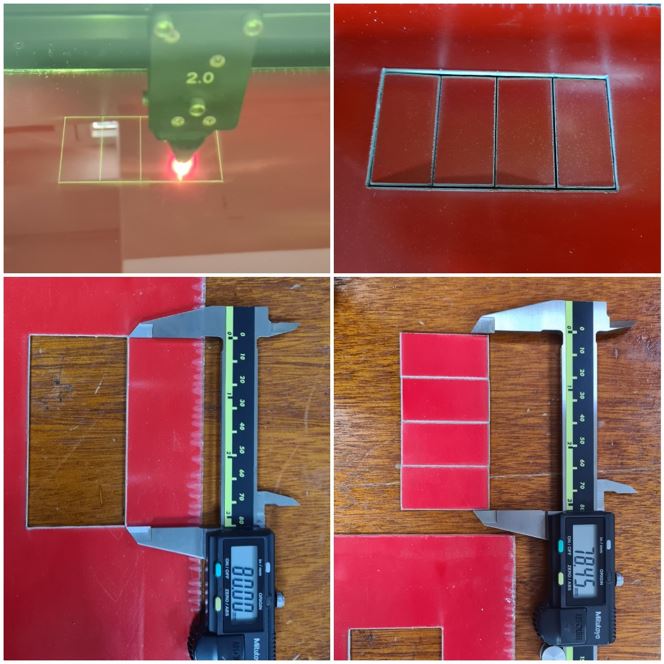
1. to calculate the kerf draw a rectangle with length of 80mm by 40mm
2. divided it into 4 pieces
3. cut it with the laser cutter
4. measure the pieces together
5. then use the following equation: (Actual length - Measured length) / (Number of cuts+1)= Kerf.
Kerf = (80-78.45)/5= 0.31
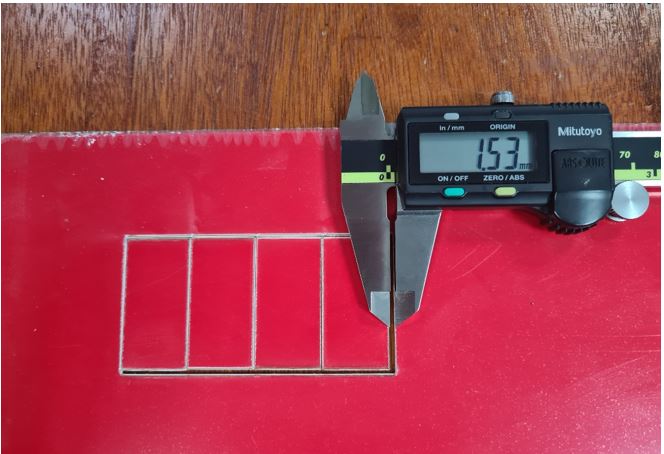
the second method a straightforward test to measure the kerf by measured the gap then dividing by 5
Kerf = 1.53/5= 0.30
Individual assignment
Vinylcutter
the machine: Roland GS-24
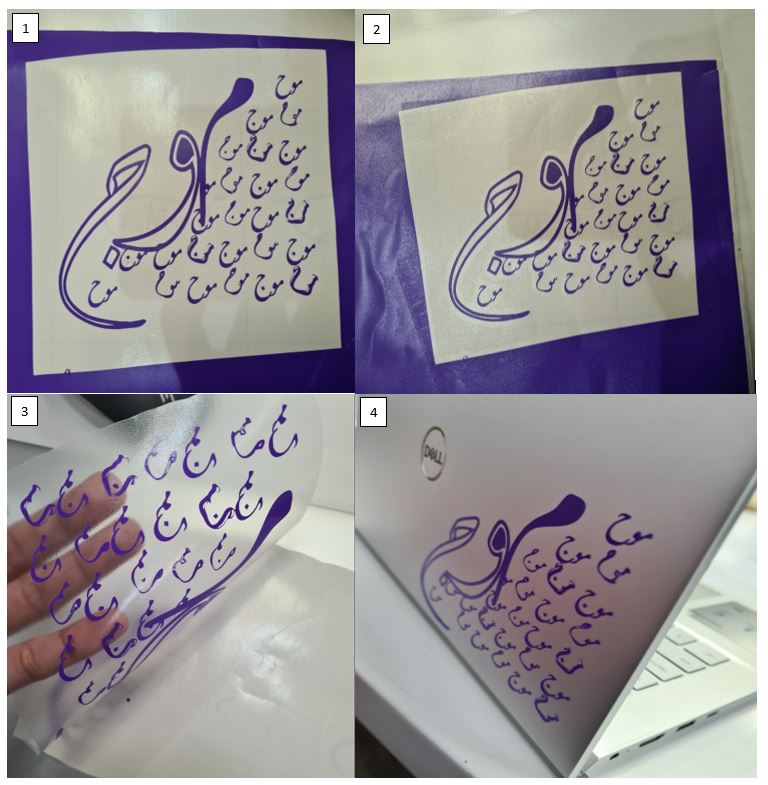
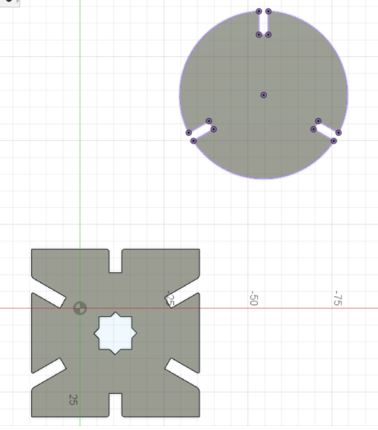
For this assignment I wanted to make a sticker with my own design that I draw from scratch in Week2.
I opened the design GIMP in the CorelDRAW Then I loaded the file into CutStudio, then adjusted the height and width with the aspect ratio of the file & the size of our vinyl, then I printed with the machine settings as shown in the below steps.
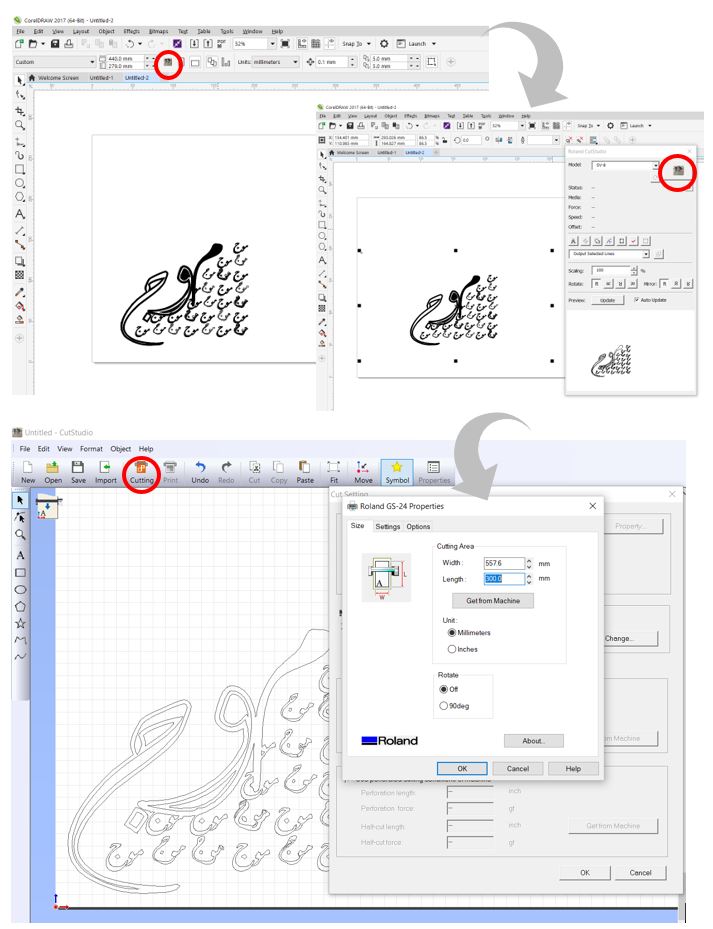
I setup the force & the pen force then I press test to make sure that the blade will cut the sticker part of vinyl not the back paper
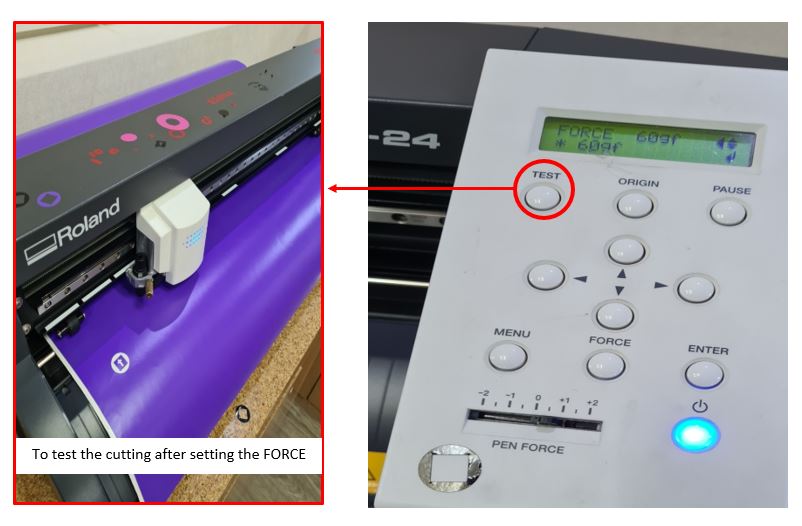
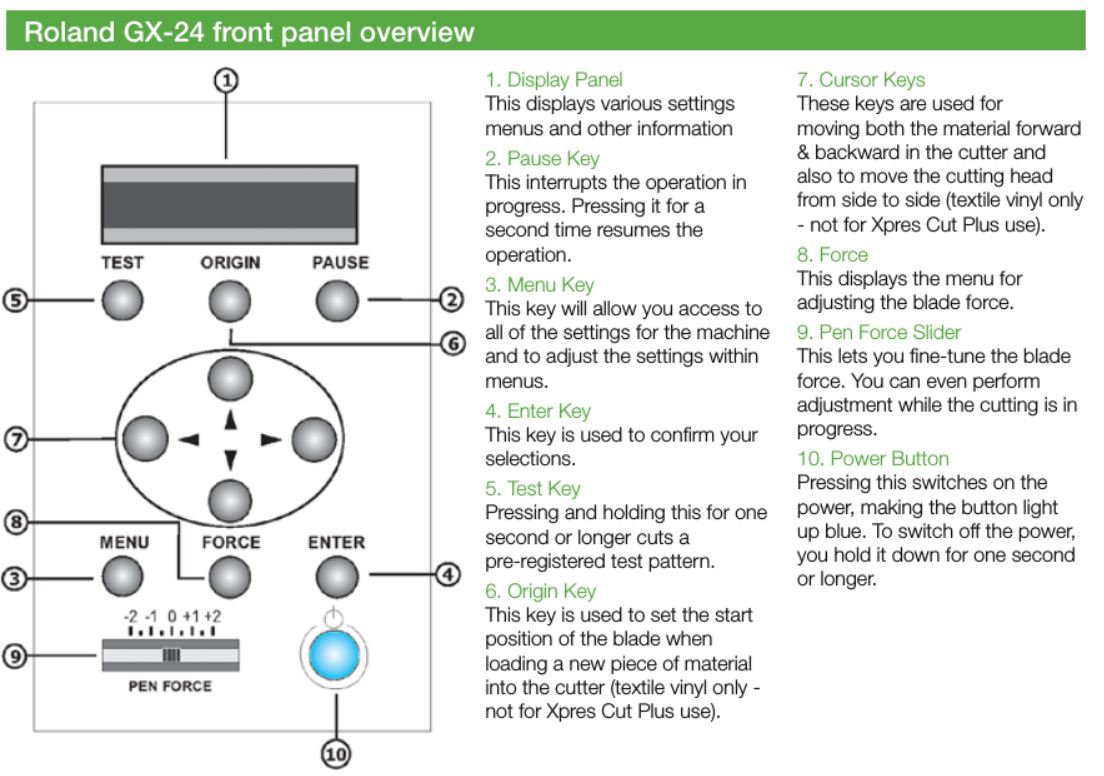
Our instructor Eng.Hashim teach us how to use the Roland GX-24 also it is useful to read the Manual to know how to navigate the machine I use this online Roland Manual as shown below
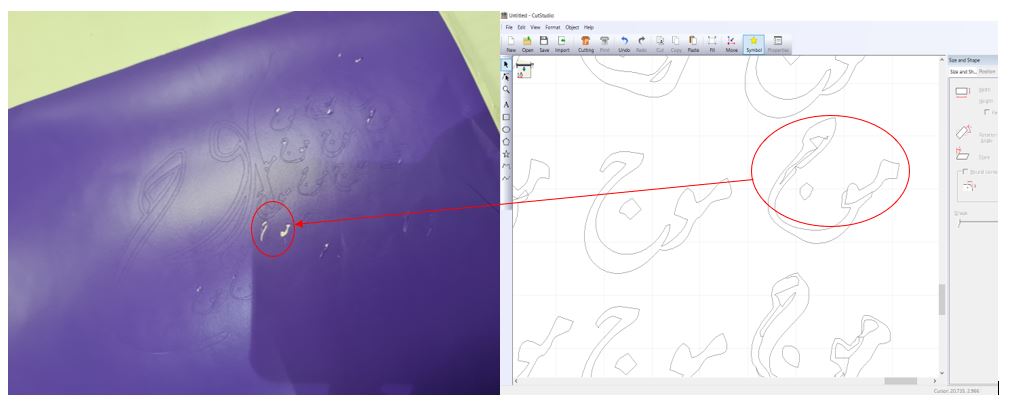
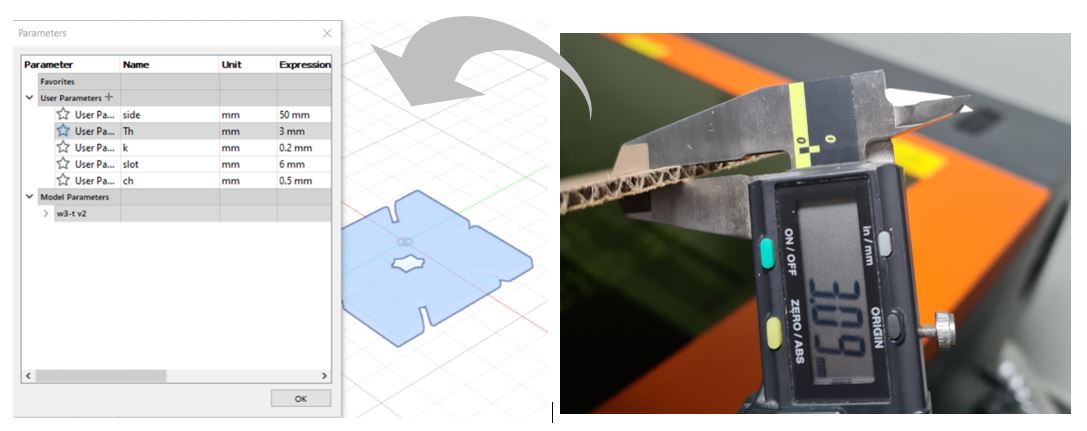
the cutting wasn’t neat because when you zoom in you will discover there is several lines that crossing each other in the design as shown in the photo
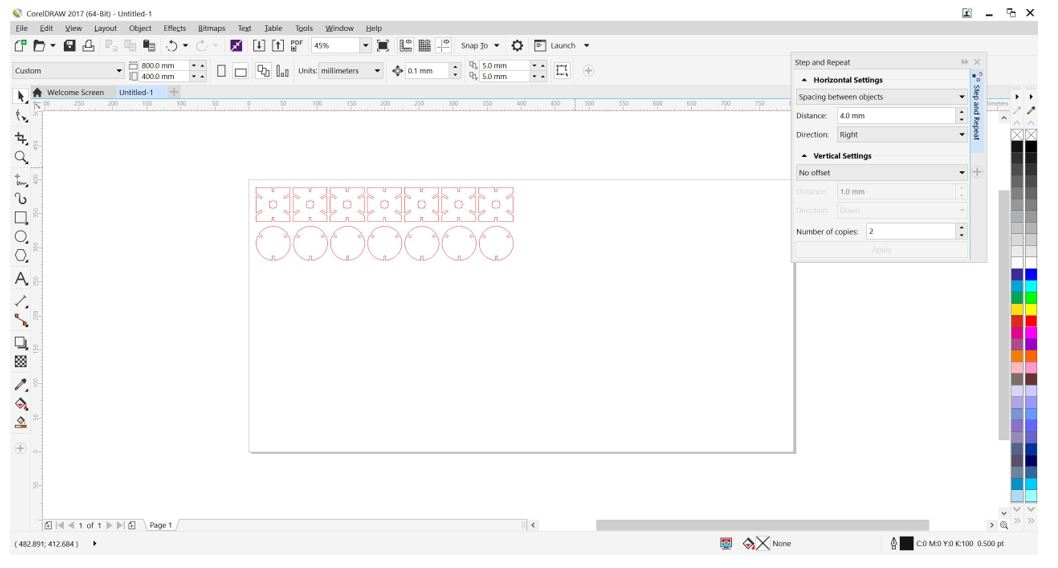
Because the design is complicated and have many details it was hard to remove the spaces, Then I apply the application tape in order to stick it on my laptop.
vinylcutter Important Tips:
•be ready for a lot of work & focusing if you chose complicated design with a lot of details.
•Make sure the lines of the design not crossing (zoom in “CutStudio”).
•Insert the size of your vinyl to the CutStudio before cutting.
•Close the holding lever or handle after inserting the vinyl roll to hold roll in position.
•Test the force before cutting.
LASERCutter
The machine: Universal Laser PLS6MW Laser
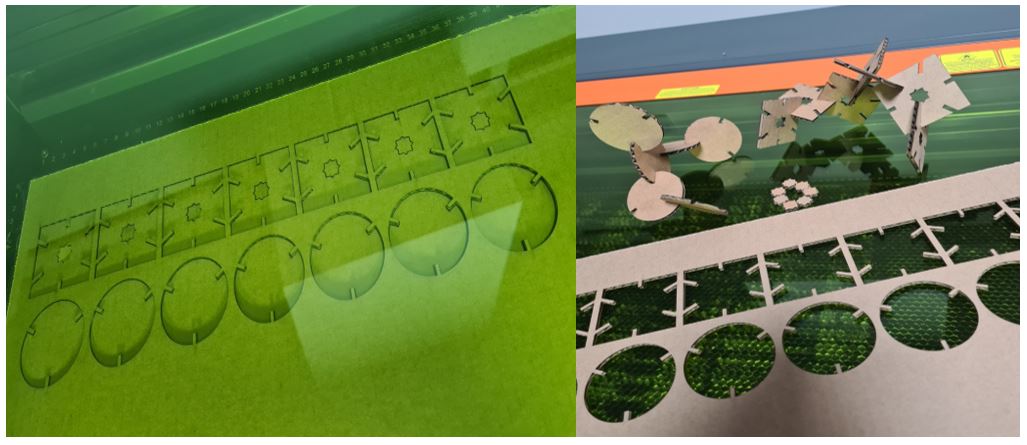
For this assignment I design a parametric construction kit. First, I started by sketching the shapes in Fusion360.
I have to know the thickness of the materials I will use in order to set the parameters. Defining the parameters in “Parameters” in Fusion360. Also I made chamfer to all the edges of the gaps in the models to be easier to assembled.
Then I exported the file to CorelDraw and (step&repeat) the kit to prepare it for the laser cutting.
Once my design is ready, I click printing then the laser settings window appeared to set the power & speed, referencing to our group assignment I took the correct measurement and set the power & speed as shown on the screenshot below.

Here we go, it was smooth cutting.
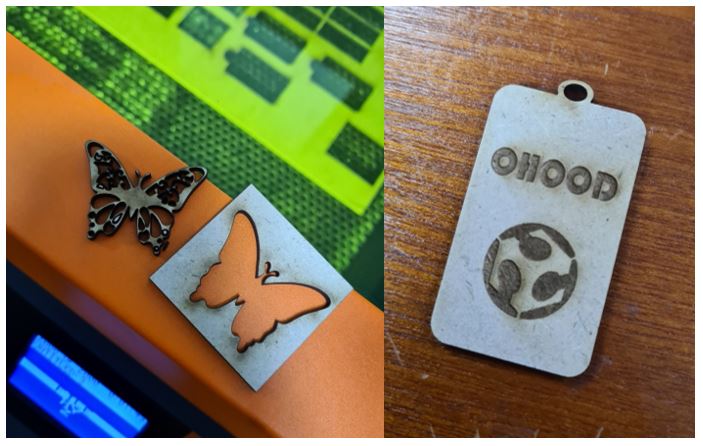
Also, I made other design such as butterfly & keychain.
lasercutter Important Tips:
•Safety cautions must be considered while working on Laser cutting machines.
•be sure that your design is parametri.
•you have to know the thickness of the materials that you will use in order to set/update the parameters.
•if you are not sure which power & speed to use it is always useful to check other students experience.
•chamfer the edges of the gaps/design in the models to be easier to assembled.