This week we will be programming an application that interfaces a user with an output device by using Processing. which is programe that help the programmer to interact with electronic devices through image icons not by using a text command. The widgets of the interface are selected to lunch actions as wanted that allows structures within which the interface is linked to application functions such as Processing.
The most feature of Processing is the simplicity of making visual widgets using code. Also it is a flexible programming language to code using visual arts interacting with Arduino IDE.

This week task was to integrate the circuit boards with interface programs on the pc. I understand the fundamentals of Processing going through the tutorial on this Website.
I started by downloading Processing then unzipped the file & run Processing.
Download the library from this link.
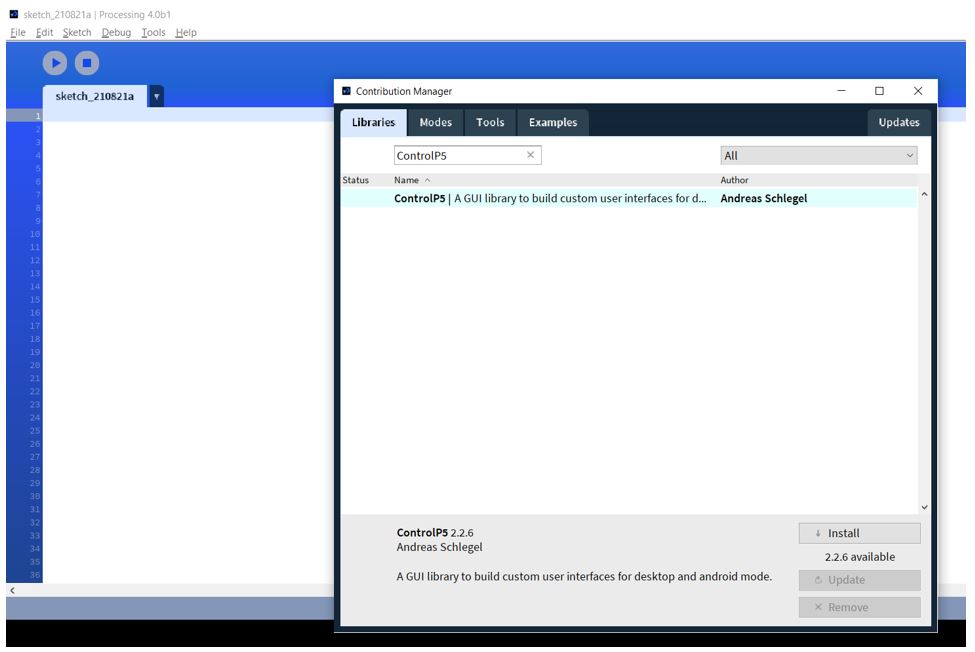
then install the downloaded library from menu (Sketch > Import Library > Add Library)
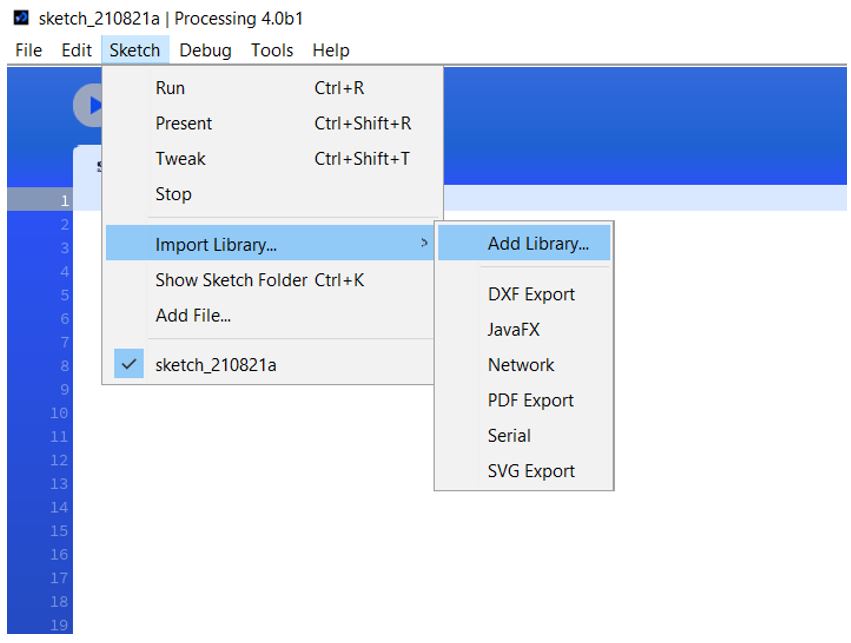
search the library name “ControlP5” then install it.
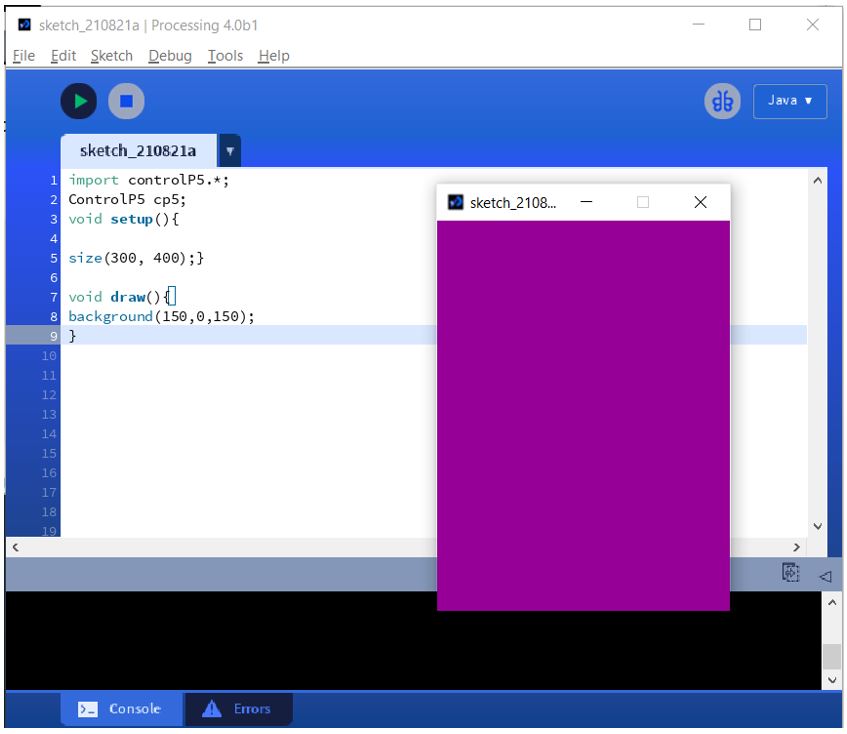
Then start creating GUI application & creating simple window by creating the background size.
import controlP5.*;
ControlP5 cp5;
void setup(){

size(300, 400);}

void draw(){
background(150,0,150);
}
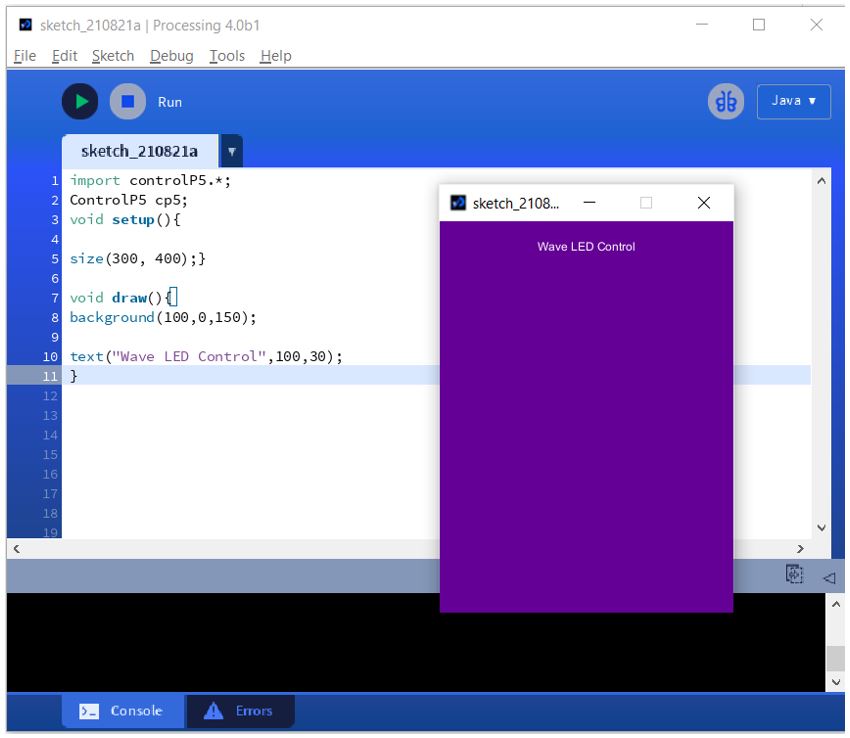
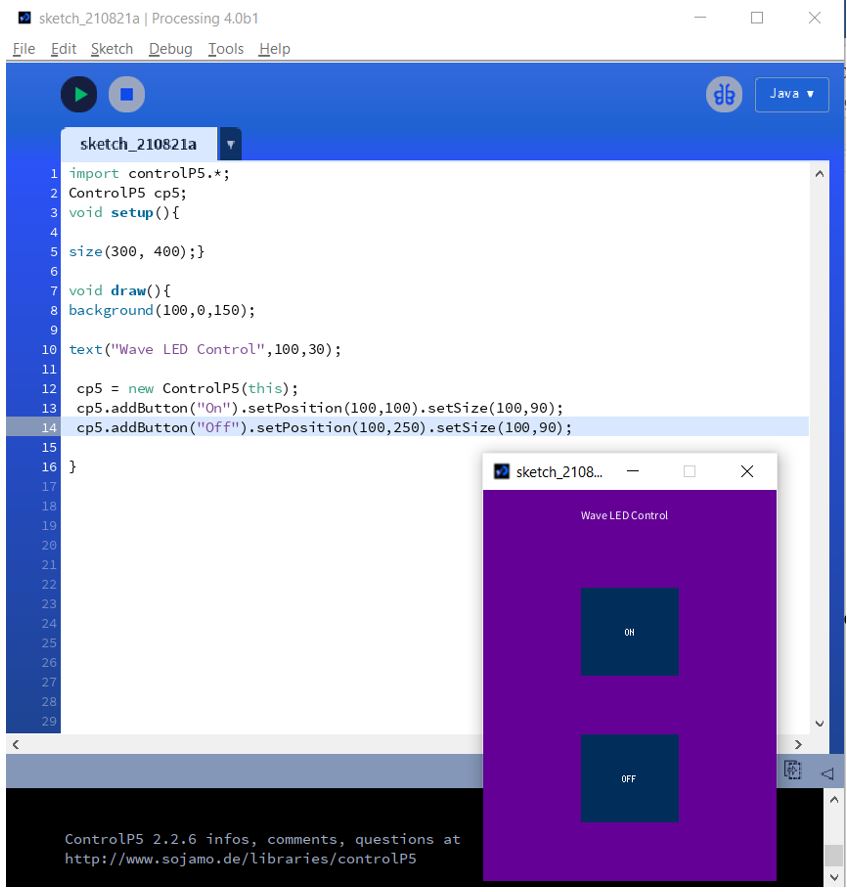
I change the background color & add a title.
import controlP5.*;
ControlP5 cp5;
void setup(){

size(300, 400);}

void draw(){
background(100,0,150);

text("Wave LED Control",100,30);
}
Then add On & Off buttons using this code
 cp5 = new ControlP5(this);
 cp5.addButton("On").setPosition(100,100).setSize(100,90);
 cp5.addButton("Off").setPosition(100,250).setSize(100,90);
Now I have to connect Arduino to Processing to lunch the communication between the application & Atmega328 by adding this code to send commands when buttons are clicked
void red(){
port.write('r');
}

void blue(){
port.write('b');
}
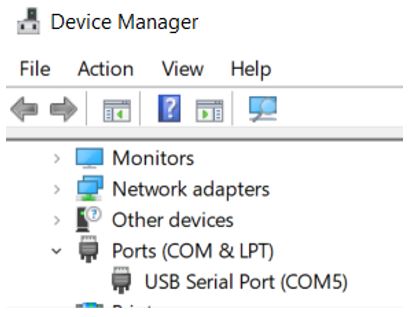
Then adding the port location that I detected from device manager
   printArray(Serial.list());
   port= new Serial(this,"com5",9600);
Combine all the code as the following:
import controlP5.*;
 import processing.serial.*;

  Serial port;
ControlP5 cp5;
void setup(){

size(300, 400);

 printArray(Serial.list());
   port= new Serial(this,"com5",9600);
 }
void On(){
port.write('a');
}

void Off(){
port.write('b');
}


void draw(){
background(100,0,150);

text("Wave LED Control",100,30);
 cp5 = new ControlP5(this);
 cp5.addButton("On").setPosition(100,100).setSize(100,90);
 cp5.addButton("Off").setPosition(100,250).setSize(100,90);

}

Then I write the Arduino code.
First I locate the LED pin
pinMode(5,OUTPUT);
Then connect it with the Processing & combine the code as following:
void setup (){


  pinMode(5,OUTPUT);


  Serial.begin(9600);
  }

void loop(){

  if(Serial.available()){
     char val = Serial.read();

     if(val =='a'){
      digitalWrite(5,HIGH);
              }
      if(val =='b'){
      digitalWrite(5,LOW);


      }
   }
 }
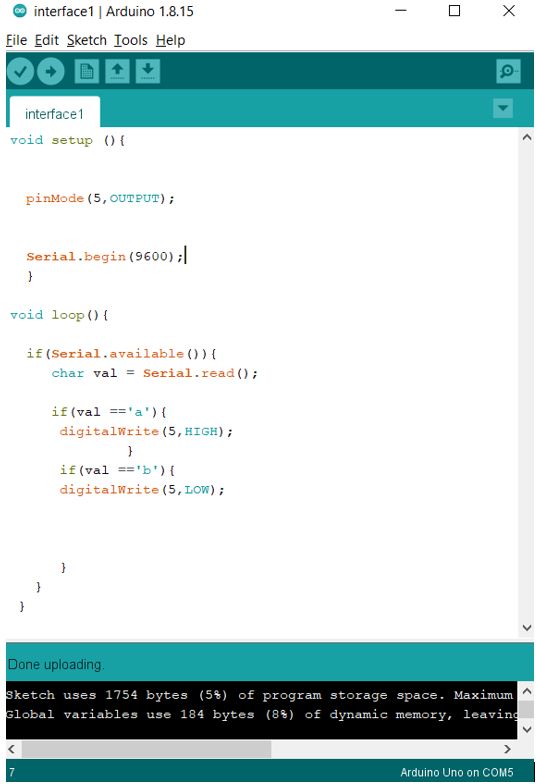
Then I upload the code successfully as shown in the video
Group assignment
My part was added in the group assignment page in this Link.