Final Project
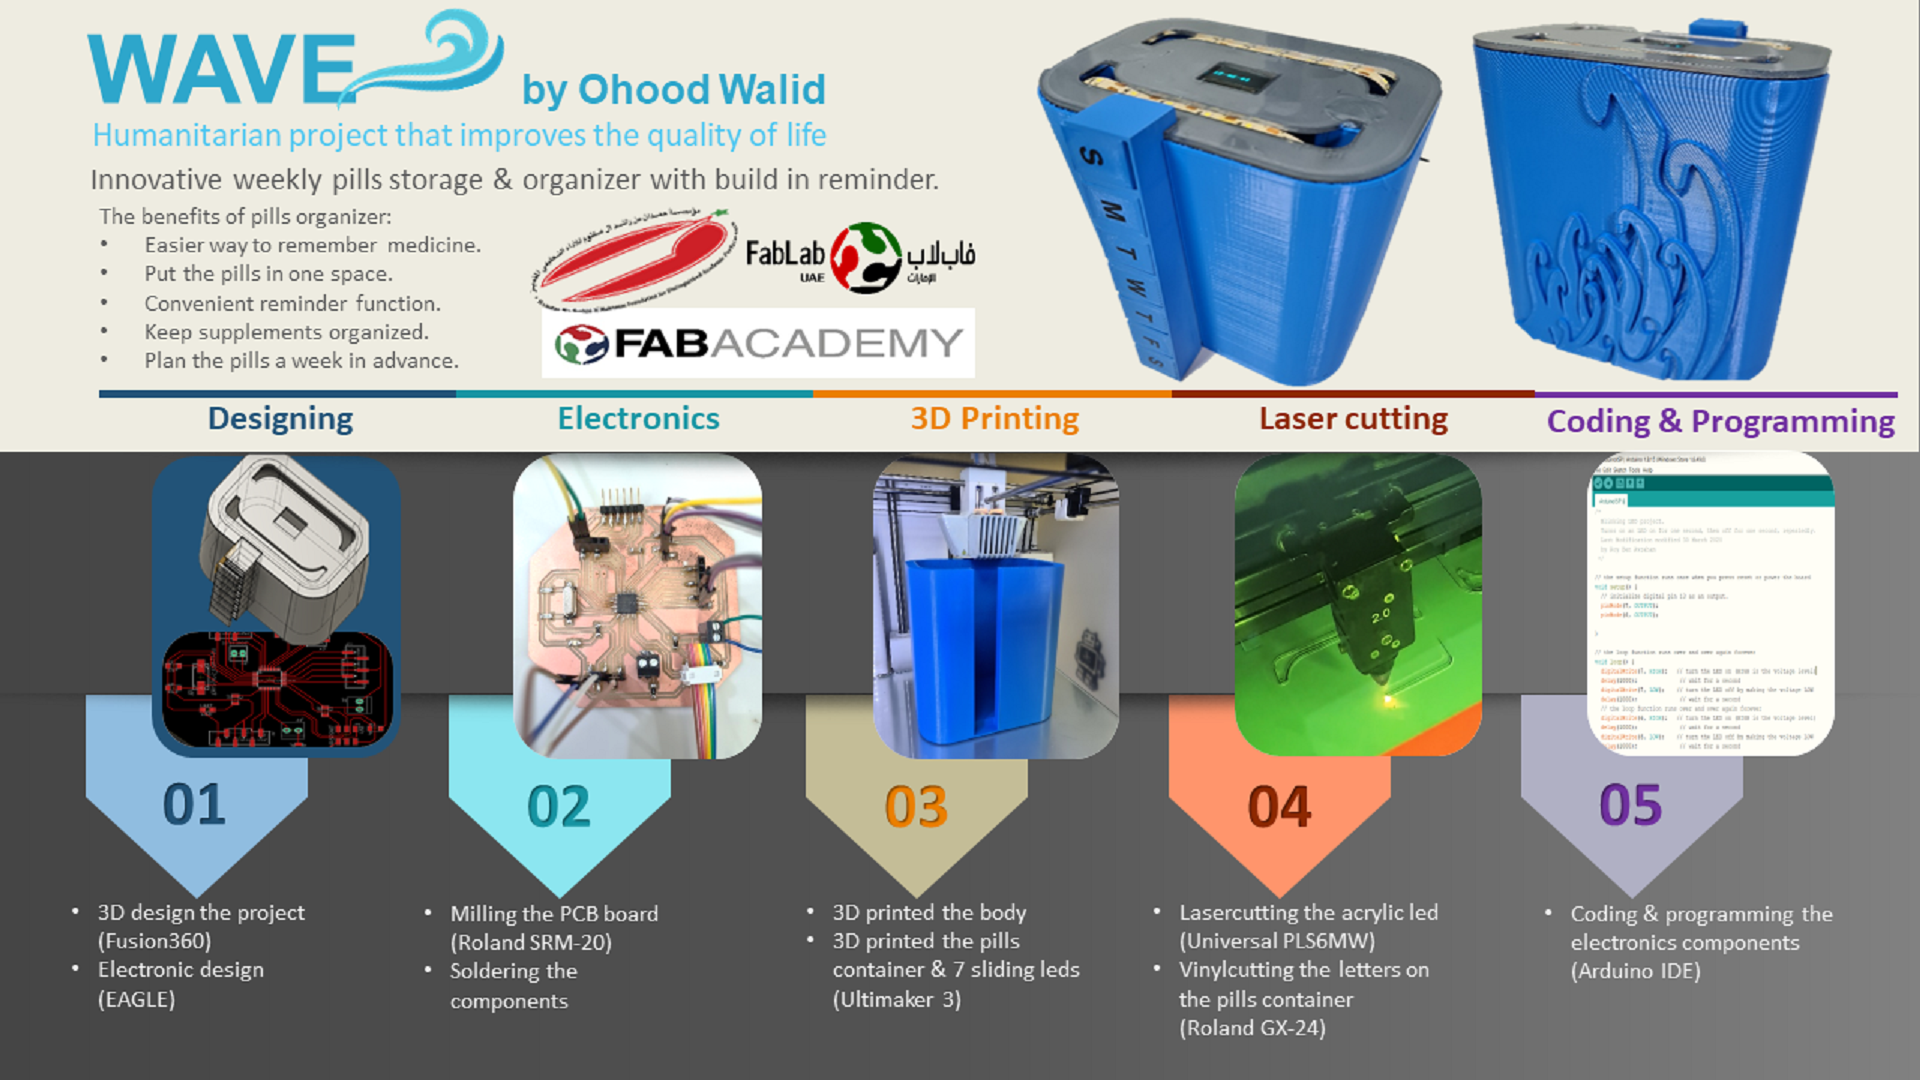
WAVE
FINAL PROJECT SUMMARY SLIDE
FINAL PROJECT VIDEO CLIP
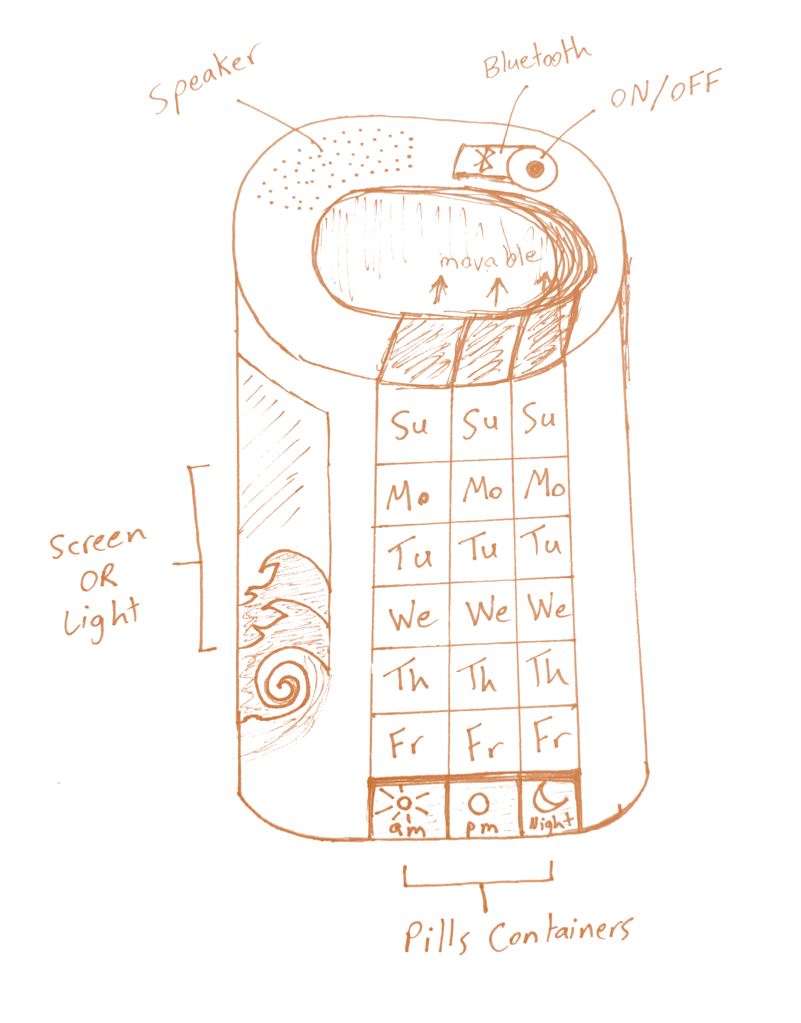
Initial Project Design Sketch
Initial Project Design Sketch
1.What will it do?
A humanitarian project that improves the quality of life through providing a reasonably arrange and storage solution for pills with a reminder.
Remembering to take the prescription medications can be a challenge, especially when it should be taken more than one. It is important to take the medications the right way so they can be metabolized and absorbed in the body to do their job.
wave is consist of organizer that is easy to load and fit all size pills so user can easily plan their medications for up to an entire week in advance, it is a simple pill storage solution with reminder to helps people who have to take medications or vitamins & minerals frequently. the idea of a better living through effective solutions
The benefits of pills organizer:
2.Who's done what beforehand?
The original intention is to provide a reasonably arrange and storage solution for pills that can facilitate people's lives and make lives more comfortable and convenient because usually the stressful life and the daily routines makes people forget to take their medication or take it more than prescribe which may cause overdose because there are no appropriate arrangement. Remembering to take the prescription medications can be a challenge, especially when it should be taken more than one. It is important to take the medications the right way so they can be metabolized and absorbed in the body to do their job. Then I developed the idea of adding some emotional benefits to improve the quality of life as added value.
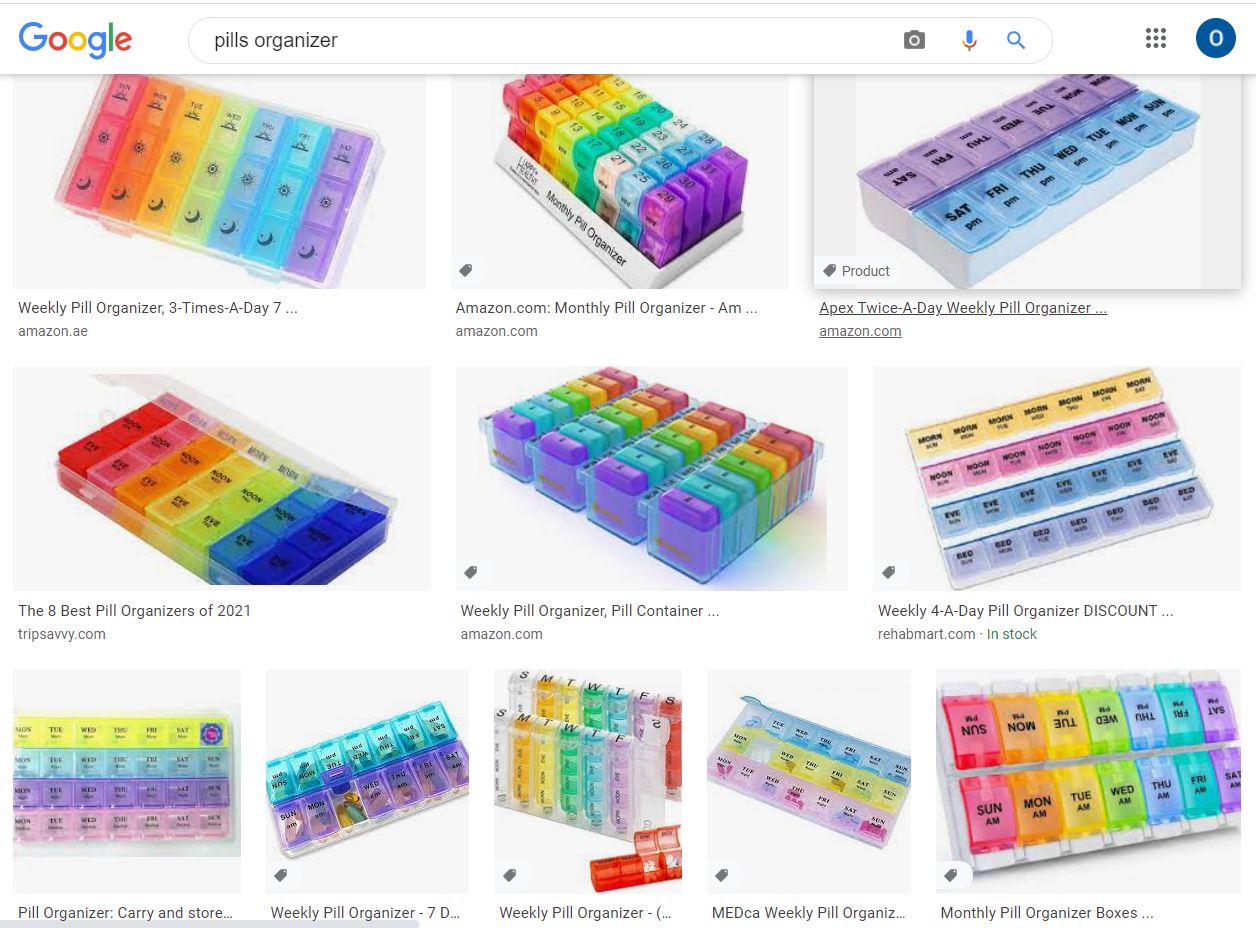
There are many pills organizer in the market but there are less options with alarm system.
previous similar projects example of pills organizer in the market
3.What will you design?
In my project I will be implementing what I learned from fabacademy, my final project will consist of the following design:
Details in the DIGITAL FABRICATION PROCESS section 11 below.
4.What materials and components will be used?
Packaging Materials:
Electronic Componenets:
5.Where will come from?
Our Lab "FabUAE" provides the materials and components from trusted suppliers.
6.How much will they cost?
Packaging Materials:
Electronic Componenets:
Total cost approx. 144 AED around 38$
7.What parts and systems will be made?
8.What processes will be used?
Design:
Fabrications:
Programming:
9.What questions need to be answered?
What are the future improvements?
Wave Future improvements:
10.How will it be evaluated?
The wave project will be evaluated according to the smooth & successful working of the system integration and the overall packaging with the ability of generating the alarm (buzz sound, light blinking & screen notification) within specific timing.
11.Digital Fabrication Process
In this section I will be showing the fabrication process of my project, which demonstrate that I’m implementing all the skills I learned from fabacademy
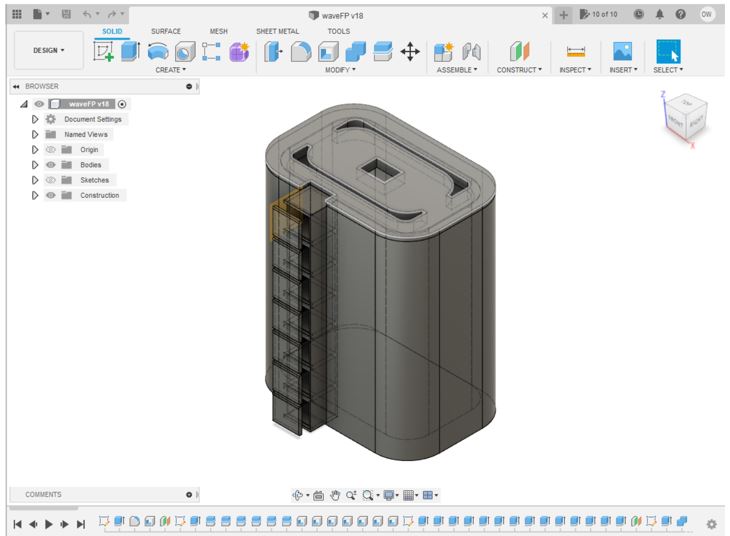
3D DESIGN & PRINTING
I design the whole packaging using Fusion360. You can find the design file in the in the (MY DESIGN FILES) section in the end of this page
Then I 3D printed each part separate, I started printing the container then the body by saving each design as (.stl)
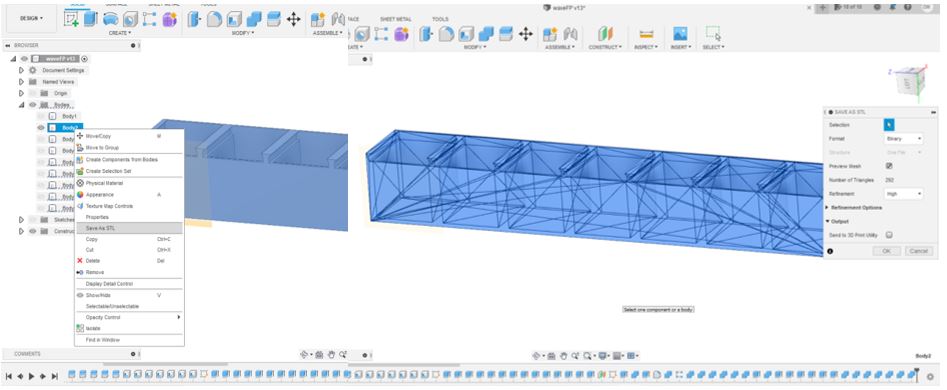
then import it in the Ultimaker Cura and choosing the setting of layer height 0.2mm with 70mm/s print speed.
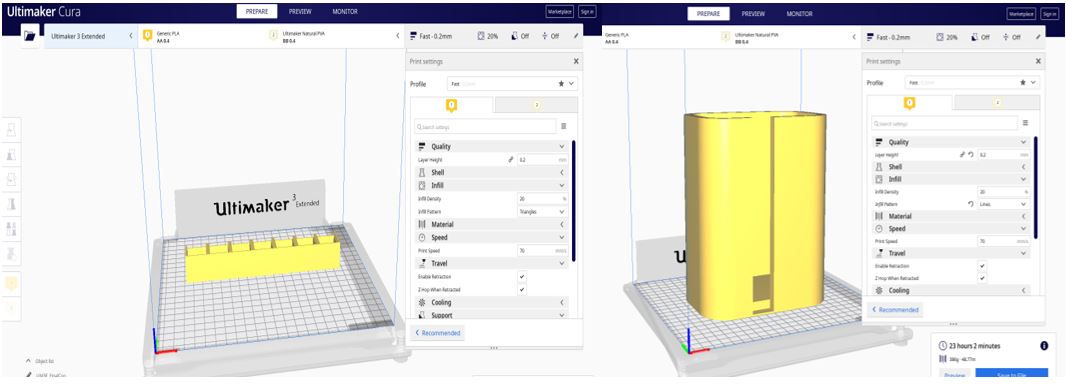
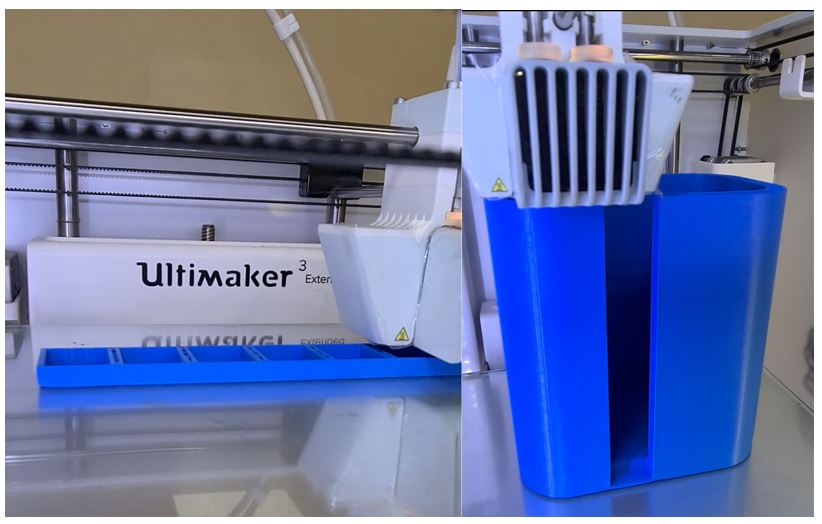
These photo while 3D printing my project using Ultimaker
For the lid I decided to Laser cutting it so I saved it as DXF to import it in the CorelDraw for the laser cutting.
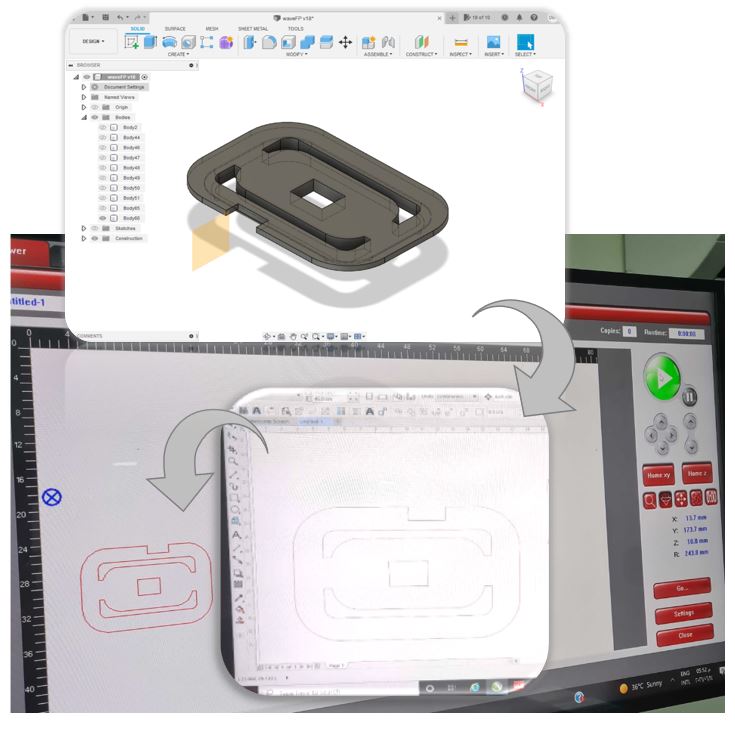
Modified the setting for laser cutting the lid (Power=80 , Speed=0.8 , Frequency=2000Hz)
ELECTRONICS DESIGN & PRODUCTION
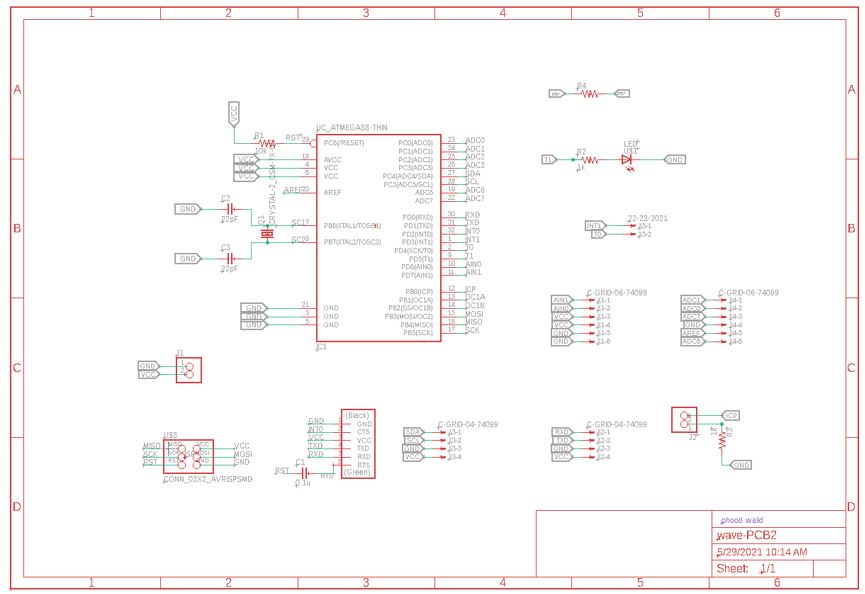
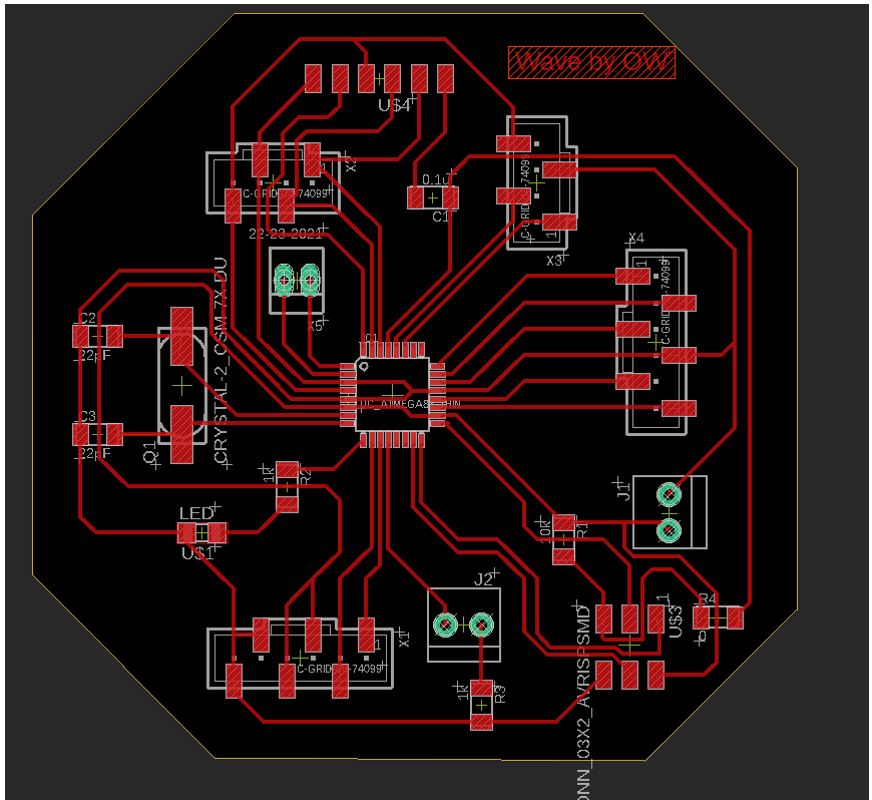
I designed the PCB from scratch using Eagel with a ATMEGA328P microcontroller.
My Schematic design
My Board Design
For more details of the electronic production of my project PCB you can visit the input week page.
PROGRAMMING
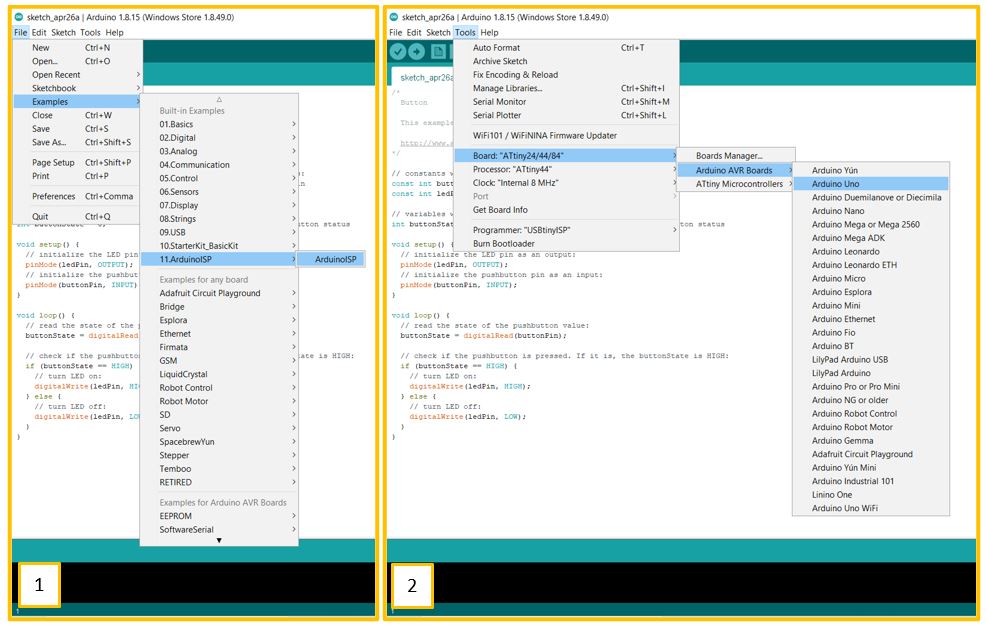
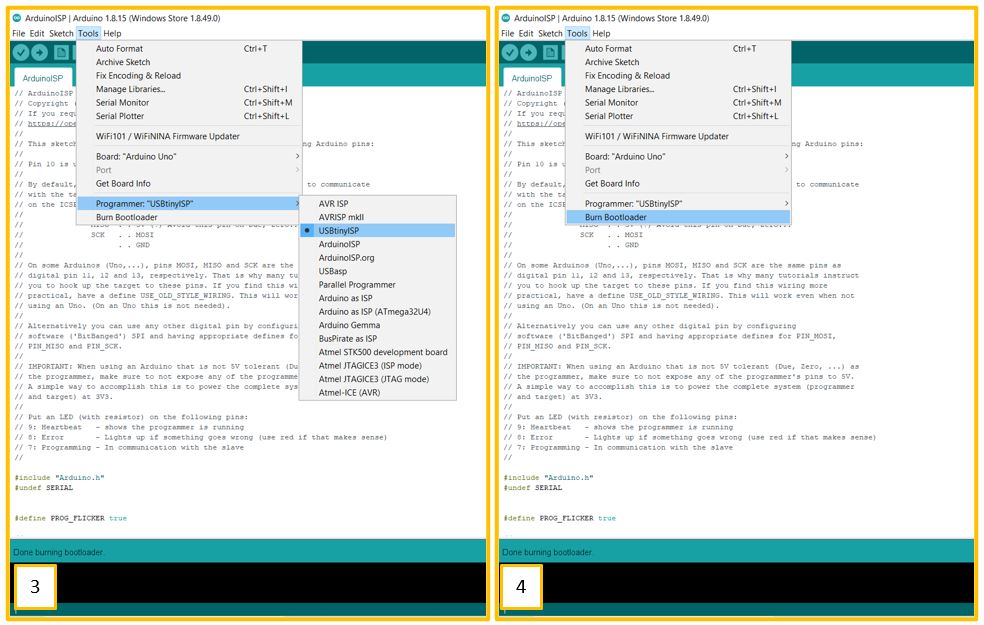
Programming my PCB using Arduino software
to program ATMEGA328P I need to burn the Bootloader to the ATMEGA328P. by following the steps in this link.
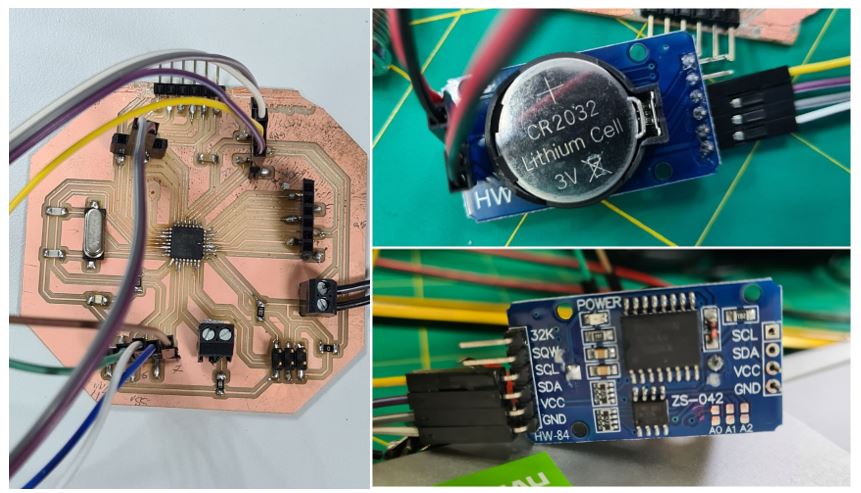
Then connecting my PCB with all the outputs & RTC module with screen to give a real time reading to add the Time as input for the wave project. Because it is important to run it with a real time and keep it up even if the system shutdown since it give indication of the time to take the medicine.
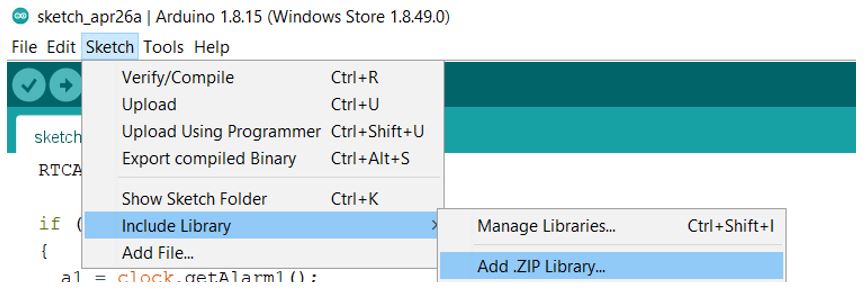
Download the needed library from this link.
Then add the library.
Then I programmed my project using the following code, for more details about the explanation of the code you can find it in the input & output:
#include <DS3231.h>

#include <Wire.h>

#include <Adafruit_GFX.h>
#include <Adafruit_SSD1306.h>

#define SCREEN_WIDTH 128 // OLED display width, in pixels
#define SCREEN_HEIGHT 64 // OLED display height, in pixels

// Declaration for an SSD1306 display connected to I2C (SDA, SCL pins)
Adafruit_SSD1306 display(SCREEN_WIDTH, SCREEN_HEIGHT, &Wire, -1);


DS3231  rtc(SDA, SCL);

Time  t;

#define buz 6
#define Led 7

int Hor;

int Min;

int Sec;

void setup()

{
if(!display.begin(SSD1306_SWITCHCAPVCC, 0x3C)) { // Address 0x3D for 128x64
    Serial.println(F("SSD1306 allocation failed"));
    for(;;);
}
  Wire.begin();

  rtc.begin();


  pinMode(6, OUTPUT);  //Buz

  pinMode(7, OUTPUT);  //Led


  // The following lines can be uncommented to set the date and time

  //rtc.setDOW(TUESDAY);     // Set Day-of-Week to SUNDAY

 // rtc.setTime(19, 26, 0);     // Set the time to 12:00:00 (24hr format)

  //rtc.setDate(6, 15, 2021);   // Set the date to January 1st, 2014

  //delay(2000);

}


void loop()

{


  t = rtc.getTime();

  Hor = t.hour;

  Min = t.min;

  Sec = t.sec;

display.clearDisplay();
display.setTextSize(2.5);
display.setTextColor(WHITE);
display.setCursor(0, 30);
// Display static text
display.print(Hor);
display.print(":");
display.print(Min);
display.print(":");
display.println(Sec);
display.display();

//display.clearDisplay();
//display.setTextSize(1);
//display.setTextColor(WHITE);
//display.setCursor(0, 10);
//// Display static text
//display.println(t);
//display.display();

digitalWrite(6, HIGH);
digitalWrite(7, HIGH);

 if( Hor == 19 &&  Min == 39) //Comparing the current time with the Alarm time

{

Buzzer();

Buzzer();

light();

light();

display.clearDisplay();
display.setTextSize(1.5);
display.setTextColor(WHITE);
display.setCursor(0, 25);
//// Display static text
display.println("Hi, Take Med!");
display.display();

Buzzer();

Buzzer();

light();

light();

}

 delay(1000);

}


void Buzzer()

{

digitalWrite(6,HIGH);  // turn the buzzer on

delay(500);

digitalWrite(6, LOW);  // turn the buzzer off

delay(500);

}

void light()

{

digitalWrite(7,HIGH);    // turn the LED on

delay(500);

digitalWrite(7, LOW);   // turn the LED off

delay(500);

}
this video shows that the code is working successfully
this video shows the whole project working successfully after combining all the parts
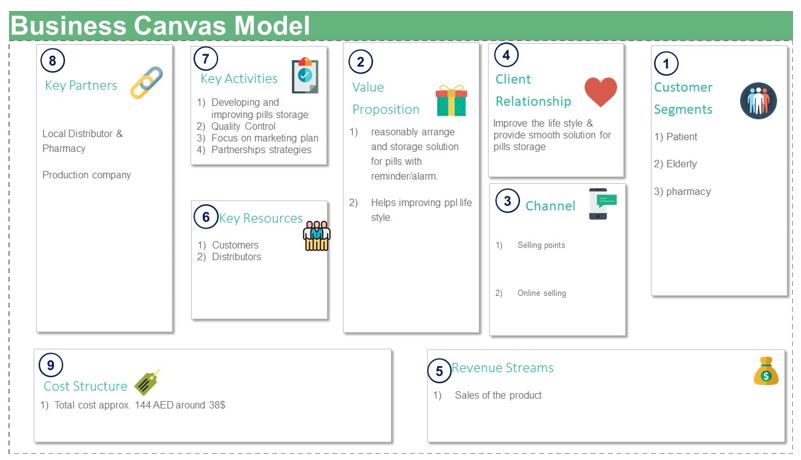
12.Develop a plan for dissemination of your final project:
I develop a plan for dissemination of my final project using Business Canvas Model method, which highlight the main pillars as the details shown bellow
13.LICENSING:
since it is a medical project and will help other, I will choose to make it an open source that is free to use and explore.
I lunch the license using Creative Commons , which is a great tool to choose the type of rights in few steps as shown below:
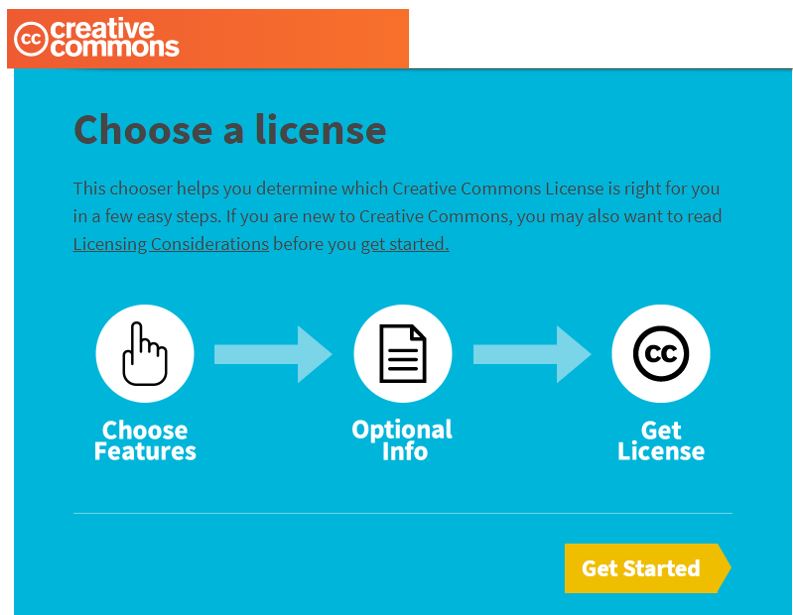
So using this tool, I’m allowing other to share & use my project for the good of humanity.
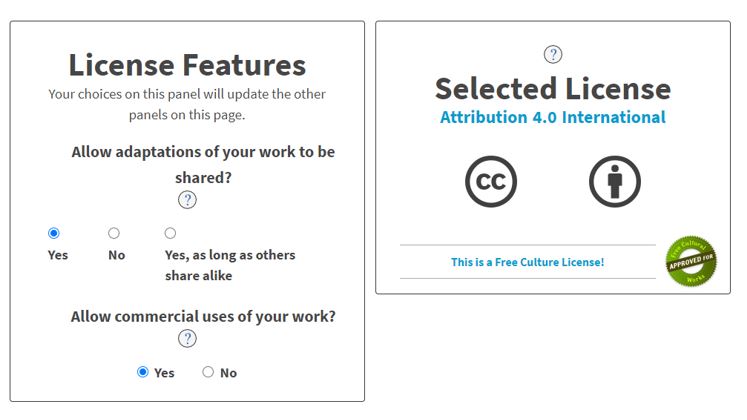

This work is licensed under a Creative Commons Attribution 4.0 International License.