Interface and application programming
Tools for interfaces and applications
Since this week I have to create an interface or multiple interfaces I will study the most appropiate interfaces that I can use via WiFi and the ESP32 because that is what I want to use for my final project.
- Processing IDE:
- Tkinter:
- App Inventor:
Processing IDE is an open-source software to create graphics and is miliar to Arduino IDE in terms of structure. It has a setup functions and draw functions like an Arduino has a setup and loop function. The software can communicate with the Arduin IDE throurgh serial communication to share data between the computer and the microcontroller.
Tkinter is a Python graphical package and it is the most commonly used in within this programming language. In fact, it is the only framework built into the Python standard library. This Python framwork provides an interface to the Tk toolkit and works as a thin object-oriented layer on top of Tk. The Tk toolkit is a cross platform collection of graphical control elemeents to build application interfaces.
App Inventor is an open-source web application that allows create Android applications using block programming. The application is so friendly that it is highly recommendable for newbies in programming. It uses a graphical user interface very similar to the programming languages Scratch and the StarLogo, which allows user to drag and drop visual object to create an application.
The following table is a comparative table with the most important characteristics between these three tools
| Processing IDE | Tkinter | App Inventor | |
|---|---|---|---|
| Advantages | Free and Open Source, Cross platform, Good for creative interfaces, Huge community that adds libraries and tools constantly | Free and Open Source, Cross platform, There are many extension of Tk and more frequently distributed on the Web | Easy and intuitive, Work in any device with a browser, Less time-consuming, Access to most to the phone's functionalities |
| Disadvantages | Do not have full control over code, it uses a lot of system resources. | There is a concern with the speed of Tkinter since most calls to tkinter are formatted as a TCL command (a string) | It is not possible to write Java code for more sophisticated development. It can only create Android applications |
Web Server in a ESP32
The objective of this week assignment is to create an interface to control or read sensors and/or actuators. Since, I already have multiple board to communicate with servomotors, motors, accelerometers and digital or analog inputs. I decided to start with an interface that can control two motors via wireless with the ESP32 as a webserver. The first step was to analyze the electrical connection between components which is shown below
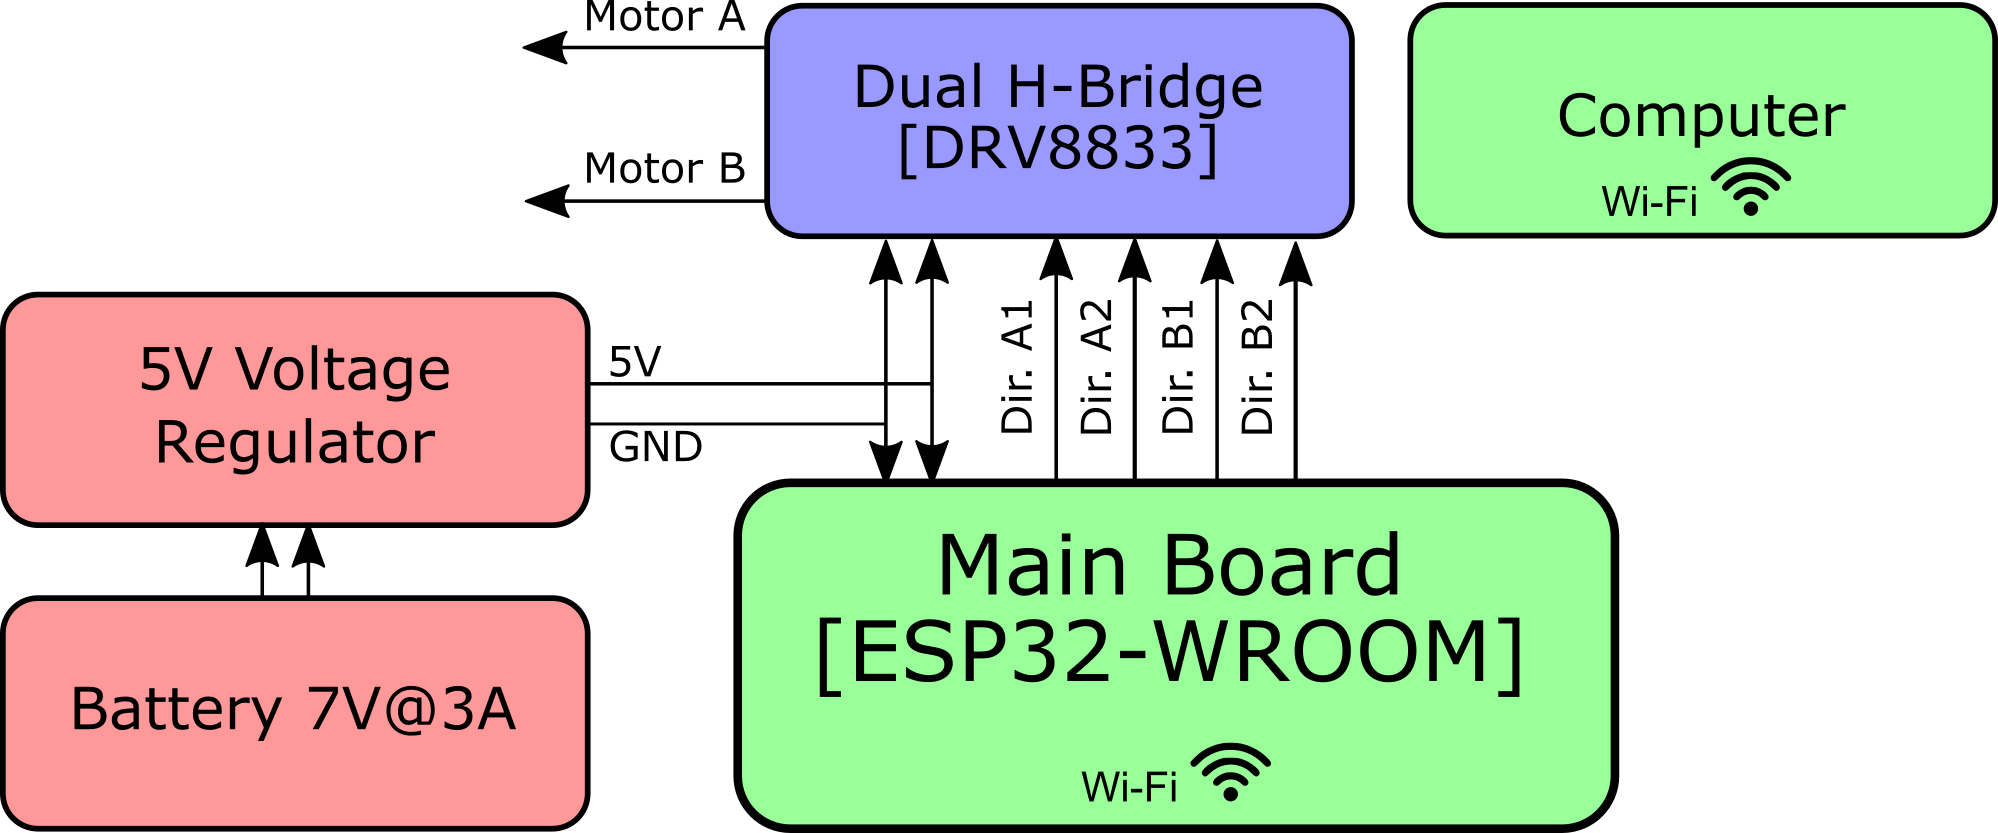
It is important to note that I am not modifying the motor speed in this exercise. I am only changing the direction or stoping the motors depending on the button that is clicked.
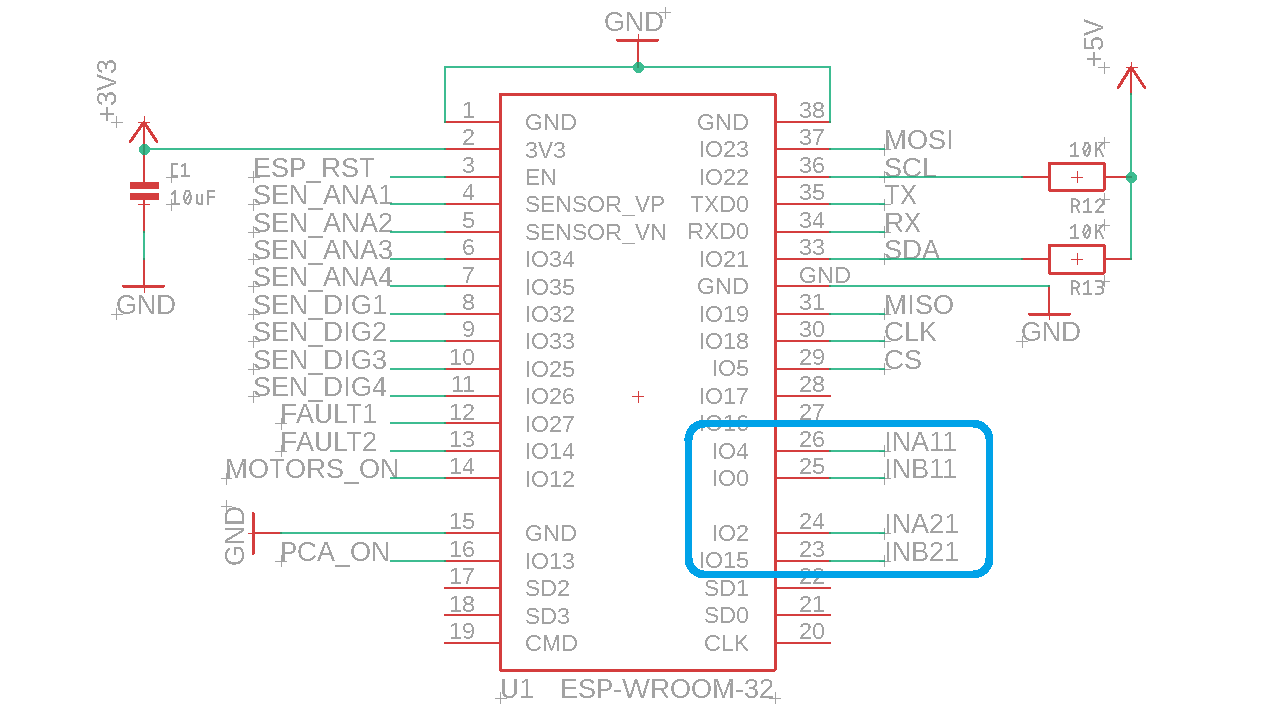
I will be using Arduino IDE to program my ESP32, I have experience using webserver in Arduino but I have not tried it before in the ESP. However, it is the same but I just need to modify a little bit the serial speed communication and the ports that the ESP32 is using to control the motors. Thus, I used te ESP board that I created to see what are the GPIOs that can be used to control the motors. After reviewing this file, I saw that the GPIOs that I left to be used for the dual H-bridges are the GPIO's 0,2,4,15 as the image below shows:
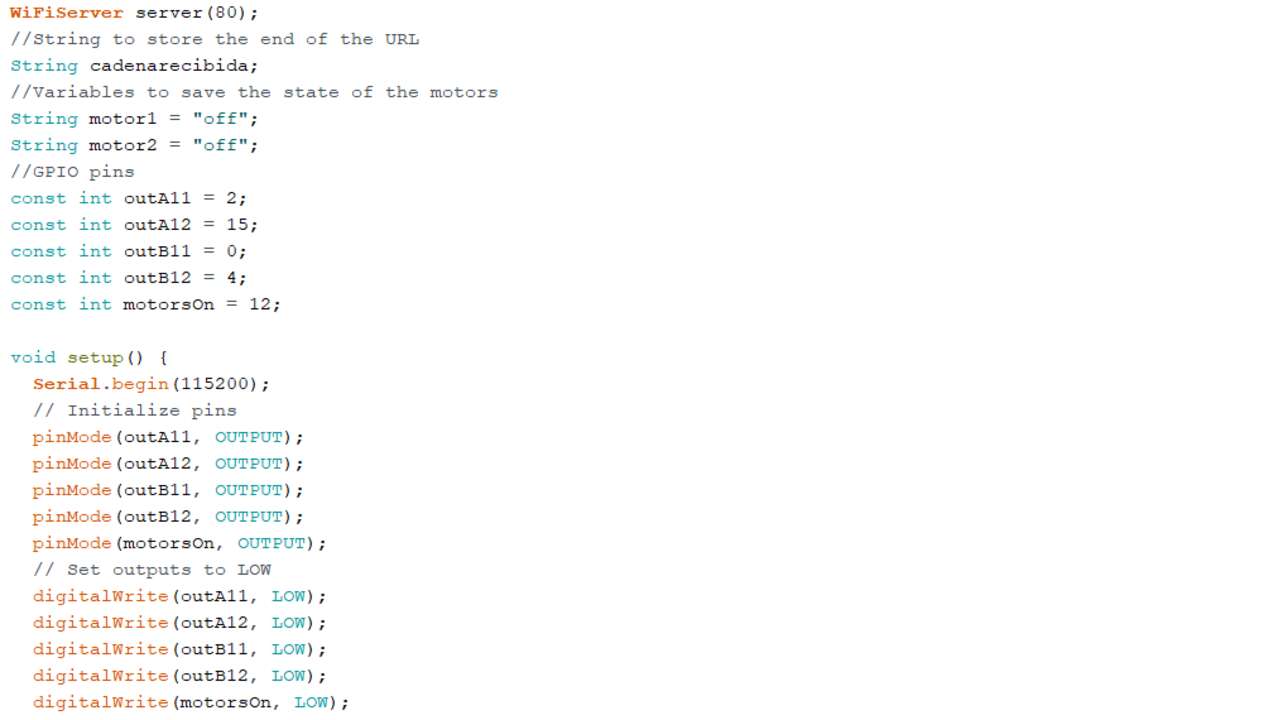
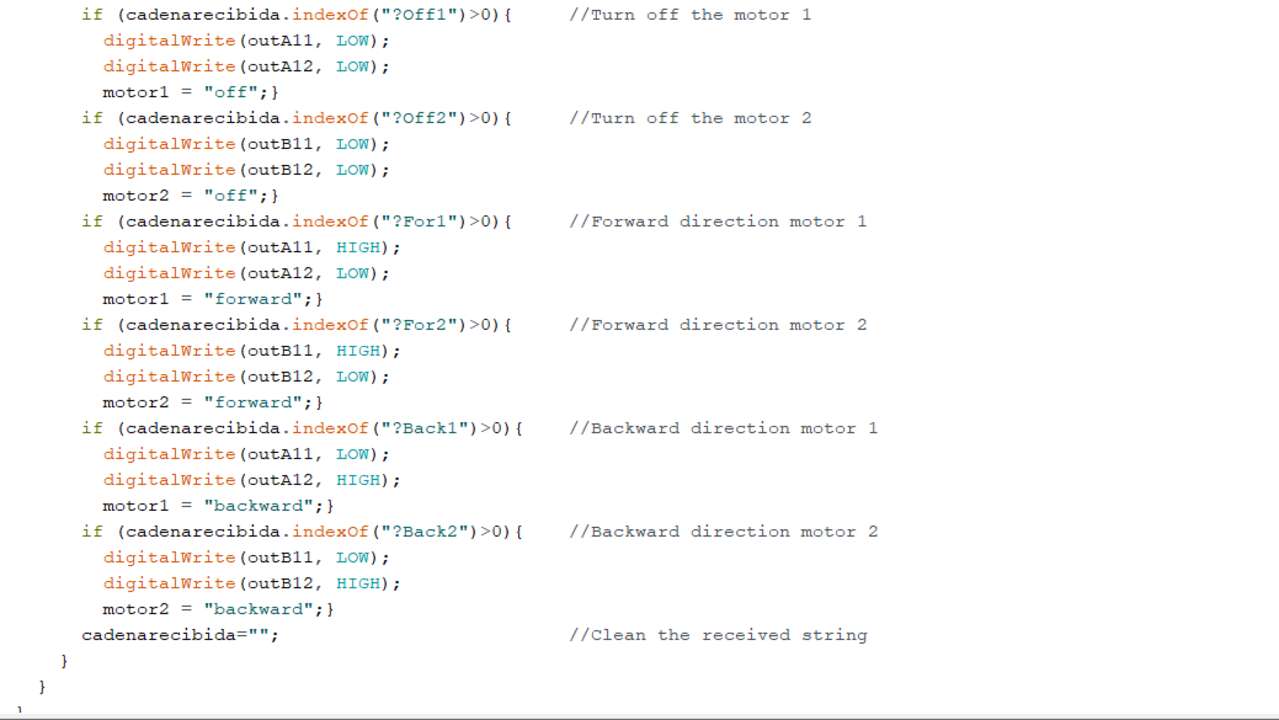
Now, I can start the Arduino program with the output declaration according to the declared pins. I also created two labels to be displayed in the serial monitor when the buttons are clicked and to save the state of the motors. The following picture shows the part of the code that was just described:
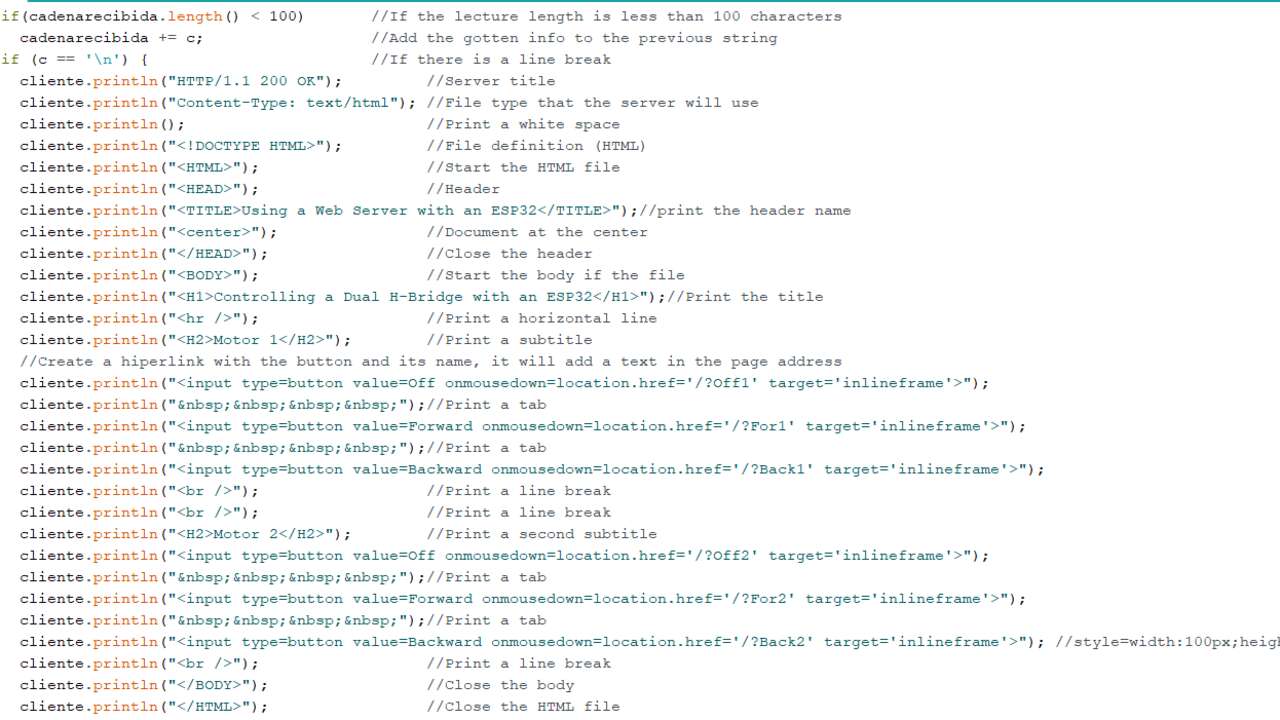
The most important section of the code when programming a web server is the HTML code which is encharged of display the required interface and sent or received information through the WiFi/Ethernet protocols. When I first created a code for a web server I did not know a lot about HTML and I did not comprehend completely the code that I made. However, the FabAcademy helped me improve my HTML skills and now I understand what is happenning in the web server code. So, I began with the normal sintax of an HTML file, with the file type, the head, the titles, the buttons, etc. The most important thing to see the this section is that the buttons add a text at the end of the original URL to be detected later on and send information to the microcontroller. In the button declaration can be seen the text that is added adter the URL when that button is pressed. The following picture depicts the main HTML code.
When the HTML code was done, I proceed to create multiple conditionals that read a saved string. This string contains the added text into the URL and depending on the string, the ESP32 will activate or deactivate the declared signals or pins. This was kind of easy but I had to create multiple conditionals to contemplate all the buttons.
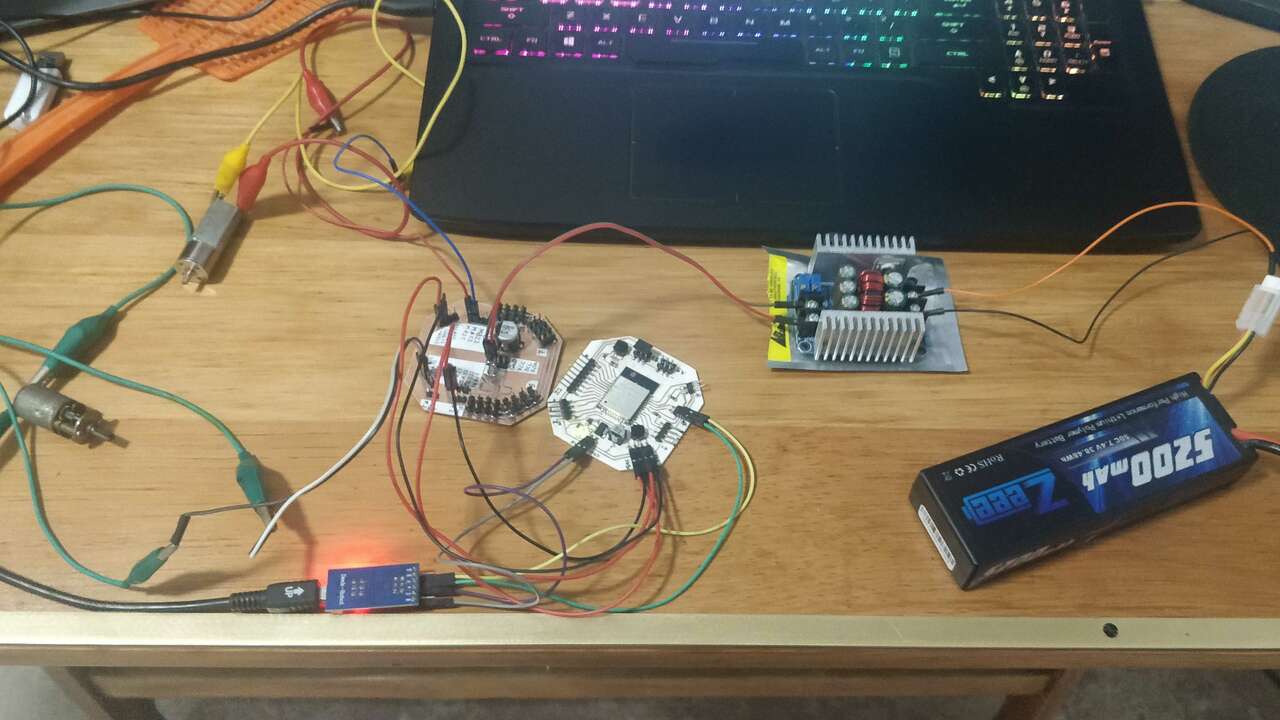
It is time to do the wiring where the ESP32 is connected to a custom board that contains two dual h-bridges DRV8833. These h-bridges are connected to a battery and to two motors that wil be controlled. The final setup is shown next:
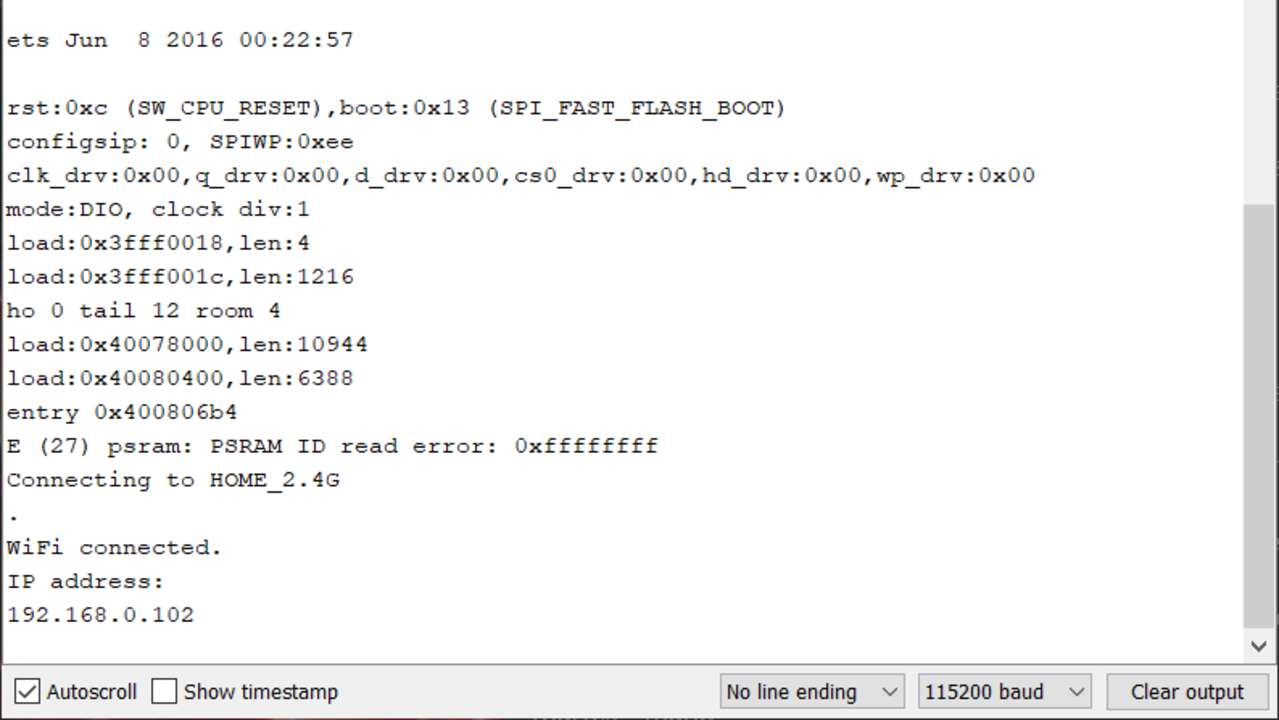
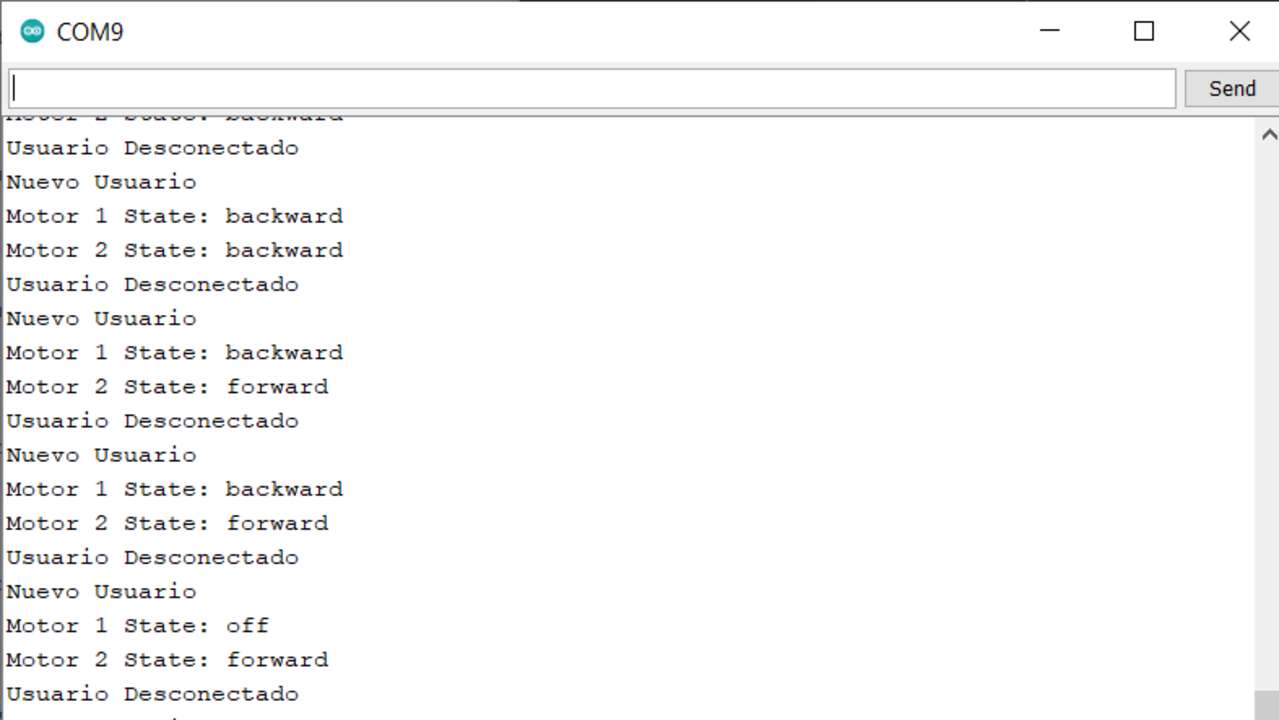
After programming the board, I openned the serial monitor to see the IP address of the web server. This IP was introduced into the web browser of a computer that is connected to the same WiFi that the ESP32 to allow the bidirectional communication between the computer and the ESP32. When the interface was displayed, I clicked multiple button to see if the serial monitors change the received signal depending on the pressed buttons. The serial monitor in these two stages is shown below:
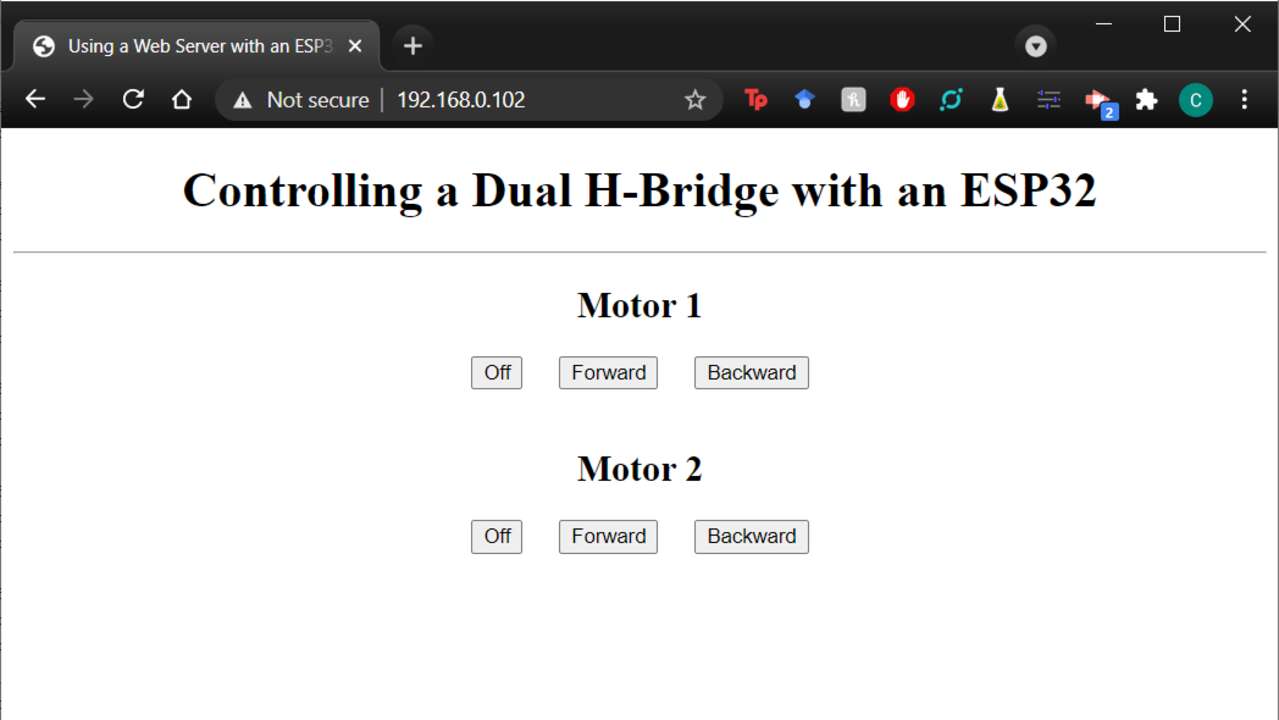
The final interface and the one that was used for the practice is illustrated below.
The whole process since the programmin until the movement of the motor is shown in the following video where can be seen that the motors change directions and they also stop depending on the pressed buttons.
ESP32 using a WiFi client socket
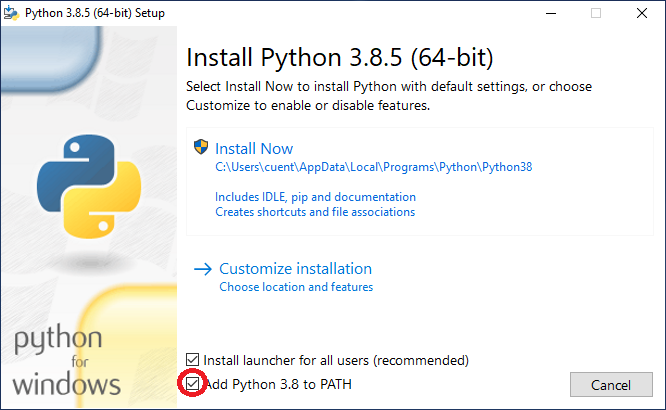
I want to create an interface with Tkinter for my final project. Thus, I decided to create another interface that uses Python and Tkinter to communicate to the ESP32 via Wifi and a socket. In order to create this interface I must have Python in my computer. I already have it but the process is really easy. You just need to go to Python and download the last stable version into your computer. In my case I download and installed the 3.8.5 version. After dowloading the file, you just need to click on install but you must be careful to also click Add Python 3.X to PATH just like the image below shows.
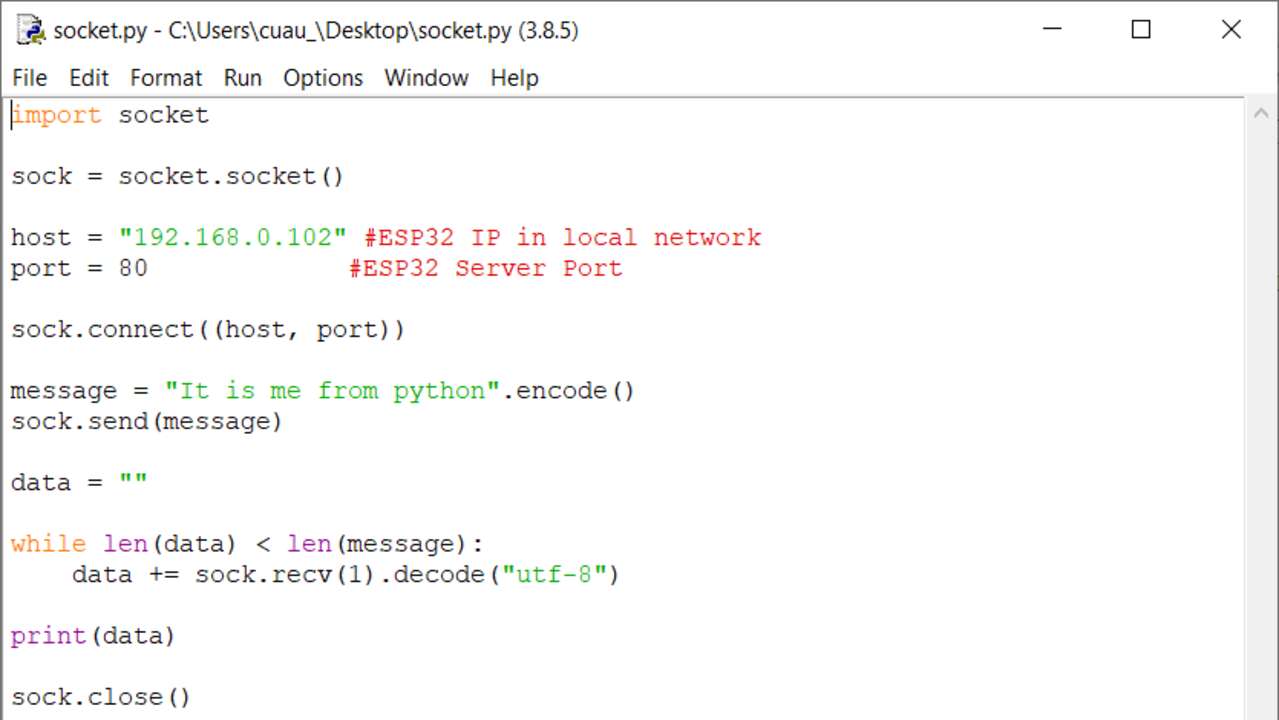
When the installation of Python was done in my computer, I searched for examples to communicate between an ESP32 and tkinter but I did not find many examples. Nevertheless, after an hour searching for information I found a tutorial that explains the use of socket in arduino to communicate with an external computer using WiFi and the socket. So, I though that will be a really good step. Thus, I copied the code that they use to communicate with the arduino but I had to modify it because the values sent are bytes and not string. That is why I used encode and decode in the python code that is seen below:
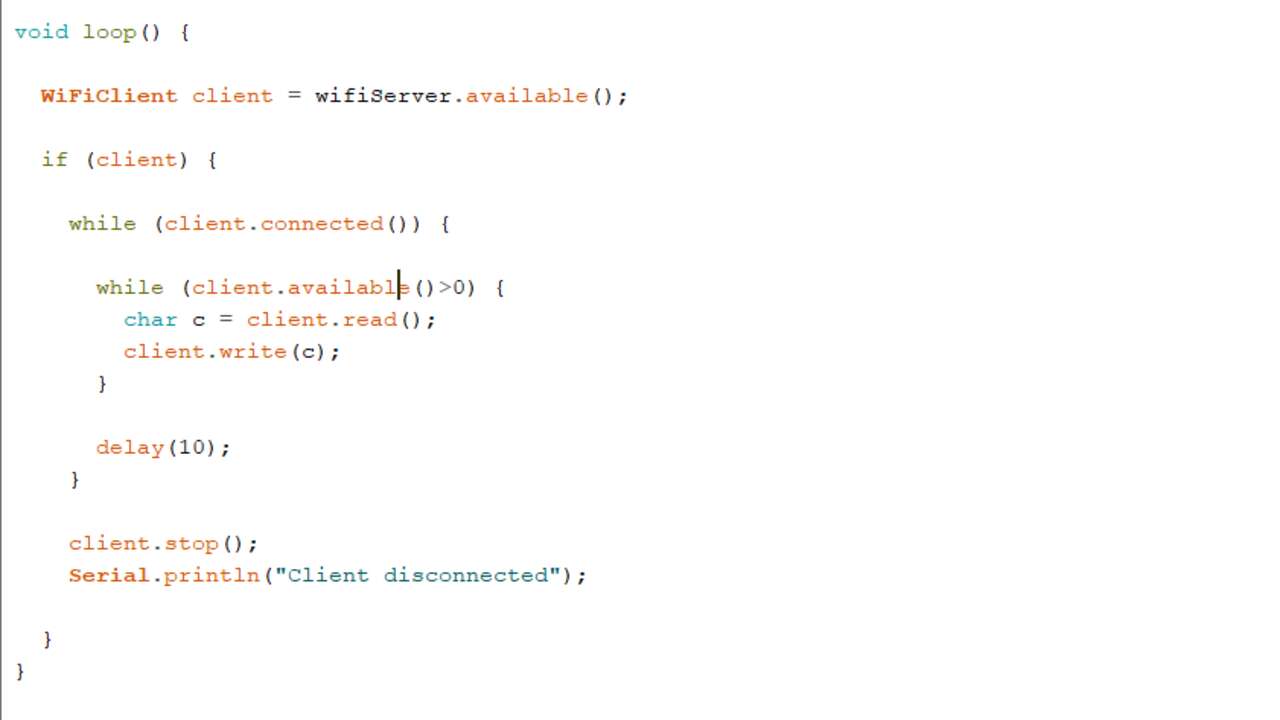
Later, I passed to Arduino to program the WiFi socket into the ESP32. In this case, I used the exact same code that was provided by the tutorial and I did not change a thing. The main code is shown next where it can be seen that whatever is send from the computer in Python will be read and send back to the computer.
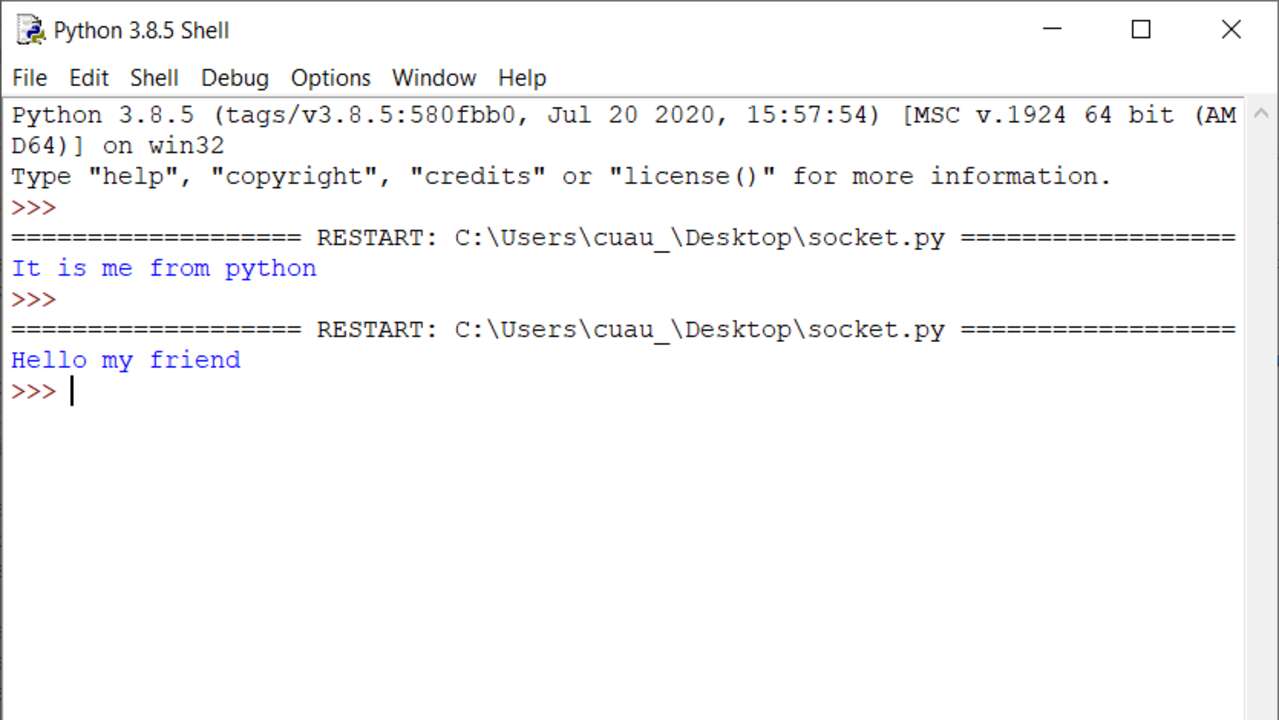
To test the code, I had to open the serial monitor to see the IP address of the ESP32. Later, I copied the IP address to the python code and I run the code. If everything went as planned, you should see the following window where basically you see whatever was sent by the python code. The next image shows two examples of texts that were sent by the Python code.
The following video demonstrate the whole process working, starting with the board programming and ending with the communication between the computer and the ESP32 via WiFi.
ESP32 and Tkinter
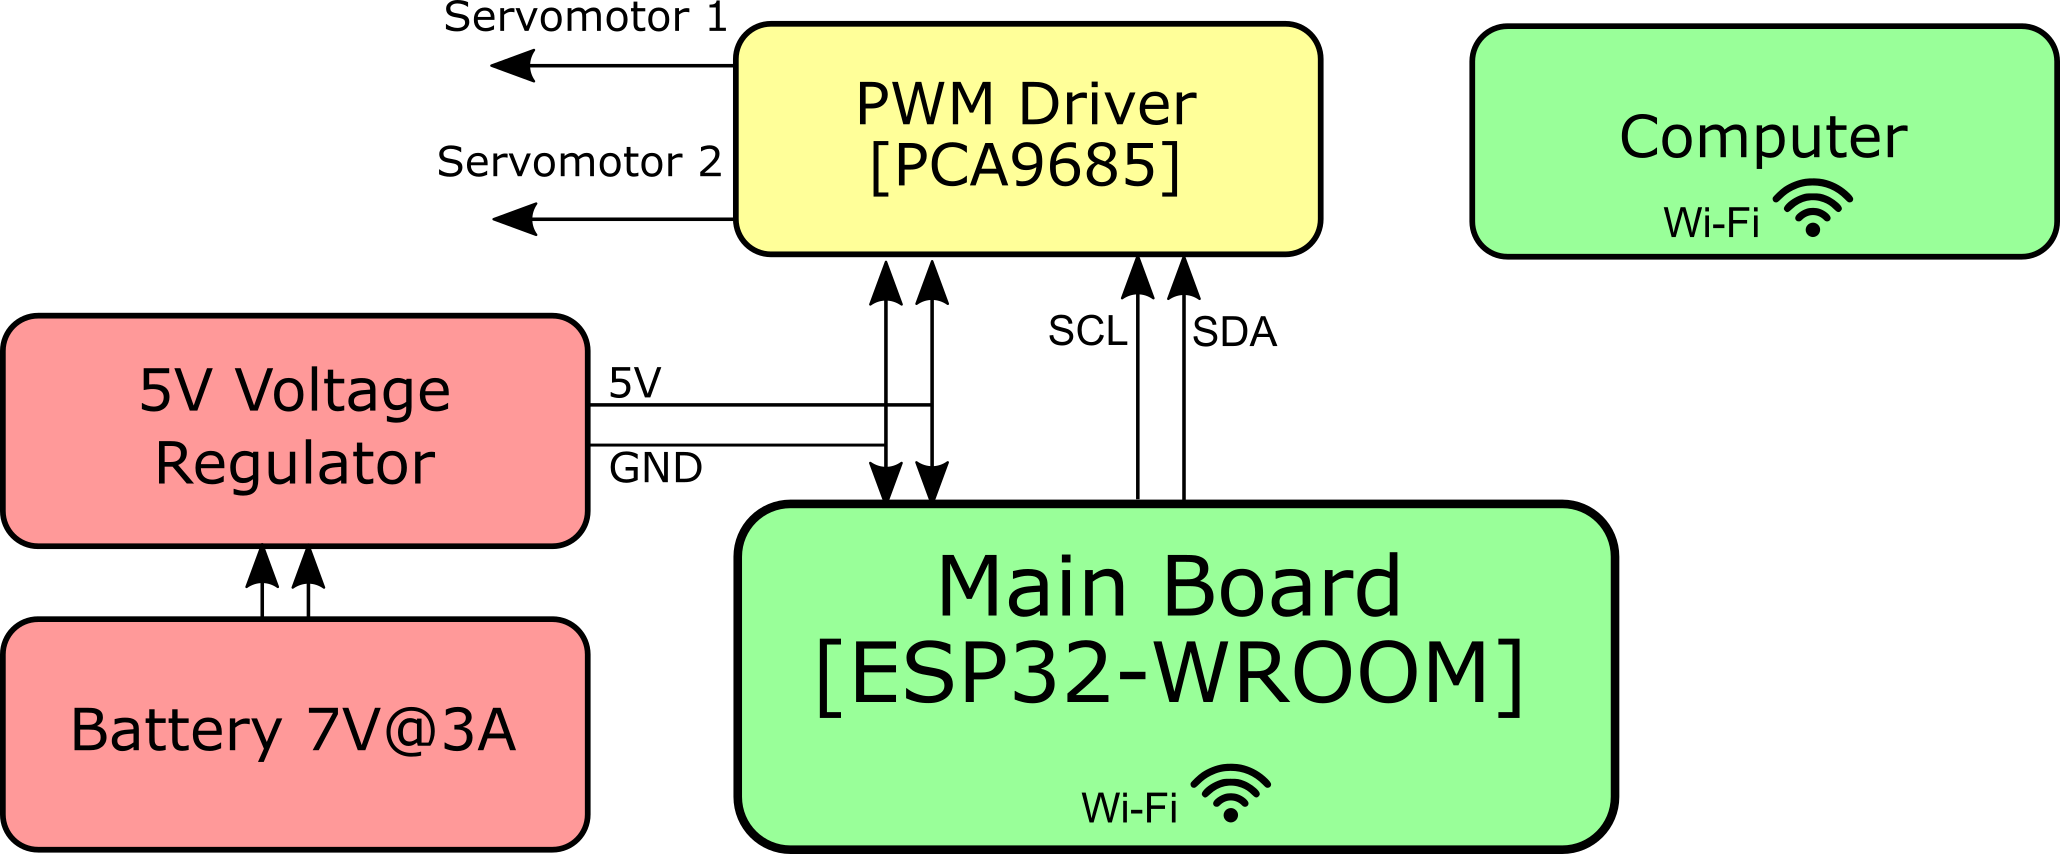
When I found out that the communication between the computer and the ESP32 was successful. I proceed to design a circuit and an interface where I can send the position of two servomotors and the ESP32 must move them sugin an external board with a PCA9685. Thus, I design the following block diagram to know that hardware I will need
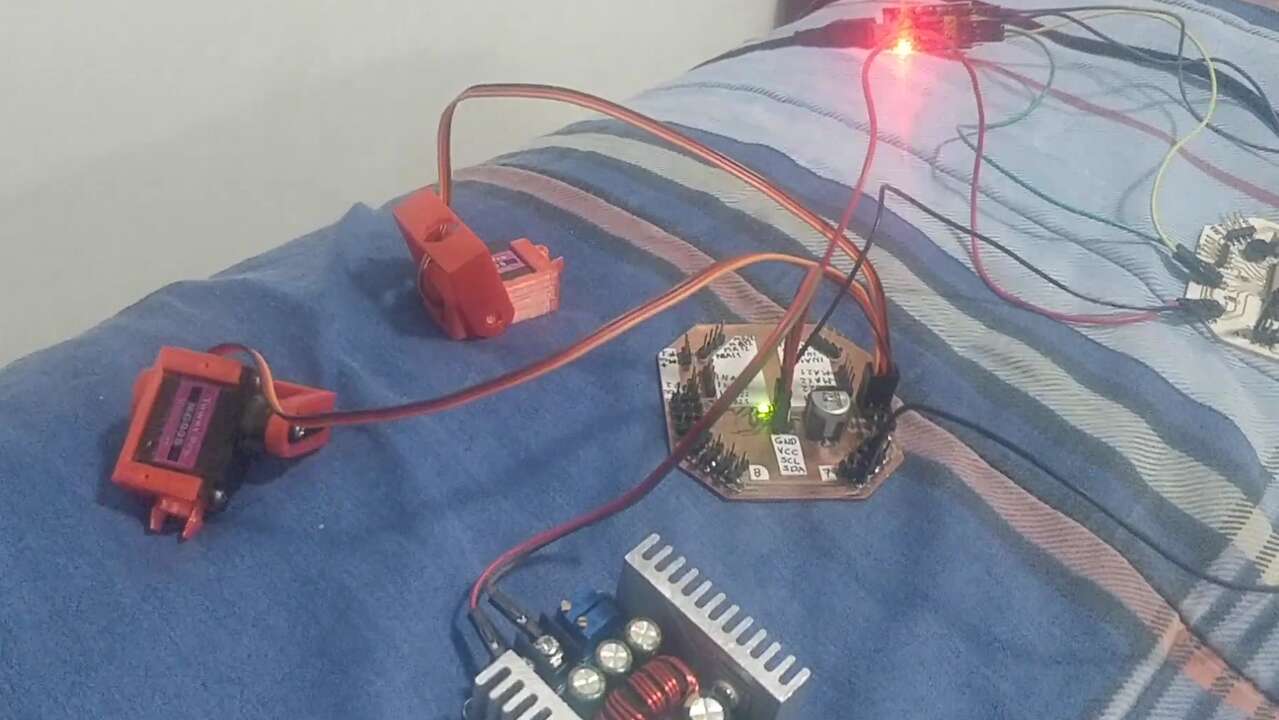
Later I did the wiring between the components as the previous diagram depicted. The communication between the ESP32 and the PCA9685 is via I2C. Thus, I did not have to connect many wires but three between the ESP32 and the PCA9685. The other wires are to program the ESP32 and the servomotor ones.
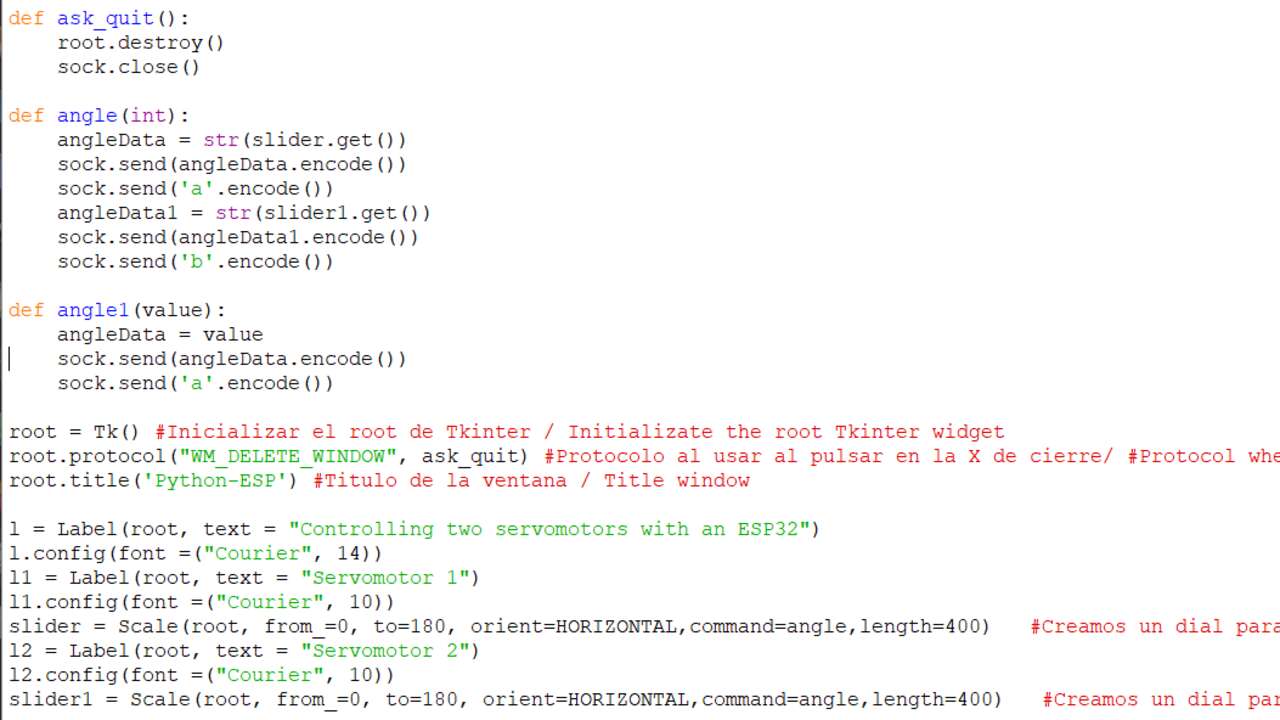
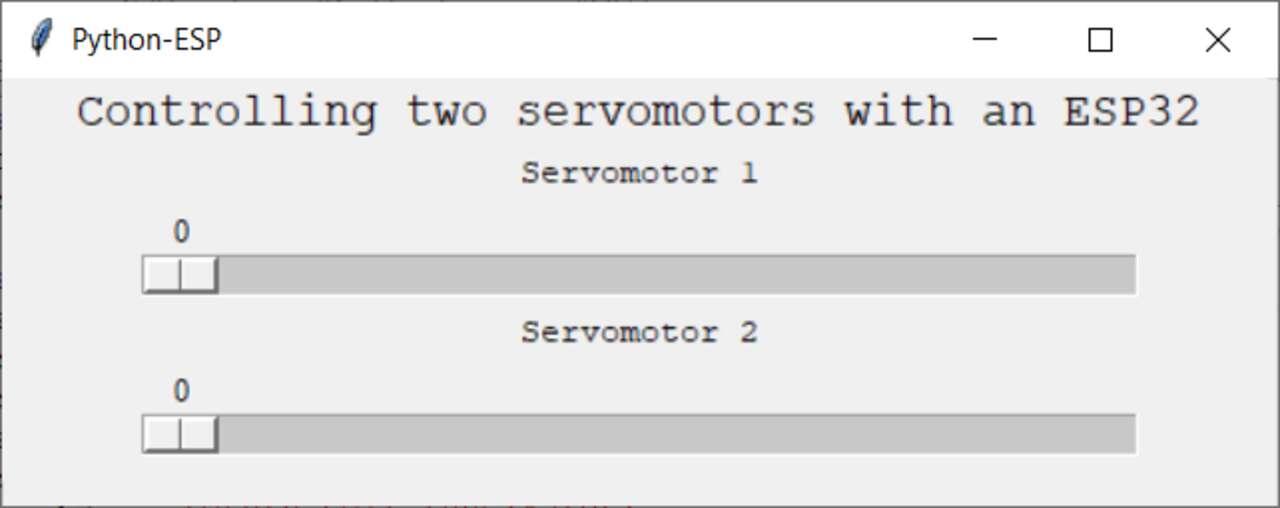
First, I searched for examples to create slide bars and send the code using Wifi clients in Arduino and I found out a really good tutorial that helped with the beginning of the code. Nevertheless, the code just had one slide bars and I wanted two of them but It is not my first time using Tkinter so I looked between my codes to add the second slide bars, the title and some label to identify between slide bars. The following picture shows the fianl code in Python that displays the items before mentionned.
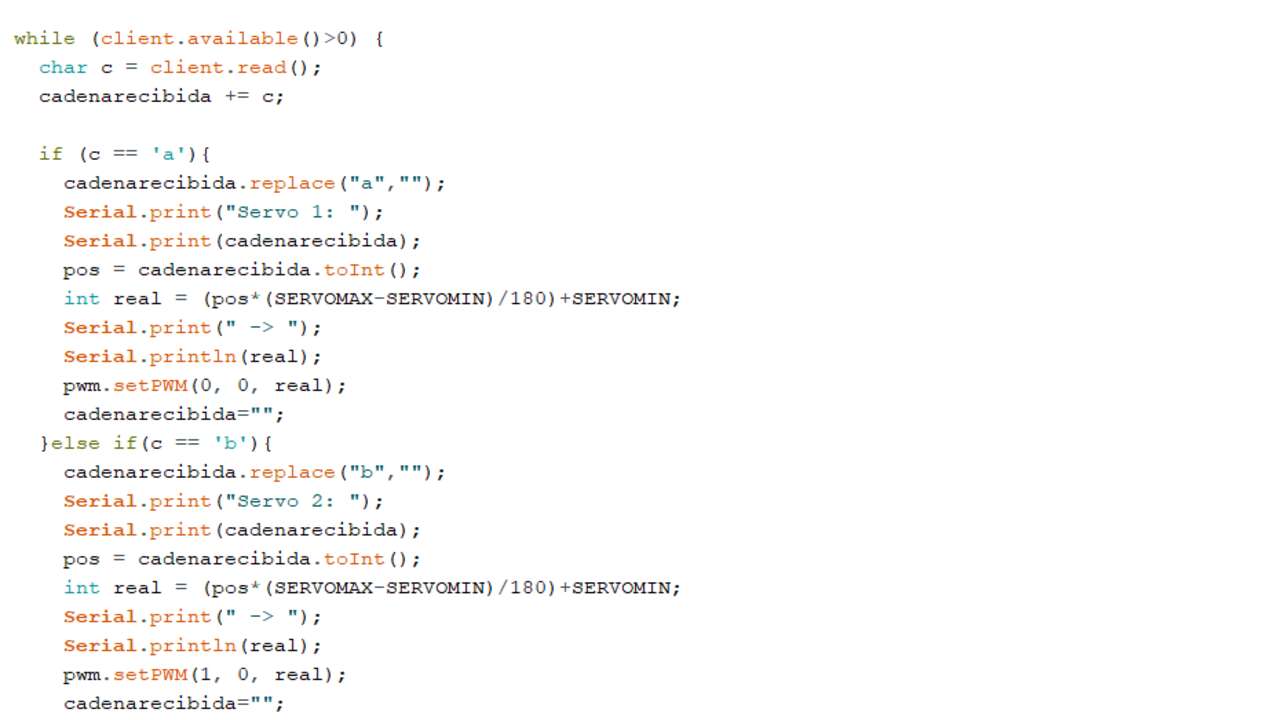
Later, I went to Arduino to modify the code and identify the sent information by the interface. Here is important to see that I used two identifiers the letters 'a' and 'b' to know the ending of the servomotor angle and also to identify the servomoto that the ESP32 must move. In the python code I send the slide bar position followed by a letter and in the Arduino code I read the sent string and when I detect a letter I erase the letter and I assigned the value to a temporary variable that is clenned after the value is sent to the PCA9685 to be process and send to the servomotors. The image below shows how the Arduino code sort the inputs and proccess it to do something.
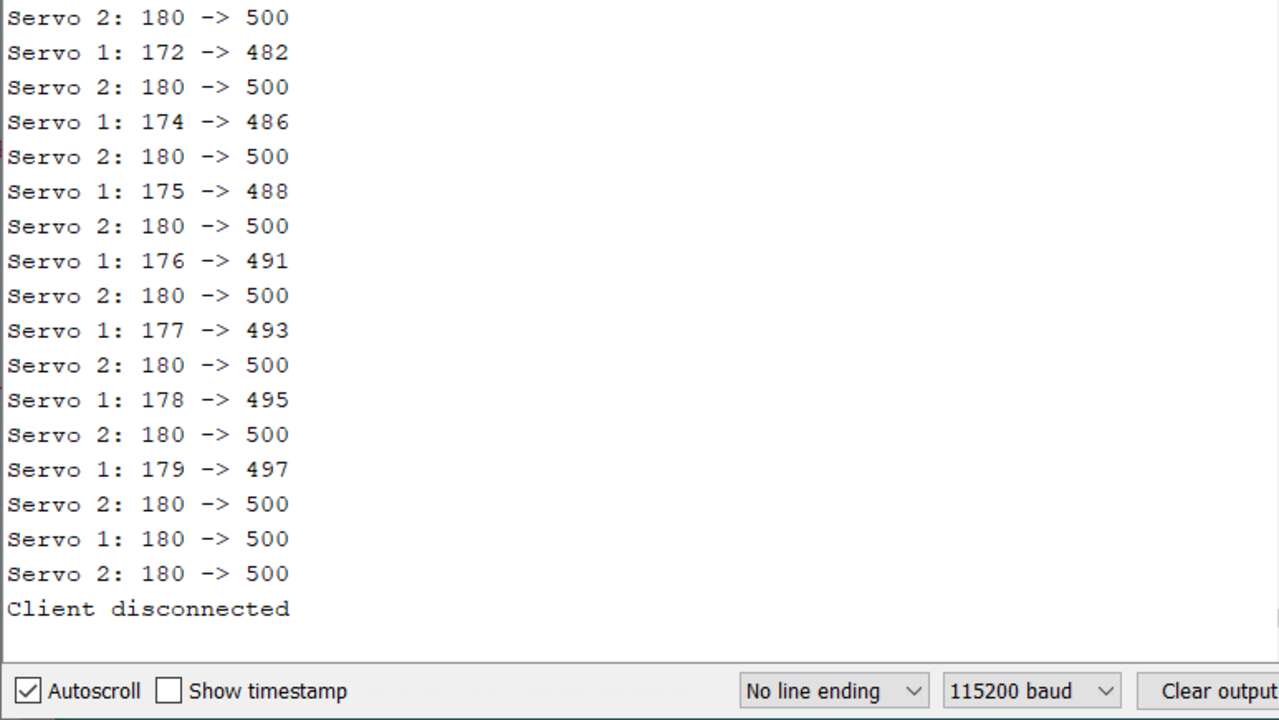
When the code was done, I tested the communication between the interface and the ESP32. The two following pictures show the created interface and the received values in the ESP32 where it is clear that the communication is working as expected and most importantly the extraction of the received information is working beatifully.
Finally, the whole system with the PCA9685 and two servomotors is shown in the next video where we can appreciate that the whole program is working without further issues.
Files created
Useful Resources