Project Management
Git and GitLab
Git is an open source software designed to handle source codes with a version control system, letting you create and track local file changes and share those changes with a remote repository.
It is not my first time working with Git and repositories. However, it was my first time working with GitLab which is a really powerful tool for web development. I had a shallow learning curve since GitLab is similar to GitHub and also because I have experience using ubuntu, atom, visual code and other programs related to programming.
In order to set up the repository on my computer, I followed the instructions of Kris Aalto Fablab which help me to create an ssh key to pull and push from and to my repository in GitLab. I also added some steps to keep order in my documentation and the whole process is as follows:
Setting up the repository
Creating the necessary directories in Ubuntu
I decided to create two folders, the first called "FabAcademy" where I will save all the files that I will used during the course and the second one called "My_WebPage" to clone the repository of my web page on my computer. To create the first folder, I used the function called mkdir which only requires the folder name to be created:
mkdir FabAcademy
It is worth to mention that the commands must be inputted in the terminal which can be accessed with the keys Ctrl + Alt + t. The second folder was created after entering to the first folder with the command cd and the directory where we want to enter:
cd FabAcademy
Once, we are inside the folder we can create and enter to the second folder with the same process:
				mkdir My_WebPage
cd My_WebPage
Creating SSH key and adding it to GitLab
Now that we have a folder to clone the GitLab repository, we can generate a ssh key with the following command:
ssh-keygen -t ed25519 -C "Cuau key"
where the name between quotation marks is the title of the ssh key. After the ssh key was generated, we need to copy the ssh key using the cat command:
cat ~/.ssh/id_ed25519.pub
The result of the command can be copy with the keys Ctrl + Shift + c. Later, we need to enter to our GitLab account with the credentials that were provided to us by email.
In the top right section there is a button called "Settings" and click on the SSH Keys on the left side of the window. Finally, we copy the ssh key using Ctrl + Shift + v in the key section as shown in the next figure:
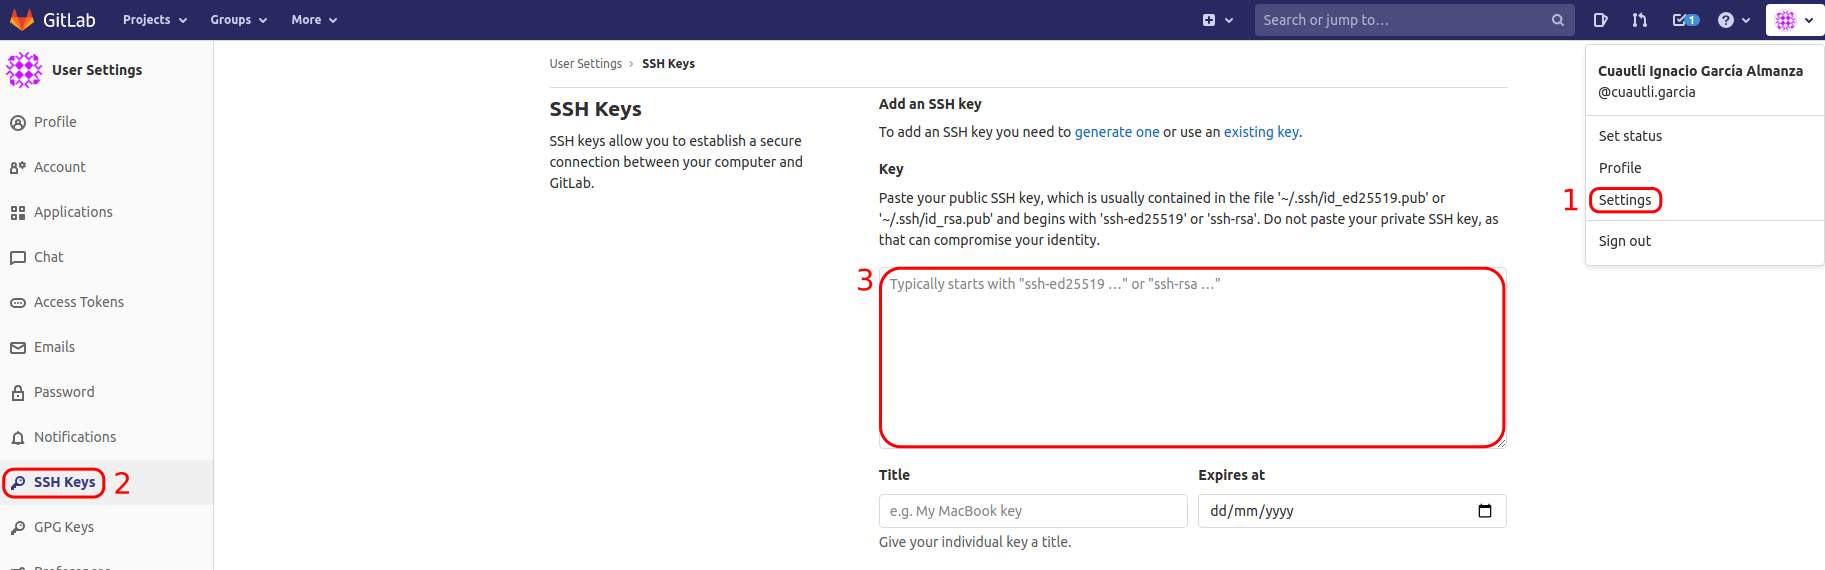
To finish the ssh key registration, it is necessary to click on the button "add key". Afterwards, I cloned my repository with:
git clone git@gitlab.fabcloud.org:academany/fabacademy/2021/labs/puebla/students/cuautli-garcia.git
It is important to note that the link to clone your repository can be found in your repository under the button "clone" and you must select "clone with ssh". To verify that the repository was in order, I made a pull to my local repository with:
git pull
Most frequent Git commands
Since there were no errors, it means that the initialization of my repository was good. Therefore, I proceed to practice with the main git commands which are shown in the following table.
| Command | Description |
|---|---|
| git add | Add modified and new files to the staging area. You can use a "." at the ends to add all the modified files |
| git commit | Commits staged changes. It is highly recommended to add (-m "commit comment") to add a comment in the commit |
| git diff | Displays the difference between modified files and their previous saved version |
| git log | View the log of Commits |
| git pull | Updates the local files with the cloud files |
| git push | Pushes committed changes to the repository |
| git status | Displays uncommitted changes to the current repository |
Practising the previous commands helped me to remember how the commands are used, because the last time I used them was the last year and I forget the syntax of some of them.
MKDocs
MKDocs is a Python-based site generator that combines Markdown with Jinja2 templates to produce websites. Documentation source files are written in Markdown but configured with a YAML file.
I programmed HTML a long time ago and I remember almost nothing. Thus, I took the decision to start my website with MKDocs because the given repository has an initial setup to work with this generator.
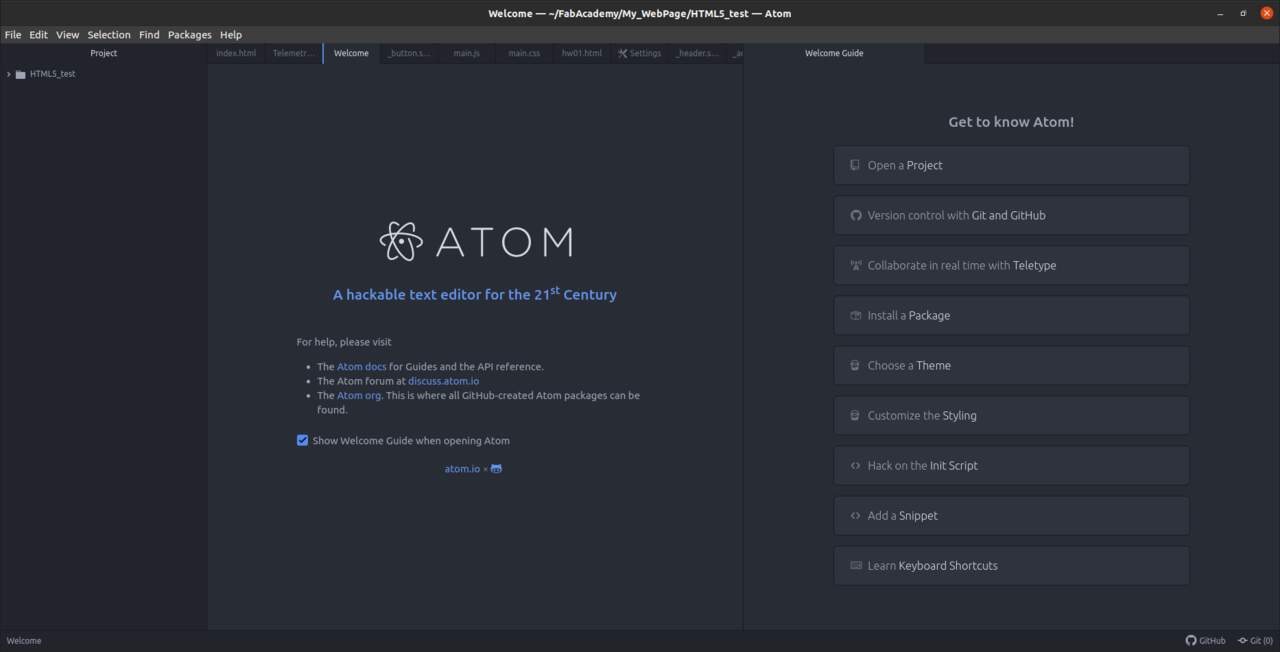
Installing Atom
To create or modify the files that we need in MKDocs it is necessary to install a text editor. So far I have used Atom and Visual Studio but I think atom is better for HTML programming. Atom is a text editor cross-platform editor which means that in the offical page of Atom you can dowload the software and install it.
Setting up MKDocs on Ubuntu
In order to modified the files and update the given template of MKDocs, we need to install Python 3 or verify that it is installed. In my case, I am using Ubuntu and there is no need to install Python 3 because it is installed by default. Nevertheless, we can verify that it is installed with the following command:
python3
If the command window displays the Python version that Ubuntu is using, it means that it is correctly installed. Therefore, the next step is to install pip which is a python package manager with the following command:
sudo apt install python3-pip
Once pip has been installed, it is time to install MKDocs in Ubuntu with the following command:
sudo apt install mkdocs
Since the template is using a theme called "material", it is necessary to install it with the following command:
sudo apt install mkdocs-material
The last thing to install is the plugin for the localized date because the template is using it. The plugin can be installed with:
pip3 install mkdocs-git-revision-date-localized-plugin
Once the plugin has been installed, Atom can be opened to start the edition of the website tipying the following in the terminal:
atom .
The first file that has to be modified is the mkdocs.yml which contains the general information about the website

After the file is saved with Ctrl + s, the project can be previewed in the browser at "http://localhost:8000" using the command:
mkdocs serve
Everytime that a file is modified or created in Atom, it is neccesary to save the changes and the website will be automatically updated. In case you do not see the changes, you can refresh the website.
Learning MKDocs and HTML
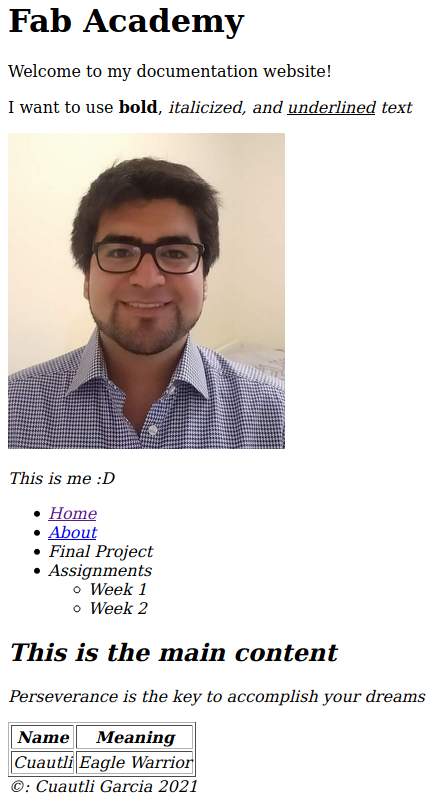
Since I did not remember a lot of HTML, I followed the given tutorial in the BootCamp and the HTML basic tutorial of the Fab Academy to create the first version of my website with HTML. These tutorials help me to realized that HTML is not as hard as I remembered or perhaps it is because nowadays we have more resources than 10 years ago when I had my first approach to HTML. At the end I was able to wrote my first HTML version which is shown below:
After I tried out HTML, I used a Markdown tutorial and a Markdown Cheat Sheet to learn how to document in MKDocs. So far, I am loving MKDocs since it allows you to use Markdown and HTML syntax in the same file. This characteristic is really useful because sometimes is easier to program with one language than the other or some instructions allow you to have more control over the website. After a few hours practising I was able to finish the first assignment about Project Management.

Most frequent syntax in Markdown and HTML
Once I practised with MKDocs, I realized that there are a few syntaxes that we need to learn since they are the most frequent used.Thus, I created the following table that contains those syntaxes in Markdown and HTML.
| Markdown Syntax | HTML Syntax | Description |
|---|---|---|
#H1 ##H2 ###H3 |
<h1>H1</h1> <h2>H2</h2> <h3>H3</h3> |
Heading |
| ***bold text*** | <b>bold text</b> |
Bold |
| *italicized text* | <i>italicized text</i> |
Italicized |
| >blockquote text | <blockquote>blockquotetext</blockquote> |
Blockquote |
1. First item 2. Second item 3. Third item |
<ol> <li>First item</li> <li>Second item</li> <li>Third item</li> </ol> |
Ordered list |
- First item - Second item - Third item |
<ul> <li>First item</li> <li>Second item</li> <li>Third item</li> </ul> |
Unordered list |
| `code text` | <code>code text</code> |
Code |
| [title](https://www.name.com) | <a href="https://www.name.com">title</a> |
Link |
|  | <img src="image.jpg"alt="alt text"> |
Image |
HTML5UP
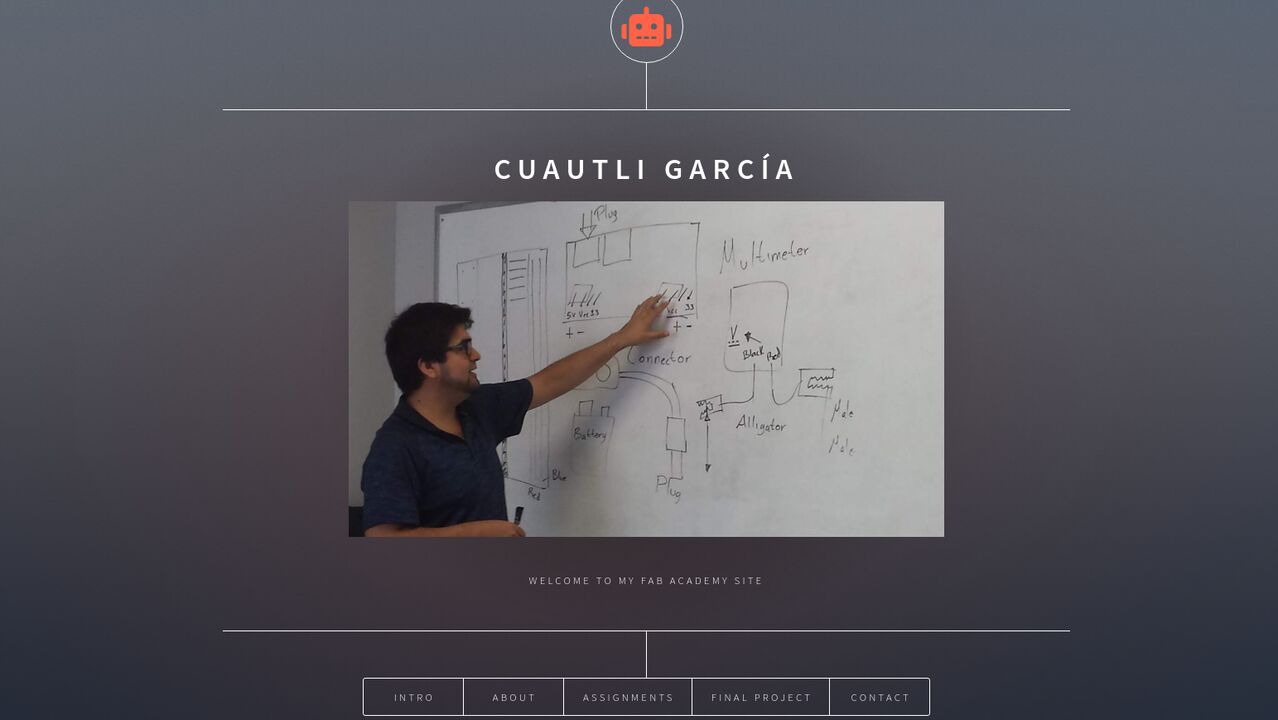
After a lot of thinking about if I wanted to continue with the given template or use HTML. I found out about HTML5 UP which is a relly good website where you can obtain a whole template in HTML and you can just change the information that you want wherever you want. I chose a template named Dimension which is a really good looking website and which I think can be a good start to build my website.
Nevertheless, it is not as easy as it sounds I had to make changes in my local repository and in GitLab. The first thing I did was to create a backup in case I lost the data or simply because I did not like it. Afterwards, I move to the folder where my website is saved with:
cd FabAcademy/My_WebPage/cuautli-garcia/
Now, it is time to erase all the visible and hidden files with the following comands:
rm -rf ./*
rm .gitignore .gitlab-ci.yml
If the files were erased the folder with your name must be empty and we can copy the downloaded files from the template that was chosen. Since, all the old files were erased and new files were copied. I added and verified that the files were changed with:
git add .
git status

The previous image shows in green the removed files and also the new files which means that everything worked as planned. Then, I proceed to commit and push the files to my GitLab account with:
git commit -m "Uploading new website"
git push
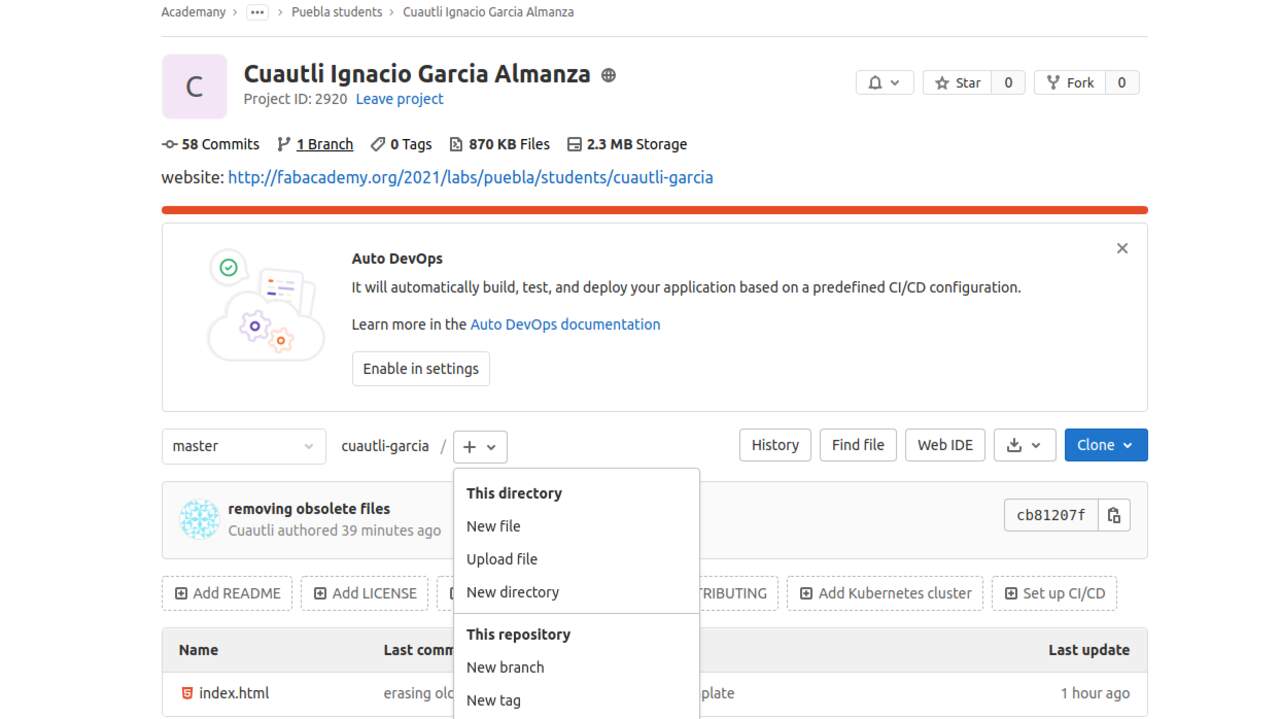
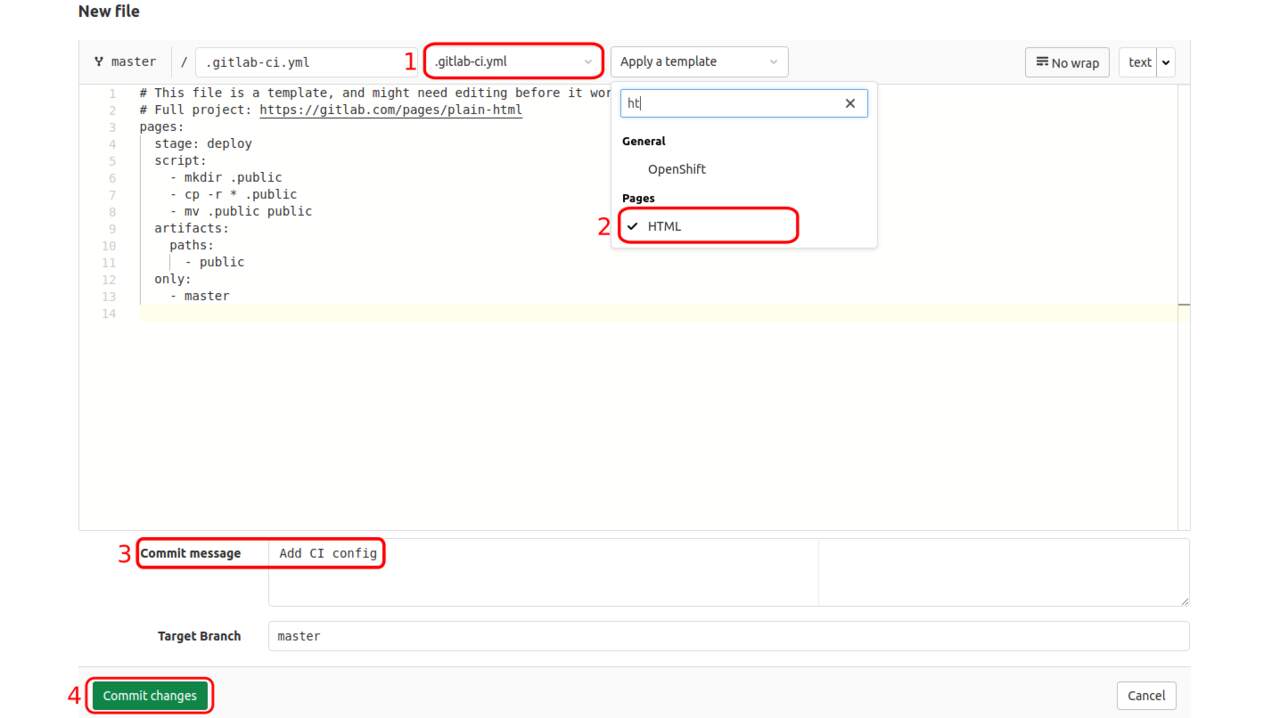
Now that all the files are uploaded in GitLab, it is time to create the .yml file which is used to tell what type of files we have (HTML). Thus, we need to open the repository in GitLab and click in "New file" as shown in following picture:
A new windows was openned where we need to select a template, the language, write a comment to save the file and click in "Commit changes". These steps can be seen in the next image with number to identify the order.
 Now, the new website can be accesed with the original url. To modify it, you can always write
 atom . inside the repository and start modifying all the files you want.
In my case, I translate the files that I had in Markdown to HTML5 and after hours doing the changes, the website looks like this: