We have reached one of the funniest weeks of all, it is time to use 3D printers, you may be wondering while looking at nothing: “What is a 3D printer? What can I print? Do I need to know a design program to print? All those questions and more will be answered in the following lines, so sit back and get comfortable because you are about to contemplate how cool a 3D printer is.
PD: In the following images and lines you will be able to observe a slight predisposition to use machines from a certain company, but it is not for any type of advertising (Flasforge sponsor me please), clarified all this, it is time to start.
3D printers are CNC machines (computerized numerical control), however we will be able to verify that this machine can do practically everything. First of all, you must understand that a 3D printer is one of the most used pillars in manufacturing and is located within additive manufacturing technologies (more specifically "fused deposition modeling" or FDM).
Its operation is very similar to that of a pastry bag forming figures moving in different directions, with the only difference being that this "sleeve" can have resolutions of up to 0.01 mm high layer (you will understand later).
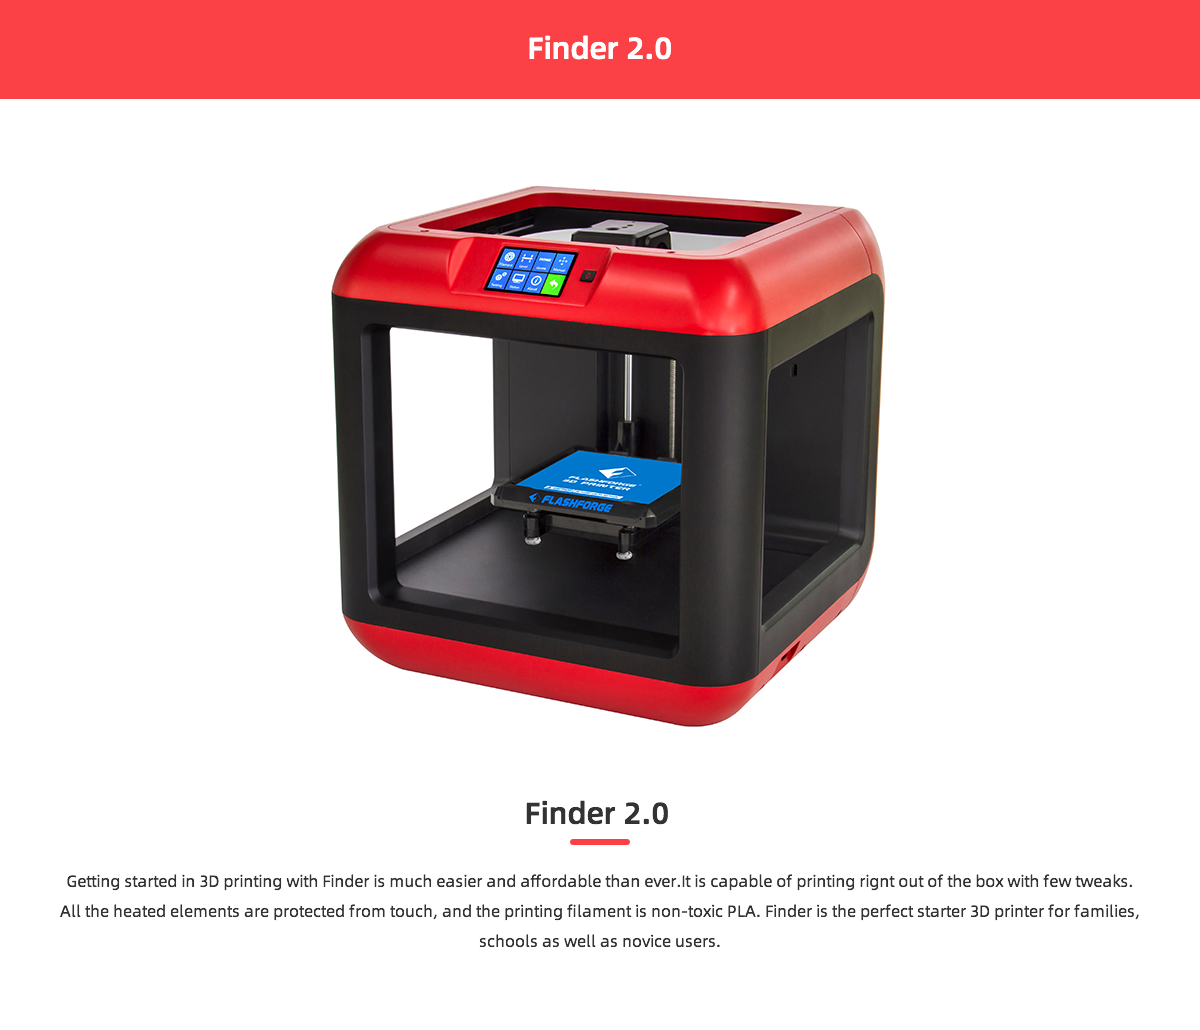
This time I will use a 3D finder, which is a Flashforge brand printer (sponsor please), this machine is a series that has been on the market for just under 5 years, however the scope it has reached is surprising. Starting with the friendly design in different colors, its very accessible price ($ 300) and ending with the connectivity functions via Wi-Fi, make this printer a good option to start in the world of digital manufacturing.
We can see all these specifications on its main website here, we can see some of the specifications in the following image:
Finally, its design is completely compact and does not expose the electronic system to avoid multiple problems that this causes, we can see some of its most important parts in the following image:
.Test the design rules for your 3D printer(s)
If you have reached this point and managed to print something perfectly, you are probably very lucky or you have set the parameters in default. Parameters are a key part of a print since they guarantee that the print comes out correctly or not.
A 3D printer has hundreds of parameters that can vary by the printer model or material to be used, below you will see some of the most important parameters.
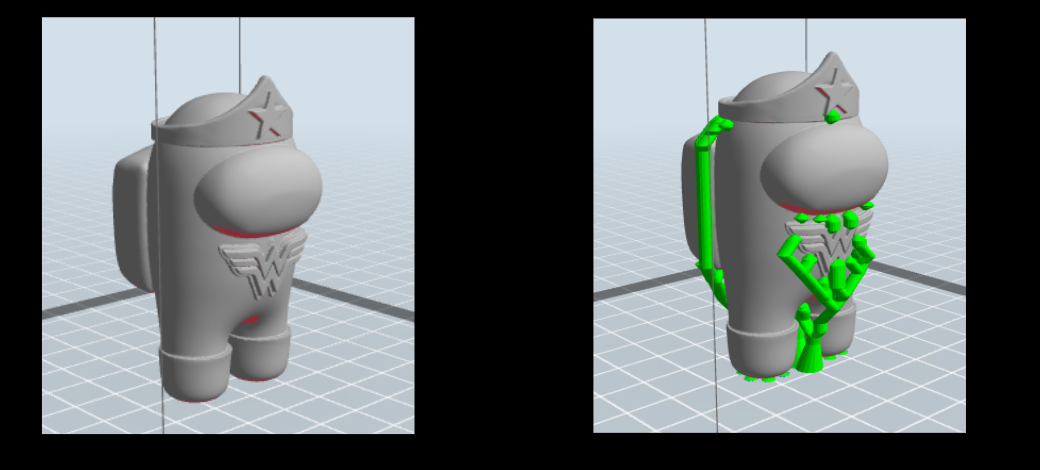
a) Supports:
-The supports are one of the easiest parameters to use but at the same time it is the one that is most omitted at the time of printing, this causes the following to occur:
-3D printing is mostly done with machines that do the work from the bottom up, which forces each layer to have a previous layer to support it, otherwise gravity will do its job and the filament will fall to the bed main printer or until it finds a support to hold onto.
-For this reason, any printing that takes pieces to the air, will require supports. The media tool is included in all printer laminating software. In the case of the 3D Finder, the software used is Flasprint and it has the media tool on the main screen.
Note :
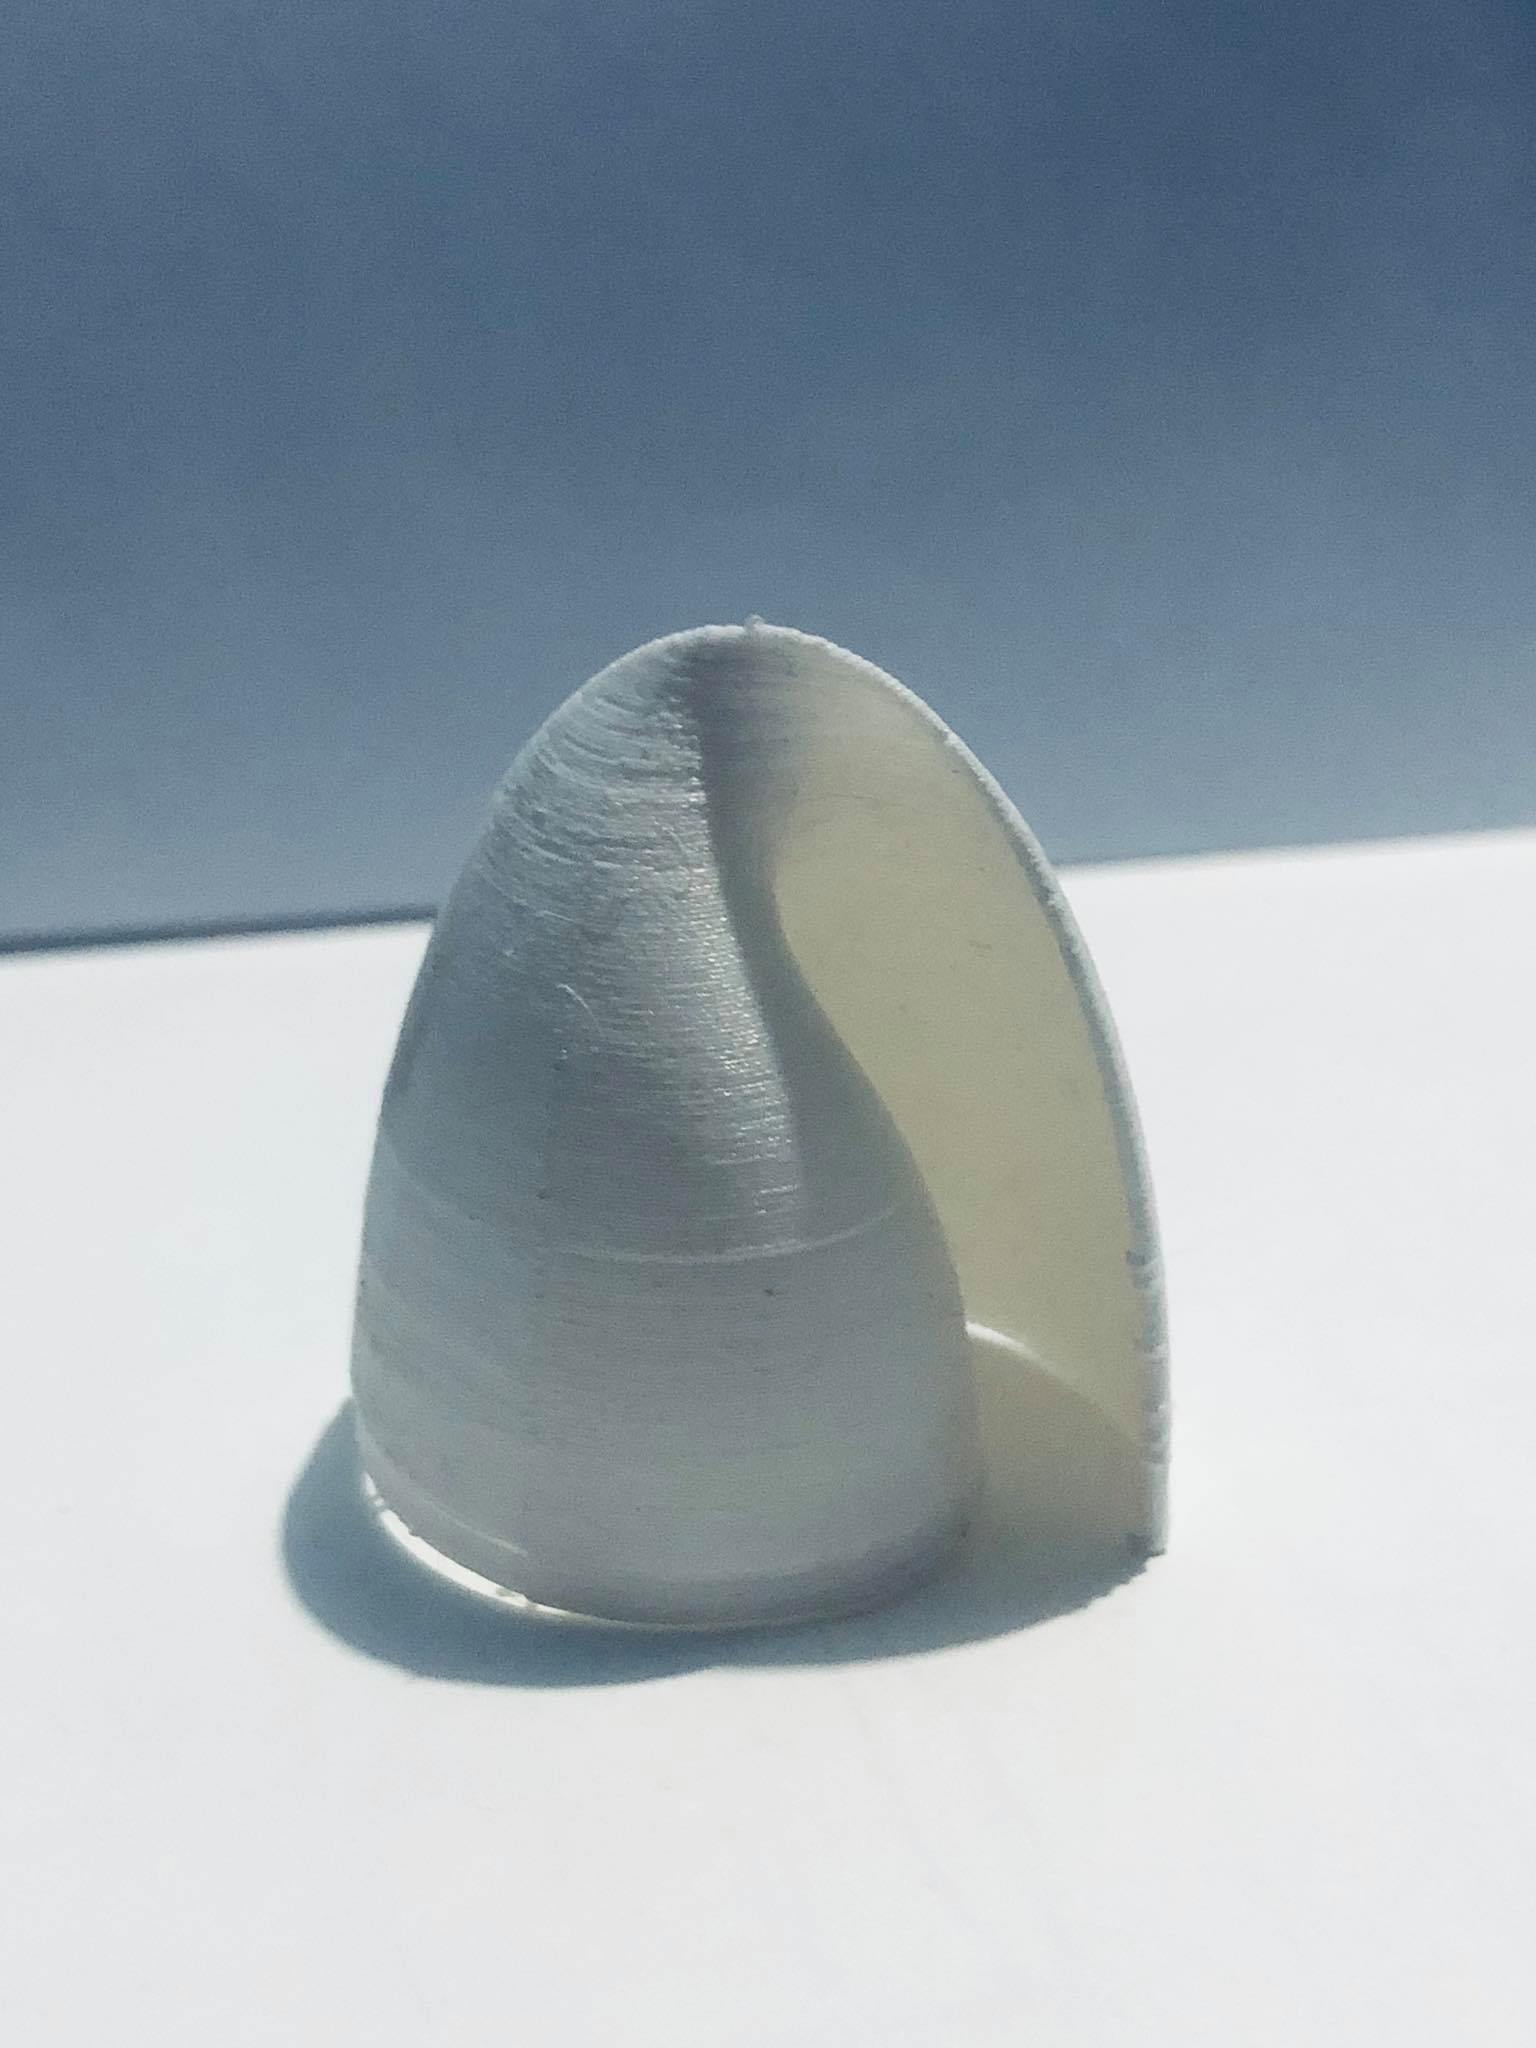
-Some prints do not require any support, even though it seems that they do, this is because the growth of these layers is diagonal or curved, ensuring that the filament does not fall.
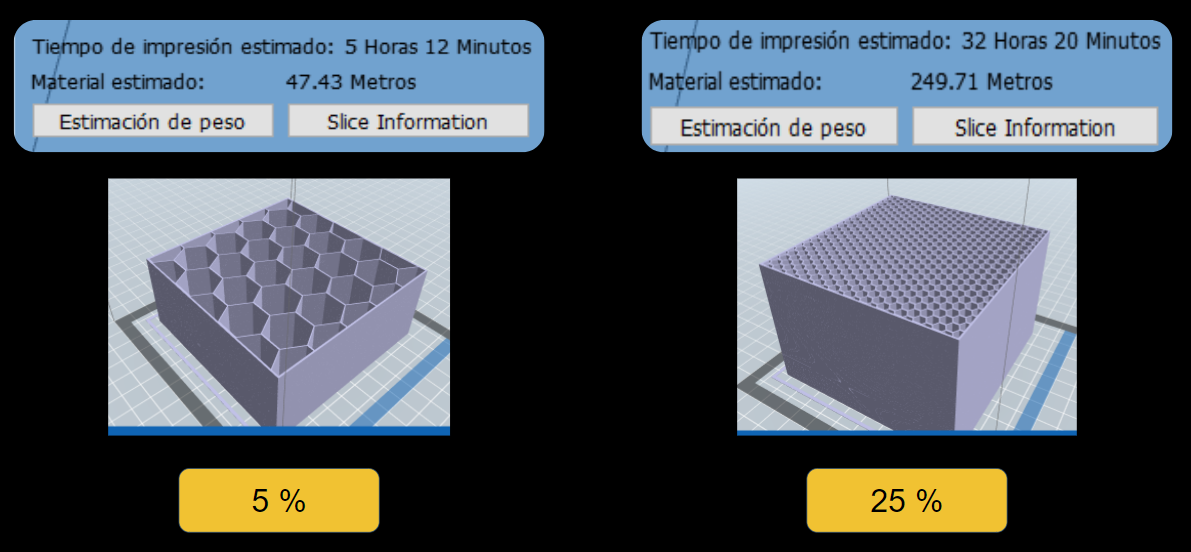
b) Filling:
-This parameter is essential to determine the consistency or weight of our printing since it determines the percentage of fill that our printing will have. The filling has a great influence on the printing time, so an approximate percentage of 20% or less is recommended.
c) Layer height:
-This parameter is the most important of all, through this parameter you will be able to define the level of resolution that your print will have. Close your eyes and imagine that we have blocks of 0.5 m2 and 1m2, with which one do you think will take less time filling a wall ?, exactly with the 1m2 one since being larger requires much less of them, in this way the layer height works, the higher the time is greatly shortened but its resolution low and vice versa in the case of have a lower layer height.
-It should be noted that the layer height has limits and this is determined by the extruder of our 3D printers. The layer height parameter can be located in the configuration window of our printing software.
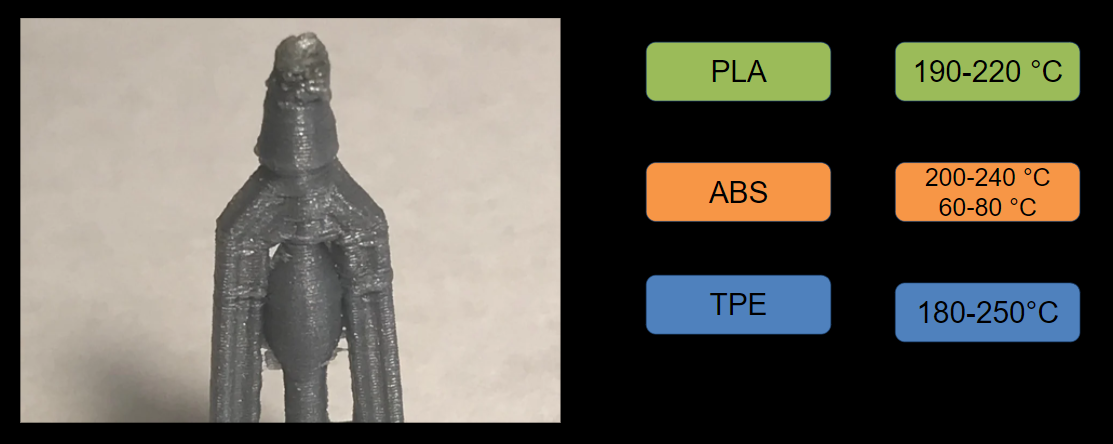
d) Speed and temperature:
-These parameters go hand in hand since they can cause us many, even if one is good and the other bad, for this I am going to mention some common errors:
.Cheese printing: If you ever saw that your printer leaves strings longer than an edam cheese on your favorite pizza, this is due to the high temperature of the extruder and the high speed of the movement of the extruder itself. Like very hot cheese, PLA needs a short moment to cool down, but if the temperature is high, it will require more time. Here are some recommended values.
Recommendations :
-The printers are variable, I recommend that you only take these parameters as a reference and explore your own with your printer.
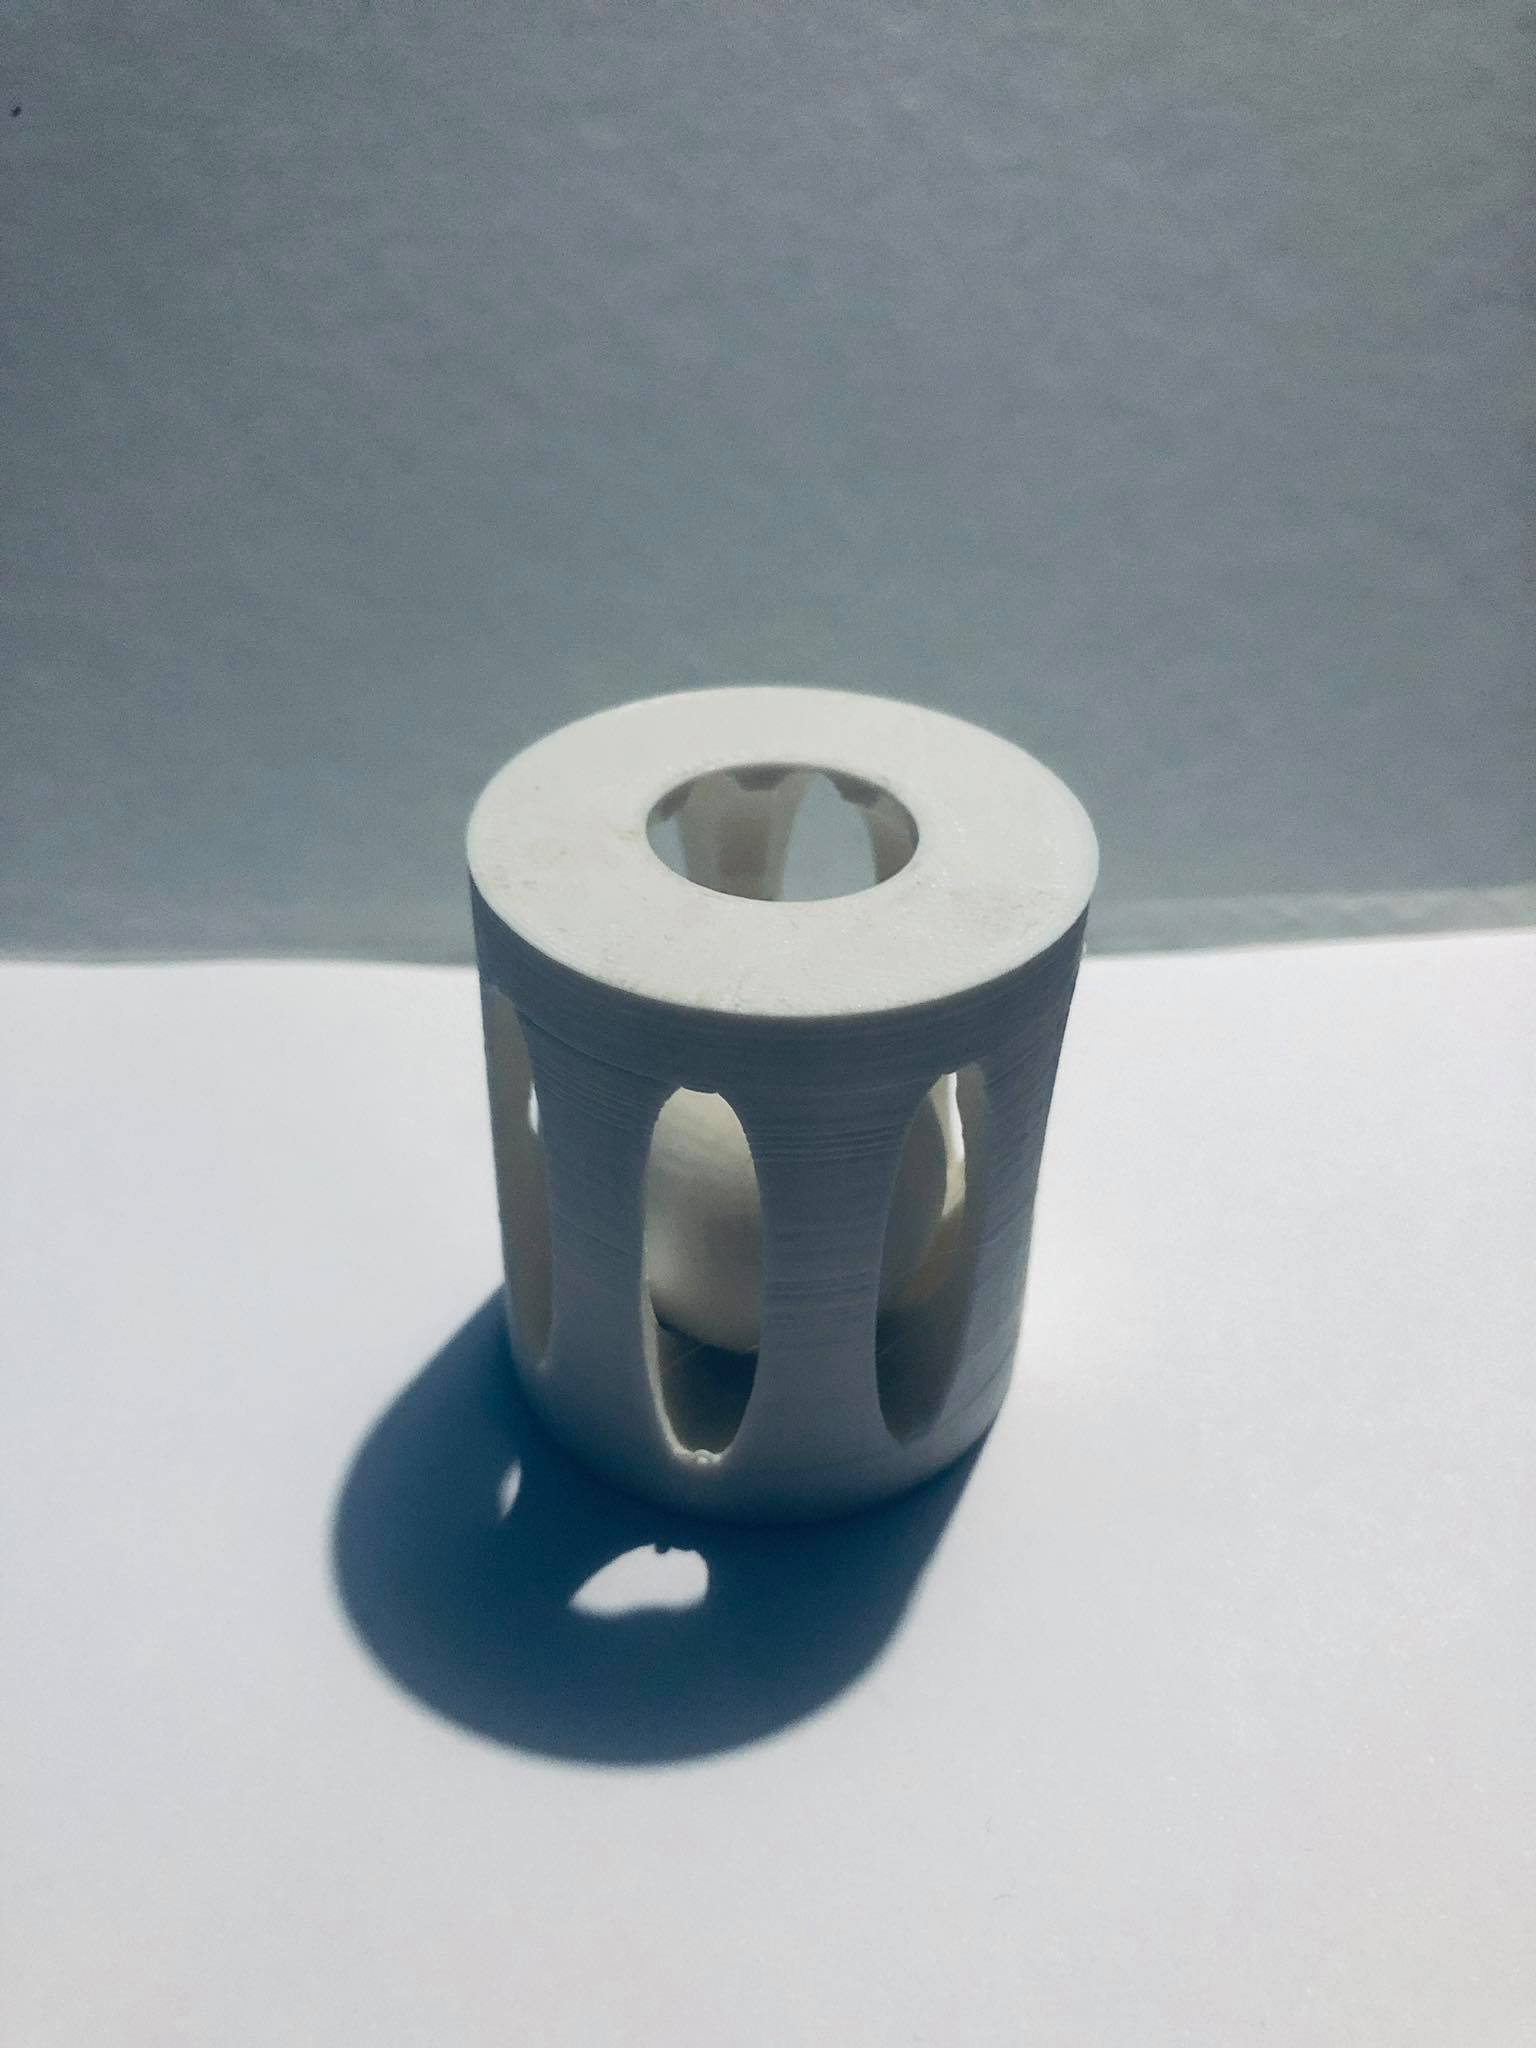
Individual assignment - Design
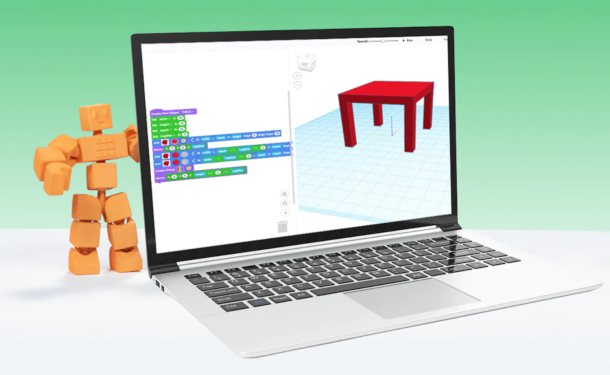
This time I chose a simple way to get to the desired 3D printing, use the tinkercad interface to be able to generate my solid and then print it.
Codeblock:
-Codeblock is an online platform tool called Tinkercad, which offers us a friendly interface to generate 3D designs using programming blocks.
-Codeblocks makes it easy to learn about parametric design in a very simple way, you can review how to create a parametric design in the following video:
-We can appreciate the printed product in the following image:
Individual assignment-3D Scan
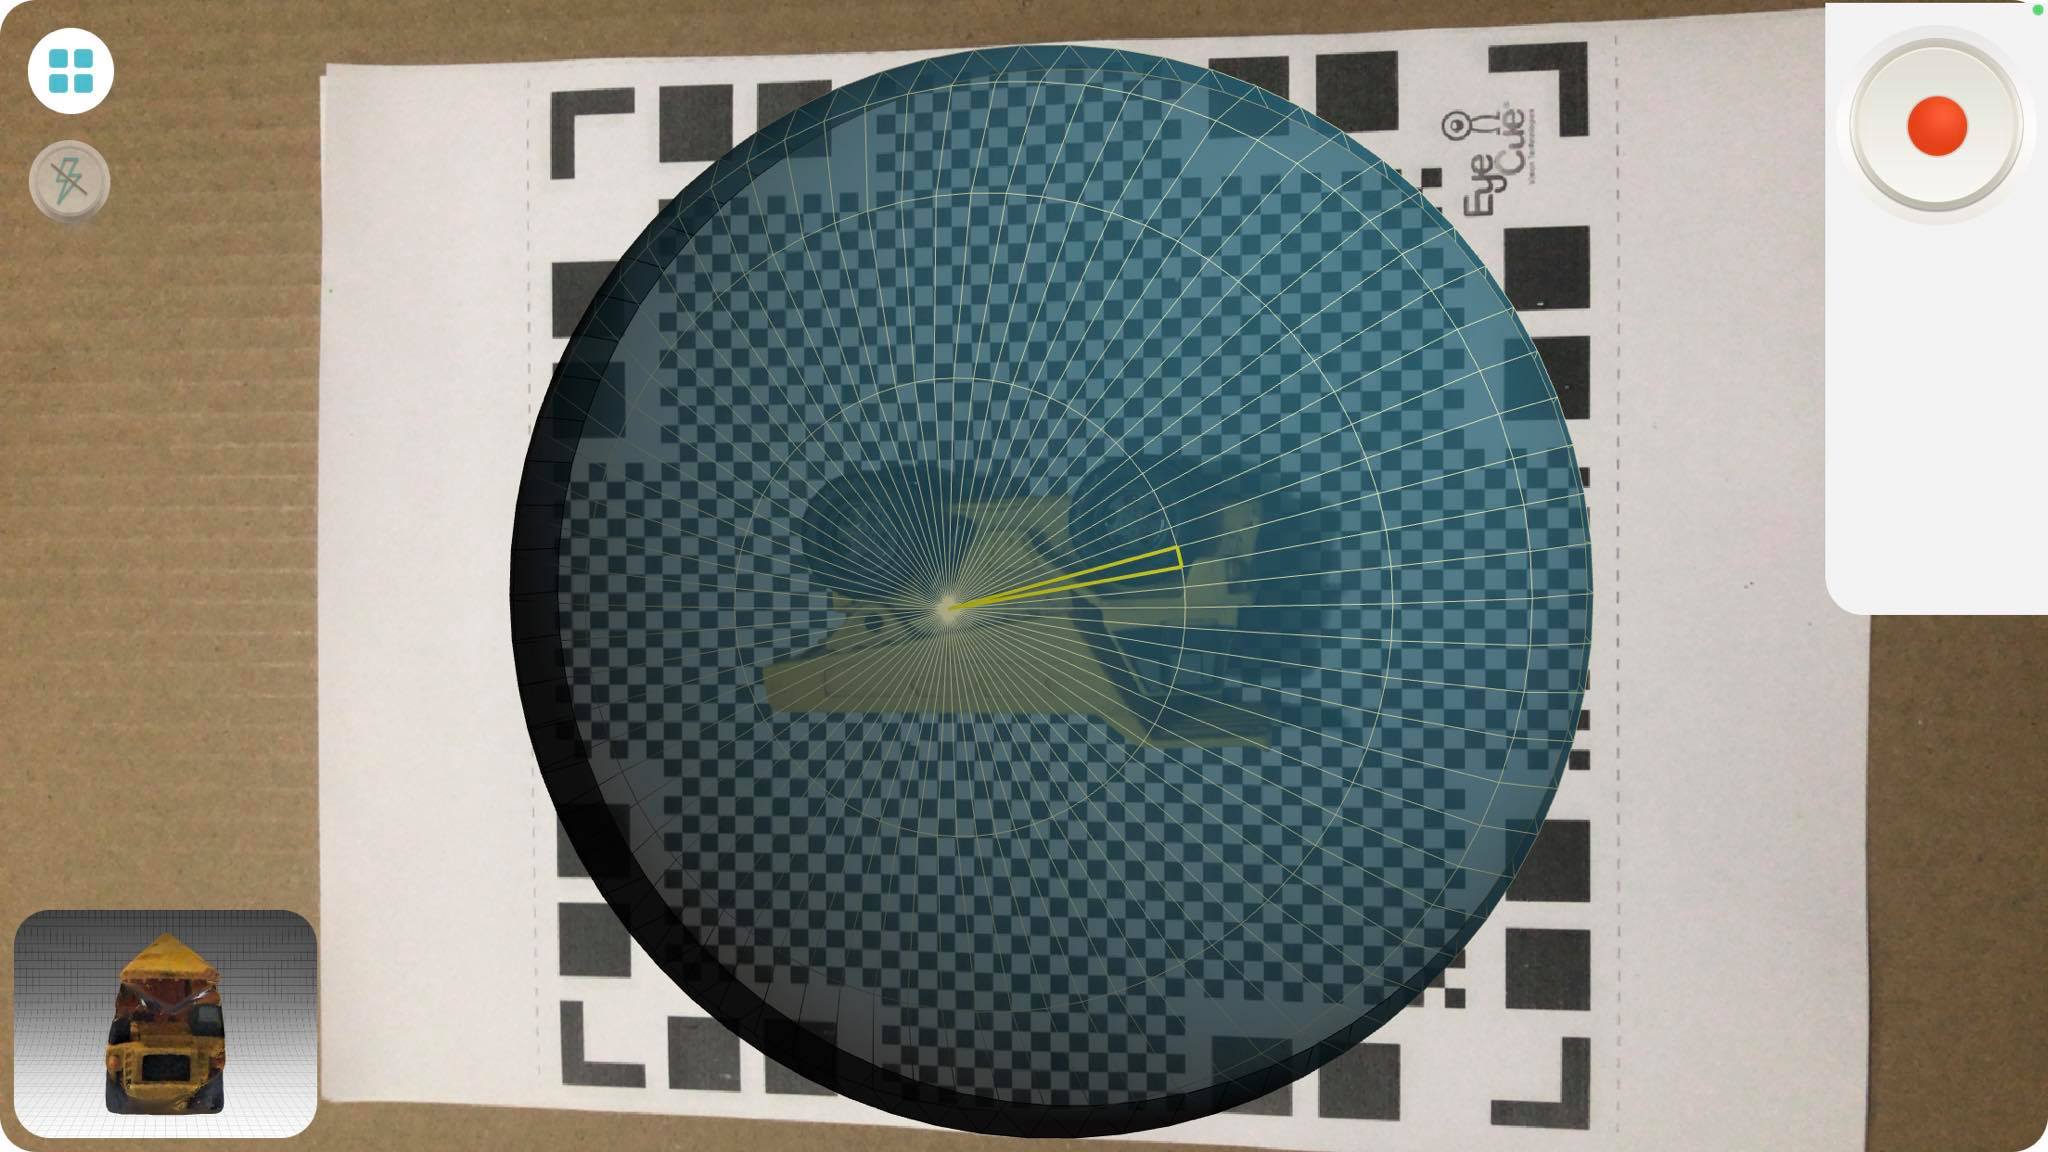
For the scan, I chose a mobile app which allows us to obtain a stl file through our mobile camera. The program I am referring to is Qlone3D.
-The application requires that the object be placed on top of a sheet containing parameters so that the camera can identify the surface to be scanned.
-Now we just have to rotate the object so that the camera can capture the details of the entire piece and form the 3d design.
-At the end, it will give us the option to scan in different positions of the object so that the design can have more details, if we do not want to do more scans, we can go directly to generate the stl or obj file.
Design and 3D print
-In these days (like every week) I was posting on my networks (instagram) about the products that I have been creating, many questions arose about it that I found myself in the need to solve since they seemed very interesting and why I love learning something, is being able to teach it. Here are some questions from the public.
1.
"..How do I print something in 3d if I don't know how to use design programs .."
-Doing "impossible" things is what I love to do the most, a 3D printing does not require previous knowledge in 3D design. There are very friendly pages which allow us to download files already designed so that we can simply print them.
-Thingiverse (https://www.thingiverse.com/) is one of the platforms which allows us to simply choose a design and then print it, without the need to have knowledge in 3d design.
2.
"..I need to invest a lot of time to learn to design in 3D .."
-Nowadays there are different types of very friendly programs for 3D design, one of them is Tinkercad. Tinkercad is a completely online platform which allows us to make simple or complex designs through design tools that are very easy to use, as you can see in the following video.
-Final printed product
3.
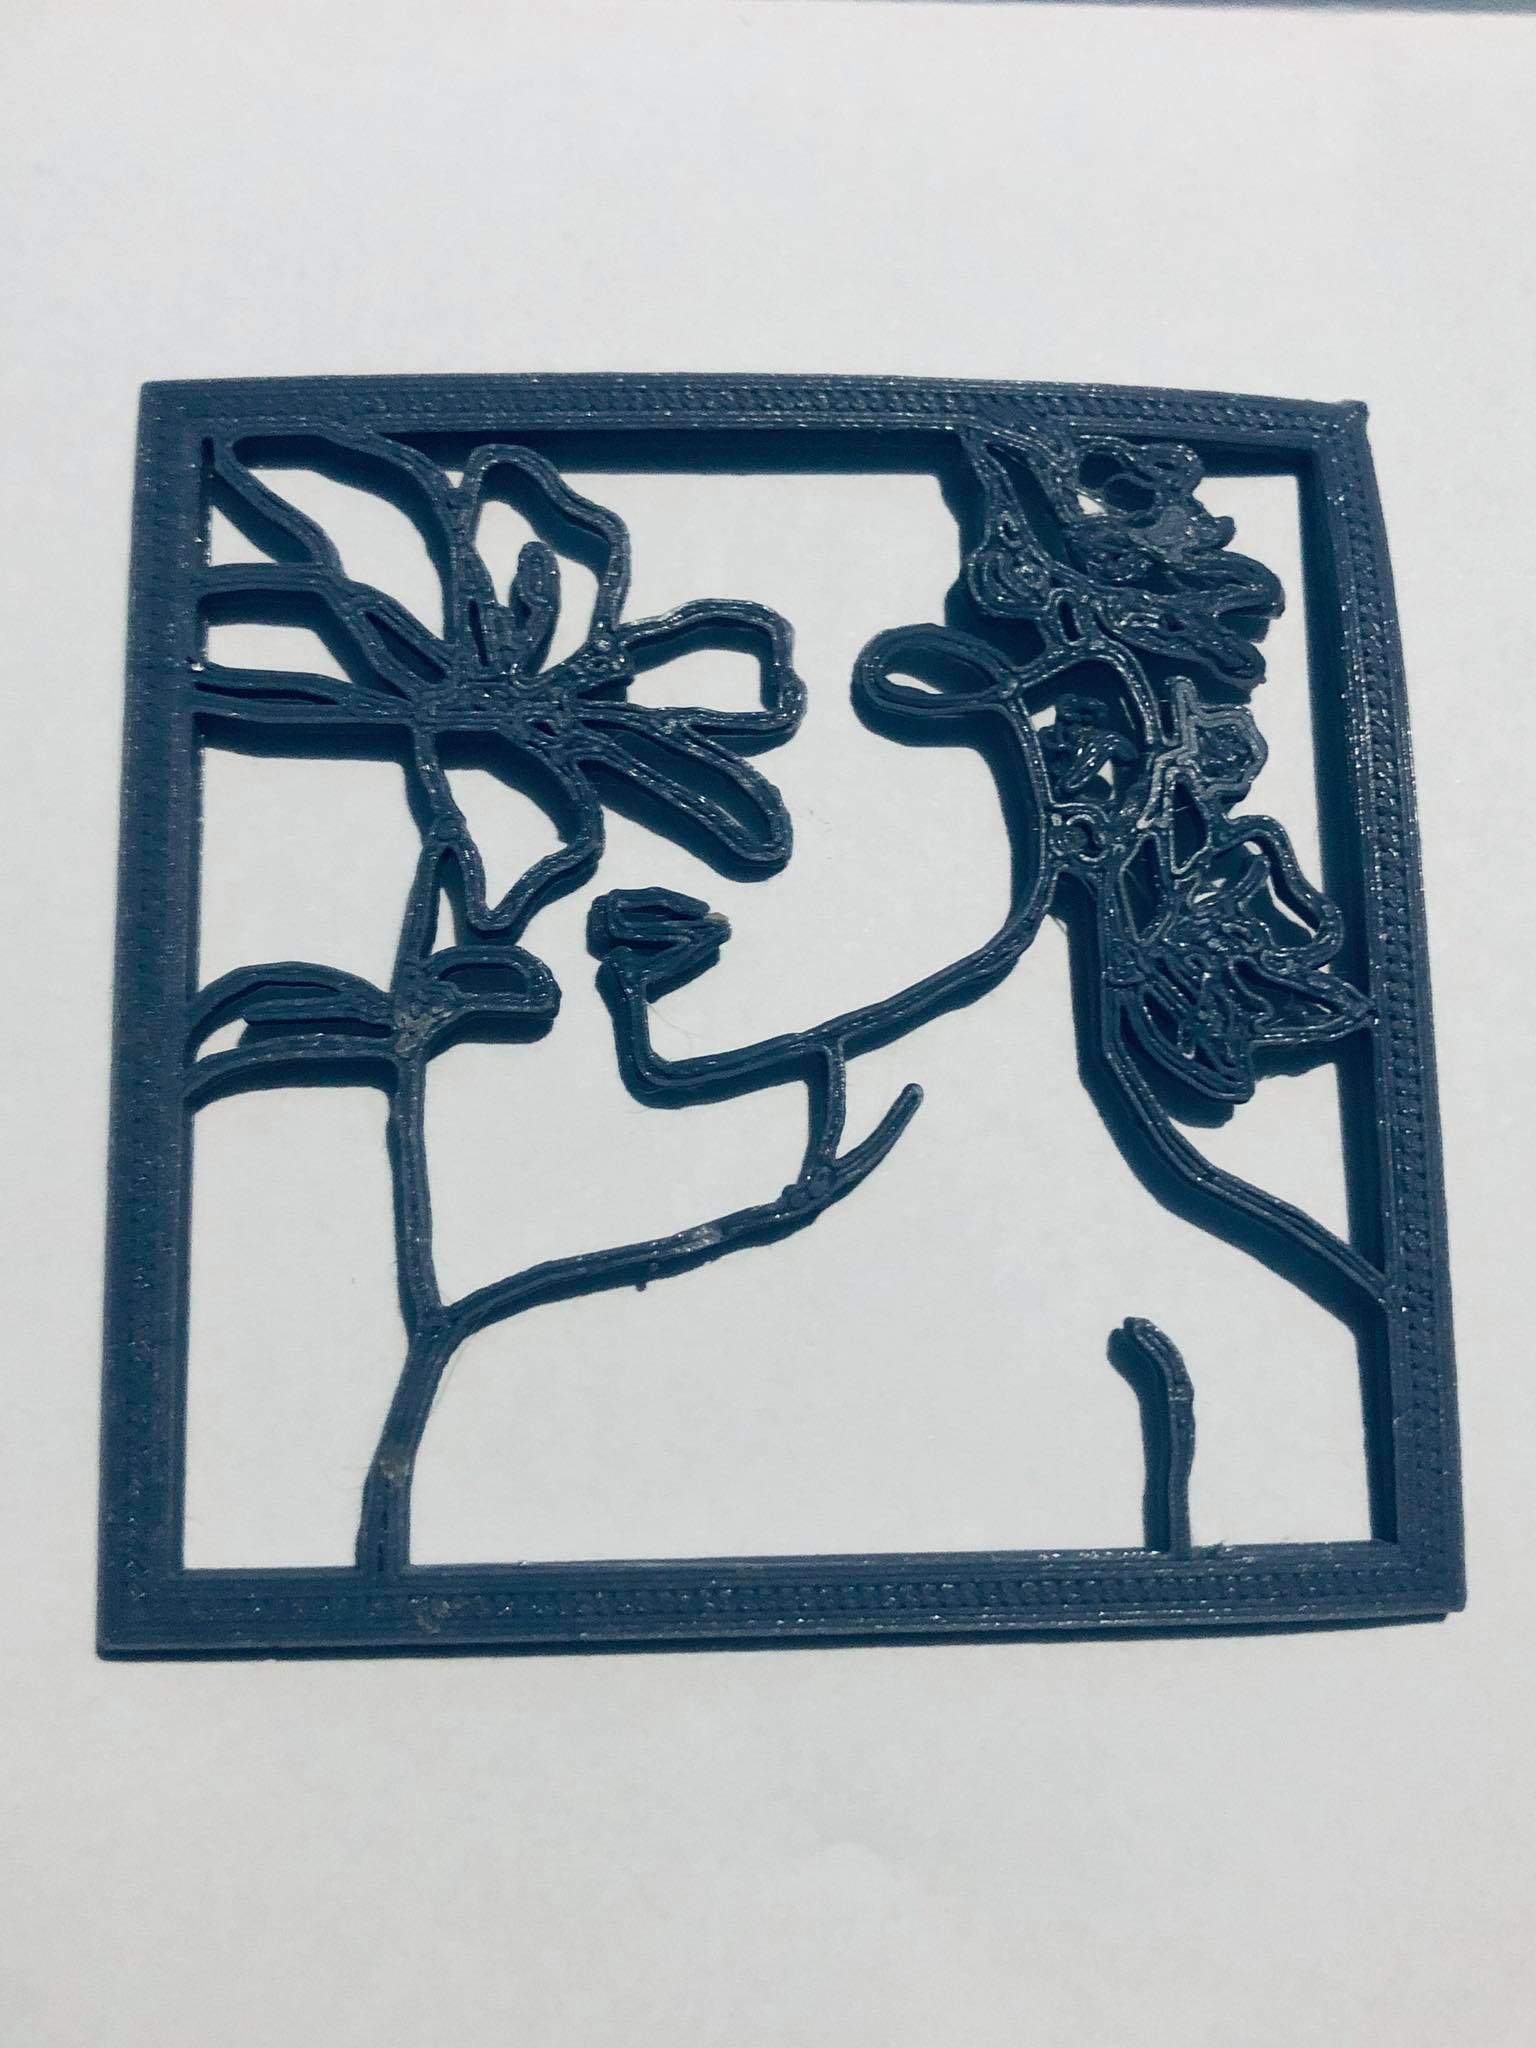
"..Only 3d files can be printed.."
-Actually, 3d printers can print from photos to 3D images, obviously before they require some additional steps to reach the desired format (stl or obj).This is the case of the following print that was made from a drawing (thanks Fiorella).
-In the case of drawings, sometimes it is necessary to redraw them so that the lines are thicker so that the software that will convert from IMG to OBJ (3D BUILDER) can recognize them, you can see the necessary steps in the following video.
-Final printed product
The design was made by additive manufacturing because the design has two pieces one inside the other and that would make it difficult to do it by subtractive manufacturing because it would have to cut internally to make the piece one and at the same time make the cut of the other. shape of the second piece.