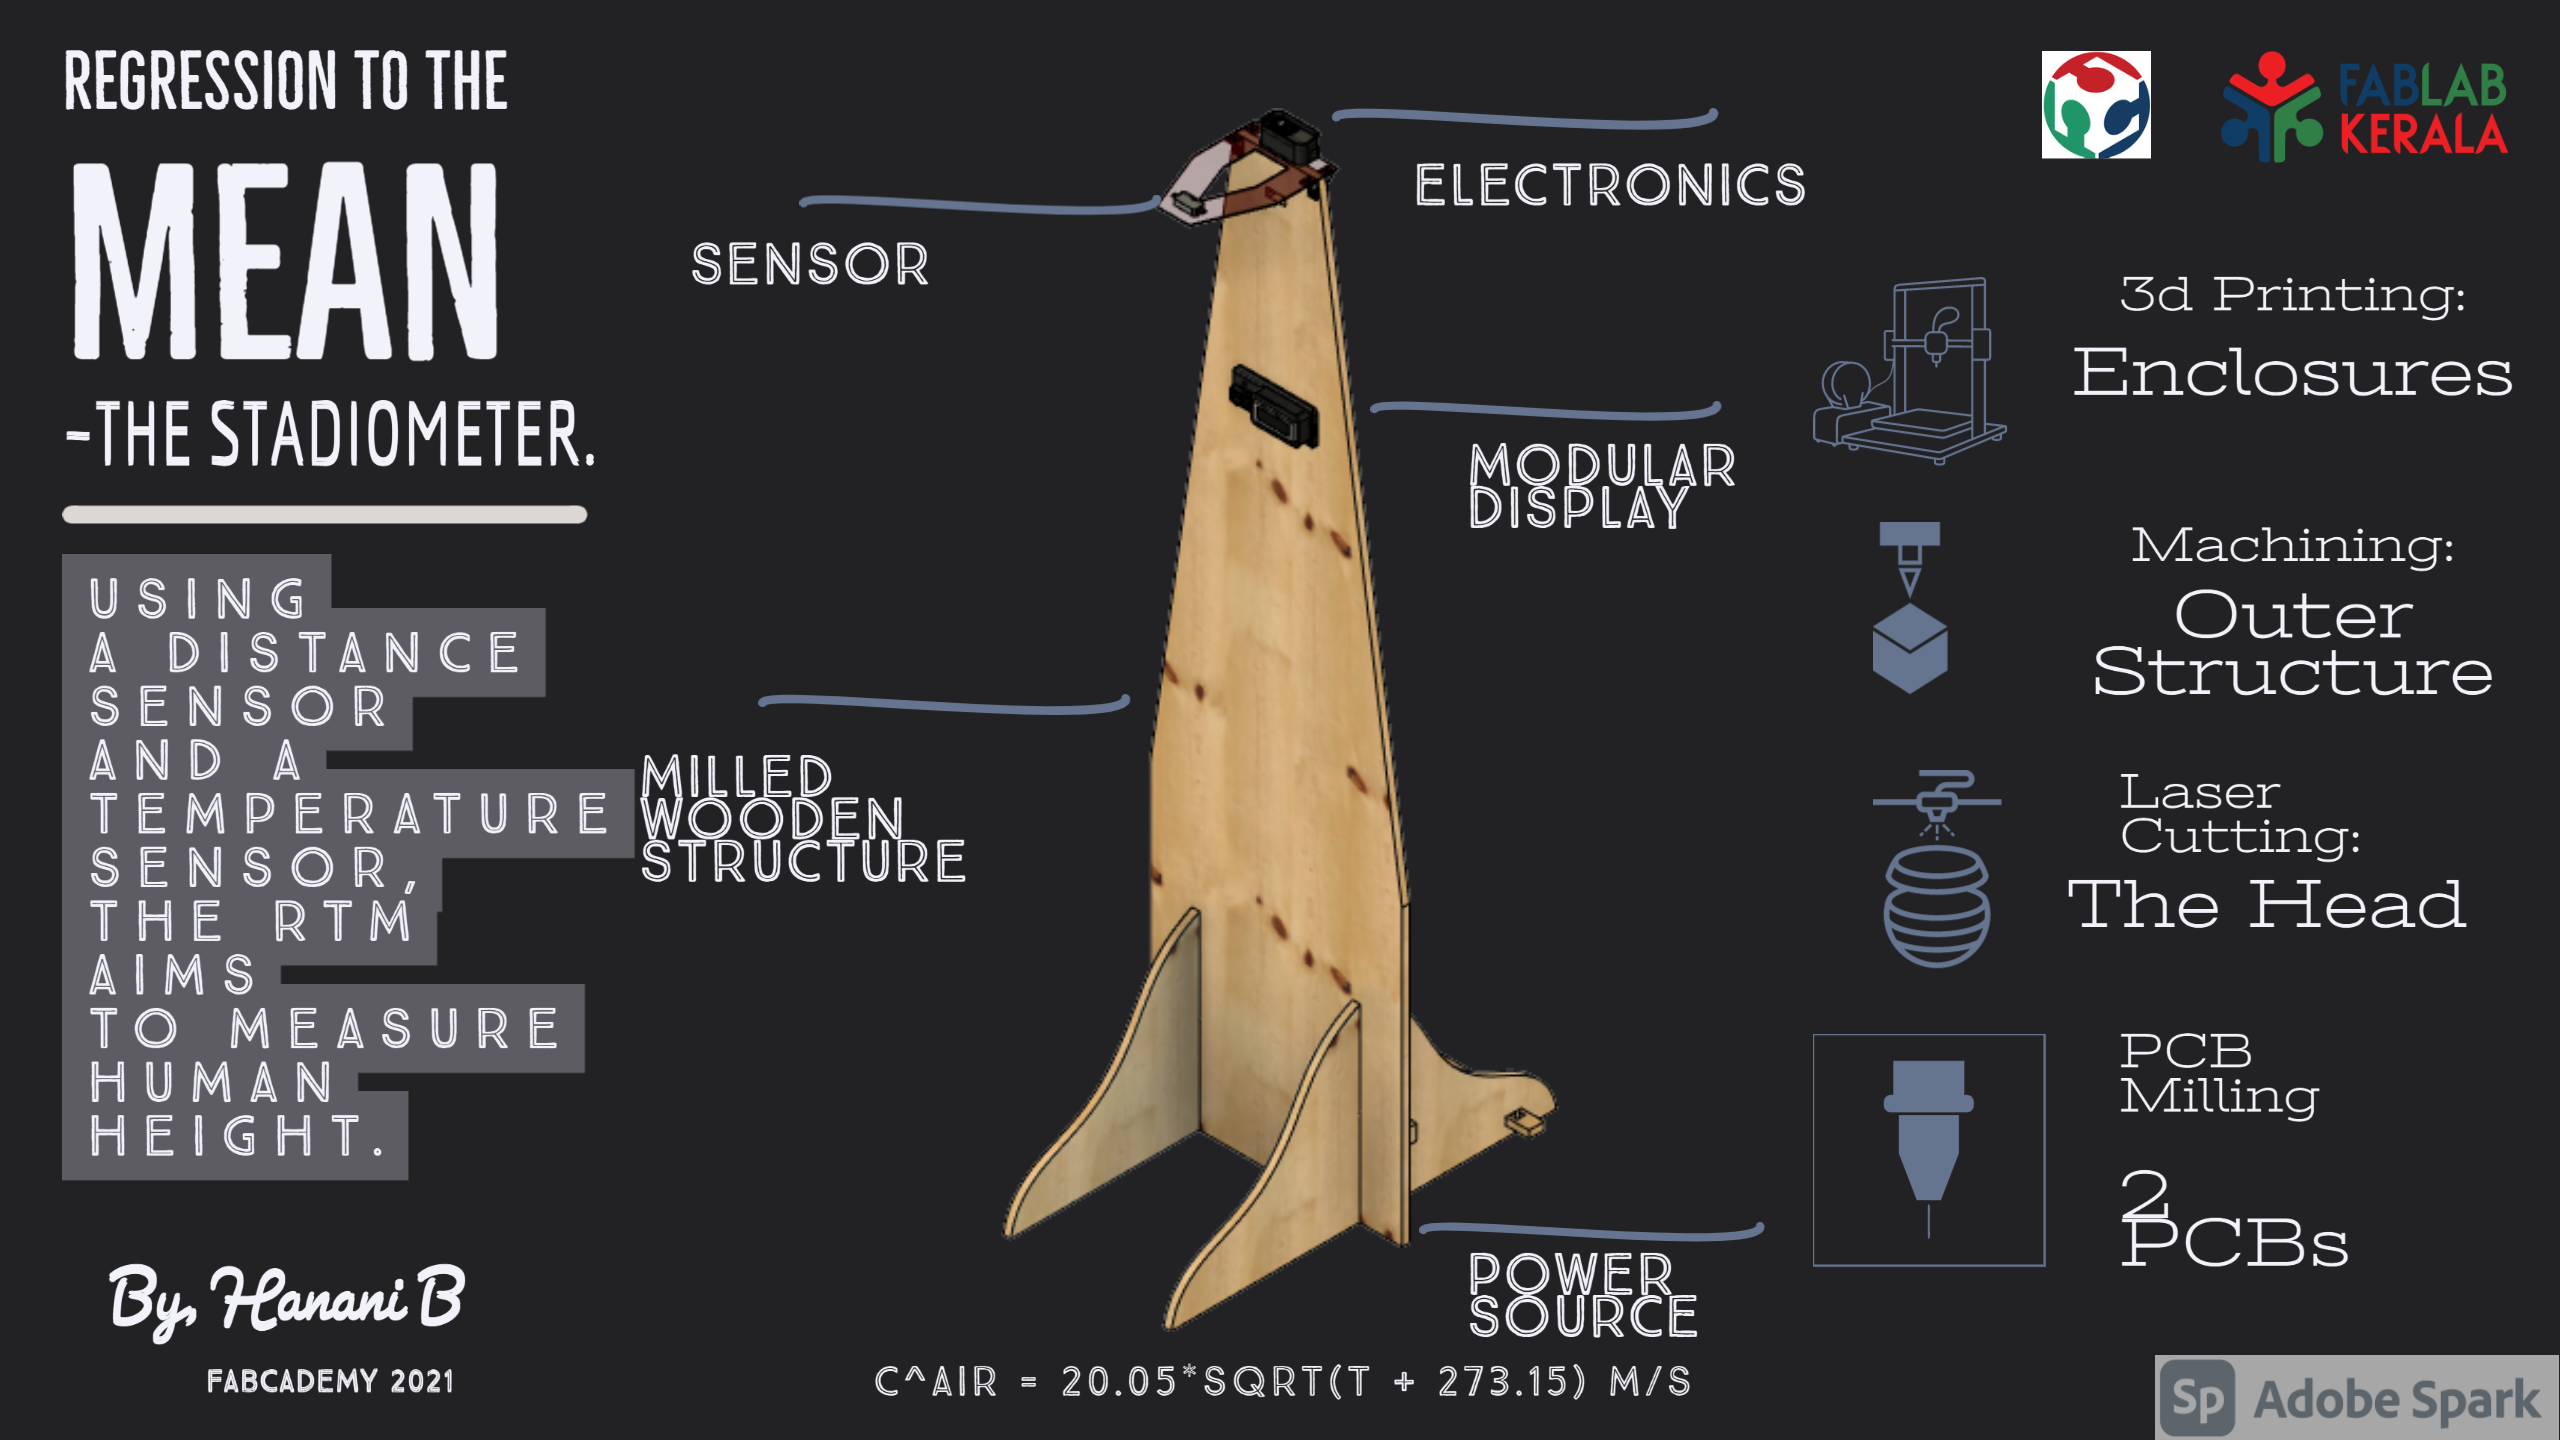
The Wooden Frame:
I have already detailed this process in CCM Week
Iterations, I had to go through for the final design:

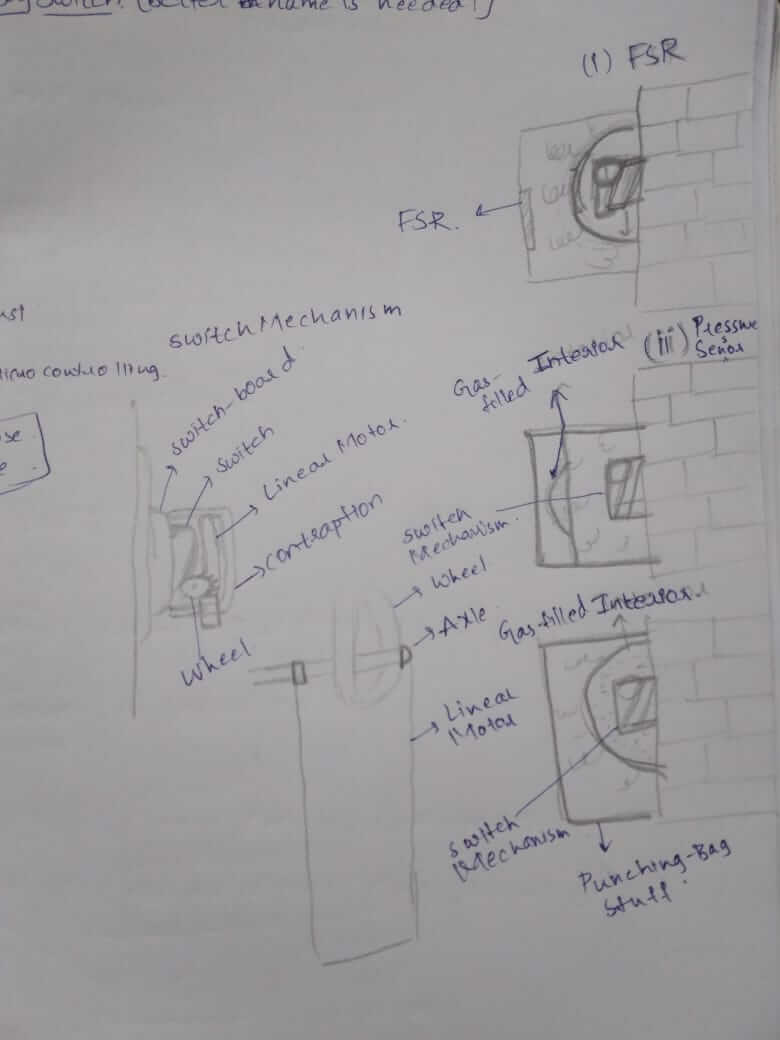
Ultrasonic-Sensor:
I am using this code to test out the accuracy of the ultrasonic sensor:
              #include

              int trigPin = 3; //Trig Pin for Ultrasonic Sensor
              int echoPin = 2; //Echo Pin for Ultrasonic Sensor
              int ledPin = 0;

              long duration;
              int cm;

              char cstr[16];

              void setup() {
                Wire.begin(8);
                Wire.onRequest(requestEvent);
                pinMode(ledPin, OUTPUT);
                digitalWrite(ledPin, HIGH);

                Serial.begin(9600);
              }

              void loop() {

                pinMode(trigPin, OUTPUT); //Set Ultrasonic Trigger Pin as OUTPUT
                digitalWrite(trigPin, LOW); //Write it to LOW
                delayMicroseconds(2); // Wait for 2mus
                digitalWrite(trigPin, HIGH); // Write the Trig Pin to HIGH
                delayMicroseconds(10); // Wait for 10mus
                digitalWrite(trigPin, LOW);// Write the Trig Pin to LOW
                pinMode(echoPin, INPUT); //Set Ultrasonic Echo Pin as INPUT

                duration = pulseIn(echoPin, HIGH); //The duration the echoPin takes to go HIGH in microseconds

                cm = microsecondsToCentimeters(duration);
                sprintf(cstr, "%03d", cm);

                Serial.println(cm);
                delay(500);

              }

              long microsecondsToCentimeters(long microseconds){
                return (microseconds / 29.15 ) / 2;
              }

              void requestEvent() {
                Wire.write(cstr);
              }
Me trying to measure my height.
LCD:
I have used this code to run and test out the LCD:
              #include  // Library for I2C communication
              #include  // Library for LCD

              LiquidCrystal_I2C lcd(0x27, 20, 4);
              void setup() {
                Wire.begin();
                lcd.init();
                lcd.backlight();
              }

              void loop() {
                lcd.clear();
                lcd.home();
                lcd.print("Regression");
                lcd.setCursor(2, 1);
                lcd.print("To The Mean");
                lcd.setCursor(0, 2);
                lcd.print("fabacademy2021");
                lcd.setCursor(9 ,3);
                lcd.print("->Jai Hanani");
                delay(200);

              }
Checking the distance measured by the ultrasonic sensor, measured from the top of the wooden frame.
Top:
I wanted to design the "top", in a triangular-looking shape, just like my frame. It's main purpose is to hold
the ultrasonic-sensor, and the eletronics.


THE DXF FILE.
3D Printed Casings:
-
Holders for The Top:


STL File

GCODE File
-
Electronics Casing:

 It has one opening on 1-side for a 2.1mm DC Connector.
It has 4 cylindrical pipes at the 4edges of the box, to nut-down the acrylic as shown in the second picture.
Design:

THE STL FILE

-
Ultrasonic-Sensor Holder:

STL FILE
GCODE FILE
Design:


I had to keep the dimensions of the ultrasonic sensor, while designing the holder.
 Credit
-
LCD:
 I had to keep the dimensions of LCD 2004A, while designing this.
 Credit
Design:

STL FILE
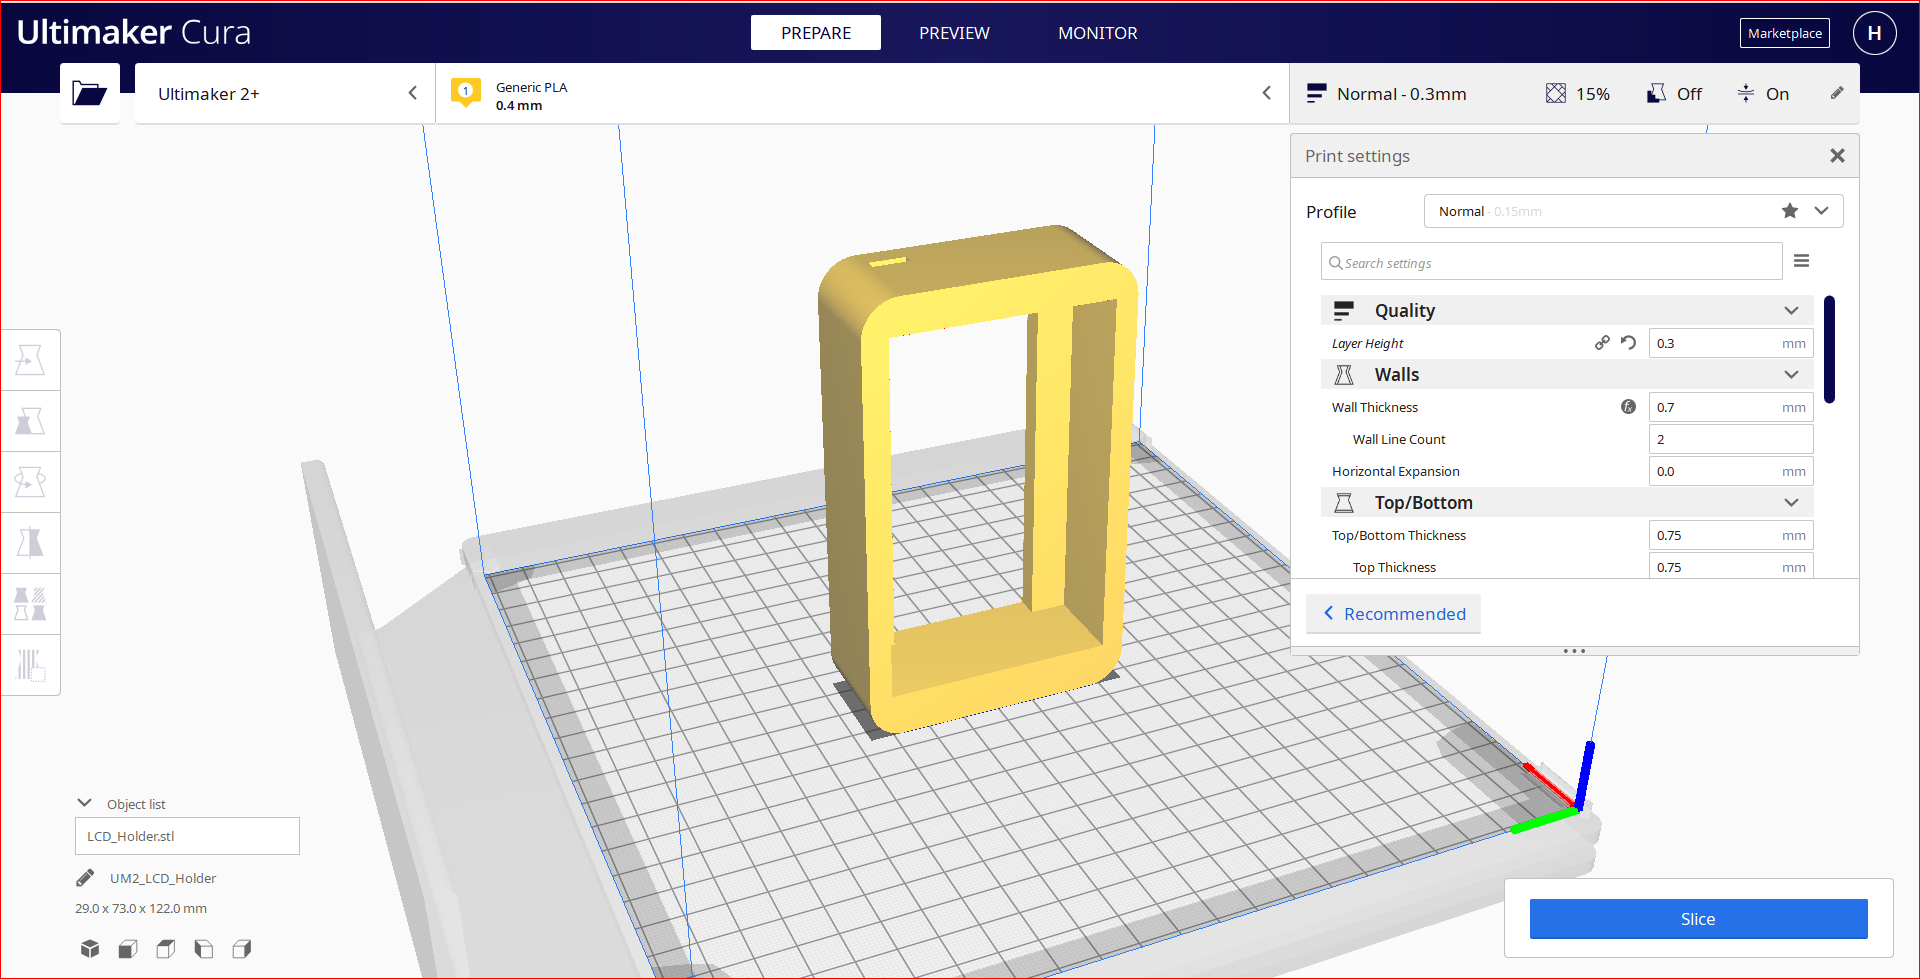
GCODE
It has an opening on the right-side for cable management.
Slider:


STL FILE
GCODE
The holes in the above image is put-in for the purpose of cable management.Like this:

The Female Slider Part:
The female part is designed with a 0.8mm offset, for a perfect dovejoint fit.

My friend Abel Tomy helped me in developing this female-part.
The F3D FILE
-
Acrylic Enclosure For Electronics Casing:

THE DXF FILE

The acrylic has two slits for hosting any additional module, for the purpose of connecting to internet, we may want add. Also, a hole for the purpose of good cable management.
-
Electronics:
-
Regression To The Mean Board:
 The BOM for this board is detailedly described here.
The Schematic:

The Board:

The Reasoning:

The DRC was the same as I've done in Input/Output Devices: here


Trace.
Outline.
-
The Level-Shifter:

For the purpose of future addition of a seperate Wifi-Capable module, which happened to be a ESP32 NodeMCU, I designed and fabricated this board to shift the 5v logic-levels from my mainboard to 3.3 logic-levels. 3.3V being the operating voltage of the NodeMCU.
The Schematic:

The Board:


Trace.
Outline.
-
The Temperature Sensor:
While I was reading up on how to make the ultrasonic sensor more accurate, I came up on this practical forumula for more accurate calculation of speed of sound:
For this reason, I made the temperature sensor module. Later I realized, it was meant for small-scale SMD electronics temperature guaging. Therefore, I had to throw this away.
Nonetheless, I still used this forumula for accurate calculation of speed of sound, based on the temperature.
This is where the use of DHT-11 Environmental Sensor comes in:
 I didn't like it, but I had to use it anyways.

Assembling The Electronics:
-
Netowrking and Power-Sourcing:
Power-Sourcing:


Black Wire is for Power-Source, and th Braided Wires is for US Sensor that comes from the behind the frame.
Assembling wires communication with Ultrasonic Sensor and I2C Communication with LCD, Troop2.

Network Map
Programming:
Here comes the critical part:
The Logic Map:
- When the systems powers on, the maximum height from the top to the ground is set. It is 212 cm.
- As well as, the LCD will display "The Regression To The Mean, FabAcademy 2021, ~ Jai Hanani".
- Whenever the microcontroller detects a decrease in its readings, that is, when a subject is detected. It displays "Subject Detected".
- Pause for 2000ms, to avoid any fluctuations caused by sudden jumps as the person approaches.
- At this stage, the LCD will display the "current" distance, the "maximum" distance, and the "average" distance.
- We keep track of "average" because, the human head is not flat, and the ultrasonic-sensor's reading change if there's any ambient air that moves around quickly.
- We do this for 10 seconds, and we take the measurement every 100ms. This is adjustable in the code based on our requirement.
- After 10 seconds, we display the "Average and Maximum" Height, and wait for the next person to come in.
- If a temperature sensor is connected, and it is sending data, we take that into consideration, when calculating the distance.
- This system has 2 modes of operation. If a Wifi Module is connected, and if it is sending data, and if the data is "0", we check the height, but if it is "1" we just measure distance from the top.
- Once a successful height measurement has been made, we send it to a Google Sheet that acts as the abode for all the heights that have been measured, as a proof that there exists a mysterious forces that regresses human height to a mean[As described by 20th century statisticians].
Auxillary/Non-Essential Features:
Commanded 'Regression To The Mean' Board Code:
#include  // Library for I2C communication
  #include  // Library for LCD

  LiquidCrystal_I2C lcd(0x27, 20, 4);

  int trigPin = 3; //Trig Pin for Ultrasonic Sensor
  int echoPin = 2; //Echo Pin for Ultrasonic Sensor
  bool personBefore = false; //Is there a person under?
  int maximum = 0;
  int count = 0;
  int avg = 0;
  const int delay_time = 100;
  const int updateEvery = 10000;
  const int buffer_length = updateEvery/delay_time;
  int buf[buffer_length];

  //5s logic
  long time_since = 0;

  int maxHeight = 0; //The height at which the ultrasonic sensor is placed
  bool heightSet = false; //Is the maxHeight set?
  int threshold = 100; //Minimum measurable value
  int min_threshold = 10;
  bool HEIGHT_DISTANCE = false;
  int incomingByte = 0; //Value from Troop3 for toggling HEIGHT_DISTANCE

  float temperature = 24;

  int measured_height = 212; // The measured distance between the ultrasonic sensor and the GROUND

  float speed_of_sound = 28.9820935899;

  int inPin = 10;         // The PIN_NO of the tactile switch
  int outPin = 0;       // The PIN_NO of the LED on-board


  void setup() {
    Serial.begin(9600);
    Wire.begin();

    lcd.init(); //Intialize LCD
    lcd.backlight(); //Switch-On BackLight for LCD
    lcd.home();
    lcd.print("Regression");
    lcd.setCursor(2, 1);
    lcd.print("To The Mean");
    lcd.setCursor(0, 2);
    lcd.print("fabacademy2021");
    lcd.setCursor(8, 3);
    lcd.print("~Jai Hanani");
    delay(2000);
  }

  void loop(){

    long duration, cm;

    Wire.requestFrom(8, 2); // Request Temp from Troop2


    if(0 < Wire.available()) { // slave may send less than requested
      digitalWrite(outPin, HIGH);
      delay(100);
      int t = Wire.read();// receive a byte as character
      if(t > 5)
      {
       temperature = t;
      }
      digitalWrite(outPin, LOW);
      delay(100);
    }

  //  //Request h.json from Troop3;
    if(Serial.available() > 0)
    {
      incomingByte = Serial.parseInt();
    }
    if(incomingByte == 1)
      {
        HEIGHT_DISTANCE = true;
      }
      else
      {
        HEIGHT_DISTANCE = false;
      }


    //...* Ultrasonic Sensor *...

    int c = 0;
    pinMode(trigPin, OUTPUT); //Set Ultrasonic Trigger Pin as OUTPUT
    digitalWrite(trigPin, LOW); //Write it to LOW
    delayMicroseconds(2); // Wait for 2mus
    digitalWrite(trigPin, HIGH); // Write the Trig Pin to HIGH
    delayMicroseconds(10); // Wait for 10mus
    digitalWrite(trigPin, LOW);// Write the Trig Pin to LOW
    pinMode(echoPin, INPUT); //Set Ultrasonic Echo Pin as INPUT

    duration = pulseIn(echoPin, HIGH); //The duration the echoPin takes to go HIGH in microseconds

    cm = microsecondsToCentimeters(duration); //Converts Time to Distance
    cm = cm + 5;
     //Hypotheses: There is a small tilt in the ultrasensor, which is giving -3 cm error. I am trying to calibrate it for it.
   //The actual height of the subject standing under the ultrasonic sensor

  //  if(heightSet == false)//If maxHeight is not set yet. Set it.
  //  {
  //    maxHeight = cm;
  //    heightSet = true;
  //  }
    if(HEIGHT_DISTANCE == false)
    {

   cm = 212 - cm;

    if(cm > 100 && personBefore == false)
    {
      personBefore=true;
      lcd.clear();
      lcd.home();
      lcd.print("Subject Detected");
      time_since=millis();
      delay(2000);
    }
    else if(cm > 100 && personBefore == true)
    {
      if(millis() - time_since > updateEvery)
      {
       int sum = 0;
       for(int i = 0; i < count; i++)
        {
          sum += buf[i];
        }
        avg = sum/count;

        //Serial.println(avg);

        memset(buf, 0, count);
        count = 0;

        //Send data to Troop3
        Serial.print(avg);

        lcd.clear();
      //Display Average, Maximum and wait 5seconds.
      lcd.home();
      lcd.print("Estimated Height");

      lcd.setCursor(0, 1);
      lcd.print("Avg(cm) : ");

      lcd.setCursor(10, 1);
      lcd.print(183);

      lcd.setCursor(0, 2);
      lcd.print("Max(cm) : ");

      lcd.setCursor(10, 2);
      lcd.print(184);

      delay(5000);

      lcd.clear();

      personBefore=false;
      maximum = 0;
      count = 0;
      avg = 0;
      }
      else
      {


      buf[count] = cm;
      count += 1;
      if(cm > maximum)
      {
        maximum = cm;
      }
      lcd.clear();

      lcd.home();
      lcd.print("Current(cm) : ");

      lcd.setCursor(14, 0);
      lcd.print(183);

      lcd.setCursor(0, 1);
      lcd.print("Max(cm) : ");

      lcd.setCursor(10, 1);
      lcd.print(184);

      lcd.setCursor(0, 2);
      lcd.print("Avg(cm) : ");

      lcd.setCursor(10, 2);
      lcd.print(0);

      c += 1;

        delay(200);
      if(c < 10)
      {
      lcd.setCursor(14, 0);
      lcd.print(184);
      }
      }

      lcd.clear();

    lcd.home();
    lcd.print("Regression");
    lcd.setCursor(2, 1);
    lcd.print("To The Mean");
    lcd.setCursor(0, 2);
    lcd.print("fabacademy2021");
    lcd.setCursor(8, 3);
    lcd.print("~Jai Hanani");


    }
    } else if(HEIGHT_DISTANCE == true)
    {
      //Account for the tilt

      lcd.clear();

      lcd.home();
      lcd.print("DISTANCE(cm) : ");

      lcd.setCursor(15, 0);
      lcd.print(cm);

      lcd.setCursor(0, 1);
      lcd.print("TEMPERATURE(C): ");

      lcd.setCursor(16, 1);
      lcd.print(temperature);

      lcd.setCursor(0, 2);
      lcd.print("SOS:");

      lcd.setCursor(4, 2);
      lcd.print(speed_of_sound);

      delay(500);
    }

    delay(delay_time);
  }


  long microsecondsToCentimeters(long microseconds){
    speed_of_sound = pow(10, 4)/(20.05 * sqrt(temperature + 273.15));
    return (microseconds / speed_of_sound ) / 2;
  }
Troop2 Code:
          // REQUIRES the following Arduino libraries:
// - DHT Sensor Library: https://github.com/adafruit/DHT-sensor-library
// - Adafruit Unified Sensor Lib: https://github.com/adafruit/Adafruit_Sensor
#include
#include "DHT.h"

#define DHTPIN 2
// Digital pin connected to the DHT sensor

int t = 0;

#define DHTTYPE DHT11   // DHT 11

DHT dht(DHTPIN, DHTTYPE);

void setup() {
  Serial.begin(9600);
  Wire.begin(8);
  Wire.onRequest(sendData);
  dht.begin();
}

void loop() {
  delay(2000);
  t = dht.readTemperature();

  // Check if any reads failed and exit early (to try again).
  if (isnan(t) ) {
    Serial.println(F("Failed to read from DHT sensor!"));
    return;
  }


  Serial.print(F("%  Temperature: "));
  Serial.print(t);
  Serial.print(F("C "));


}

void sendData()
{
  Wire.write(t);
  delay(100);
}
Troop3 'Internet' Module:
          #include <ESP8266WiFi.h>
            #include <ESP8266WiFiMulti.h>

            #include <ESP8266HTTPClient.h>

            #include <WiFiClient.h>

            WiFiClient wifiClient;


            const char* ssid = "hegemon";
            const char* password = "hanani8*";

            String h_json = "https://regression-to-the-mean-default-rtdb.asia-so
            utheast1.firebasedatabase.app/h.json";
            String sheets = "https://script.google.com/macros/s/AKfycbydjE9P
            ltupO9nM8zP2mHAVZa9KVbnbdixOOnca1CRpYrt5YbZ1faIueJgu9OI8qVHX/exec";
            String abel = "https://token-59dc3-default-rtdb.firebaseio.com/height.json";

            String serverName = "https://regression-to-the-mean-default-rtdb.asia-
            southeast1.firebasedatabase.app/h.json";

            int h; //Height Value sent by the Commander;

            //unsigned long lastTime = 0;
            //unsigned long timerDelay = 5000;


            void setup() {
              Serial.begin(9600);
              WiFi.begin(ssid, password);
              while (WiFi.status() != WL_CONNECTED) {
                delay(500);
              }

            }

            void loop() {


                if (WiFi.status() == WL_CONNECTED) {
                  //Check if t
                  if (Serial.available() > 0)
                  {
                    h = Serial.parseInt();
                    int t = 1;
                    String sheets_url = sheets + "?height="+h;
                    x(sheets_url, t);
                  }
                  //Get h_json value
                  int l = 0;
                  x(h_json, l);

                }
                else {
                  int temp = 0;
                  Serial.print(temp);
                }
              }


              //h_json is 0
              //sheets is 1

              void x(String path, int id)
              {
                HTTPClient http;
                http.begin(wifiClient, path.c_str());

                // Send HTTP GET request
                int httpResponseCode = http.GET();
                if (id == 0)
                {
                  if (httpResponseCode > 0) {
                    String payload = http.getString();
                    int data_1 = payload.toInt();
                    Serial.print(data_1);
                  }
                }

                http.end();
              }
The Apps Script code for the Google Sheeet that will store the height data:
          function doGet(e) {
            Logger.log( JSON.stringify(e) );  // view parameters
            var result = 'Ok'; // assume success
            if (e.parameter == 'undefined') {
              result = 'No Parameters';
            }


            else {
              var sheet_id = "1UKjOThunhEcy9mBIkCVqow7ecE3Aq20NQuLKHlieqPY";
              var sheet = SpreadsheetApp.openById(sheet_id).getActiveSheet();
              var newRow = sheet.getLastRow() + 1;
              var rowData = [];
              rowData[0] = new Date();
              for (var param in e.parameter) {
                Logger.log('In for loop, param=' + param);
                var value = stripQuotes(e.parameter[param]);
                Logger.log(param + ':' + e.parameter[param]);
                rowData[1] = value;
                result = 'Height Entered to SpreadSheet'

                // //Sending to Abel's Project

                  let url = "https://token-59dc3-default-rtdb.firebaseio.com/height.json";
                let options =
            {
              'method': 'put',
              'headers': {},
              'payload': `${value}`
            }
            UrlFetchApp.fetch(url, options);
              }
              Logger.log(JSON.stringify(rowData));
              // Write new row below
              var newRange = sheet.getRange(newRow, 1, 1, rowData.length);
              if(rowData[1] > 120){
          newRange.setValues([rowData]);
              }

            }
            // Return result of operation
            return ContentService.createTextOutput(result);
          }
          /**
          * Remove leading and trailing single or double quotes
          */
          function stripQuotes( value ) {
            return value.replace(/^["']|['"]$/g, "");
          }


 Credit: