U.Interfacing Final Project
For this week I decided to interface my final project application and have a integration with google assistant using Firebase,MIT app inverter,Google Sheets and IFTT's.So I used Firebase as a common place to tiger and Real time data storage. and update this using app inverter ,sheets and Google Assistant.and ESP32 always check the Realtime data is updated or not
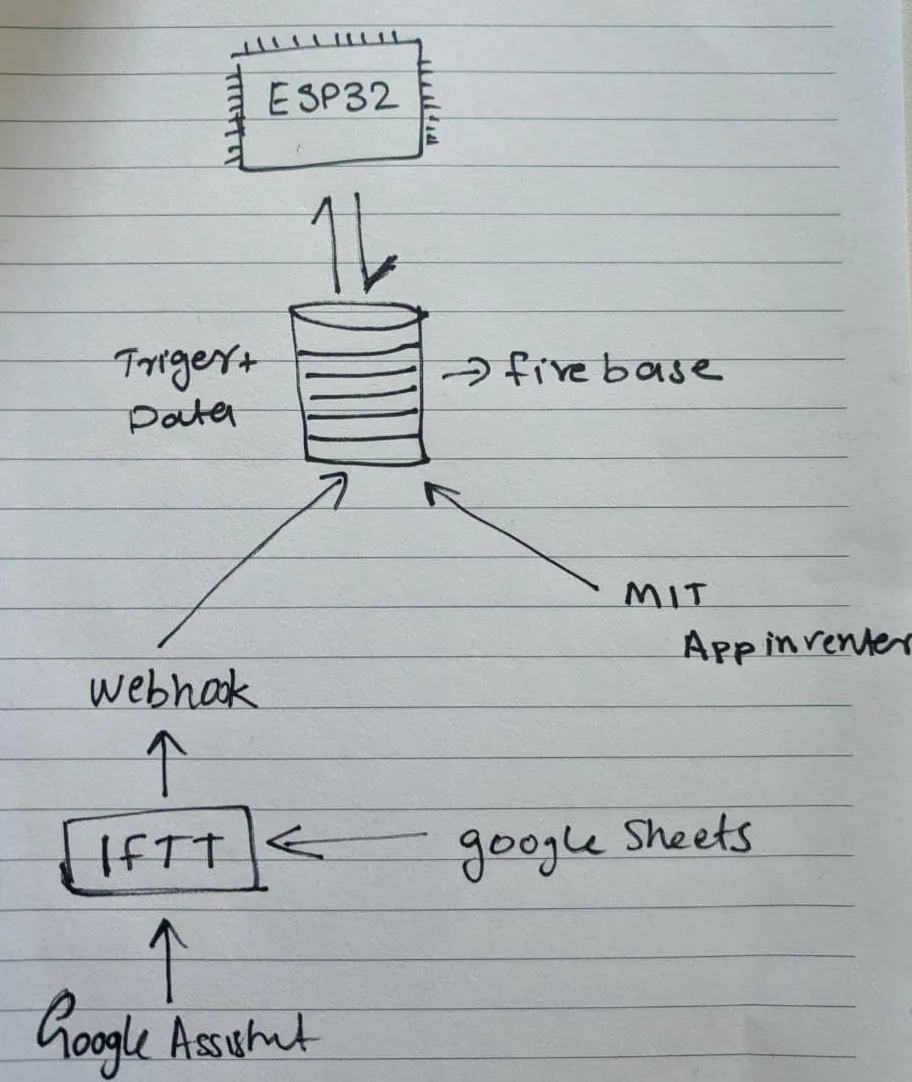
FireBase
Firebase is a platform developed by Google for creating mobile and web applications.Firebase has three core services: a real-time database, user authentication and hosting.I use the real-time data base.
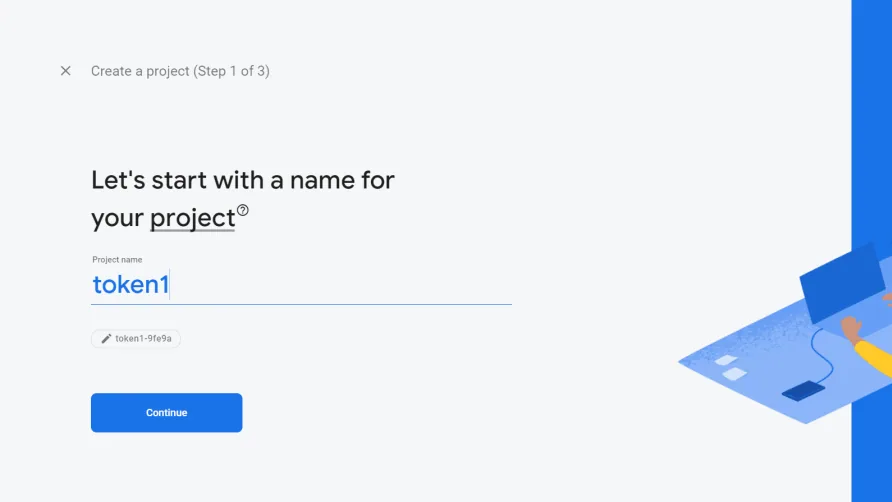
Select the Add project option to create a new project. You will be asked to Enter your project name, give the project a suitable name.
To get started head over to Firebase, and sign in using your Google account.
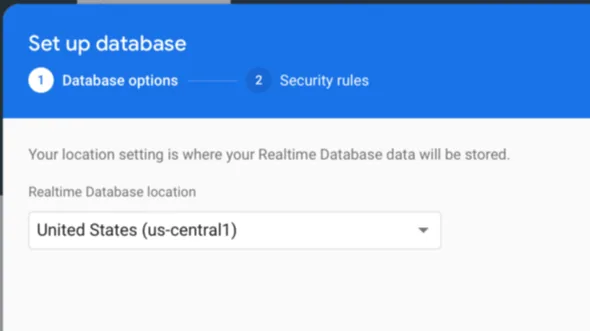
In the database creation menu you can choose a location that is closest to you, and select Next.
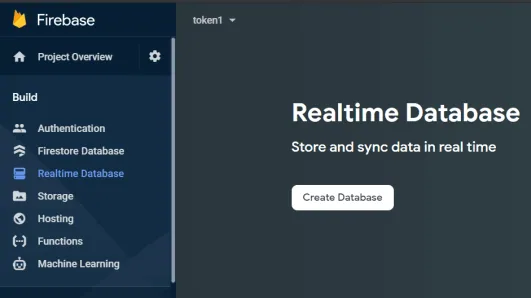
Next we need to create a database which will hold all our data. To do this, select the Realtime Database menu option on the top left, and you’ll be taken to the Realtime Database page. Select the Create Database button
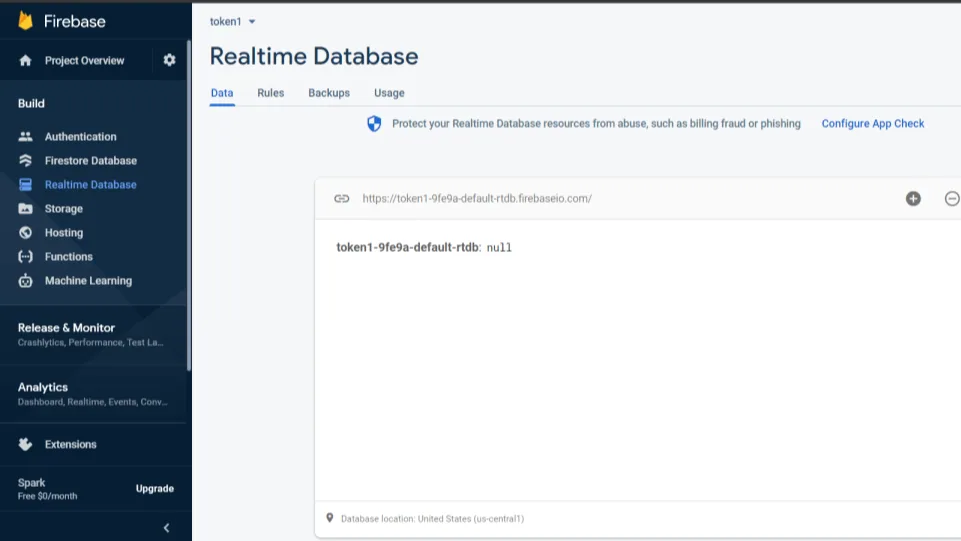
Lastly you should see a new page with your new empty database, and we are all set!
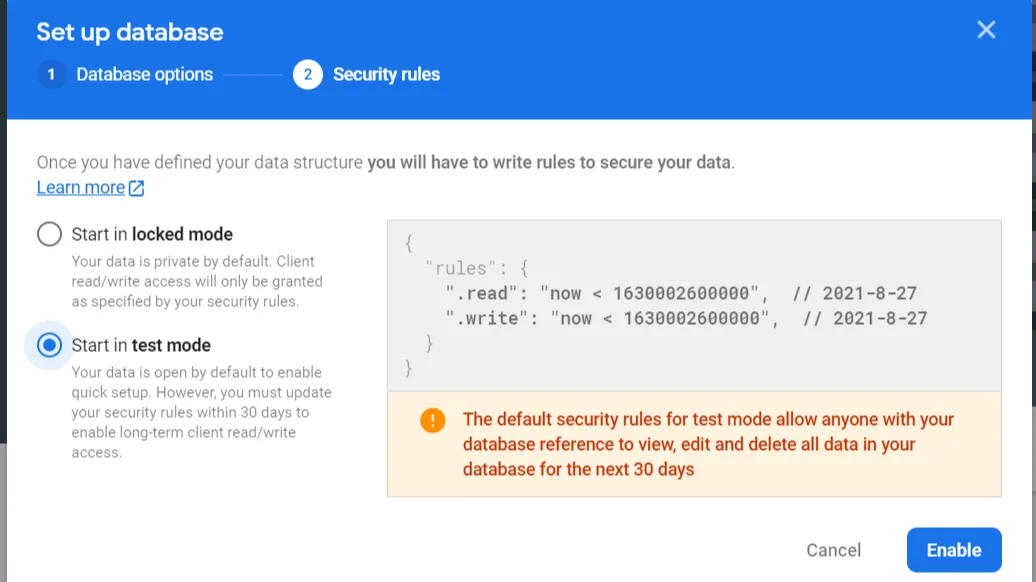
You will be presented with the option to initialise your database in locked mode or test mode. Select test mode for now. The main difference is that in test mode a database access rule is placed allowing unauthorised access to your database for thirty days.
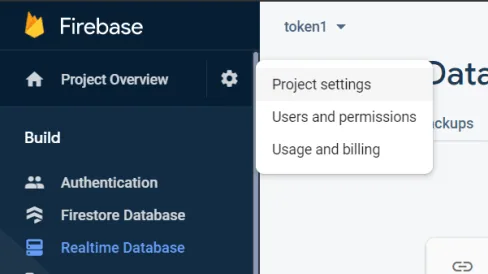
The second item we need to store is the project’s API key. To get you API key navigation to the project settings page by selecting the settings icon on the top right, and then selecting the Project settings menu.
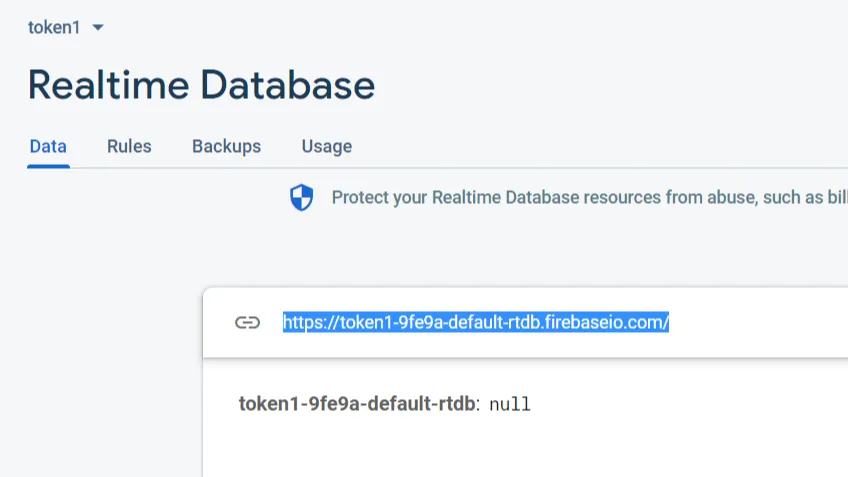
Before, continue there are two items you need to copy and store for future use in our embedded application. The first item we need is our Realtime Database URL, which you can find by copying the URL of the Realtime Database page
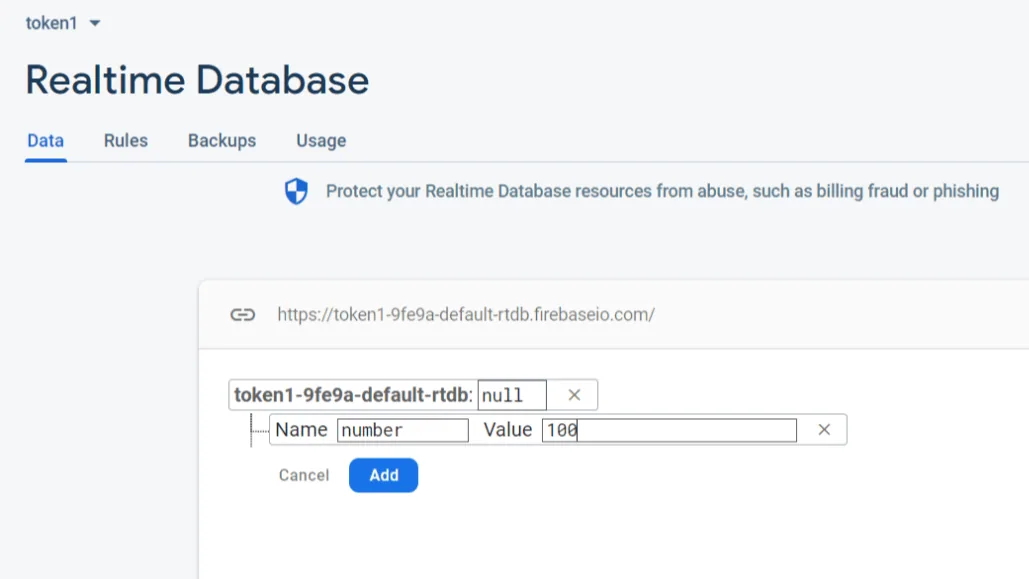
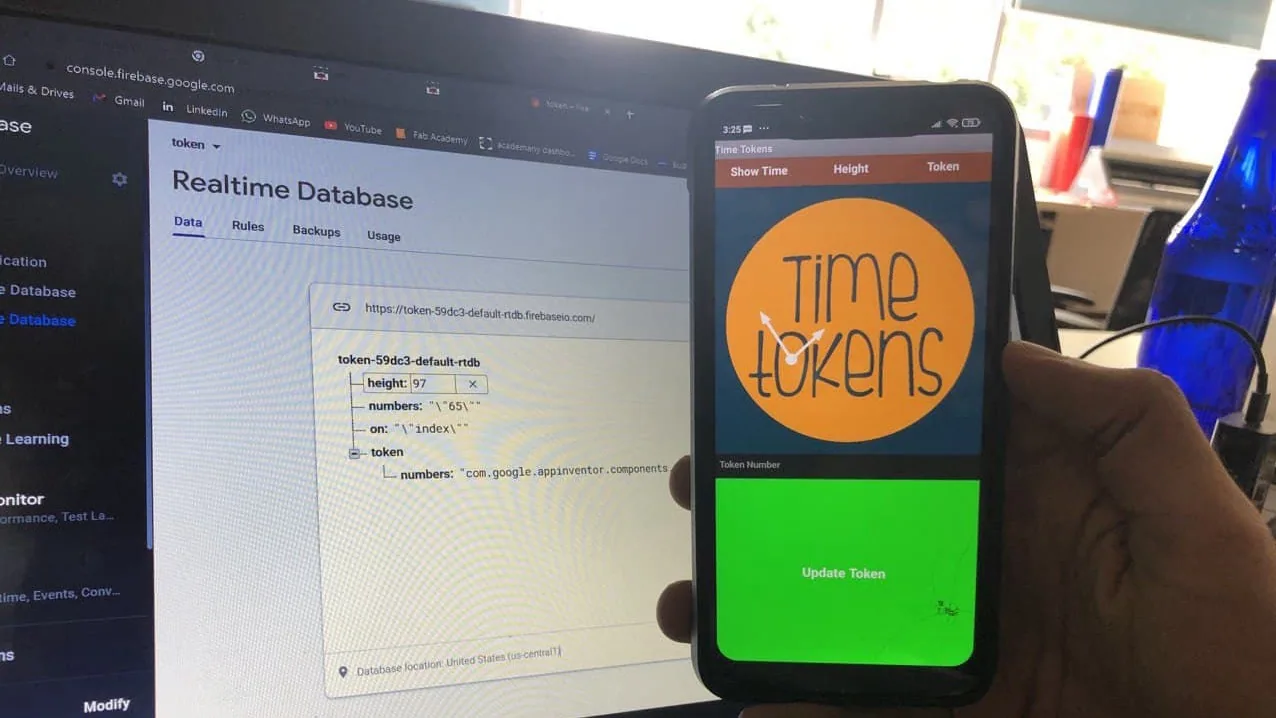
You can create variables inside the real-time database.As triggering functions or just user input.
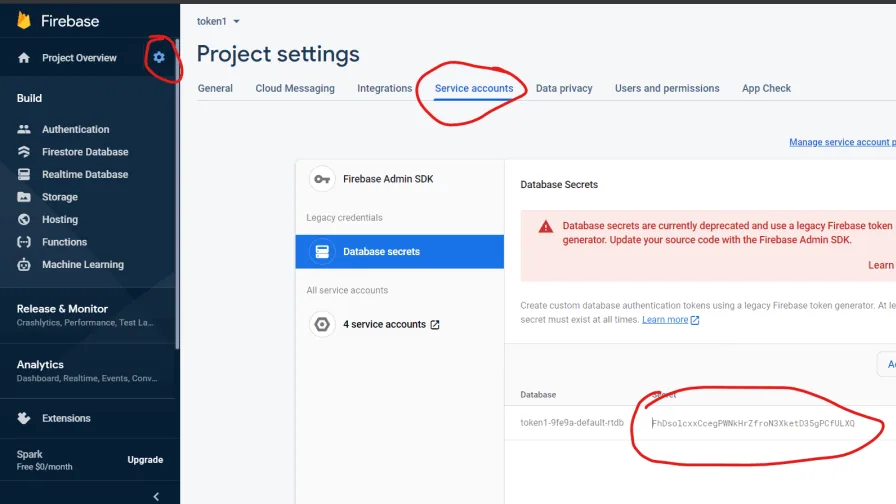
Now click on Service accounts and then Database secrets.On clicking on Database Secrets you will find a secret key, copy this key and save it in notepad, this is your firebase authorization key which you will need later.
TIP##
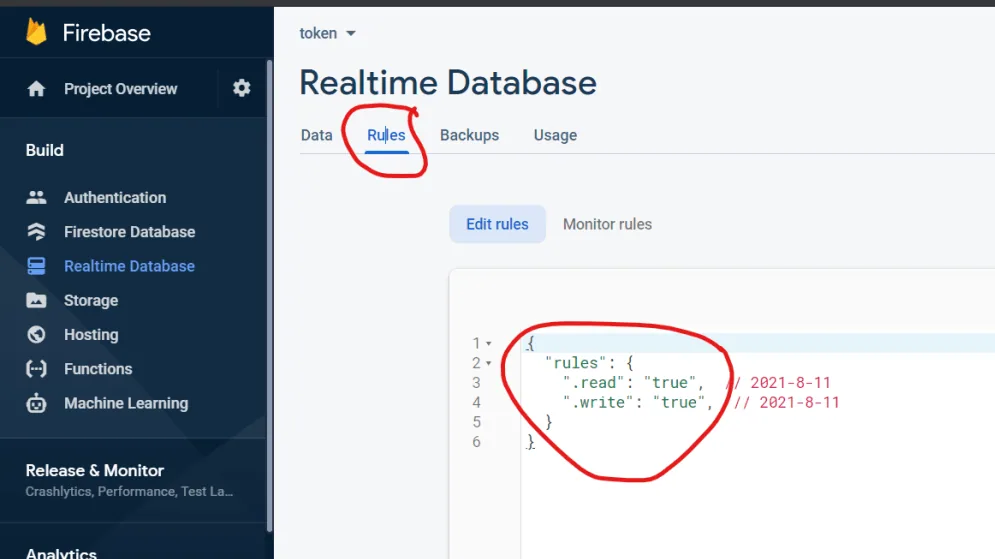
You can update the rules from 30 days test to read and write to true . so that you can use for longer time.
Setting up ESP32 module with Firebase
To work with ESP32 using Google firebase you will need a firebase library so firstly download that library using below link and save it in Arduino library files.
https://github.com/mobizt/Firebase-ESP32
After installing the library you are ready to work with Google firebase using ESP32.
Add Firebase library and define database link and authentication data.
#include <FirebaseESP32.h >
#define FIREBASE_HOST "Real time Database link which copied"
#define FIREBASE_AUTH "add Authentication key"
FirebaseData firebaseData;
This will call for authentication and get variable in the 'variable Name'
and store it as string.// i used sting since text box inputs from app is sring.
Firebase.begin(FIREBASE_HOST, FIREBASE_AUTH);
Firebase.reconnectWiFi(true);
if (Firebase.getString(firebaseData, "Variable Name"))
{
String i = (firebaseData.stringData());
For updating posting geting creating .databases and expand in Firebase Refer lib Finctions.https://github.com/mobizt/Firebase-ESP32
MiT App Inventer
MIT App Inventor is a web application integrated development environment originally provided by google, and now maintained by the "Massachusetts Institute of Technology (MIT)".This software will provide an easy interfacing for beginners. It is free and open-source software.
https://appinventor.mit.edu/
Its just drag and drop items, you can add text box ,buttons.specify the size ,color images and all to look good.
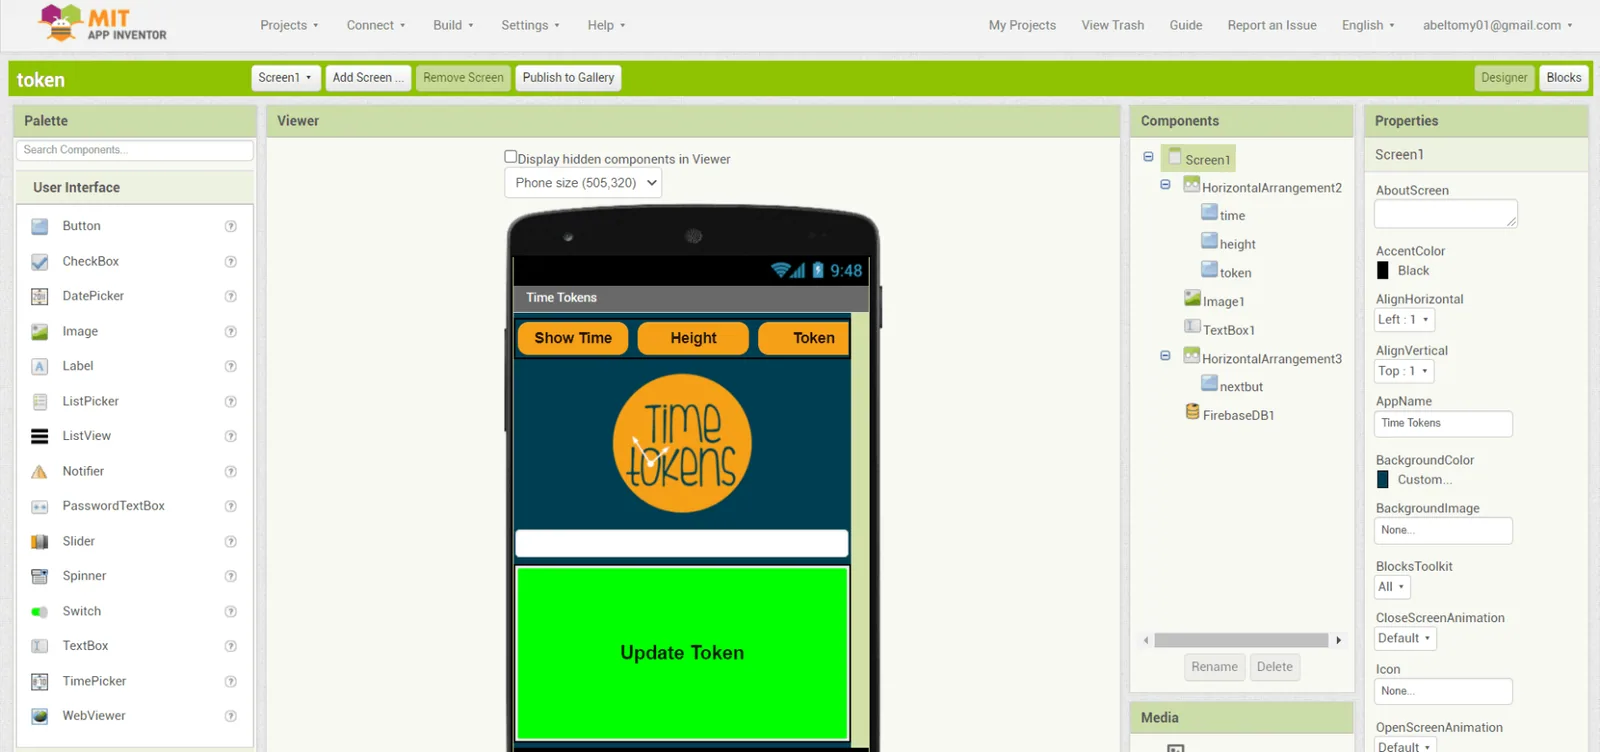
These are the components, buttons to tiger, text box to get data (token) from user and for config. the authentication and bucket URL.
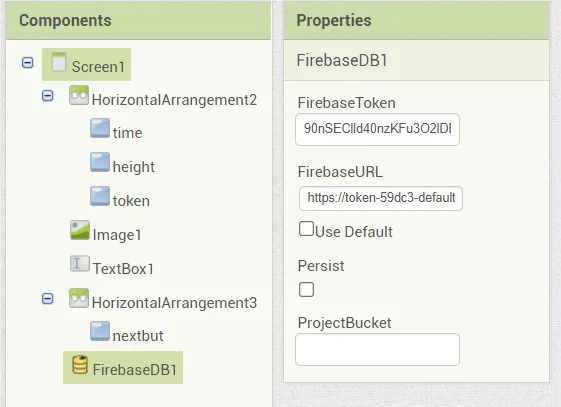
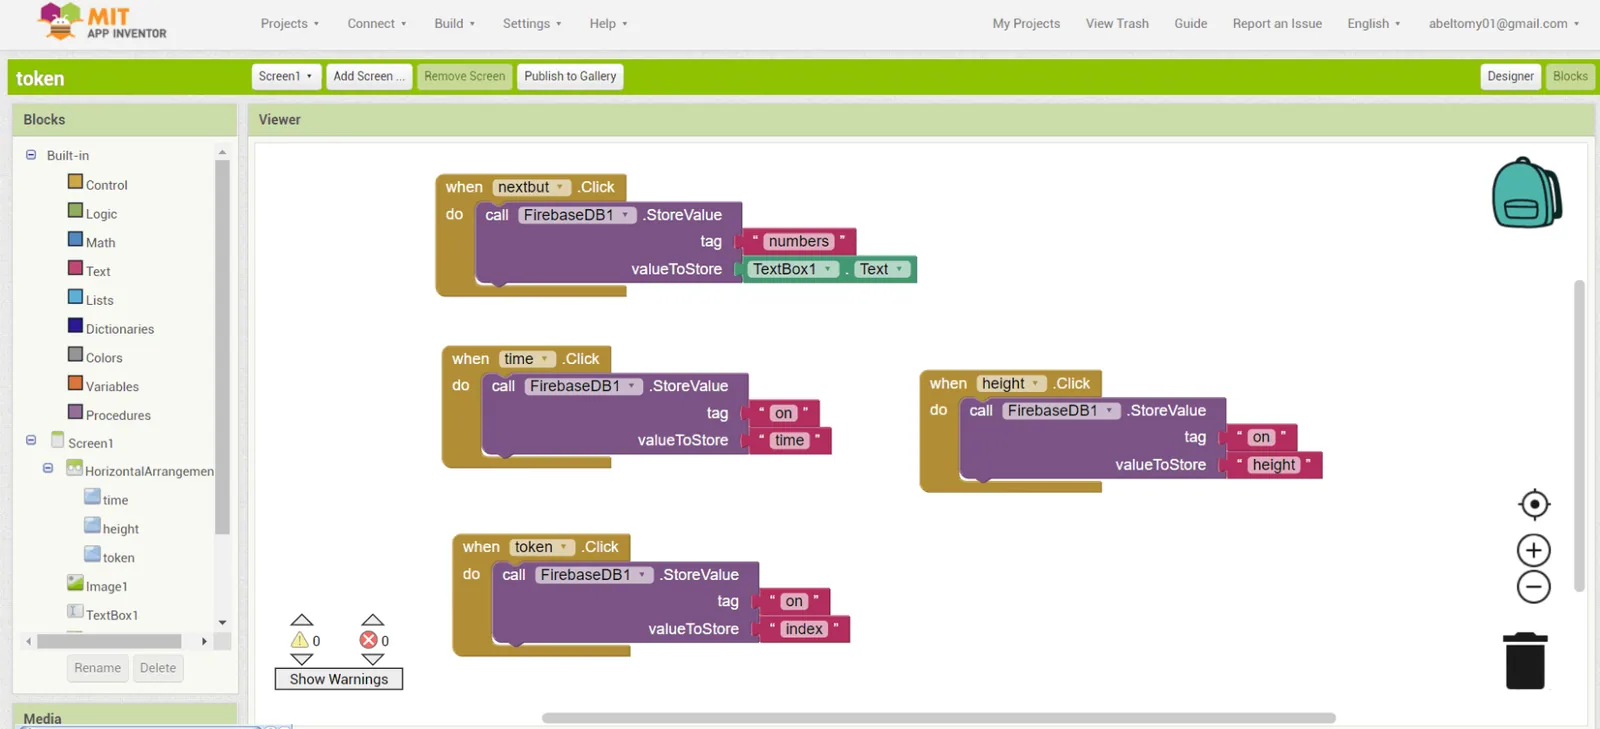
On the other hand the block editor is the different environment in which we can visually can arrange the different color-coded blocks to place the logic of the app. We set the logic of app by arranging these color-blocks in the way we can solve the puzzle pieces.
Logic is: when user click a button, authentication is done and update the variable with a value or the value in the text box.
Google Assistant, Cloud Functions( Firebase ) and Dialog Flow
Cloud Functions for Firebase is a serverless framework that lets you automatically run backend code in response to events triggered by Firebase features and HTTPS requests. Your JavaScript or TypeScript code is stored in Google's cloud and runs in a managed environment. There's no need to manage and scale your own servers.Dialogflow’s inline webhook editor is deployed on Firebase Cloud Functions.
Follow this tutorial to build an agent and train your google assistant.
https://cloud.google.com/dialogflow/es/docs/tutorials/build-an-agent/create-customize-agent.
\You can trier the function in Firebase to do some specific tasks in fire base witch include adding variables updating deleting etc.so you have to write the function in .js.
you can also visit to know more about Firebase functions:-
https://firebase.google.com/docs/functions
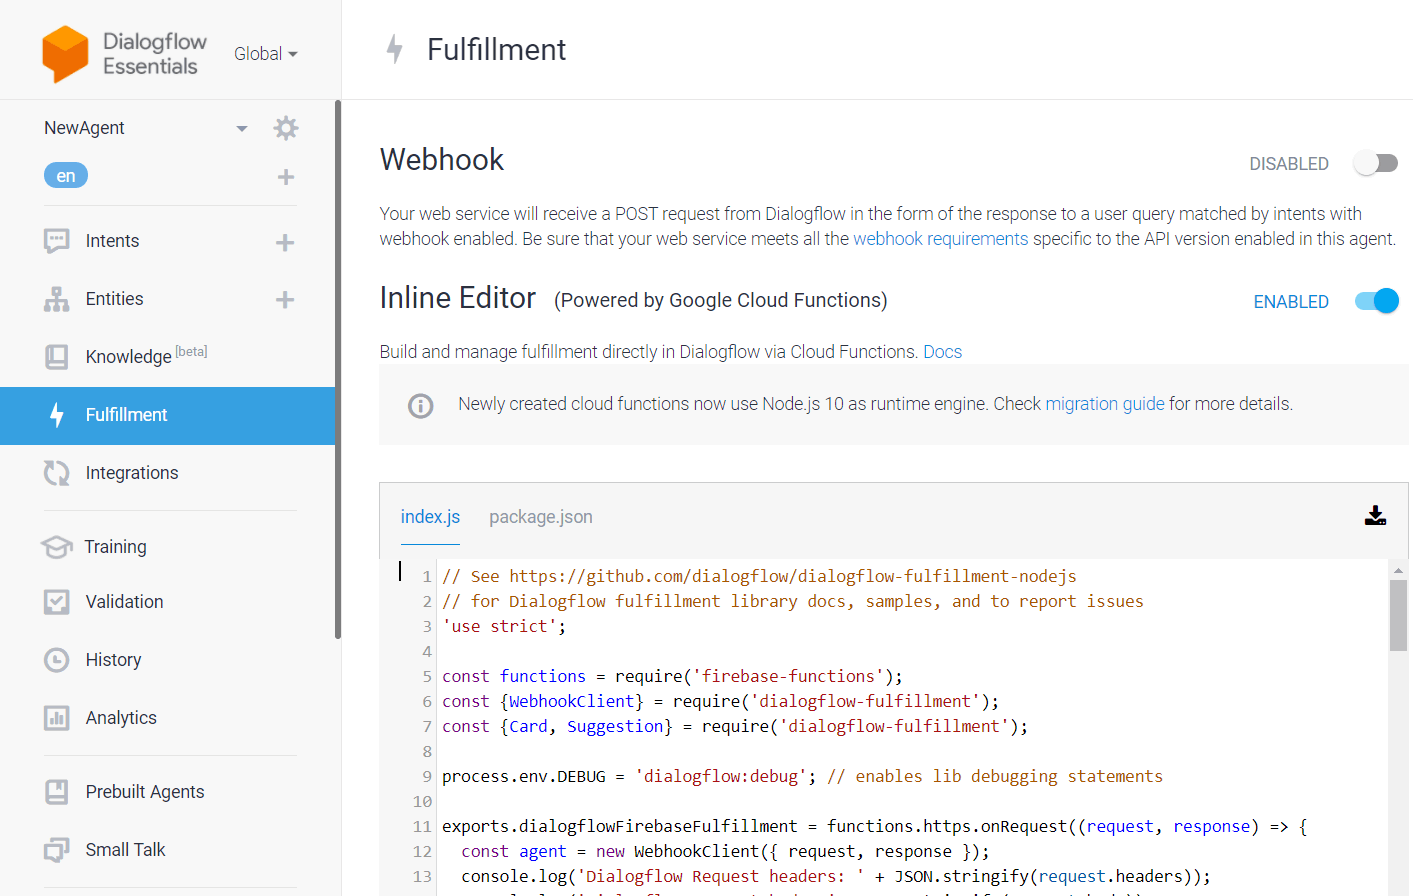
For the fulfillment or the function to be called can be done in both ways configure web hook or use inline editor.
Firebase CLI
The Firebase CLI (GitHub) provides a variety of tools for managing, viewing, and deploying to Firebase projects.
To download and run the binary for the Firebase CLI, follow these steps:
1.Download the Firebase CLI binary for Windows.
2.Access the binary to open a shell where you can run the firebase command.
3.Continue to log in and test the CLI.
Its like Git, it can update the cloud function locally the term used instead of push is Deploy.
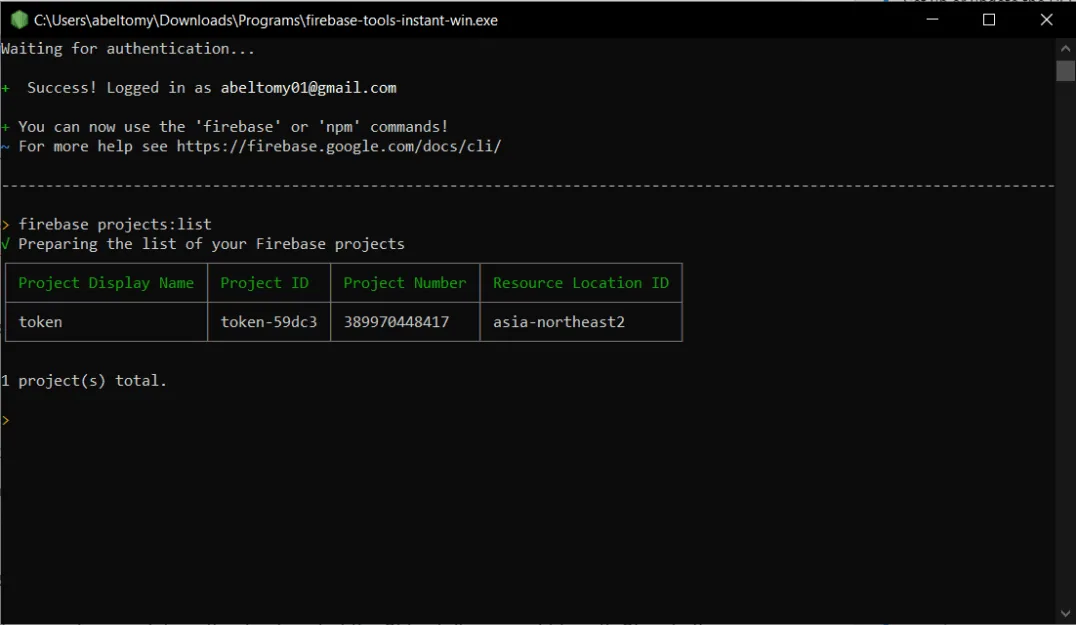
Select the project.
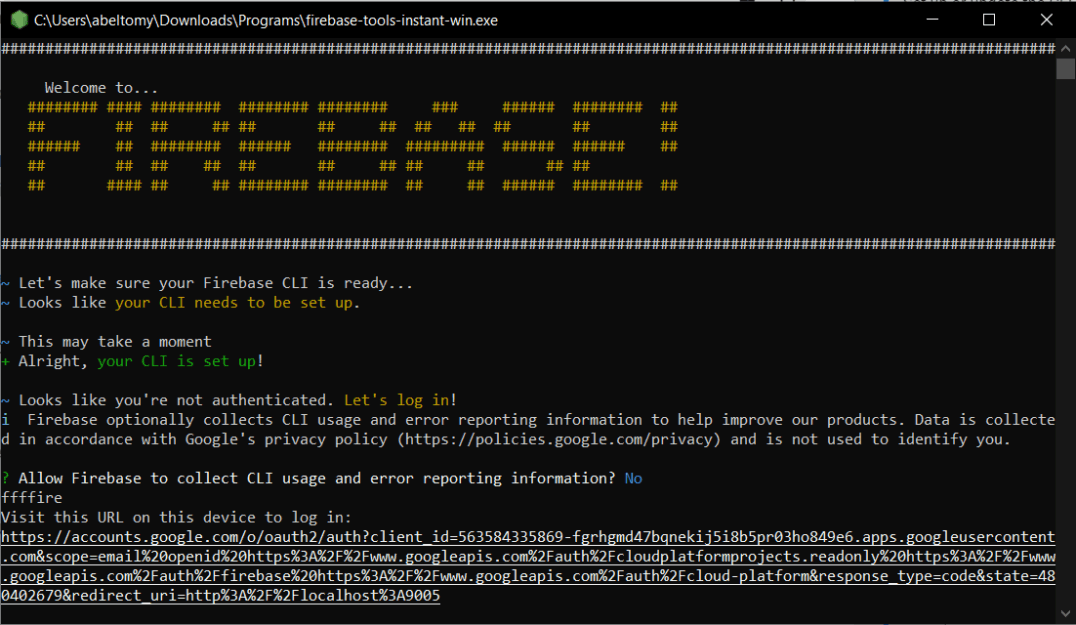
Open CLI binary for windows.Login to account.
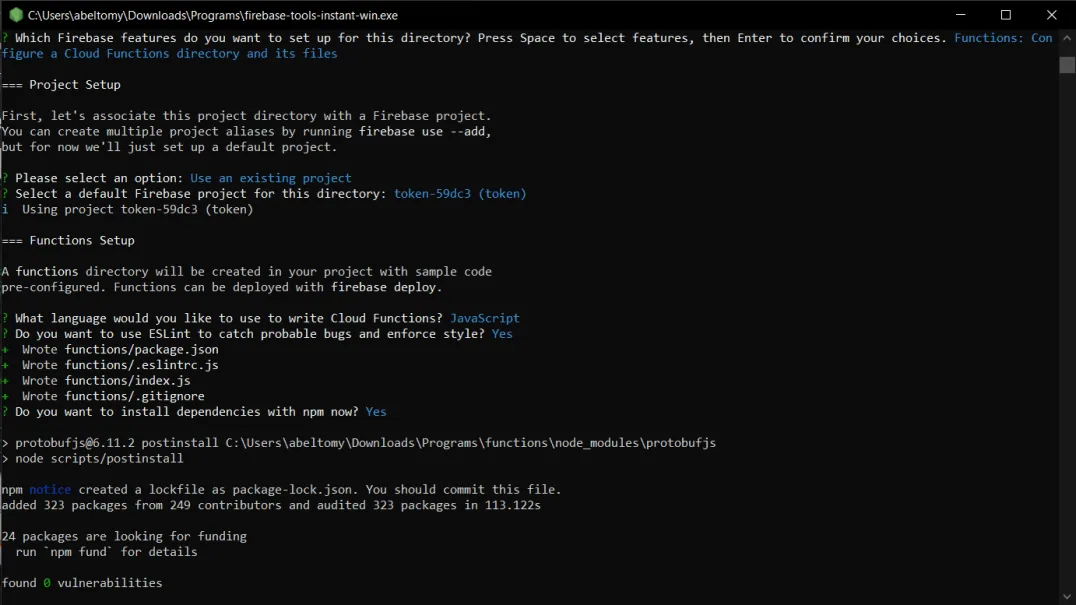
when selecting for project they will ask for functions files in local repo.
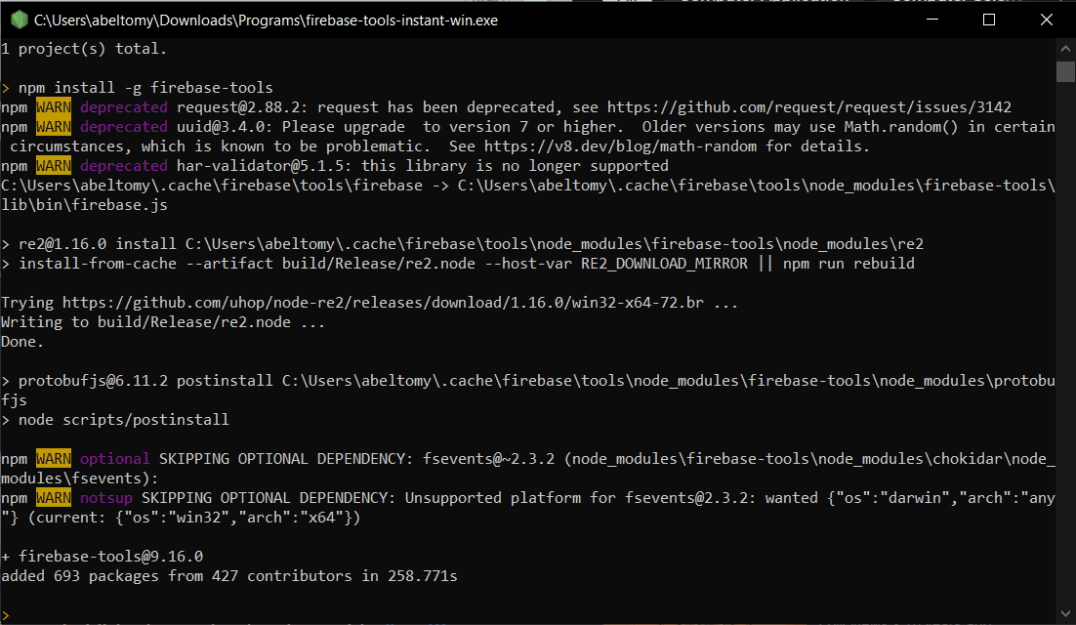
npm install -g firebase-tools
it will update the tools and lib. of firebase
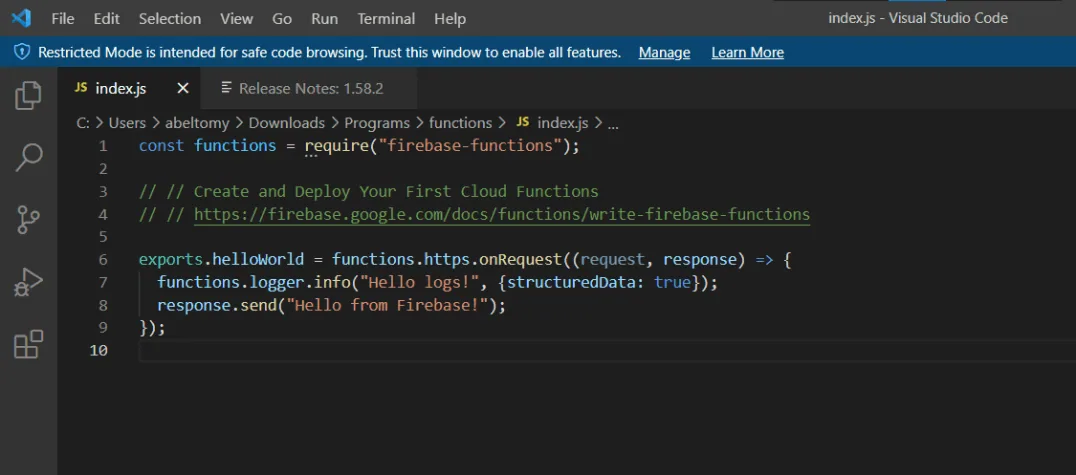
You can edit the function (index.js)
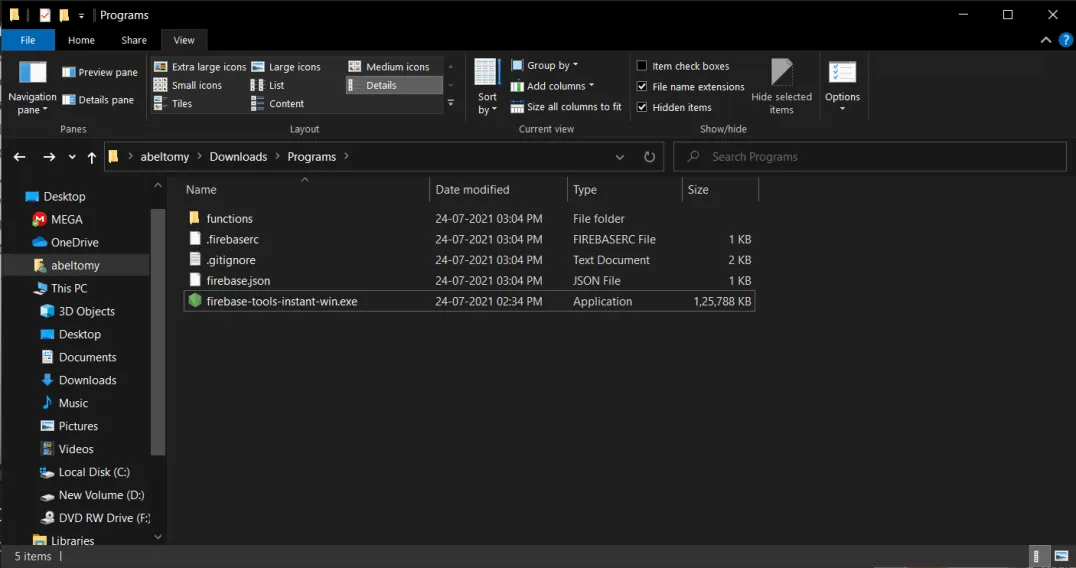
Local clone is created
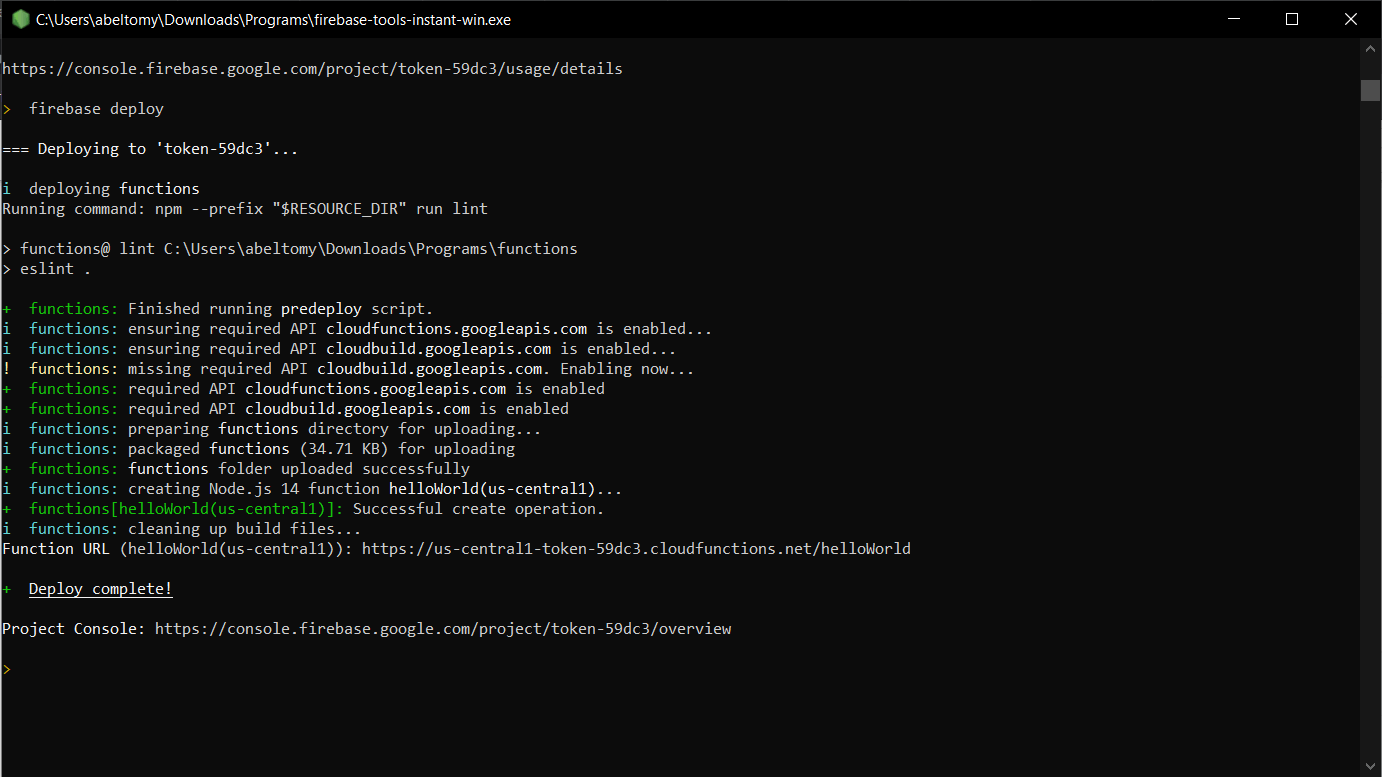
firebase deploy
it will push the function to Firebase and it willl be triggered as google assist. teachings as we done in Dilogflow.
IFTTT's
https://ifttt.com/home.
If This Then That is a service that allows a user to program a response to events in the world. IFTTT has partnerships with different service providers that supply event notifications to IFTTT and execute commands that implement the responses. Some event and command interfaces are simply public APIs.
Logic : If google asst triggered with a specif word and with number a web hook is executed and data updated in Firebase.
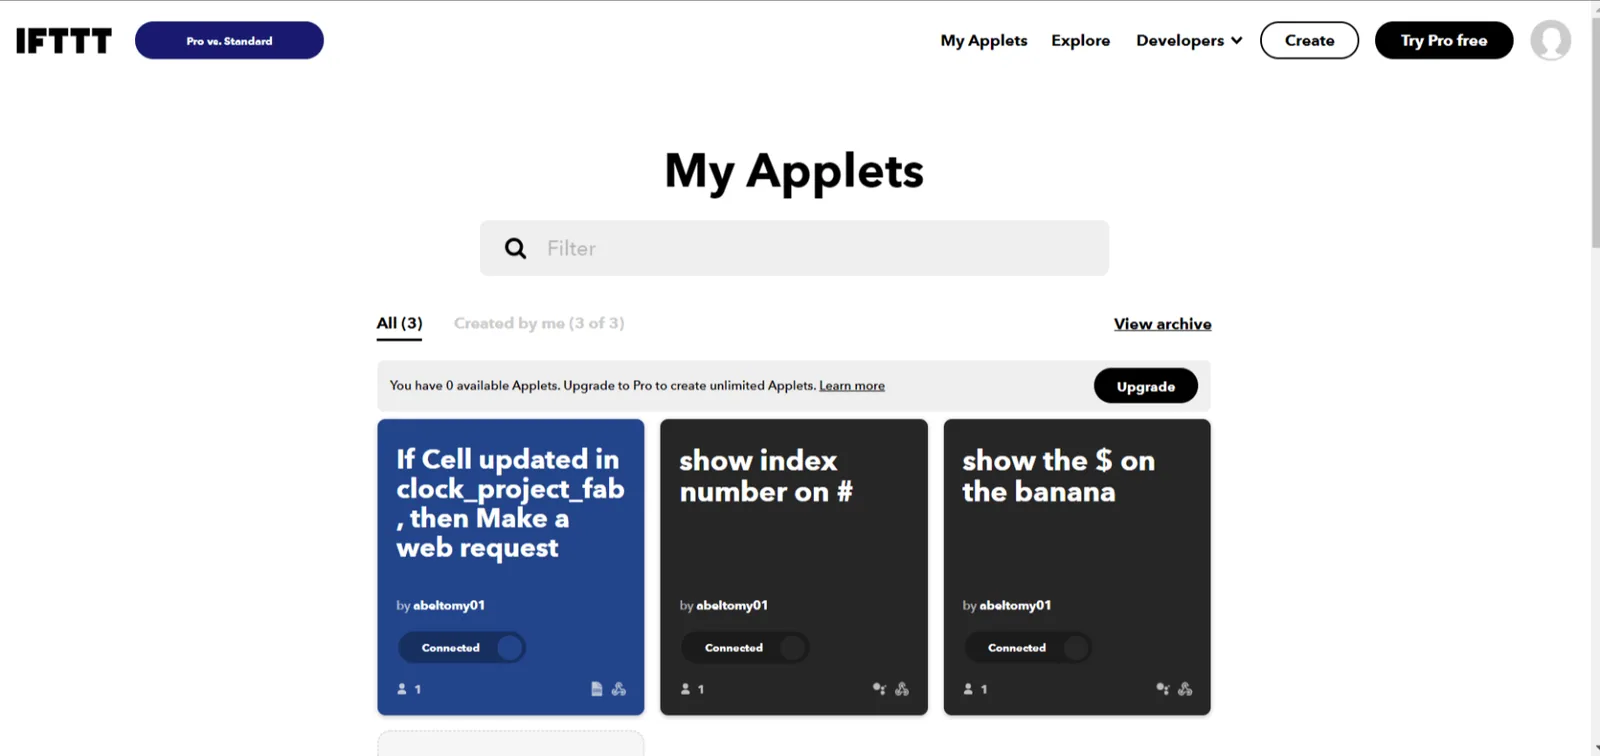
Each block is called applets, you can create one by login IFTTT
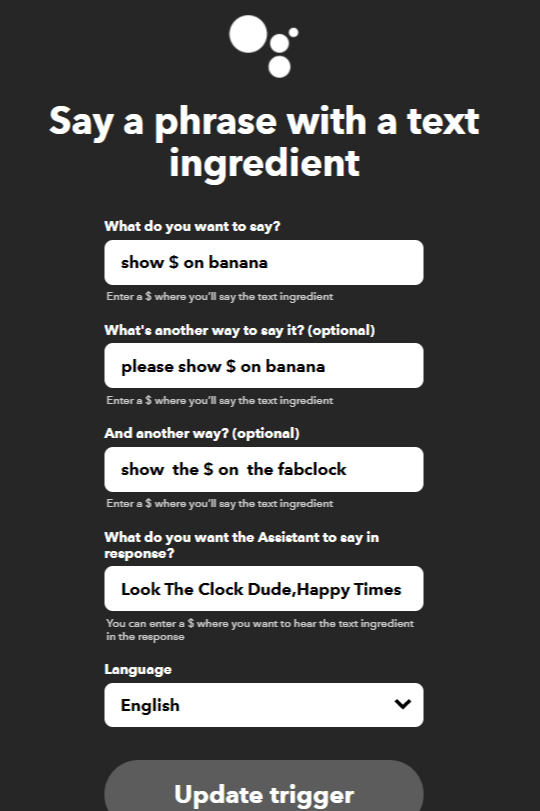
place of ' $ and we can also set response.
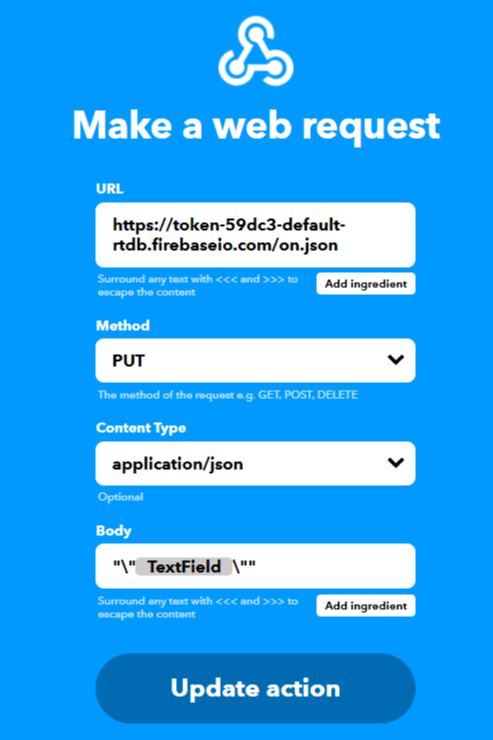
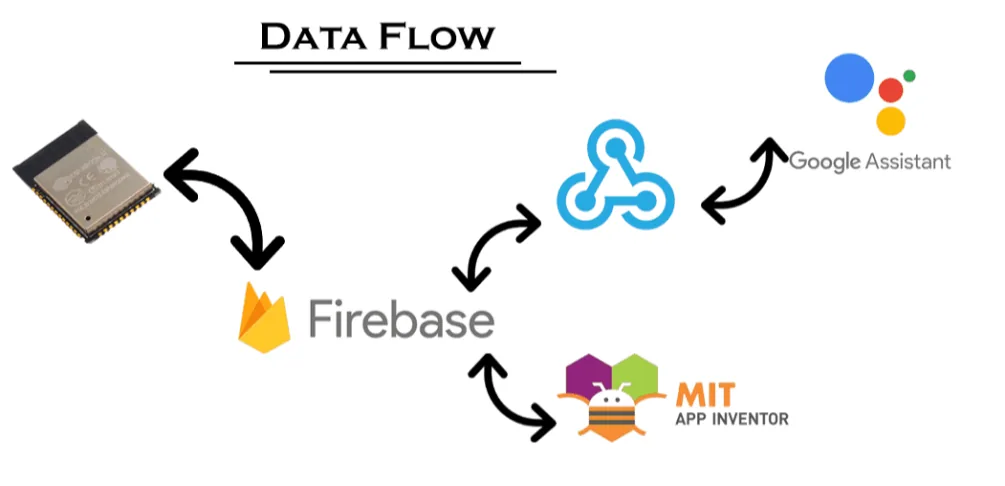
The Whole interfacing of final project DONE.HAPPY ME.
You can also try out google sheets and app scripts for data and cloud functions.
link.
Download design Files.Click here.
Its just drag and drop items, you can add text box ,buttons.specify the size ,color images and all to look good.