Final project
Initial idea
Here is a sketch of the idea for the final project:
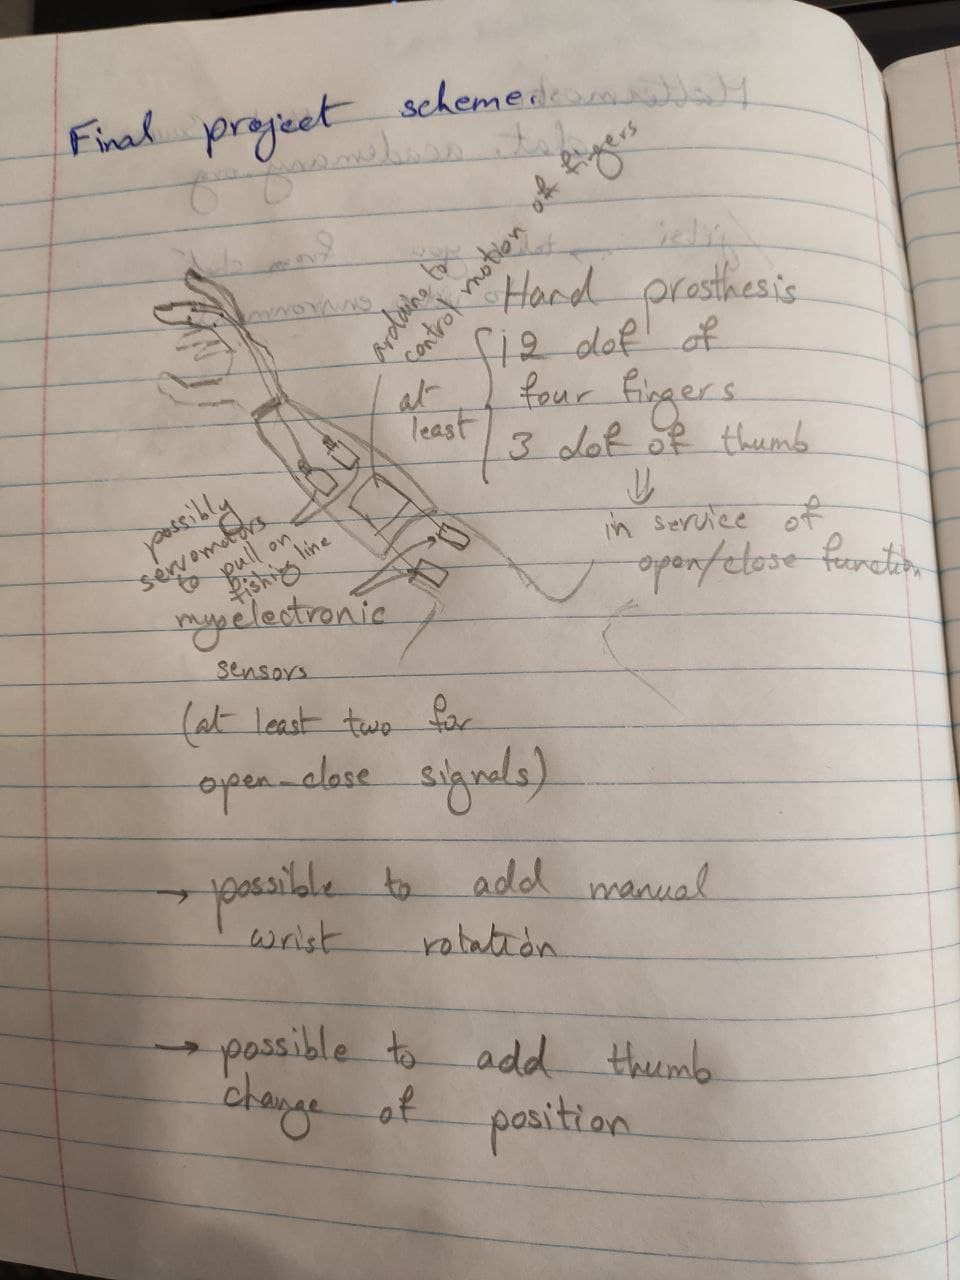
The final project is going to be a prosthesis for a transhumeral amputee. At this level of amputation the extension/flexion functionality of the biceps/triceps is preserved, and I'm hoping that we will be able to pick up hand closing/opening signals as well.
The hand will possibly have open/close function of the fingers, academany possibly manual rotation of the wrist. Depending on time and options available, perhaps manual changing of the position of the wrist can be added as well.
EMG signals of the stump muscles will be picked up by two or more myoelectric sensors, and transmitted to an arduino board which will actuate servomotors (or others, TBD) to move the fingers, which will be connected to the motors possibly using fishing lines (or other means, TBD).
External ideas
Input from Neil Gershenfeld
Neil suggested two things about the prosthesis:
- State-of-the-art prostheses are made with composites. Learn to used them in the Wildcard Week. Learning to work with composites lets you make light and interesting 3D shapes. Learn composite workflow so you can make a 3D form and layout composite.
- In order to detect myoelectric signals, there's a DB series in the AVR family of processors, in particular, AVR128DB32
Input from a user of prostheses
I had a conversation/interview which a double amputee, who has been using prostheses since a young age, and he was kind enough to share his insights with me. Here are some main ideas that he mentioned:
- He would prefer a robotic-looking-hand to one that pretends to be natural.
- When it comes to aesthetics vs functionality, functionality definitely wins the cake.
Input from a printer of Hackberry prostheses
Electromyography sensors
Initially, my idea was to purchase ready-made electromyography (EMG) sensors for use with the prosthesis.
Here are some samples I looked at:
- MyoWare Muscle Sensor: This is a single 3-electrode input sensor for 1 muscle, selling at about $40.
- Myo Gesture Control Armband by Thalmic Labs, a 3-man-Waterloo-graduate-started start-up that had raised $135 million when working on the armband. But in 2018, Thalmic Labs rebranded as North and began focusing on its new product of holographic Alexa glasses (North was later acquired by Google). In 2019, the IP for the myo armband was bought by New York-based CTRL-labs, which was developing an EMG armband of its own. CTRL-labs itself was acquired by Facebook. Currently, the myo armband's sale is discontinued and is not available for purchase. In 2015, it could be pre-ordered for ~$150 and purchased for ~$200.
- gForcePro+ EMG armband by OYMotion Technologies, a Shanghai-based company. These tend to go for $1500, which by itself is above the amount a Fab Academy project can cost.
- gForceOct Wireless EMG system by OyMotion Technologies again.
- This nameless sensor that retails for 20 Euros, and its bundle with the electrodes goes for 40 Euros.
- Gravity Analog EMG sensor by OYMotion. This is a single EMG sensor comparable to the MyoWare sensor, at the same almost $40 price.
- Open Source Multichannel EMG Armband design by Ossaba et al
- Flexible sensor developed at University of Twente
- The Copenhagen Bionics sensor
How does an EMG sensor work
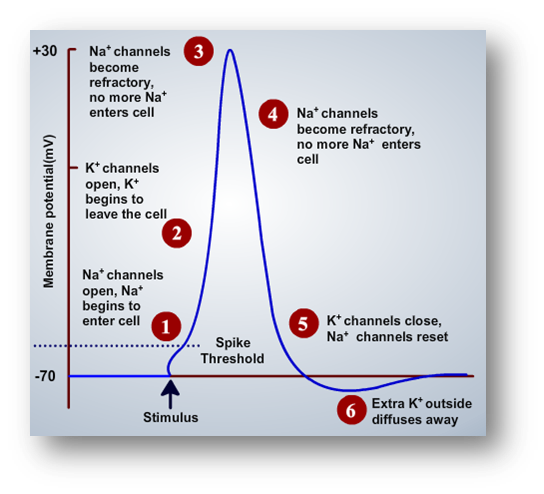
Here are the changes in the muscle that lead to it flexing, and generation of the muscle signal (from here):
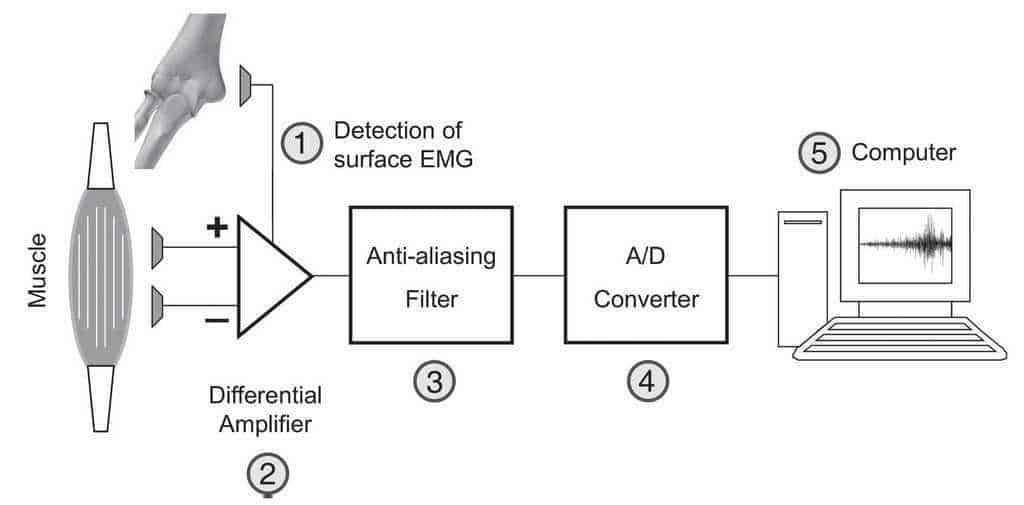
Here's how an EMG sensor is built according to how2electronics.com:
How an actual hand functions
The following is a paragraph about wrist motion and its range in order to ensure sufficient independence in activities of daily life from Joint Structure and Function: A Comprehensive Analysis by Levangie and Norkin, pp. 313-314:
What appears to be a redundancy in function at the midcarpal and radiocarpal joints ensures maintenance of the minimum ROM required for activities of daily living. Brumfield and Champoux found that a series of hand activities necessary for independence required a functional wrist motion of 10° of flexion and 35° of extension. Ryu and colleagues included a wide range of hand functions in their test battery and determined that all could be completed with minimum wrist motions of 60° extension, 54° flexion, 40° ulnar deviation, and 17° radial deviation. There is consensus that wrist extension and ulnar deviation are most important for wrist activities. Wrist extension and ulnar deviation were also found to constitute the position of maximum scapholunate contact. Given the key role of the scaphoid in wrist stability—acting as a link between the proximal and distal carpal rows—this extended and ulnarly deviated wrist position will provide a stable base that allows for maximum hand function distally. When deciding on the position of fusion for the wrist, the surgeon commonly chooses an optimal functional position of approximately 20° of extension and 10° of ulnar deviation. This extended position also positions the long digital flexors for maximal force generation in prehension activities.
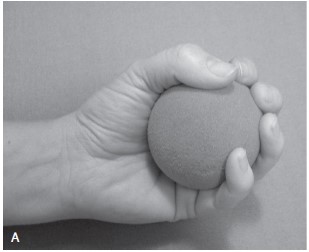
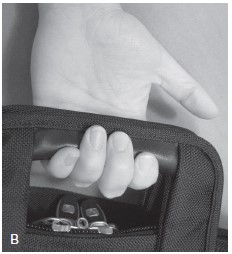
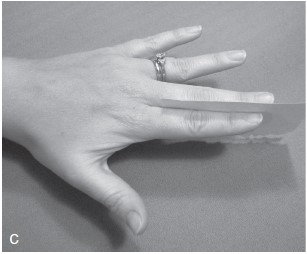
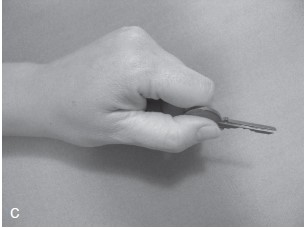
Here are some images from page 346 of the same book, showing a few grips by the hand:
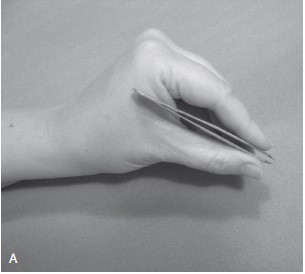
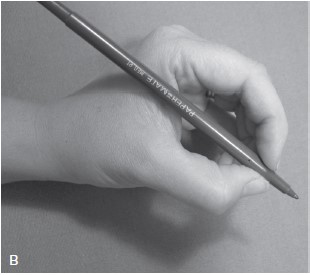
And here are some images from page 347 of the book, showing a few types of prehension handling:
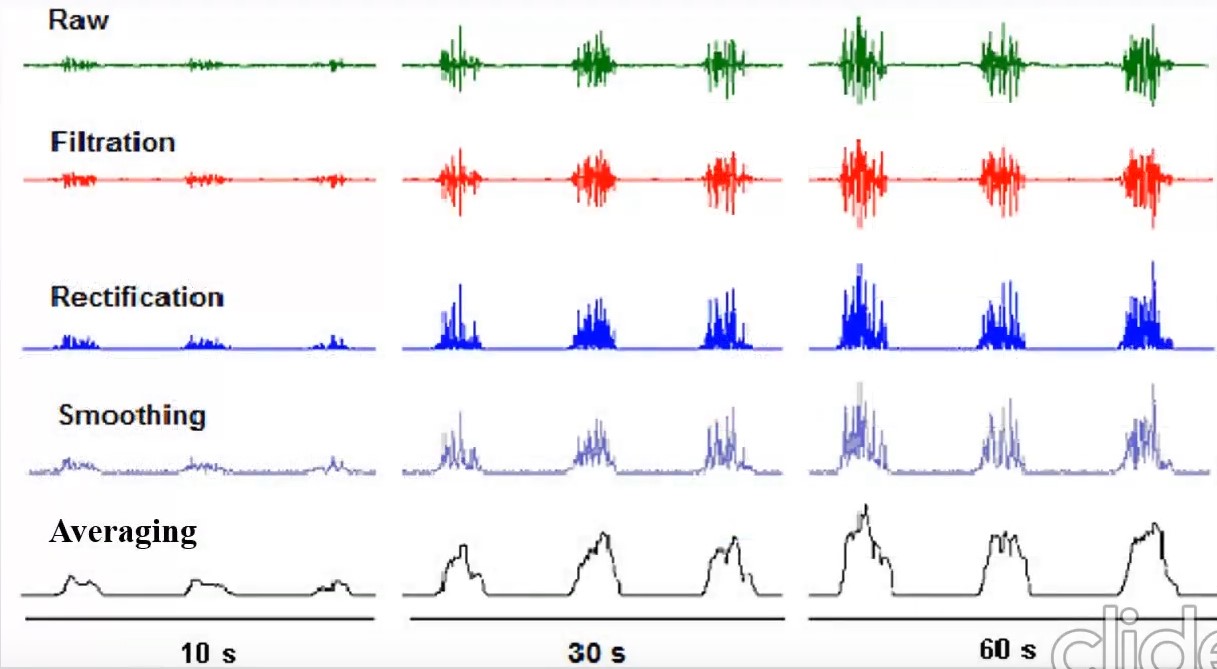
Here how the myoelectric signal changes after each stage of processing:
Existing state-of-the-art designs
Here are some existing designs that I find awe inspiring:
- The hackberry arms
- A biomimetic anthropomorphic hand developed by Zhe Xu and Emanuel Todorov from the University of Washington at Seattle
Creating the mechanical design
In order to create the mechanical design for the arm, I first 3D scanned the arm of Harutyun, a very helpful and kind young man, whom I'd like to thank deeply for his help and volunteering. I used the 3D scanner Artec EVA, which the Oqni organization kindly allowed me to use, and I'd like to thank them very much as well.
Here's how the 3D scan turned out:
From there, I processed the scan using the Artec Studio Professional software, and then exported it as an .stl mesh.
I then opened the .stl mesh inside Fusion 360, and got to work. I decided to keep the arm portion and the palm area, in order to create a composite, and 3D print the fingers. I then tried to convert the mesh to BREP, but the conversion was aborted since the mesh contained too many facets.
So then I tried to convert the mesh to a solid using FreeCAD. I opened the .stl file in FreeCAD, switched to
the Part Workbench, and selected Part → Create shape from mesh.


