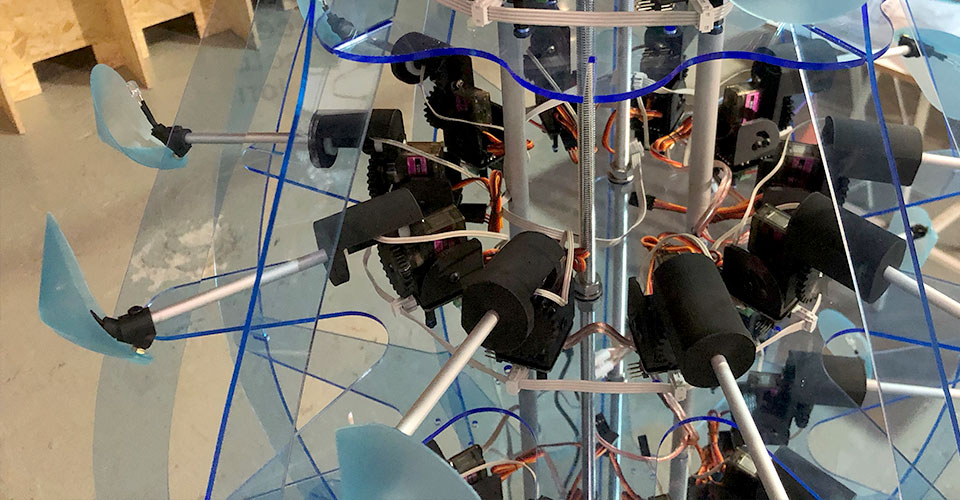
Final Project Development
FINAL PROJECT DEVELOPMENT
My final project will have a form still to be defined. Potentially a series of objects that will compound an interactive experience to showcase Molecular Biology topics to a general audience.
All work will be part of the outcomes for the ChromDesign Project and part of the research that I’m doing within my Ph.D in science communication.
The FabAcademy structure serves as a framework to develop research on conveying Molecular Biology topics using digital fabrication. My plan os to evaluate each tool & technology at every step and development of the project.
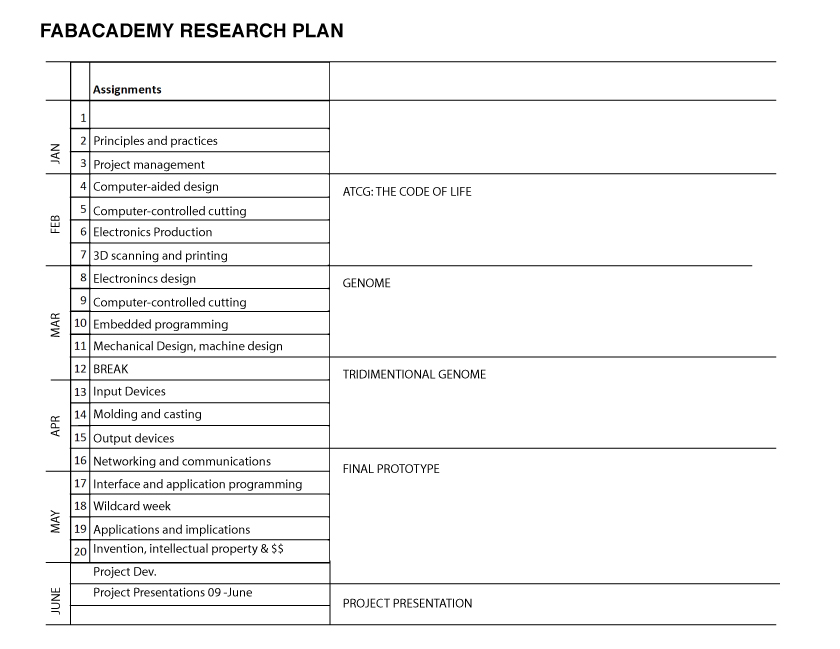
"Final Project Research Plan "
ATCG: THE CODE OF LIFE
As part of my FabAcademy Journey I wanted to explore the digital fabrication tool of the week to convey a biological concept. In this case I’m working with the most basic unit of the genetic code: the ATCG letters, the code of life.
1.CAD
My question for CAD was how could I use laser cutting to create parametric modules that would fit only on the possible letter combinations ( AT / CG)?
ATCG PARAMETRIC MODULAR STRUCTURE
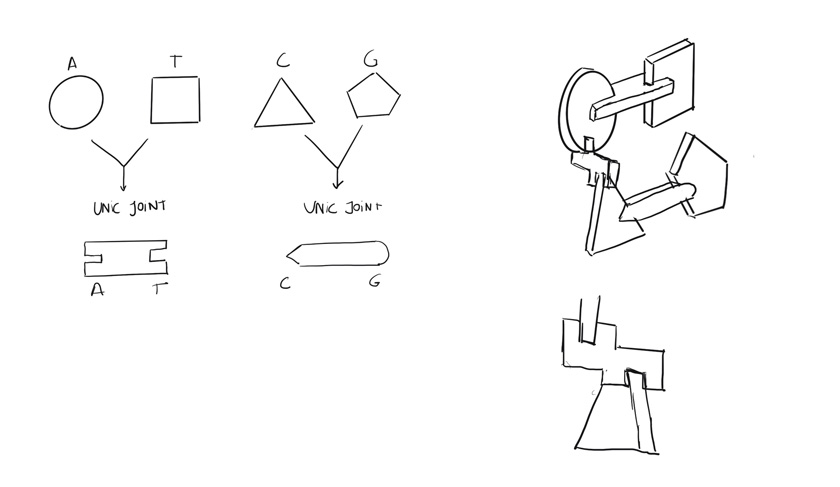
"How to create parametric modules from the "CODE OF LIFE" ATCG"
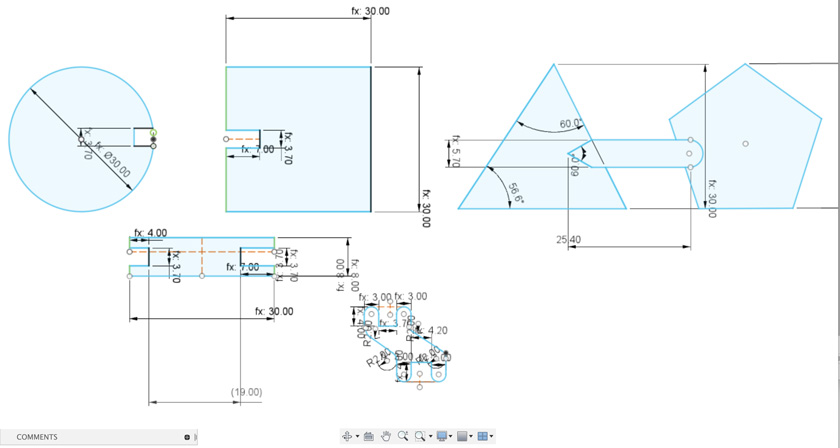
"Designing Parametric components for the DNA Kit."
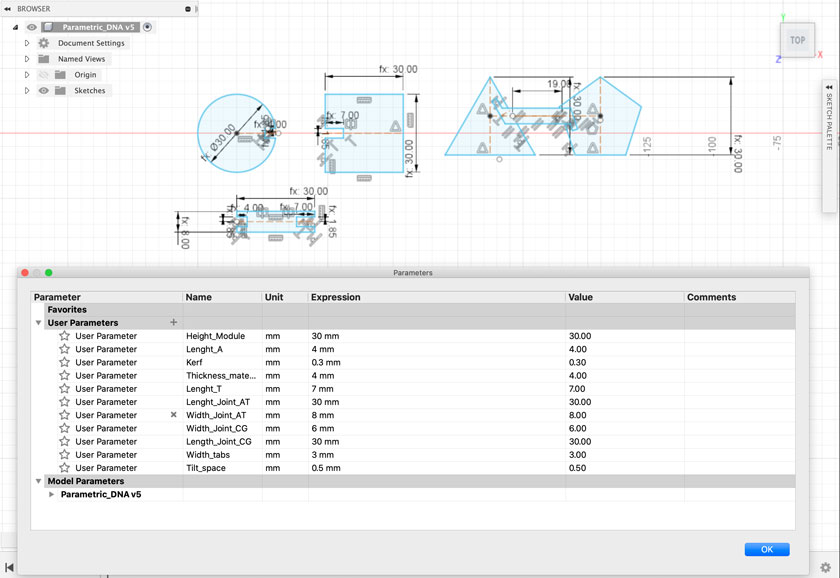
"Second iteration of the components for the DNA Kit."
Some of the problems detected on the first iteration of the pieces was a design problem. I fixed the connection between the CG module with a new unique way to connect the two base pairs.

"Fusion 360 sketcht. LEFT: old design. RIGHT: new design"
Even though there’s still a lot of work to do to have a 100% functional kit, I’ve achieved multiple goals
2.LASER CUT
Laser cutting is a great digital fabrication tool to bring to life the concept that I’ve developed. It’s quite straightforward and it allows fine tuning to get as close to what you had in mind. Therefore I decided to build the Code of Life construction kit.
My first attempt was using cardboard because I wanted a cheap and recyclable material to prototype. Cardboard is great, but not to work on such a small scale. The joints and the links broke almost immediately.
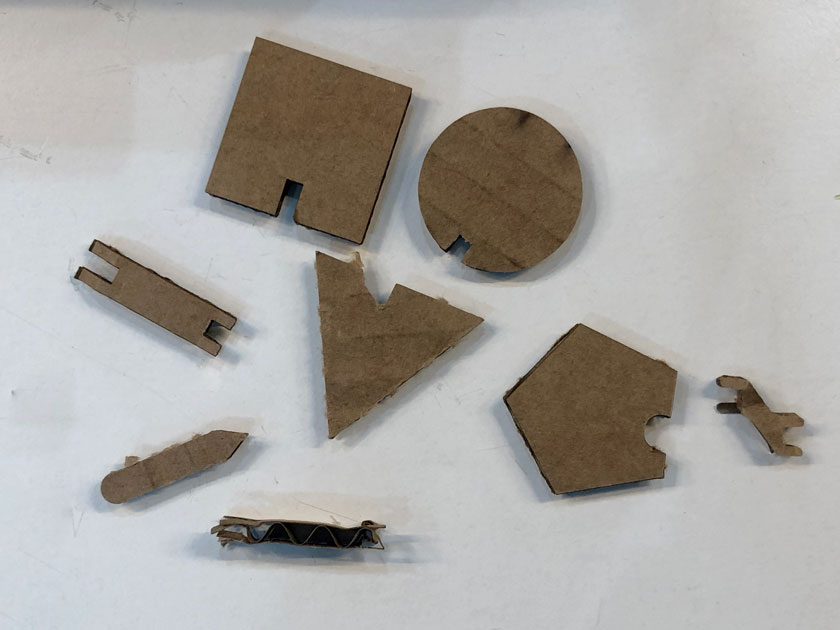
"Test Laser Cutting Carboard of the different Modules and connectors. A,T,C and G have different modules with different connectors. Some Pieces work better than others."
I worked with acrylic that offered my stronger joints and a very playful and colorful material to play with.
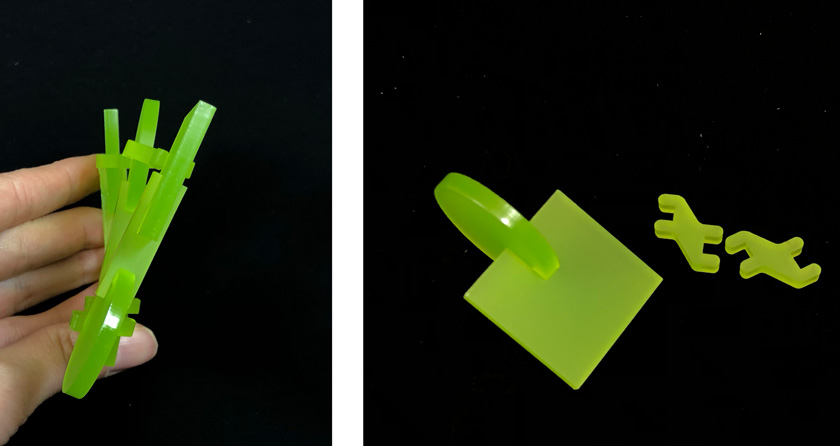
"Modular kit that includes unic pairs of pieces. In this case we can see A T stacking and creating the familiar spiral of the DNA"
"Left: Stacked modules from above where spiral movement can be seen , Right: Modules and connectors. "
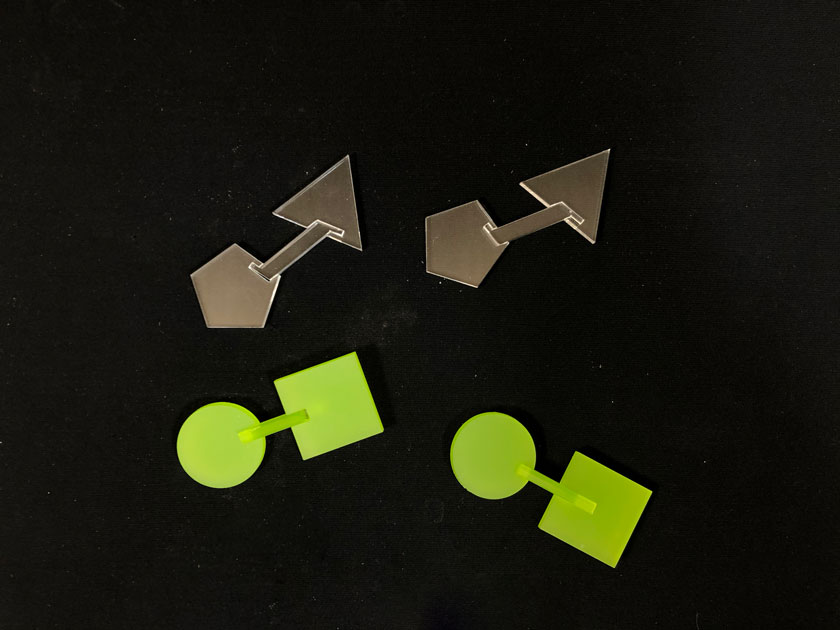
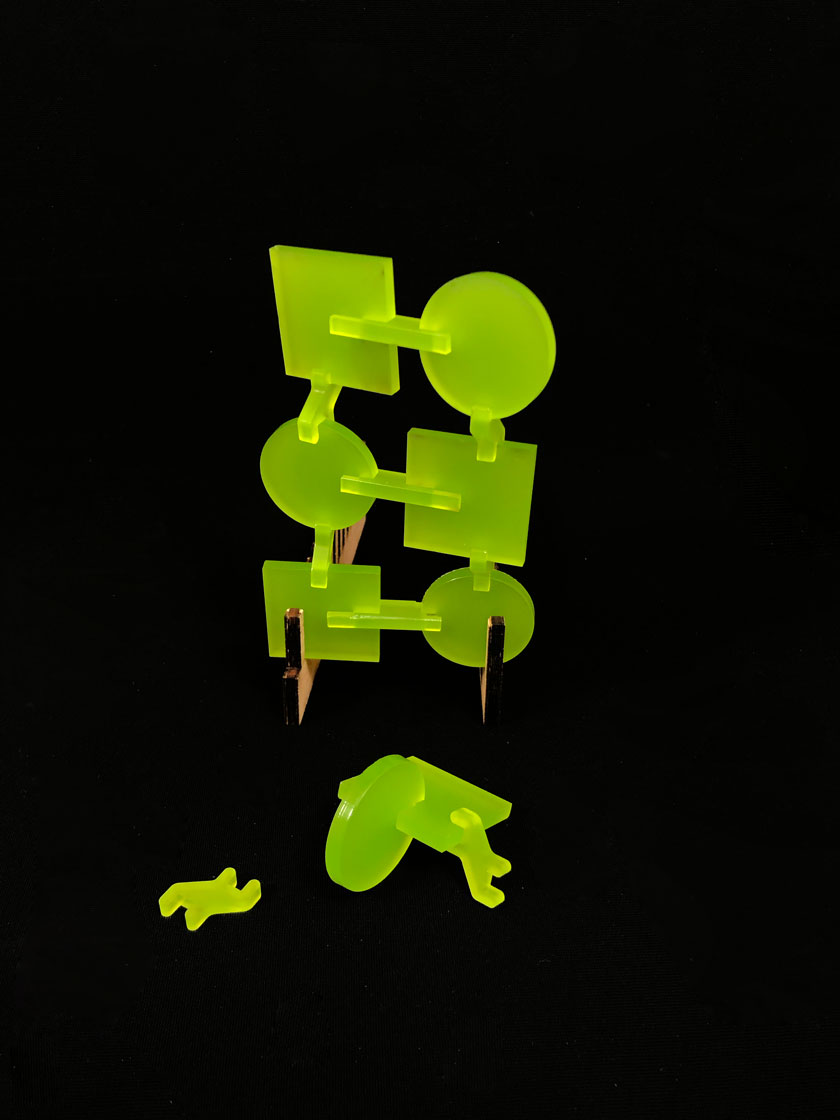
"Two pairs of AT modules & two pairs of CG modules. "
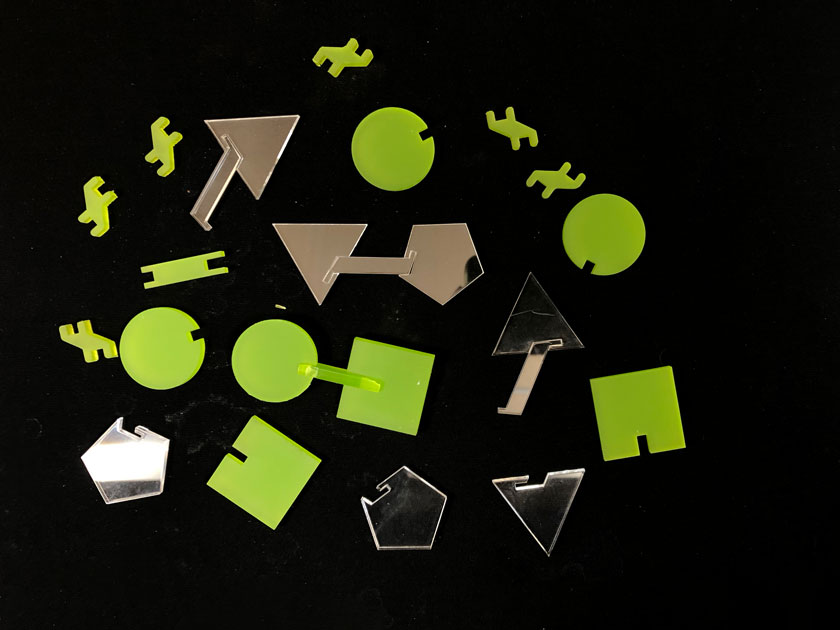
"Modular kit that includes all the elements to create the genetic code."
To provide both playfulness and meaning I’m considering designing some cards that will provide examples of real genetic code to follow and build a model.
3. 3D PRINT
As my final project takes shape, I’m continuing to improve the existing first prototype I designed. To do so, I revised some of the connectors that didn’t work well when laser cutting. Therefore, I’m using 3D printing now to achieve a twisted form that will connect the modules.
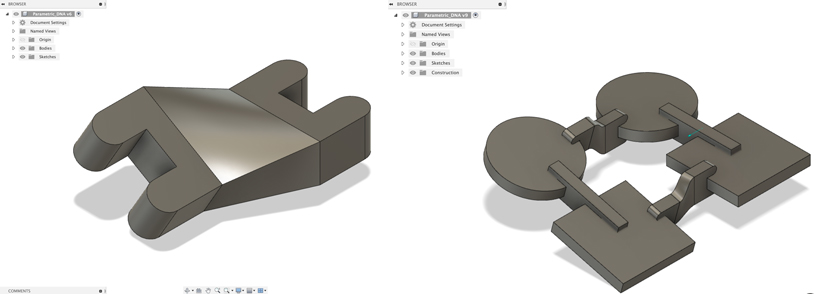
" LEFT: Redesigned connector version 1. RIGHT: Redesigned connector version 2 in place with the other modules."
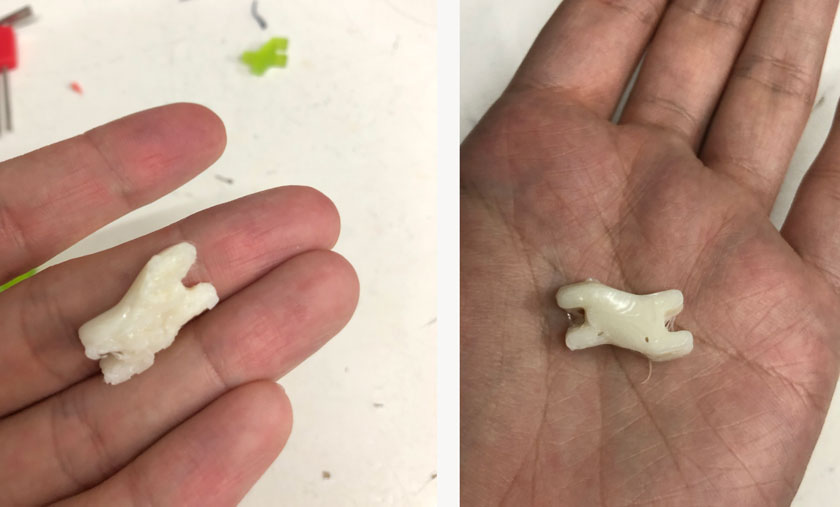
" LEFT: Failed FLEX filament connector. RIGHT: FLEX filament connector."
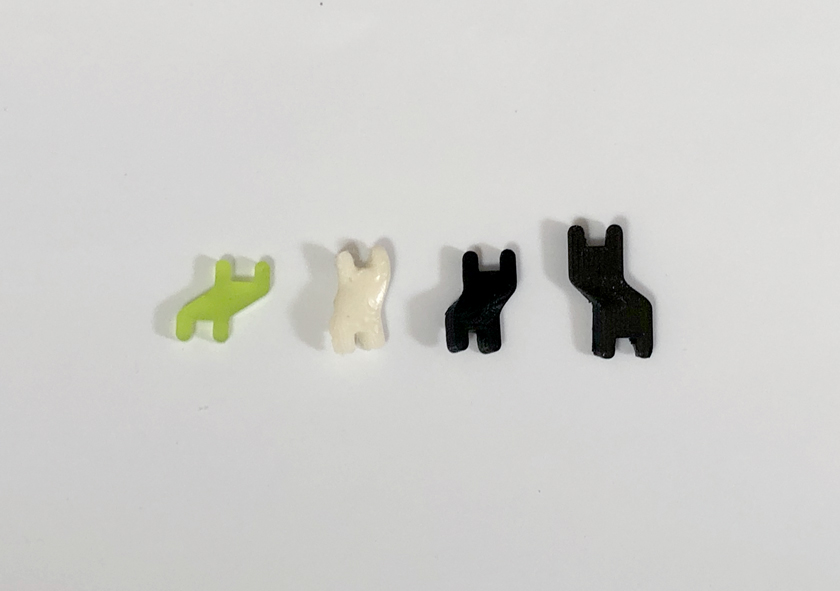
" Image showing the progress of the different connectors. From Left to Right: Acrylic, FLEX Filament, PLA version 1 (45 degrees twist), PLA version 2 ( 15 desgrees twist.) "
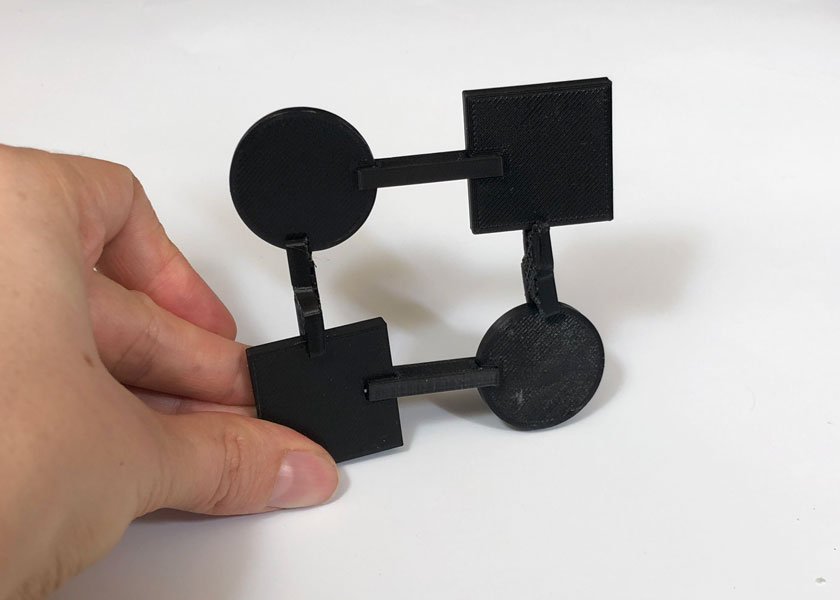
" Final shot of 3D printed modules and new connector all together."
" Fusion 360 model of the different modules including the new connector."
4. TIME TO RETHINK THE PROJECT
As we’re now halfway through the FabAcademy, I decided to collect all the processes I’ve been doing that helped me evolve my idea of ATCG: The Code of Life.
Even though this ideation process isn’t part of the Fabacademy, for me is part of my design process. It will surely inform some decisions about the form, aesthetics, and functioning of the final object.
BRAINSTORMING
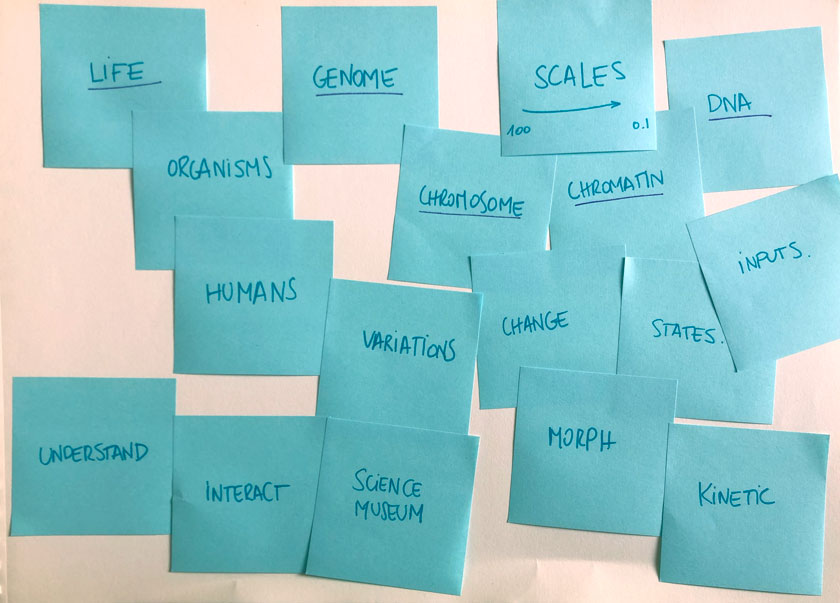
"Post-its showcasing key concepts that will define the Fabacademy Final Project."
Until this point I believe I had a narrow point of view on how to develop the complexity behind of ATCG, and I believe I was staying to close to the DNA spiral which was extremely limiting to convey more concepts.
TAKING INTO ACCOUNT THE AUDIENCE
The main idea is to build on knowledge from something that is familiar to something that might be unfamiliar.
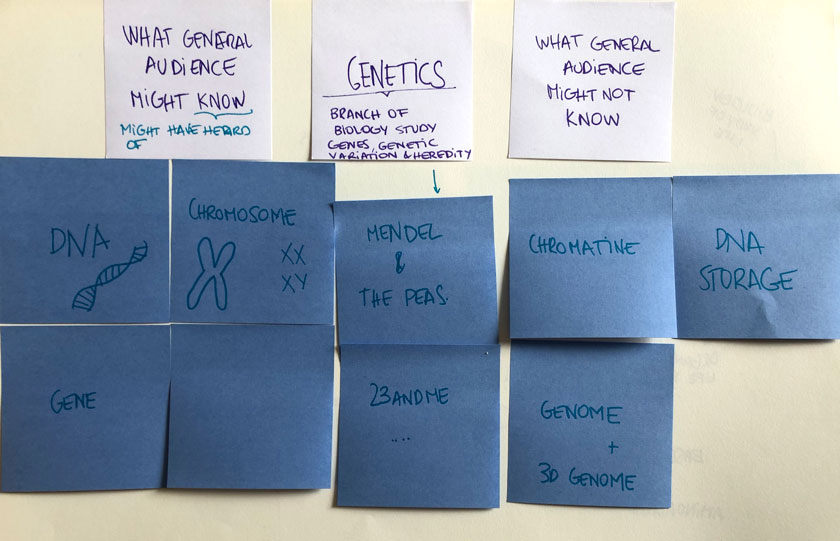
"Post-its showing concepts that are closer to a general audience and concepts that are further."
FIRST PROPOSAL
In here, there is a quick sketch of quite an overly ambitious plan for an interactive experience that will create a journey to explain, learn and offer play around genomics.
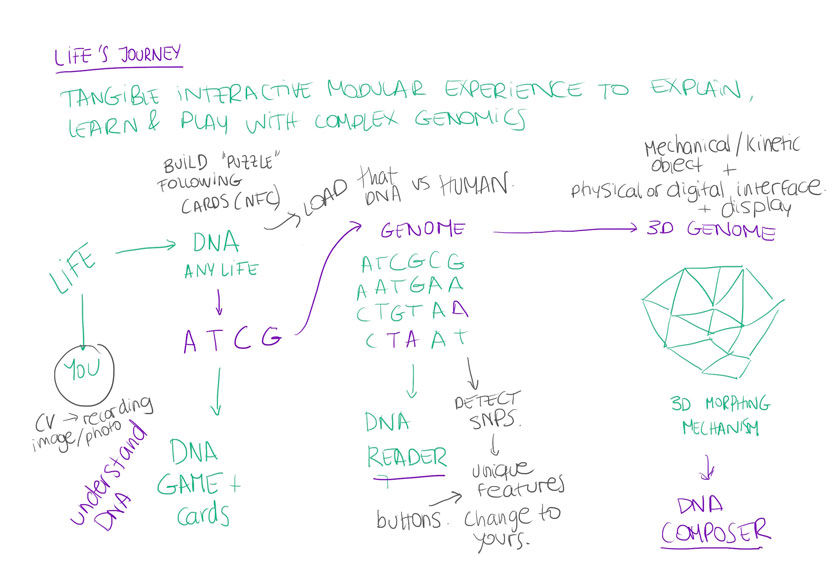
"Sketch showing the concepts behind the Life's Journey Project."
NARROWING THE PROJECT’S SCOPE
It took me a while to realize that the scope of this project will go beyond the Fabacademy as there’re many elements to take into account to be considered all in just one final project. That’s why I decided to dial back a bit and try to scratch a bit on some key concepts.
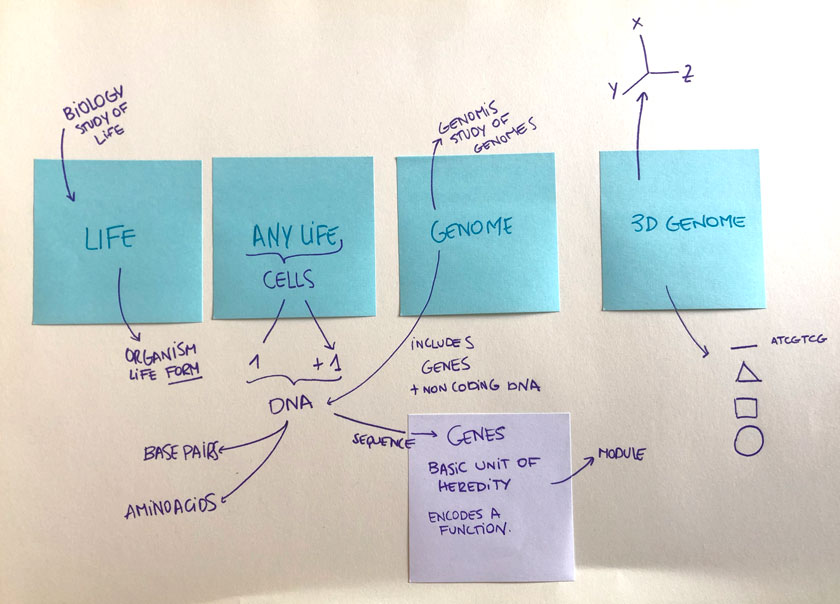
"Post-its showing key concepts for the final project and some relationships."
What am I going to focus on?:
- ATCG
- DNA
- Basic Unit
- Sequence
- Encoding
NEW PROPOSAL
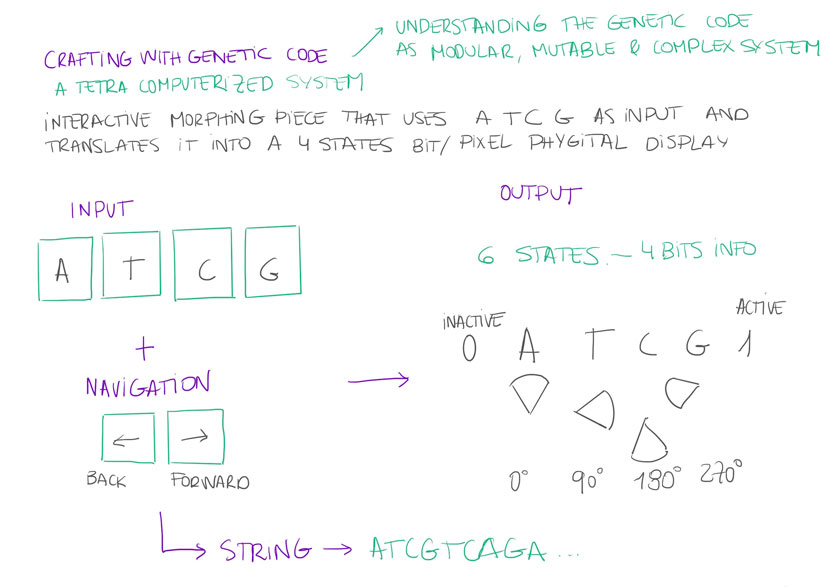
"Visual explanation of the rationale behind my final project."
The main idea is to take advantatge of some logics of Computation & Digital Fabrication in order to convey the different states that the genetic code can have and how those changes relate to the whole of such a large system.
REFERENCES
Before going to sketch the object that I’m going to build I went back to gather some important references:
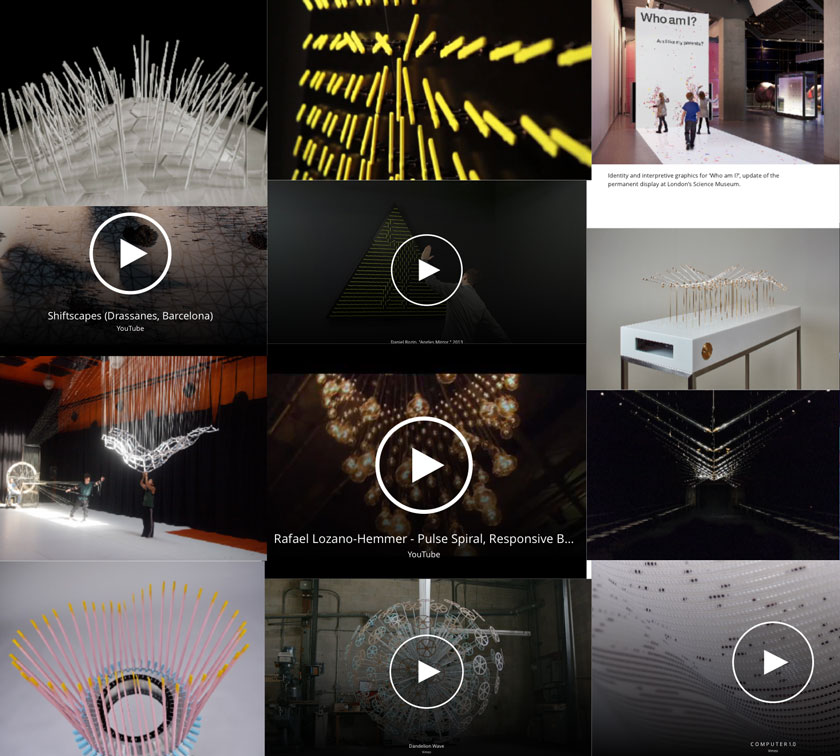
"References moodboard part 1."
Links to the references from Left to Right, Top to Bottom:
PROGRAM PROTOTYPING WORKSHOP WITH EDOUARD CABAY
Daniel Rozin, “Angles Mirror,” 2013
Exhibition Science Museum – Who am I? (2010) 2010
Mohor Bose, Shiftscapes, IAAC 2017-28
Daniel Rozin, “Angles Mirror,” 2013
Studio Drift, In 20 little steps
Reuben Margolin, Connected, 2011
Reuben Margolin, Dandelion Wave, 2016
Victoria Manganiello, Computer 1.0, 2018
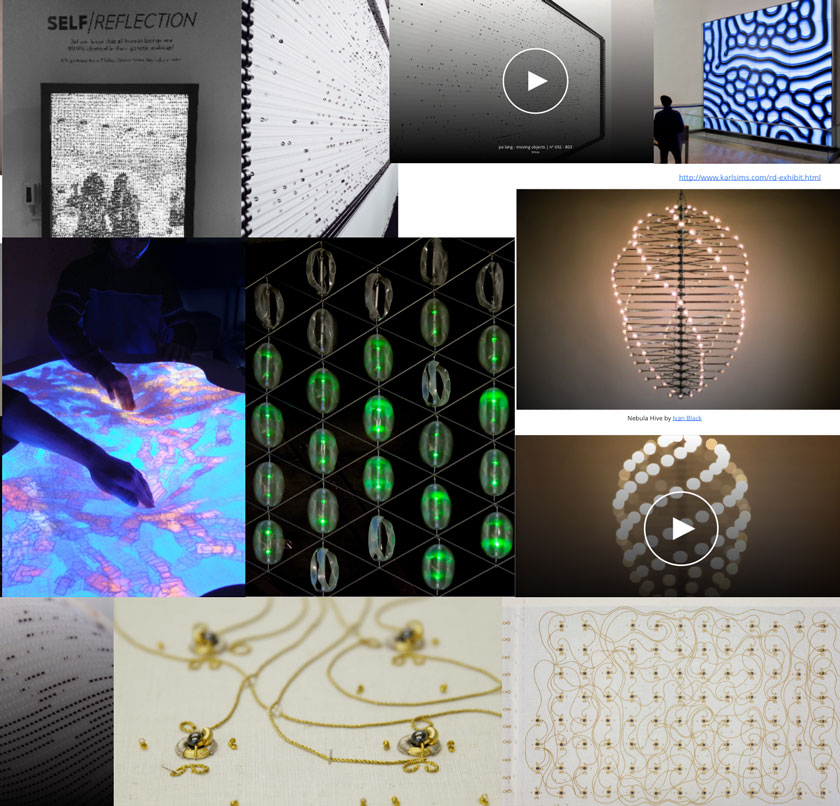
" References moodboard part.2"
Self Reflection interactive Installation
Pe Lang, moving objects nº 1415 - 1702, 2015
Karl Sims, Reaction-Diffusion Media Wall, 2016
Estudio Biopus, Sensible, 2007
Höweler+Yoon, Windscreen, 2011
Irene Posch, The Embroided Computer
SKETCH
This sketch is very rough, but it includes all the elements that define this object.
To sum up a bit, the object is meant to have a significant size and be positioned from the waist to eye-line height.
The kinetic piece will have 3 main components: The body, the interface and the display.
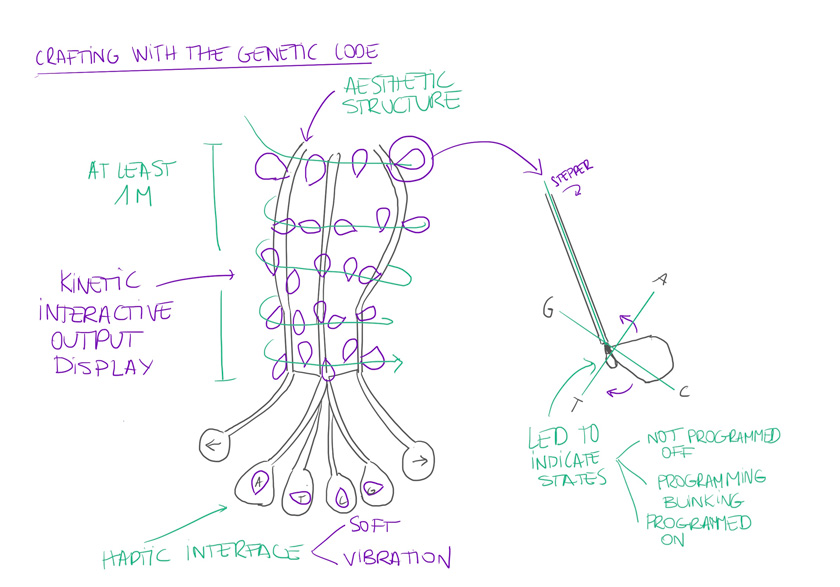
" First sketch of the Final Project Object."
As explained above, the input and interface will be the for letters of the genetic code A, T, C, G. The user will have the agency to “Type” the genetic code and to have a phygital display that will encode the genetic code in a pattern that it will be both intelligible but expressive and furthermore, alive. There’re additional controls to move along the letters and change the value as if you were on a text processor typing.
Each one of the elements of the display will have 4 positions according to each one of the 4 letters. The form and its functioning will be further developed in the next stage of the project.
VISUAL LANGUAGE REFERENCE & AESTHETICS
As I’m creating a visual language that encodes the genetic code, I’m also seeking inspiration for different languages and aesthetics to shape the final form of the phygital display.
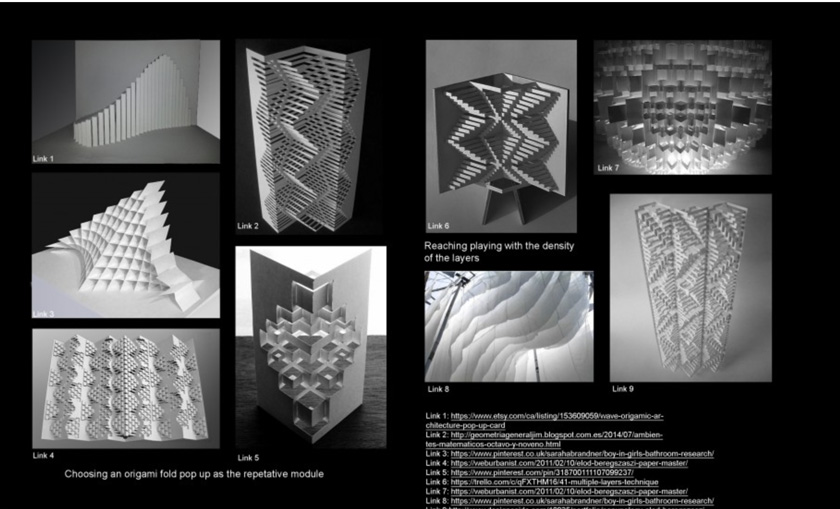
"Origami references for aesthetics purposes from the Visual filter project."
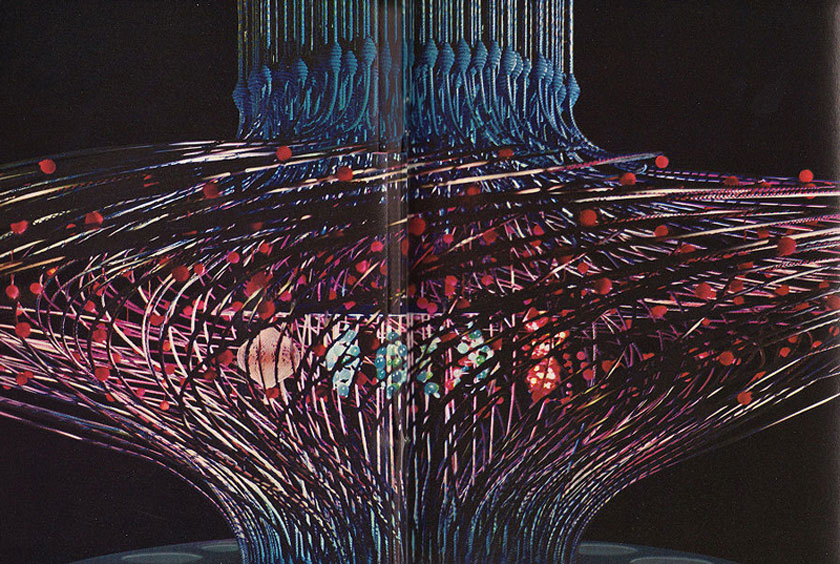
"Chromosome: Genes in Action exhibit, designed by Burtin, 1960. Photograph by Ezra Stoller © Esto. From the Lou Danziger Archives."
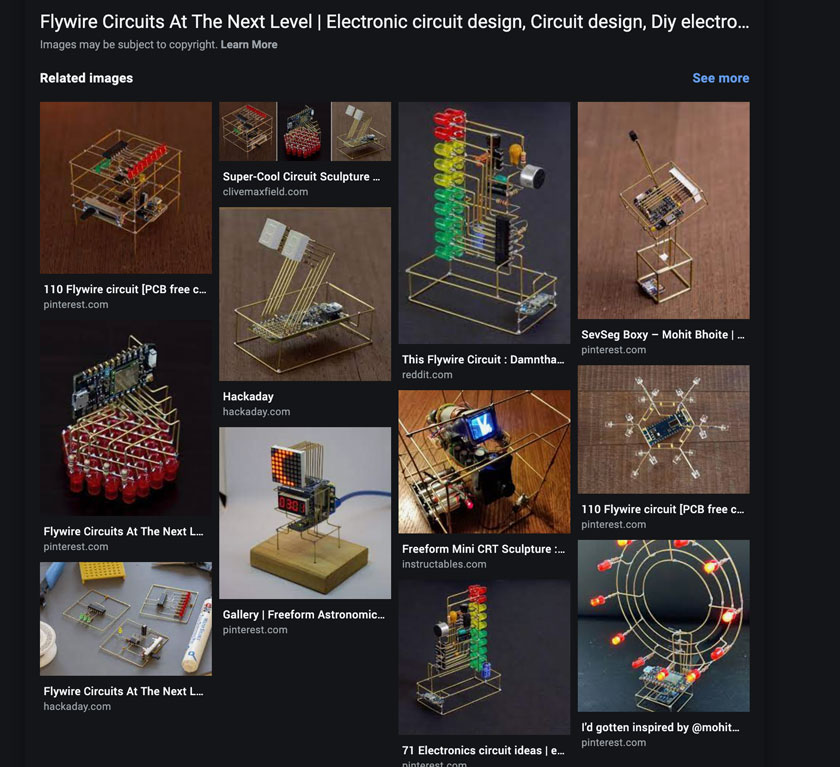
"Screenshot showing different flywire circuits."
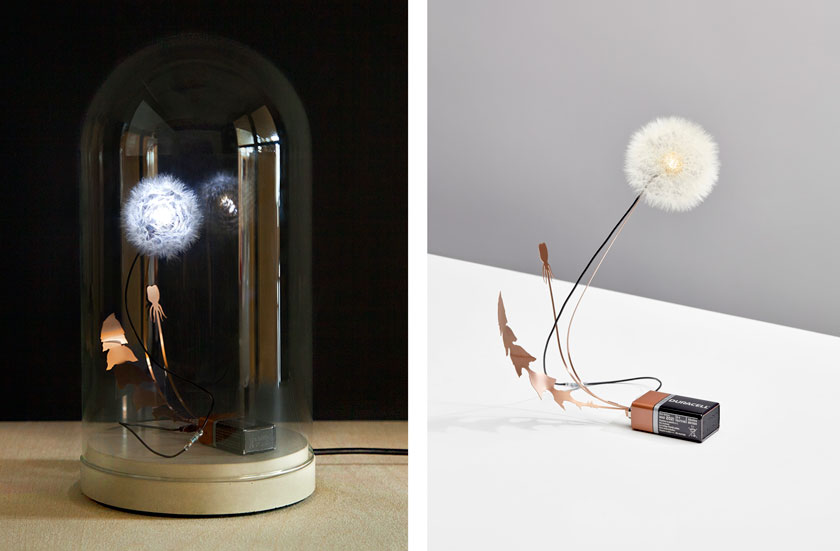
"Images of Studio Drifts DandleLight project."
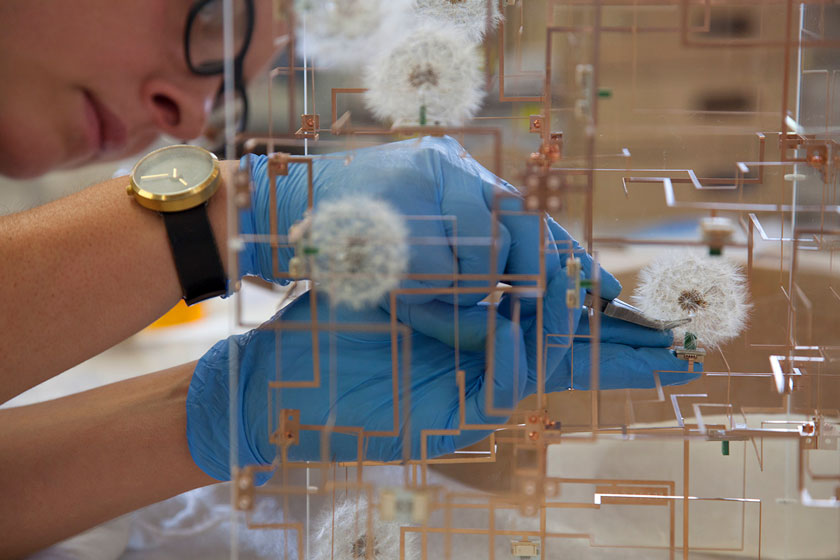
" Final shot of 3D printed modules and new connector all together."
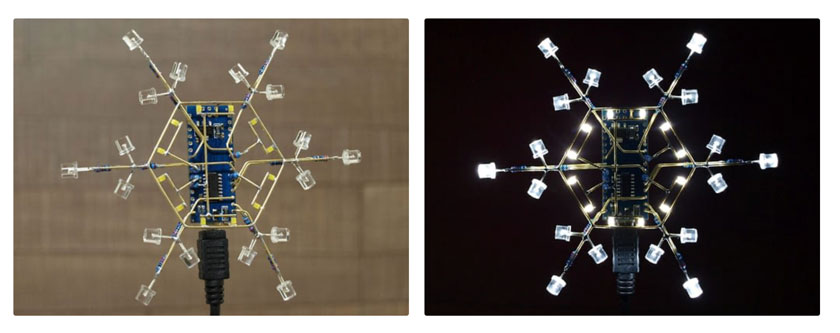
"Image showing a brass electronic board in the form of a snowflake."
SMOOTHING LEARNING CURVE FOR FINAL PROJECT
Even if the model for the project is not developed yet, I feel confident on the hardware, coding part of this proposal. The machine design group project gave me a lot of insights that will be very helpful to move this project forward.
"Motor calibration."
"Motor calibration."
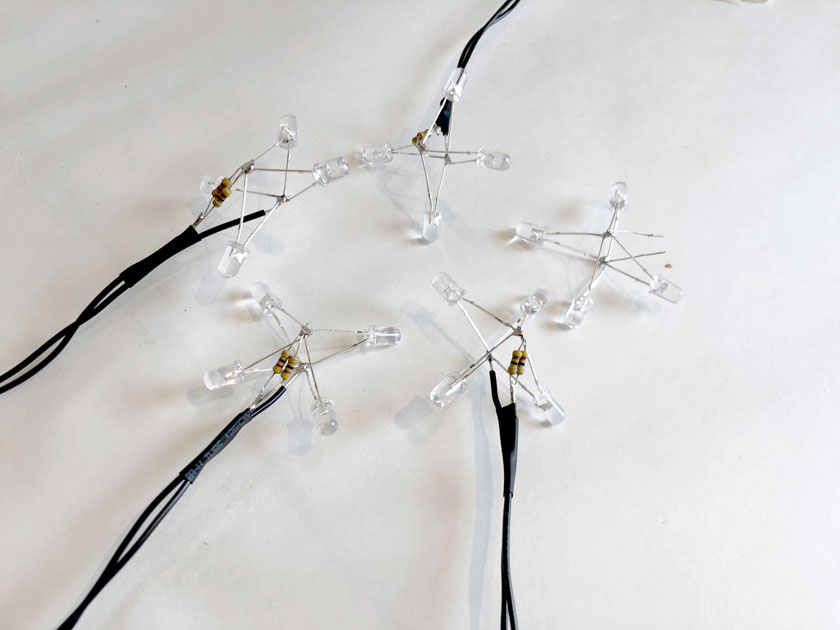
"FlyWire Led structure from an old project of mine."
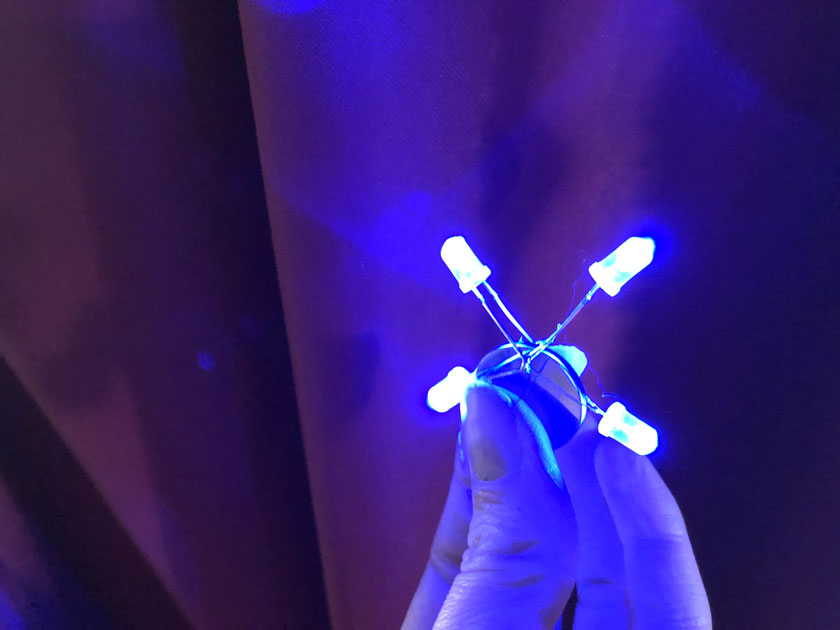
"FlyWire Led structure from an old project of mine."
MODELLING FINAL PROJECT USING FUSION 360
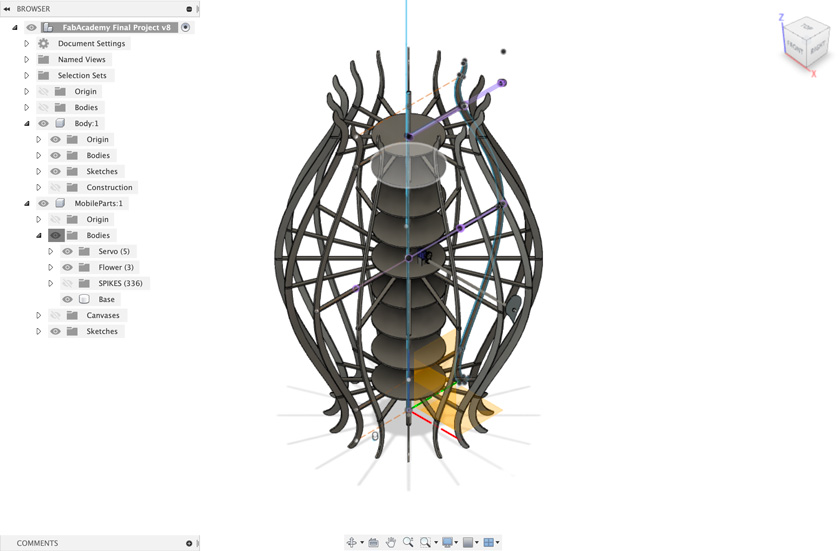
"Acrylic structure 3D model."
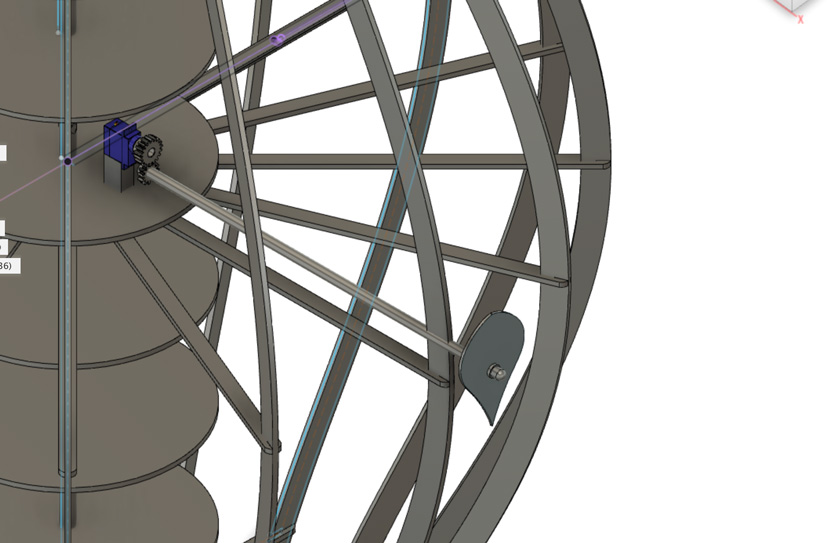
"Detail of mechanical component (WIP)."
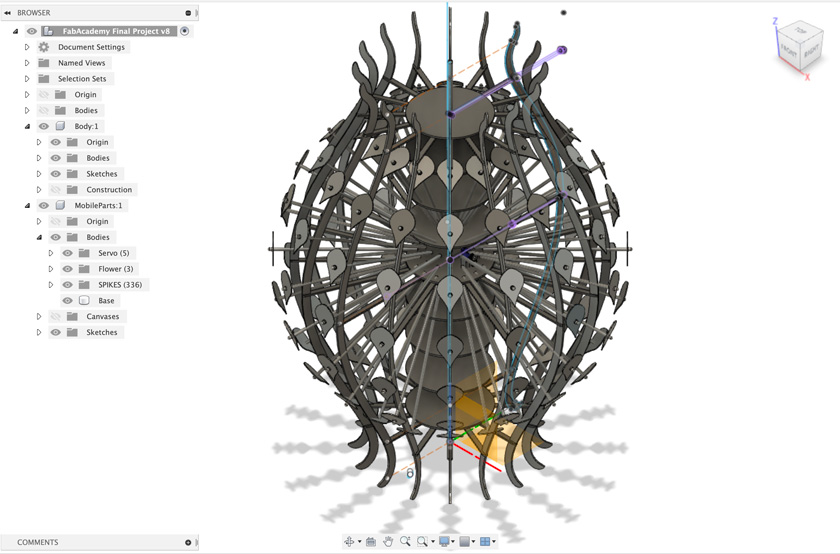
"FlyWire Led structure from an old project of mine."
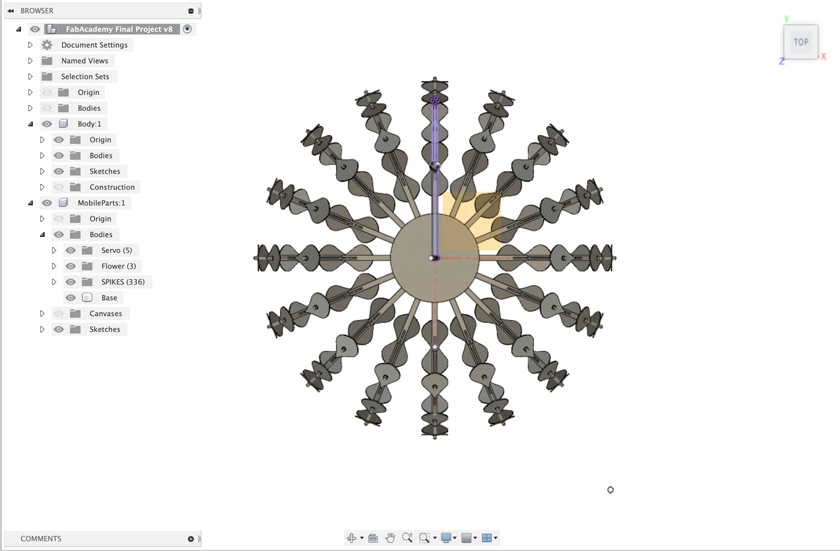
"Aproximation of number of elements of the phygital display.."

"Front and Top view of the structure + display elements WIP."
MODELING SPUR GEARS FOR MY MODULE (WIP)
I’m creating a set of spur gears with bearings for the mobile module of my final project.
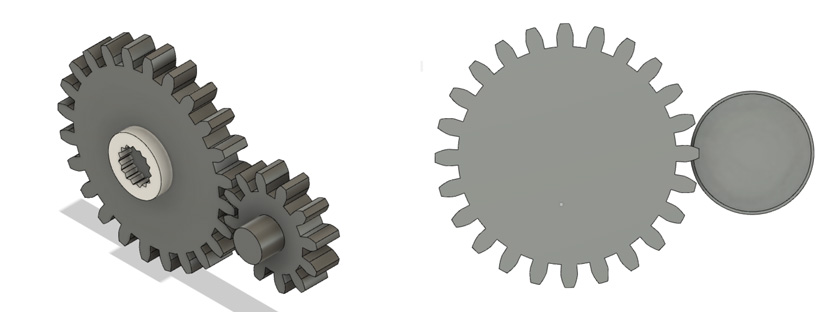
"WIP set of spur gears + bearings."
"Testing Gear Box modeled using Fusion 360."
The gear teeth seem to fit perfectly. I still have some tolerances with the socket where the bearing will be inserted on top of the servo, but for now this tests allows me to move forward!
Download .STL Files for Gear Box components
REFERENCES:
Making things that move reference; Mechanisms References; Mechanical Movements; Must Read to understand different types of gear; Spur Gear Calculator; McMaster Fusion Integration;
CREATING THE GENETIC CODE: START ENCODING GENETIC CODE
I tried to work on a small chunk of the system that my final project will have, that is the program that will encode the genetic code and transform it into the phygital display.
For this test I’m using the Serial to read Keyboard Input ( letters A,T,C,G) and transform it into a different color each letter.

"Screenshot showing the genetic code letters coming from the Keyboard as an input."
"Serial Sending Genetic code to one Neopixel"
For the second iteration I tried to do the same encoding but on a sequence of LEDs.
"Serial Sending Genetic code to multiple Neopixels"
Download ATTiny 3216 NeoPixel + Serial Monitor
Reference Keyboard Input to Arduino
HERO SHOT
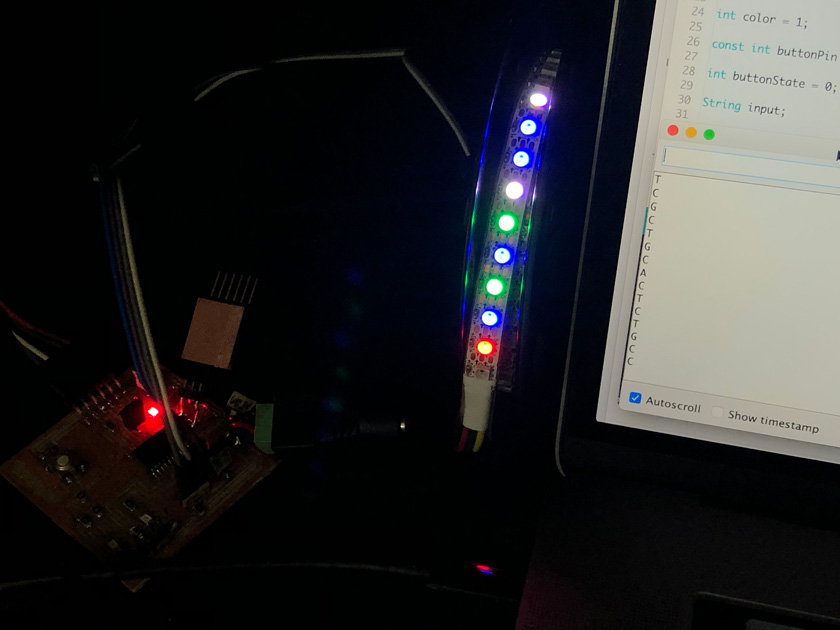
"Tiny Outputs Board connected through FTDI receiving Keyboard input thorugh Serial to change Neopixel colors."
Even though this is not the final form of the output, it will help me to display a vast amount of outputs before having all the servo outputs.
WORK ON SERVO MODULES COMMUNICATION ( NETWORK & COMM )
DESIGN NETWORK PHASE 1
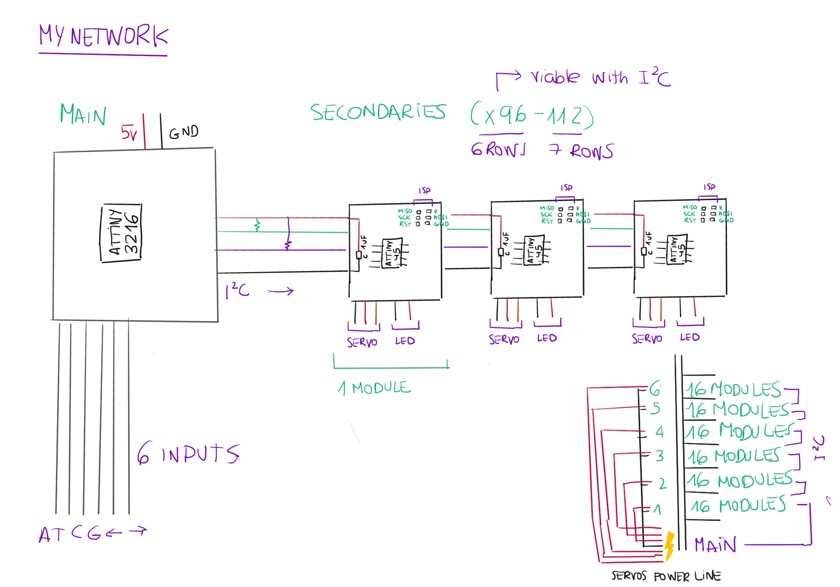
"Diagram showing my Networking proposal using I2C."
So this week, I decided to use as a main board the Tiny Outputs board I designed last week which already included wired SDA & SCL pins.
For the secondary board, the one that will control each individual servo I started from scratch trying to minimize all the elements I needed for both size and consumption.
"I2C Attiny 3216 Sender + Attiny45 board 2 receiver (10k Ohm resistor fix)"
DESIGN NETWORK PHASE 2
After lots of cold sweats I have an improved version for the I2C communication code.
"I2C Hero shot | Attiny3216 + 2x Attiny45"
I tried adding even one more node that I could fit on the bus board I created and it tells me I will be able to expand it.
" I2C Attiny3216 + 2x Attiny45 secondary nodes + 1X Arduino Pro mini"
NEW GEAR BOX
Edu suggested me to use SLA printing to create the gears for my project. With some help, let’s give it a try. To make sure the expansion of the printing wasn’t a problem, the print was done at 98%, 100% & 102% scales.
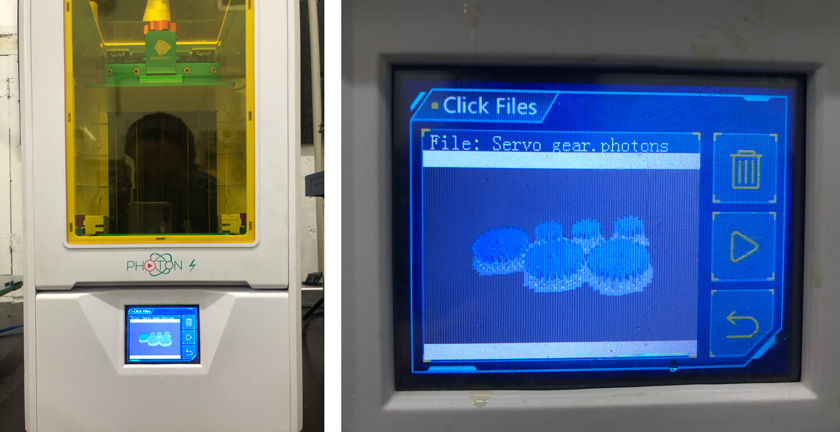
"Printing Gears with SLA."
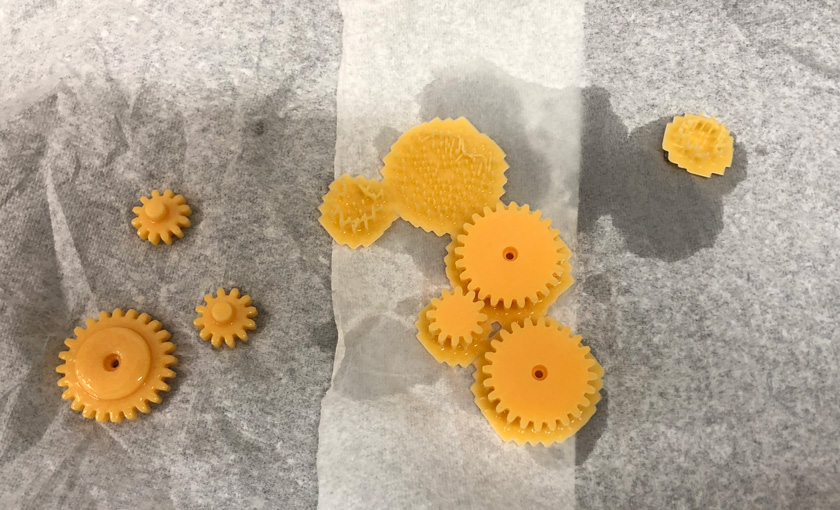
"SLA printed gears."
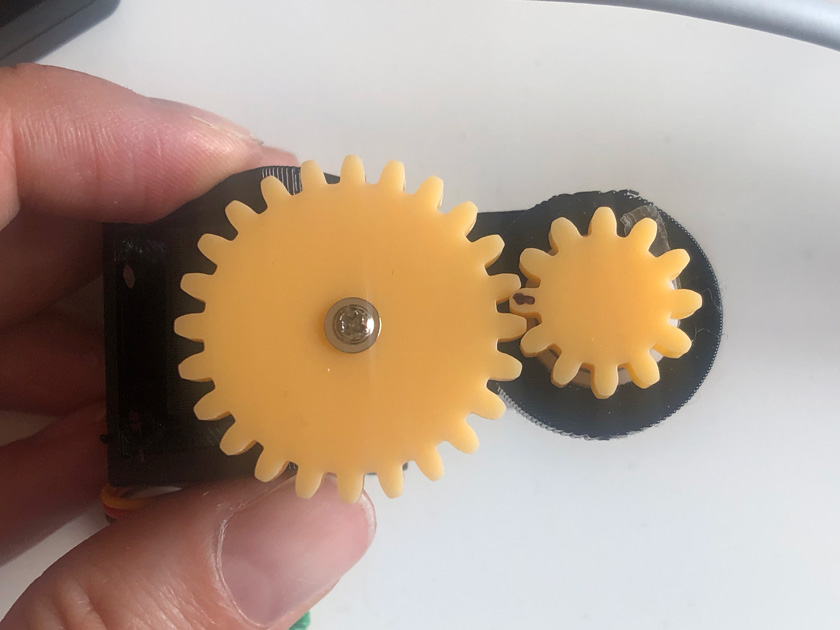
"SLA printed gears."
DEVELOP SERVO BASE MODULE
I’ve been working on a base that will allow me to position properly all the servos with its corresponding gear boxes.
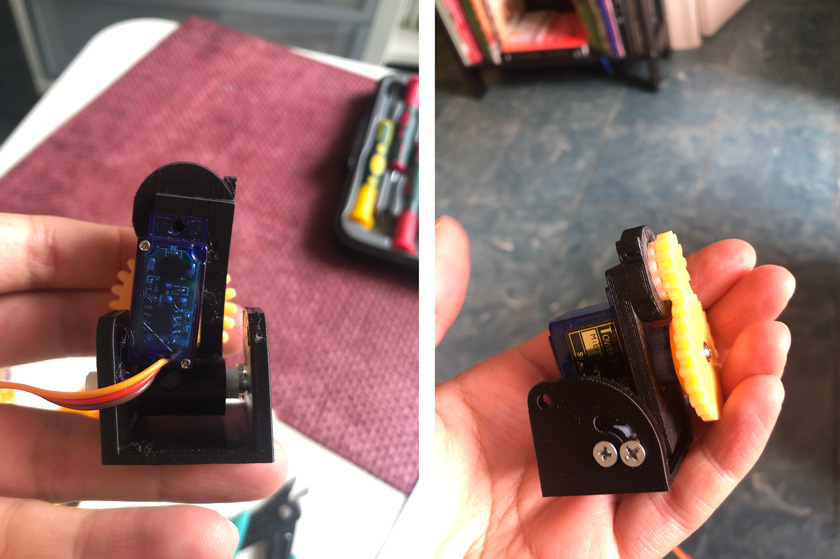
"Servo base module version 1. Some tolerances need fixing"
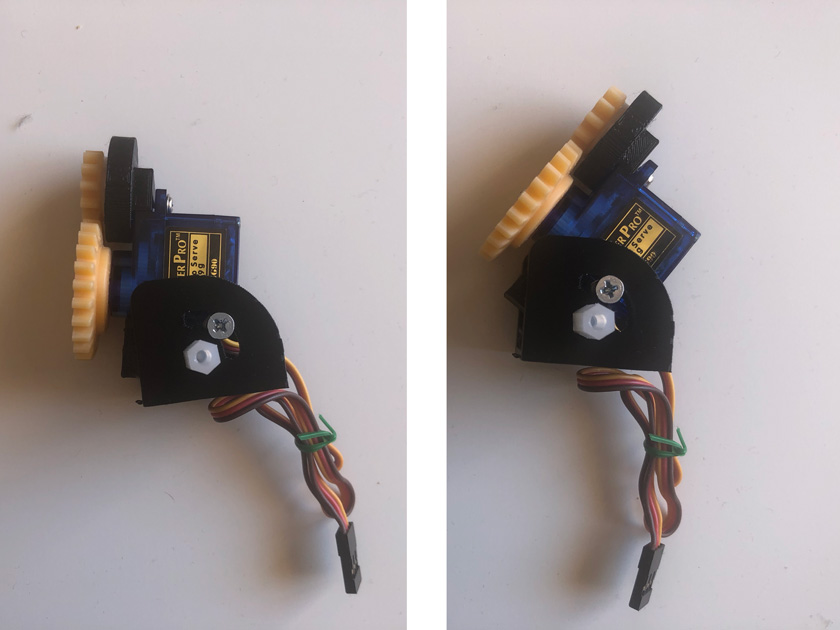
"Servo base module version 2."
DEVELOP INPUTS (INTERFACE)
RECEIVING MESSAGE IN ARDUINO AND MAPPING IT TO A SERVO
This is the closest step to my final project. I’ve been working in parallel to create this gear box that will map the 4 positions in 360º using a 180º servo and finally I can get some input and output very similar to the user experience I’d like to offer.
"Sending message from Processing and Receiving it in Arduino + Servo"
MATERIAL SELECTION
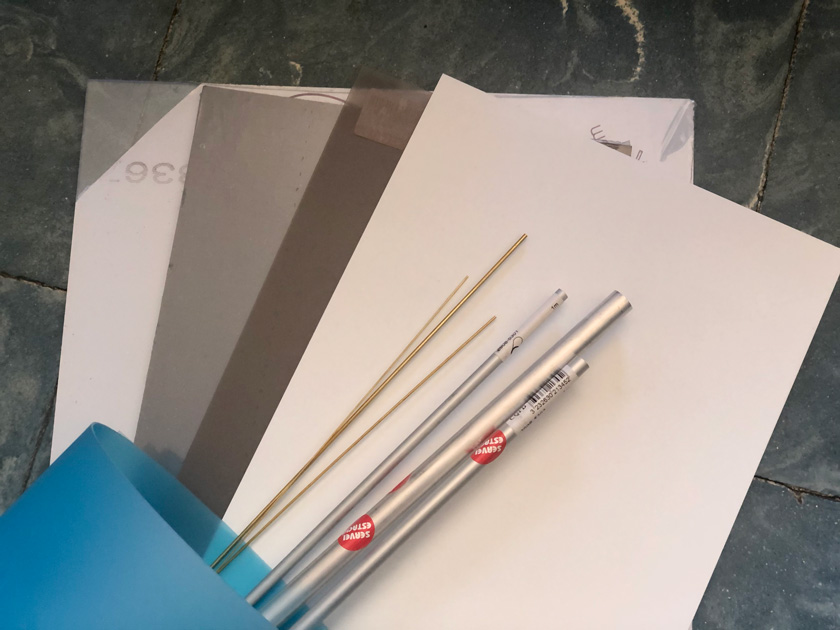
"Servo base module version 2."
DESIGN DISPLAY ELEMENTS | DEVELOPING PIXELS
Even though thermoforming didn’t work as I expected to create the final form for my petals; I decided to keep working on them to advance on this part of the spiral. So my plan is to solve 4 issues:
- Polypropylene pixel
- Pixel rod attachment
- Gear shaft
- Led wiring management
POLYPROPYLENE (PLAKENE) ROTATION PIXEL
CREATING FINAL PIXEL DESIGN
As the shaped I created for the Thermoforming design it was one I quite liked a lot, I decided to base the final one from one of the hand-made designs.
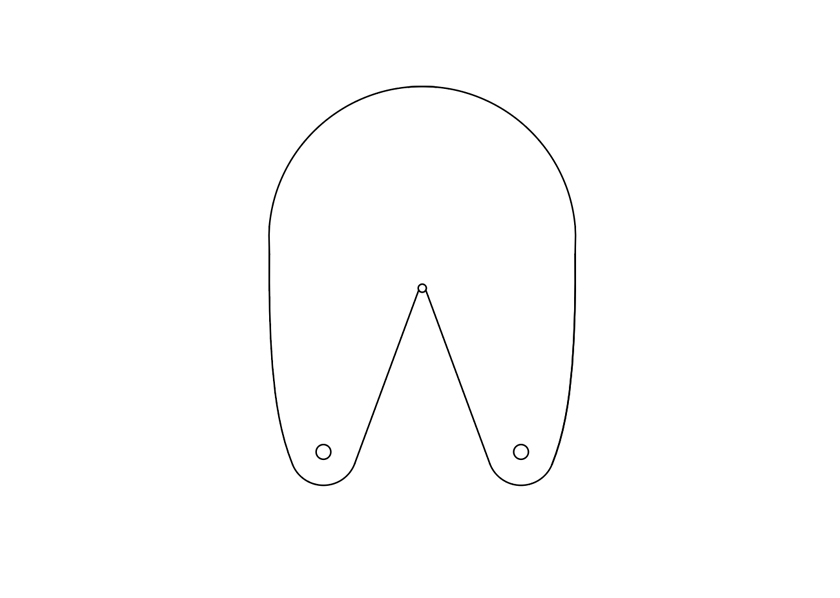
"2d design for the Plakene cut out. It includes a middle circle as a relief for the material's tension"
LASER CUT BLUE PLAKENE COVER
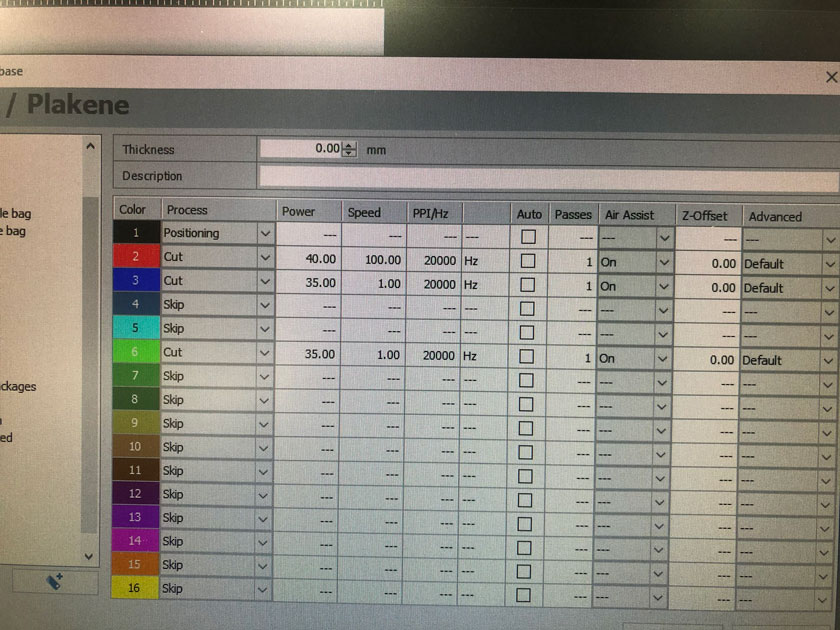
"Trotec Laser cutter settings for Plakene ."
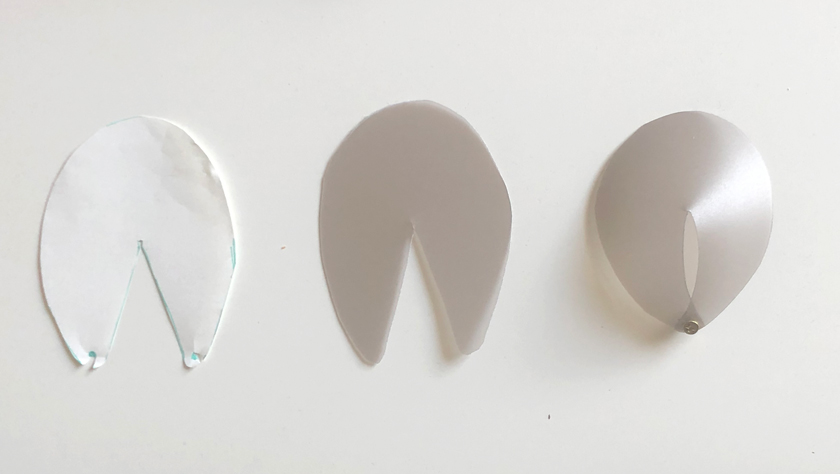
"From paper to laser cut pixel form."
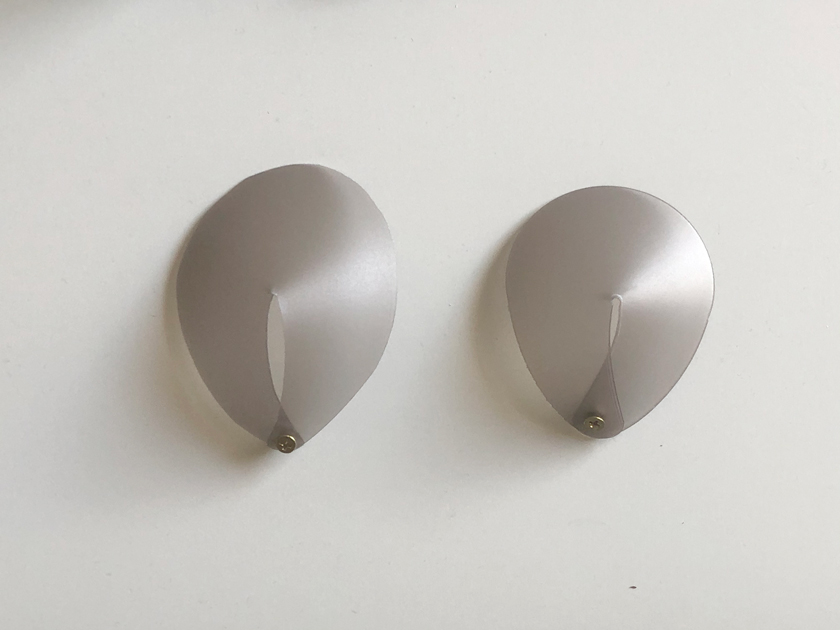
"Finding right diameter for the inner stress circle."
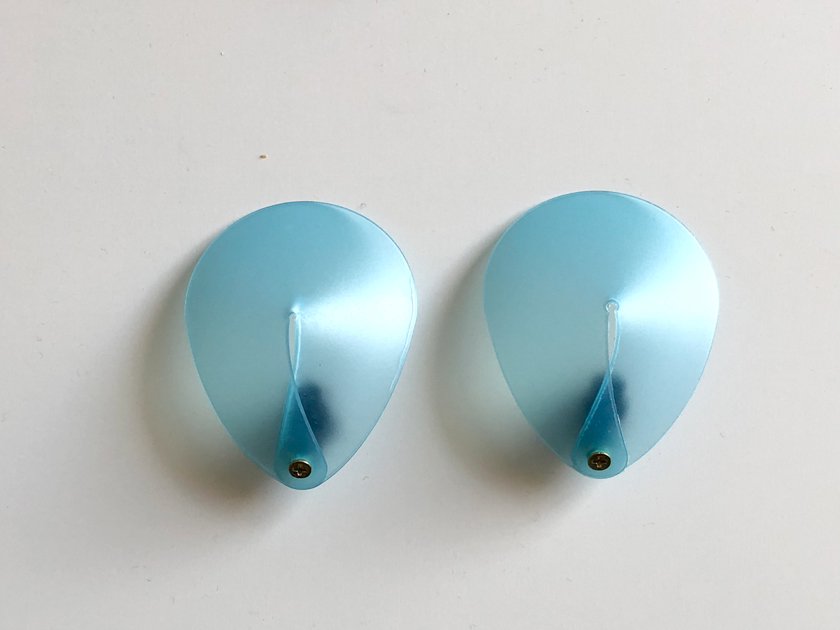
"Finding right diameter for the inner stress circle using final material (blue plakene)."
PREPPING ALUMINIUM RODS
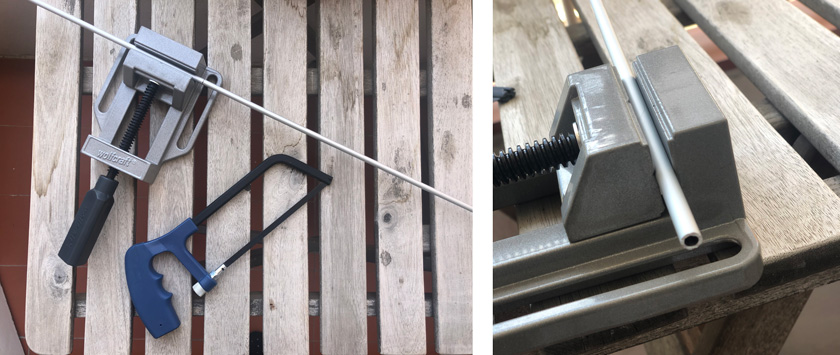
"LEFT: Aluminium rod ready to be cut. RIGHT: Rod after cutting."
DESIGNING A GEARED SHAFT FOR THE GEAR BOX
This part was crucial to find the best part possible to connect the gearbox to the pixel.
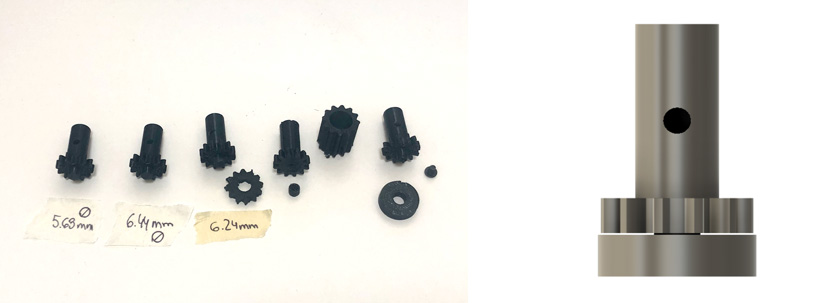
"LEFT: Design evolution for the geared shaft (3D printed). RIGHT: final 3D model for the geared shaft."
ROD TOPPER JOINT | PIXEL ROD ATTACHMENT
I had to design a piece to connect the rod to the blue pixel piece. I had two iterations until the final form, see process here.
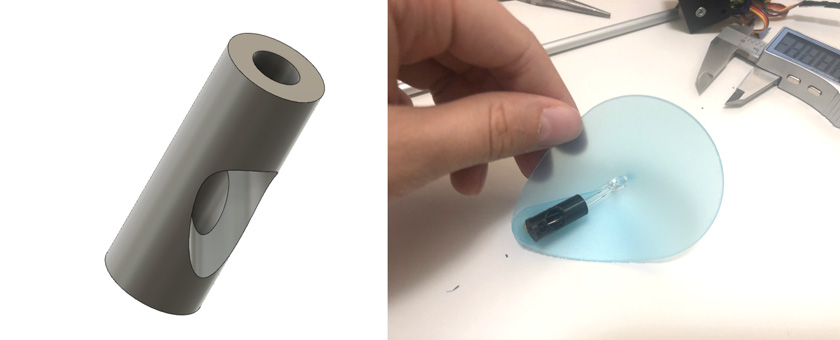
"LEFT: 3d model first design for the rod topper piece.RIGHT: Testing fit for the piece."
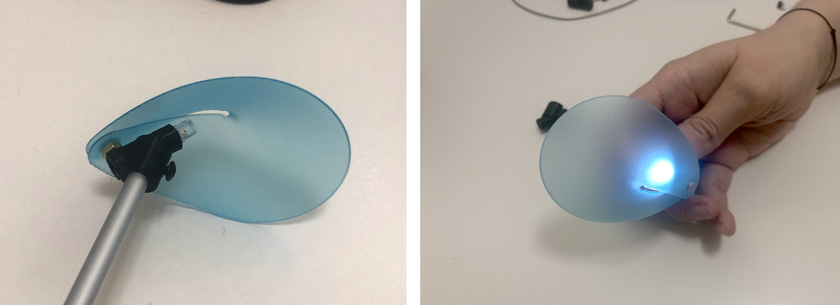
"LEFT: Second iteration of the rod topper (3d printed). RIGHT: Testing Led on the pixel."
PIXEL ASSEMBLY
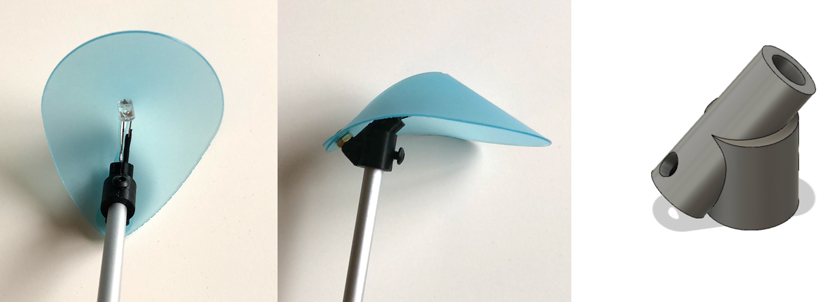
"LEFT: wired led inside the pixel. MIDDLE: side view of the attachment. RIGHT: 3D model of the final attachment."
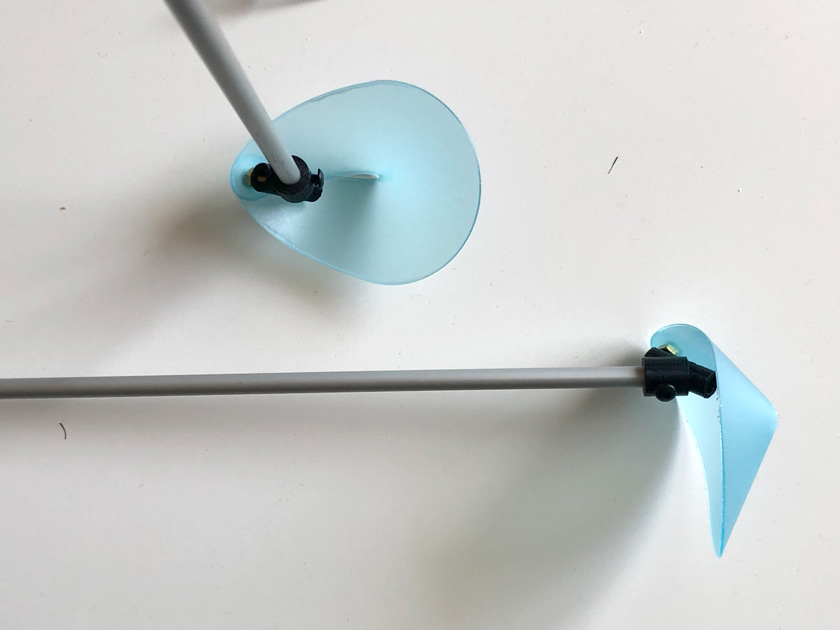
"Different views of the assembled pixel."
WIRING MANAGEMENT
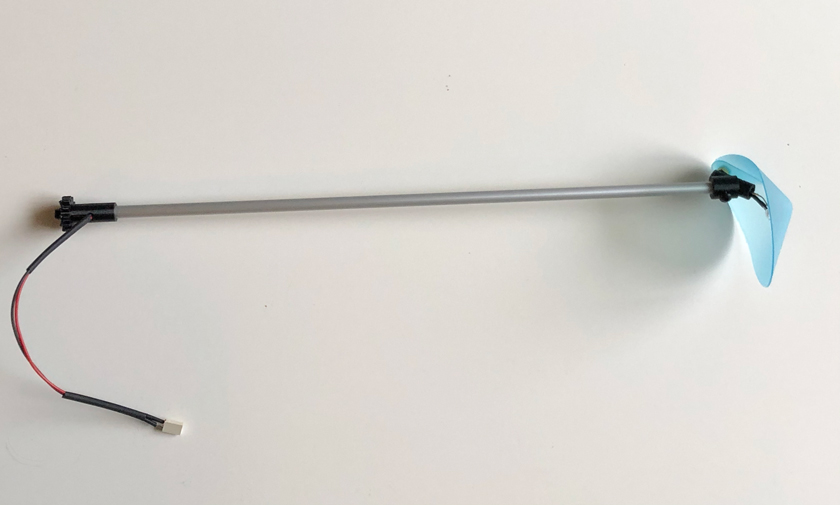
"Finished pixel ready to be attached to the gear box including wiring."
NEW MAIN BOARD! WELCOME
As my old main board was very flickery I redesigned to have one that is more compact.
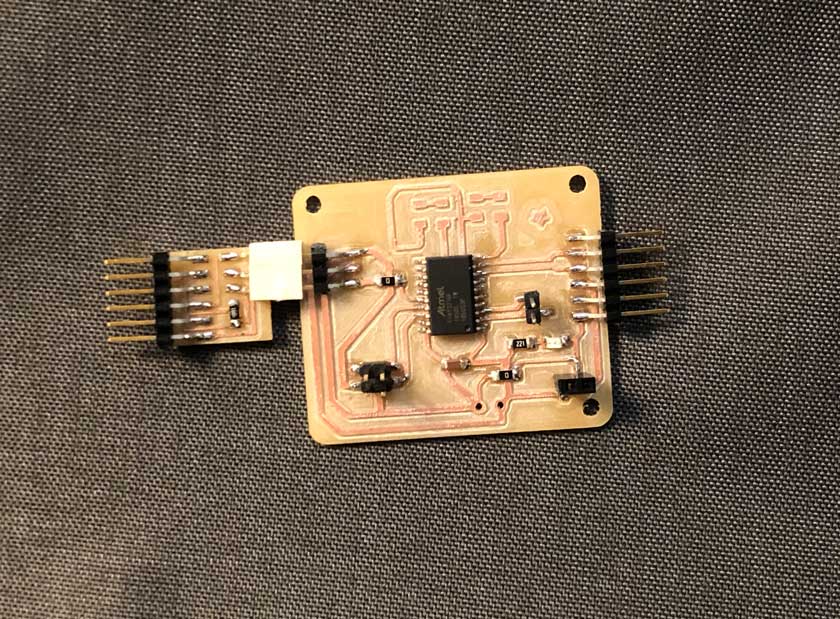
"Hero shot showing Attiny 3216 main board + two Attiny45 secondary nodes communicating through I2C."
"I2C Hero shot | Attiny3216 + 2x Attiny45 + 1x Pro mini"
I2C MODULES NEXT GEN
This is the upgraded version of the I2C modules including better connections for the power supply, connectors & headers to fit an I2C bus.
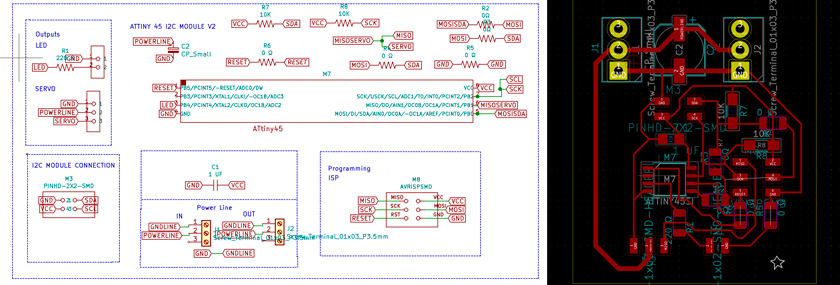
"Upgraded version of the I2C modules including better connections for the power supply, connectors & headers to fit an I2C bus."
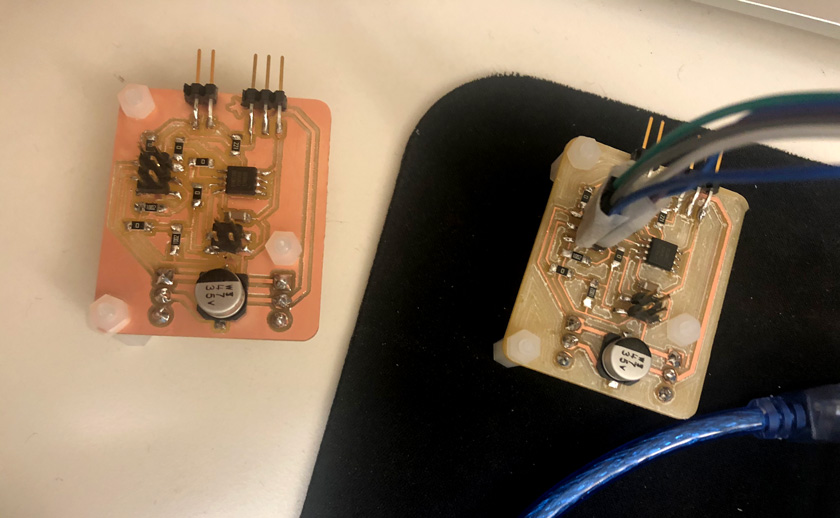
"New boards milled with the G-code Cnc machine."
CODIND MAIN SYSTEM
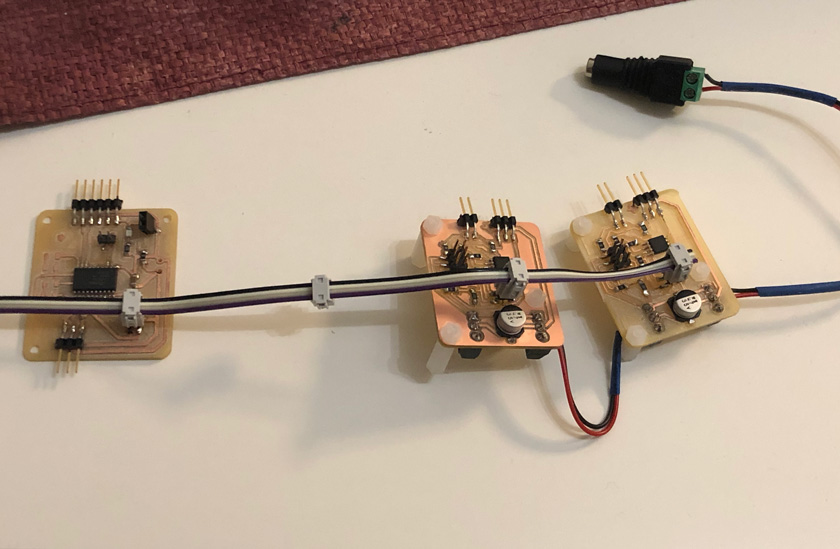
"Main Board Attiny3612 + 2 Nodes Attiny45 connected by the I2C bus.."
When redesigning the board I didn’t realize I was going to use so many inputs. Therefore, I’ll need a 3rd generation.
I’m currently working on integrating all the different working parts of code that I’ve already.
- Send I2C from main to secondaries (done)
- Input letters from interface (done)
- Input Navigation nodes (done)
- Moving servo 4 positions (done)
- Animating visual feedback led (WIP)
- Randomizer (TBD)
TESTING INPUTS | PROTOTYPE
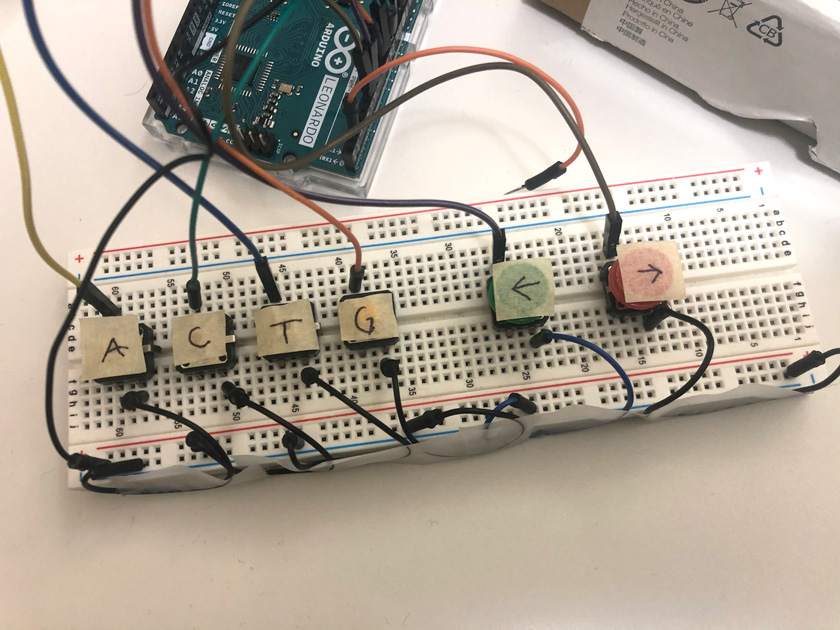
"Prototype for the inputs keyboard using a breadboard and some switches."
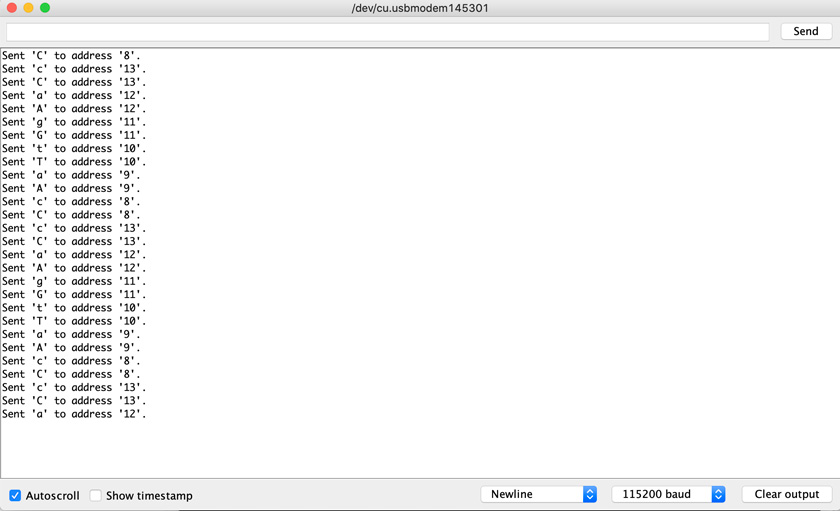
"Screenshot of serial showing the inputs in use."
"Testing Input - Output."
"Testing Input - Output x2"
SERIAL FABRICATION
Planning serial fabrication is a key step in such an ambitious project to move forward as the project scalates I’ll need many elements. These are the elements that I’ve identified that will need serial fabrication.
- Gear Servo x 50
- Gear shaft –> PLA 3D printing
- Servo support –> PLA 3D printing
- Gear box –> PLA 3D printing* Rod topper ( Pixel support) –> PLA 3D printing
- Pixel plakene pieces –> Laser cutter* Main board pcbs x 5 –> Jlbc
- Pixel controller module x 50 –> Jlcpcb
This is my plan to try to make it the deadline. Lots of work!

"Gantt chart showing all the taks I need to do separate in different categories according to the project's main parts."
WIP poster
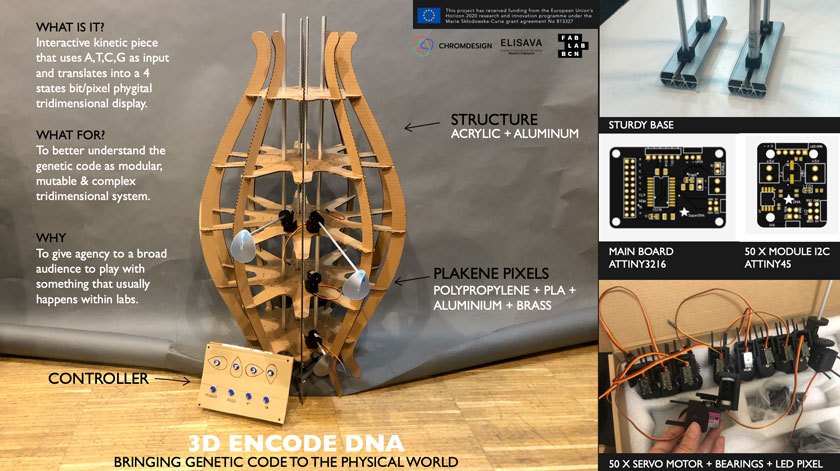
"First draft for Fabacademy's final project slide"
BUILDING AS MUCH AS I CAN IN LOW FIDELITY TO ITERATE ON THE FINAL FORM & MATERIALS
Acrylic structure WIP. STATUS: Cardboard prototype.
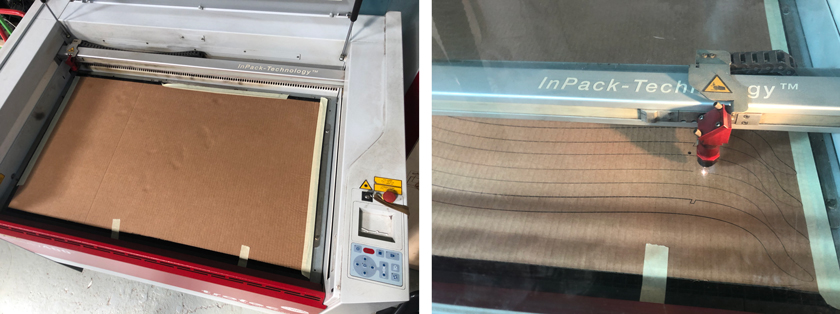
"LEFT: Trotec 400 ready for cutting. RIGHT: Laser cutting structure framing."
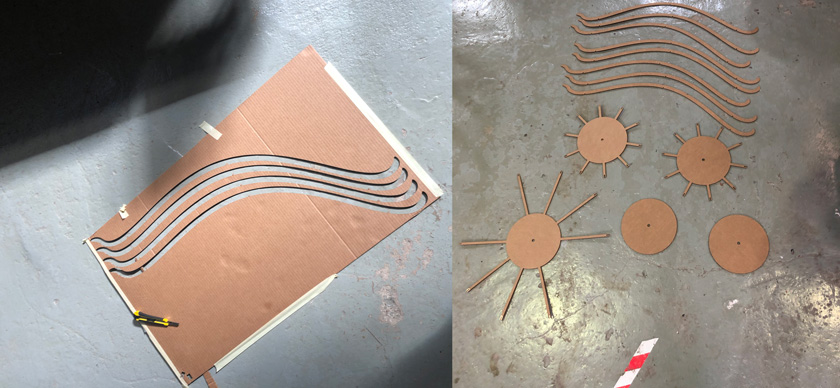
"LEFT: Cardboard cutout. RIGHT: All structure pieces ready to assemble."
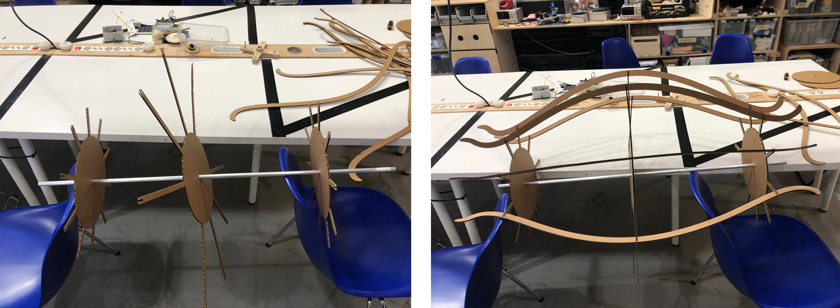
"LEFT: "Fancy" Setup to put together the structure. RIGHT: Adding pieces one by one while realising some design flaws. "
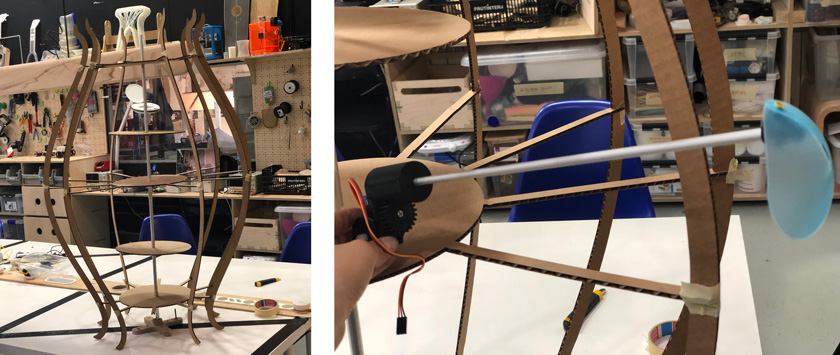
"LEFT: Tadaaaah, structure v1. RIGHT: Pixel in place. "
After assembling it, it felt like I needed a proper support for the base.
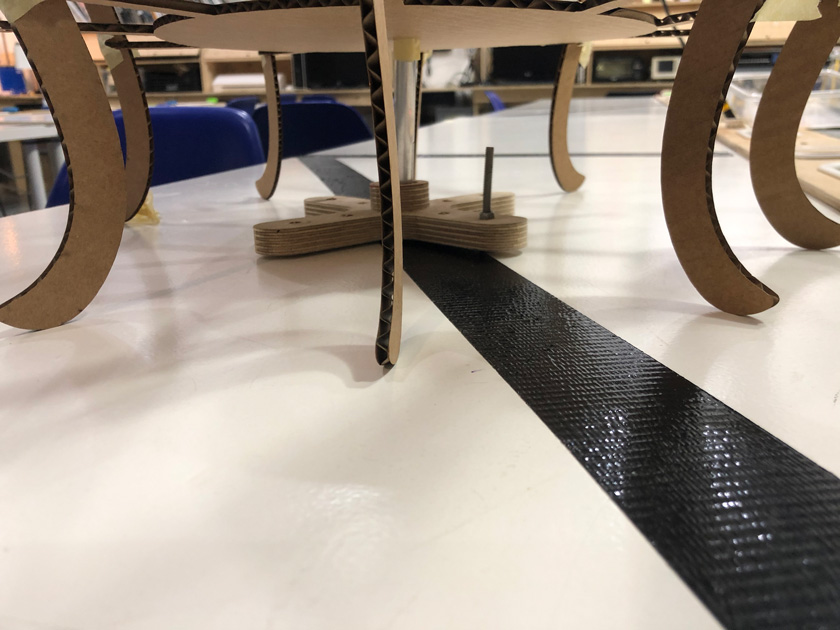
"To hold the structure in place I added a wooden piece I found around the lab. I'm considering adding it to the design."
This is the new base:
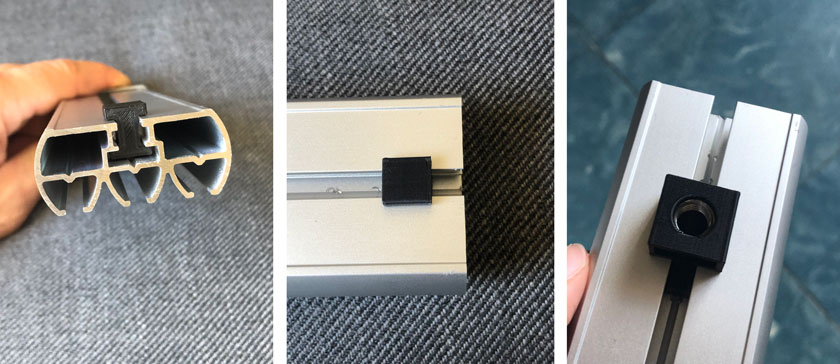
"LEFT: 3d printed T shaped form to fit the frame. MIDDLE: Top view T shaped piece. RIGHT: T-shaped piece including hole for metal rod."
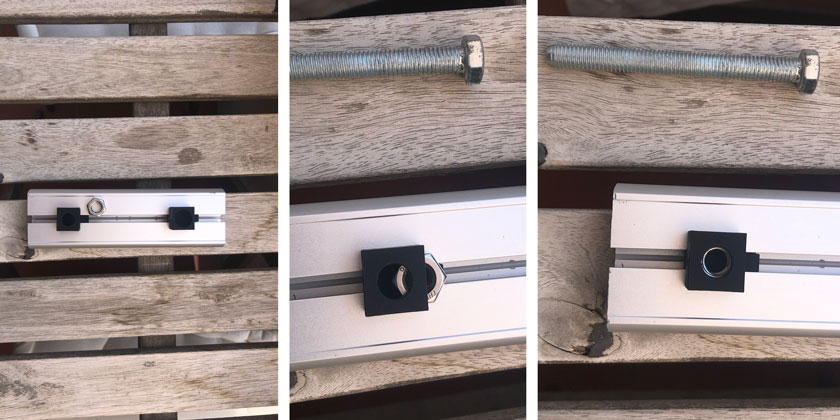
"From LEFT to RIGHT adding a nut inside the 3D printed piece to fit a threaded rod."
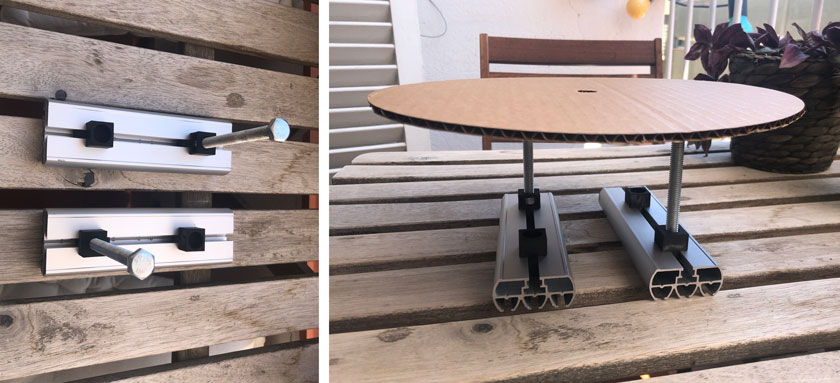
"LEFT: Fitting 8mm screws. RIGHT: Trying to put a cardboard top to check stability"
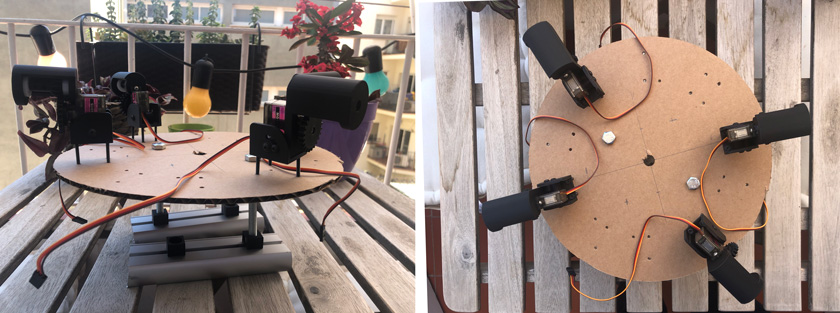
"LEFT. Testing 4 motors, side view. RIGHT: 4 motors top view."
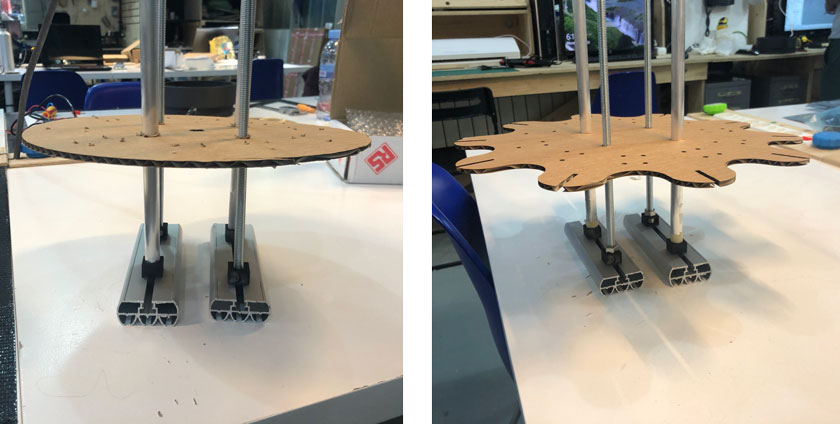
"Testing the final rods."
This is a new version to prove that it can holde everything together:
This is the documentation that illustrates the second cardboard prototype for the structure.
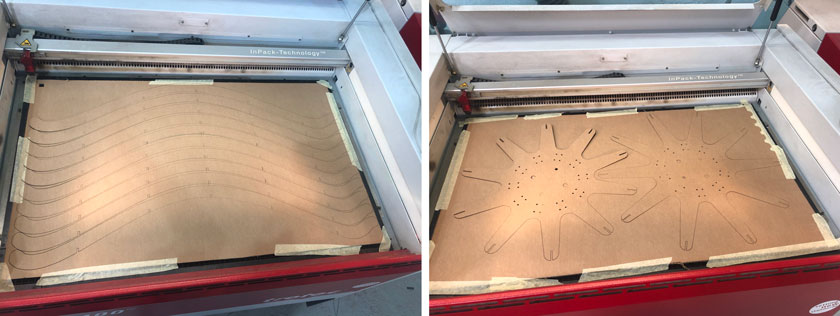
"Laser cutting structure components."
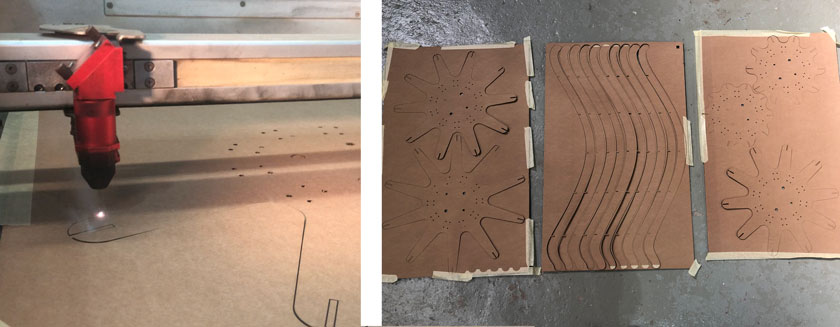
"Laser cutting structure components."
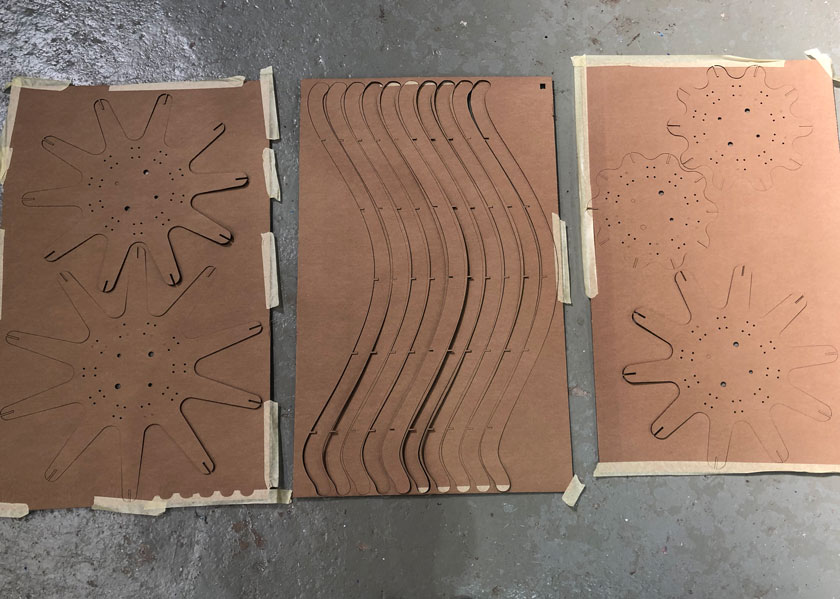
"All laser cut pieces in cardboard."
Putting this prototype together was intense, lots of nuts and quite long threaded rods.
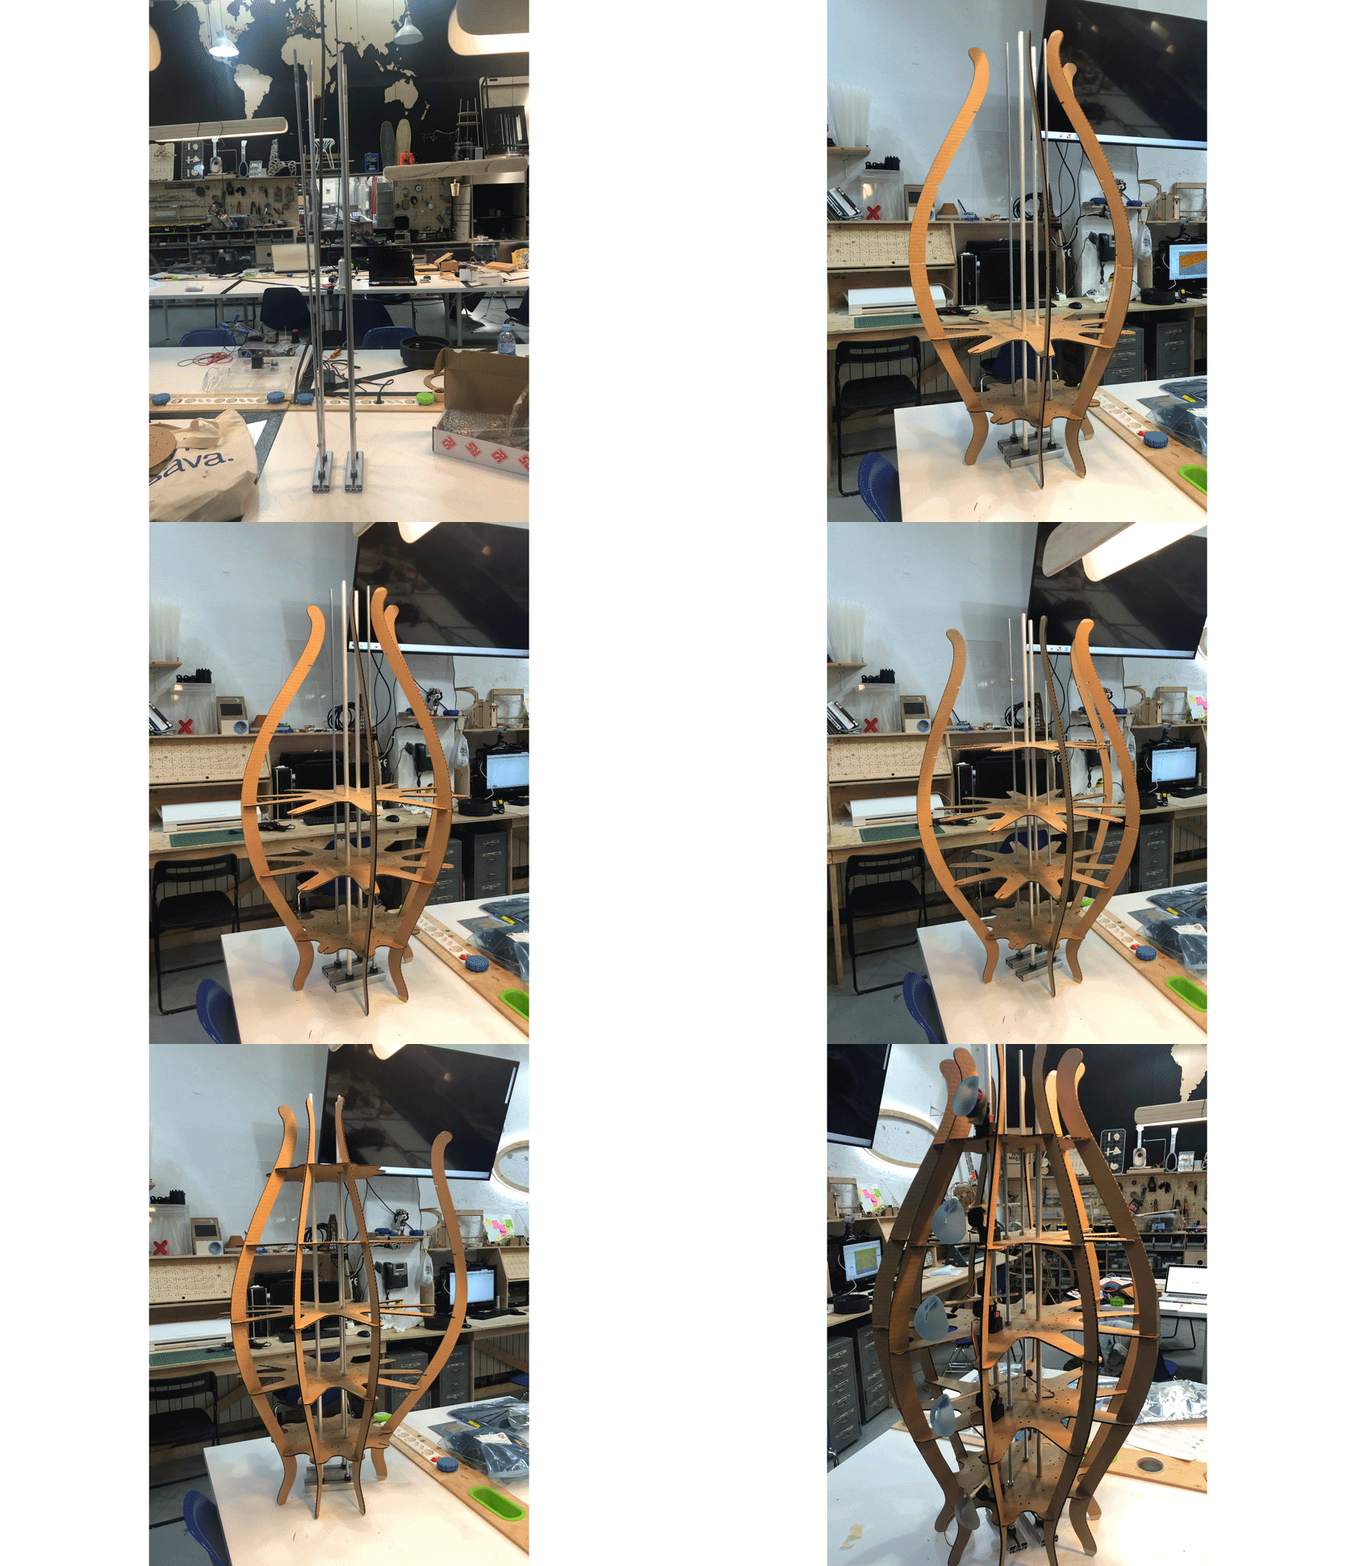
"Gif showing the assebmly of the structure."
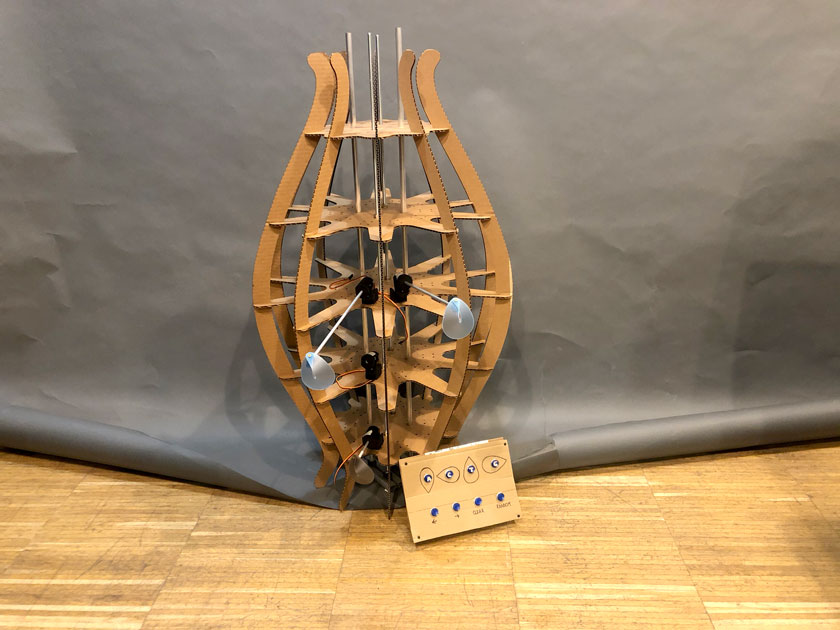
"Quick not a photoshoot picture for the structure & the controller."
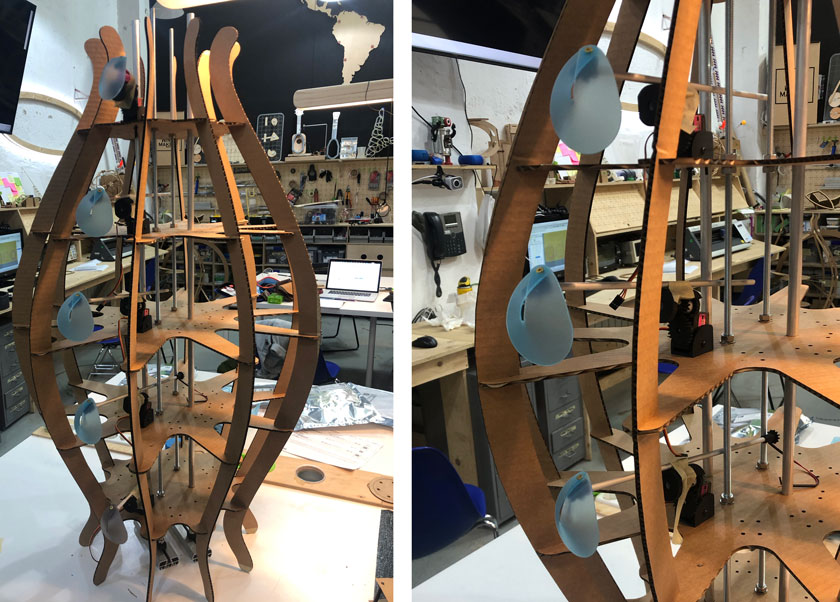
"LEFT: 5 modules somehow attached to test the lenght of the rods. RIGHT: Close-up: 3 modules."
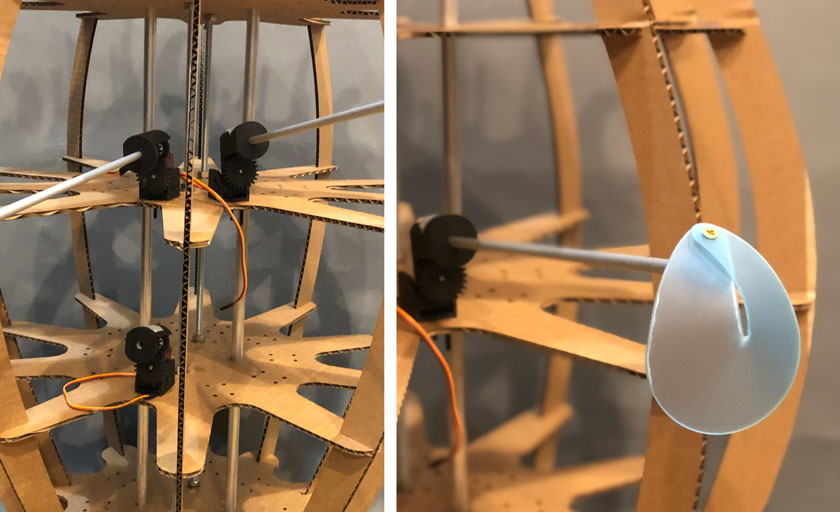
"LEFT:Detail motors attached to the cardboard base. RIGHT: Pixel detail."
Ready for acrylic check!
Gear Box DONE
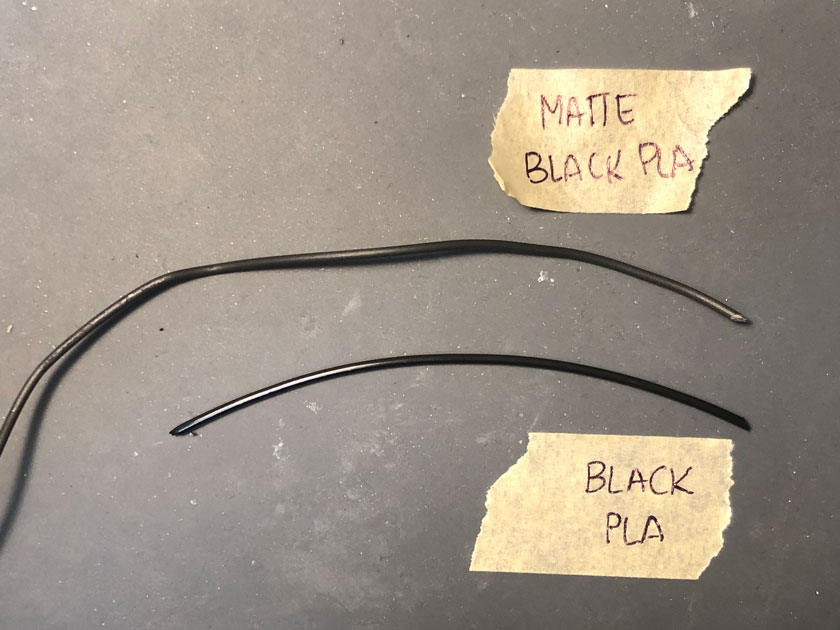
"New filament for the gear box & pixel elements, black matte. "
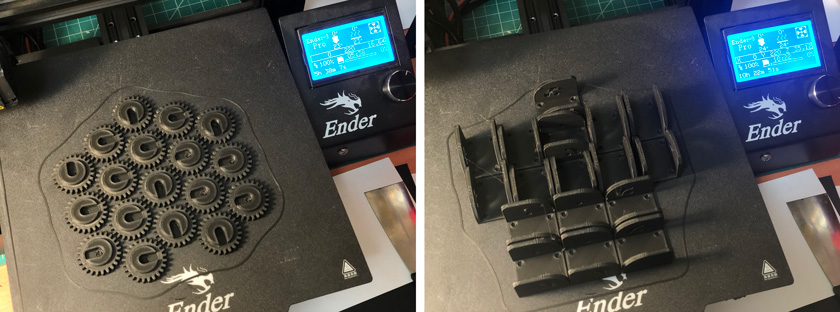
"LEFT: Gears with new insert. RIGHT: Printing bases to test on the structure. "
"Adding insert with the soldering iron tip."
Mobile Physical Pixels KINDA DONE
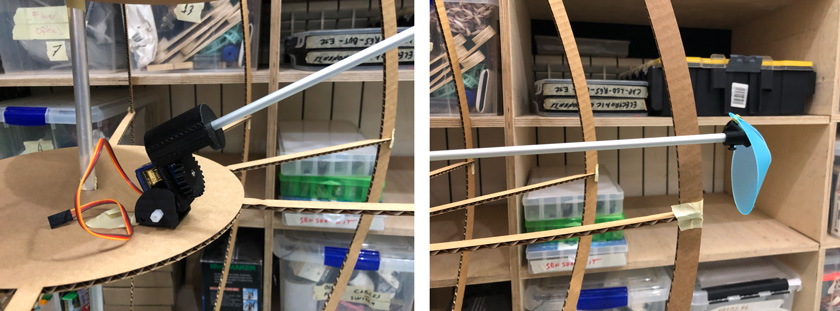
"LEFT: gear box in place. RIGHT: Pixel in place."
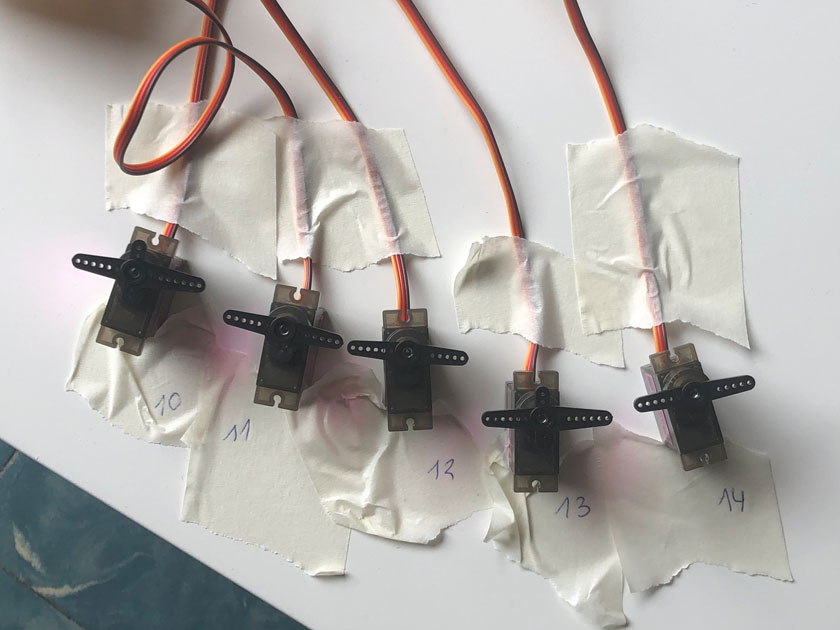
"5 servos attached to the i2c nodes with the i2C addresses written on tape."
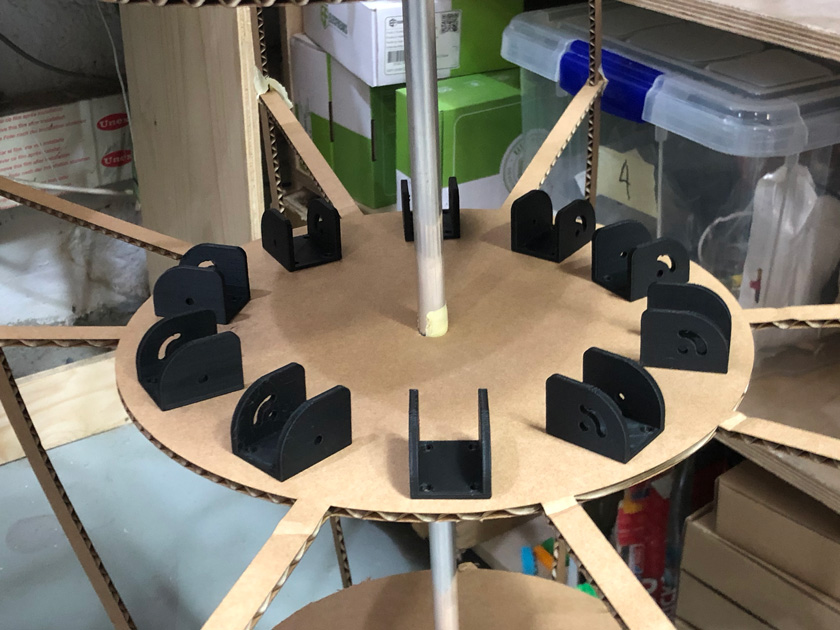
"3d printed bases tryout on the structure."

"LEFT: laser cutting Plakene. RIGHT: Plakene Laser cutter settings."
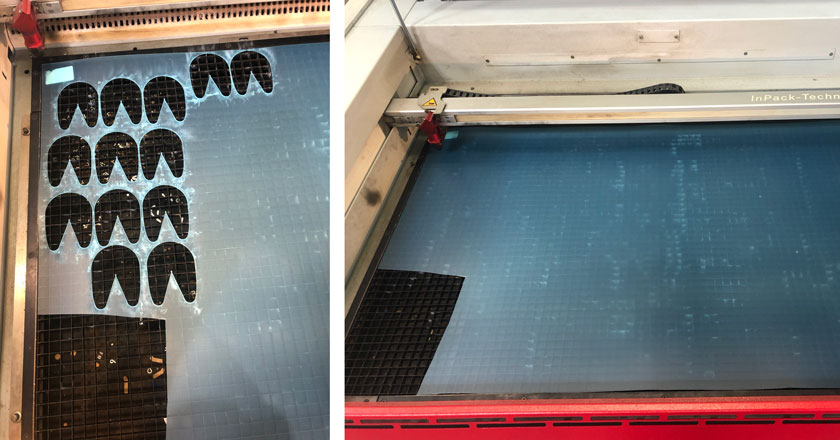
"After & before cutting the pixels on plakene."
Last week I’ve finished the design for the mobile module, so this week I started some mass production to be able to achieve the deadline.
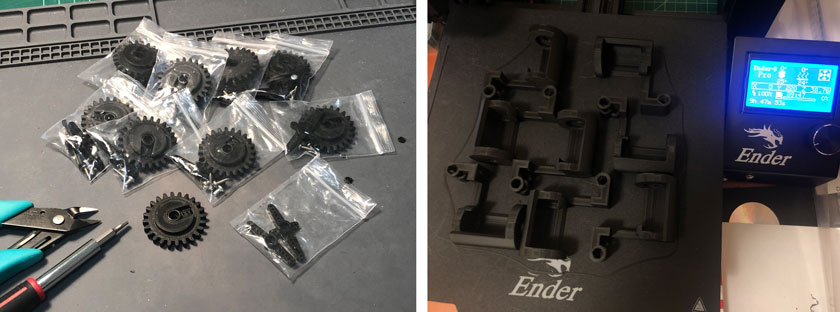
"LEFT: Fitting gears. RIGHT: Printing servo tower."
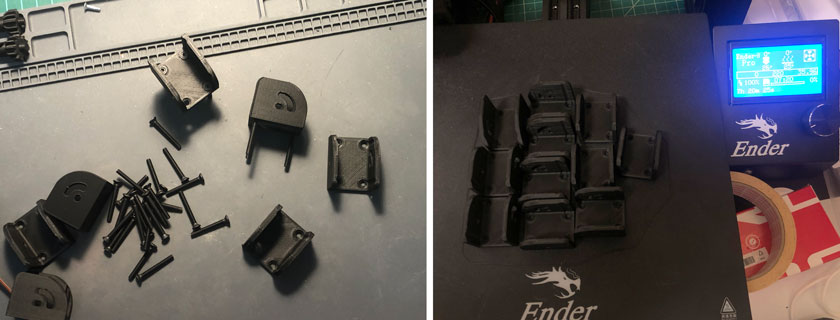
"LEFT: Assembling screws on servo bases. RIGHT: 3D printing multiple bases"
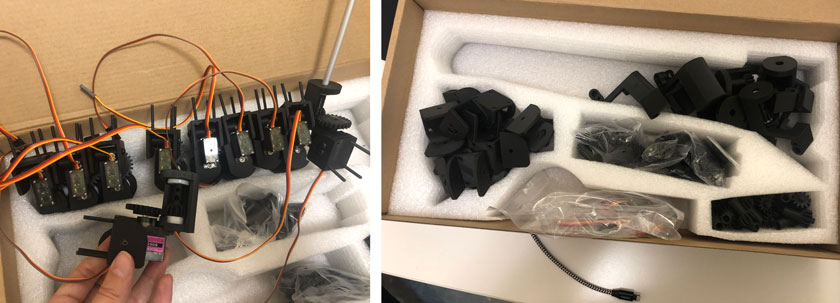
"LEFT: Assembling 10 modules to be able to test one floor. RIGHT: Assembly box, organizing components as they print."
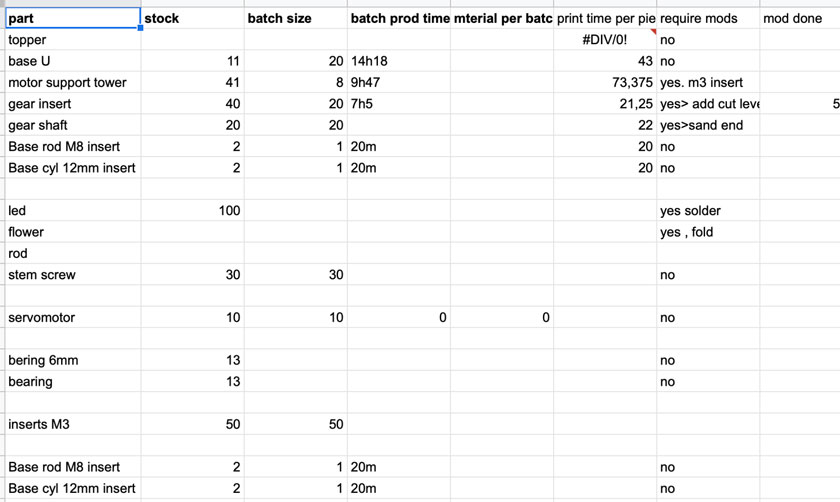
"Excel sheet tracking progress."
Main board DONE
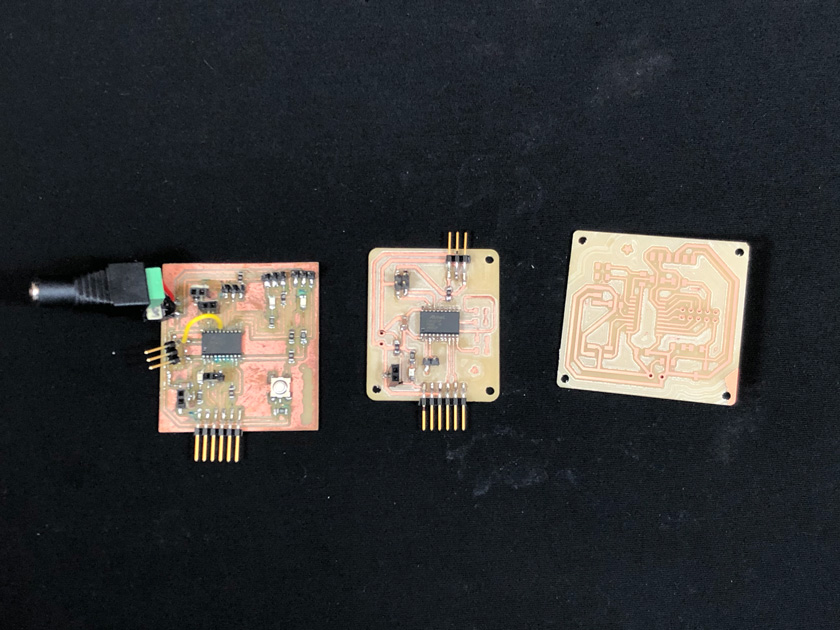
"3 iterations of the main board."
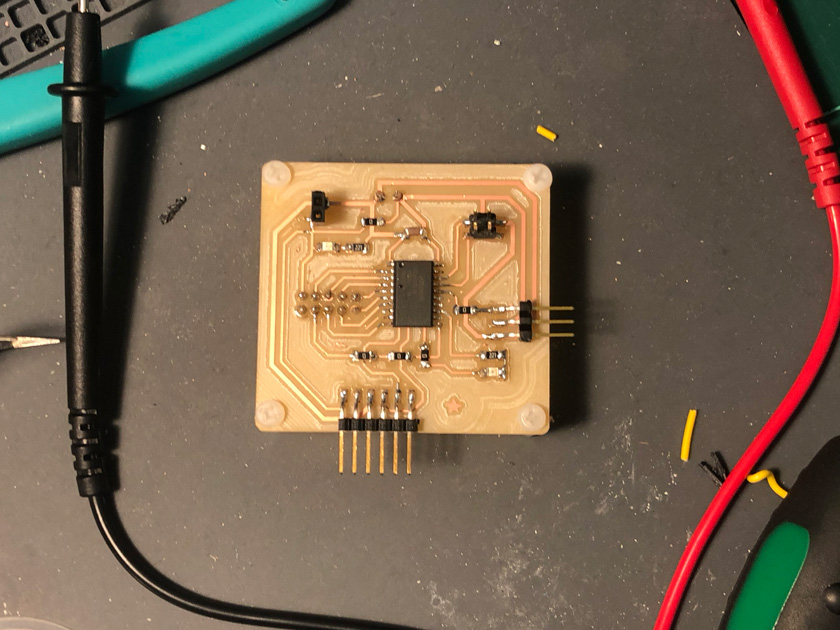
"Last version for the Main board for my final project."
Secondary boards (to control the Physical pixels using I2C) DONE
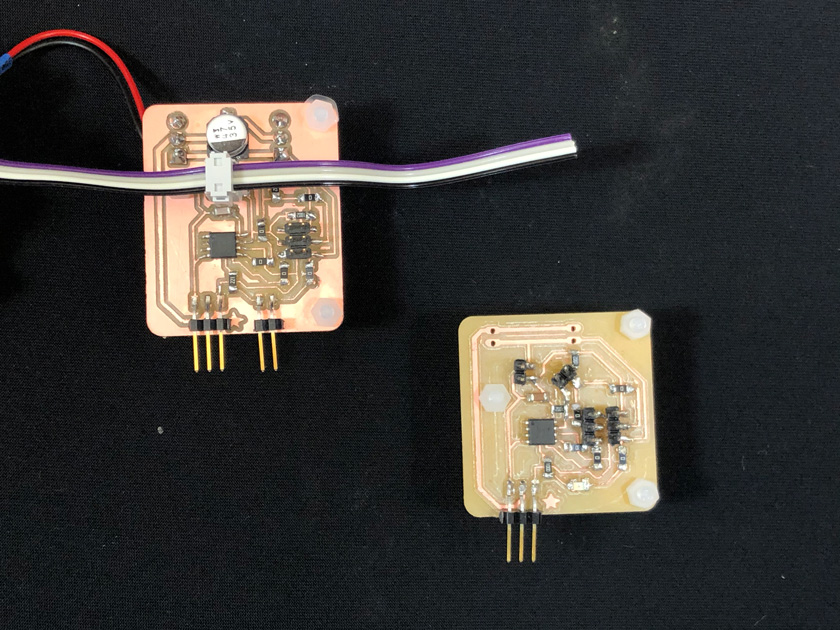
"32iterations of the secondary board."
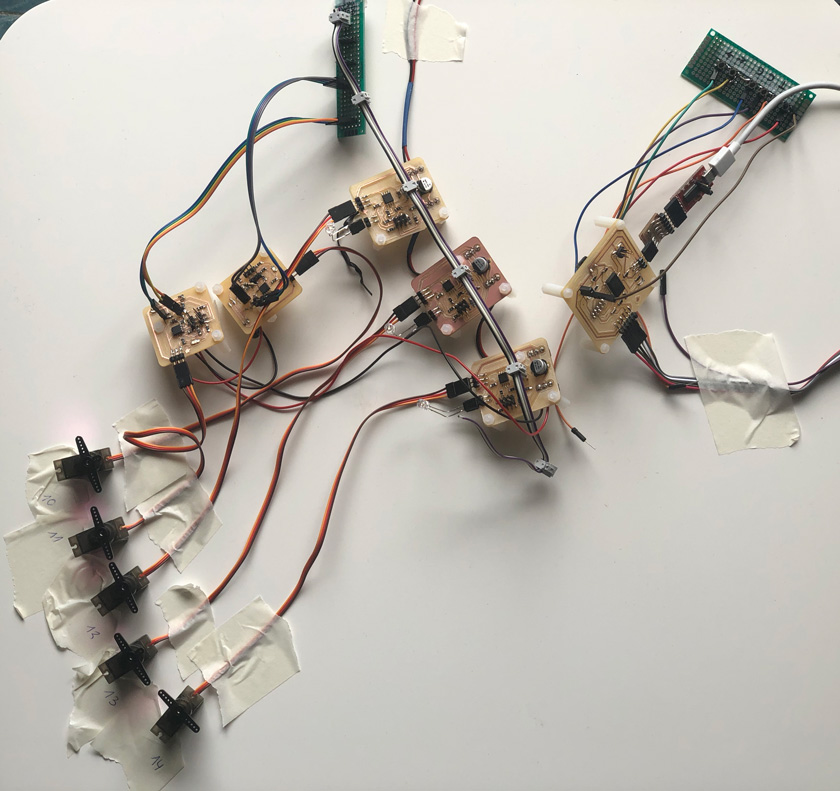
"5 I2C secondary boards connected to the main board and controlling 5 servos."
"Pressing A,T,C,G to move servos and changing module using arrows (led changing state)."
Interface - (not anymore soft) WIP
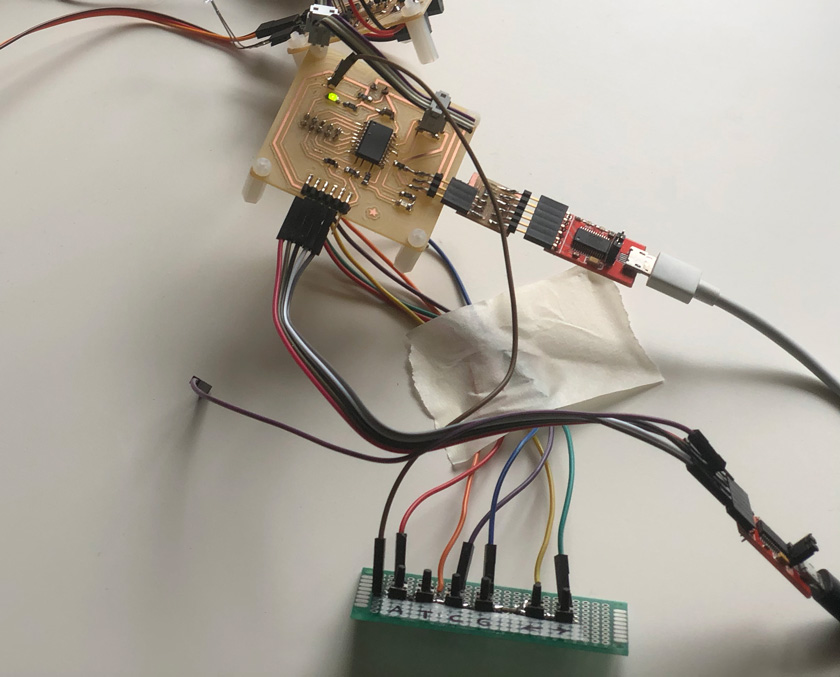
"Close-up of the prototype for the inputs interface."
To get a sense of scale I created a quick prototype for the controller. I need to improve some elements of the interface.
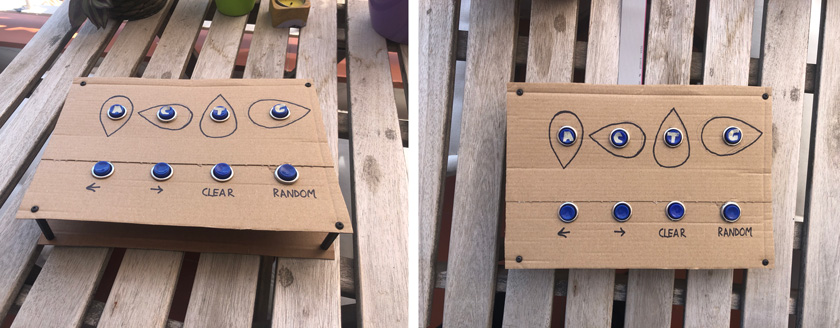
"LEFT: Carboard prototype. RIGHT: Controller prototype + flat "
BUILDING MY BOM AS I KEEP FINISHING PARTS
Still WIP. I’ll be updating the list as some hardware has been updated and I expect some minor changes on some consumables such as screws, nuts, spacers & bolts.
STRUCTURE: 2x 12 mm aluminium rod. 2x threaded rod. 10x nuts. 2x 1000mm x600 mm fluor blue edge acrylic. 2x 1000mm x600 mm smoked acrylic.
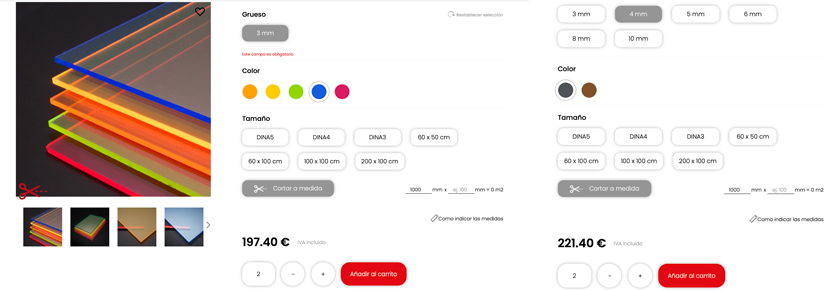
"LEFT: acrylic quote for outer part of the structure. RIGHT: Acrylic quote for inner part of the structure"
PIXELS: 50 x 30mm long, 6mm diameter anodized aluminium rod. 50x servo motors. 50x 3D printed gears. 50X 3D printed structures. 50x bearings 6mm diameter. 50x bearings 5mm diameter. 50x 3D printed base. 3 X 50 hegaxonal spacers + nuts.
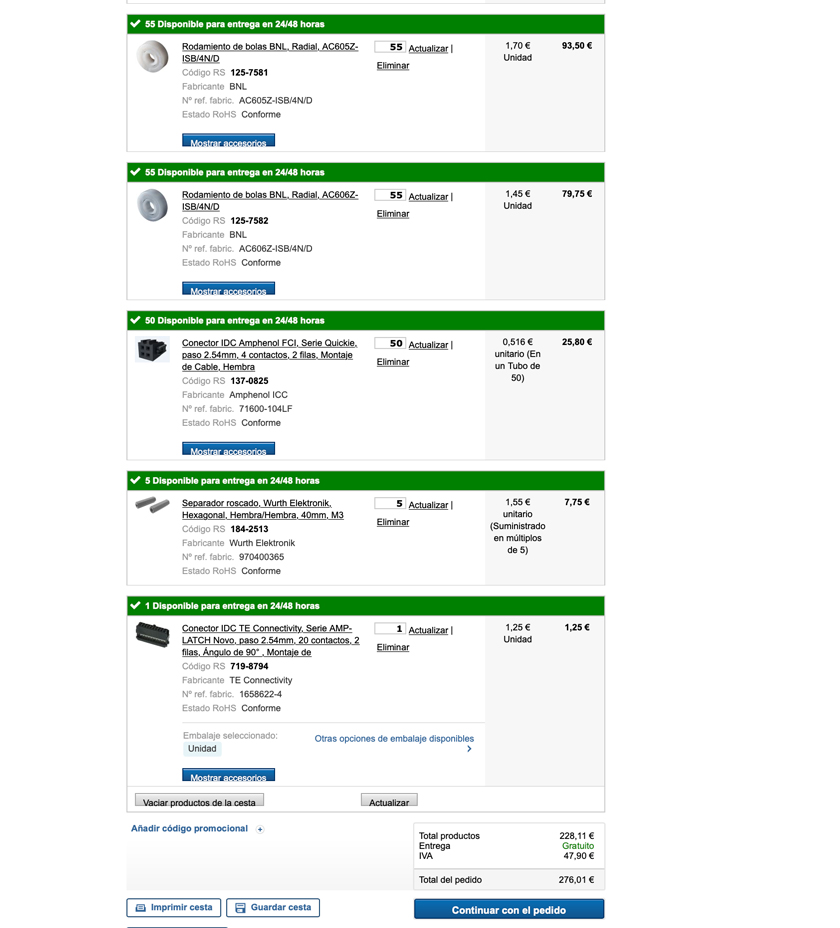
"RS bill for bearings + IDC connectors "
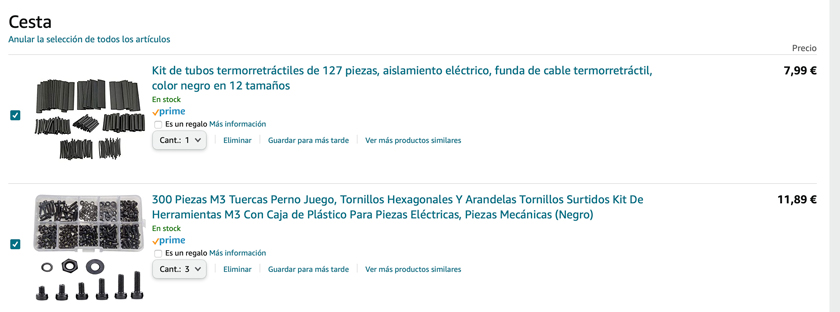
"Black heat-shrink tubing + bolts, washers & nuts."
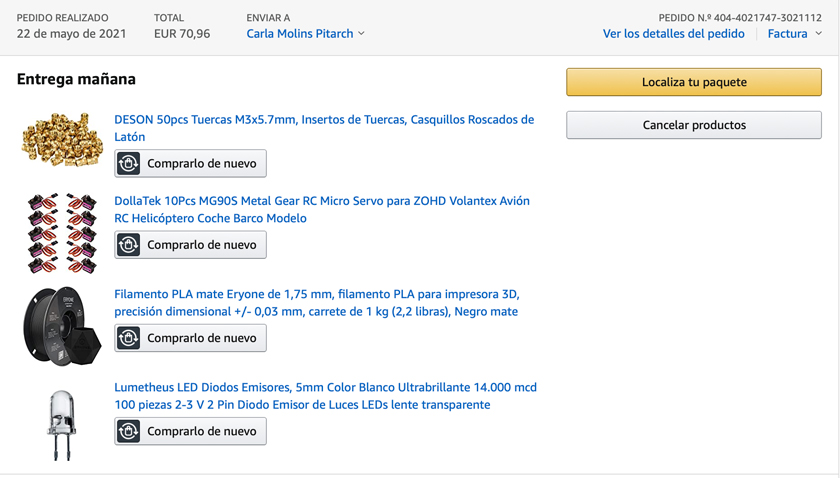
"Inserts, servo motors ( metal shaft), black matte filament + ultra bright LEDs."
PCBs: 1 main board. 50 secondary boards.
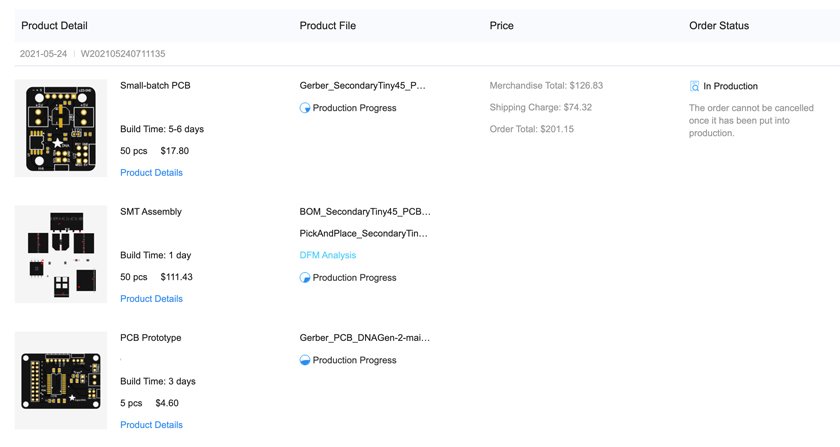
"JLCpcb production panel."
PHYSICAL INTERFACE:
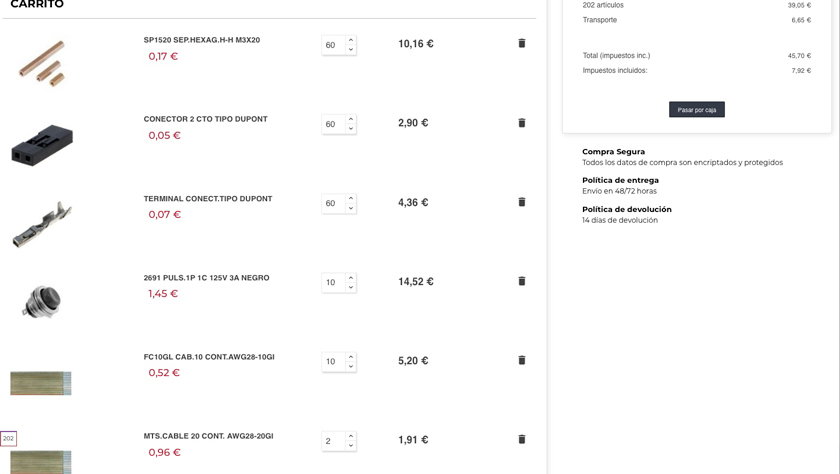
"Diotronic quote for switches, dupont connectors & wire."
POWER: Power supply + clear cable.
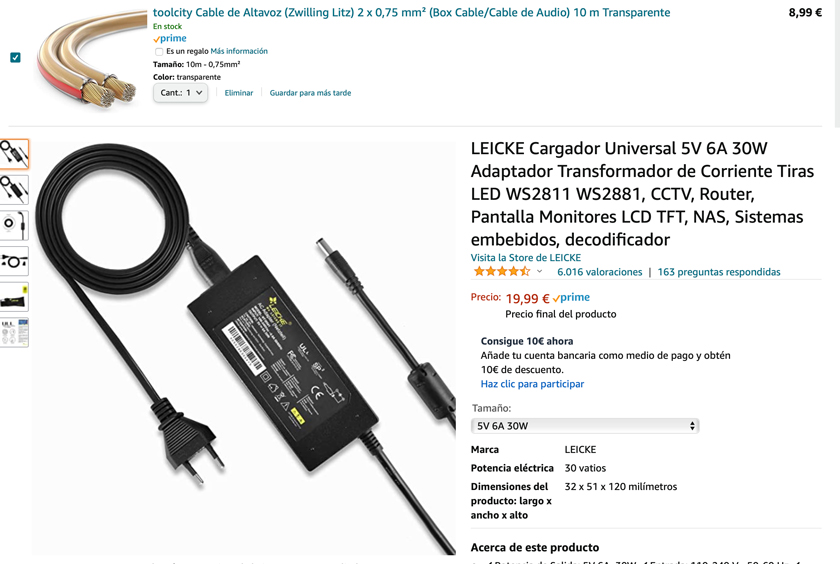
"Wire for power + power supply."
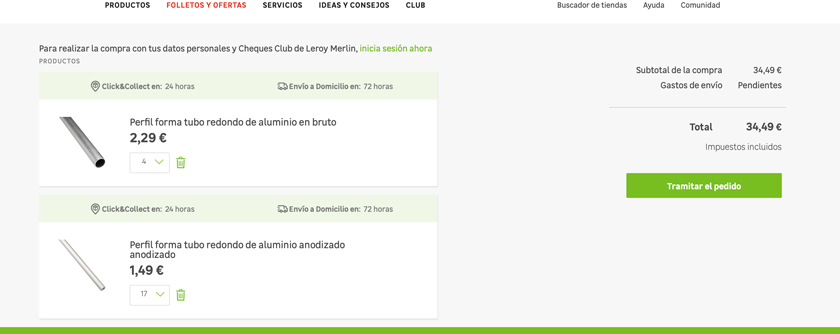
""
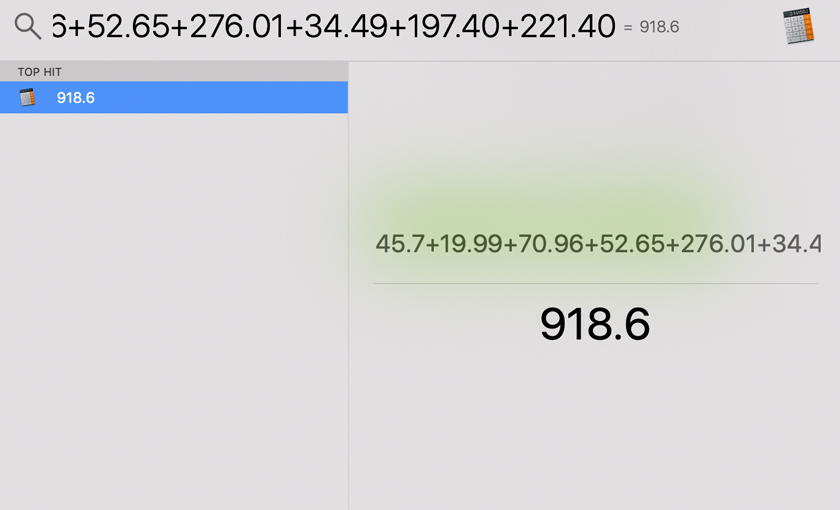
Up to this moment, this is the approximate bill of materials:
""
I expect at least almost 100€ more in motors as I only got 10 and some more hardware.My expected BOM I’d be around 1200€
On the bill of materials you can see the components that were acquired that includes mainly materials to laser cut, PLA, hardware & electronic components to assemble the system.
Besided what I got online I needed more hardware & components that I sourced locally.
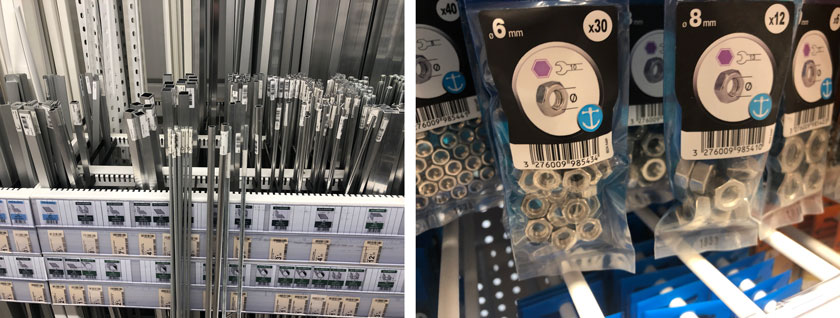
"LEFT: Rod chasing at Leroy Merlin. RIGHT: Nut chasing."
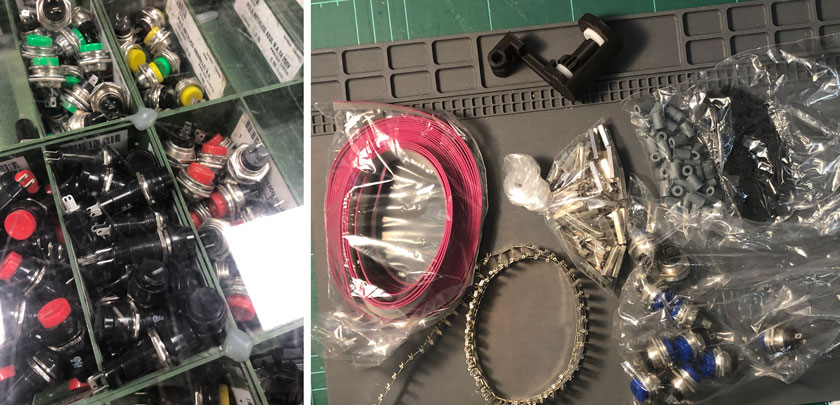
"LEFT: Choosing switches at Diotronic. RIGHT: Diotronic Haul."
SOME ISSUES:
PCBS
OPTION A (Waiting) OPTION B (Mill 5 more) I’m a bit anxious for the shipping of my pcb’s as I haven’t received an update in two days, so I contacted them. We’ll keep waiting!
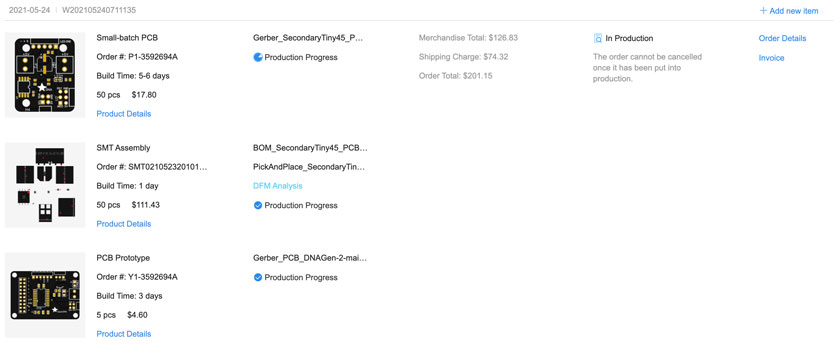
"Jlcpcb order status page."
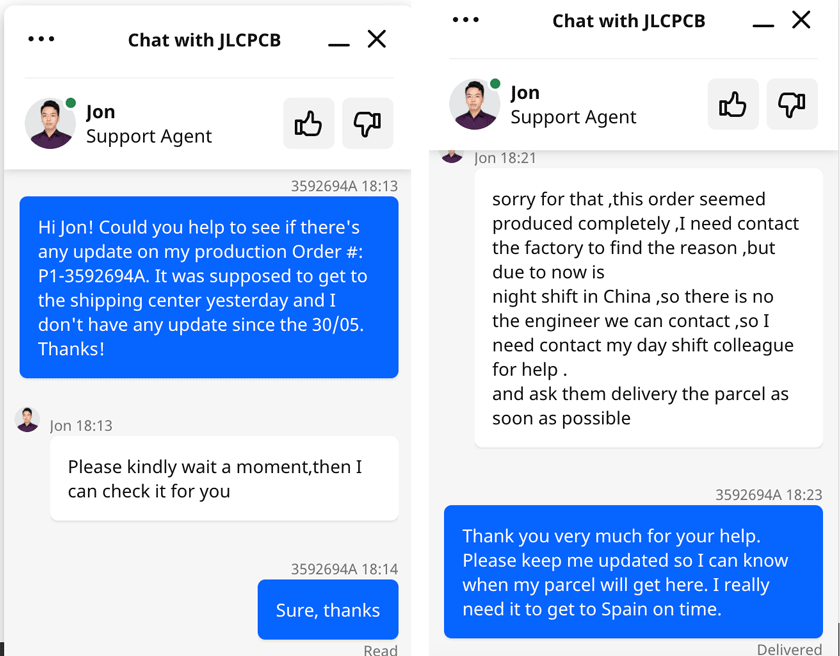
"Jlcpcb chatbox."
LAST SPRINT
From here my documentation is not as organized as it usually is. I spent a lot of time building stuff in series and often I forgot to take good pics.
To get a glimpse of the assembly process, the last part of the video I presented on the 11th of June includes a super fast timelapse of the built.
Find here a list of all the steps needed to assembly my final project. The video shows a tiny bit of each part:
- CAD design
- Main + Secondary Boards Design
- Main + Secondary Boards Milling + Soldering
- Programming system
- Laser Cut Structure, interface + Pixels
- 3D print x 50 pieces of all nodes components
- Order PCBs & receive them
- Assembly 50 Pixels
- Program nodes
- Program main board
- Put everything together
- Wire
- Power
- Enjoy!
After the presentation I kept working on assebmling more nodes. I’m happy to see all it’s working now!
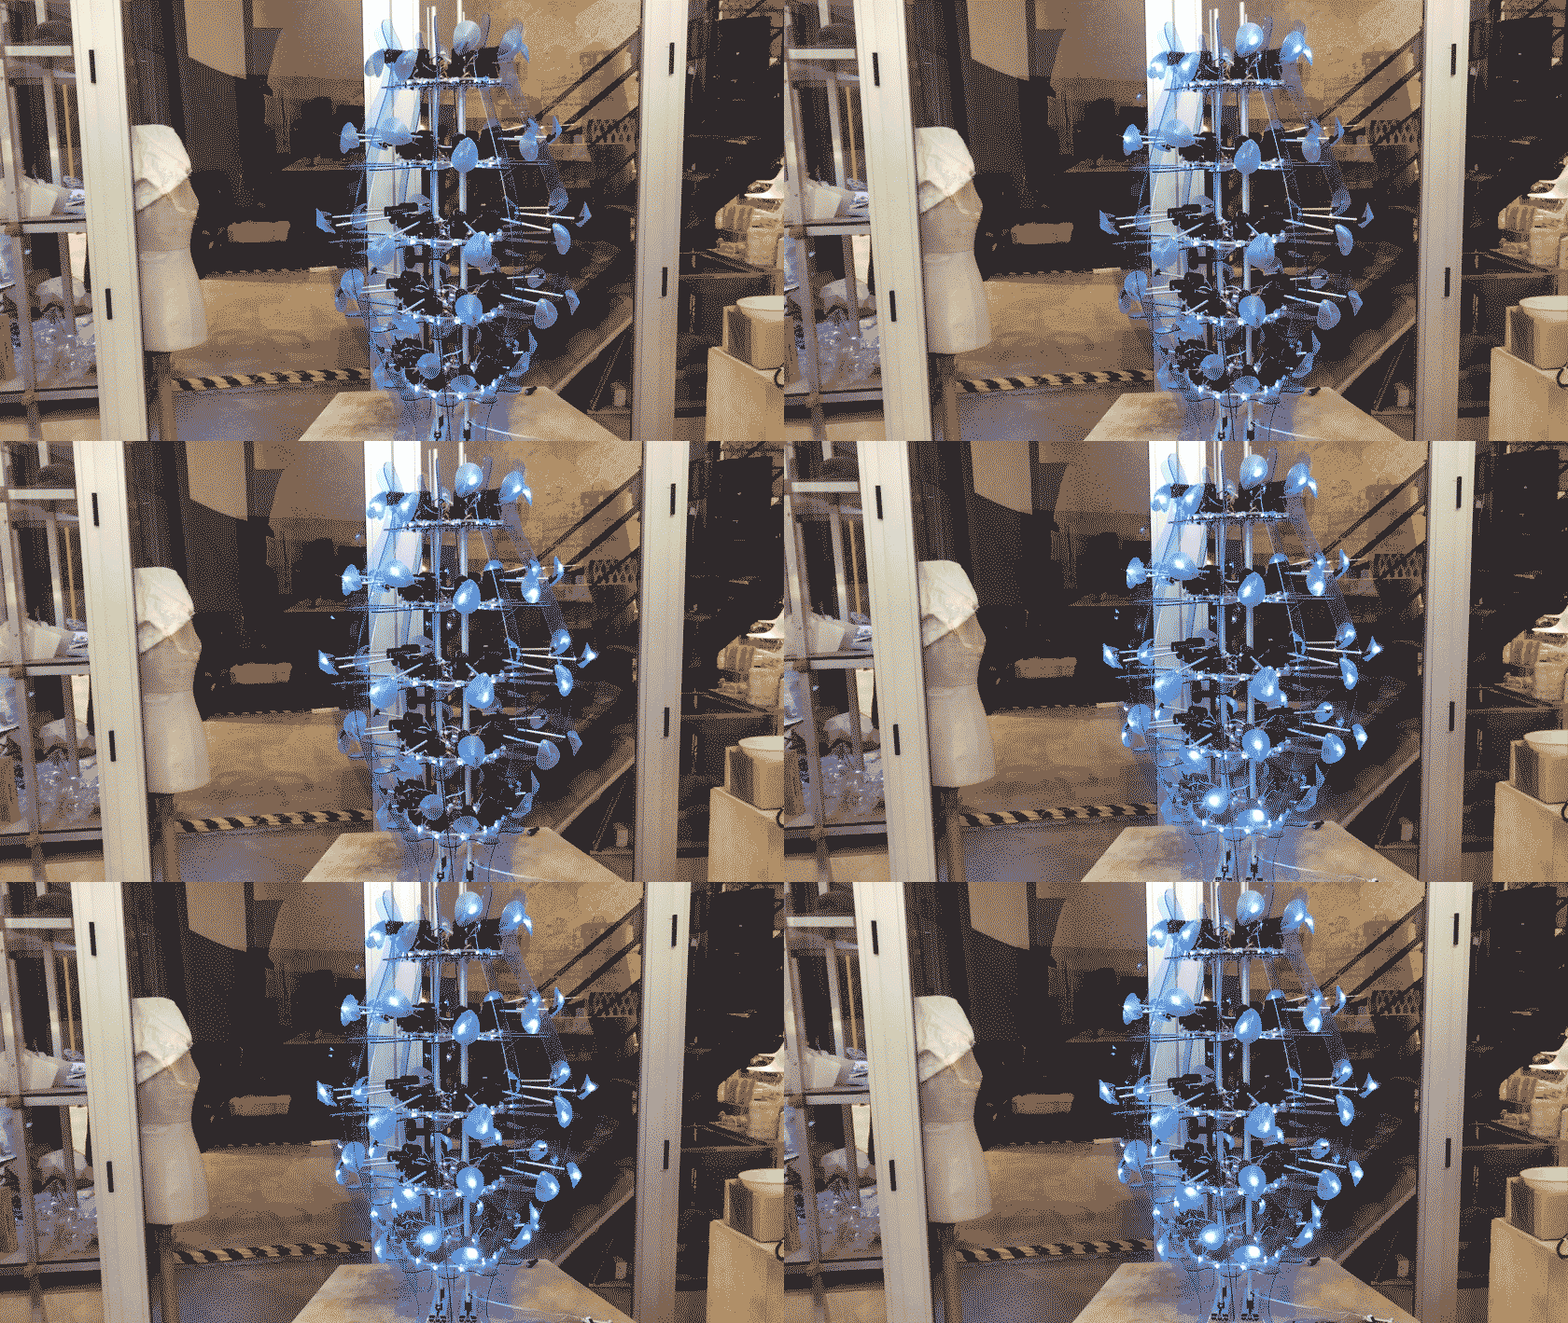
"Acrylic structure lighting up."
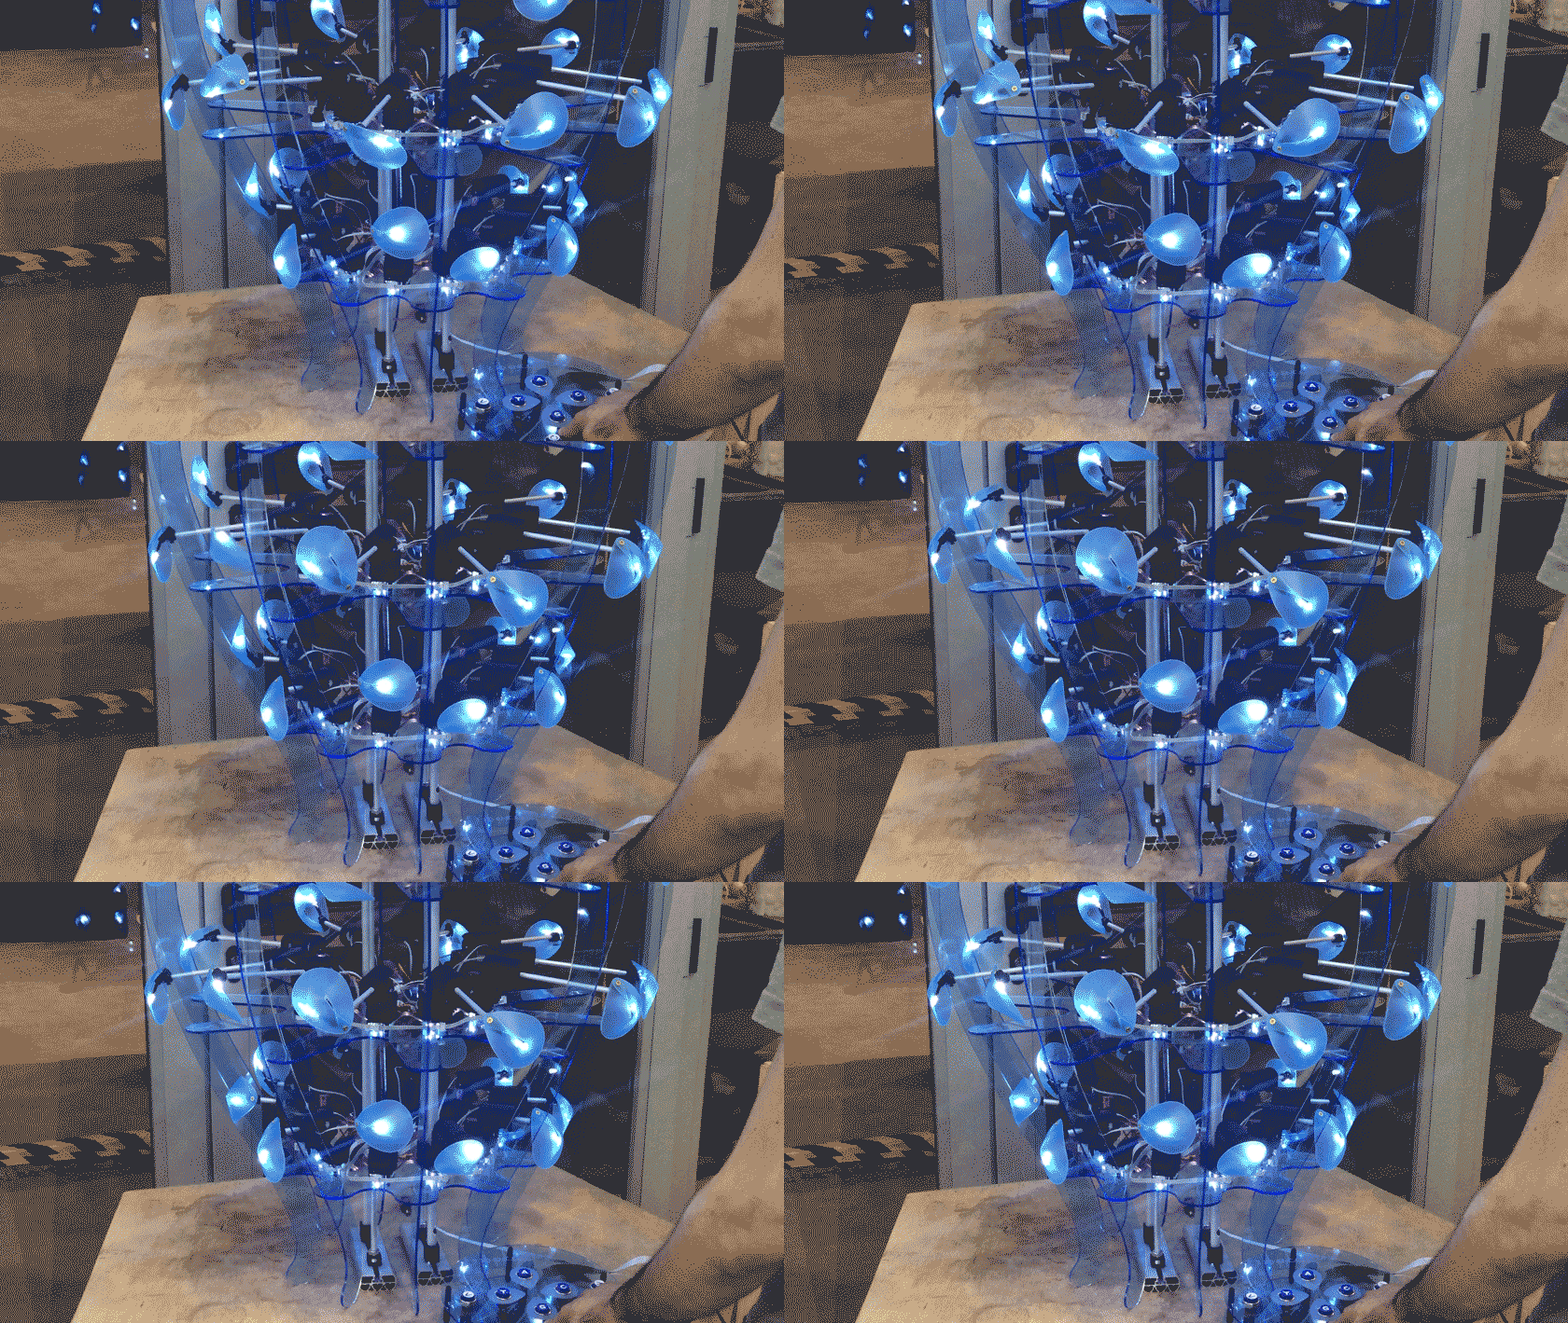
"Acrylic structure randomizer."
To see all the hero shots & files go to the Final Project Page
LAST QUESTIONS
WHAT TASKS HAVE BEEN COMPLETED, AND WHAT TASKS REMAIN?
I managed to fulfill the expected scope. There is still some work on calibrating all nodes to ensure that they move accurately.
All the other tasks remaining would be to iterate in some components if I were to build the structure again. As for now, I’ll leave it as it is.
WHAT’S WORKING? WHAT’S NOT?
The system of 50 nodes is fully operational. However, there are some parts that would require revision to have a better experience:
- Add a hook into the servo supports to hold the led wire, as sometimes it gets tangled.
- Change the switches of the interface controller. Some are a bit flickery, and by replacing the hardware, the experience would be better.
- The acrylic structure is quite fragile; when I exhibit the piece, I’ll need to cut some pieces again.
WHAT QUESTIONS NEED TO BE RESOLVED?
My main question is about powering the system. Right now I’m powering the I2C bus + mainboard using one power supply and the servos using another. Otherwise, I was having micro-shorts, not sure why.
WHAT WILL HAPPEN WHEN?
I’m planning to showcase this project in November; by then, I expected to have a new interface and fix the acrylic structure.
WHAT HAVE YOUR LEARNED
I Learned A LOT. There were so many things that I’ve never done before! I also learned how important it is to do something in the proper order… As the PCBs were delayed because of customs, I built the structure first and then assembled everything. It’d have been way easier to complete each floor and then putting everything together. I had wiring nightmares because of that!
