Invention, Intellectual Property, and Income
INVENTION, INTELLECTUAL PROPERTY AND INCOME
This is the content we had covered this week:
W17 - Invention, Intellectual Property, and Income
WEEK’S ASSIGNMENT + PROGRESS
Develop a plan for dissemination of your final project
This week’s discussions gave a lot of perspective on where this project stands within my Ph.D research. Also, it helped me see how to move forward to the next stages of this prototype.
I’m still figuring out the best way to license this project. For now, I’m leaning towards –> Attribution-NonCommercial-NoDerivatives 4.0 International (CC BY-NC-ND 4.0).
As it’s an important decision to make as changing license in the future is not a viable option, I’ll take further thought before summiting the final documentation. I’ll discuss all this with my Ph.D thesis advisors.
After some deliberation this is the final license:
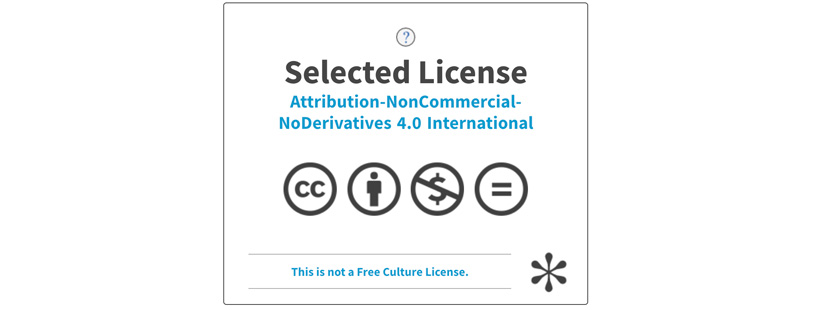
"Selected CC license."
3D Encode DNA by Carla Molins Pitarch is licensed under CC BY-NC-ND 4.0![]()
![]()
![]()
![]()
Prepare drafts of your summary slide (presentation.png, 1920x1080
This is the first draft for my poster.
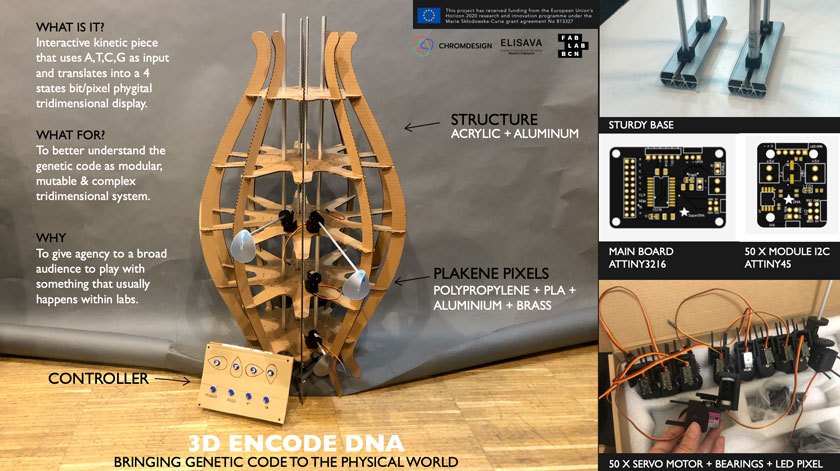
"First draft for Fabacademy's final project slide"
I’d like to make some editions for next week:
- Add fabrication process next to the component.
- Add milled & fabricated PBC side to side.
- Add better images that frame & enhance the details of each component.
This is the revision of the poster that was presented on the 11th of June:
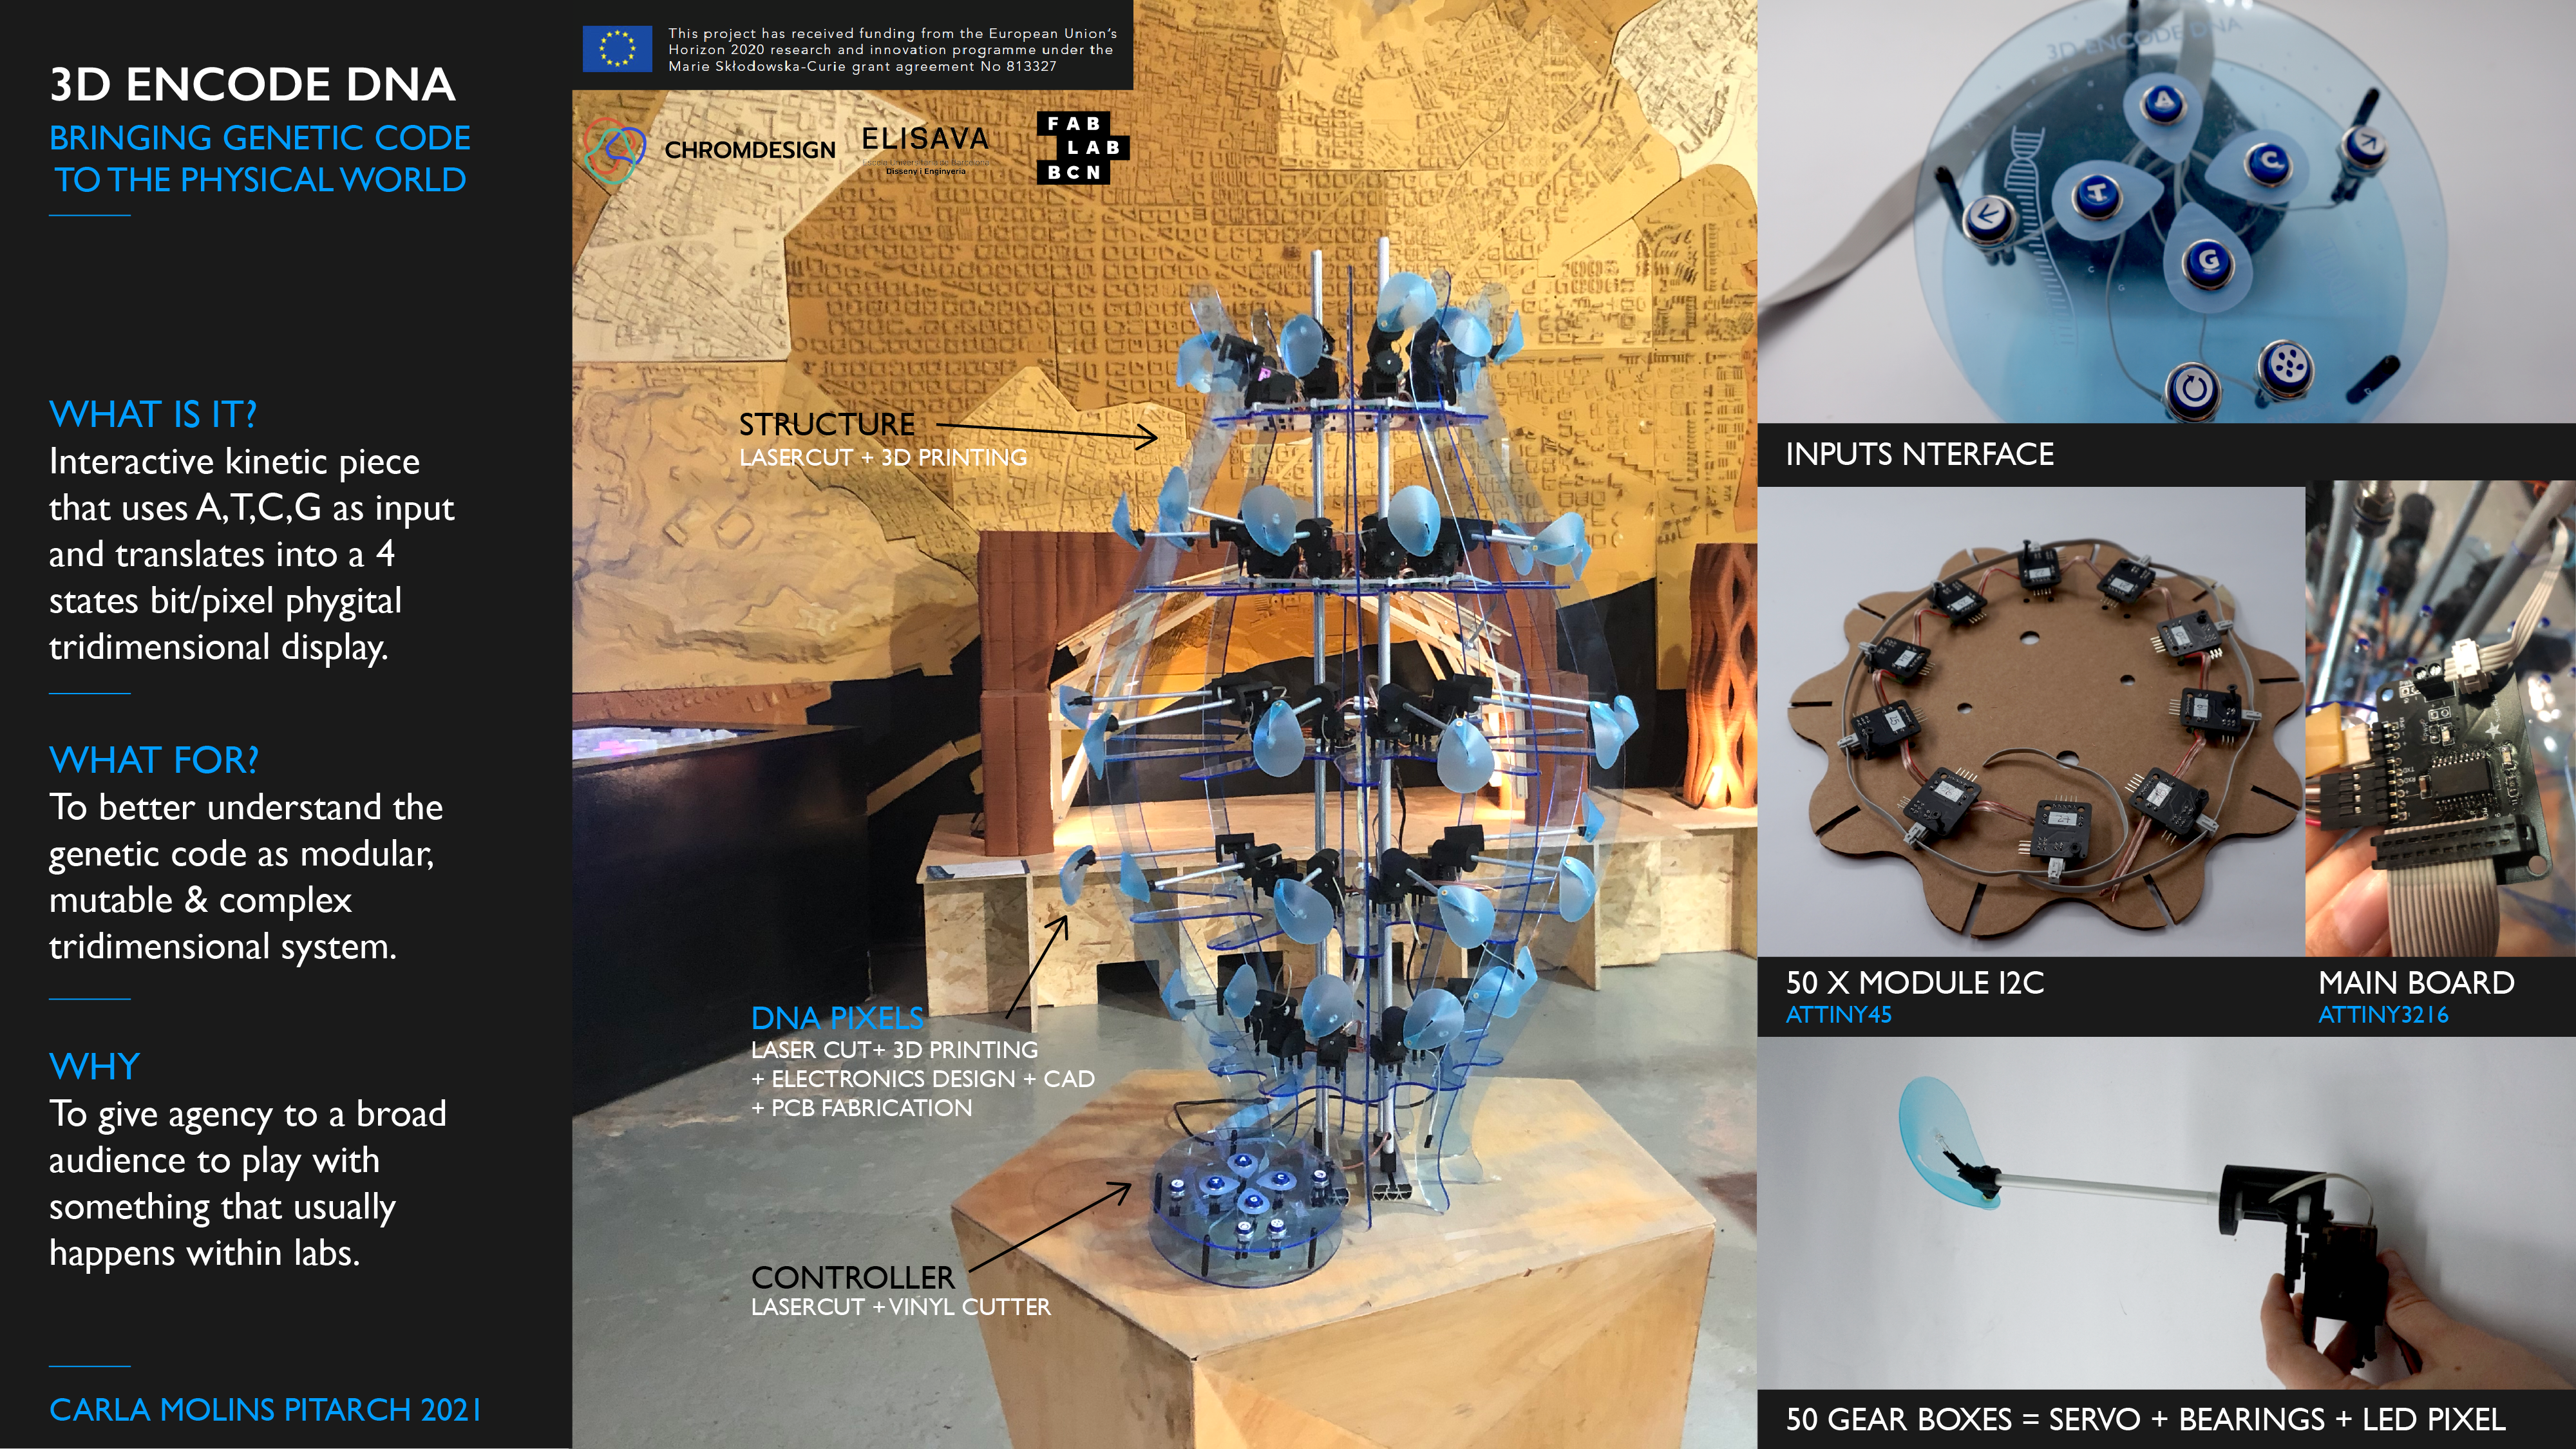
"Presentation Slide"
Video clip (presentation.mp4, 1080p HTML5, < ~minute, < ~10 MB)
This week I covered a lot of steps towards making some final parts for my final projects. Even though I don’t have a video yet I can show some parts that will be covered for sure in the video. That’s why I did a storyboard that includes 3 main parts for the vide:
1) Context
2) User Experience
3) How was it done?

"Storyboard part 1"
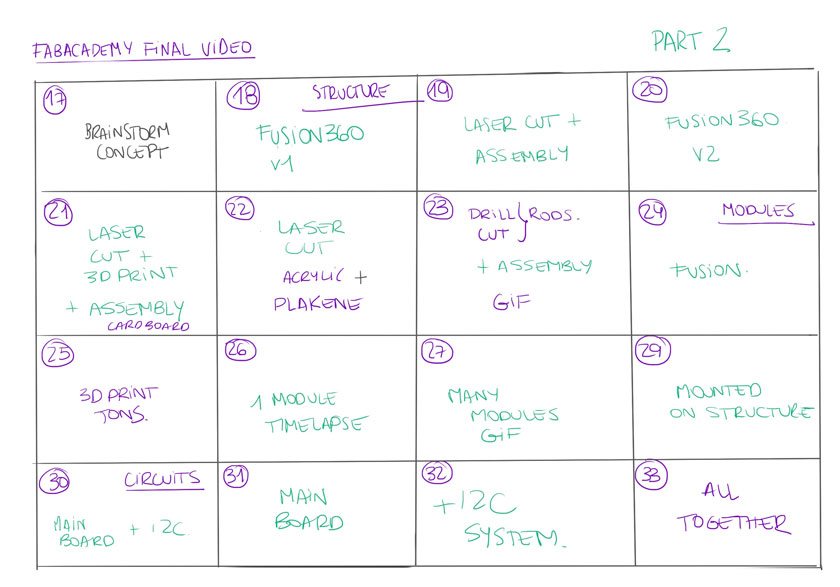
"Storyboard part 2"
The Video presented on the 11th of June followed the structure proposed:
WEEKLY PROGRESS
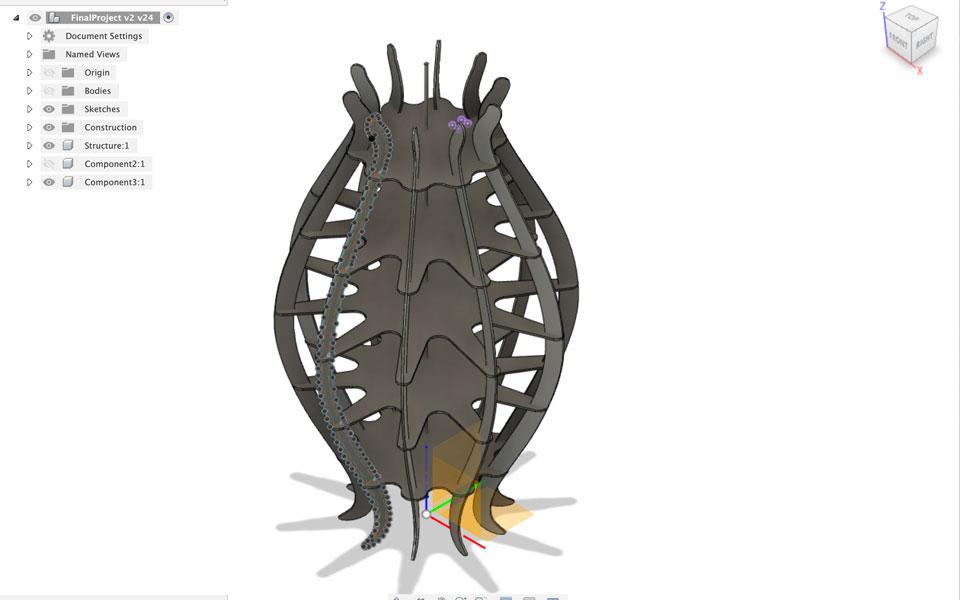
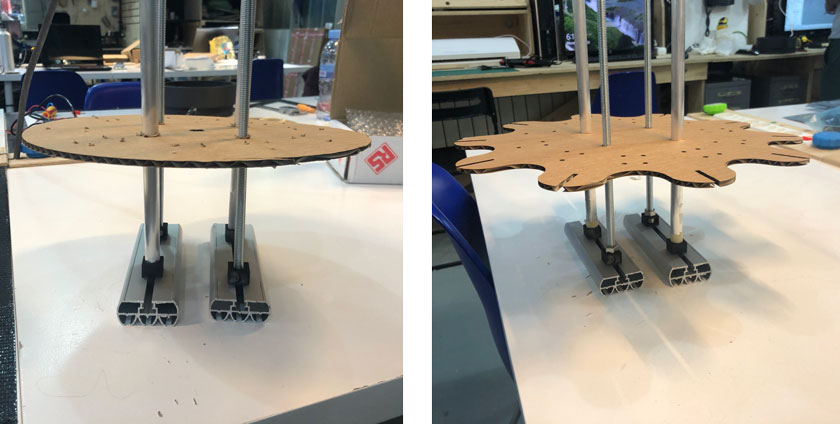
BASE | STRUCTURE (23)
The base is a new part I built this week on the second iteration of the structure. It really works!
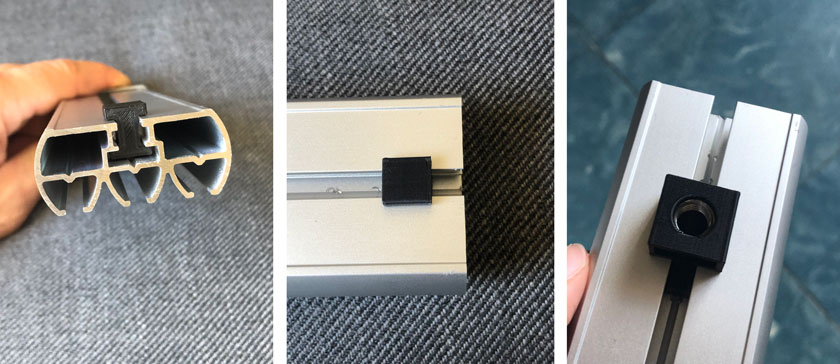
"LEFT: 3d printed T shaped form to fit the frame. MIDDLE: Top view T shaped piece. RIGHT: T-shaped piece including hole for metal rod."
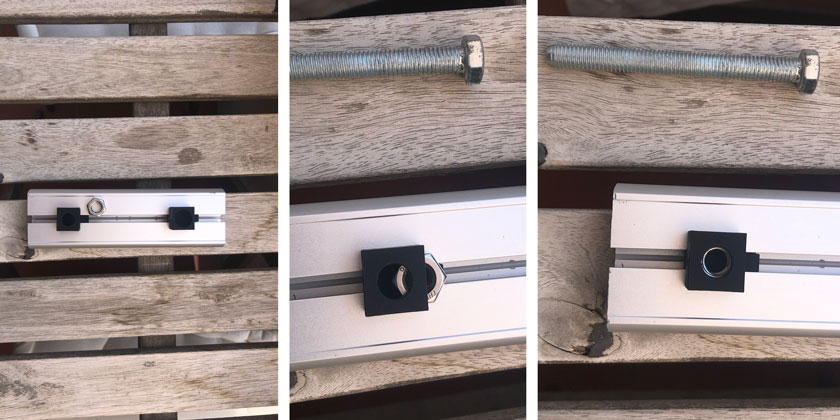
"From LEFT to RIGHT adding a nut inside the 3D printed piece to fit a threaded rod."
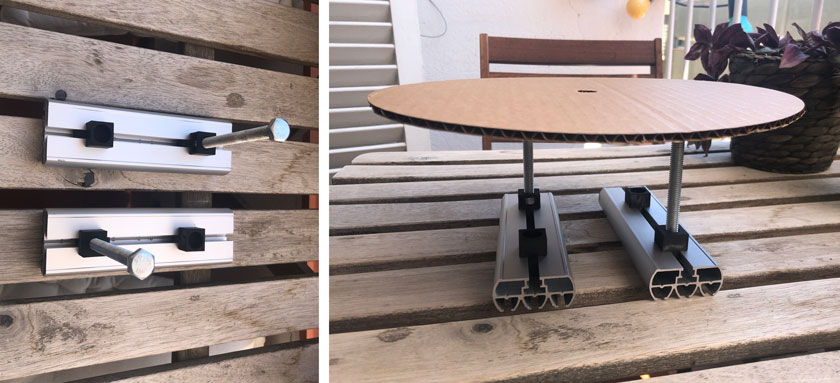
"LEFT: Fitting 8mm screws. RIGHT: Trying to put a cardboard top to check stability"
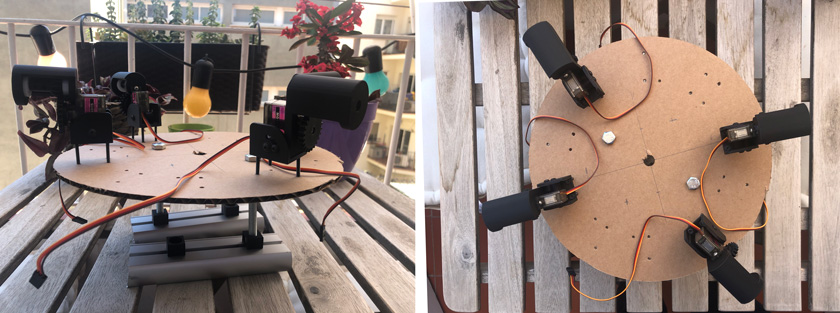
"LEFT. Testing 4 motors, side view. RIGHT: 4 motors top view."
"Testing the final rods."
HARDWARE & COMPONENTS
I needed more hardware & components that I sourced locally.
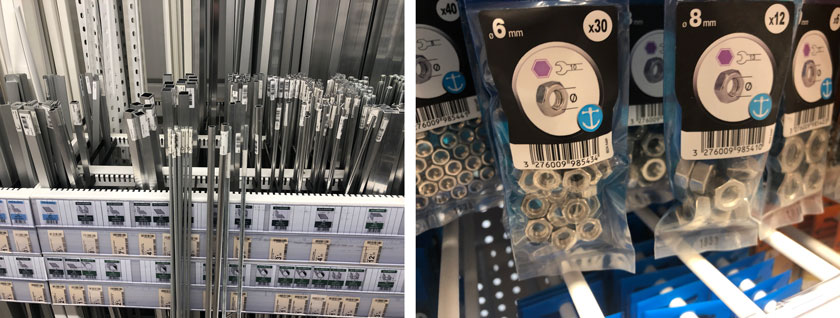
"LEFT: Rod chasing at Leroy Merlin. RIGHT: Nut chasing."
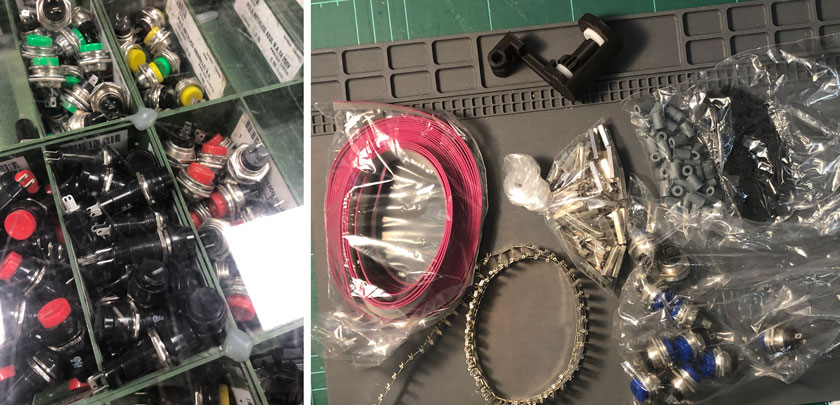
"LEFT: Choosing switches at Diotronic. RIGHT: Diotronic Haul."
LASER CUT V2 (21)
This is the documentation that illustrates the second cardboard prototype for the structure.
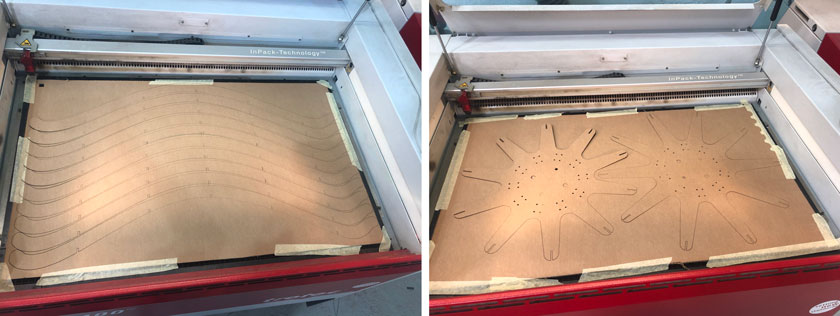
"Laser cutting structure components."
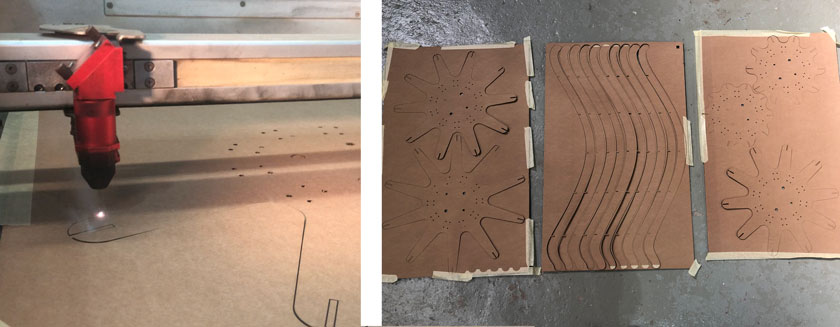
"Laser cutting structure components."
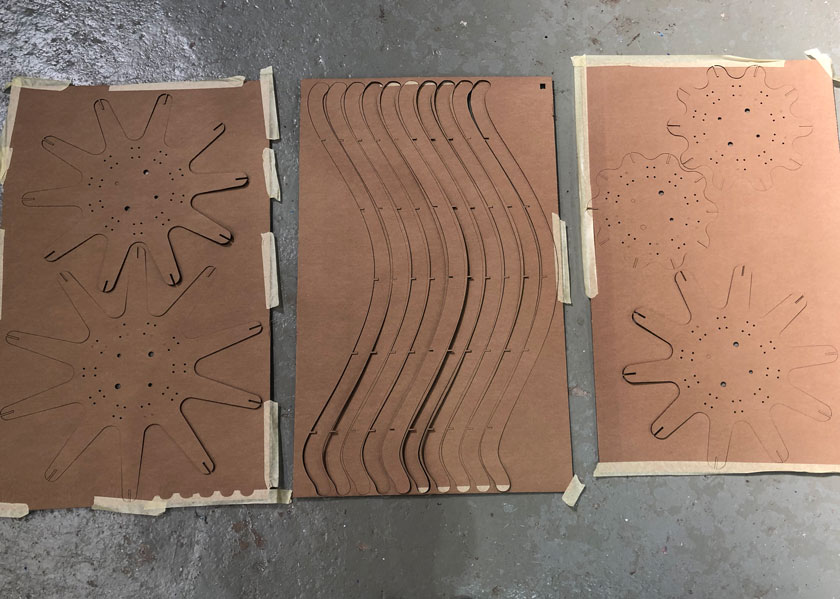
"All laser cut pieces in cardboard."
LASER CUT PLAKENE (22)
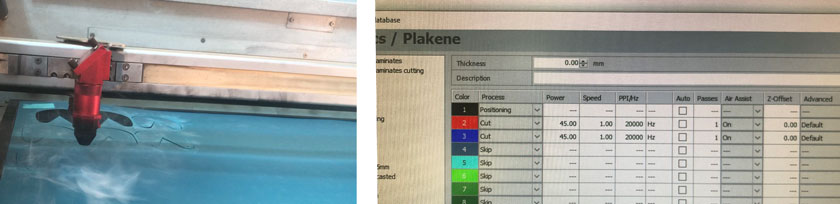
"LEFT: laser cutting Plakene. RIGHT: Plakene Laser cutter settings."
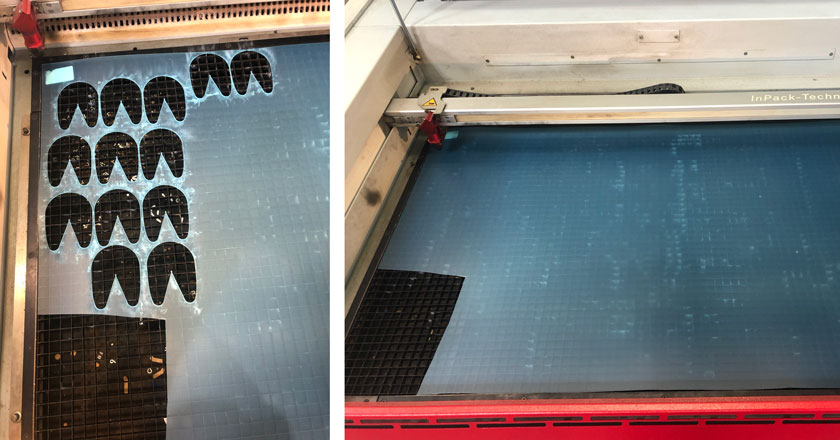
"After & before cutting the pixels on plakene."
3D PRINT MODULES (25)
Last week I’ve finished the design for the mobile module, so this week I started some mass production to be able to achieve the deadline.
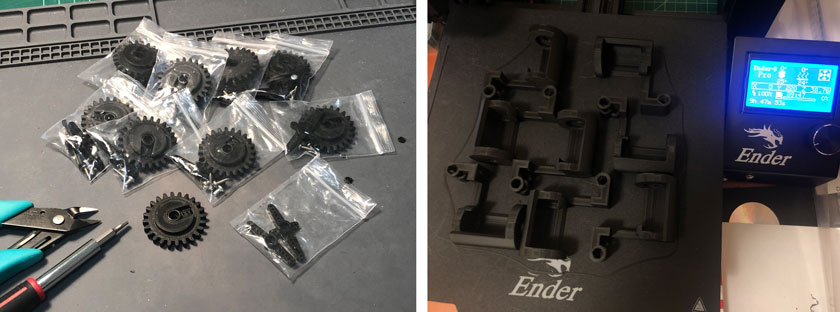
"LEFT: Fitting gears. RIGHT: Printing servo tower."
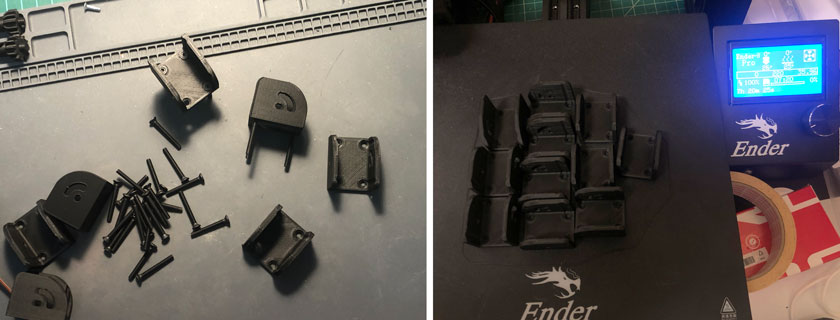
"LEFT: Assembling screws on servo bases. RIGHT: 3D printing multiple bases"
"LEFT: Assembling 10 modules to be able to test one floor. RIGHT: Assembly box, organizing components as they print."
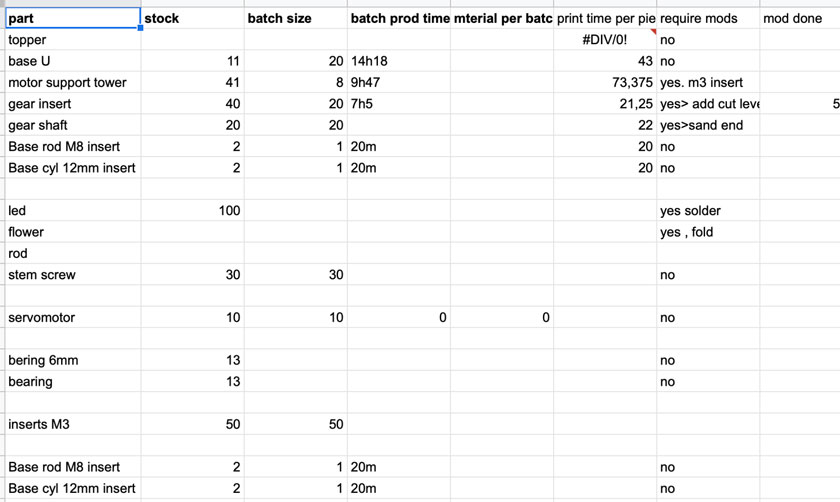
"Excel sheet tracking progress."
CONTROLLER PROTOTYPE (10)
To get a sense of scale I created a quick prototype for the controller. I need to improve some elements of the interface.
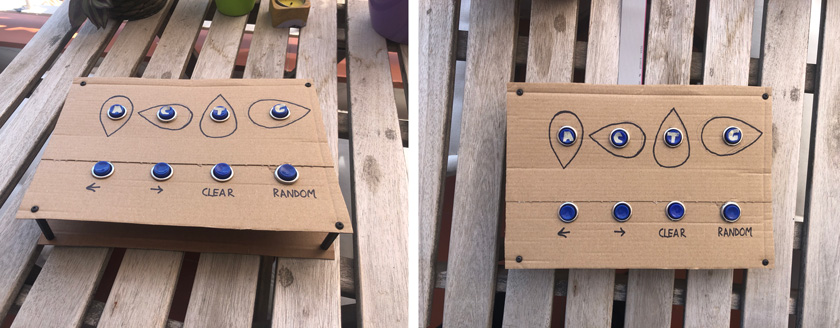
"LEFT: Carboard prototype. RIGHT: Controller prototype + flat "
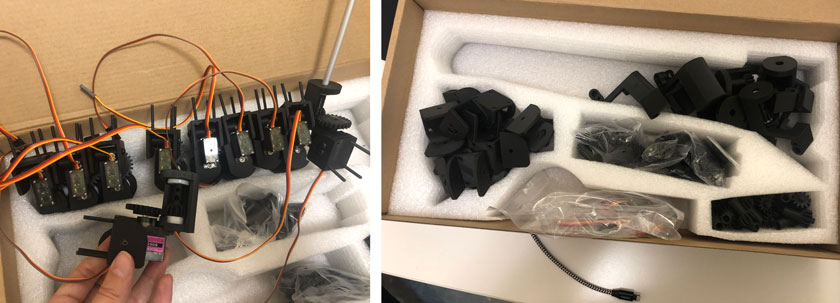
ASSEMBLY (33)
Putting this prototype together was intense, lots of nuts and quite long threaded rods.
"Gif showing the assebmly of the structure."
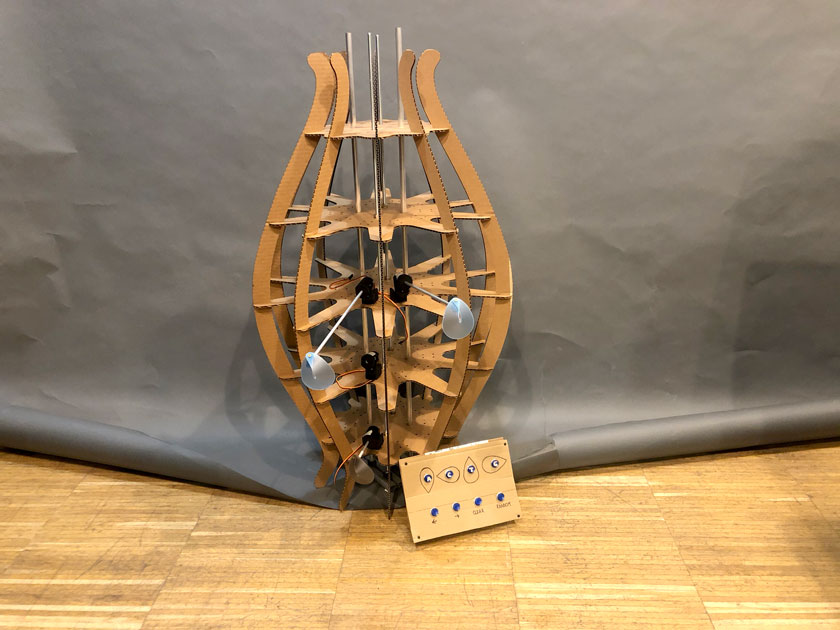
"Quick not a photoshoot picture for the structure & the controller."

"LEFT: 5 modules somehow attached to test the lenght of the rods. RIGHT: Close-up: 3 modules."
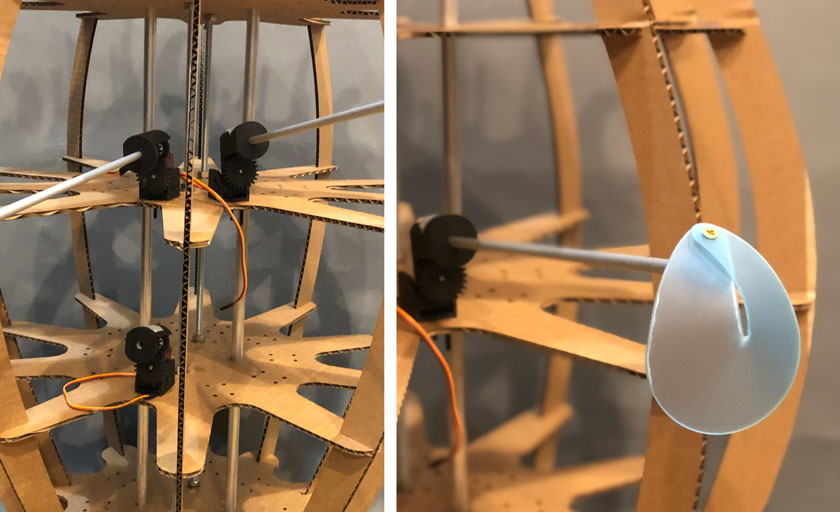
"LEFT:Detail motors attached to the cardboard base. RIGHT: Pixel detail."
WEEKLY ISSUES
I’m a bit anxious for the shipping of my pcb’s as I haven’t received an update in two days, so I contacted them. We’ll keep waiting!
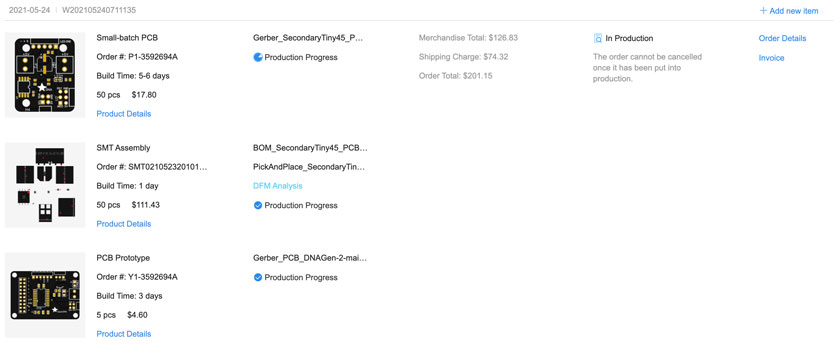
"Jlcpcb order status page."

"Jlcpcb chatbox."
