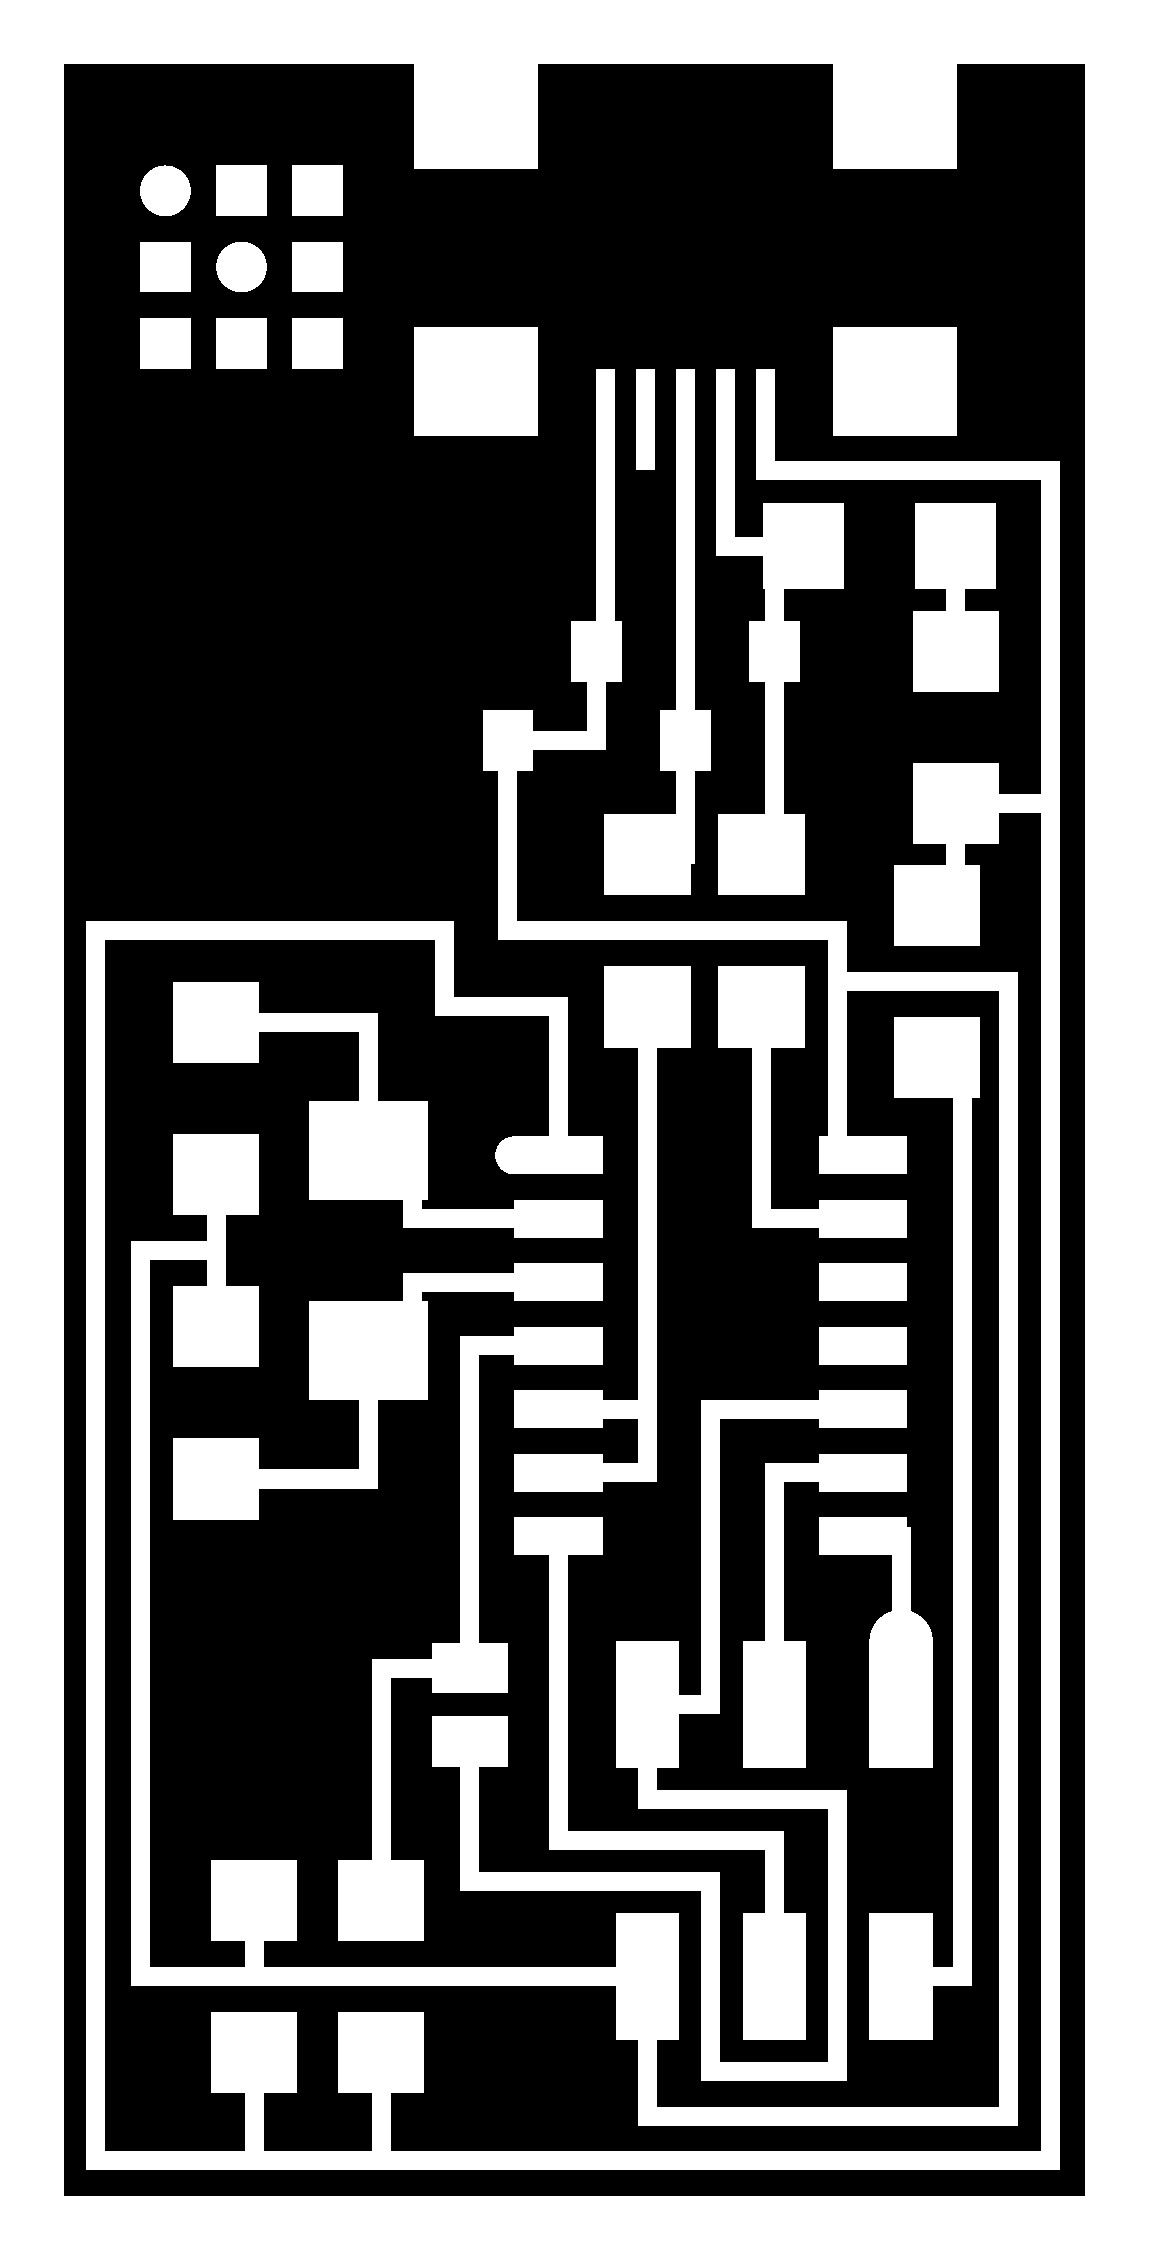
The steps for creating the Tiny45 USB. 1. Downloaded traces from ZZZ-Tutorials
2. Followed steps in tutorial to export the PNG trace file as an RML file. This is needed to mill the circuit with the MDX50.
3. Milling the Traces:
4. Milling the outline for the USB. This should be done aftter the milling of the traces.
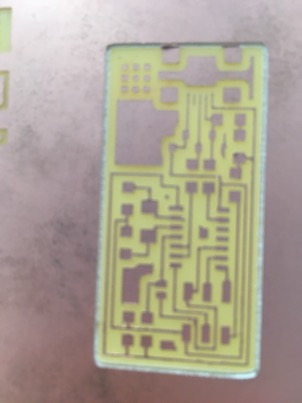
5. After the milling was complete, the usb had some burrs on the edges. I used a file to remove the burrs. This must be done very carefully, otherwise you might remove some of the actual traces on the board.
6. The PCB, Tiny45, after removing the burrs.
7. The Tiny45 is now ready for soldering. The components are as shown. The list was obtained from the tutorial site.
8. The following equipment were used for soldering.
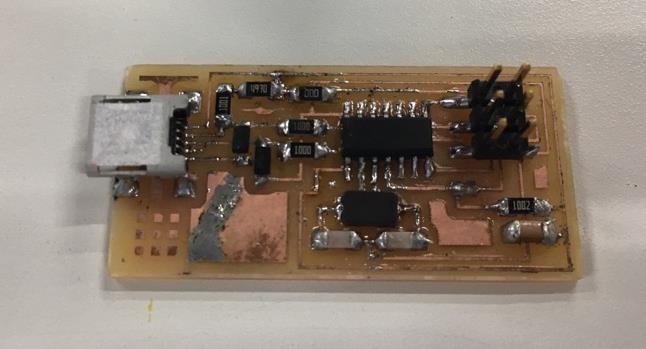
9. This is the Tiny45 after soldering. It is very important that as you solder, that you check for shorts immediately. This will save you a lot of time in looking for shorts after soldering. To check for shorts, I used a Multimeter, set to check the connectivity.
ATtiny45 - Development
ATtiny: Programming
5. After the milling was complete, the usb had some burrs on the edges. I used a file to remove the burrs. This must be done very carefully, otherwise you might remove some of the actual traces on the board.