

Week 6 3D Scanning and Printing
This week we are going to learn a core concept of fablab: using 3D printing and 3D scanning technology than change our physical world (atoms) to malleable as our digital world (bits).
Weekly Assignment
- Group assignment: test the design rules for your 3D printer(s)
- Individual assignment: 1 design and 3D print an object (small, few cm3, limited by printer time) that could not be made subtractively. 2 3D scan an object (and optionally print it)
Main Manufacturing Processes
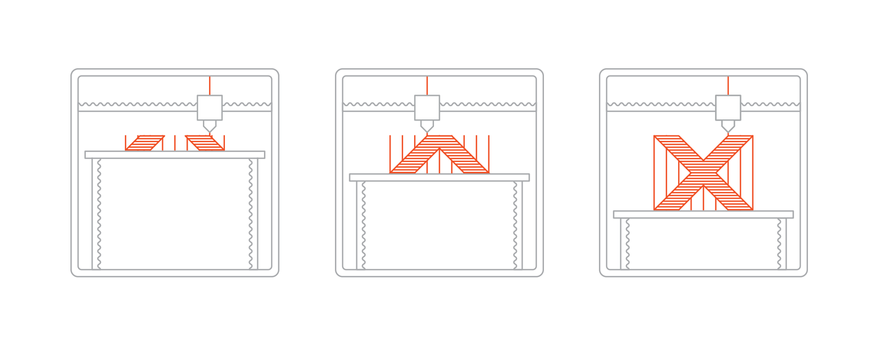
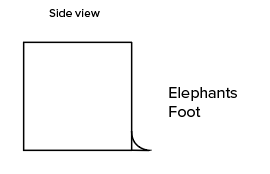
3D Print Limitations
Your digital design will become a physical object. In the digital design environment, there are no laws of physics to adhere to, such as gravity.Anything can be "drawn" in 3D on a digital canvas, but not everything can be 3D printed.
General Design Consideration for 3D Printing
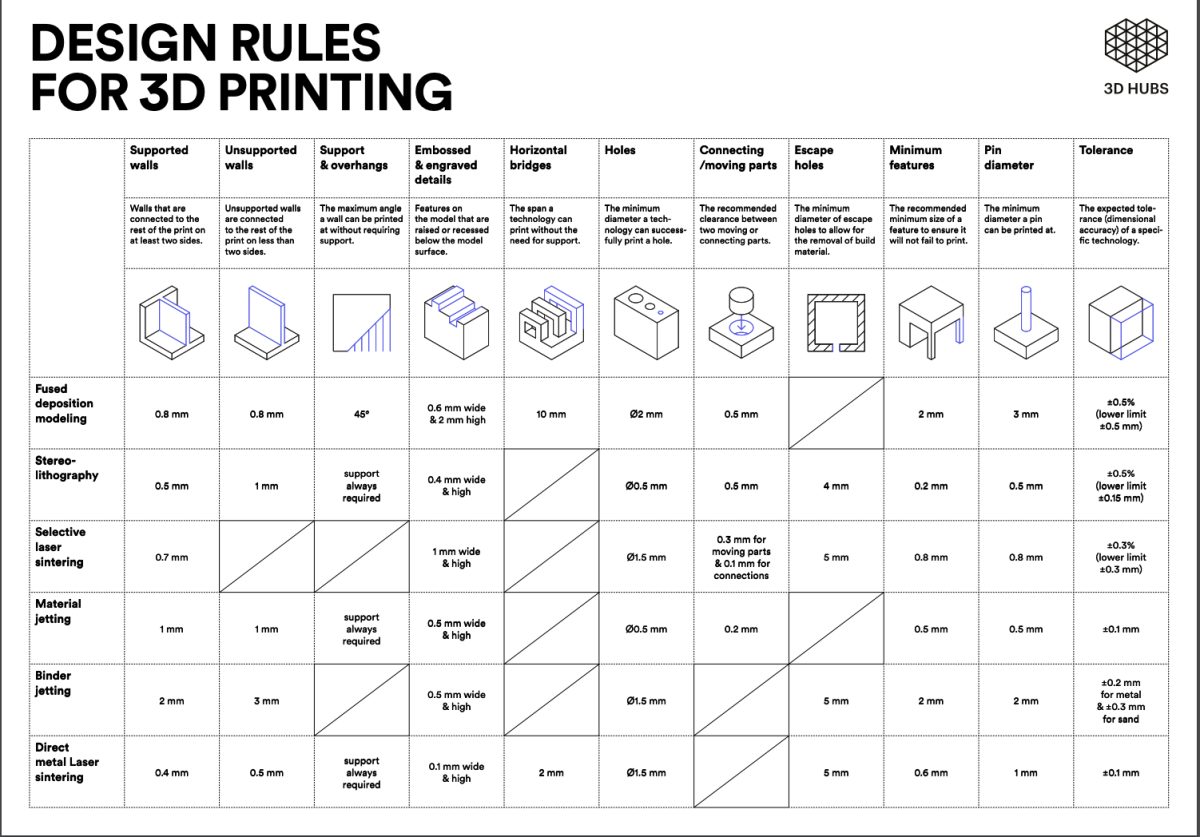
Design Rules
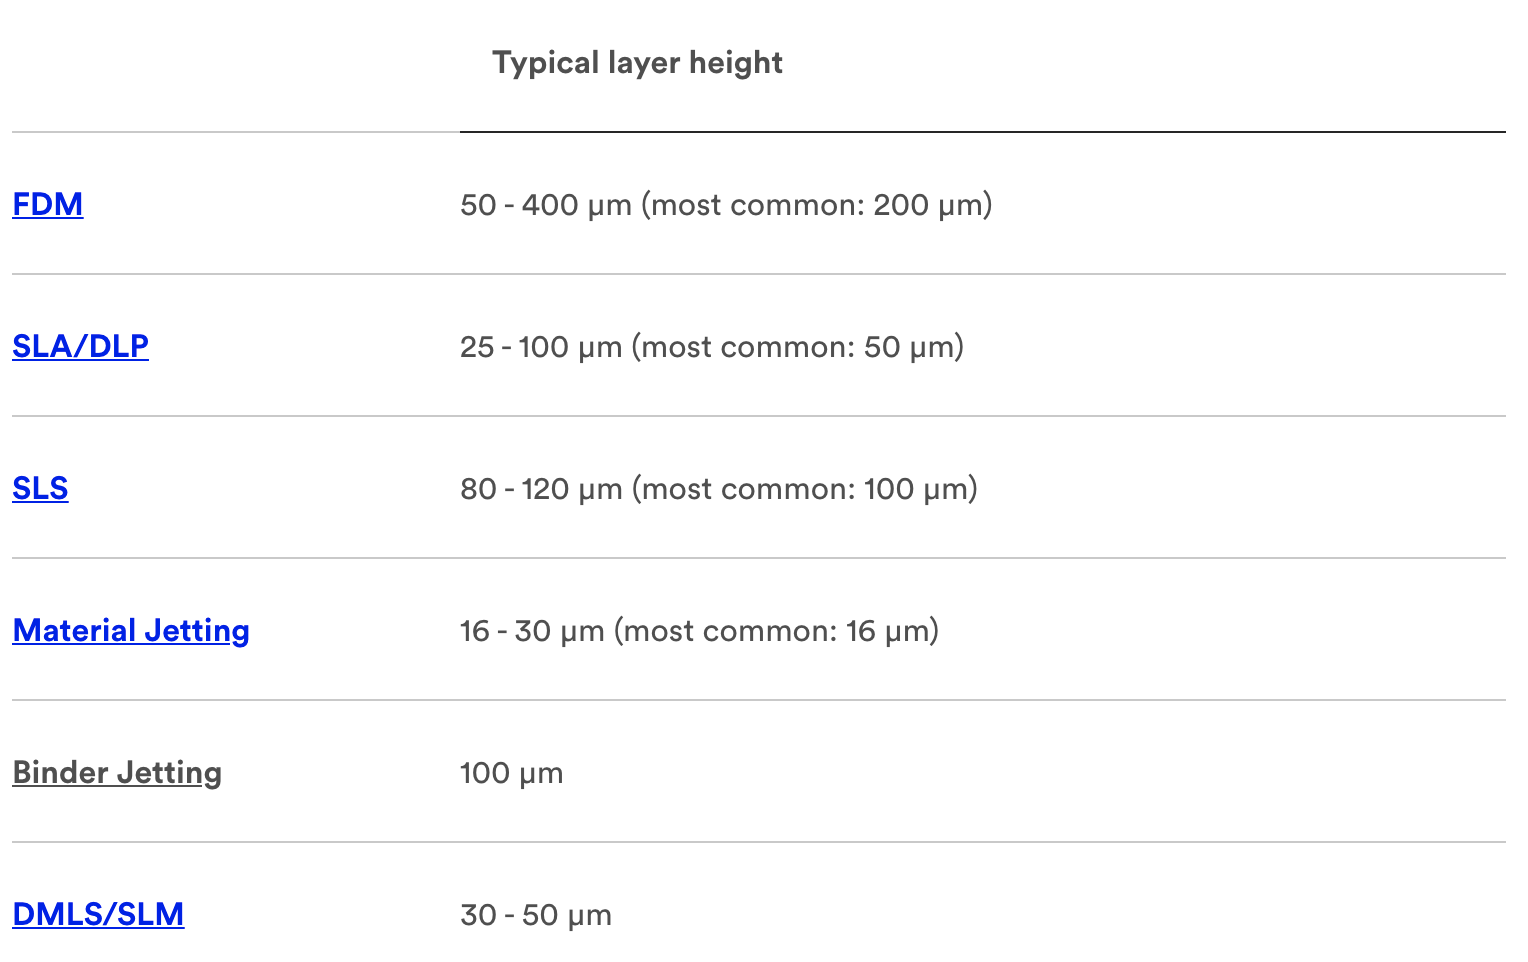
Layerheight
Level of Detail
More Reference:
More Design Rules: How to design parts for FDM 3D printing
More Design Rules For Different Filement
What are the 3D model design guidelines for printed parts?
More 3D print explaining on 3DHubs.
Group Assignment
Group assignment is documentd by Jin Group assignment link:Test the design rules for your printer(s)
Individual Assignment
3D Scanning
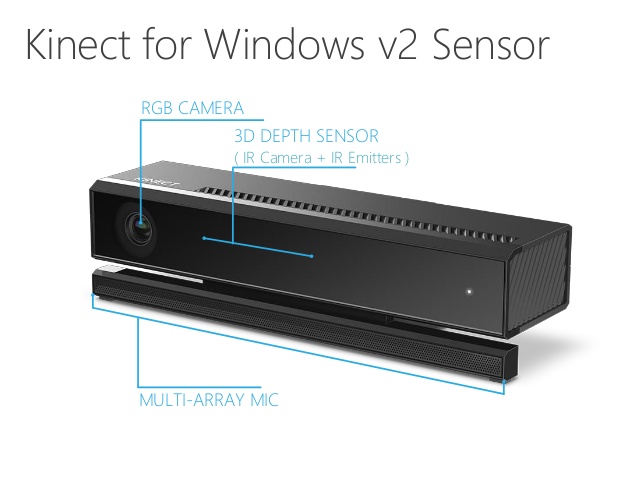
We use Kinect 2.0 for 3D scanning.
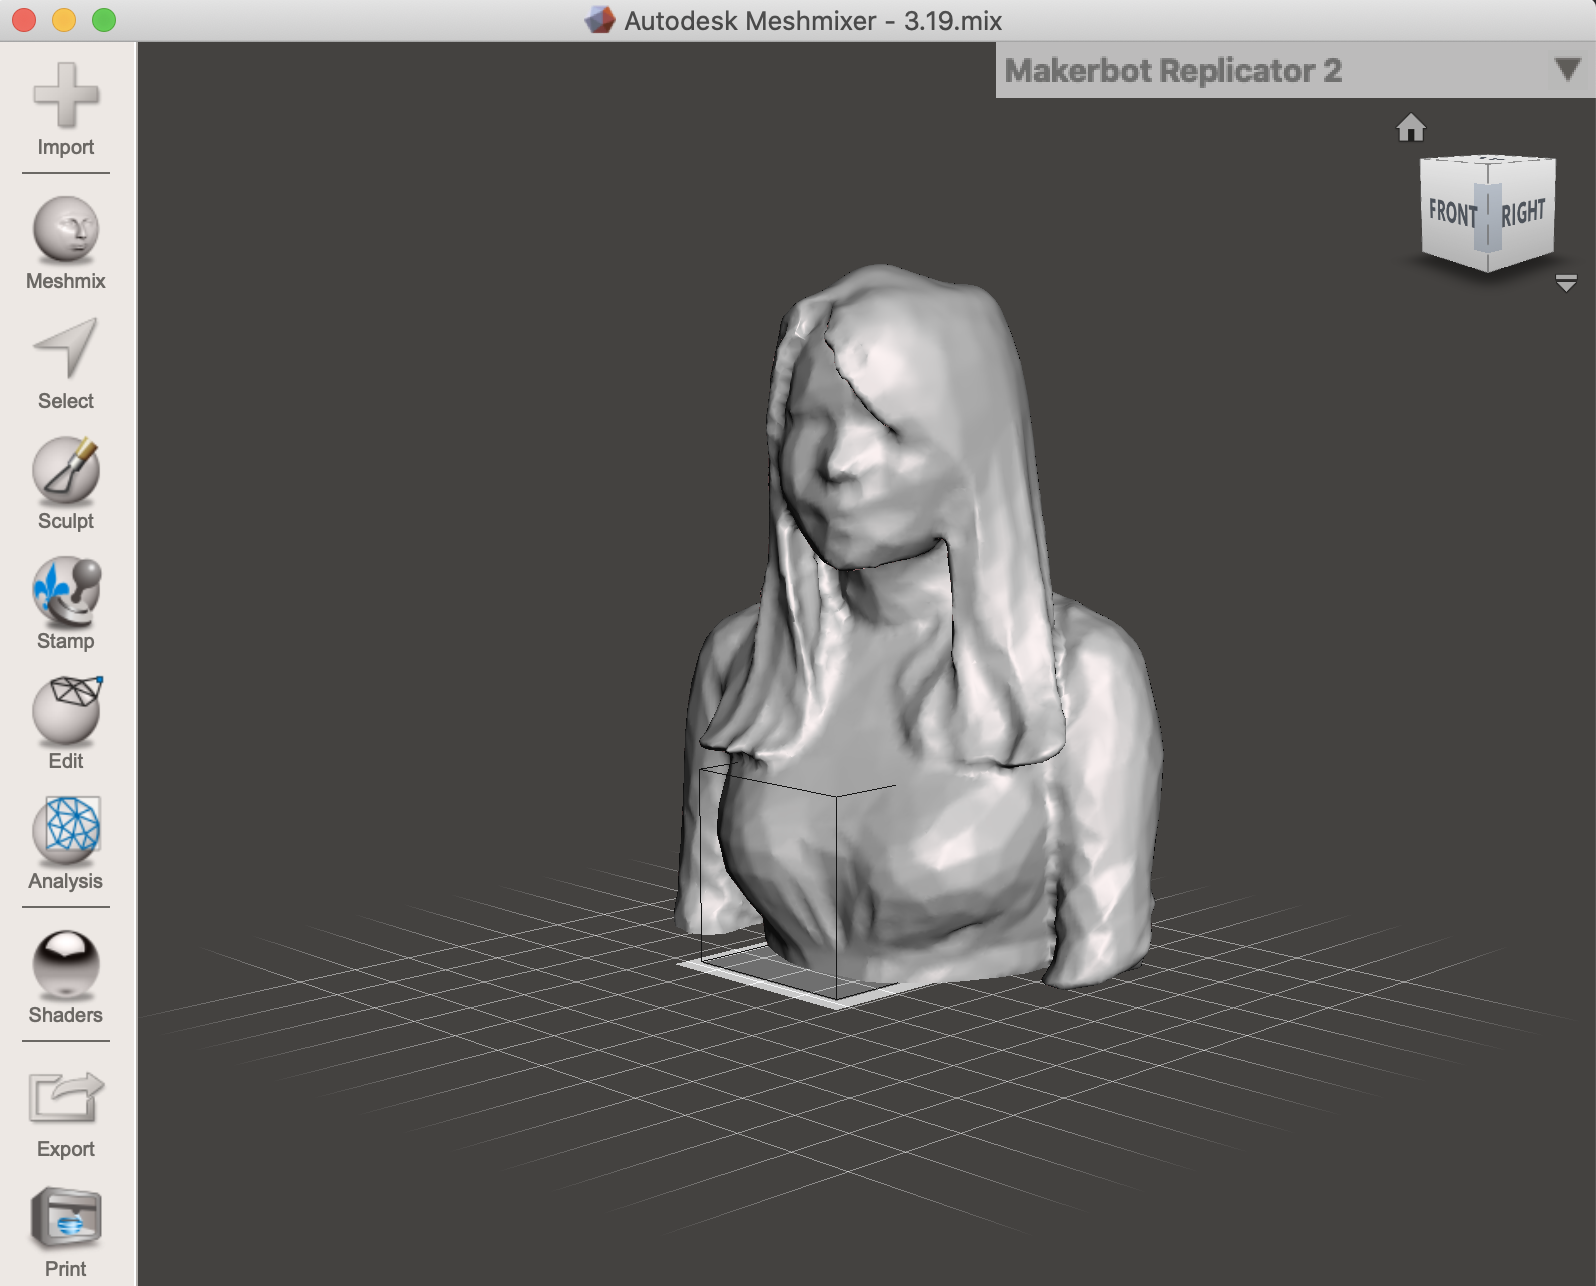
Skanect is a software that for scanning, and Meshmix is a software for edit model.
3D Scanning collects data of a real object and translates it into a virtual 3D model. There are different types of 3D scanners, the one we used is a KINECT from Windows. This one works best with big surfaces, ie: a human body, if you are looking to scan smaller objects such as jewelry, this is not the scanner you would use. 3D scanning is quite fun, but you need to know that after scanning your object, you will have to repair the mesh. This is because when we scan, the precision is not perfect and the surface can have "holes". Among the softwares you could use to repair your mesh once you did the scanning, is MESHMIXER from Autodesk.
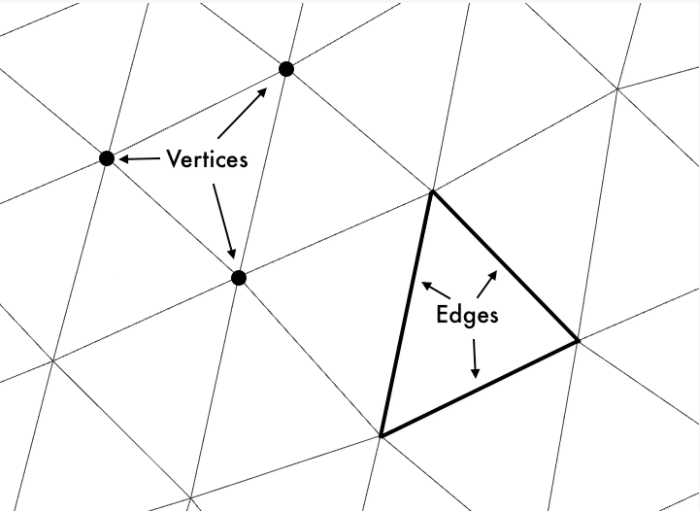
Meshmixer operates on triangle meshes, which consist of three types of elements: vertices, edges, and triangles.
- Vertices are points in 3D space. We can also associate other information with vertices -- for example, color.
- Edges are connections between pairs of vertices.
- Triangles are triples of vertices.
More Meshimix tutoriel.
Scanning Process:
- Have a clear background behind object for scanning.
- It works better if the scanner is fixed on a tripod and the object to scan spins on a fixed axis.
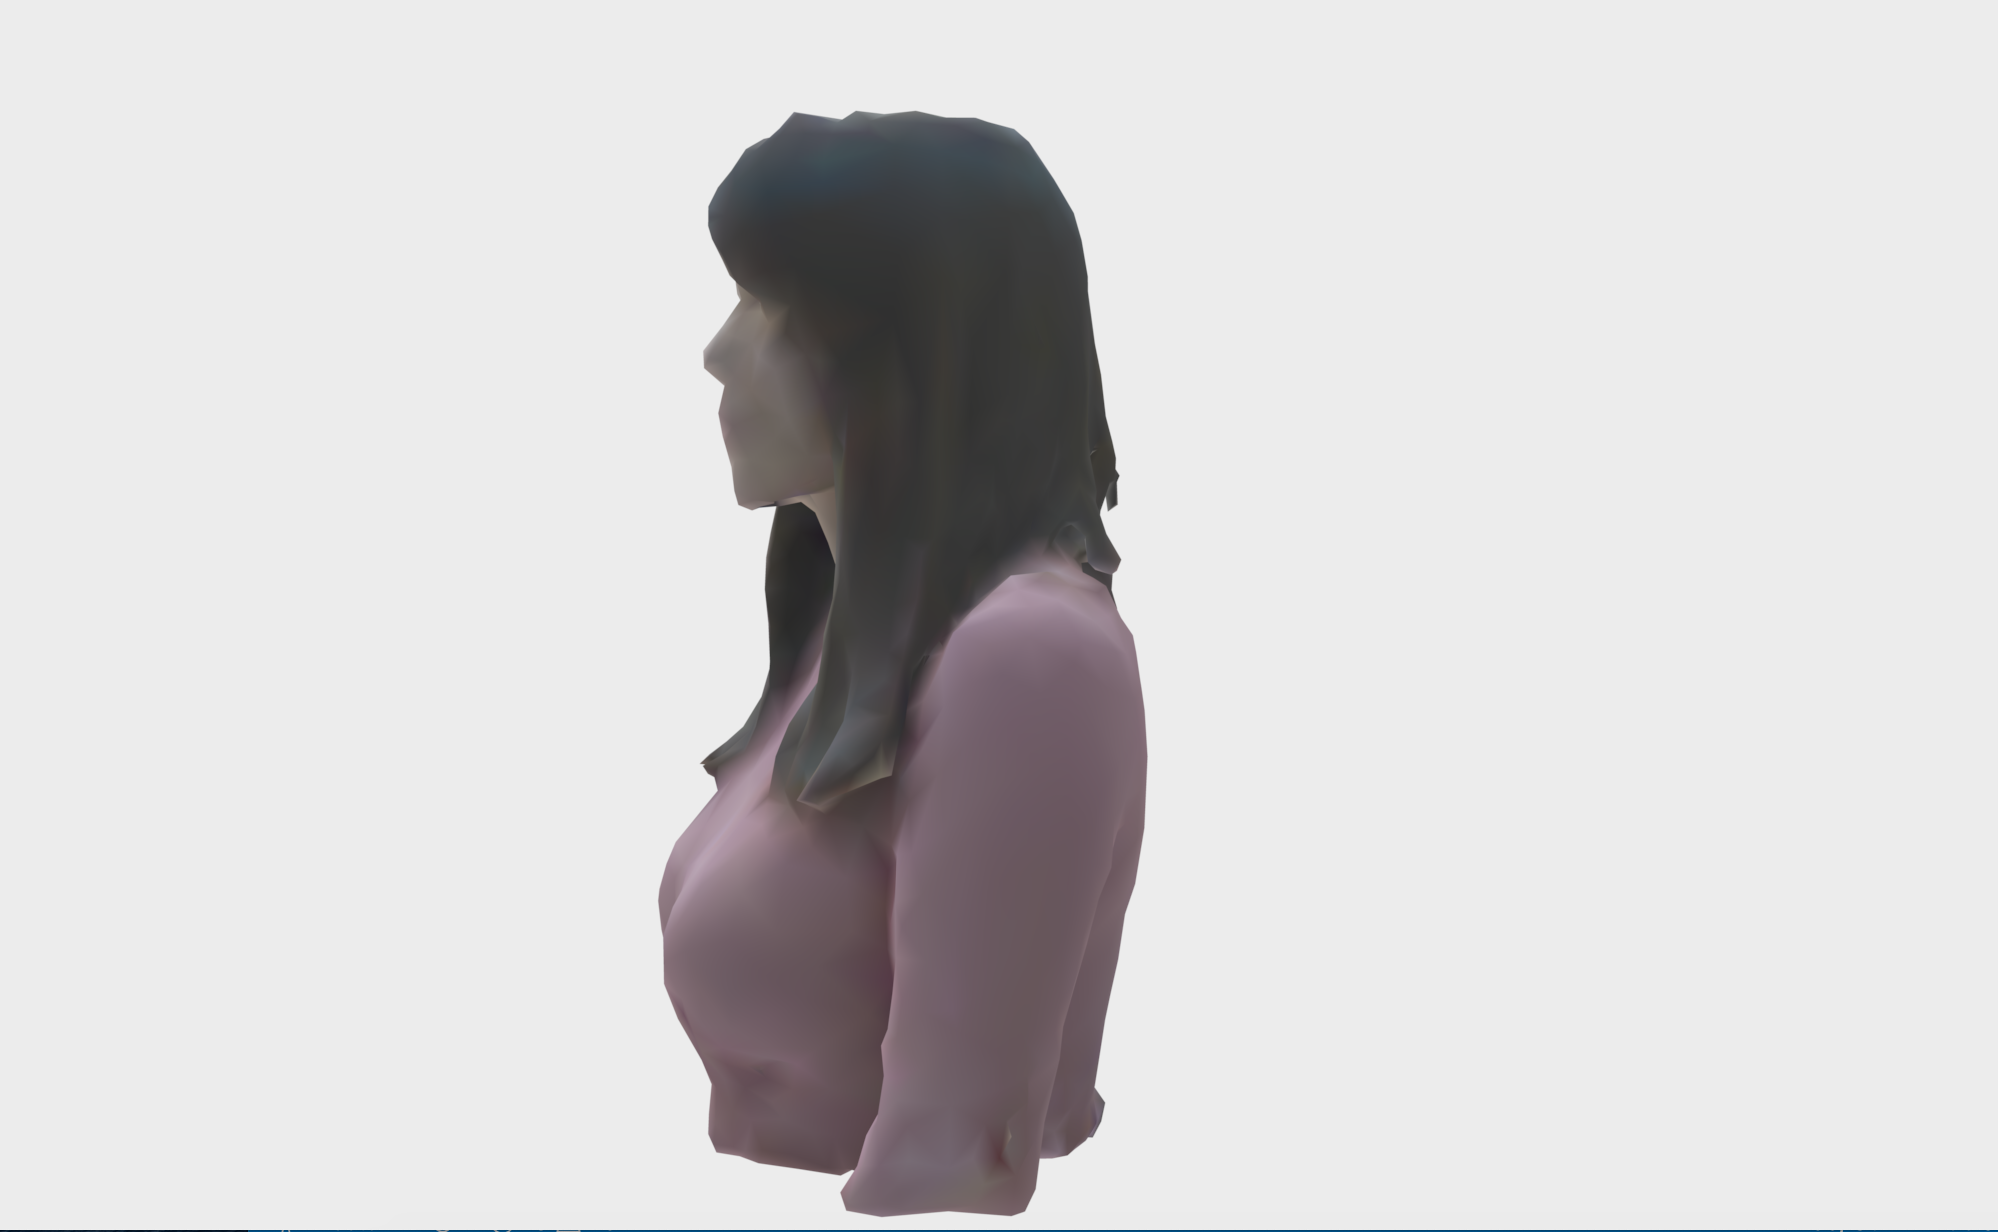
- Think of the best position to begin scanning your object. Remember that this process is like take thousands of photos that in the end are "stitched" together to build the object. And the stitch will be slightly visible, so keep in mind where you want to the stitch to be. In this case, when scanning a person, is a good idea to start recording from the side, this wat the stitch will be on the back of your head.
3D Printing
For 3D printing, I tried tindcad and fusion360 for design, also I used mini printer, Raise 3D and ultimaker.
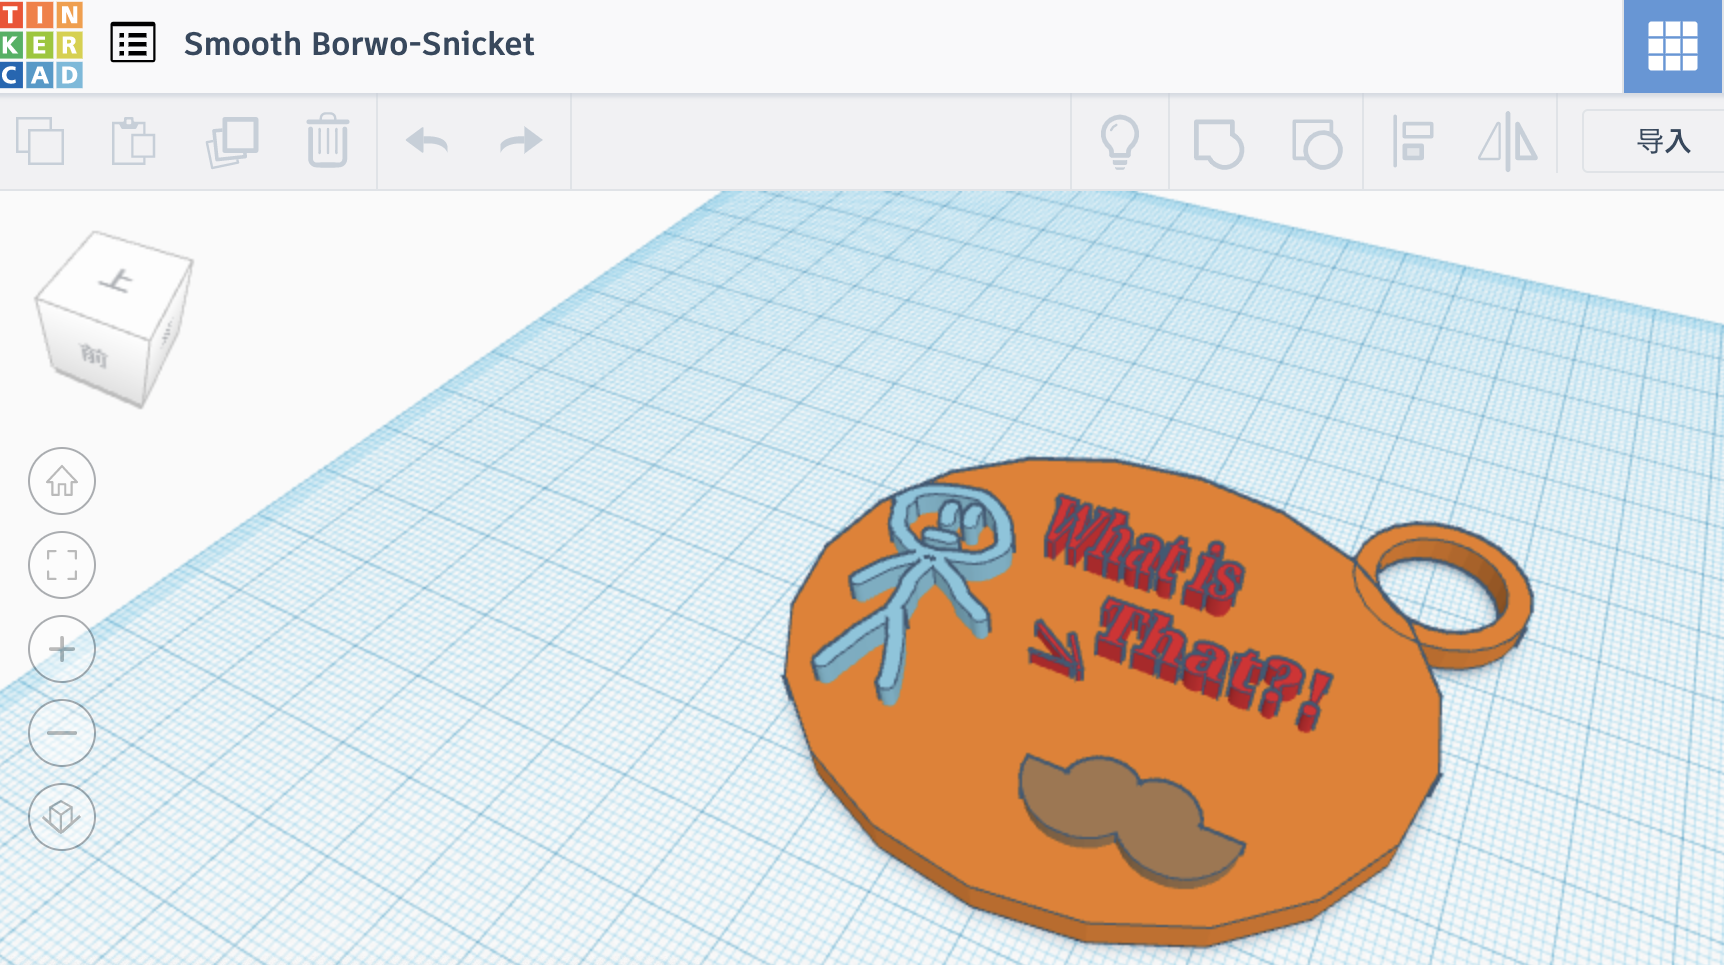
Tinkercad and Mini printer.
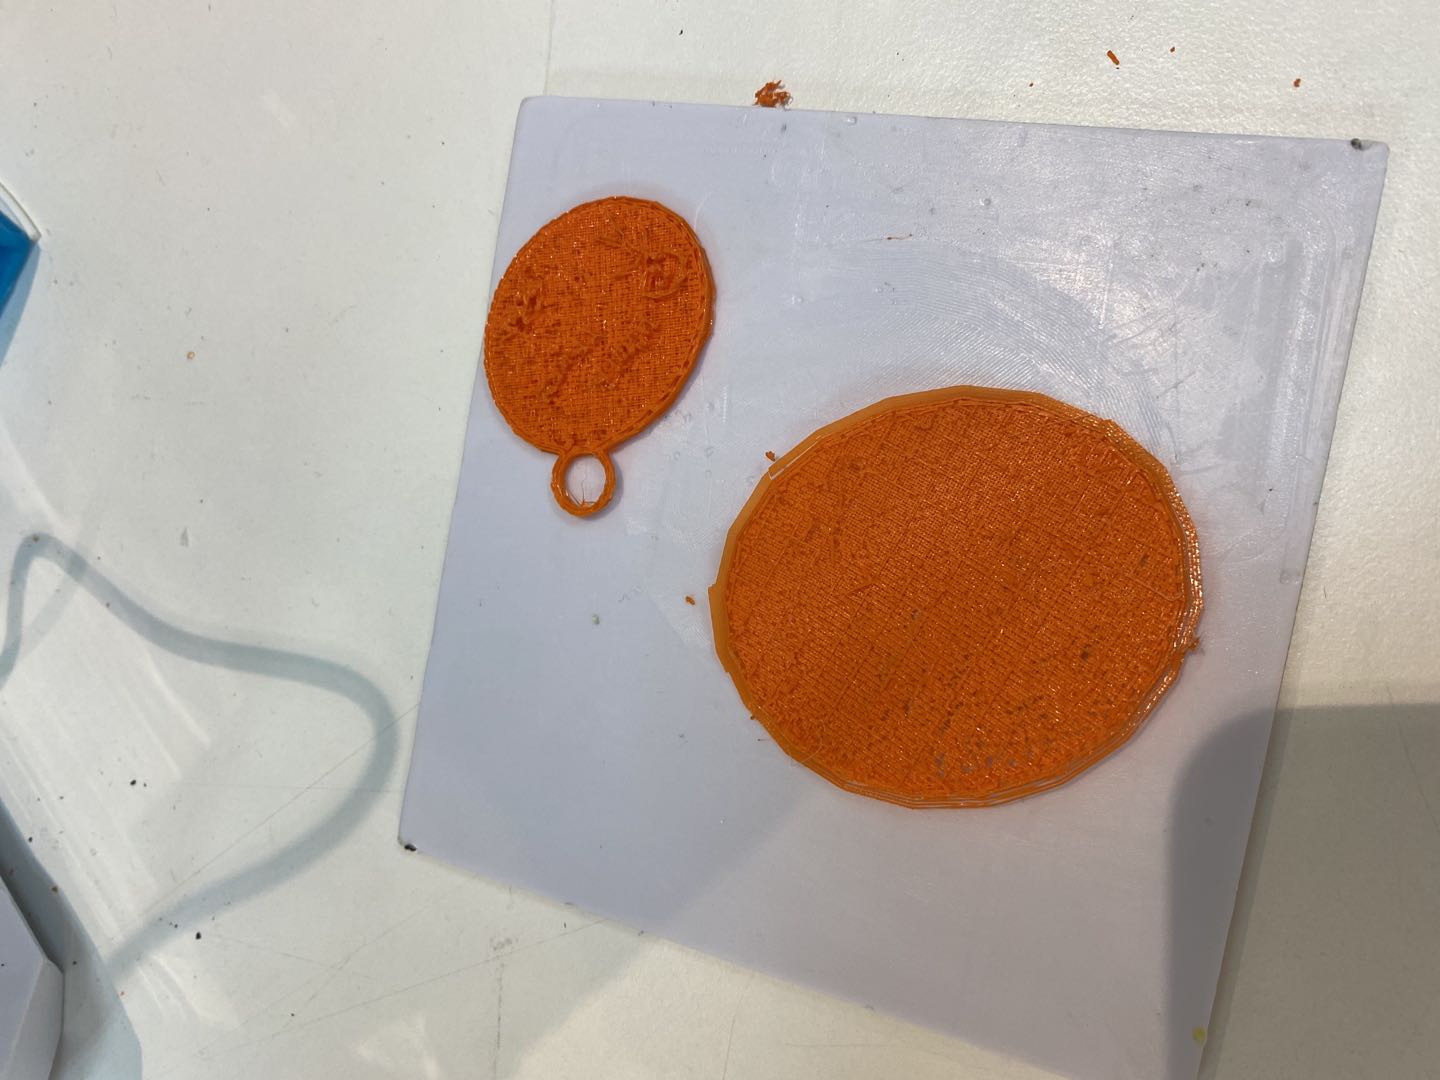
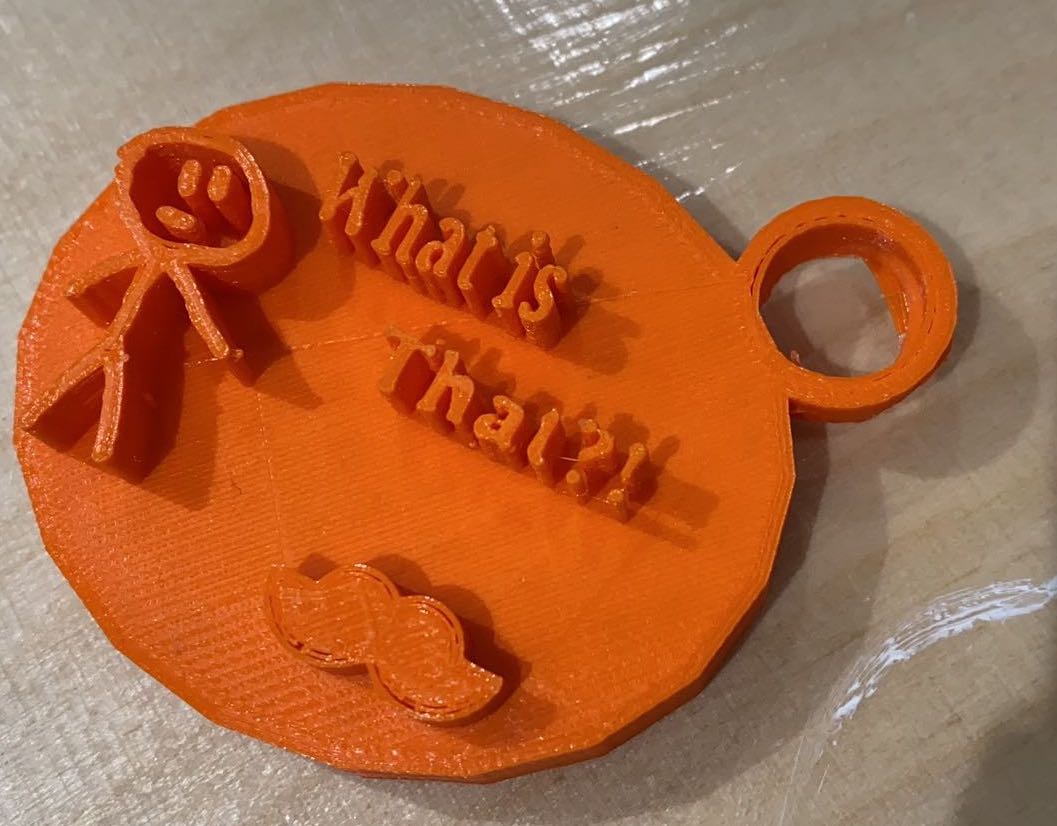
Tinkercad is a very easy 3D modeling software for kids, I played it with my students. We failed several times, becasue we did do the right support and filling setting. In the end we got a good key chain.
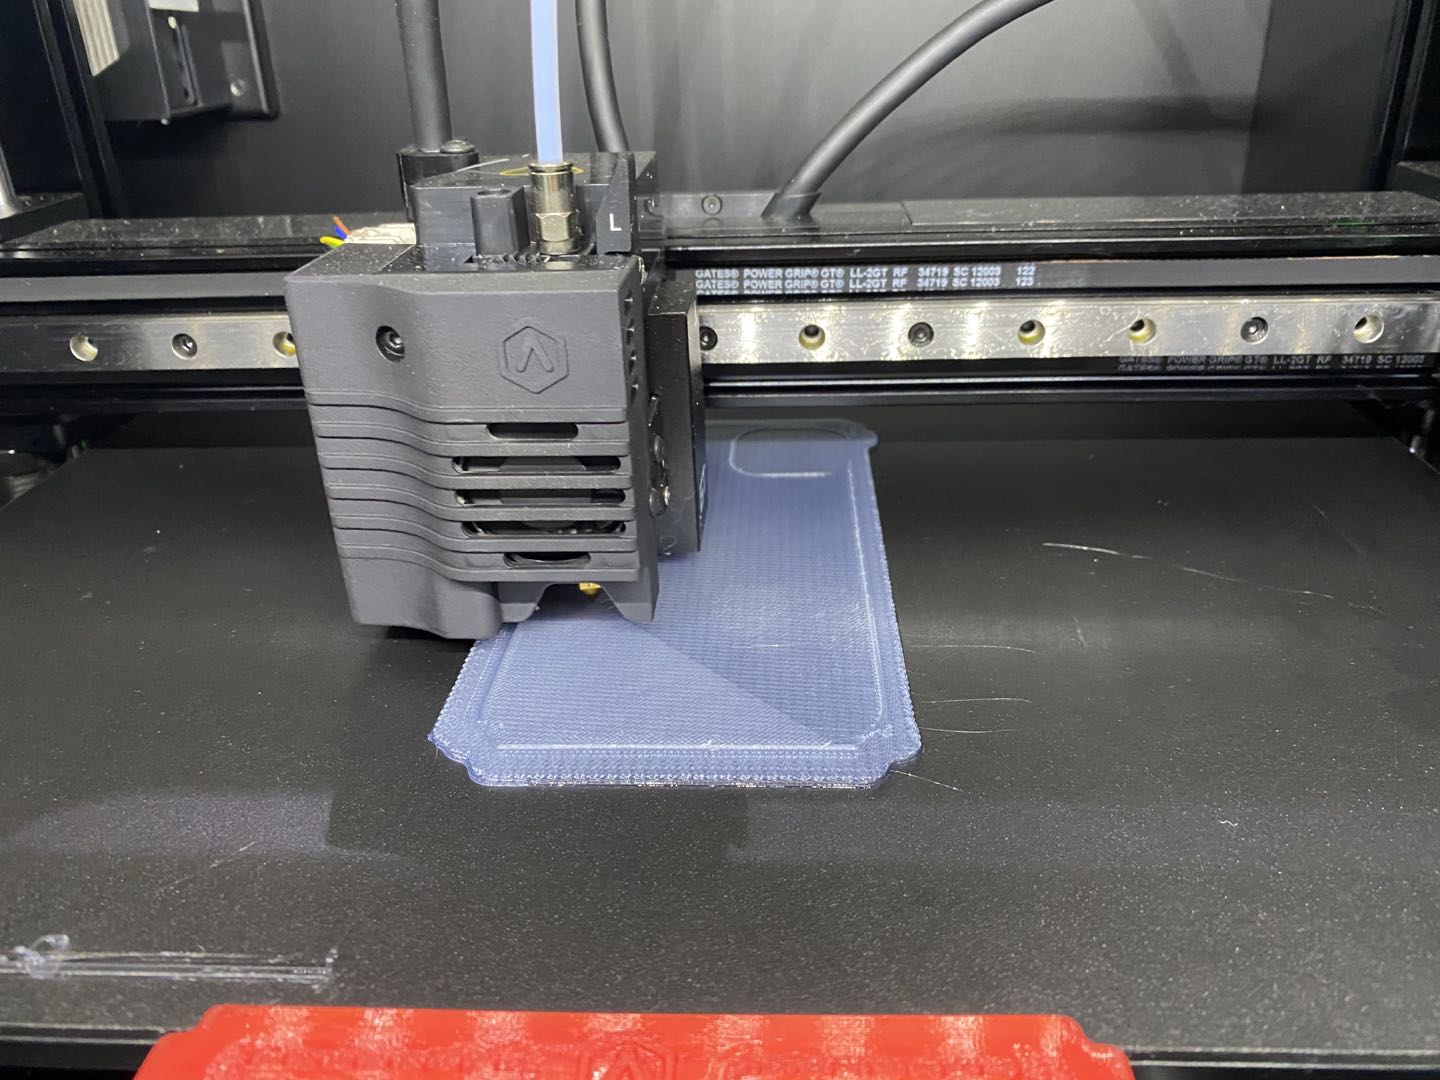
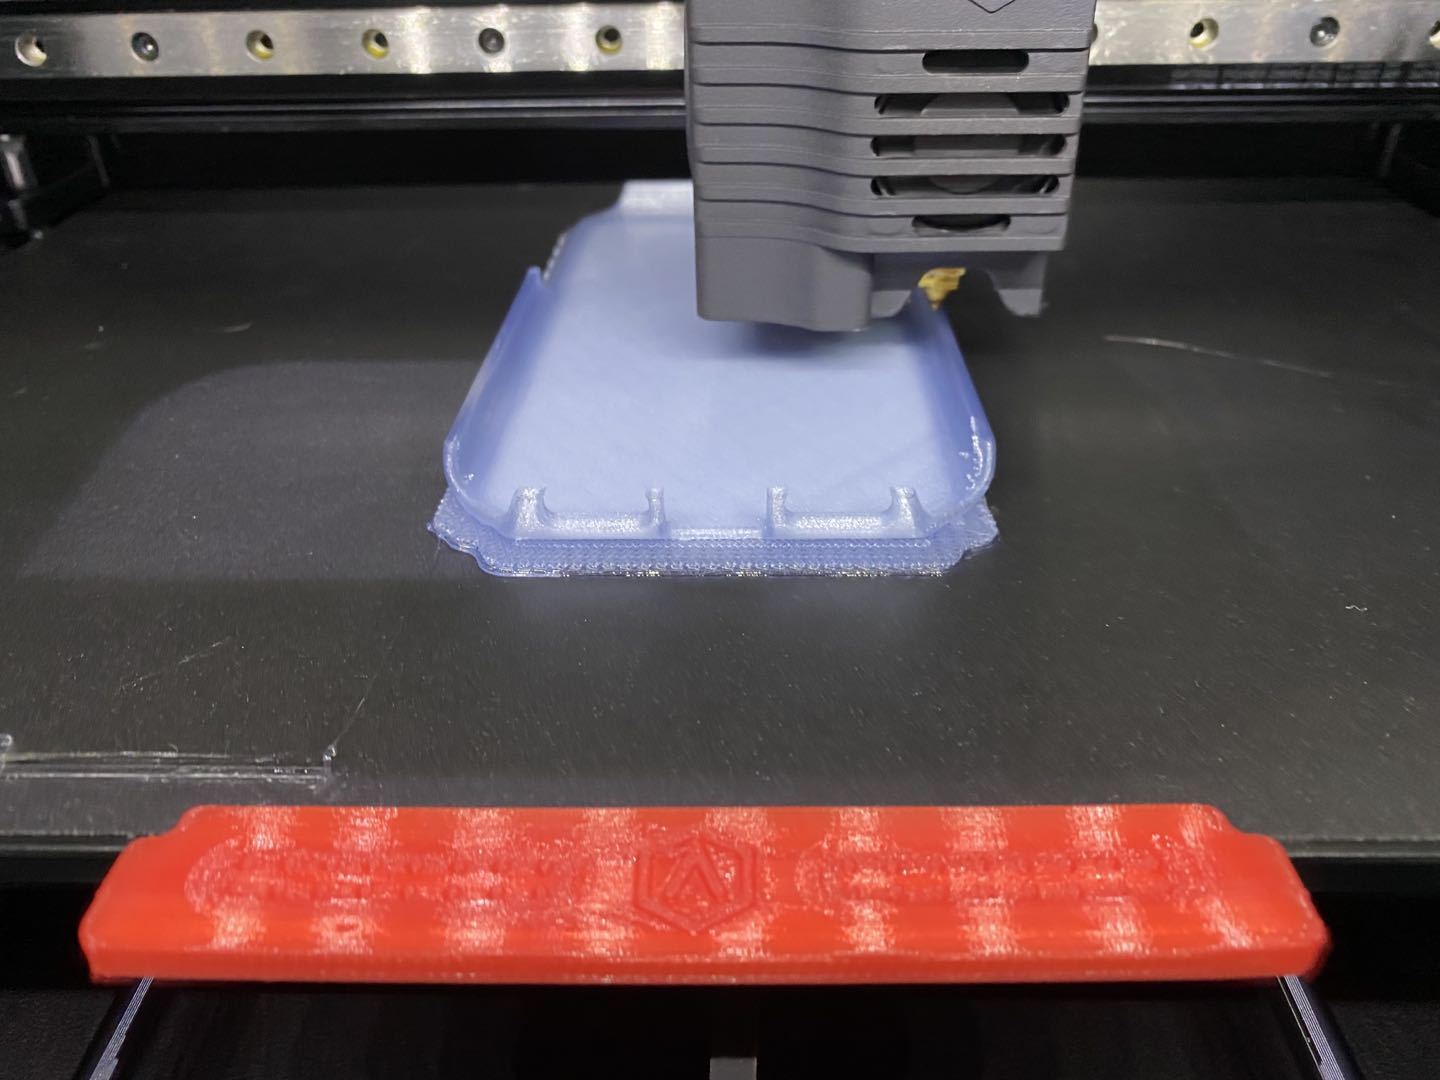
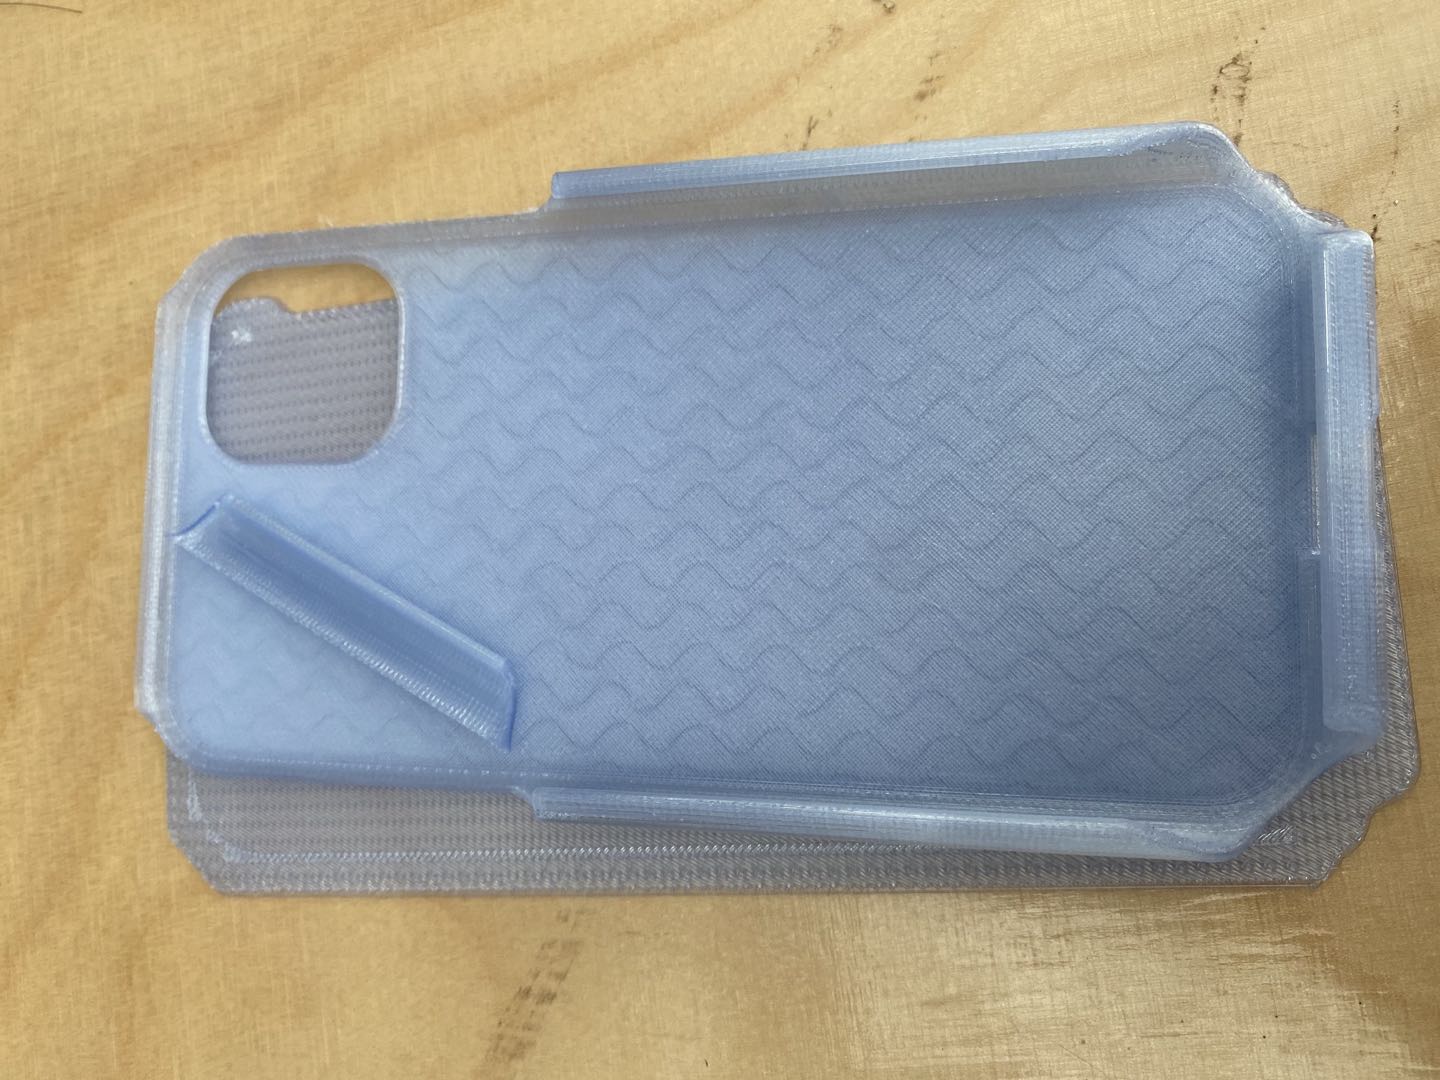
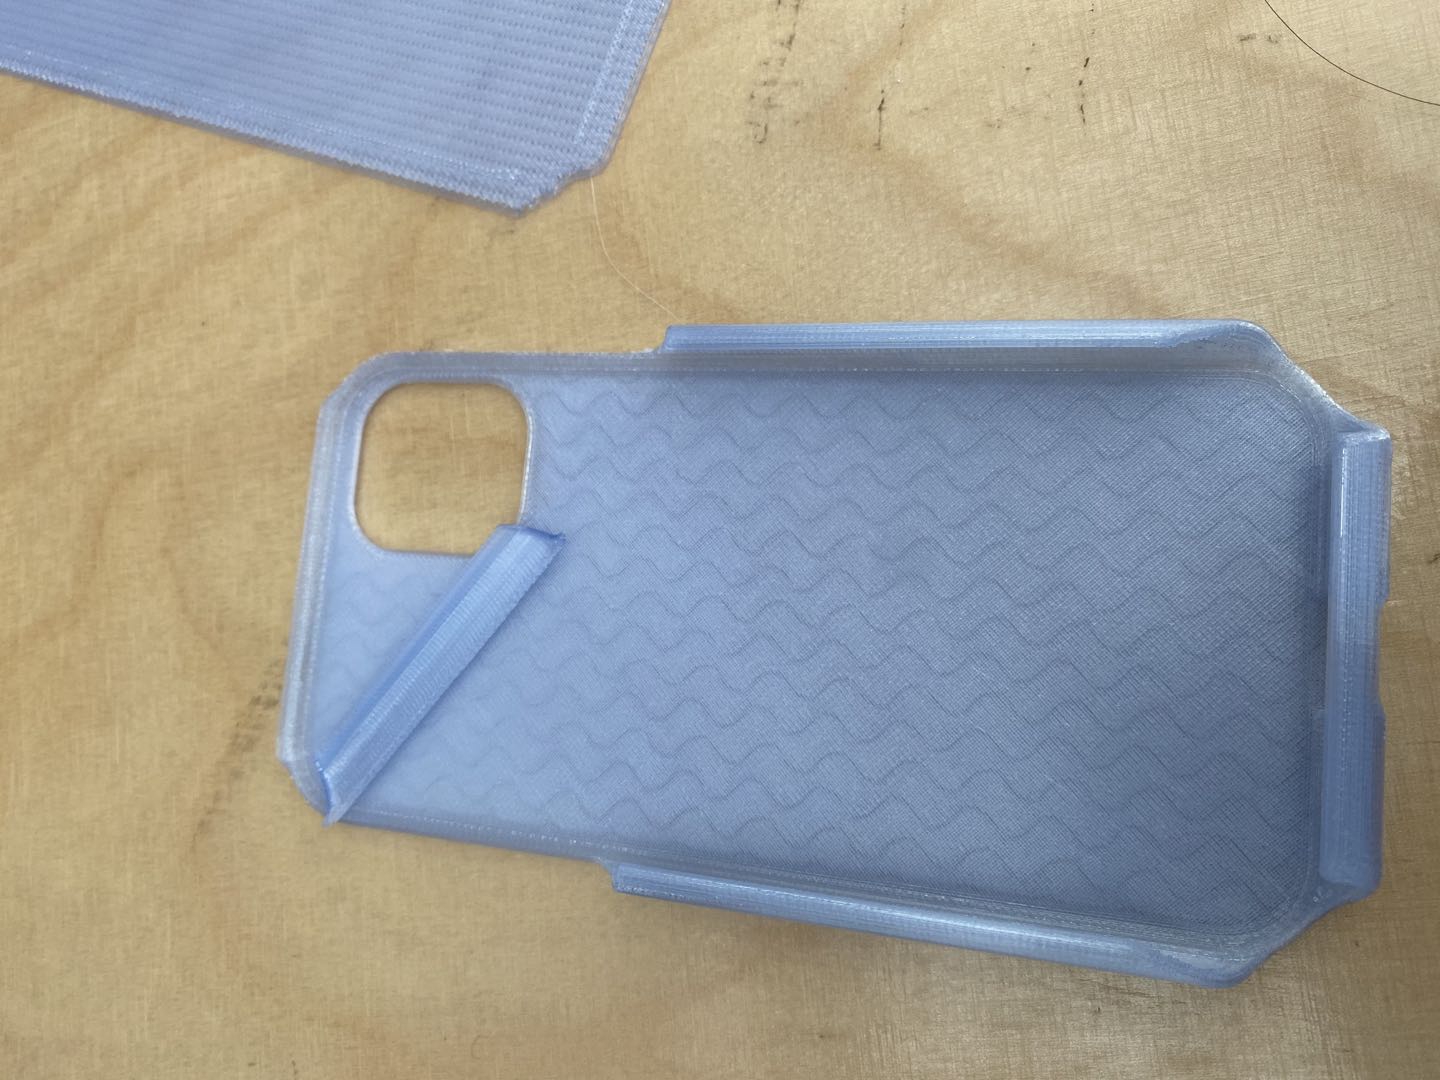
Iphone case printing
I also decide to print an iphone 11 case. I download a model from thingsgiver and print it on Raise 3D printer. It seeems printing well but the side part is easy to break. The reason is that printer is printing layer by layer, so when you print a thin part vertical, its fragile between layers. This printing is just for fun, so I learned that FDM 3D printing in generral for prototype, it not that stronge. When we design things we need to make our design thick enough for the function.

Final project printing
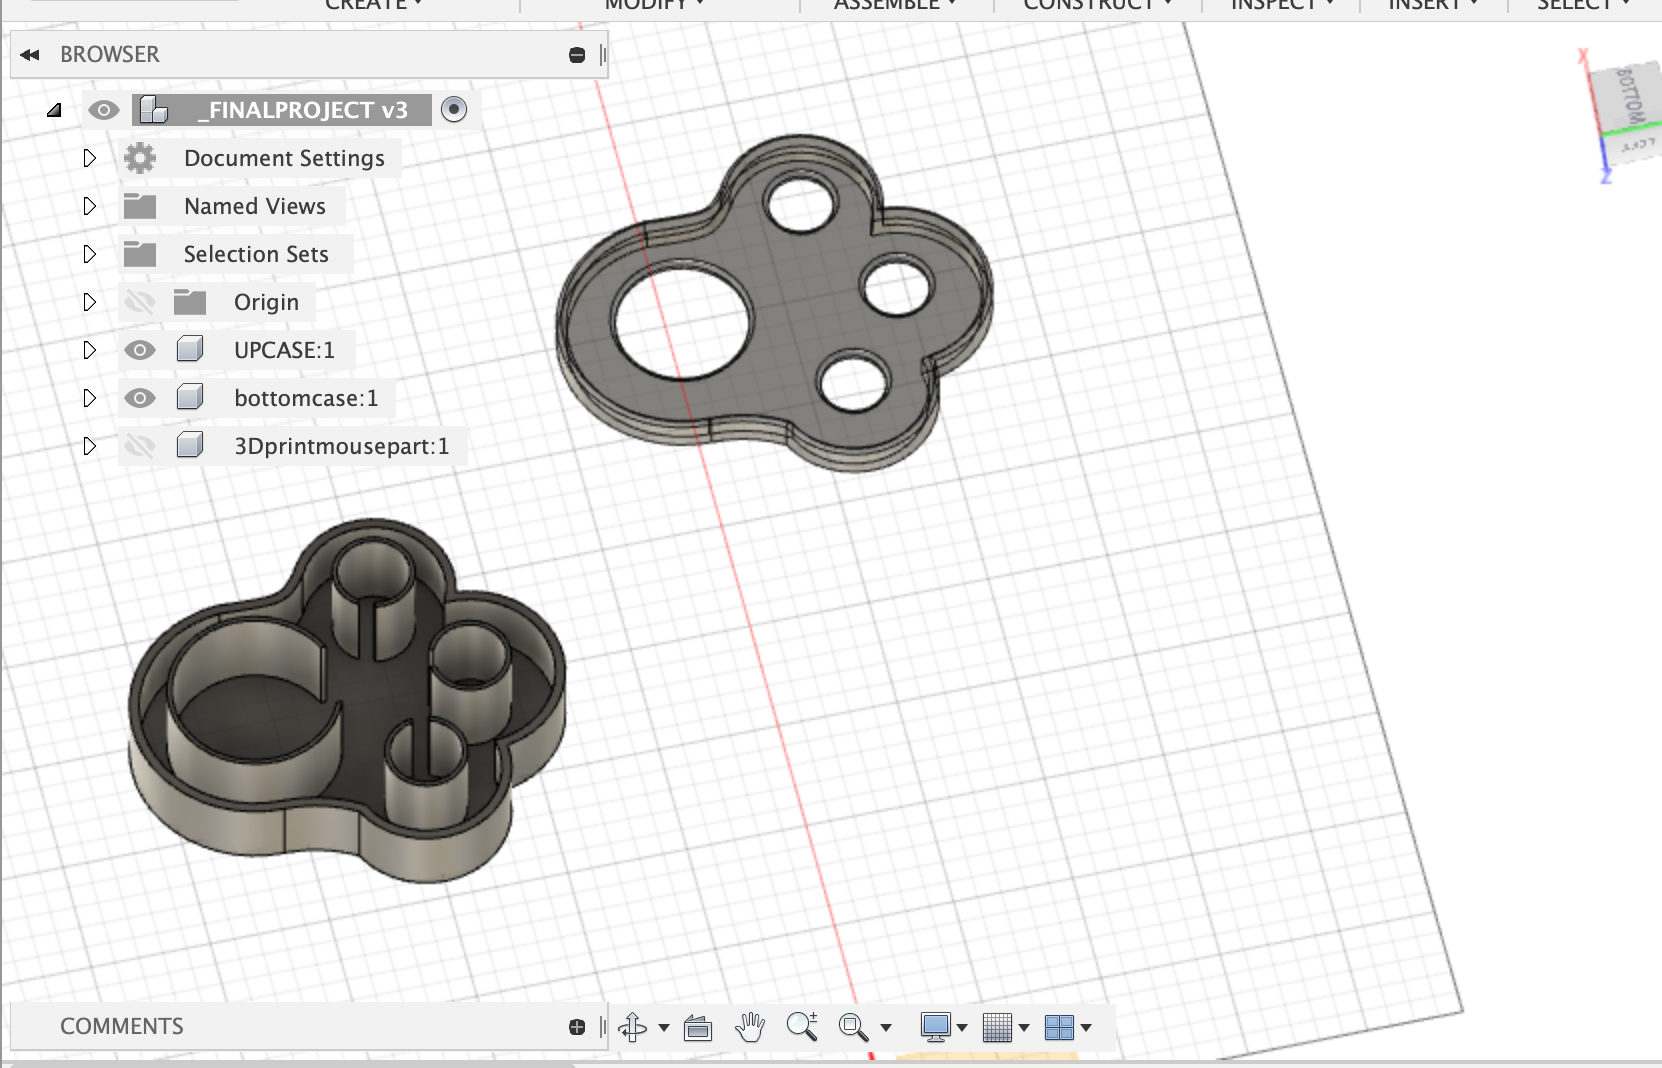
My final project also need a case, I design it in fusion360, here is my first design.
The first print failed because I forgot to put raft to make object stick on plate, so when nozzle print more layers on the base it start to move a little bit. I stop printing when I found out this mistake.
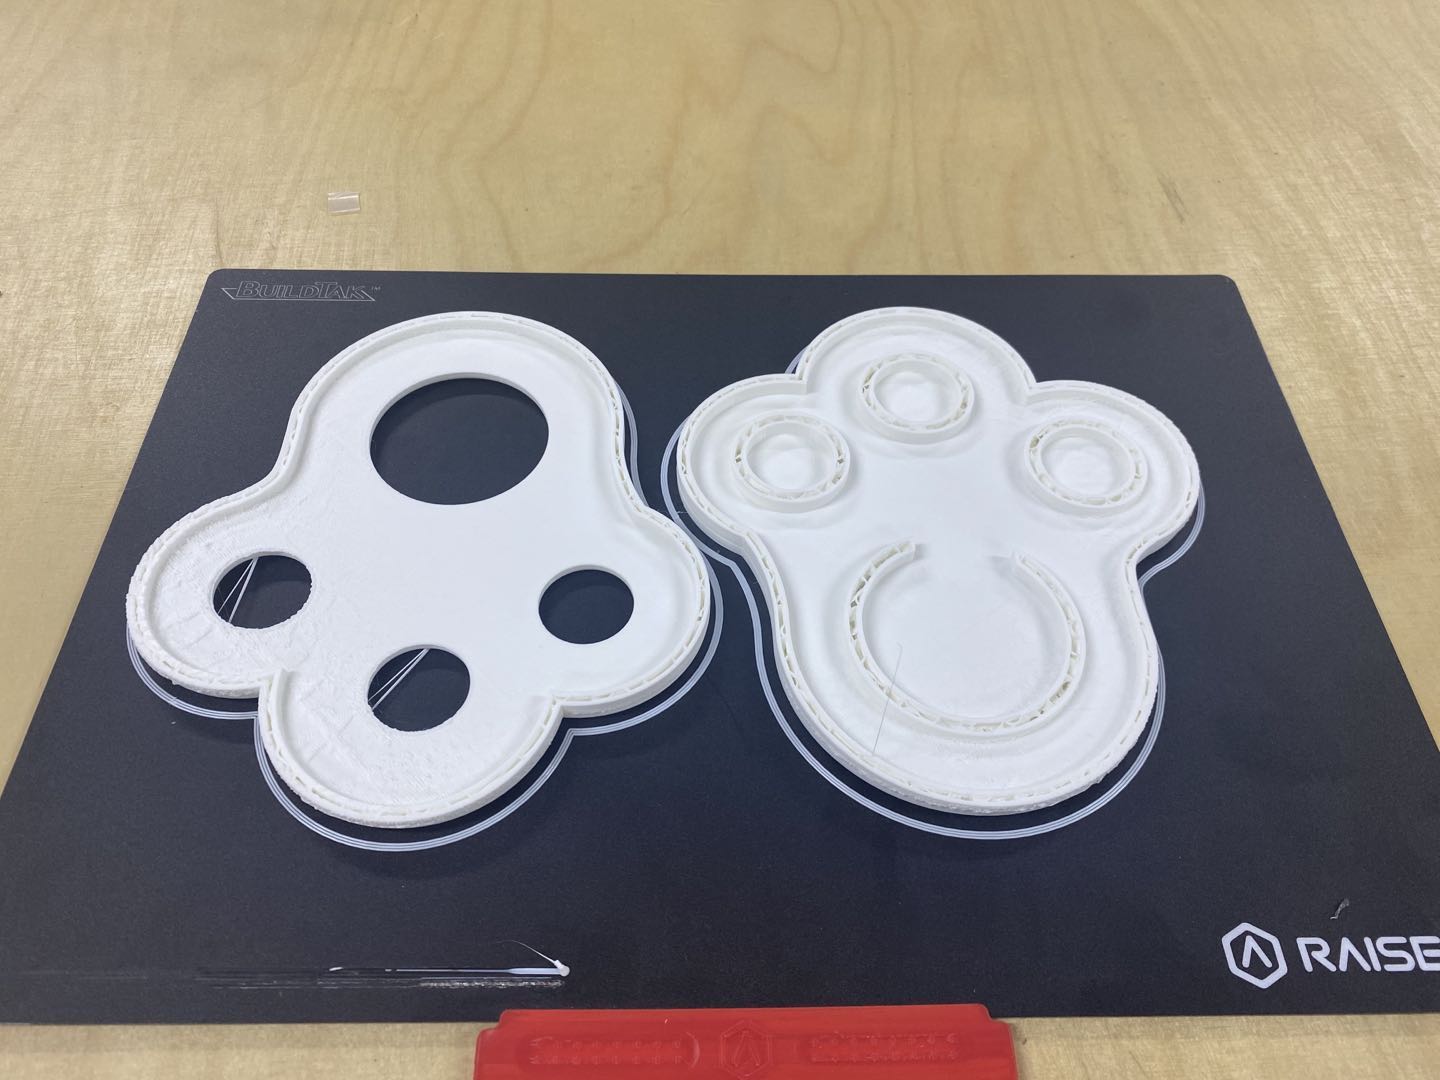
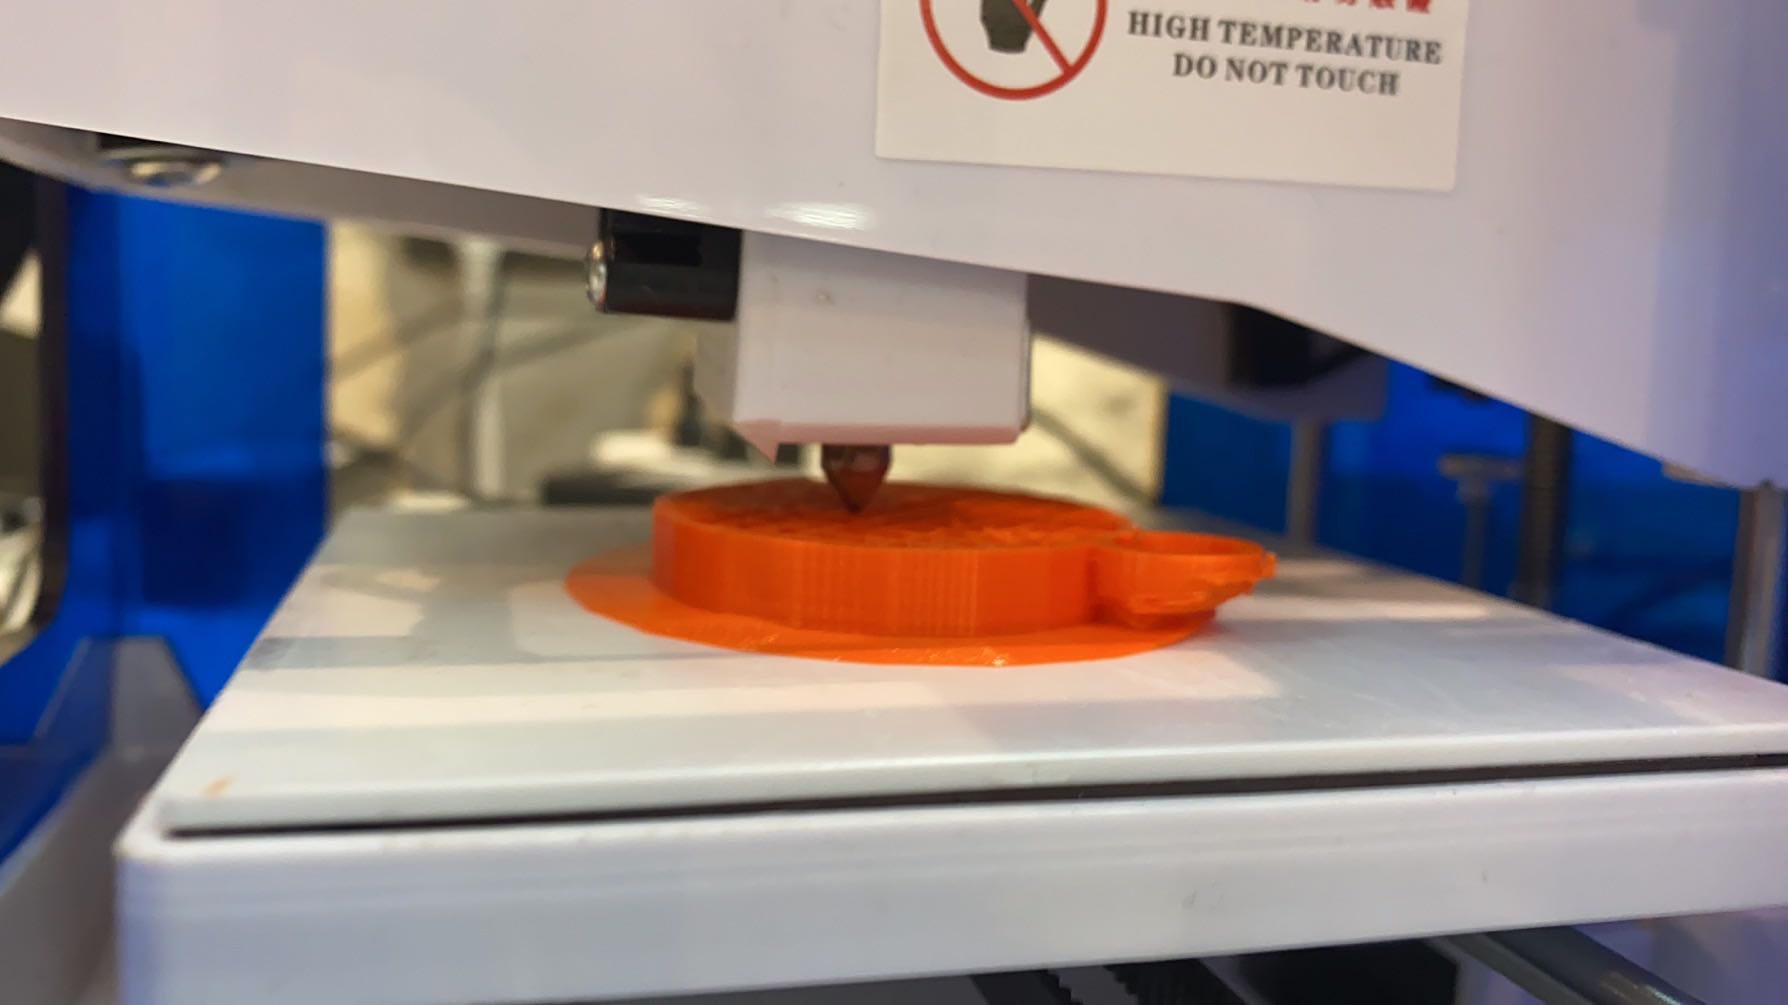
Then I print again, this time printing goes well but you can see those two pieces actually can not been assemble together well. I caculate size wrong. It took about 12 hours to print, I am wasting materirels and time.

In this design, I have several problems. 1 It's not easy to assmeble two parts together well. 2 I design tube for buttons and force sensor, but they can not fit in this case properly. 3 It takes too long to print. So I change my design and make second version design.
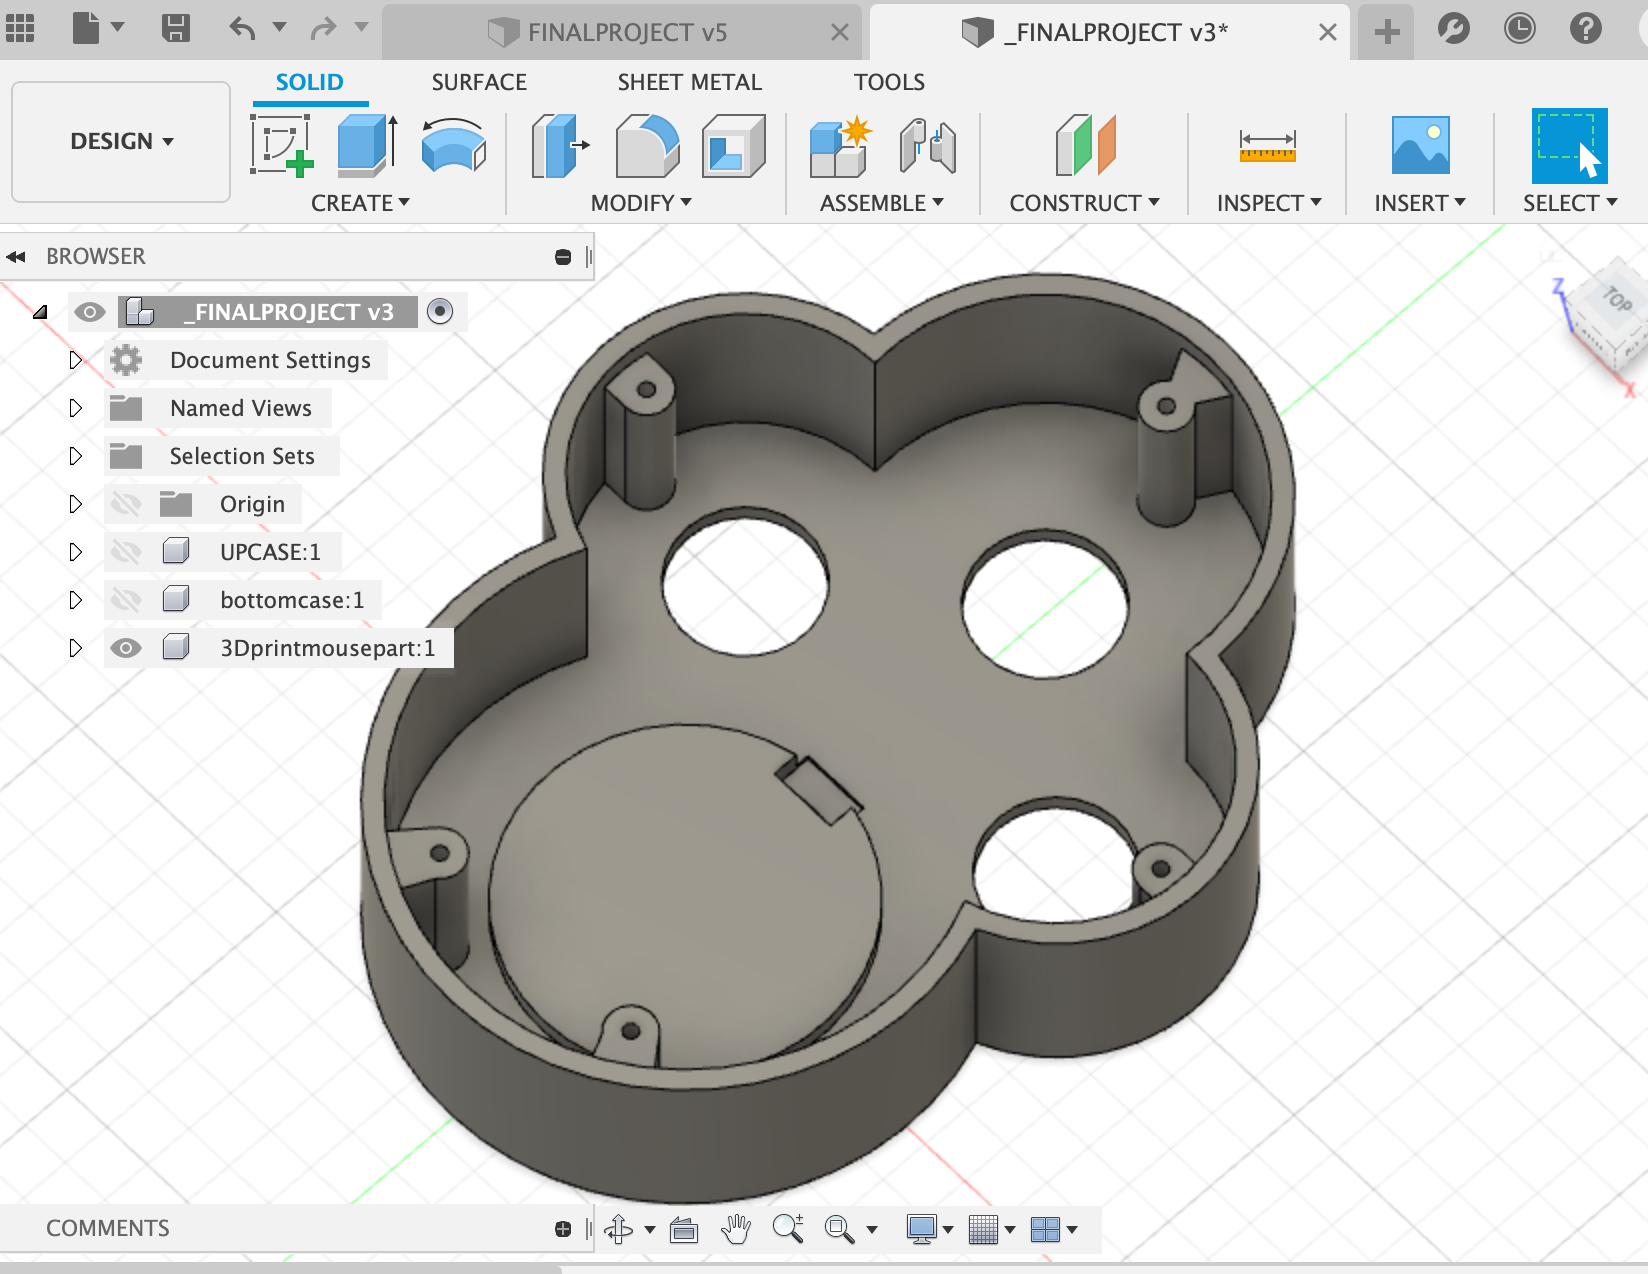
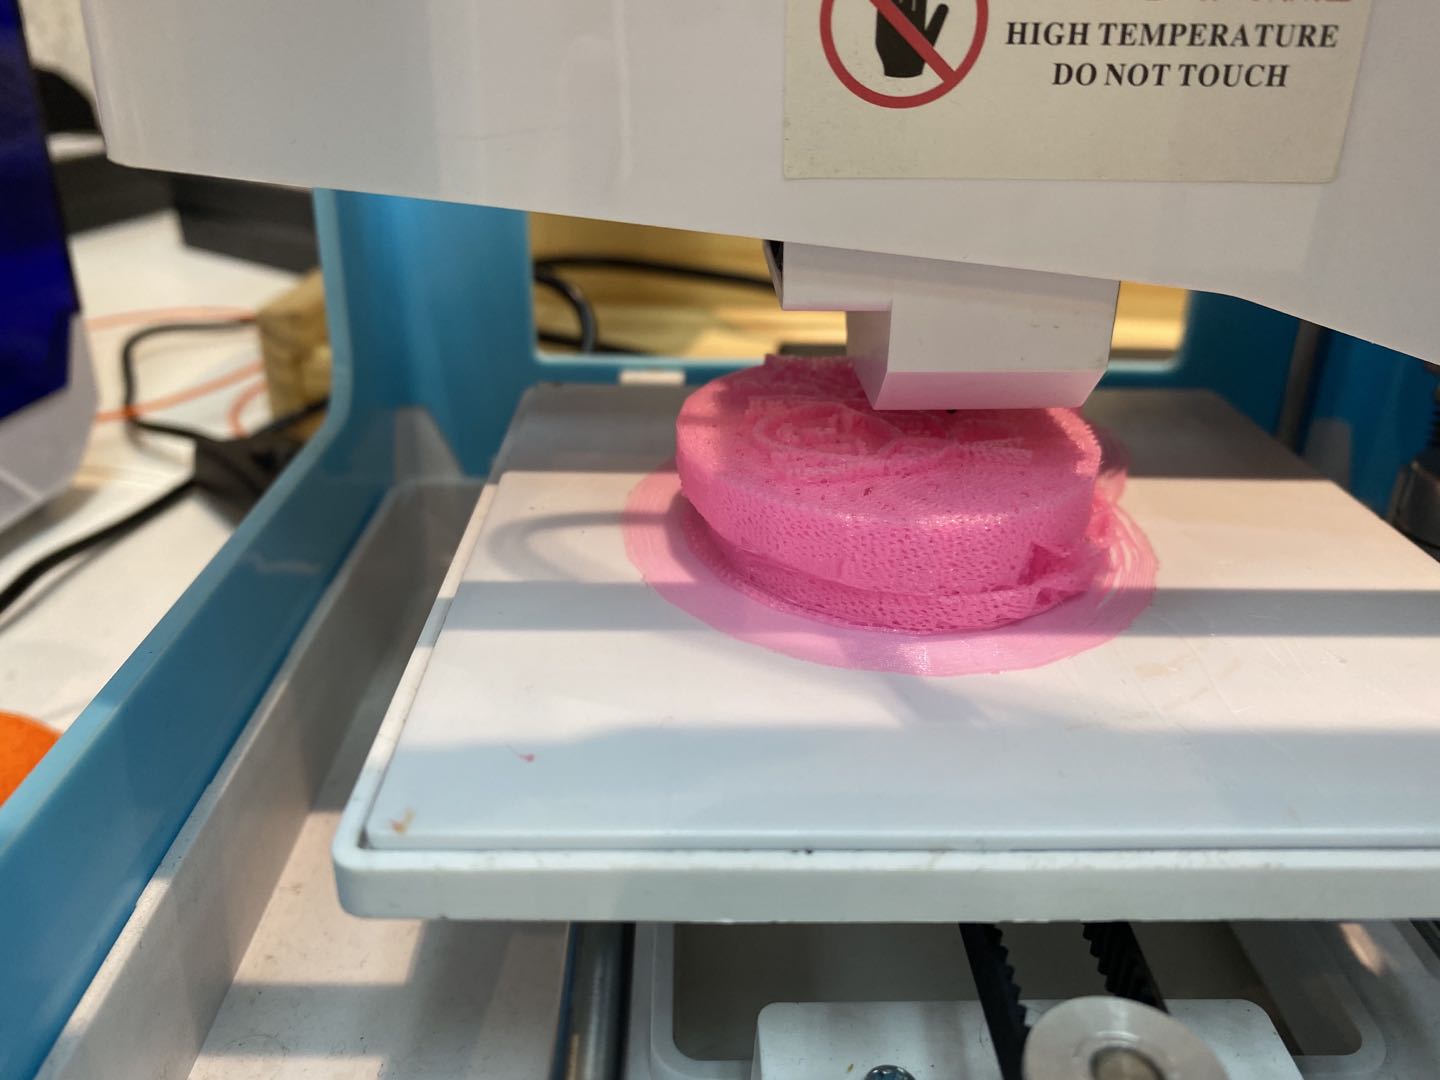
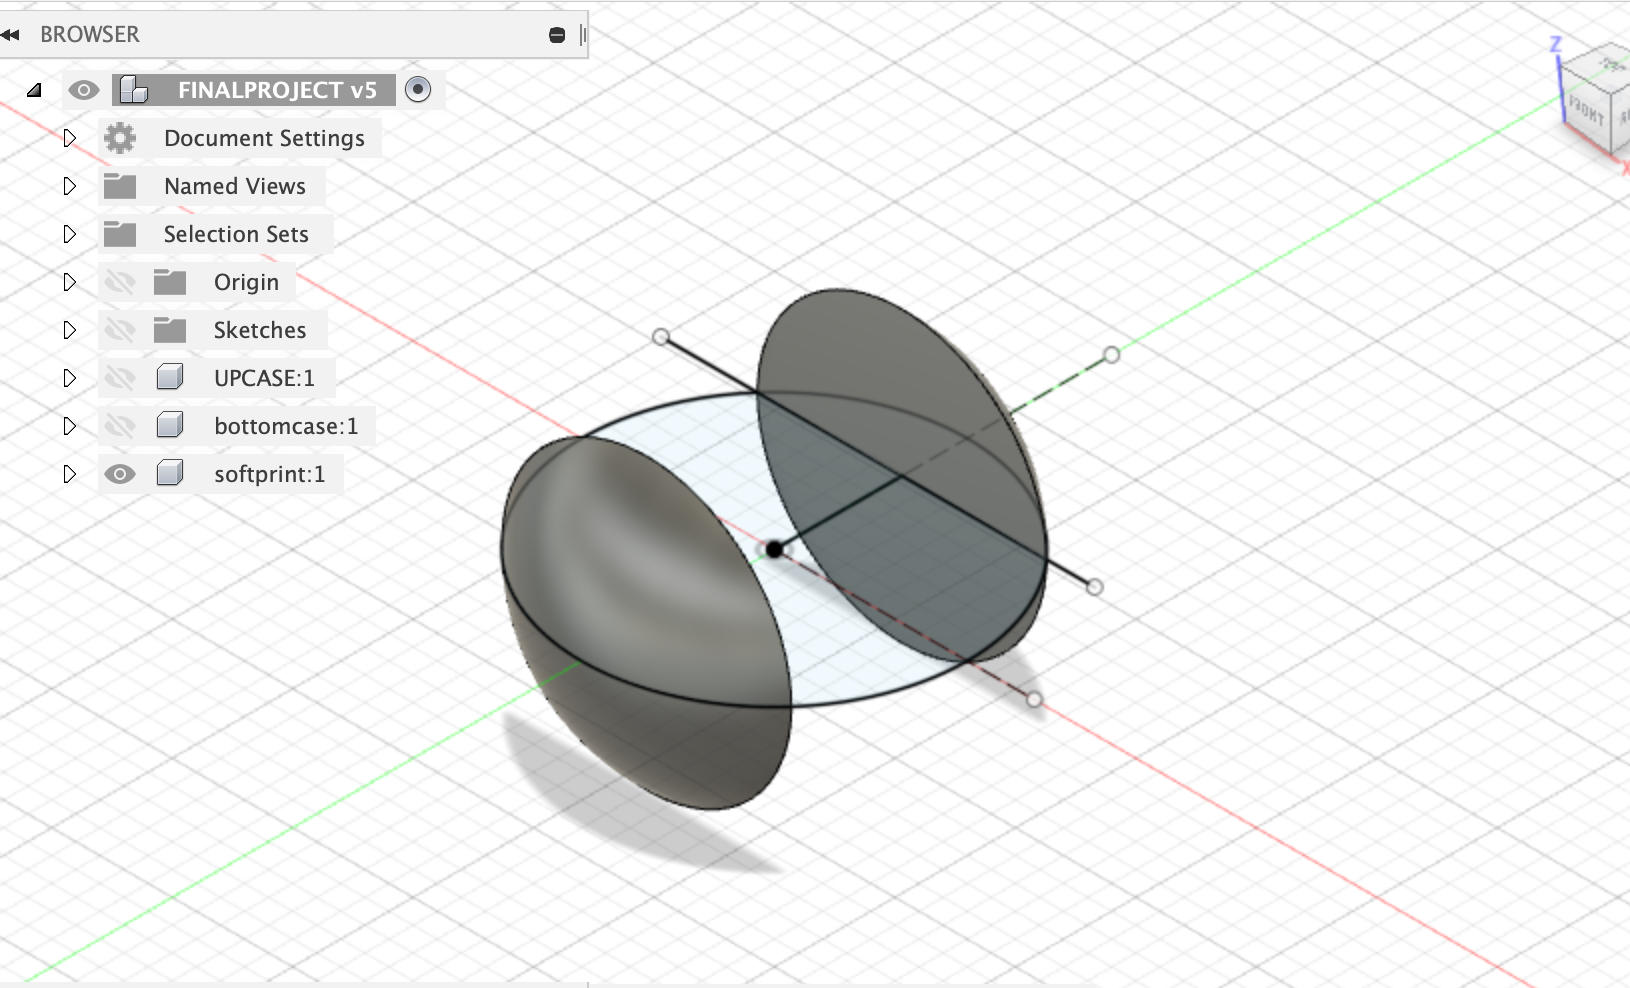
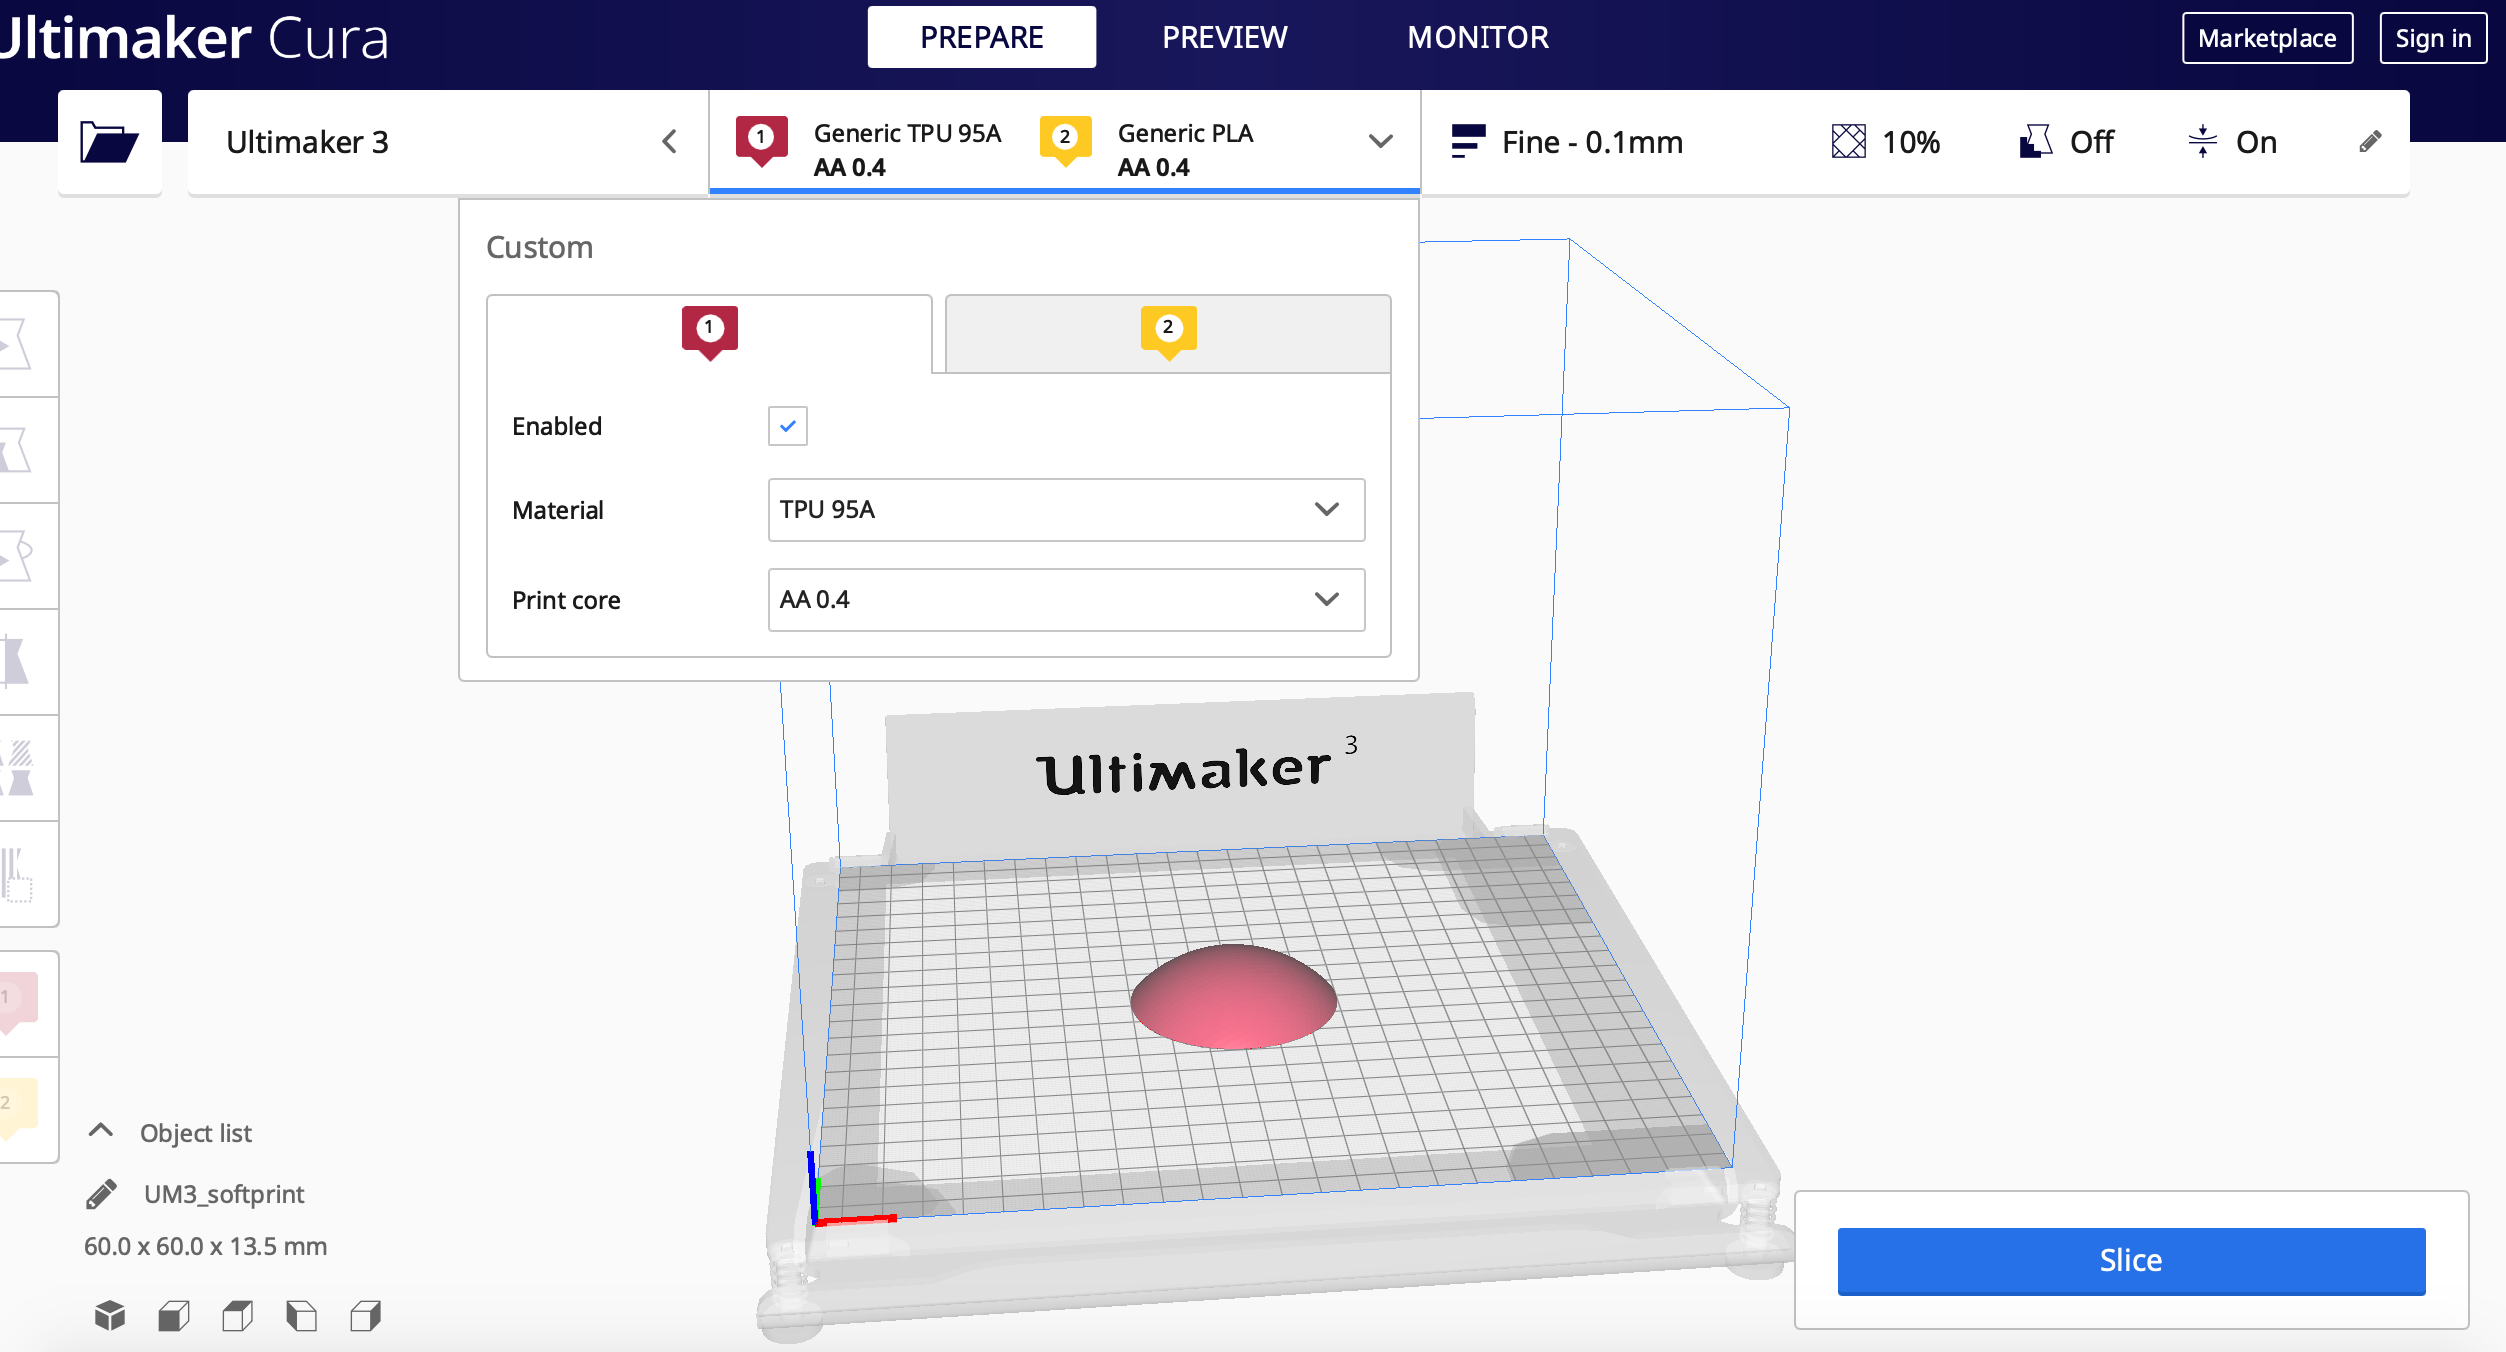
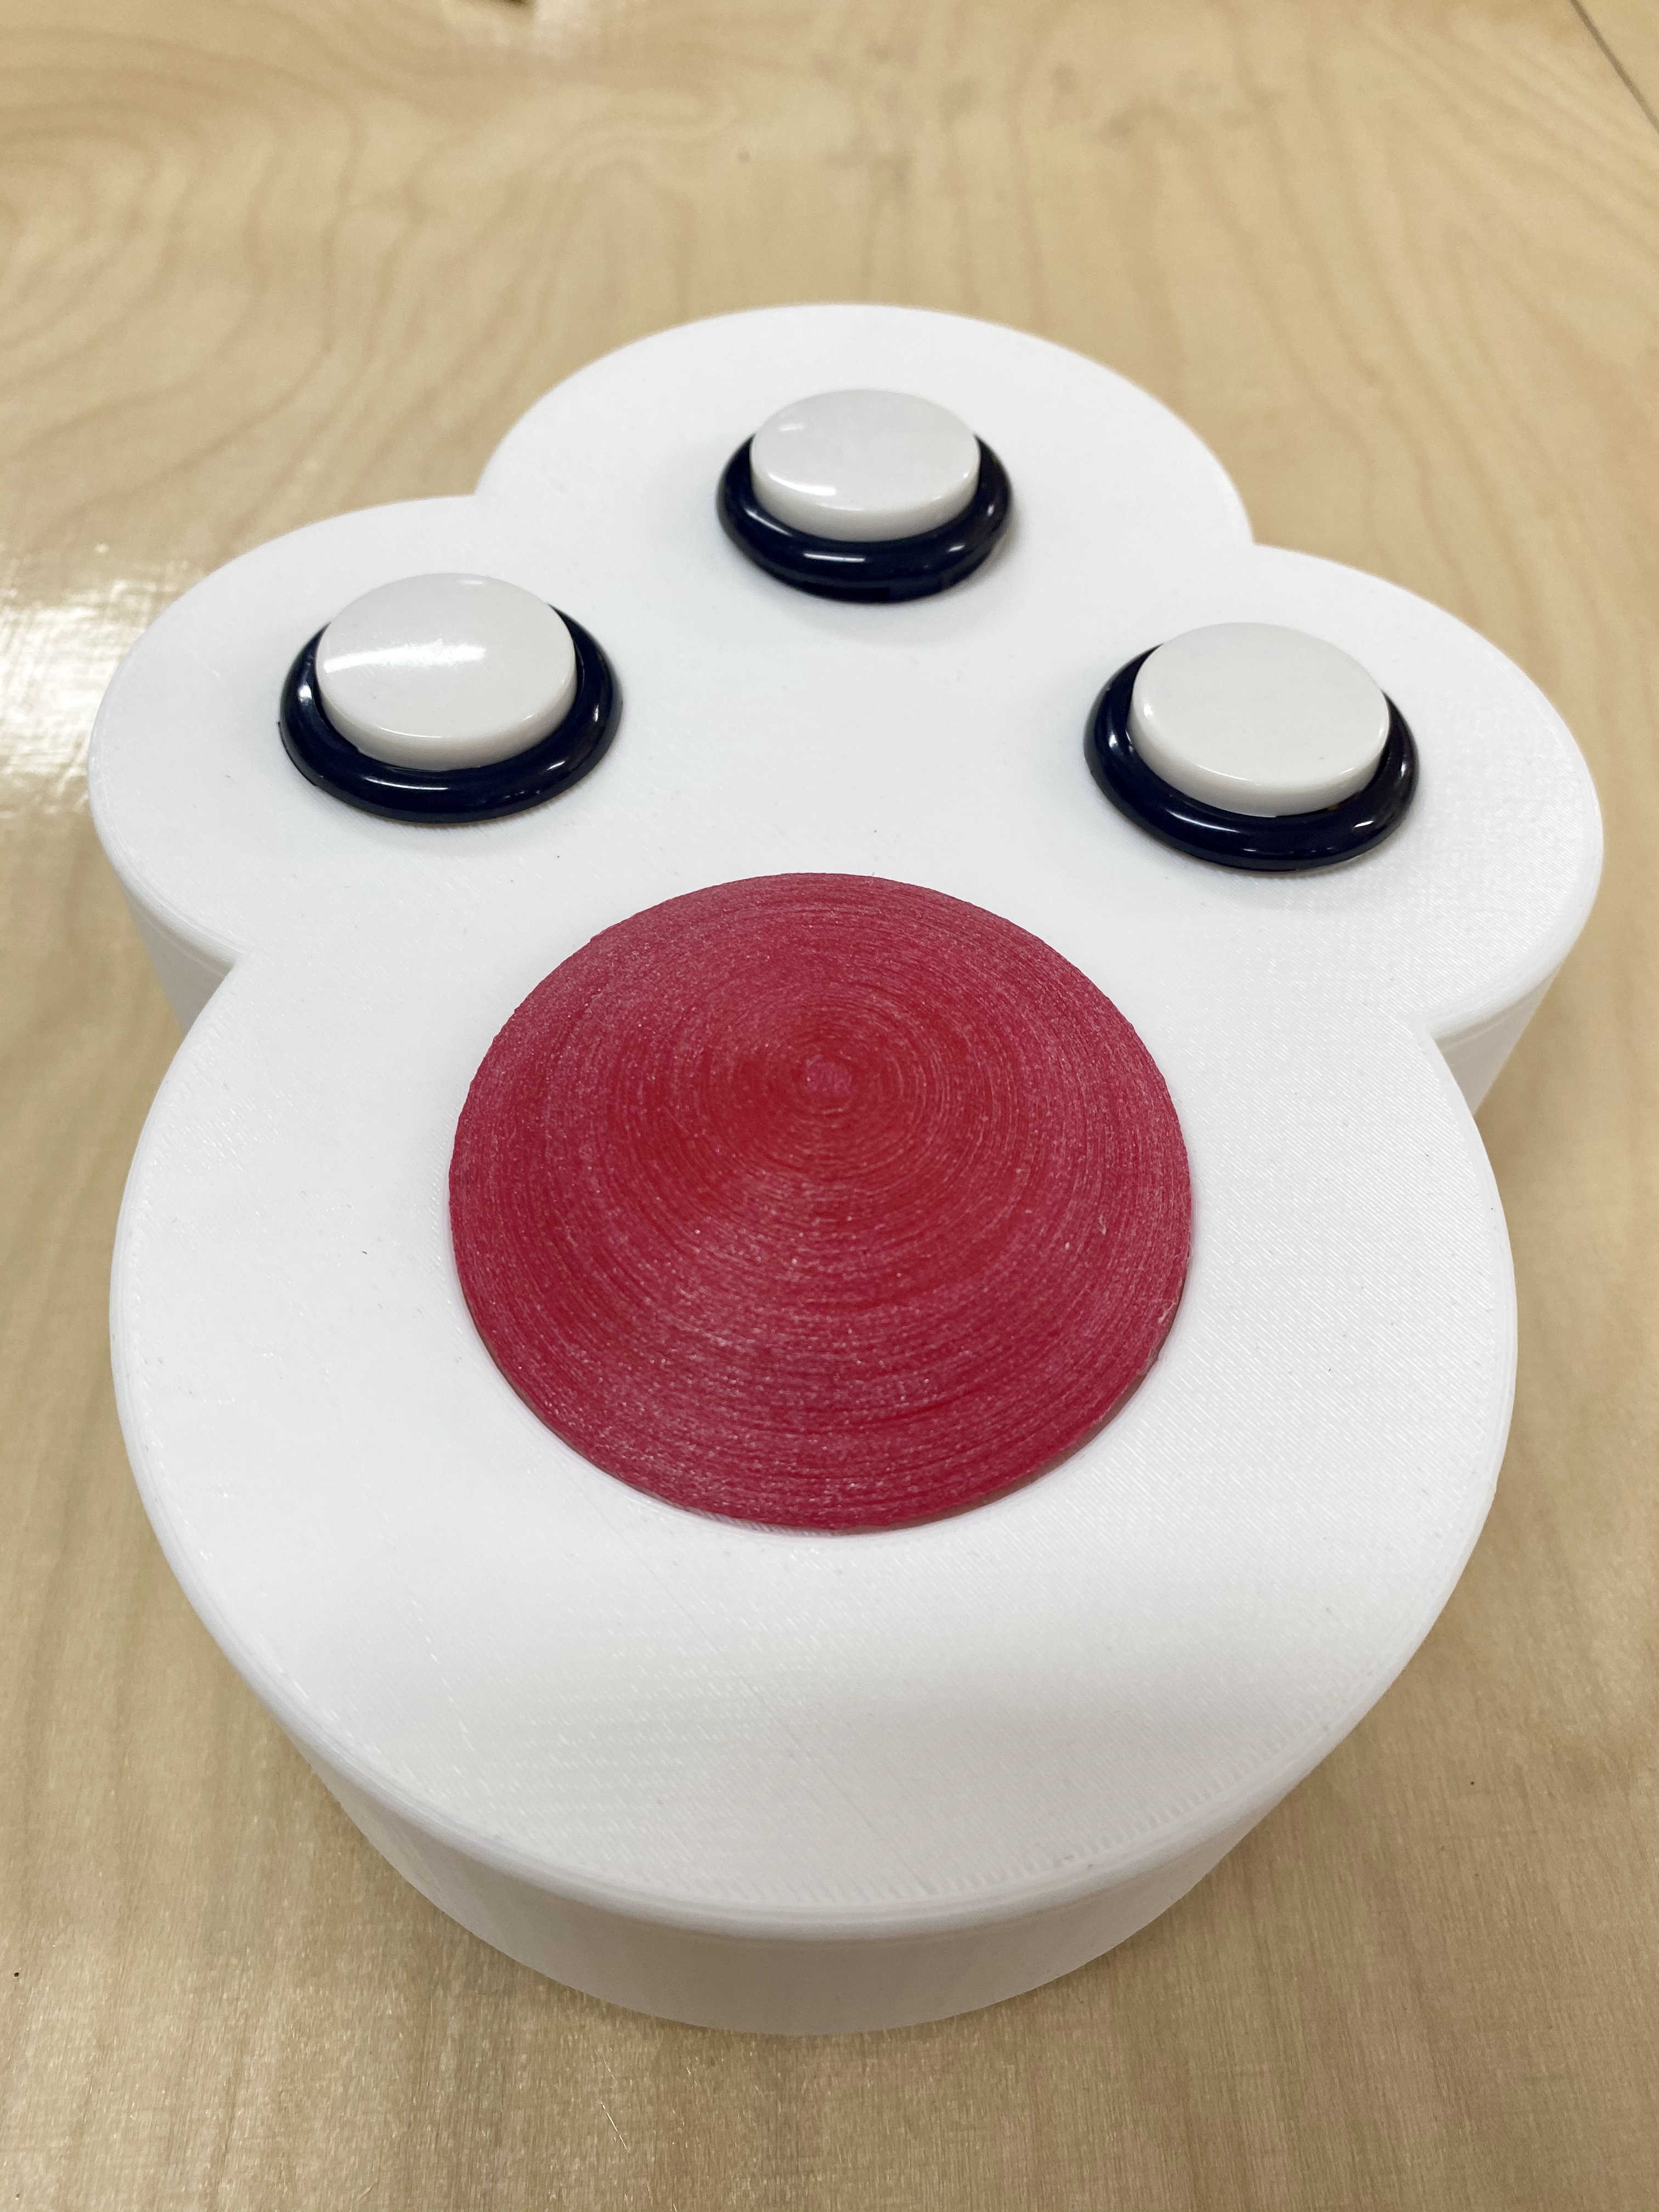
In this design, I only print one part, and use laser cuter to cut a bottom board, also I can put button through these holes properly, so I measure button size carefuly and make sure they can fit in those holes without problems. Also I decide to use soft materiels to print a soft part, and put it on force resistor, so kids can hit on it to show the level of their emotion and willings. I designed a platform for force resistor, the sofe print part will be on the force resistor.
The last print works well:
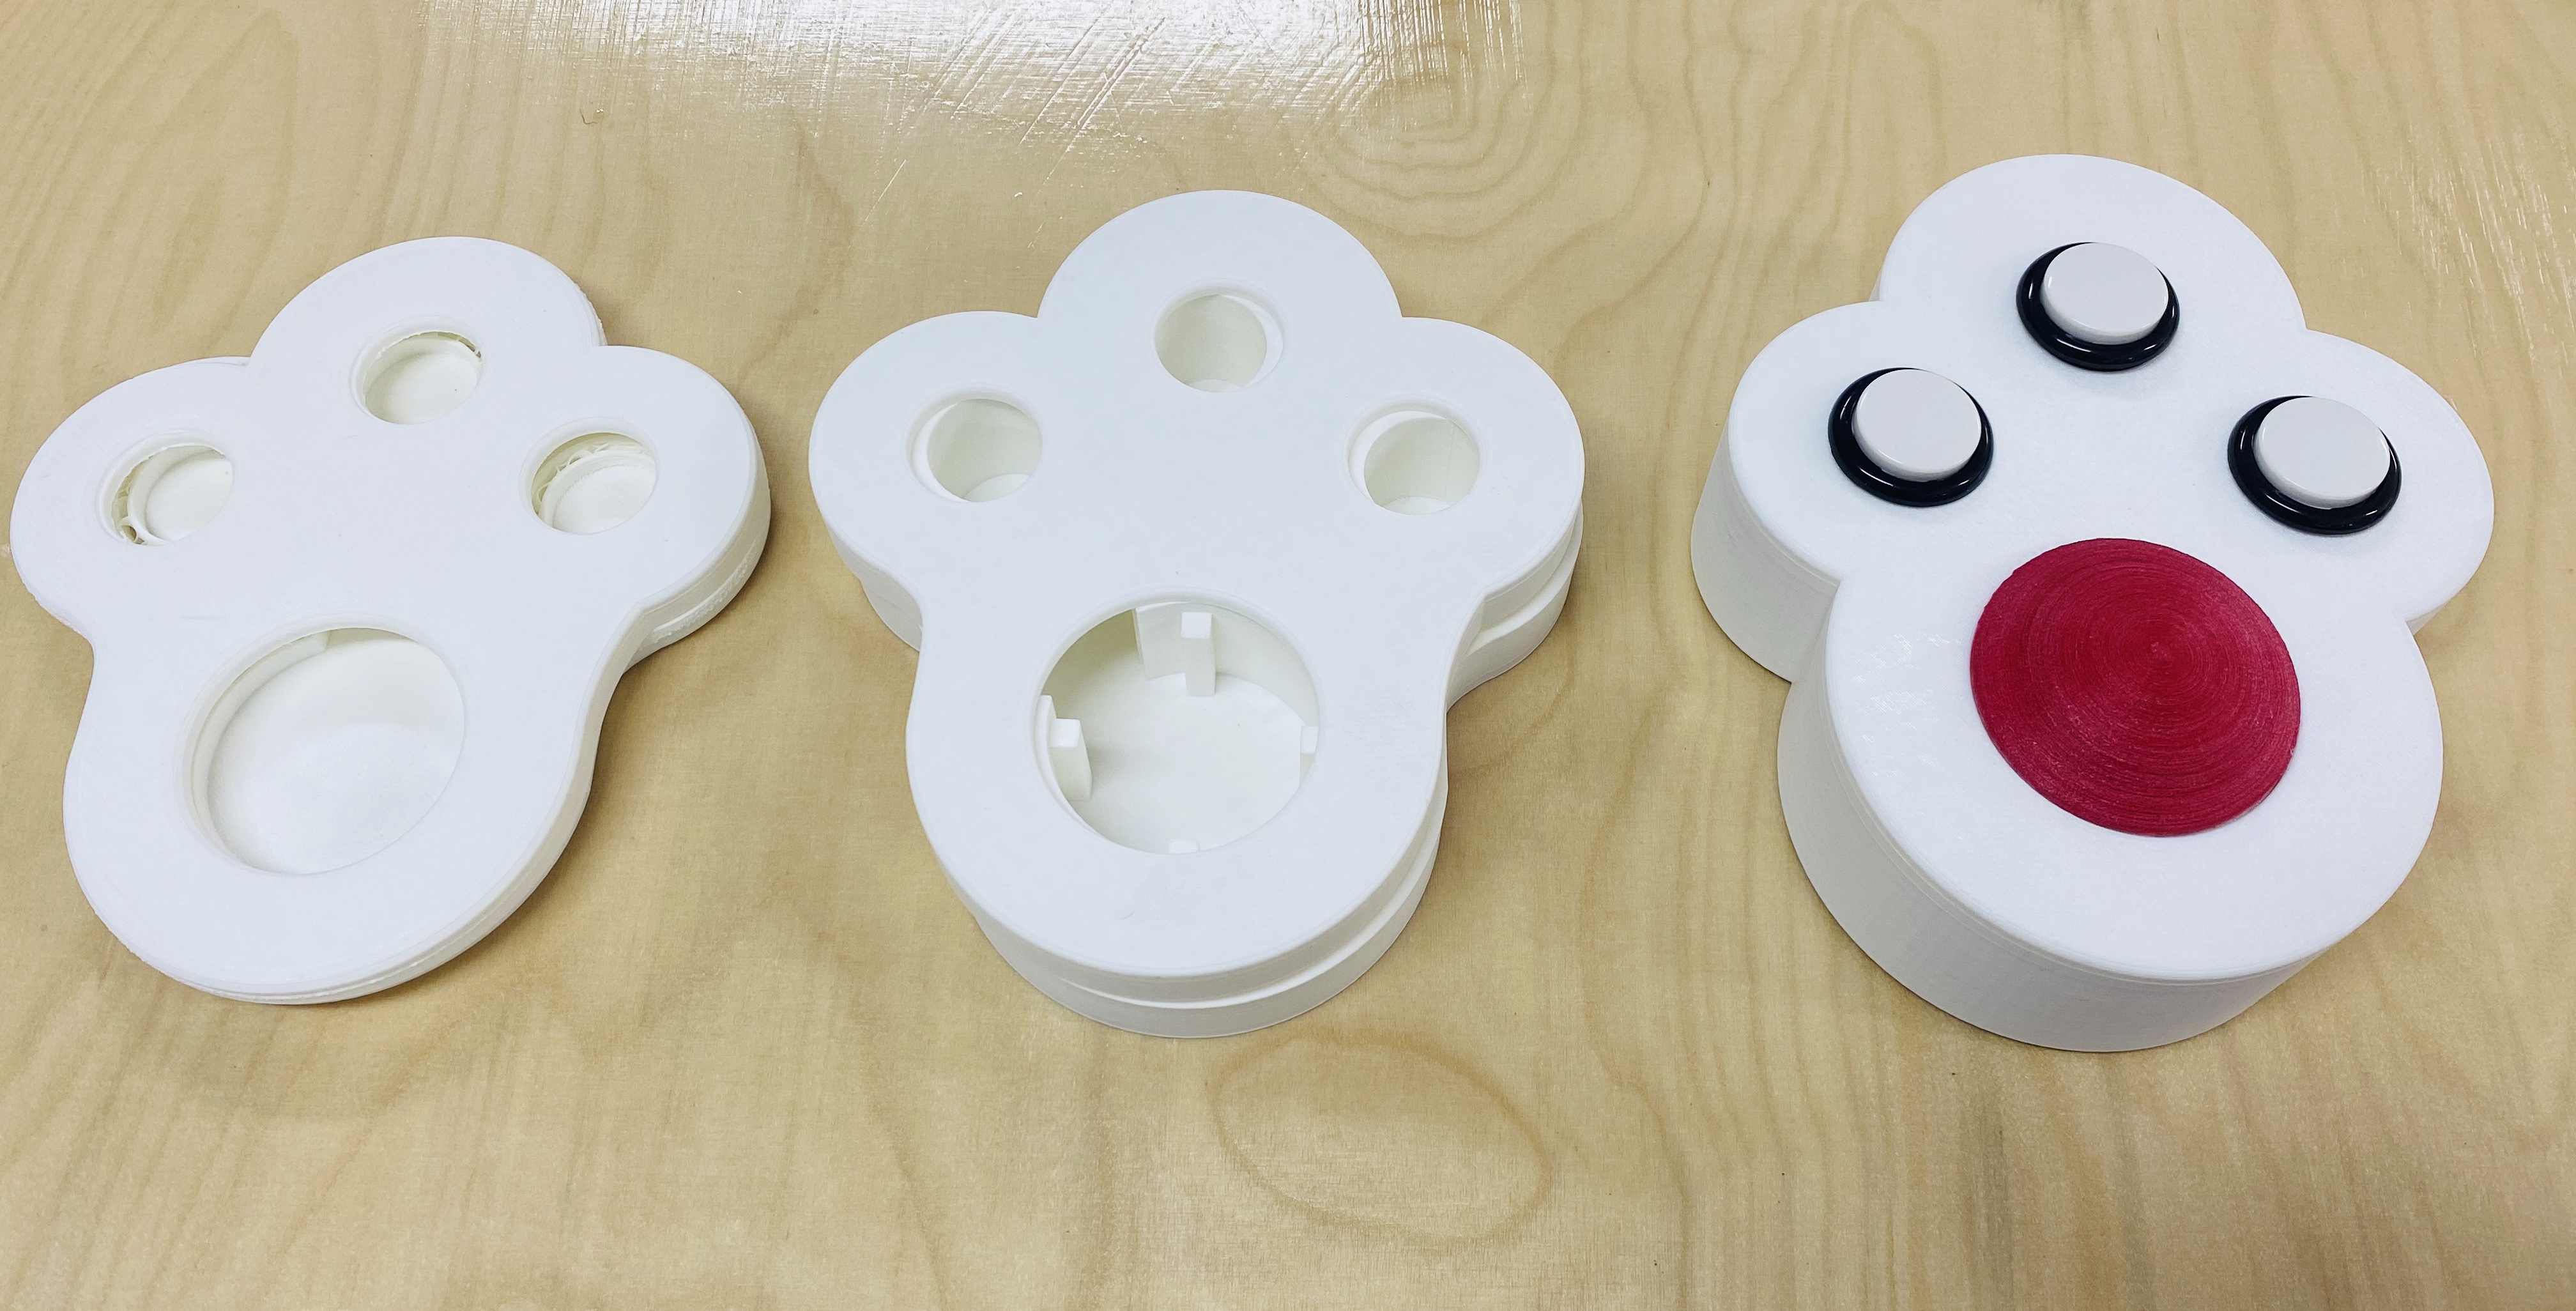
Here are First print VS Second print VS the last one.
Download Link:
- Download Final Project stl
- Download Final Project gcode
- Download Softprint stl
- Download Softprint Gcode