Assignment
Week2: Computer-Aided Design
Assignment
Model (raster, vector, 2D, 3D, render, animate, simulate, ...) a possible final project, compress your images and videos, and post it on your class page
Table of content
My Work
Once I used Fusion360 for modeling a box kit and inkscape for creating an instructional image for driving laser cutter in bootcamp training at Fablab Kamakura. Except that, it's first time for me to use these tools. So, I tried to use very basic function, checked their feature and utilize that to create stuff mainly related in my project.
2D Modeling Tool
Raster: GIMP
GIMP is one of the most popular drawing tools. It's very powerful to edit layers of image.
I made the original logo of my product that I plan to create thorough final project. The product named "PoTone" is a device converting image into sound. So far, I'm satisfied with icon of camera that I drew by simple circle lines filled with cover color. GIMP supports many type of font that would help design.
For doing this, I followed a tutorial video by Nick.com in youtube as it is. In the future, I want to create my own frame using my product shape.

The special tips for layering opacity control is "Alpha" channel. A layer has 4 channel comprises red, green, blue and alpha. The alpha channel is used for transparency.
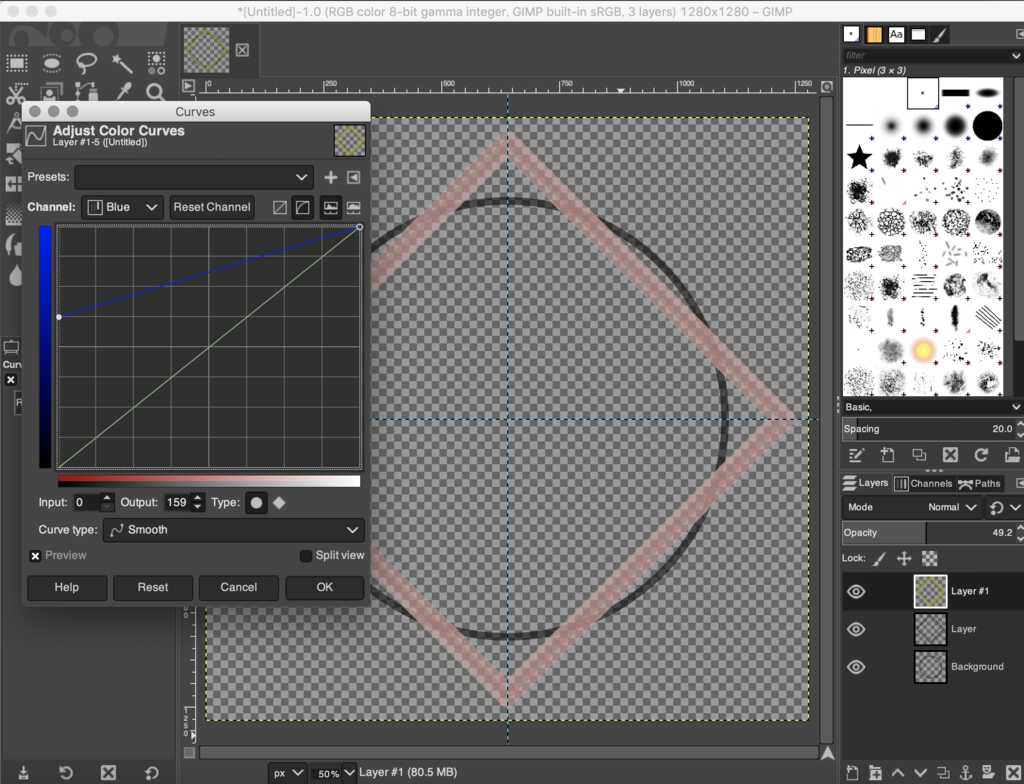
1.Select layer of square, right click and select “alpha to selection”(create layer of alpha), "Grow"(thicken) the alpha layer (and set color for visibility)
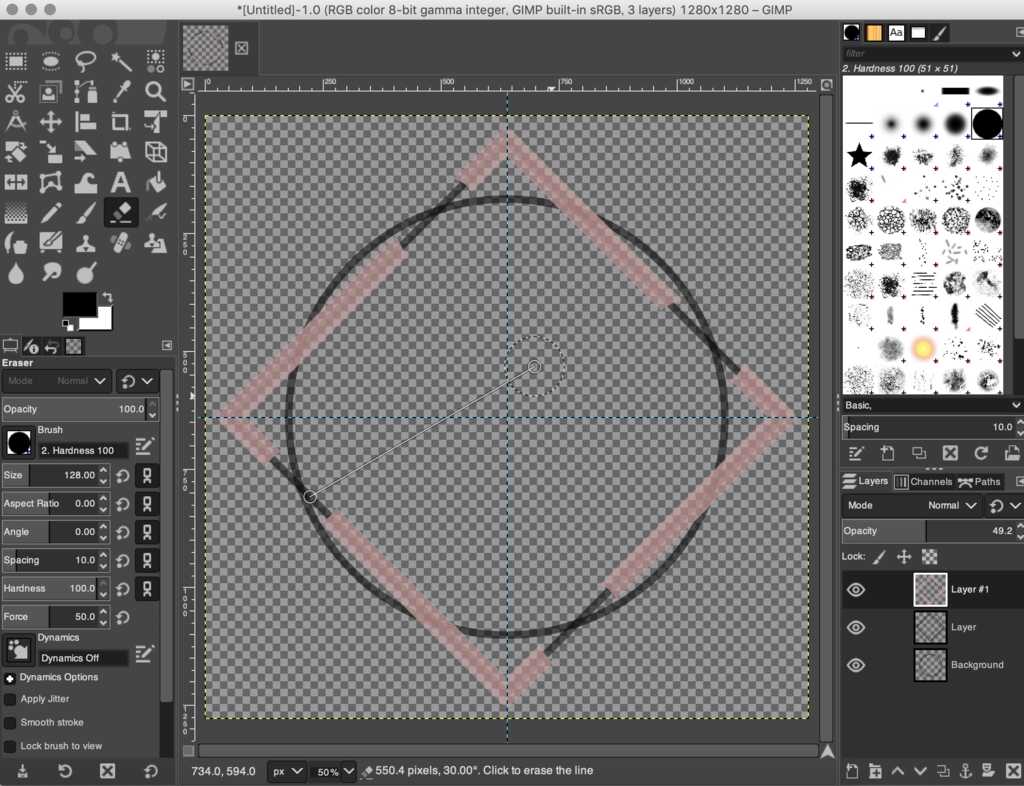
2.Erase the overlapped area of the alpha layer to keep(not to delete) the circle line.
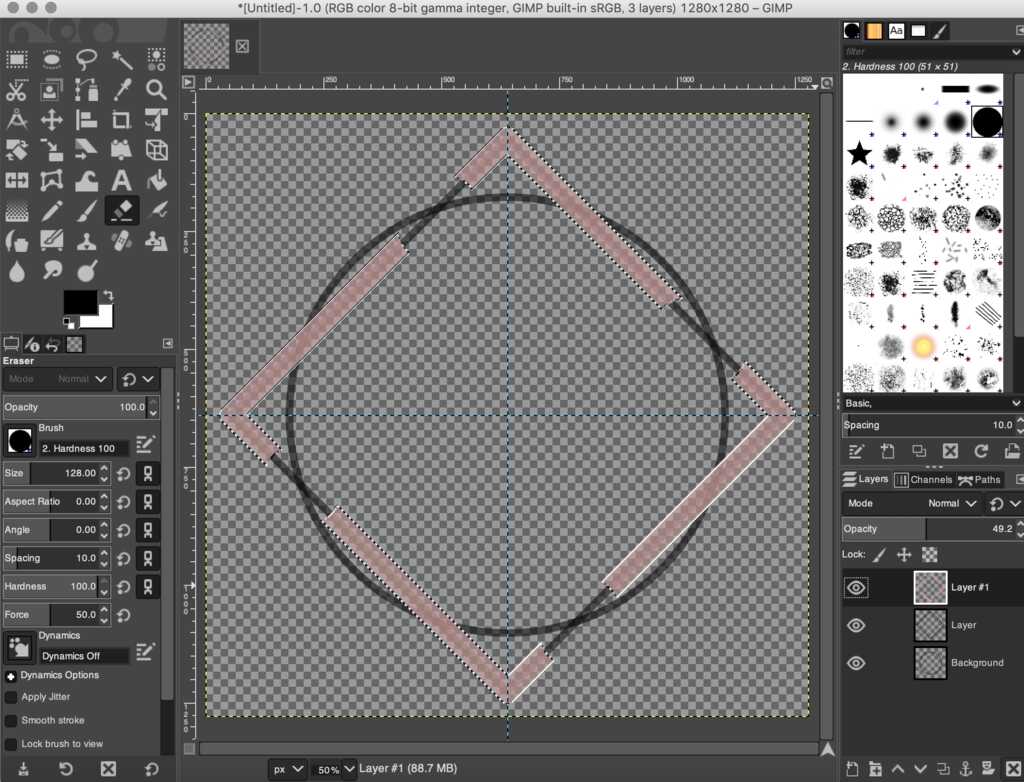
3."Alpha to selection" with above alpha layer (outcome of 2.) and delete the layer
_1024x_q50.jpg)
4.Go to background layer(circle) and Select > Clear(delete the overlapped area by alpha)
Raster: Krita

Krita is an open source painting software that is developed by artists wanting to provide affordable art tools for everyone. Krita is used to create concept art, texture and matte paintings, illustrations, and comics.
Krita's UI seems to be easy to use for drawing. Also, Krita has strong filters. This picture of my selfie is edited by illustration and mosaic filter in Krita.
Vector: Inkscape
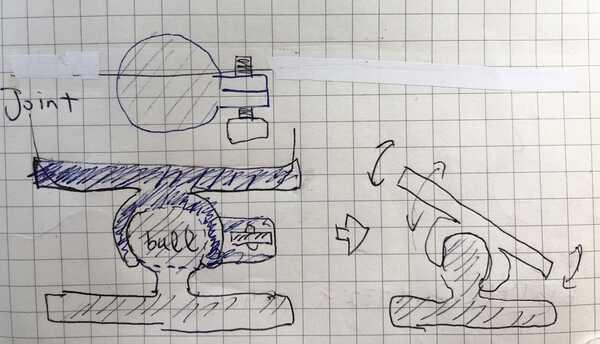
My final project needs a body in shape of "pot". For expanding user experience to take a photo, I want to make that body not only standing upright, but also standing diagonally. I came up with some ideas for holding the body in slanting degree (ex. fixing the body with screw that pinches the cover wrapping the base shaped in ball like right sketch). However, it adds complexity in design.
Instead, my idea is using "Johnson Solid", a set of shapes in convex polyhedron(凸多面体)each face of which is a regular polygon. My idea is using N25 Gyroelongated pentagonal rotunda that is likely to be a shape of pot (or cup?).
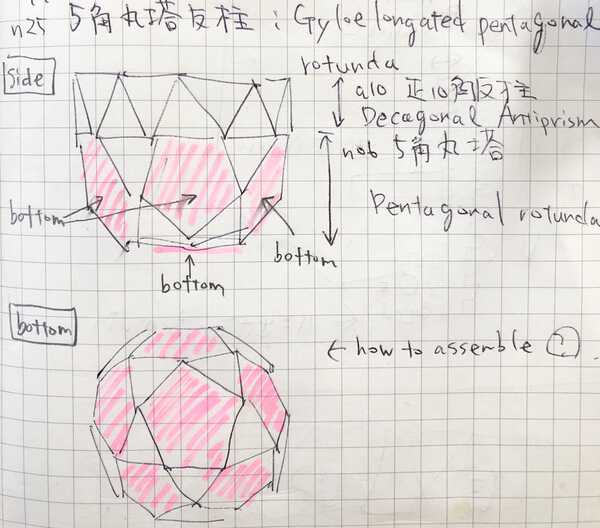
Gyroelongated pentagonal rotunda("GPR") has 6 pentagons, 1 in bottom and the other 5 in the side. The pentagons in side can be a "bottom" when the user rotate it. The body stands diagonally! Additionally, I think shape in flat faces will help to make prototype rapidly (ball or rounded surface would be great and easy but it will consume time to print out using 3D printer, molding and my site is far from big CNC).
Though there are some development images of GPR in bitmap in internet, I need path of that for modeling and customizing the shape. That's why I started to dig in how to trace the raster image and generate vector image.
Here is my trial (and error) using multiple tools...
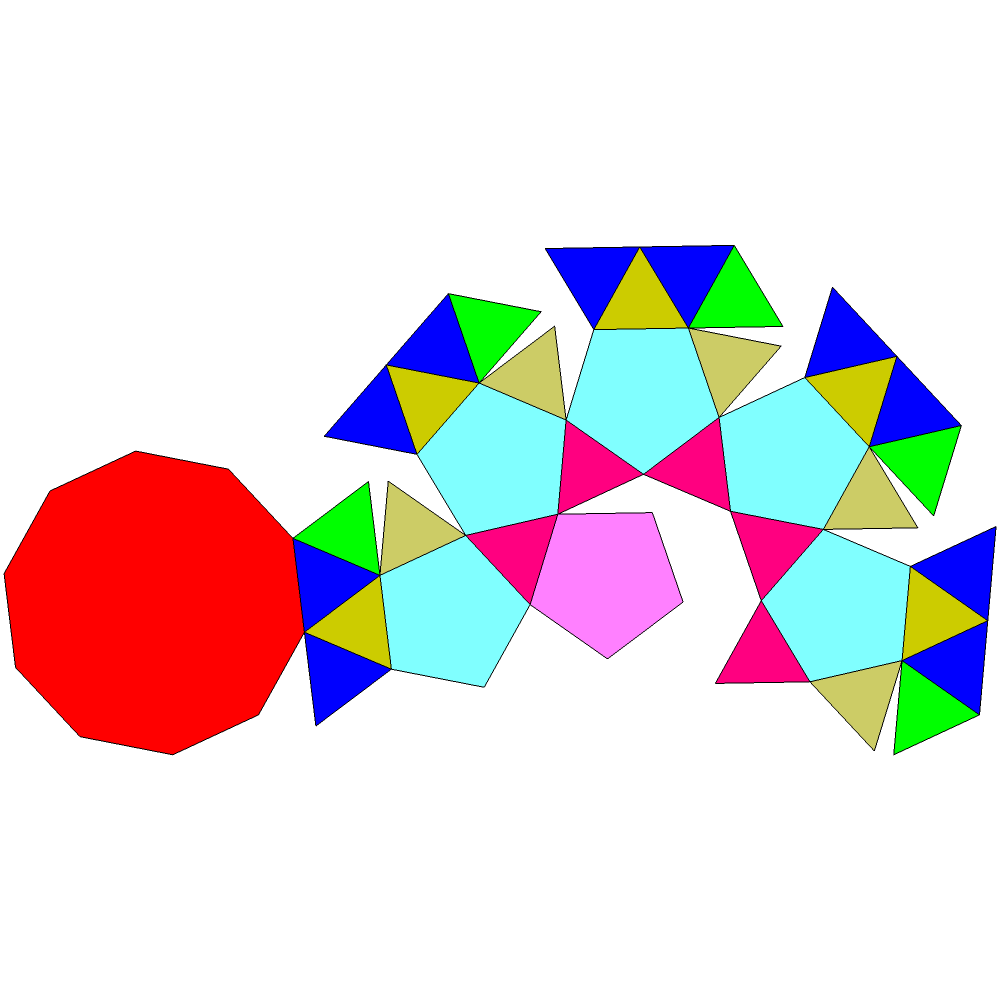
1. Original development file downloaded from wikipedia
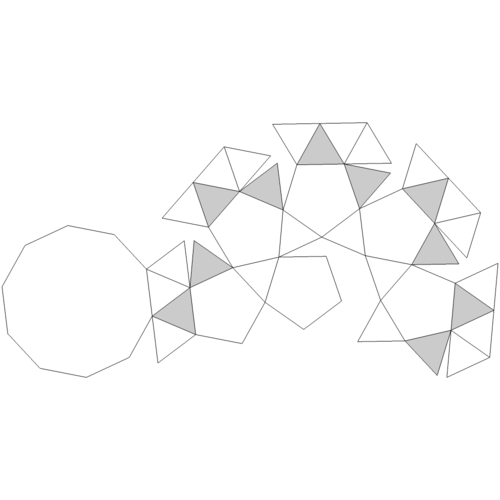
2. Convert the image in color-off by Krita's filter. However, thin line and color could not be captured by Inkscape's function of "Trace Bitmap"
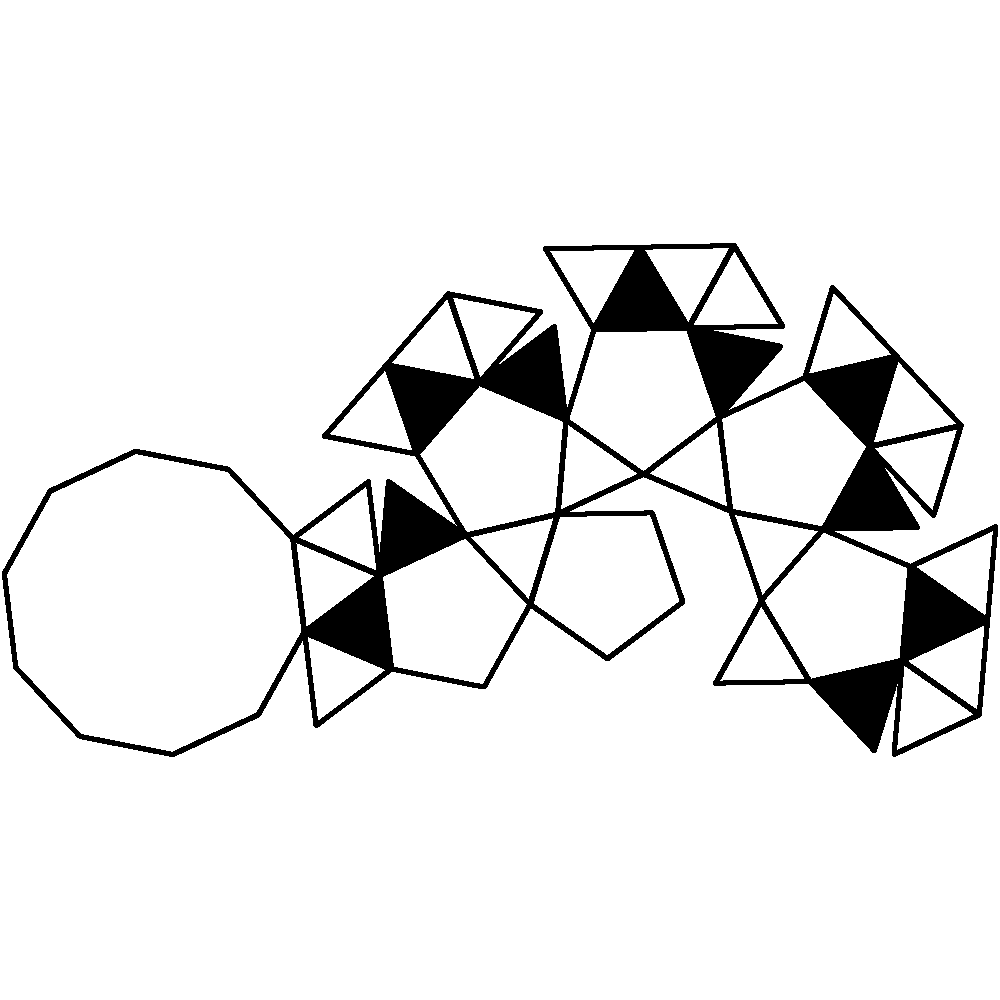
3. Bold the line and color by GIMP (selection, "Grow" and "fill with FG color")
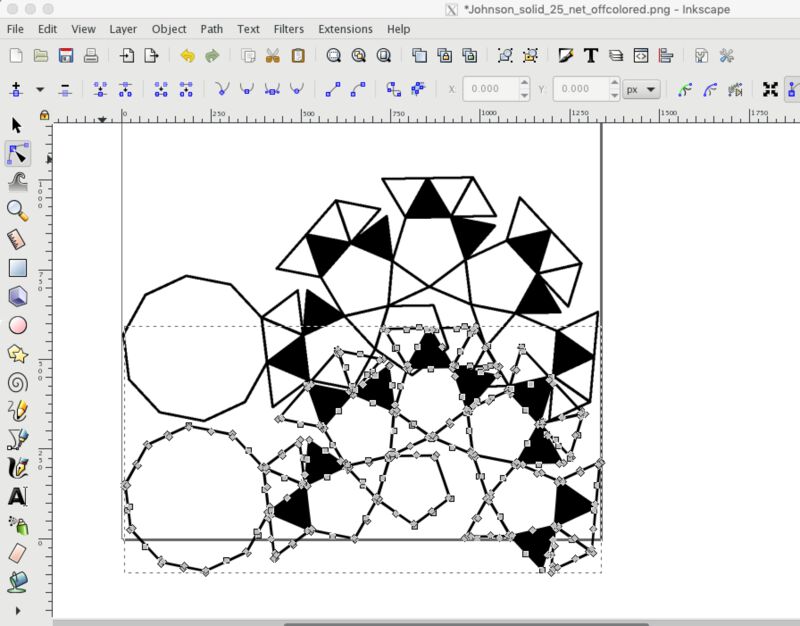
4. Bitmap to path by Inkscape
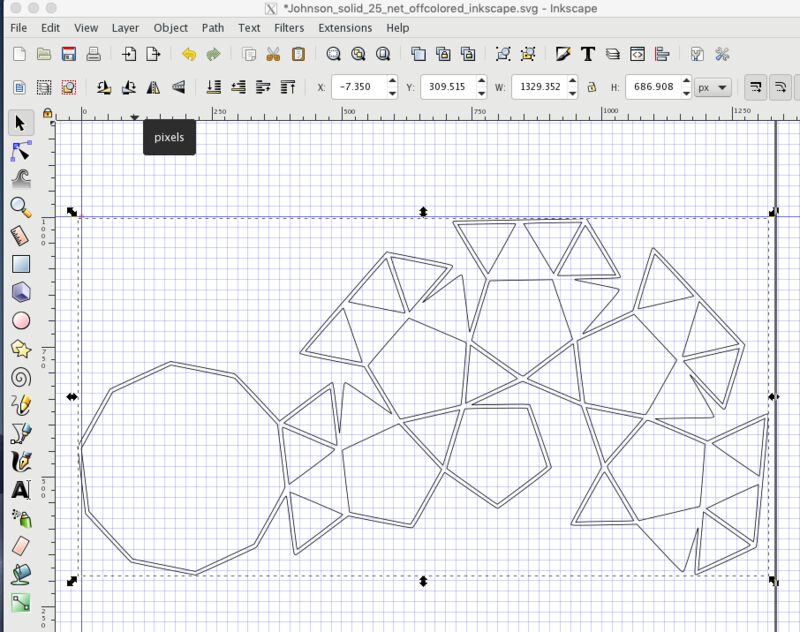
5. But! The path is duplicated and sometime not connected like above. Configuration to edit colors in Bitmap or parameters like quantum in Inkscape might work. However, here it's easy to make polygons and generate it into 2D/3D model rather than being sticky with configuration. So, I gave up capturing at this point and started to make sketch.
3D Modeling Tool
FreeCAD
FreeCAD is open source 3D parametric modeler. As Neil instruction in global session, that supports every general concepts for 3D modeling like constraints/shape/resolve/loft/sweep/fillet/assempling(touch/vertex)/folding/parametric modeling/algorithmic modeling/sending geometry to external renderer in real time/animation etc.)
Firstly, I went through with FreeCAD Tutorial by Fab Academy. The tutorial was super helpful to get familiar with basic function in FreeCAD.
Then I tried to make a development sketch of "GPR".
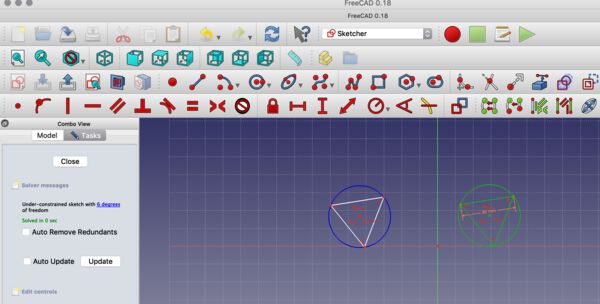
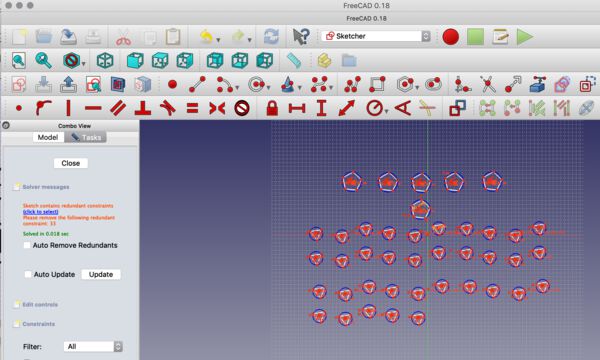
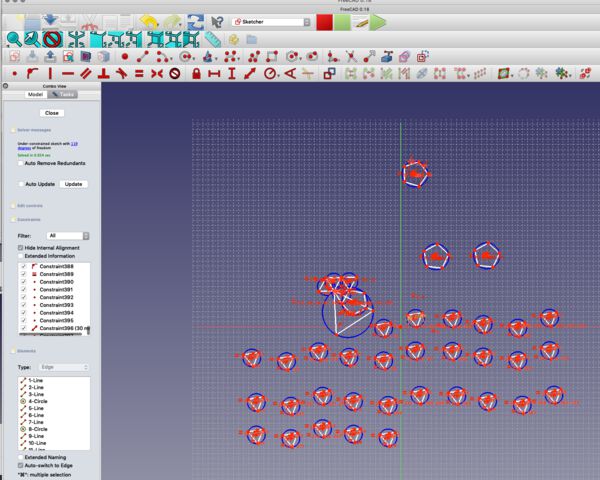
While I tried to make triangle and pentagon with constraint of length, make "clone"s of them and attach the unit using constraint of coincident. However, the shape of polygons looks to be changed occasionally when coincident constraint works.
Furthermore, FreeCAD freezes or goes down in my Macbook Pro frequently even though I stopped the other applications and allocate resources to FreeCAD. This seems to happen in the other FabAcademy students who use OSX version of FreeCAD. Considering time constraints, I moved to Fusion360 that I experienced in Pre-session for FabAcademy and it's much stable in my local environment.
Fusion360
Fusion360 is a cloud based CAD/CAM tool that is dominant to be used in many modeling scene. That covers every concepts for 3D modeling as well as FreeCAD. It works in my local environment smoothly, so I use this for drawing materials' design of my final project. Finally, I rendered below images putting original logo!
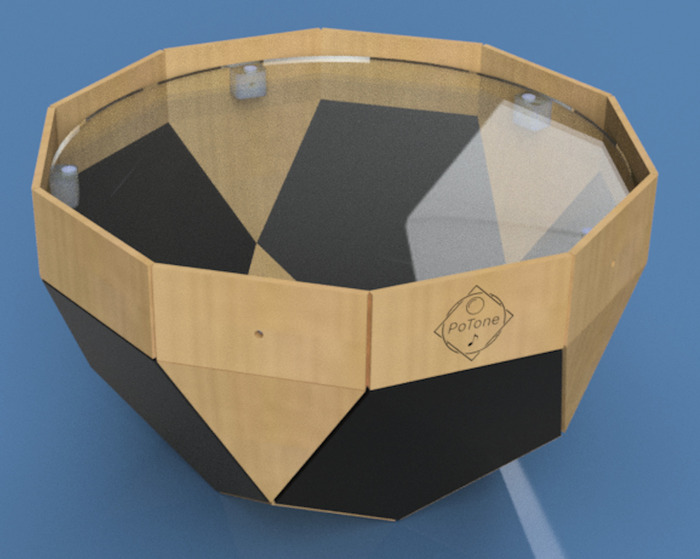
_x600_FAweek2_20200211.jpg)
How I make this?
Fusion360: 2D model of a development image
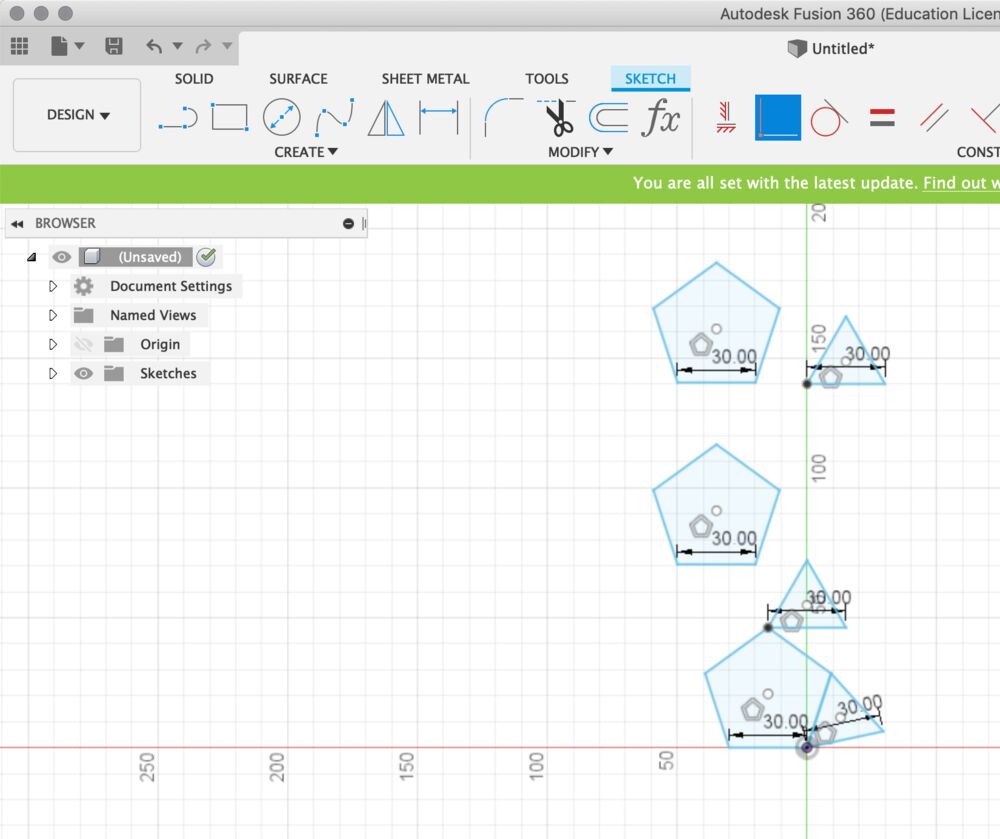
1. Sketch polygon(triangle and pentagon) and add length as "dimension".
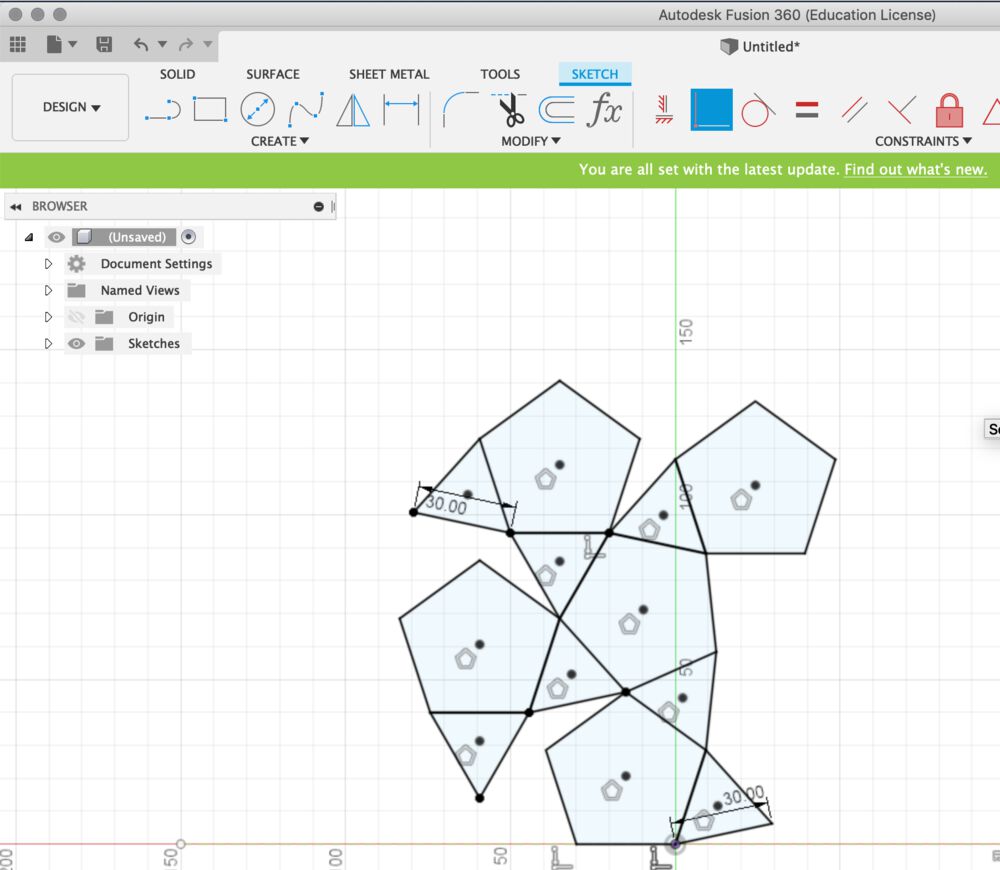
2. Attach polygons using "coincident" constraint.
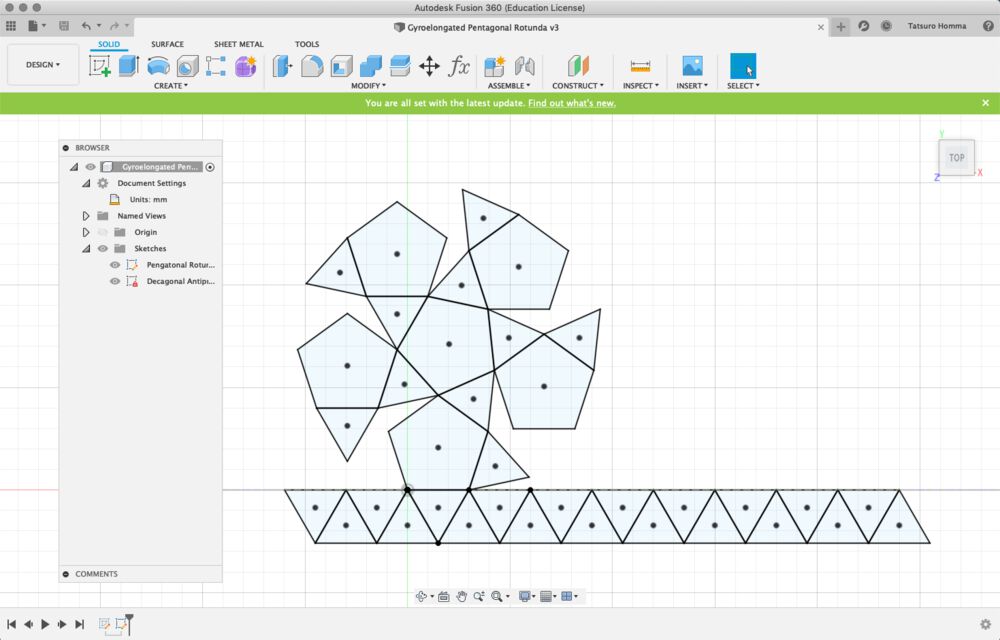
3. A development image of Gyroelongated pentagonal rotunda
Fusion360: 3D model
At first I tried to fold the 2D development image and make a 3D polyhedron. I tried following steps. However it did not work as I could not set axis of edge correctly.
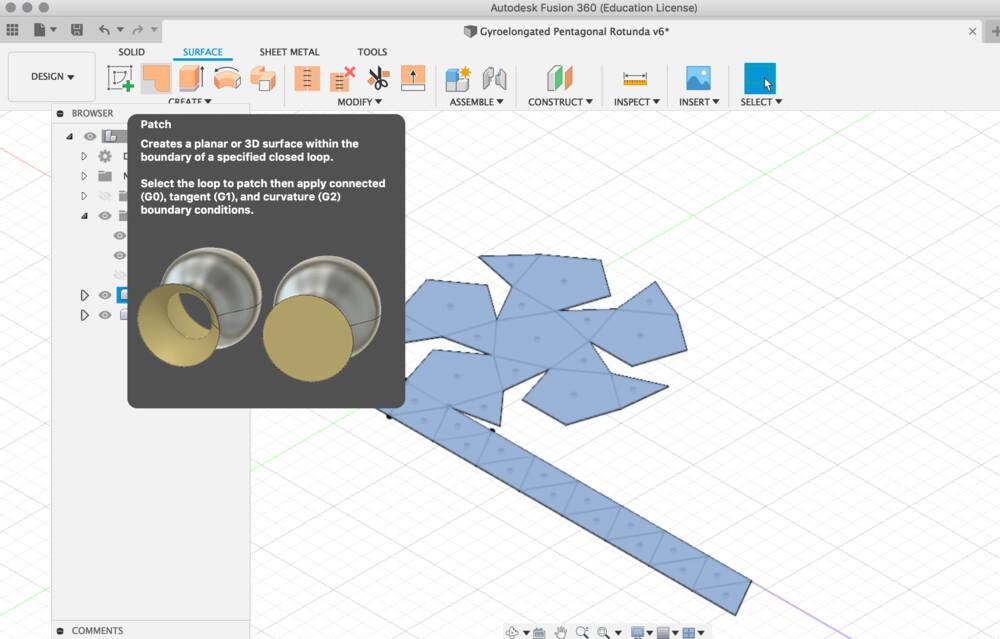
1. Add patches on surface of sketch (without thickness)
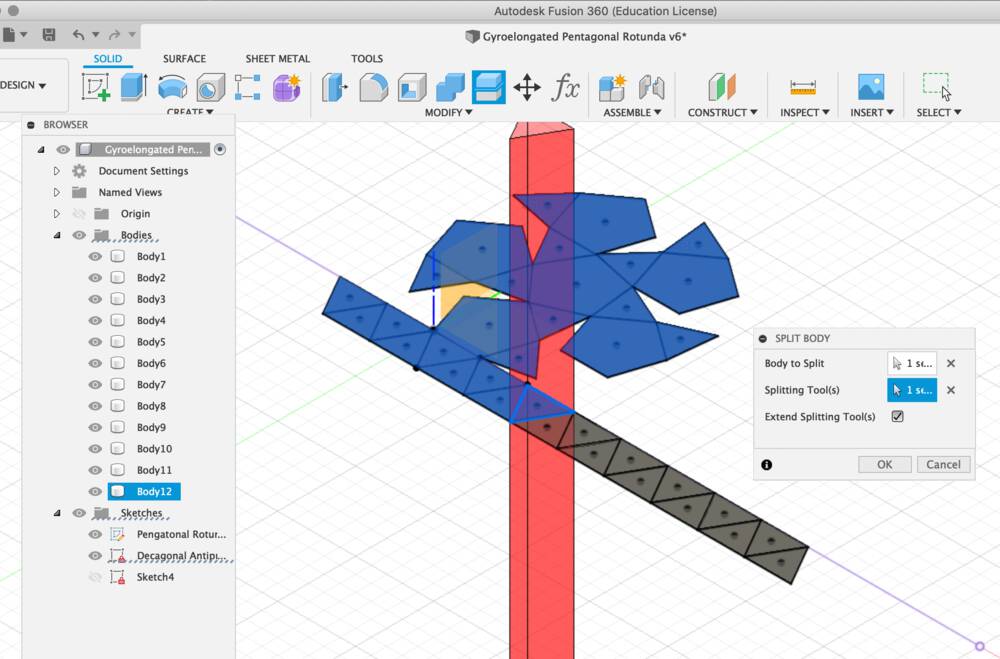
2. Split body into multiple polygons for each polygon
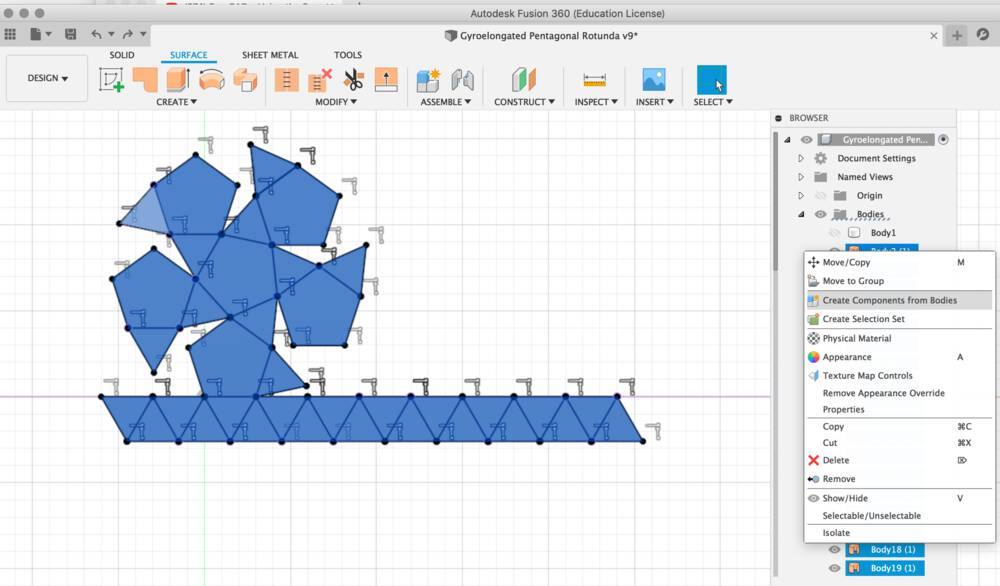
3. Create components from bodies
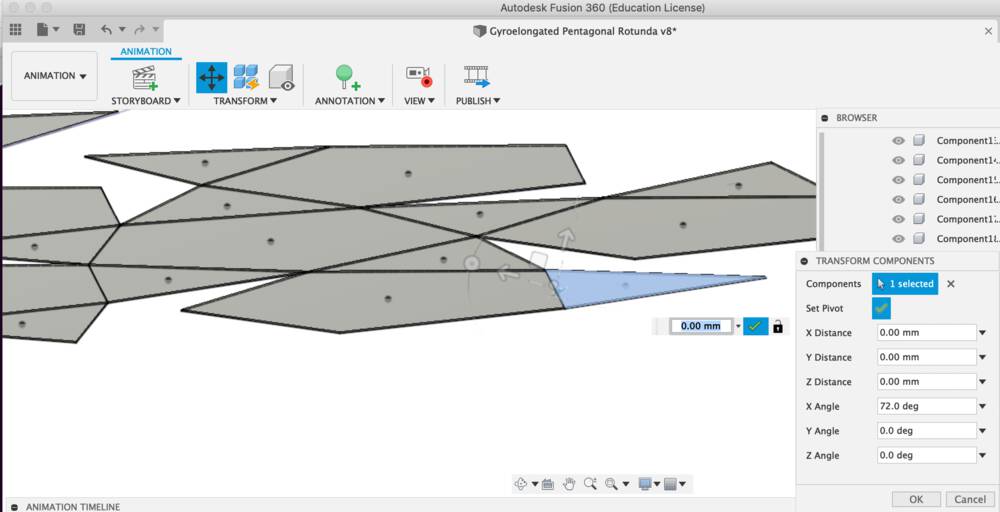
4. Fold a component of polygon along the side (edge of polygon) as a pivot. However, I could not set the edge of polygon as pivot in proper distance and angle.
Instead of folding, I make 3D design as follows. An instruction in this blog (in Japanese) helped me to make this.
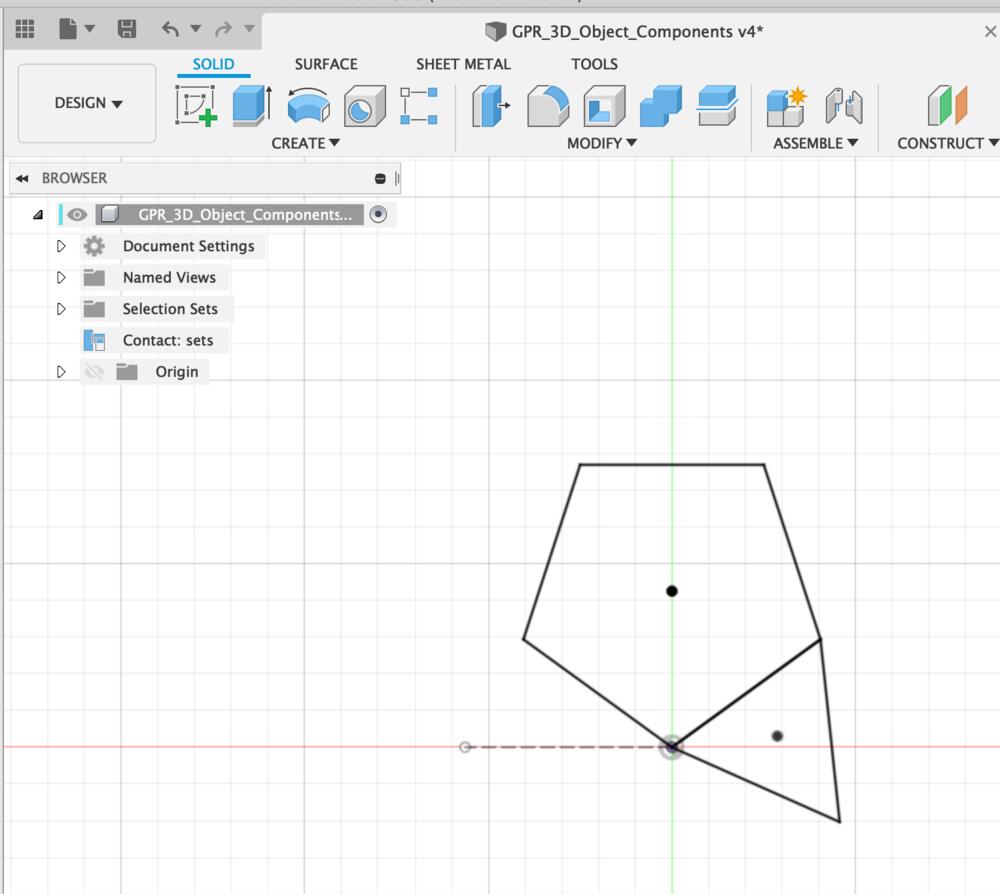
1. Sketch polygon(triangle and pentagon), add constraints of length as "dimension" and make construction line in horizontal position of opposite side, then end sketch.
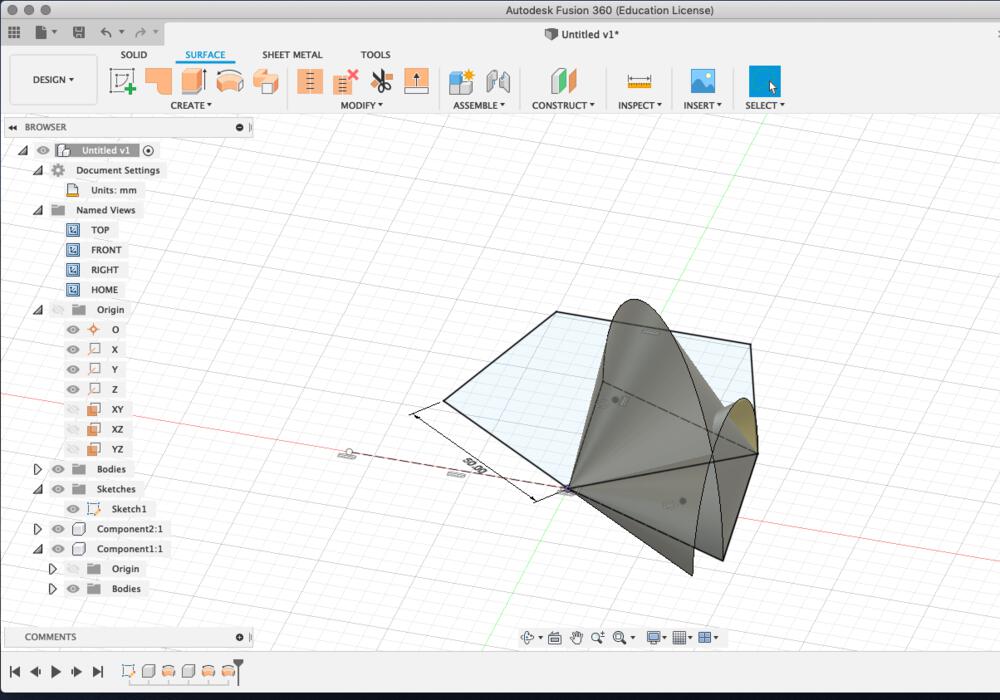
2. End sketch and check resolved line of revolve the side of triangle for finding intersect point of revolved vertex (pivoting bottom of triangle) and revolved side (pivoting the construction line at 1.).
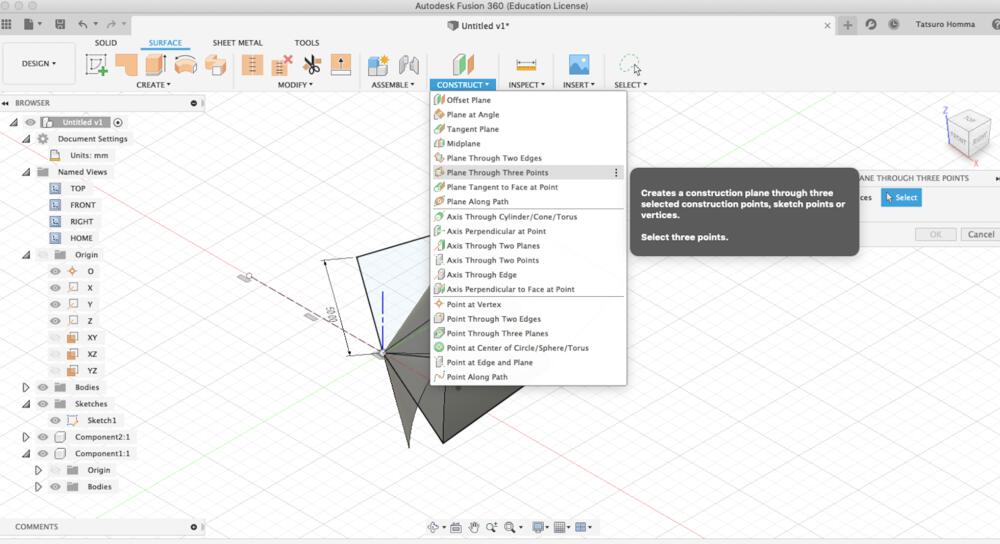
3. Construct > construction plane from three points
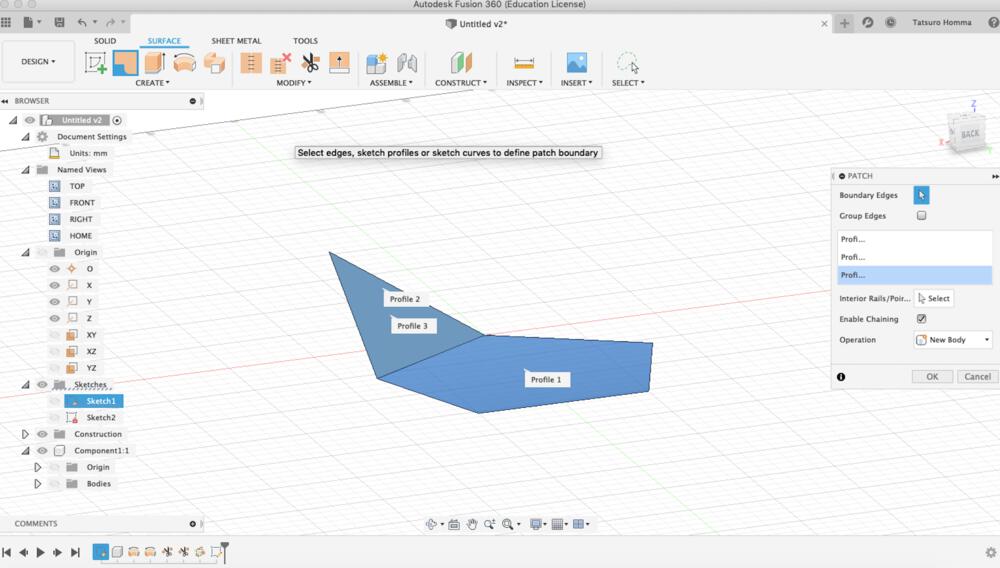
4. Sketch polygon(triangle) and create patch to surface of it and pentagon at the bottom.
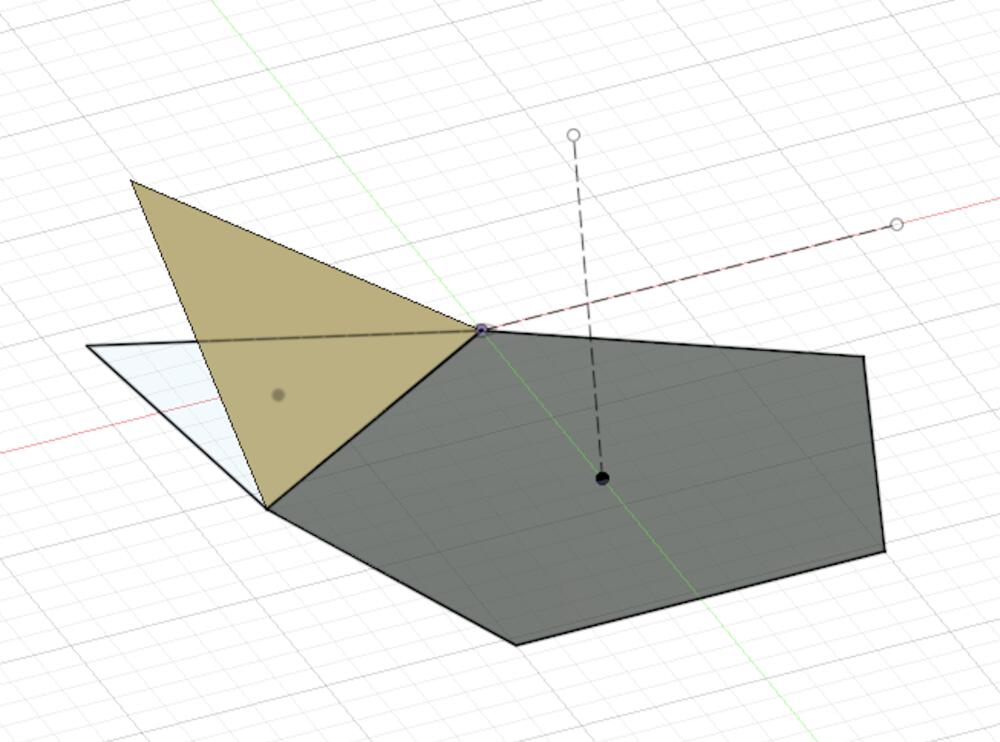
5. Add a construction line as a central pivot of pentagon at the bottom.
_and_make_4_copies.png_1000x_q75.jpg)
6. Pattern > Circular pattern and make 4 copies of triangle by set a central contraction line(5.) as axis.
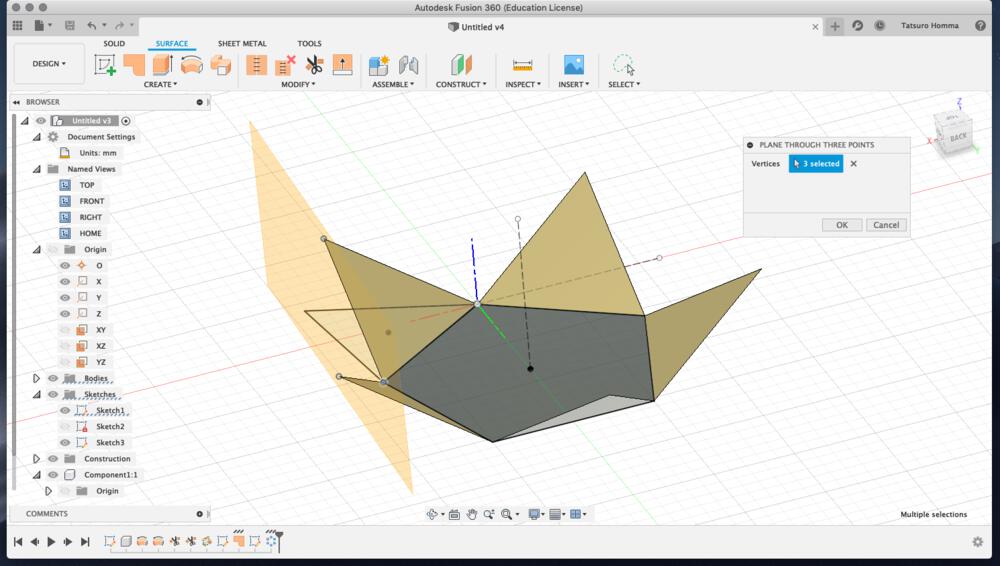
7. create a construction plane for side pentagon from three points of triangle.
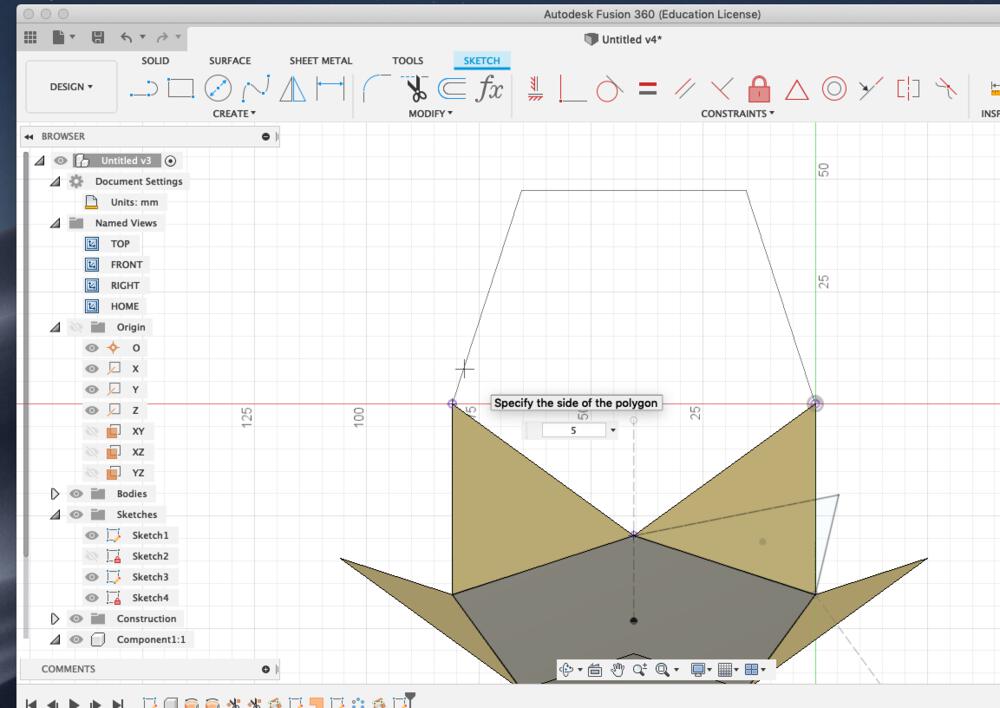
8. sketch a edge polygon on construction plane of 7.
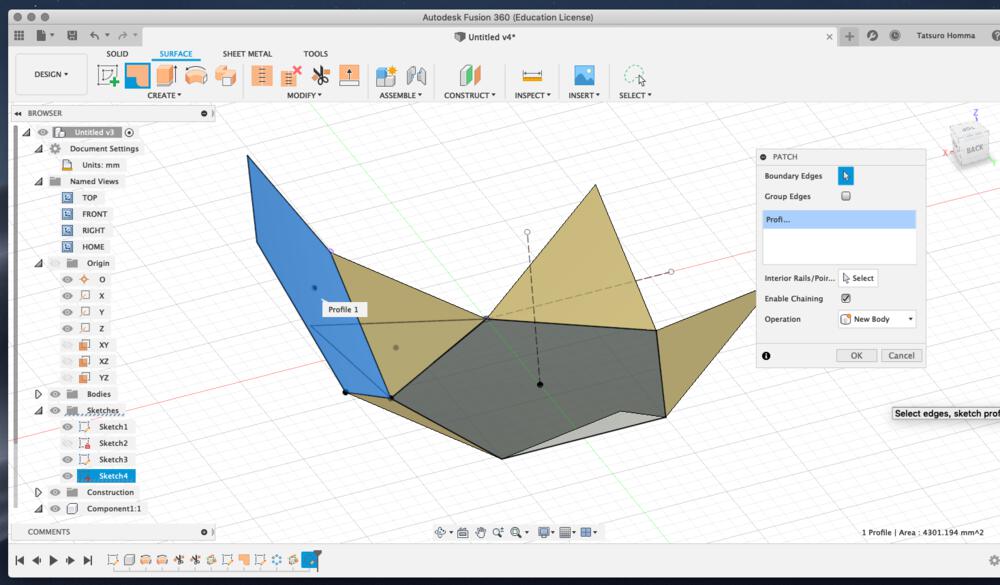
9. Add patch to added polygon.
_.png_1000x_q75.jpg)
10. Pattern > Circular pattern and make 4 copies of triangle by set a central contraction line(5.) as axis (same as 6.)
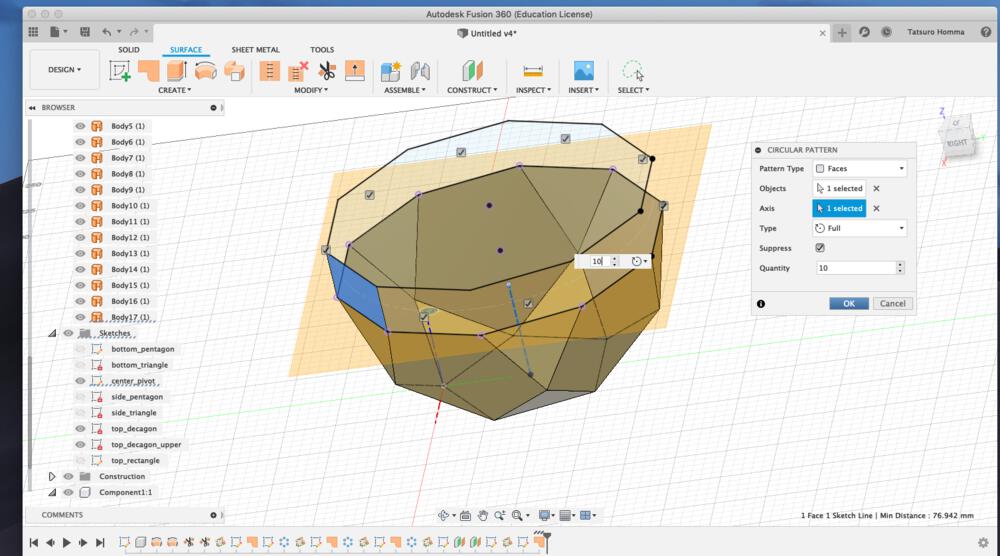
11. Repeat same process from 7. to 10. and make triangles to upper side.
This image is making a circular pattern for side rectangle. I changed my mind to make rectangle instead of triangle for good usability to set or remove the front panel. For making the rectangle in the side, I constructed "offset plane" for upper side of decagon, create "project" line of the decagon and traced the line of it.
Unfortunately, there are no screenshot for these detail works.
- "Thicken" the surface of patch. It's necessary to check the direction of the distance of thick. I set it into "from inside to outside"
- Sketch the "Center diameter circle" of top table at the "offset construction plane", then "extrude" it for giving thickness
- Sketch the "rectangle", "filet" and "extrude" of table stopper
- Make hole on the side rectangle using "extrude" the circle through table stopper ("to All")
- Make hole on the top table using "extrude" the circle through through the top table ("to All")
- Attach the tenon(ホゾ?) to the top of table stopper using "extrude" and "joint to obeject"
- "Make components from bodies"
- "Assemble > Joint" - attach table stopper to the inside of the side rectangle and top table to the table stopper
- "Design > Render" - set "appearance" and "scene"(background) of the object
- Put logo image to the surface using "Decal"
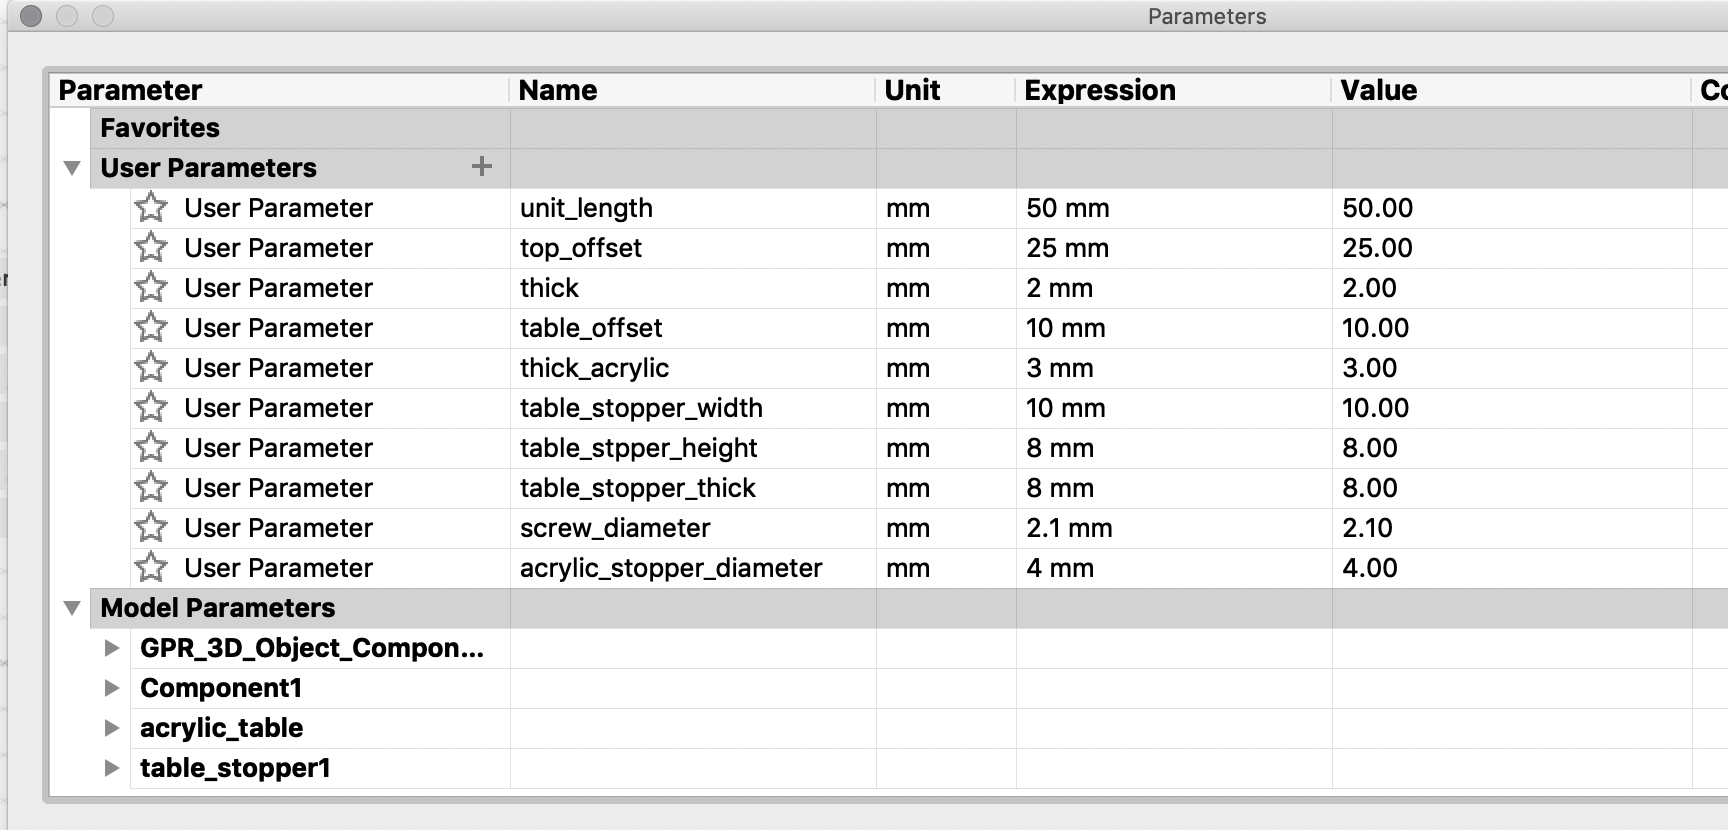
I tried to make every value of length, diameter and thickness as user parameter.
Some looks to be effective to reflect value to the model, but the others not because the way to make polyhedron(凸多面体) and constraint would have conflict..? This needs to be checked in next week activity of computer controlled cutting.
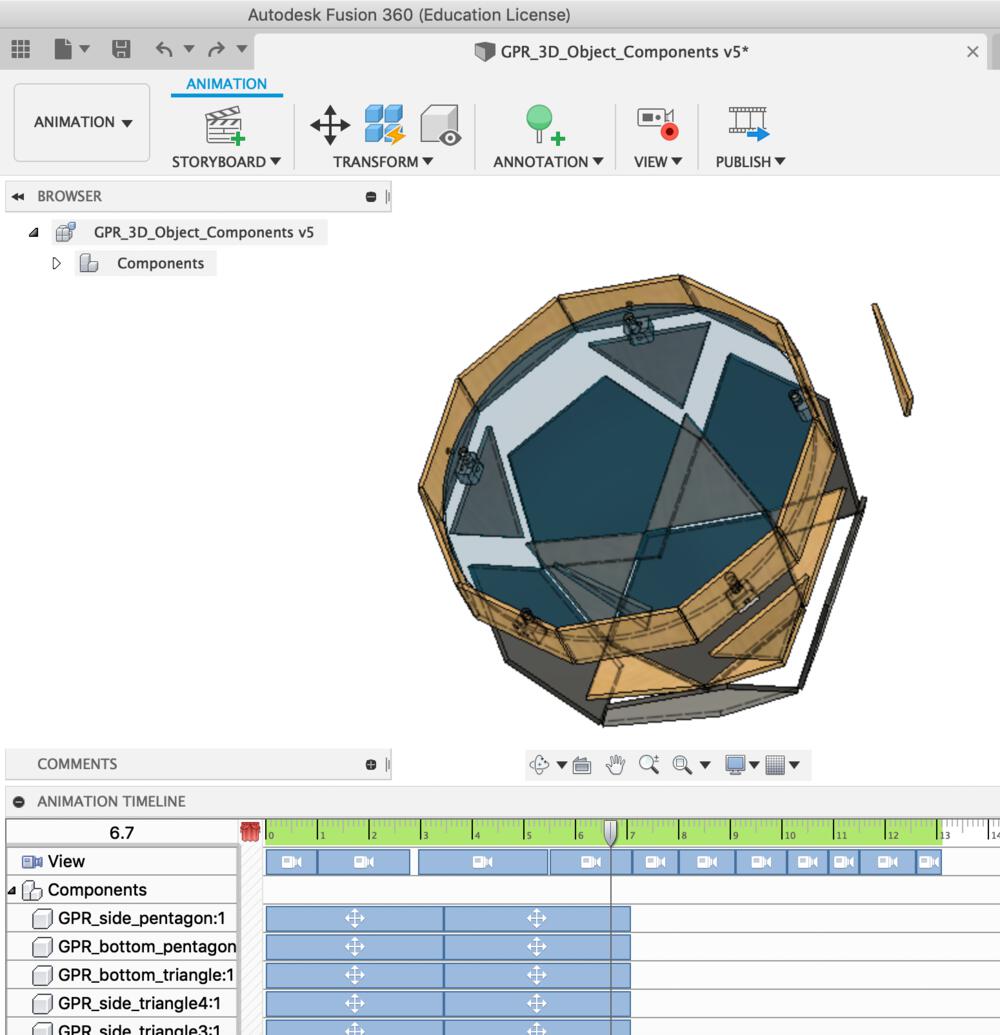
Create animation timeline with "Auto Explode", "Restore All", add camera angles and zooming.
I tried the other CAD tools.
Grasshopper(Rhinoceros)
Grasshopper is a visual programming language and environment that runs as a plugin within the Rhinoceros . This video is a 3D "Voronoi" model that I created following a youtube tutorial
Voronoi 3D modeling using Grasshopper.
Blender
Blender is a free and open-source 3D computer graphics software used for creating animated films, visual effects or 3D printed models etc.
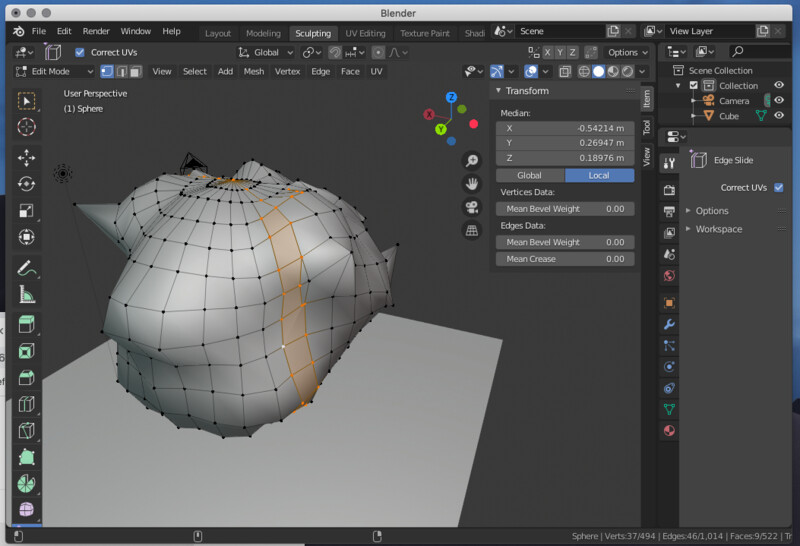
Editing vertex of sculpture surface in Blender
Files
- GIMP(logo): xcf, png
- Inkscape(traced path from bitmap): dxf, svg
- Fusion360(Product outline overview)
Lessons Learned
- Making CAM requires concrete concept of creation.
- I run out of time for trying to get started to use GIMP, Inkscape, FreeCAD, Fusin360, Blender etc (Ah, almost everthing..)). At the entry point, it's important that thinking clearly about the objective of hands-on and go directly to do that in challenger's mind. Ideally, it's great to utilize multiple tools in cross functional way.
- Still seeking effective way to make doument - Command line edit tool like imagemagick or ffmpeg is cool. Do I need to do output(not only memo but write html) at least every day(?)
References
- GIMP Documentation
- Krita Documentation
- Inkscape Tutorial
- FreeCAD
- FreeCAD Tutorial videos by FabAcademy
- Autodesk Fusion360 Knowledge Network
- Fusion 360 マスターズガイド ベーシック編 改訂第2版 (日本語:Japanese)
- Rhinoceros
- Grasshopper
- Blender
- ffmpeg documentation