Assignment
Week1: Principles and Practices, Project Management
Assignment
Plan and sketch a potential final project
Work through a git tutorial
Build a personal site describing you and your final project
Upload your site to the class archive
Table of content
- Assignment
- My Work
- Plan and sketch potential final project
- Work thorough a git tutorial
- A. Setup Git
- B. SSH Key Access to Git
- C. Copy your personal repo
- D. Upload your repo online
- E. Gitlab notification setting
- Build a personal site describing you and your final project and upload it to the class archive
- Lessons Learned
- References
My Work
Plan and sketch a potential final project
Here I sketched my idea about what I want to make at final project.
For doing incremental approach, I setup a "Project" page from the beginning and try to proceed the activities for final project incrementally with a final project planning sheet
Work through a git tutorial
I followed a git tutorial with hands-on advice from Tamiya-san especially in the first setup part.
A. SETUP GIT (to do only the first time)
Install Git
      $ git --version
      git version 2.10.2
Add your Git username and and configure you email address for uploading
As I have already setup my github account in my laptop, I decided to use existing account as it is. Follows are examples for confirming my account name and email.
      $ git config --global user.name
      Tatsuro Homma
      $ git config --global user.email
      tato.flam@gmail.com
B. SSH KEY ACCESS to GIT (to do only the first time)
Generate your SSH key
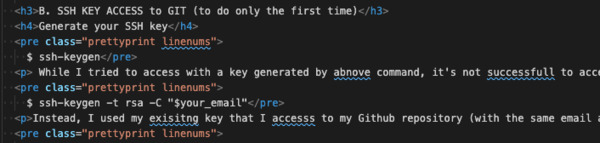
$ ssh-keygen
While I tried to access with a key generated by above command, it's not successful to access to Gitlab. That might be because I omit my email address from above command. The right command is
$ ssh-keygen -t rsa -C "$your_email"
Instead, I used my existing key that I access to my Github repository (with the same email address for Gitlab).
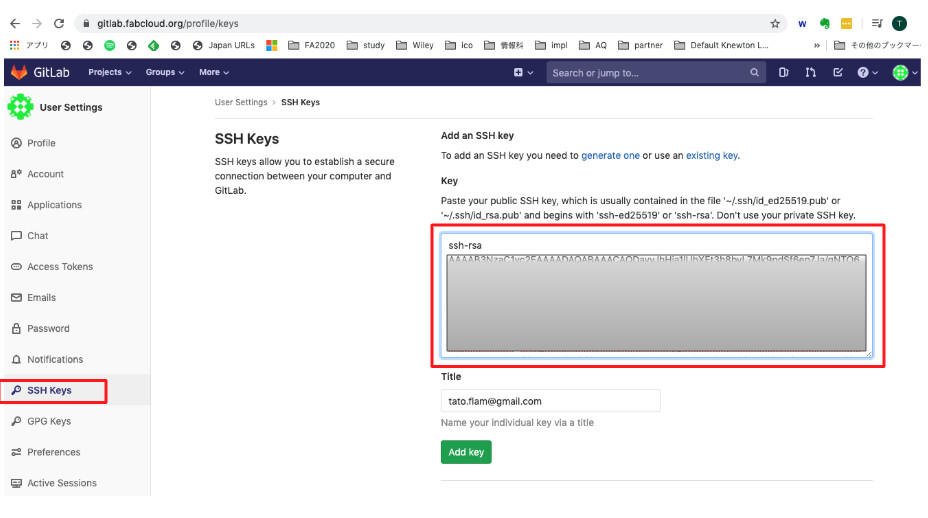
$ cat ~/.ssh/id_github.pub
Copying the output of above command(public key of id_github) to ssh setting part of Giblab repository, then I could access to Gitlab FabAcademy repository finally!
C. COPY YOUR ACADEMY PERSONAL REPO
Clone your student repository
      $ mkdir ~/repo/gitlab
      $ cd ~/repo/gitlab
      $ git clone git@gitlab.fabcloud.org:academany/fabacademy/2020/labs/kannai/students/tatsuro-homma.git
      Cloning into 'tatsuro-homma'...
      ...
      Receiving objects: 100% (174/174), 405.43 KiB | 83.00 KiB/s, done.
      Resolving deltas: 100% (100/100), done.
D. UPLOAD YOUR REPO ONLINE
Make change to markdown template
$ vi index.md
Check git status
      $ git status
      On branch master
      Your branch is up-to-date with 'origin/master'.
      Changes not staged for commit:
        (use "git add ..." to update what will be committed)
        (use "git checkout -- ..." to discard changes in working directory)

      modified:   docs/about/index.md

      no changes added to commit (use "git add" and/or "git commit -a")
Add modified file to git (staging area)
      $ git add .
      $ git status
      On branch master
      Your branch is up-to-date with 'origin/master'.
      Changes to be committed:
        (use "git reset HEAD ..." to unstage)

      modified:   docs/about/index.md
Commit to git local repository
$ git commit -m "initial commit to gitlab"
Check git status (again)
      $ git status
      On branch master
      Your branch is ahead of 'origin/master' by 1 commit.
        (use "git push" to publish your local commits)
      nothing to commit, working tree clean
Upload to Remote Repository
      $ git push
      ...
      To gitlab.fabcloud.org:academany/fabacademy/2020/labs/kannai/students/tatsuro-homma.git
         f50d30d..5b7c0f0  master -> master
The first push(or chage in GUI) to remote repository trigger a set of tasks defined in .gitlab-ci.yml of Gitlab CI. It takes 10 or more seconds. the web site of
E. Setup Gitlab notification setting
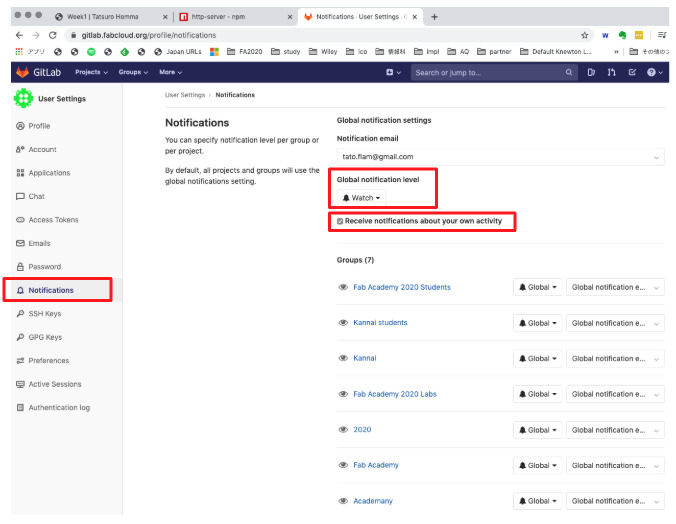
For checking issue status that will be discussed in Fab Academy 2020 community, I configured gitlab setting. Login to Gitlab and click account menu > Settings" > "Notification", then check following items:
- Global Notification Level: "Watch"
- Check the checkbox of "Receive notifications about your own activity"
Then you can receive email notifying issues that anyone (including you) raised in Gitlab Fab Academy 2020 repository.
Build a personal site describing you and your final project and upload it to the class archive
I’ve checked some past students’ site and researched what and how those past graduates described their accomplishment. Here are some of references
- Markdown(MkDocs)
-
Websites made by markdown template is fine to be well structured and allow developer to describe in straight forward way.
- Elena Cardiel(ie university, 2019)
-
Elena's site is very informative (even she made a section of “how to survive FA) and well consolidated structure with header bar.
- Miriam Choi (Seoul, 2019)
-
Miram's site is great to tell about her story by infographic drawing and animations. And “Hanna” font is cool.
- Josep Marti (Barcelona, 2019)
-
Josep's site is simple and well visualized based on grid based responsive design using template of HTML5UP.
Neil highly recommends to write HTML in local client instead of editing Markdown in web GUI in Gitlab. Also, Tamiya-san advised me to go with HTML5 from the beginning of Fab Academy course If I want to publish “fine” website. Otherwise, we would not be able to change and refine our website design afterward. I’m not so familiar with HTML5/CSS, but it would be a good chance to start that using templates introduced at global session. So I picked the “Editorial” template from HTML5Up, the one looks good for adding detailed description, menu structure and free layout. Then tweaked some of features like font by using Hanna and changed font-color, font-size, and added bootstrap.min.css and github.min.css etc.

Tips for building and uploading website
Enable HTML website at Gitlab CI
-
At GUI in Gitlab repository
new file > Select a template type (.gitlab-ci.yml) > Apply a template (Pages: HTML) HTML5Up template
-
HTML5Up is responsive template and the concept looks to be similar with with bootstrap, a very famous framework CSS3. However, SCSS description using HTML5Up is not fully compatible with Bootstrap (and some features are not documented). For example:
      Define column size:
        -Bootstrap: col-sm-[number of grid]
        -HTML5Up: col-[number of grid]-small

      Define column offset size
        -Bootstrap: offset-[number of grid]
        -HTML5Up: off-[number of grid]
For other tips about the template, "element" page of the “Editorial” demo and that source code helped coding. Text Editor
-
I used following local editors in laptop(Macbook pro):
- vi
- CotEditor
- Atom
- Visual Studio Code
1 and 2 are very powerful for use of simple text editing. For updating config files right before/after typing command line, vi is useful as it’s run in terminal console. Cot editor is also powerful for editing simple text. At this point, I use CotEditor for change lines of plain text into list element in HTML using regular expression.
Atom is a powerful development editor that supports to visualize file in tree structure and can open multiple file in tab.
After hearing a presentation of Kazuki Yanome at Asian review on 4 Feb, I switched to VSC from Atom. VSC has various extensions (the same libraries can be supported for Atom as well) and I wanted to use "Code Spell Checker" for checking my spelling in English. While Atom also has a package for spell checker, a look and feel of VCS is better than Atom for me.
Atom Tips
- For easy editing..
-
preference > Editor and check “Show indent guide” and “Show invisible”.
- Auto Indent
-
select all (Command +A) and Edit > Lines > Auto Indent
- setting up tabs
-
preference > Editor Tab length: 2 (default),Tab Type: soft(use spaces for “tab”)
VSC Tips
- Add Extensions
-
Preferences > Extensions and search "Code Spell Checker"
What I miss-typed is specified like:
Convert Image
-
- Install
-
$ brew install imagemagick - Check and modification
-
// check $ identify CarpentryWork.jpg CarpentryWork.jpg JPEG 2048x2048 2048x2048+0+0 8-bit sRGB 993078B 0.000u 0:00.001 // change format $ convert [input file] [output file] convert CarpentryWork.png CarpentryWork.jpg // change by horizontal pixel (X: 500px) $ convert [input file] -resize 100x [output file] convert Finalprojectsketch.jpg -resize 500x Finalprojectsketch_500x.jpg // change by vertical pixel (Y: 150px) $ convert [input file] -resize x150 [output file] convert Finalprojectsketch.jpg -resize x150 Finalprojectsketch_x150.jpg - One liner batch command
-
      // check size of multiple files at one time
      $ identify *jpg
      CarpentryWork.jpg JPEG 2048x2048 2048x2048+0+0 8-bit sRGB 993078B 0.000u 0:00.001
      CarpentryWork_resized.jpg JPEG 1000x1000 1000x1000+0+0 8-bit sRGB 327172B 0.000u 0:00.000
      FinalProject_Howitworks.jpg JPEG 2432x3721 2432x3721+0+0 8-bit sRGB 1.98688MiB 0.000u 0:00.001
// change size of multiple files at one time $ for v1 in $(ls -1 pic*jpg) do convert ${v1} -resize 200x ${v1}_200x.jpg done
Local HTTP Server
-
- Install globally
-
$ npm install http-server -g - How to run it?
-
      // At local repository directory, just run "http-server [path] [options]"
      $http-server .
Then access to
http://127.0.0.1:8080/, local HTTP Server hosts personal page!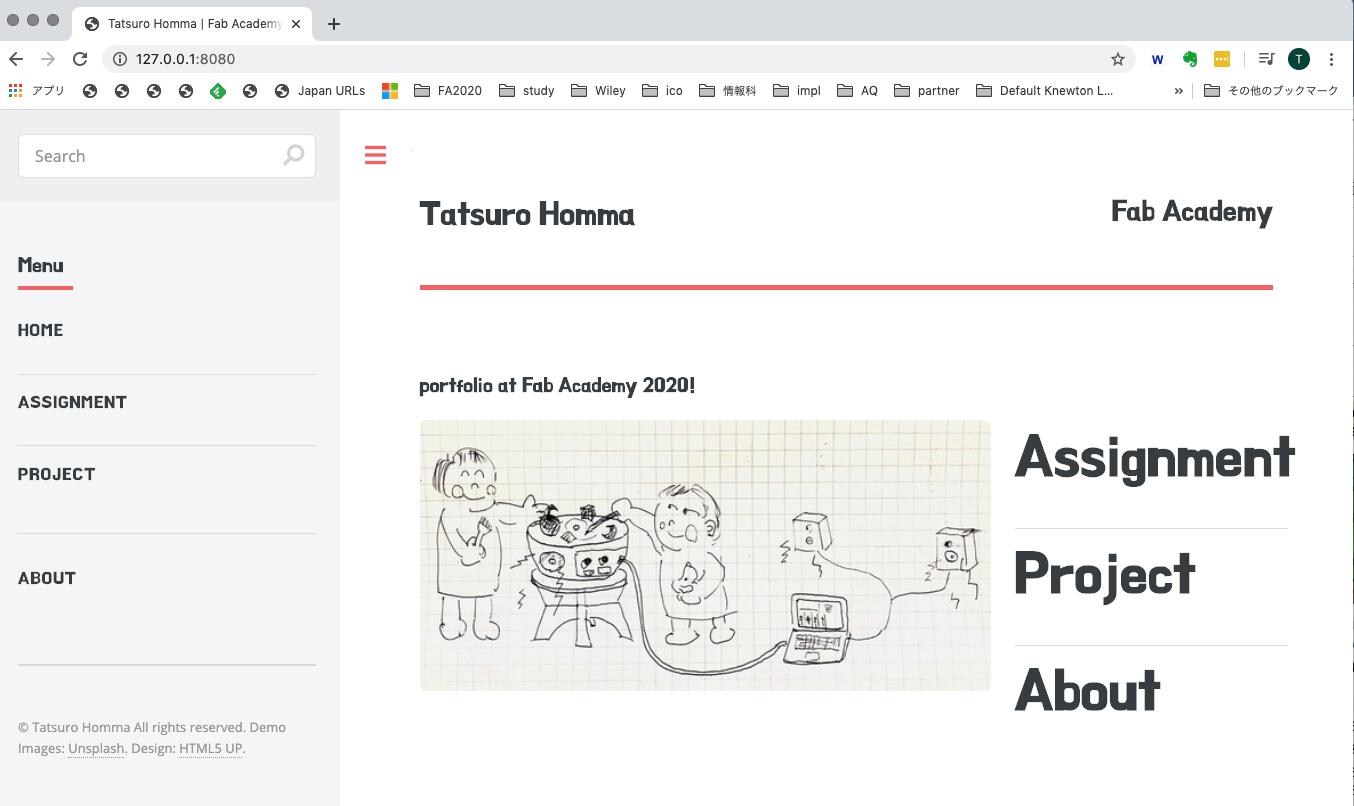
Lessons Learned
- HTML template does not always support what I want to make. It's important to acquire basic knowledge of technology tweak to utilize it in minimum level.
- Documentation takes time. Preparation on working(at least take "consolidated" memo) would be a good solution.
- Top down approach to plan and manage project, Bottom up approach to make and debug.
References
- Fab Academy Assessment
- Fablab Kannai week01 assignment page(Principle and Practice)
- Fablab Kannai week02 assignment pageI(Project Management)
- Gitlab Logo Image
- Gitlab trademark and logo guideline
- Gitlab CI
- HTML5Up Editorial Template
- Bootstrap Grid reference(とほほのBootstrap4入門>グリッド)(Japanese)
- Imagemagick "convert" manual
- Visual Studio Code Get Started
- Jun Kawahara Fab Academy website(for using code box in CSS design)