
Week 7 (Computer-Controlled Machining)
Week 7
Due to a lot of internal problems in Honduras the arrival of my CNC was longer then expected. This didn’t really matter to me because of the excitement. I needed to build a really sturdy table that could support the CNC’s dead weight. We don’t have anything similar to IKEA in Honduras so the only logical solution was to go buy some wood and plywood to make the table.
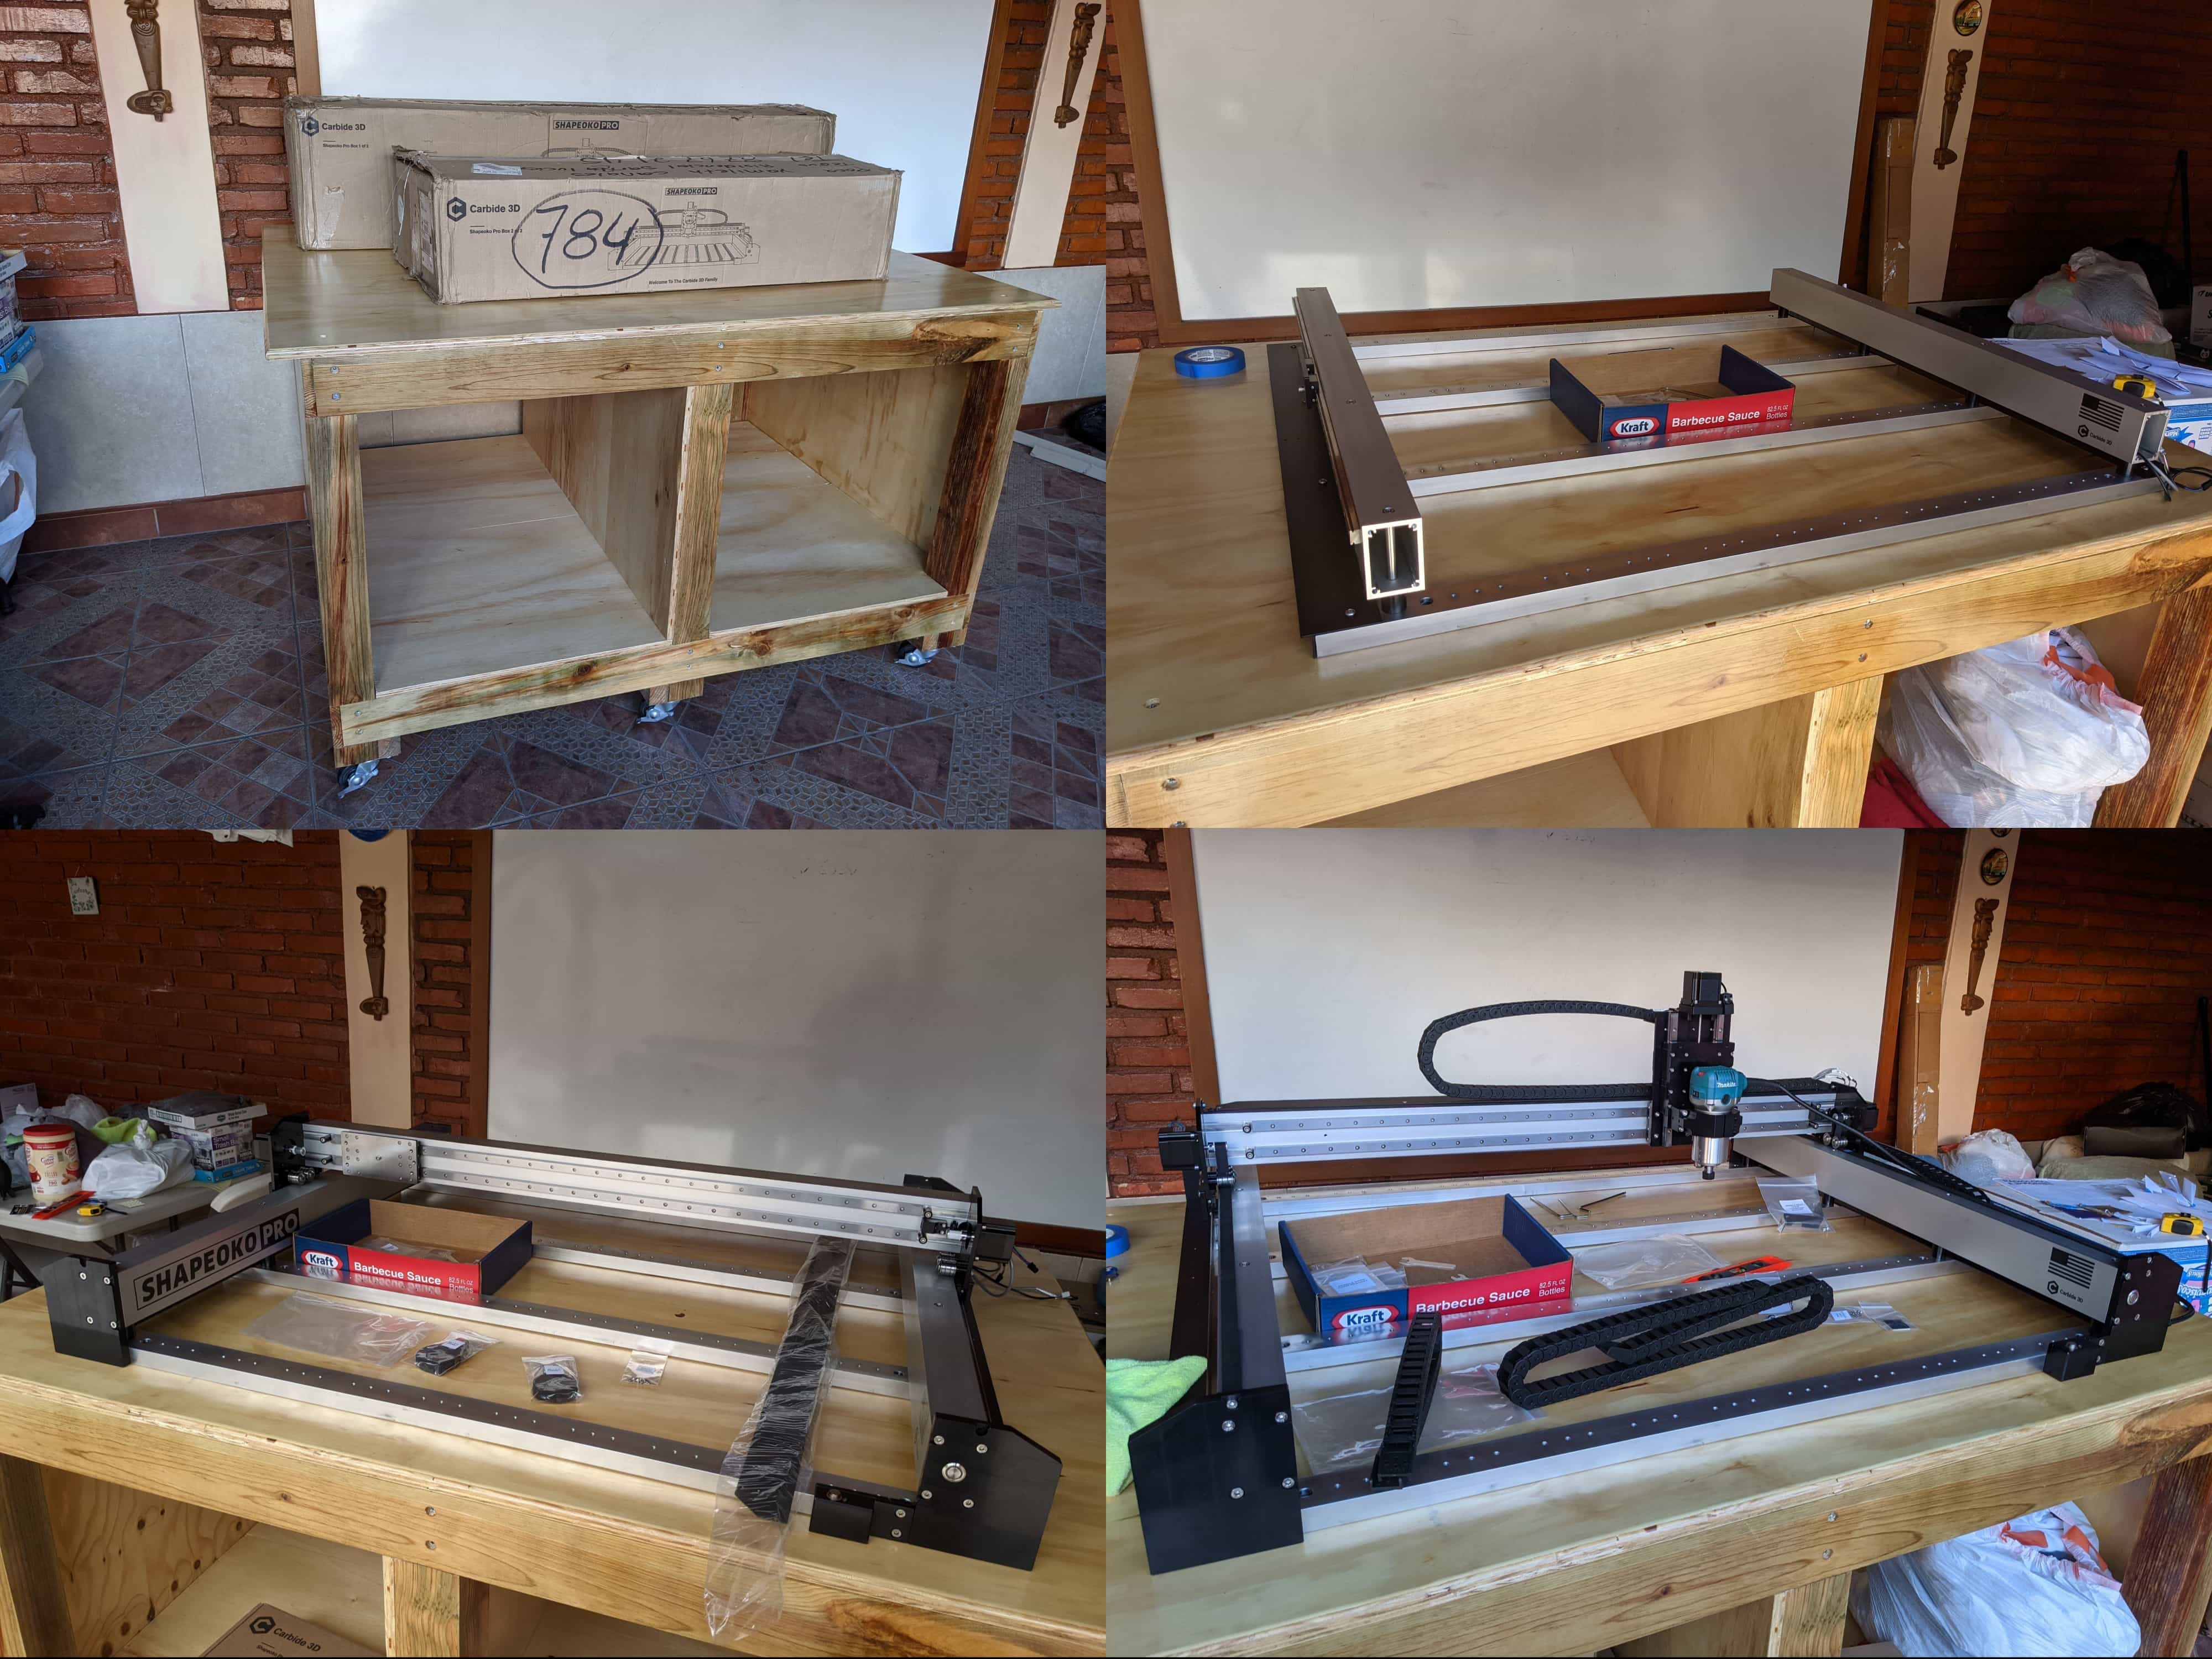
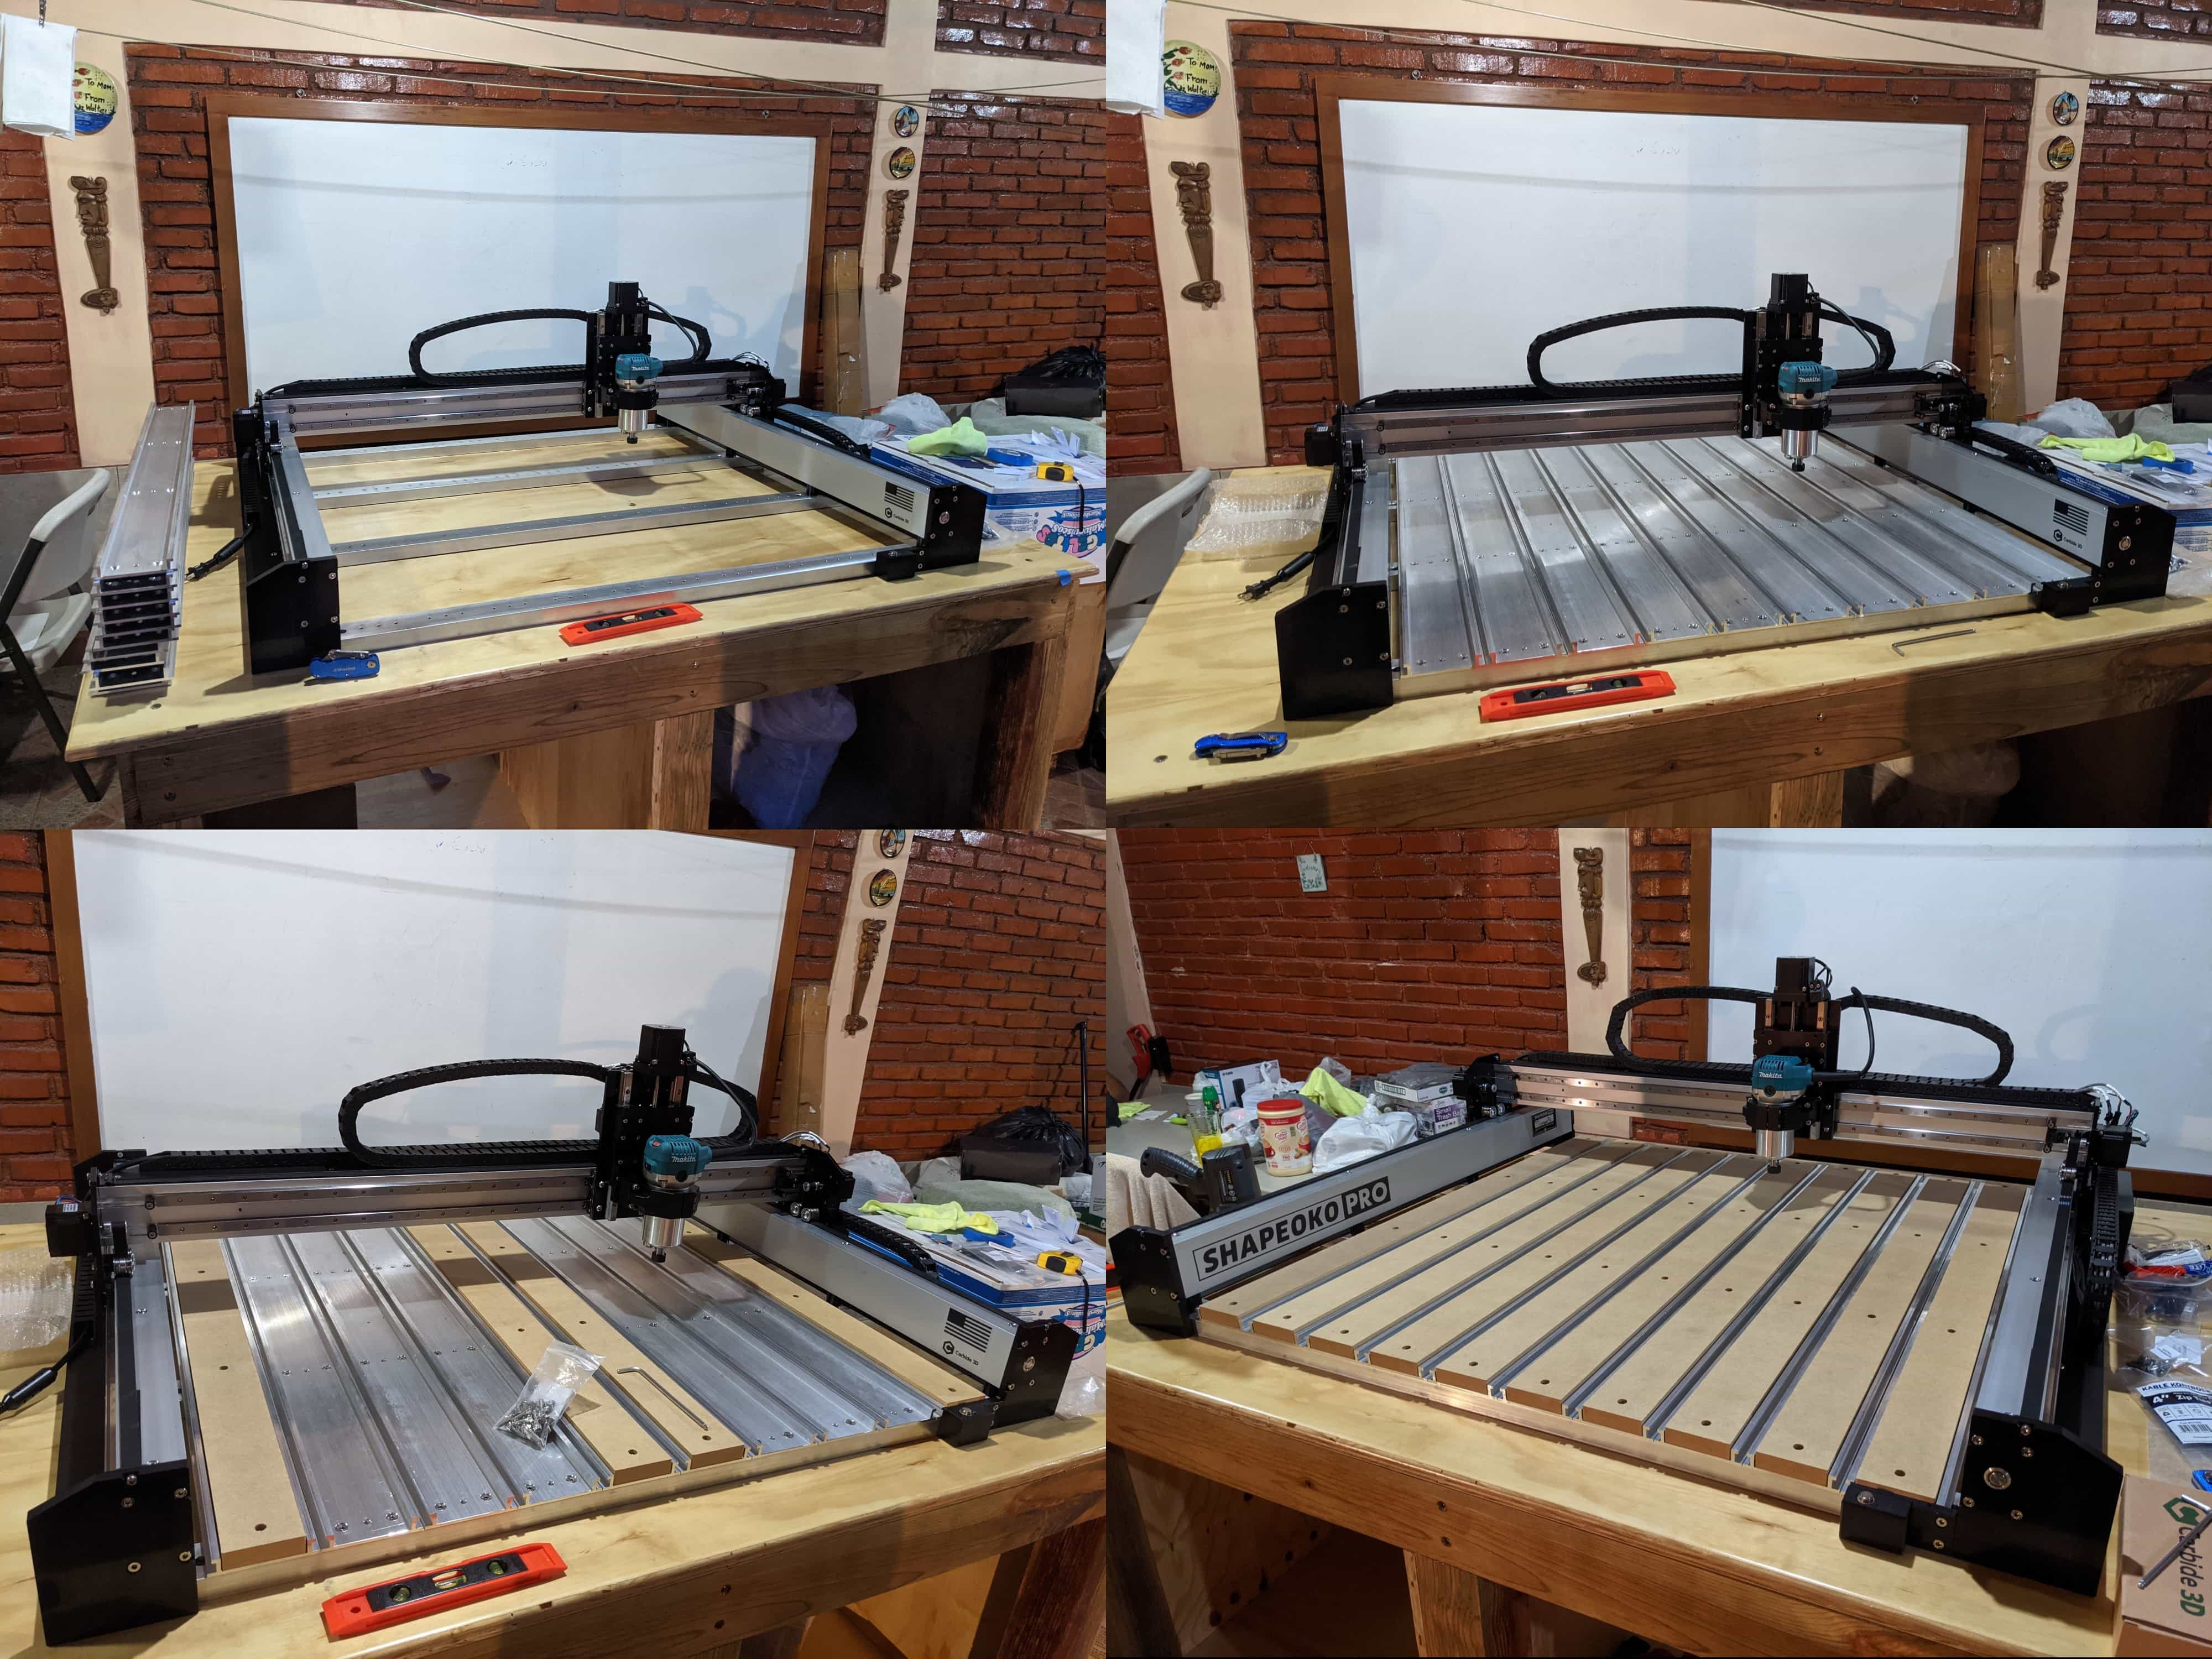
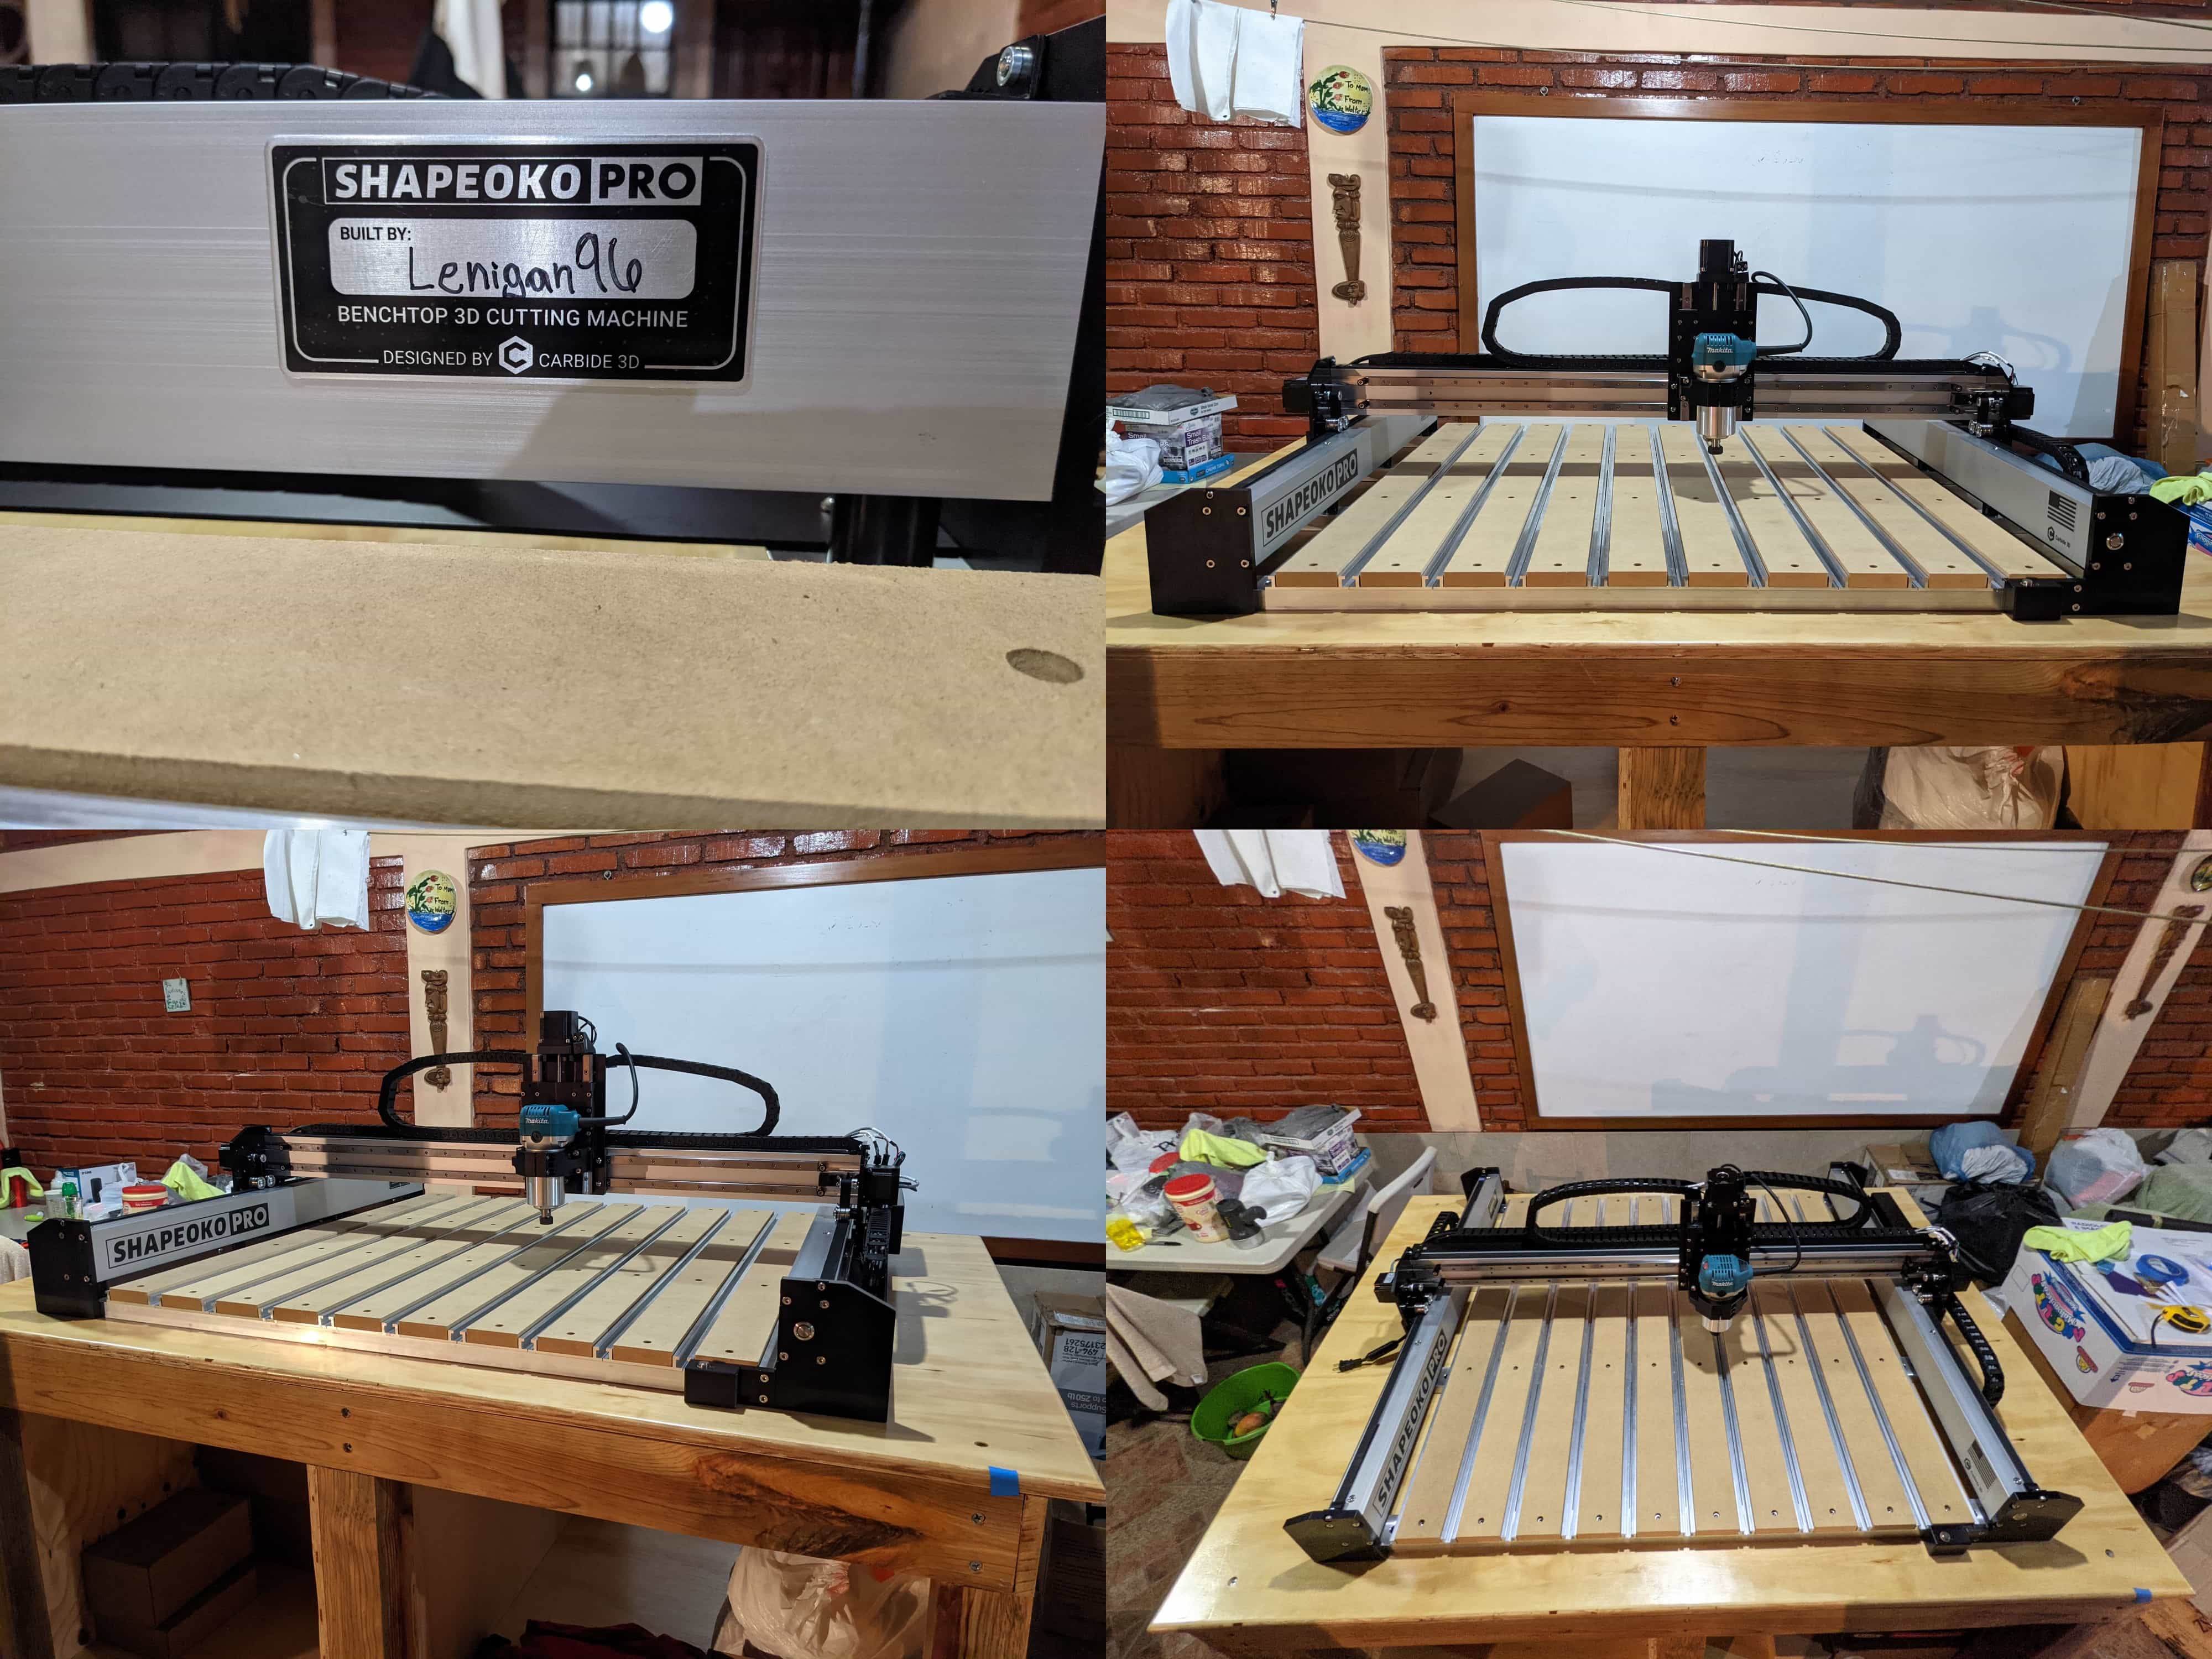
I’m not really sure why but most of the CNC owners I’ve been watching on YouTube don’t really emphasize the importance of squaring everything. The Shapeoko Pro is designed to square itself if you assemble it properly but that doesn’t help square the router. Most CNC owners say they don’t need a lot of precision to make their projects. That’s doesn’t apply to me because I’ll use this big CNC to make my PCBs. The machine is more then capable of doing this, but most people don’t trye this because they probably have easy access to a smaller CNC. Maybe because they can easily purchase one or they probably have easy access to a Fab Lab/Makerspace. I don’t have the money nor FabLab/Makerspace near me. This makes me think outside the box and I know I can use my Shapeoko Pro to do this. I just need to make the correct mods (Spoiler ALERT… Easier said than done but not imposible).
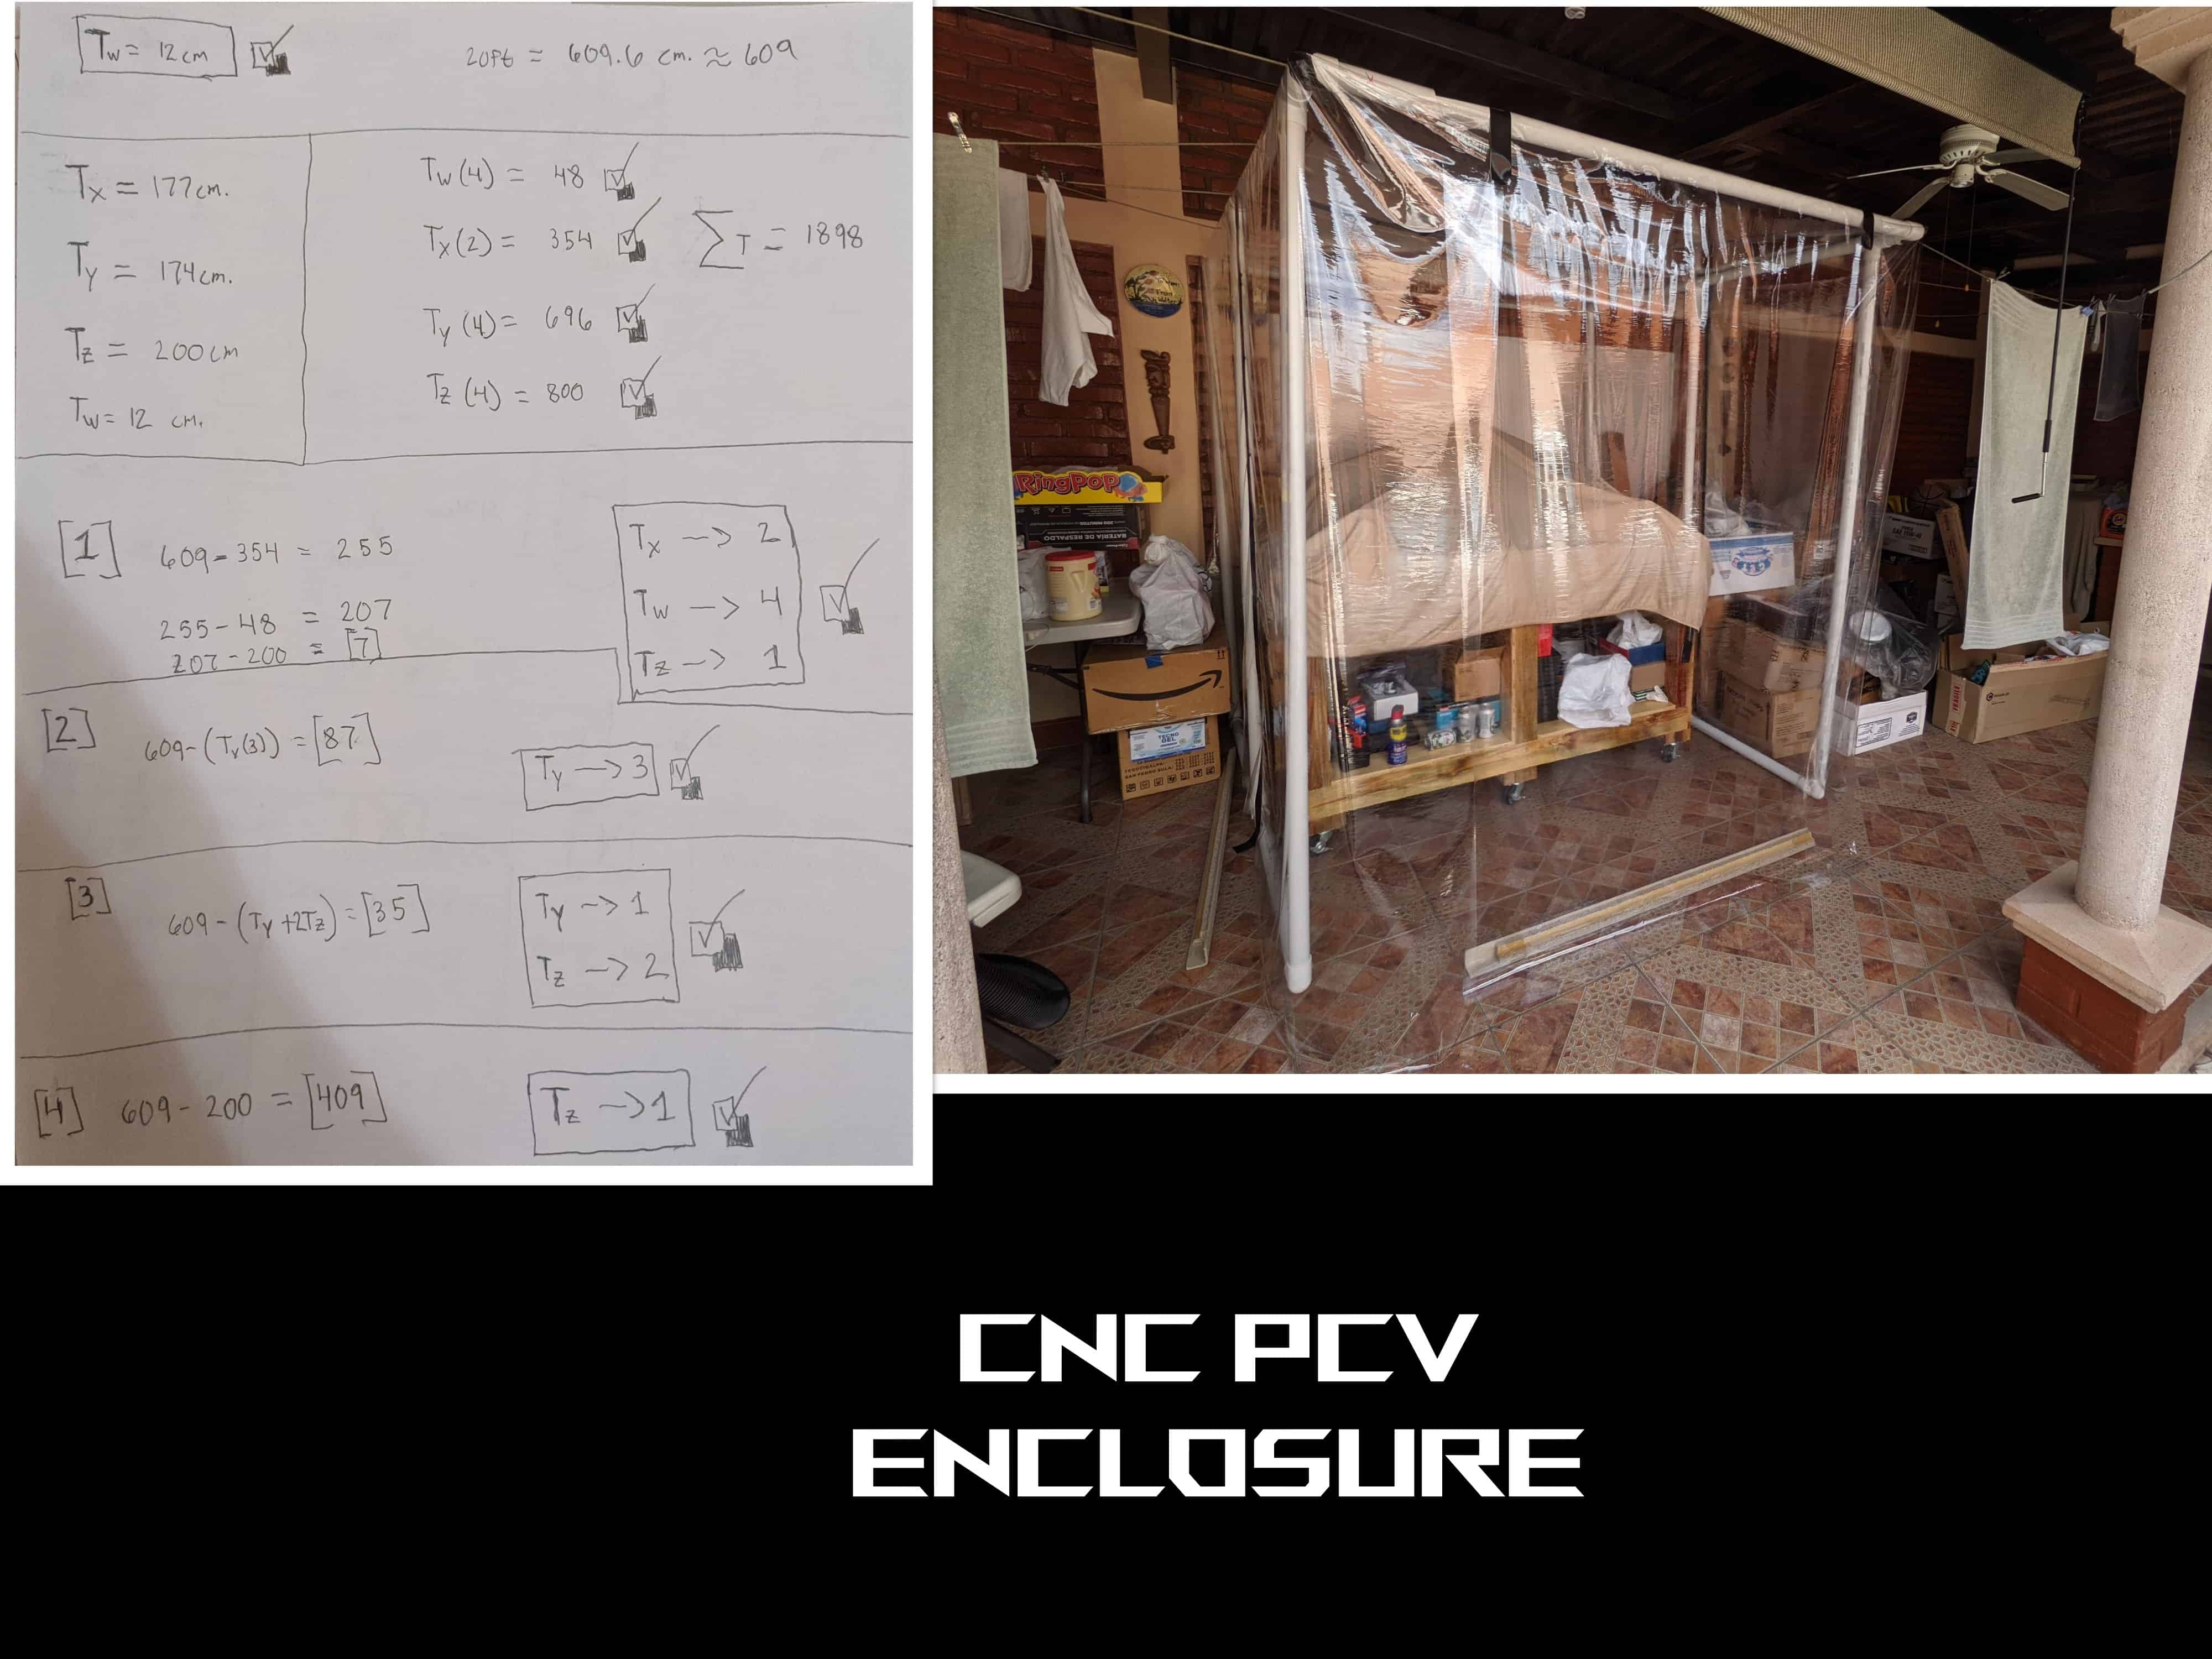
Now I need to solve the problems one by one… As you can se in the previous video, my CNC in under a roof in my home backyard. I desperately need to build some kind of enclosure to protect the machine as much as I can form the outside world. After thinking a lot, I decided to make a structure with 1.5 in. PVC pipe. In Honduras you have to buy the whole 20ft of pipe. I couldn’t buy just what I needed to build the enclosure. I decided to make a design using the 20ft reference as a starting point. After doing this I went to the hardware store and purchased everything I needed. To cover the PVC skeleton, I decided to use thick transparent plastic. I wanted a material that wouldn’t let dust in and in case I had any roof leaks it wouldn’t let the water go through and reach my CNC. The plastic was 17 yards and with the help of my family we chapped and cut the plastic and use duct tape to place it into place.
Next step was designing my own DIY dust collection system. Controlling the amount of dust flying around is extremely important for many reasons. If you skip this step in the long your you will have health complication, damage your machine and in my case in particular my mom would kill me hahaha. I went to the hardware store to see what I’ve got to work with. Remember that in Honduras you don’t have access to CNCs. So, getting proper equipment for one ins basically impossible. I found some transparent buckets that could work to make a DIY cyclone system. I then designed and 3D printed some adapters. The new challenge was finding a tube that could probably work on the CNC dust collection system.
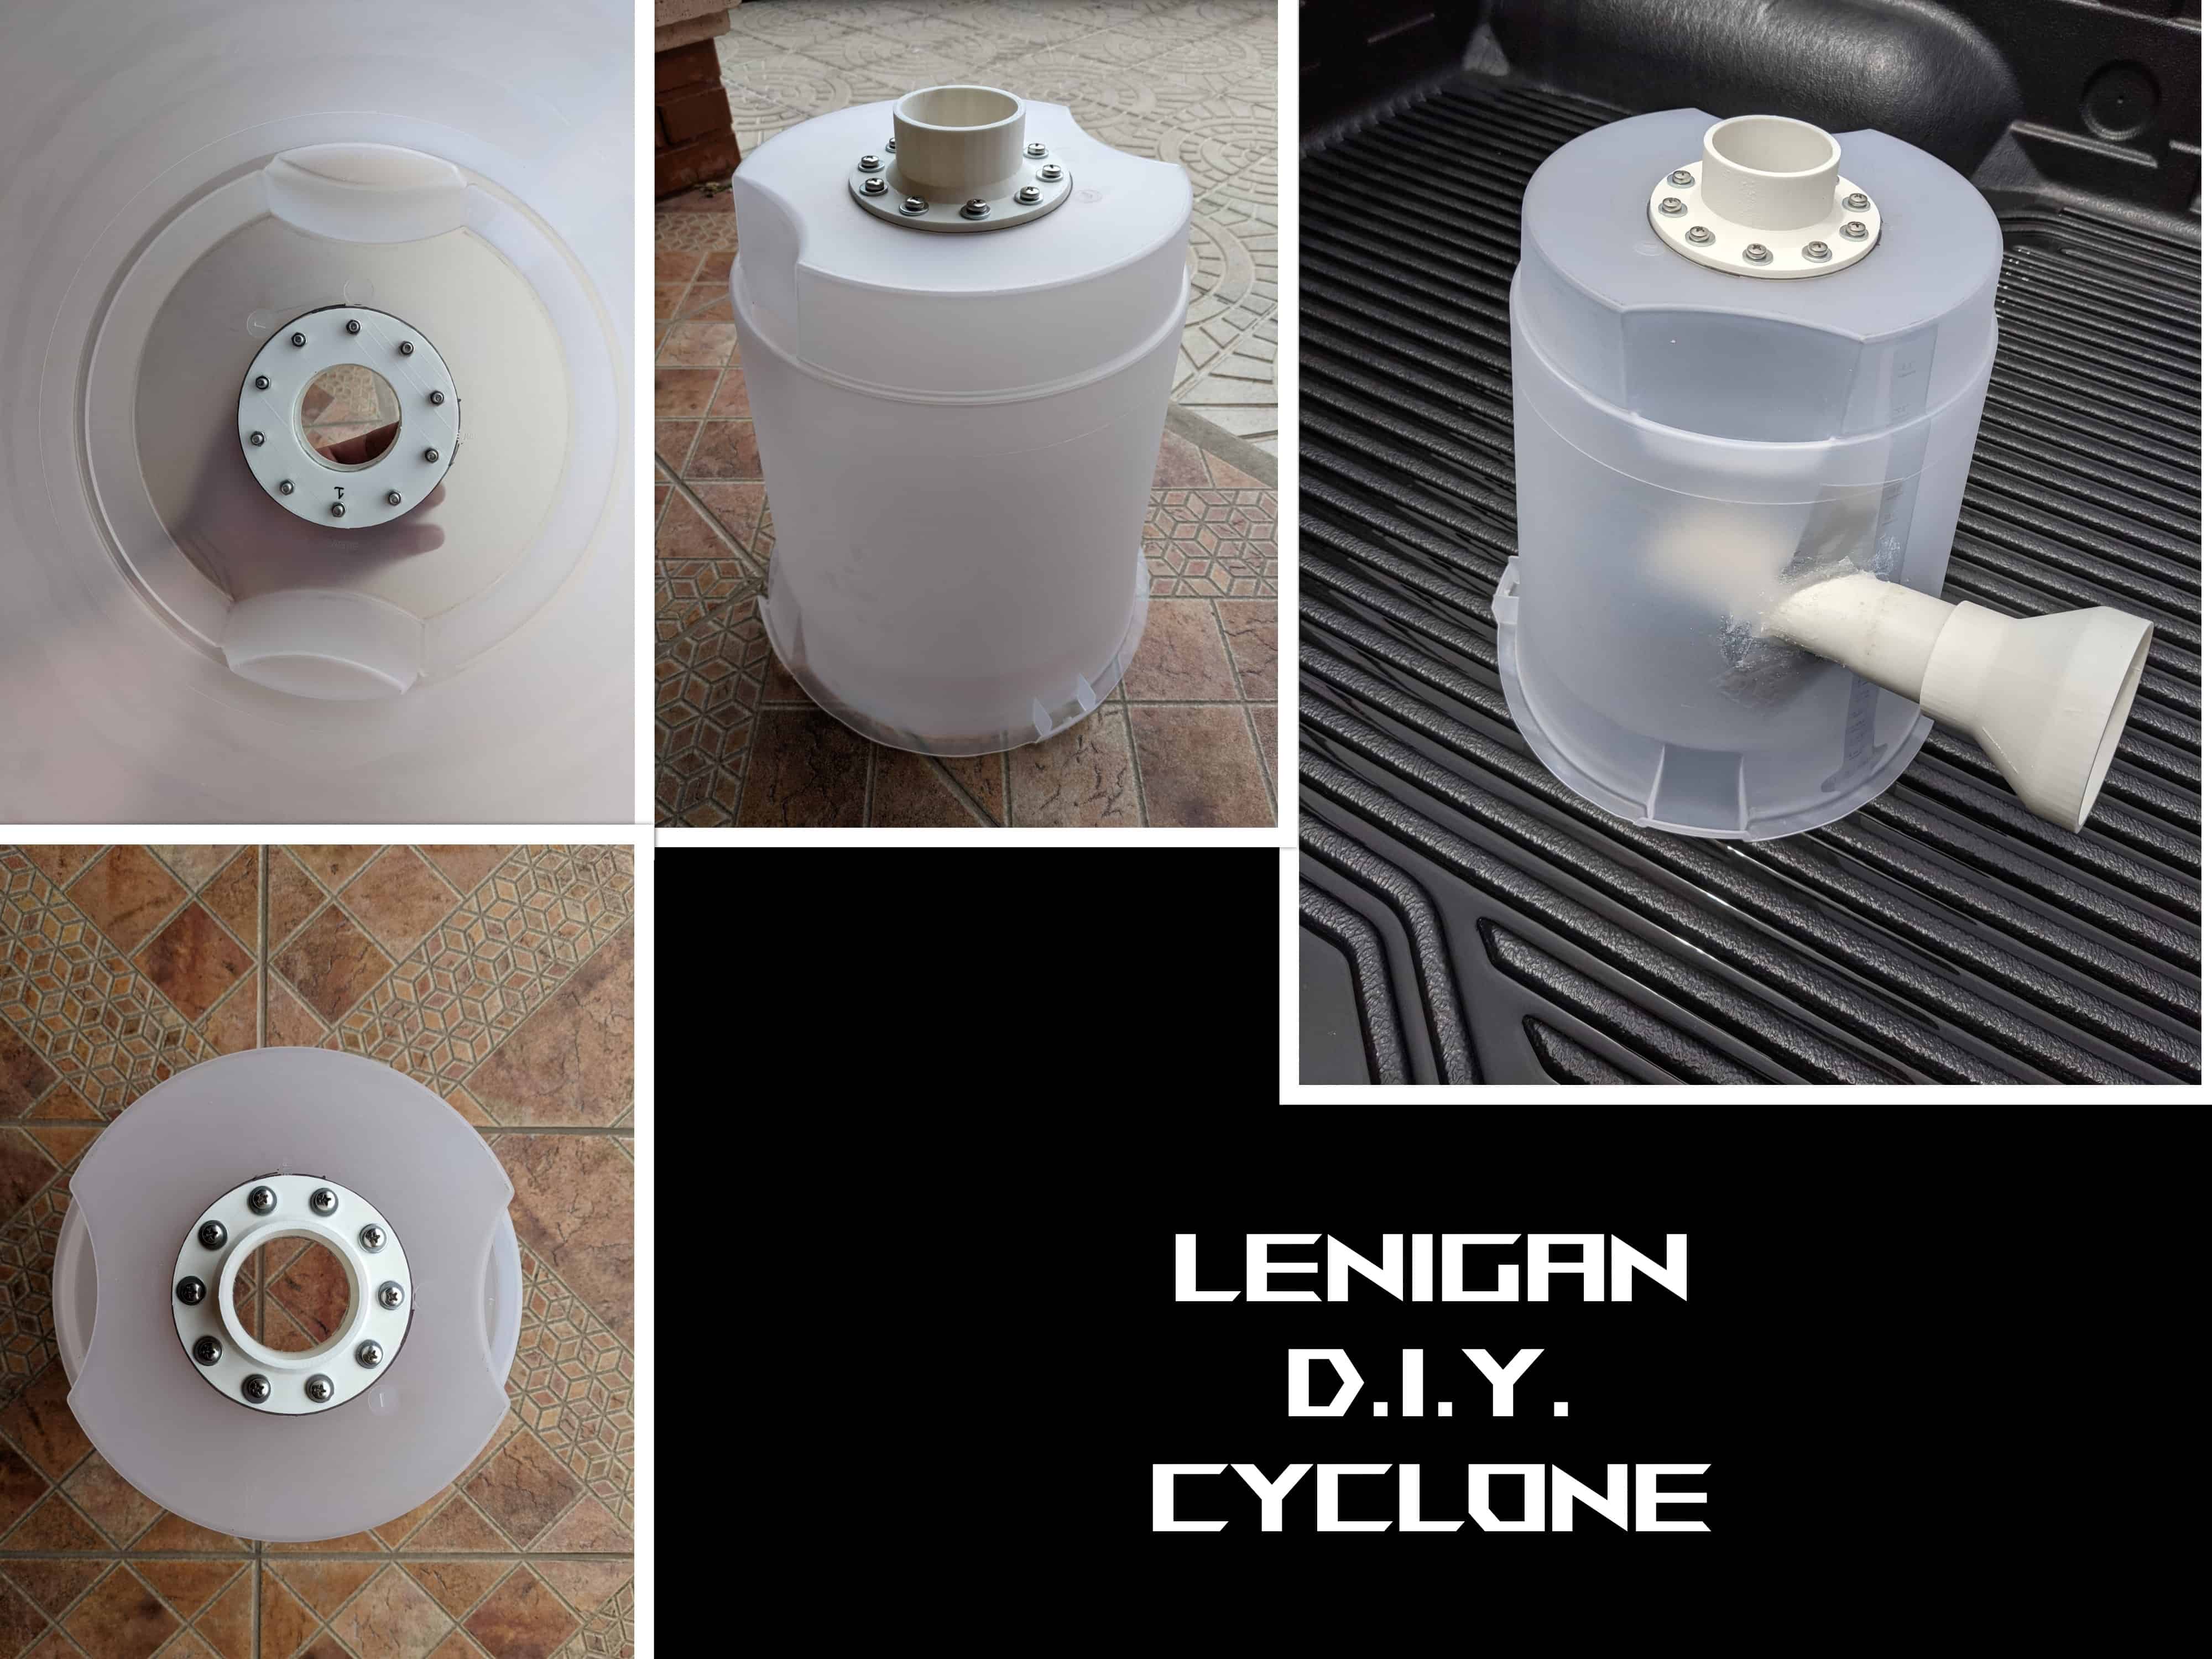
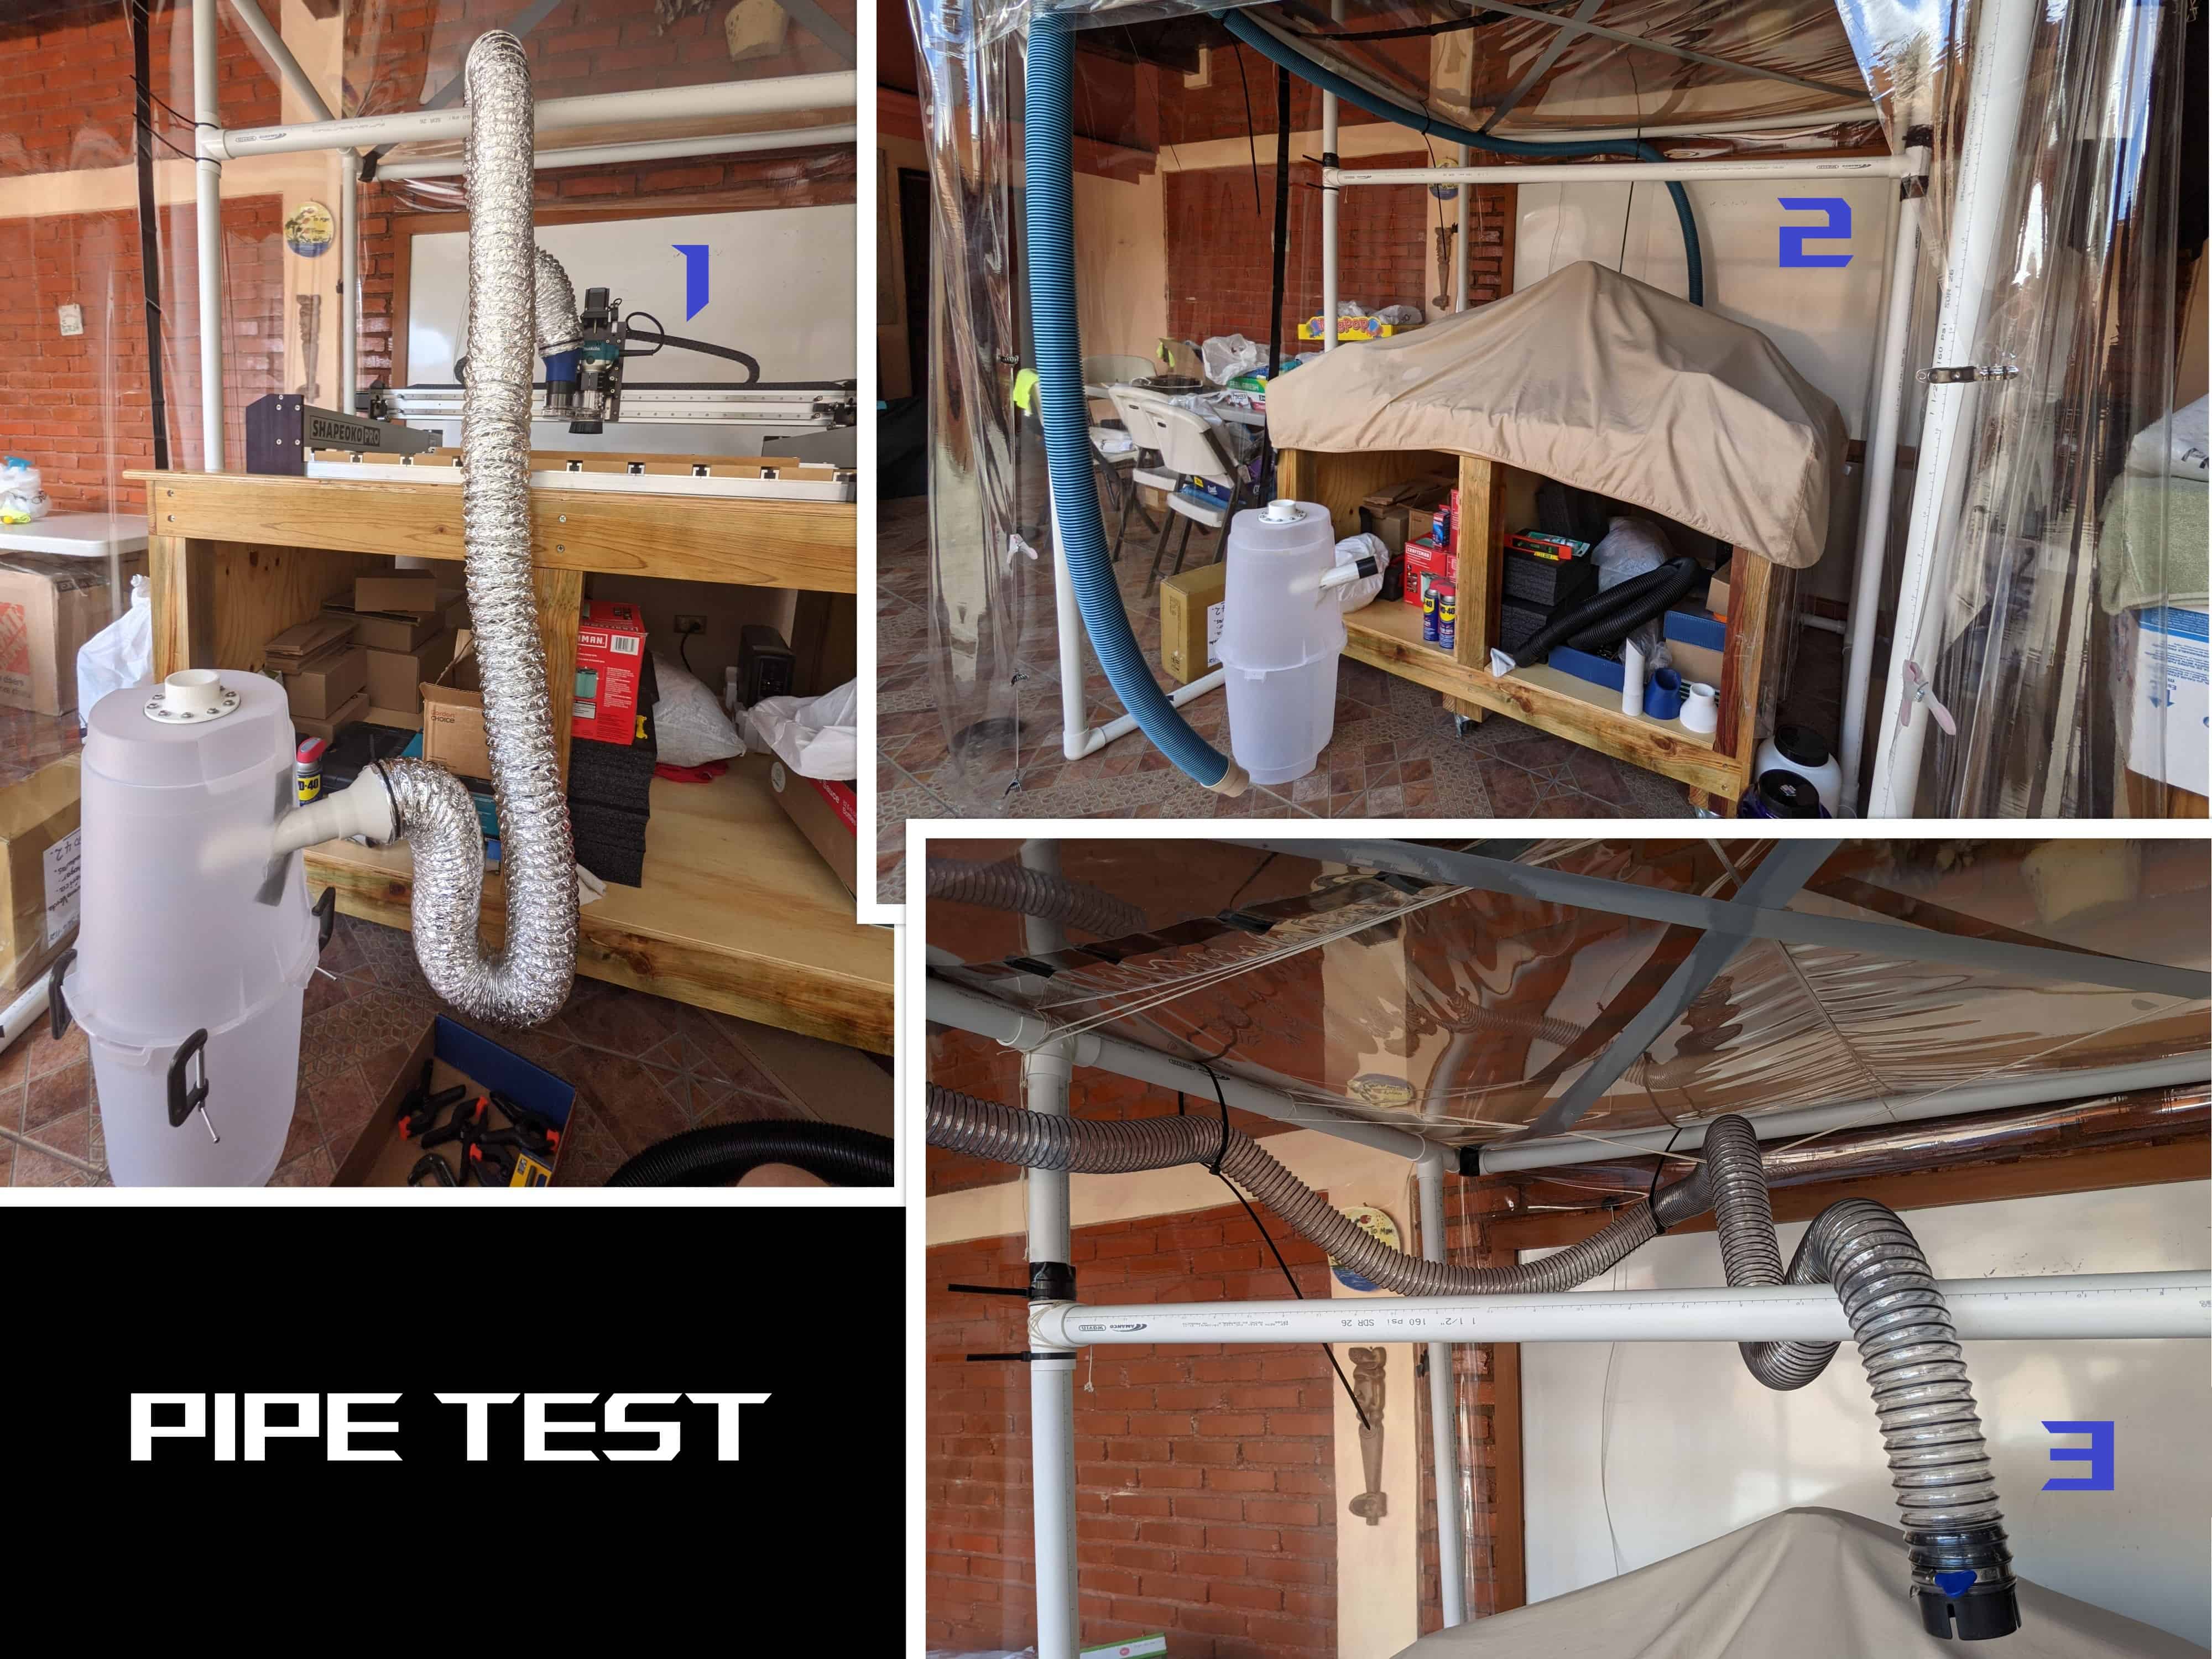
I tested 3 types of pipes. Unfortunately, the winner is a type of pipe imported from the USA that isn’t sold in Honduras. The first idea I had was to use a tube normally used on drying machine. This pipe had a diameter of about 11mm. I couldn’t find any kind of adapter to reduce the diameter of the pipe. So, I designed my own and printed them with my 3D printer. The adapter worked flawlessly. One was for my DIY cyclone and the other for the router mount.
In parallel, I was also determining what software to use to generate the G-Code for my CNC. Carbide 3D has carbide create but for me it wasn’t that fun to use. I ask in the biggest nonofficial Shapeoko forum in Facebook what software was everybody using. Everybody had a polarizing debate between V-Carve and Carveco Maker. Both are paid options but the best option in my opinion is Carveco Maker. You pay a monthly subscription of 15 dollars and you get everything you need to make 2D, 2.5D and 3D milling. I manage to learn how to use the software and solve the pipe problem at the same time.
Now going back to the pipe test… The first tube worked but had a major problem. The vacuum has a strong suction power. So strong that the tube was trying to go tui tr original form. The tube was contracting with a really strong force. I was able to confirm the DIY cyclone worked but the pipe didn’t. After a week of desperations trying to find a better tube in the country, I suddenly had a crazy idea that could probably work. I was able to get a pipe that’s meant to be used in pool vacuums. I was long (20 ft) and strong enough to maintain its given shape but it was too rigid to let the router move freely. After conducting more test, I got really desperate because I couldn’t get a better option in the county. Unfortunately, I had no other choice then ordering a PVC pipe from Amazon and import it. I waited 1.5 weeks to acquire it. That solved the enigma of the correct pipe
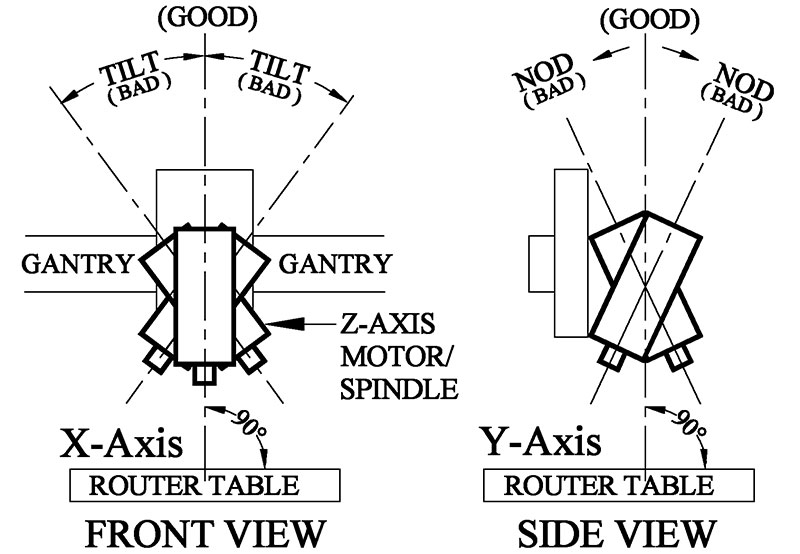
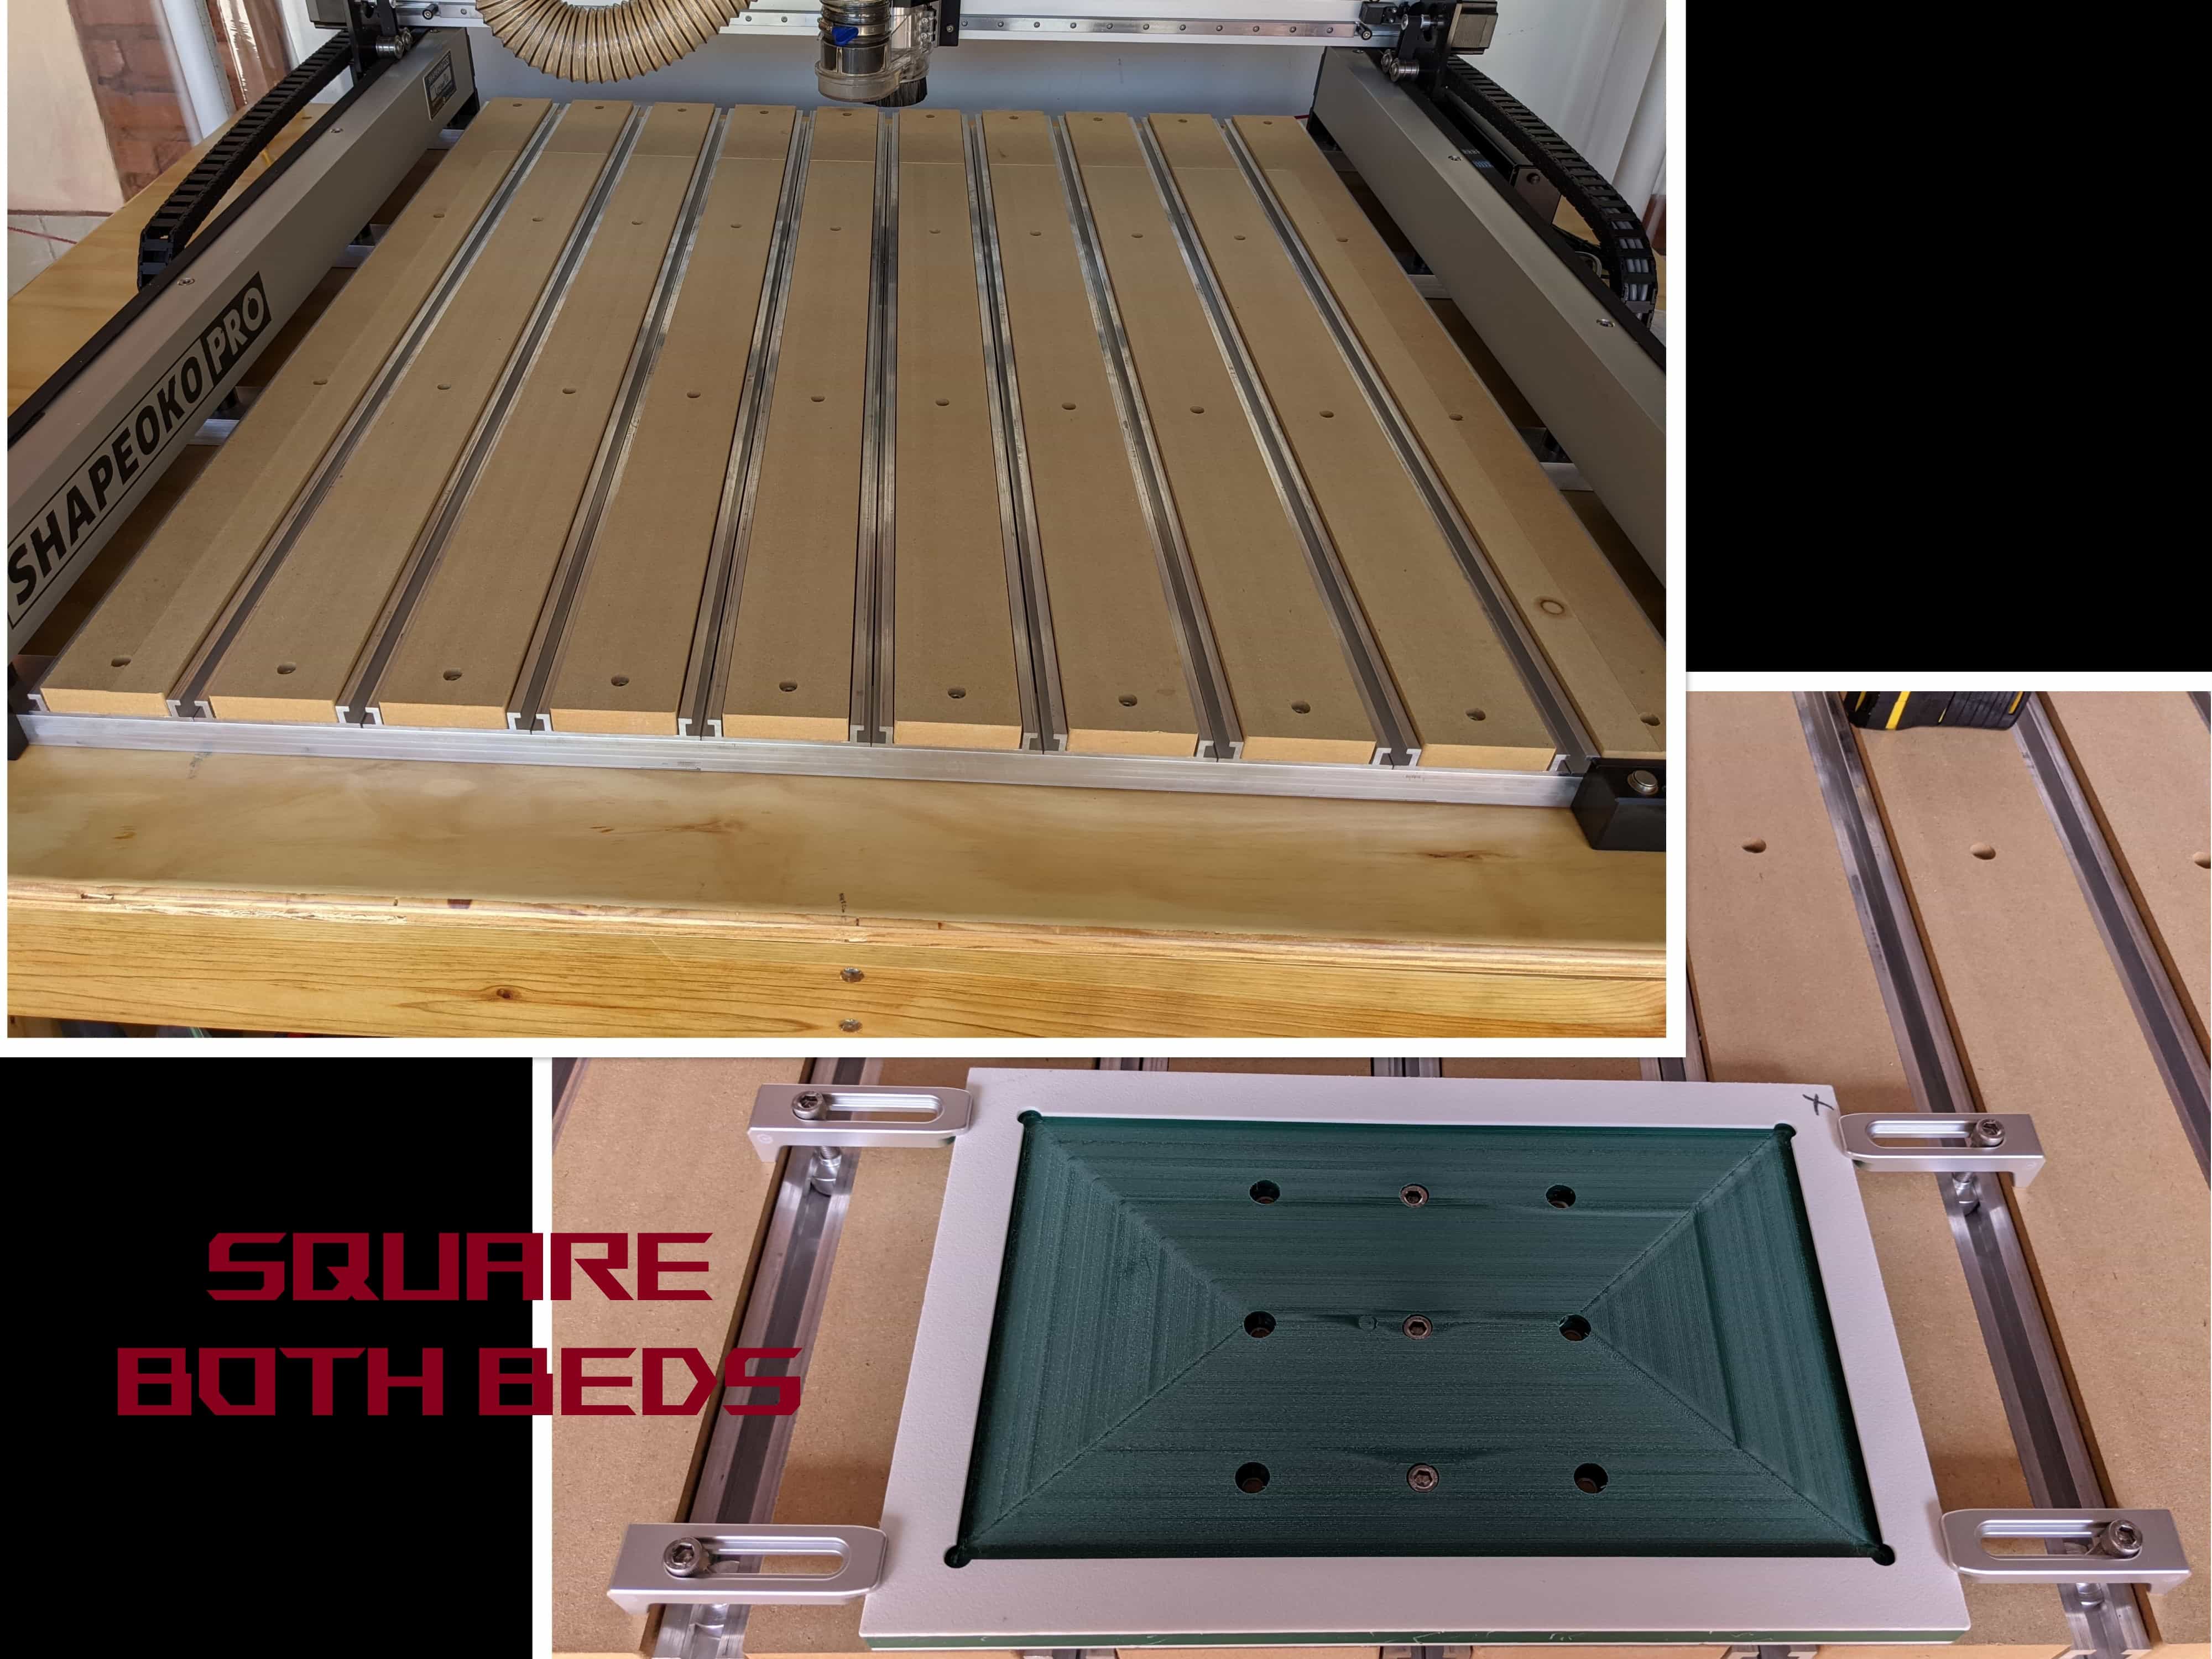
I did my best to “eyeball” my tramming process due to a lack of proper tooling. I then proceeded to surface the bed of my CNC. After doing this I tried to surface the top face of a piece of wood. Sadly, I saw some inconsistencies. Some lines appeared on the wood and this could mean a lot of things. The next picture (Fig. 1) explains one of them (credit to SERVO Magazine )
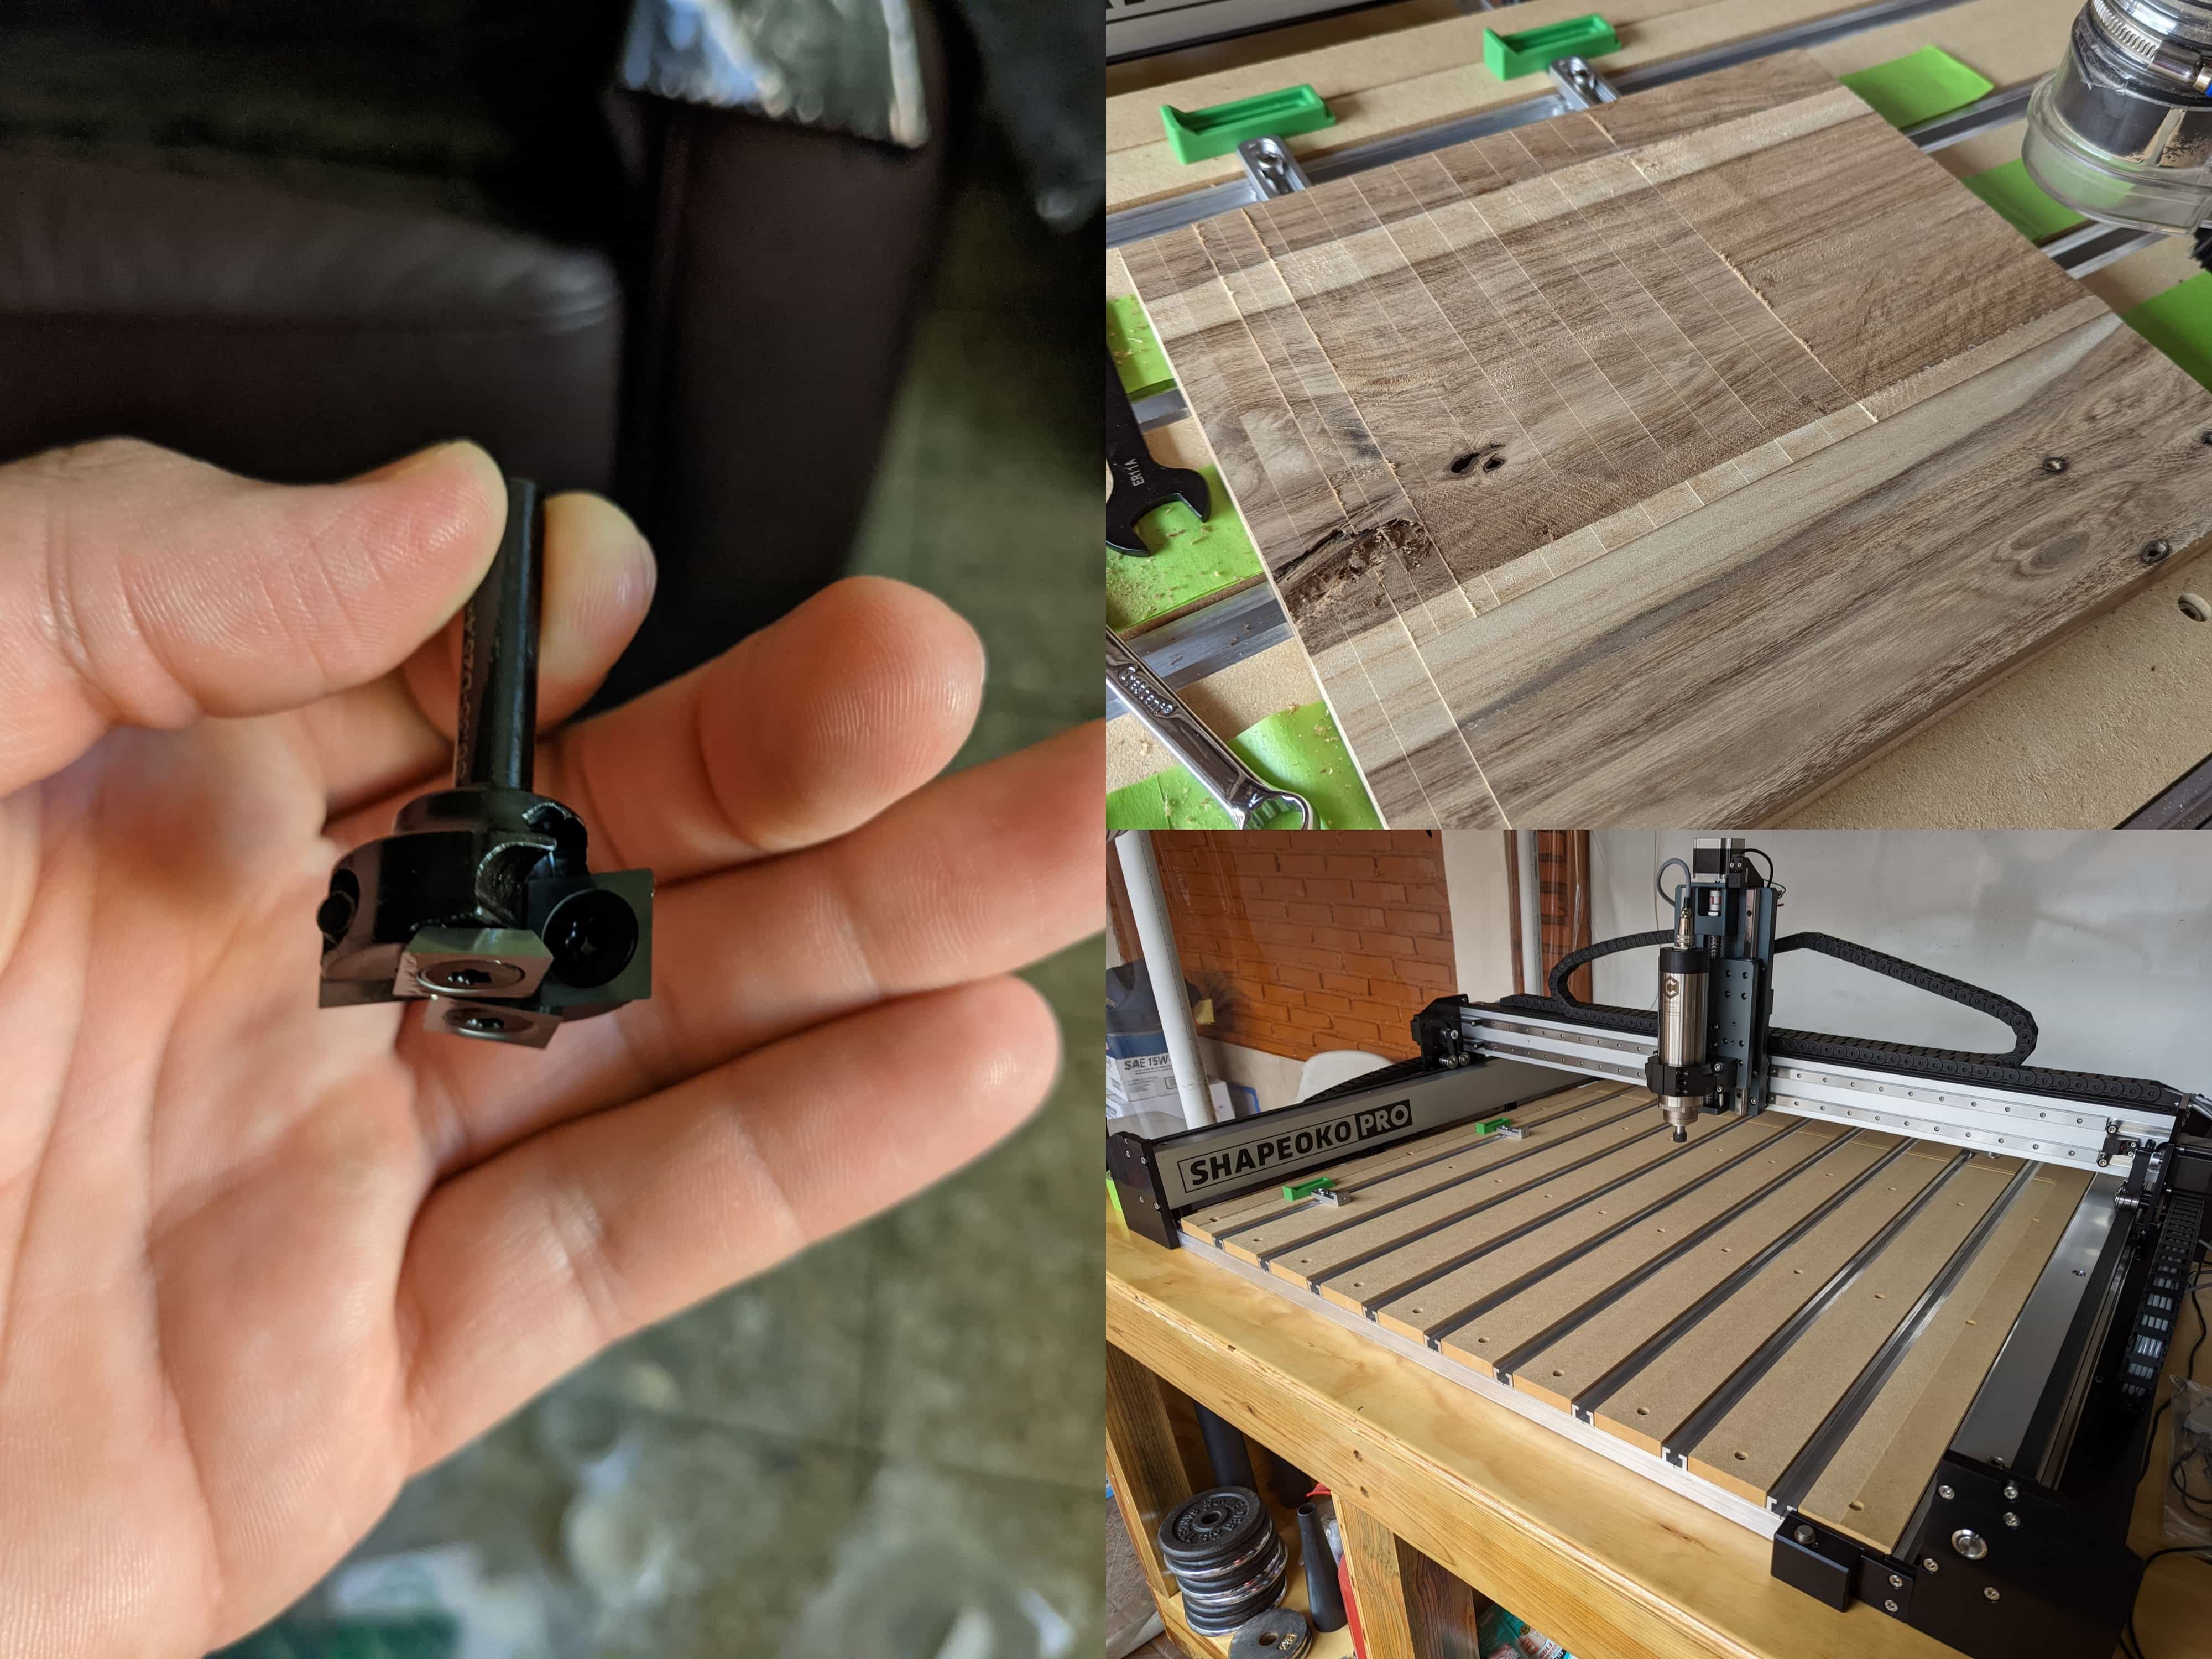
The McFly Surfacing Cutter is Carbide 3D’s first attempt to develop a surfacing bit. I had theory that the Inserts could have alignment problems. The only way I could successfully discards this variable was getting a mor premium surfacing bit. I managed to get my hands on the Amana Tool RC-2265 Surfacing Bit . This was a complete game changer. To determine the best toolpath, I modeled the part in SolidWorks and acquired some useful information. I needed to calculate a precise Stepover do to the big diameter of this bit.

Week 7
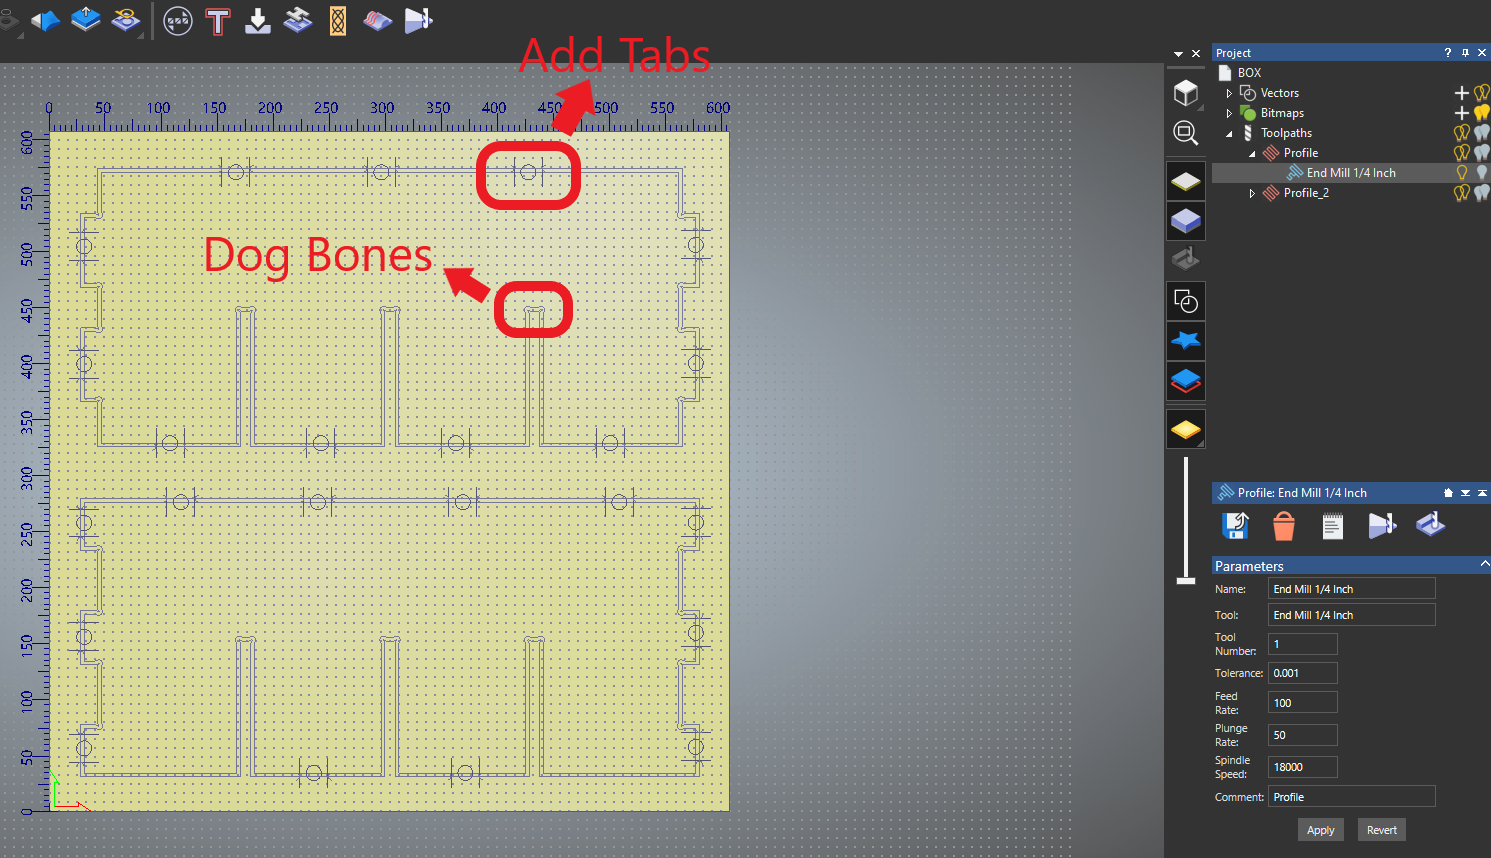
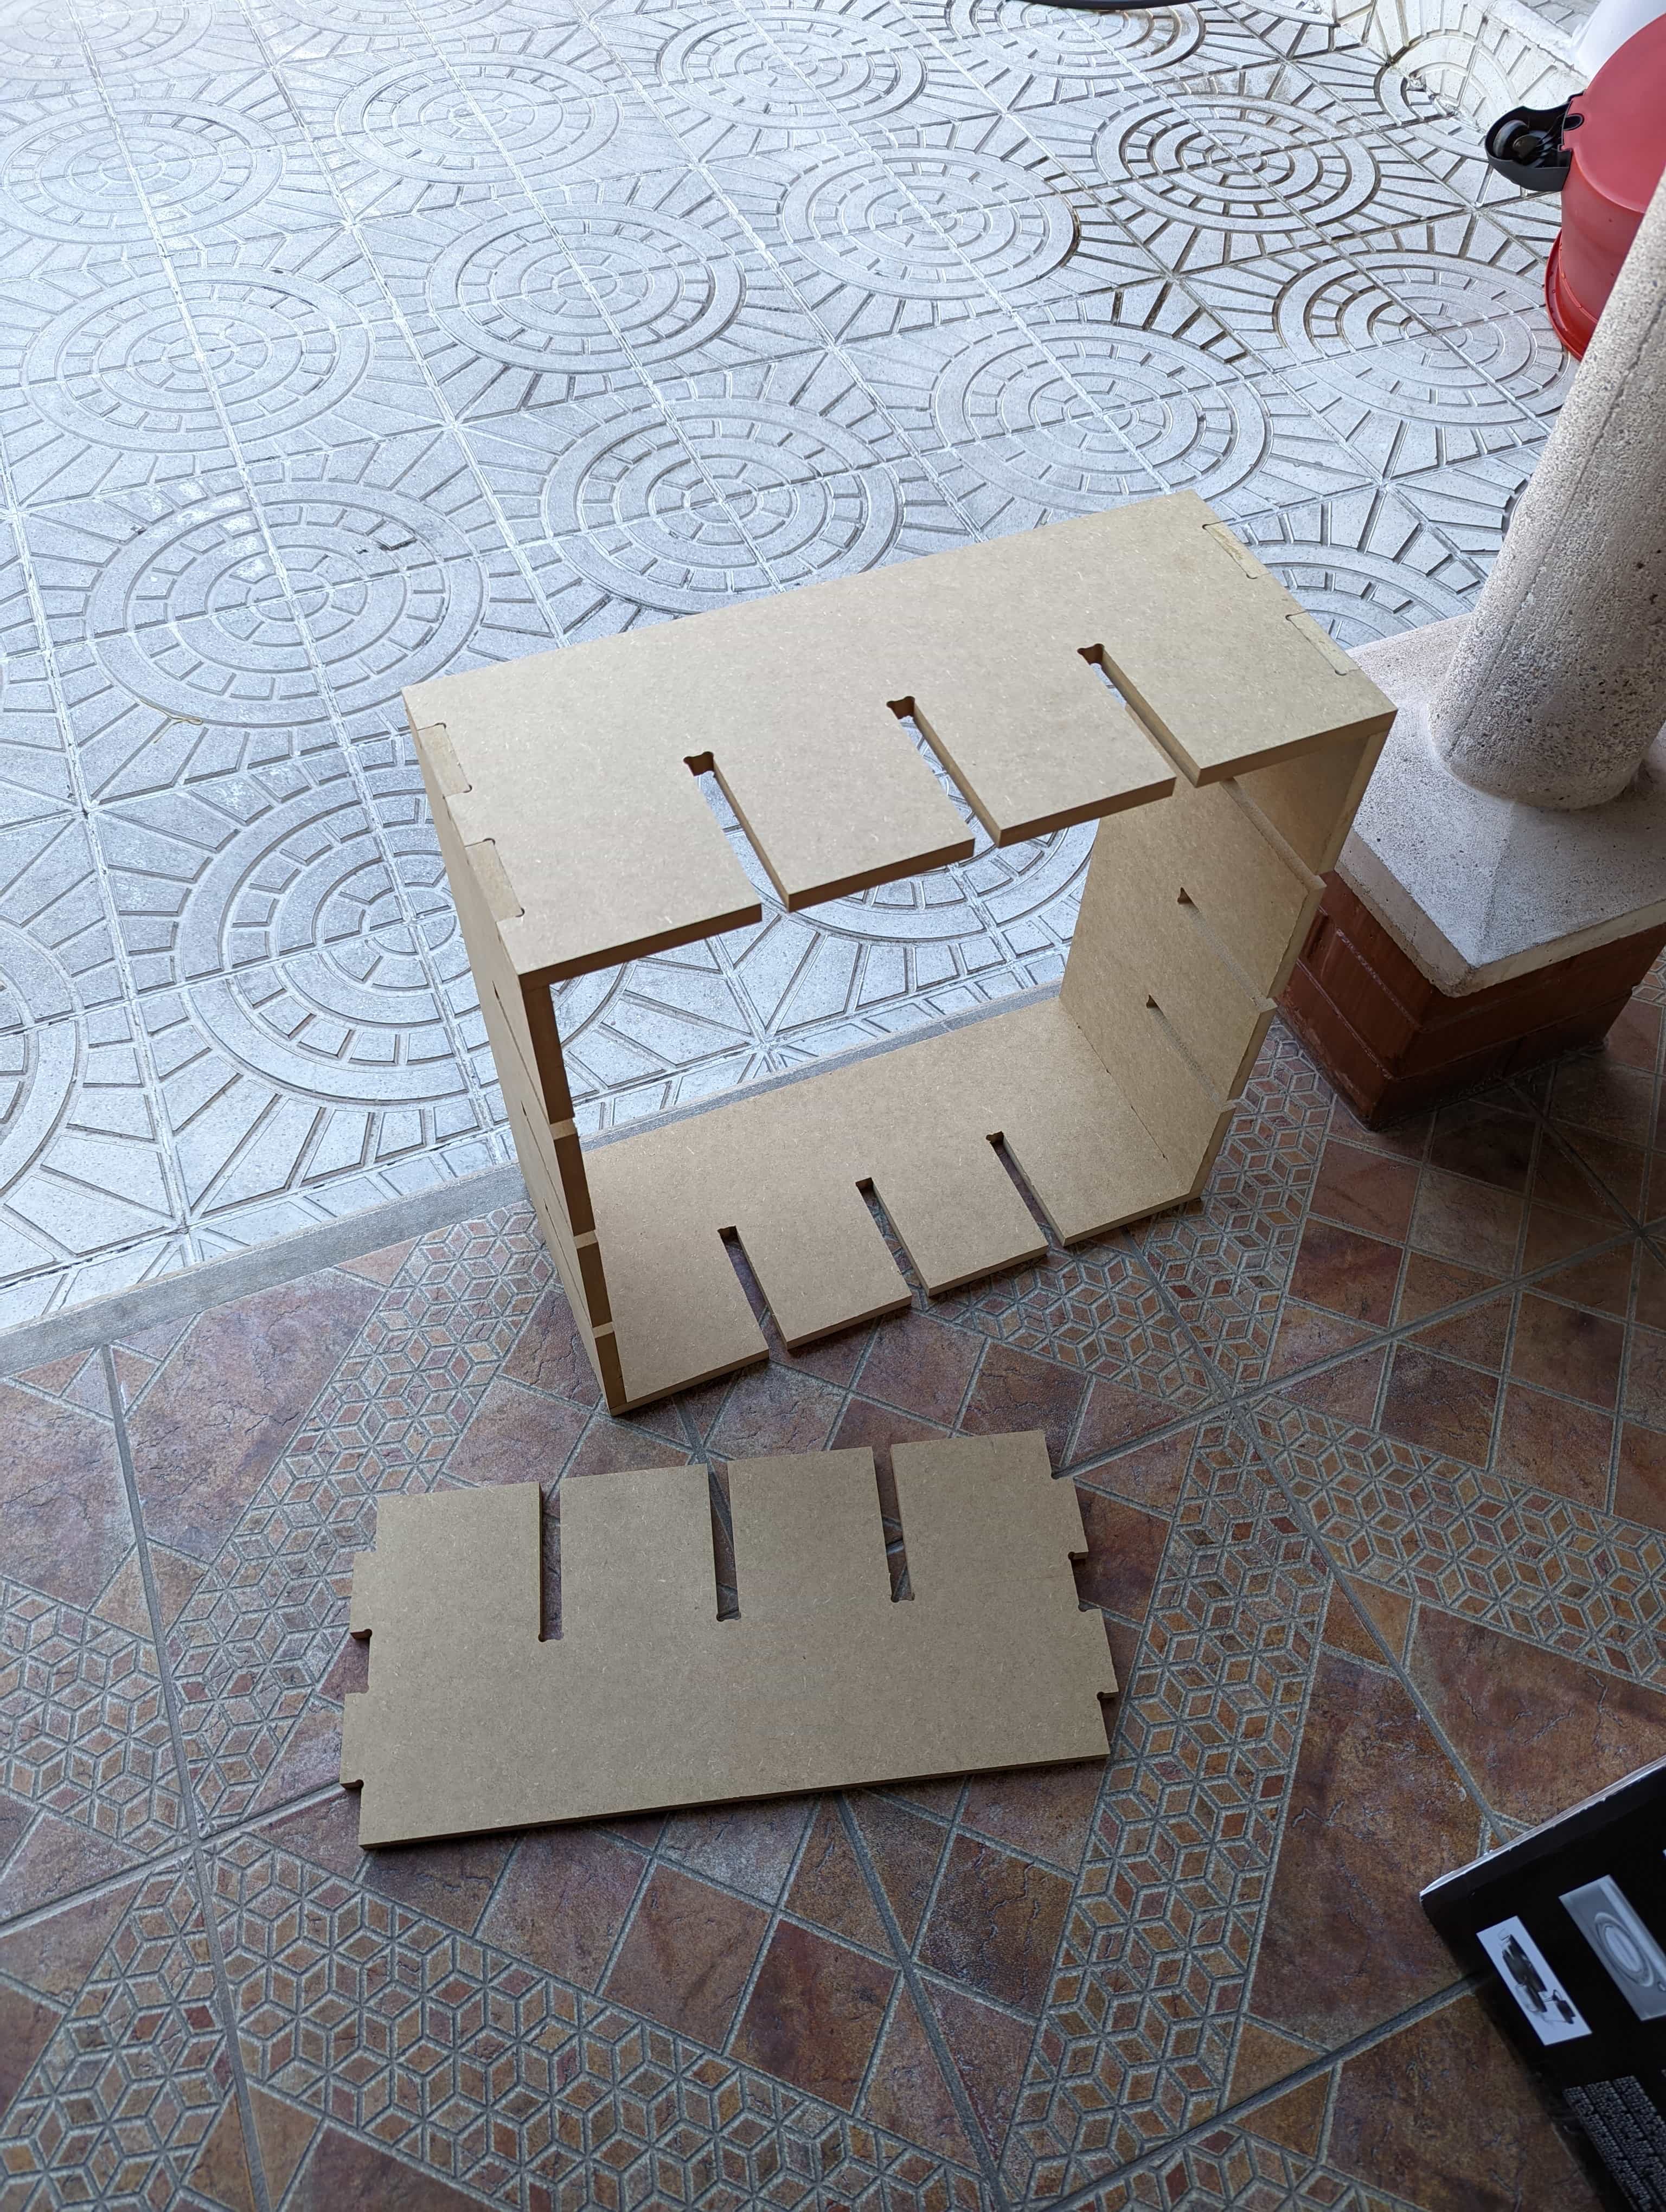
The idea is to create a cabinet that becomes bigger by adding modules. This design is inspired in something I saw couple of years. I have no idea who did it though. The modules can be placed in different configurations to make squares or rectangles as needed. While designing in favor of a CNC you need to consider the diameter of the bit you’re using. By doing this you’ll avoid designing areas the bit won’t be able to mill due to geometrical limitation. It’s also really important remember that a CNC can cut corner like a laser cutter. The technique I used to avoid these problems is by adding the “Dog Bone” to all corners.
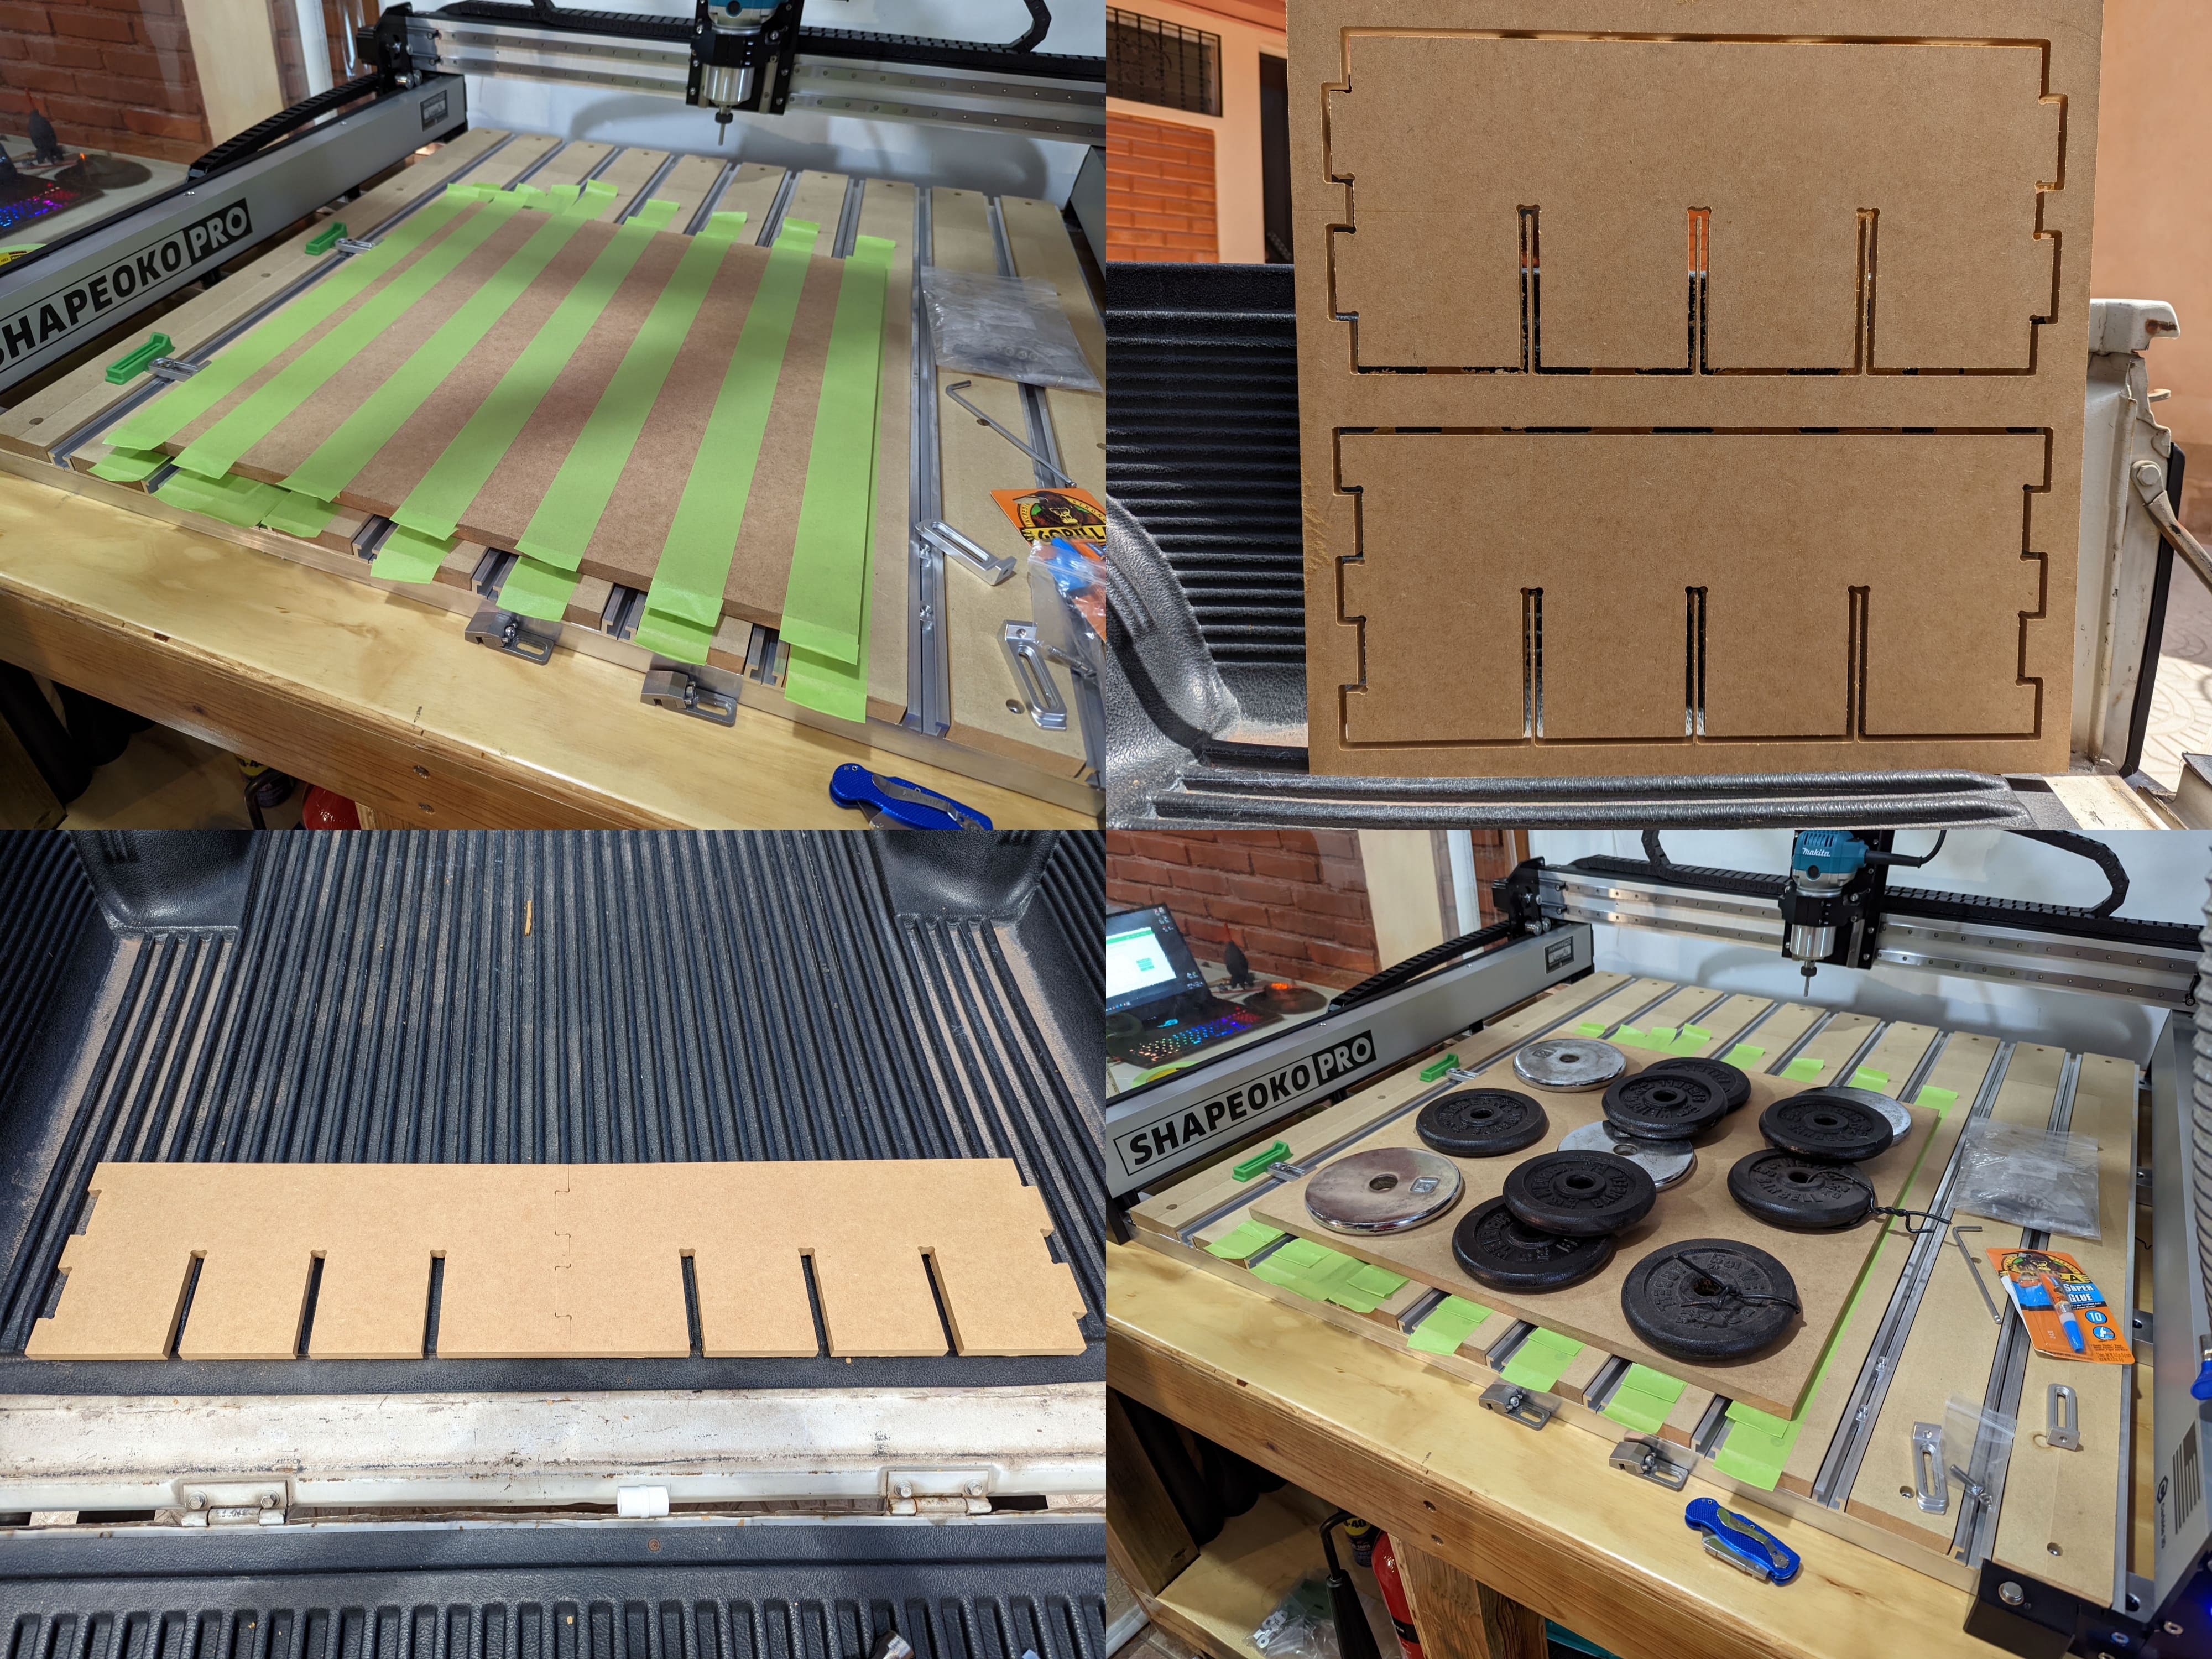
I used 2 claps to make sure the MDF was squared and painters tap and super glue clamping method to make sure the center wasn’t warping. I added some weights to make sure the part was completely flat on the bed of my CNC.
Make (Almost) Anything