group assignment:
review the safety data sheets for each of your molding and casting materials,
then make and compare test casts with each of them
https://fabacademy.org/2022/labs/ciudadmexico/cdmx_molding-and-casting.html
individual assignment:
design a mold around the stock and tooling that you'll be using,
mill it (rough cut + (at least) three-axis finish cut),
and use it to cast parts
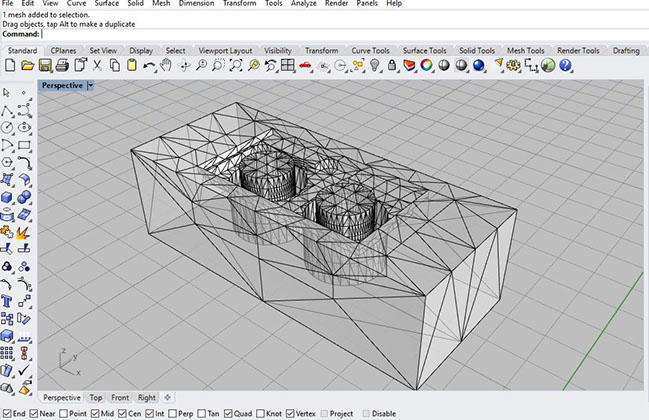
For this assignment I wanted to use a wax mold designed in the Rhino software and machined on the Roland MDX-40A Model found in FABLAB.
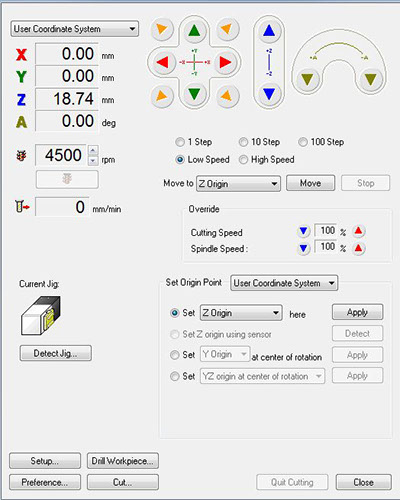
In the Roland MDX-40A Model, first of all we assign the origin of the three axes so that we are left with x=0, y=0 and the z axis depending on the height of the model to work with.
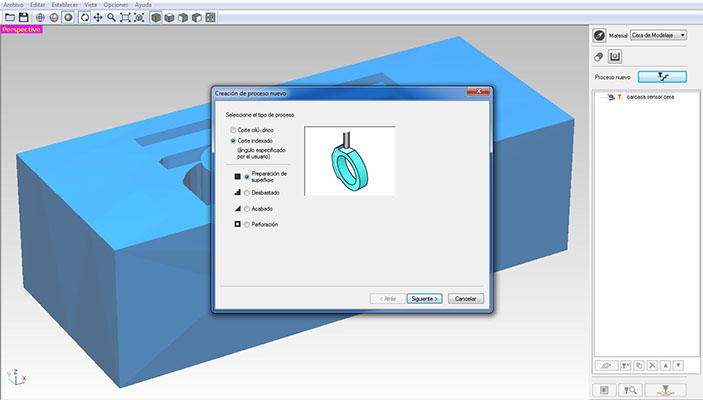
Once exported as .stl we open the file and select surface preparation to leave it flat and even from the top.

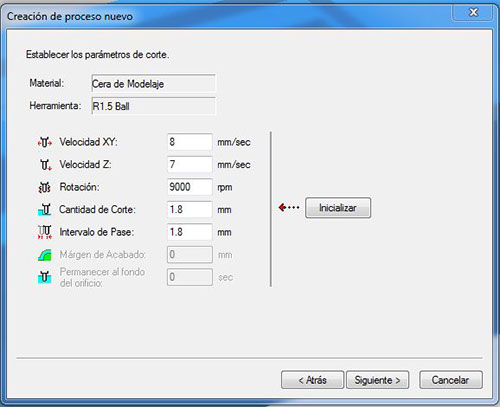
We select and assign:
- The type of tool: R 1.5 Ball
- The material to be machined: modeling wax
- XY speed: 8mm/sec
- Z speed: 7mm/sec
- Rotation: 9000rpm
- Cutting amount: 1.8mm
- Pass Interval: 1.8mm

The simulation is done in the Modela program where it shows the passes and the machining

Y-axis heights, Z-axis origin, and rpm are adjusted
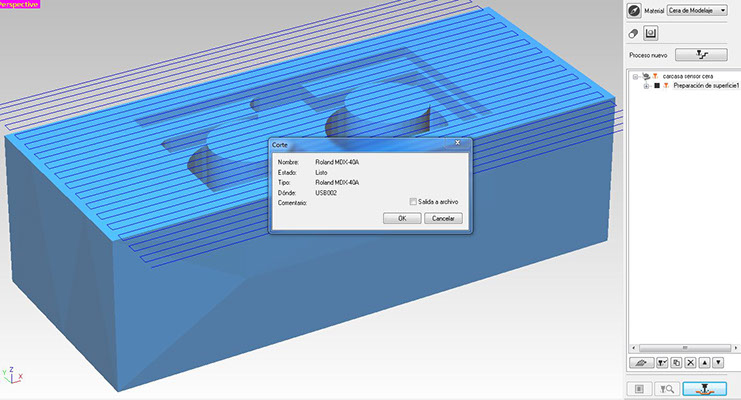
ready the values the wax is placed in the machine to start the cut
.jpg?crc=3794639137)
.jpg?crc=34351157)
Se marca el centro del bloque para colocar el contrapunto
a la medida correcta y carear la pieza
Since the surface was ready and prepared, we select the indexed cut which will roughen the wax.
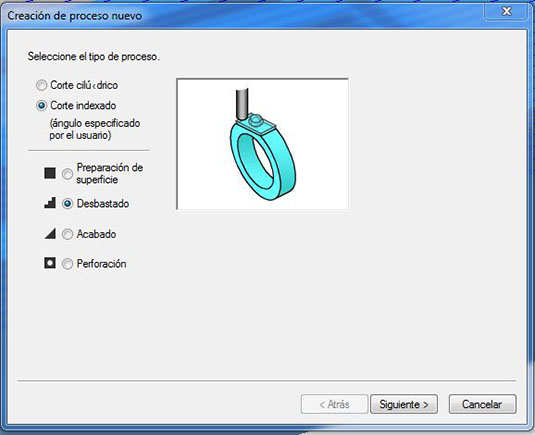
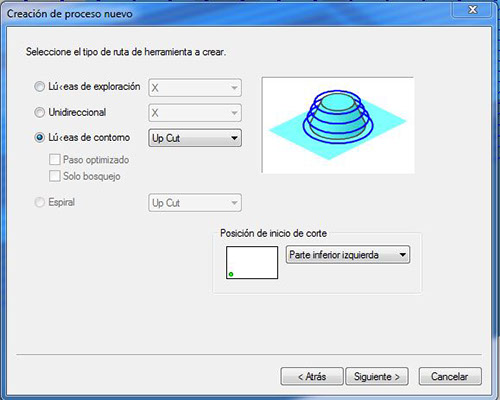
The type of path of the cutting tool and the starting position of the cut are assigned.
We select and assign:
- The type of tool: R 1.5 Ball
- The material to be machined: modeling wax
- XY speed: 8 mm/sec
- Z speed: 7 mm/sec
- Rotation: 9000 rpm
- Cutting amount: 1.8mm
- Pass Interval: 1.8mm
- Finish Margin: 0.2mm
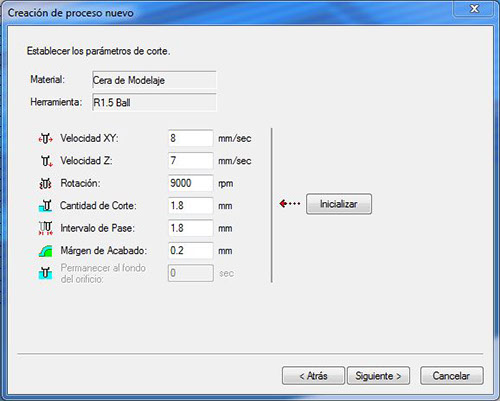
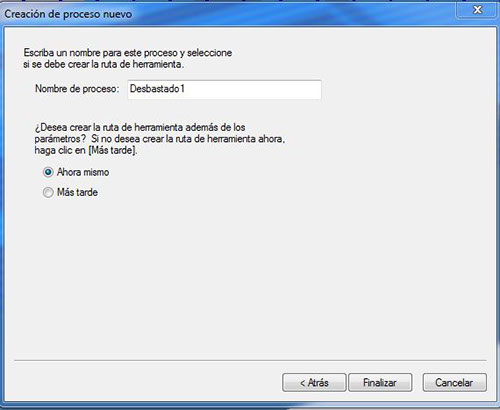
The process is assigned a name and we select right now and finish

The simulation is done in the Modela program where it shows the passes and the machining
Ready and placed the piece of wax and with the appropriate values to start machining
.jpg?crc=438841792)
start milling
.jpg?crc=37026283)
milling continues
.jpg?crc=3822330377)
milling continues
.jpg?crc=4019789541)
finish milling
.jpg?crc=486784346)
The piece of wax is ready for casting
.jpg?crc=4041921701)
For casting, I used PCM-770 urethane rubber and prepared the wax mold with all the Smooth-On brand release agent.
.jpg?crc=4154699313)
In the product instructions it indicates that compound A should be mixed in 2 portions to compound B in 1 portion and the curing time is 16 hours..
-crop-u34974.jpg?crc=3916892975)
.jpg?crc=3905269005)
.jpg?crc=448933353)
Release agent is applied to the wax mold
Compound A and B are measured and mixed in a 2:1 ratio.
.jpg?crc=3795015452)
Once the mixture is ready, the emptying is done slowly to prevent bubbles from forming in the rubber piece, which would damage the piece.
.jpg?crc=37136025)
The mold is placed in a vibrating machine to expel any bubbles that may have formed during casting.
-crop-u34964.jpg?crc=281733965)
-crop-u34954.jpg?crc=425975998)
After 16 hours of curing, it is easily removed from the mold and it was perfectly registered, ready to be attached to the ultrasonic sensor.
As a complement to the exercise of this assignment, it will be tested if we can make a mold with the piece of rubber that resulted from the wax mold. The end result should be another pottery mold.
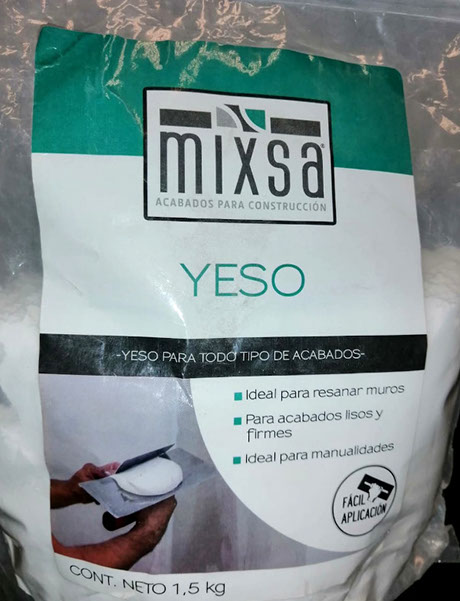
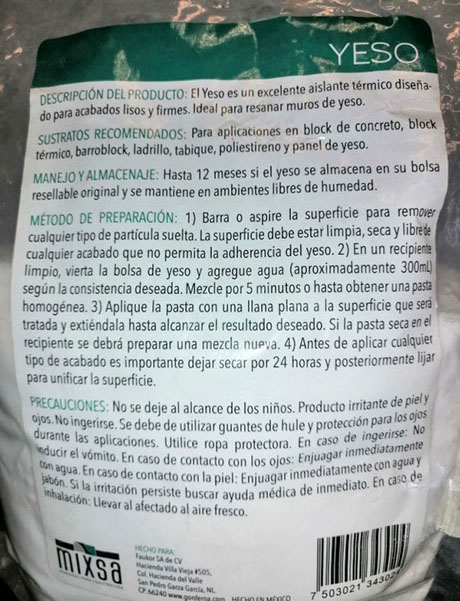
A special plaster for handicrafts is used, it is mixed in a portion of water for a portion of plaster and it must be allowed to dry for 24 hours before sanding and finishing.

We will use a container to put our rubber model to which we must apply Vaseline that serves as a release agent for the piece and we will use a container where we will mix in a proportion of 200 g of plaster and 200 ml of water.


Here we see the model inside the container that should be 20% larger than the model so that the mold has better resistance.


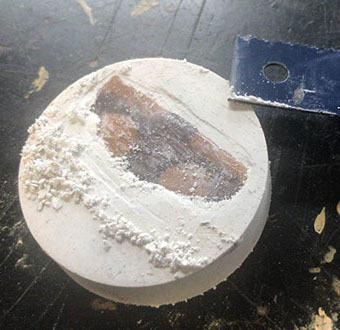
Once the mixture has been poured carefully to avoid bubbles, it is allowed to dry for 24 hours and we can unmold it and work to discover the model inside the plaster mold with a special saw to work plaster.
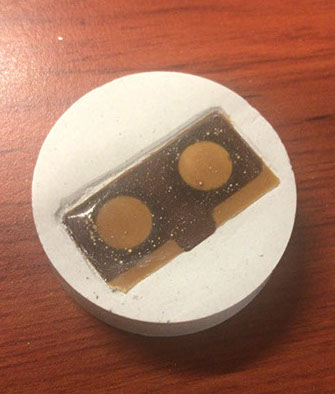
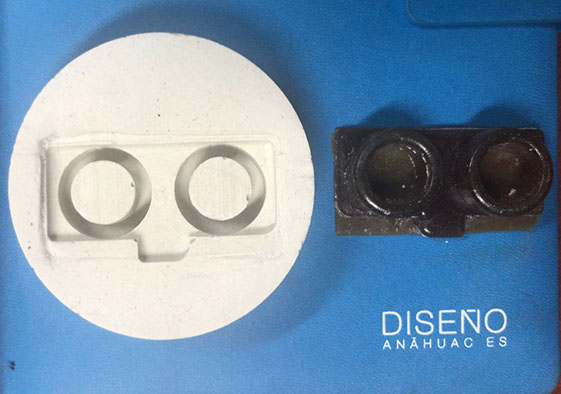
The mold is ready with the model inside, we just unmold it carefully, separating it slowly evenly on all sides. The result is very good since all the details of the rubber model were recorded in the mold and since it is made of this material it can be demolded very easily, so I recommend making pieces in detail and in the future being able to make pieces with a ceramic cast.


