
A6
3D Scanning and Printing
One of the most advanced features in recent times, 3d printing allow the user to explore, create ammd invent new things never before seen, beacuse of accuracy and precision.
3d scanning along side printing, allow the user to understand and portray a better environment around the physical world.
With this week assignment, i decided to explore two different ways of printing:
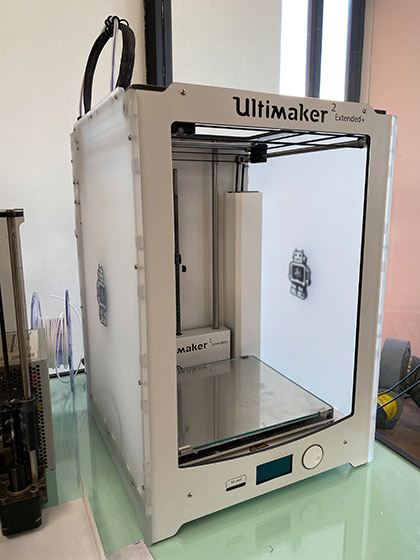
First, through the ULTIMAKER 2+ extruding 3d purple PLA print
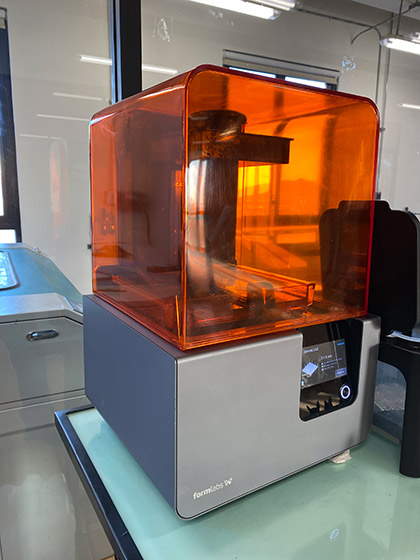
Second, through the FormLabs 2 stereolitography clear resin print
Ultimaker 2+ technical specifications:
Build volume: Ultimaker 2+ 223 x 223 x 205 mm
Assembled dimensions: Ultimaker 2+ 342 x 493 x 588 mm
Print technology: Fused filament fabrication (FFF)
Compatible filament diameter: 2.85 mm
Weight: Ultimaker 2+: 11.3 kg (24.9 lbs)
Connectivity: USB
Maximum power output: 221 W
Formlabs Form2 3D printer specs:
Technique: SLA (Stereolithography Apparatus)
Build size: 5.7 × 5.7 × 6.9 inches (145 × 145 × 175 mm)
Weight: 13 kg - 28.5 lbs.
Operating Temperature: Auto-heats to 35° C/ 95° F
Print material: Photopolymer resin
Layer thickness: 0.001, 0.002, 0.004, 0.008 inches (25, 50, 100, 200 microns)
Laser Specifications: EN 60825-1:2007 certified
Class 1 Laser Product, 405nm violet laser, 250mW laser
Connectivity: Wi-Fi, Ethernet and USB
Power requirements: 100–240 V
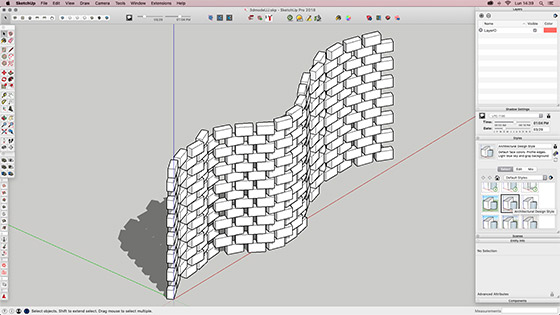
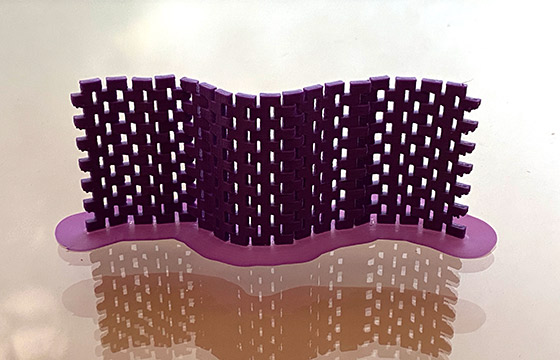
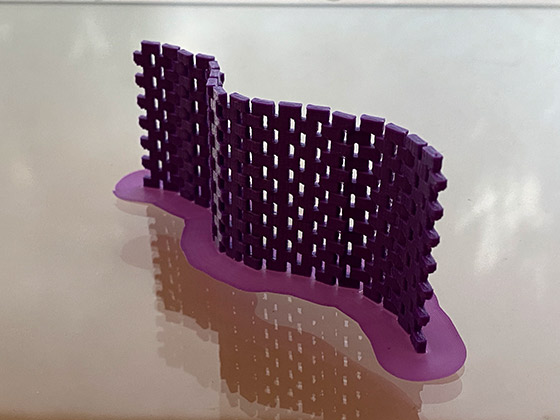
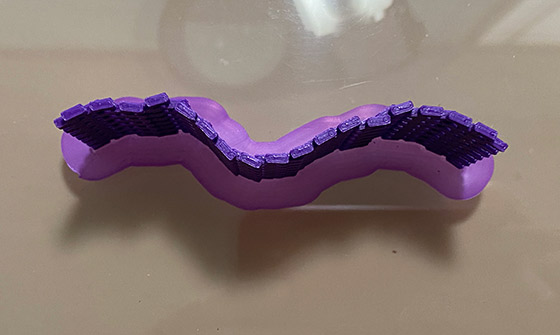
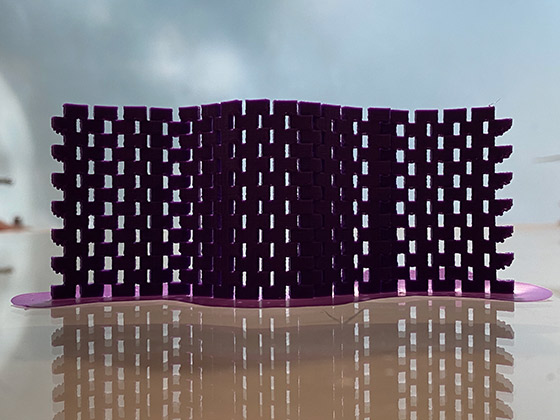
Wall Model
Being an architect, i always try to find new ways to develop basic standards... through a very simple model, i explore a simple curvature with open gaps along the structure of the brick wall. The main idea relies on the fact of self-sustainable mass with holes.
The wall i used is a some sort of parametric process using a SPLINE sequence to fit in acurve all the bricks, and have this wavy wall.
After that, the first and second row repeats 6 times to have the proper height.
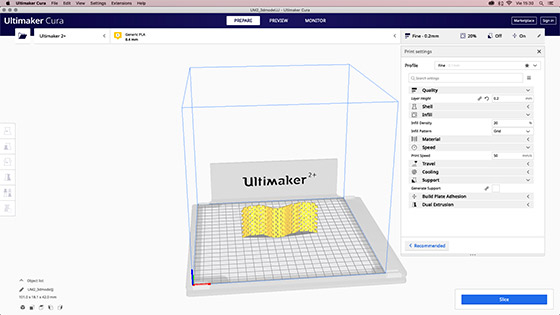
The WALL file, was exported to STL file then to to CURA software, and finally saving the model as a new .stl (binary) file.
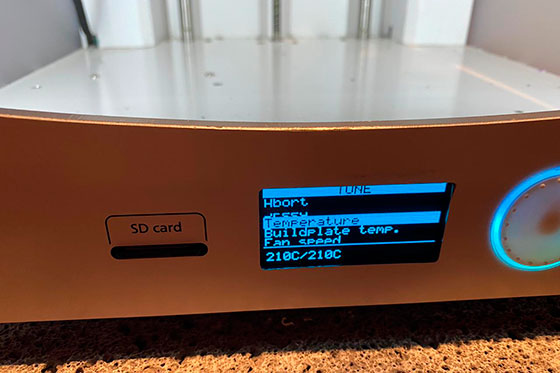
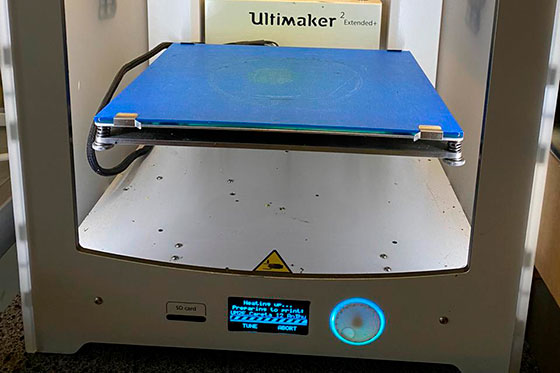
Ultimaker 2+ has a very nice options menu.
This test was done at:
0.2 mm layer height
20% infill, witha grid pattern
Print speed 60mm/s
No supports
No Adhesion type
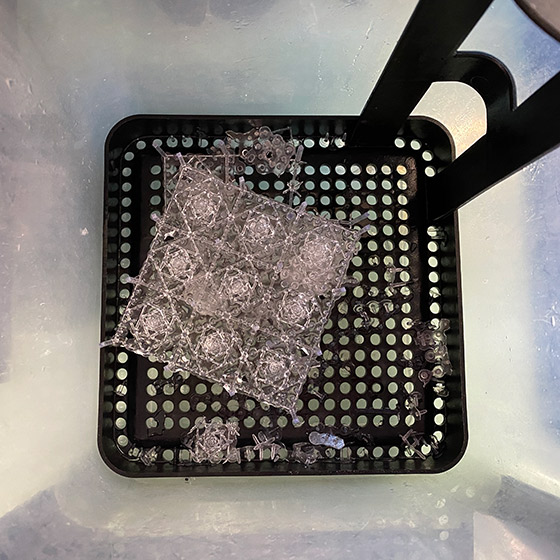
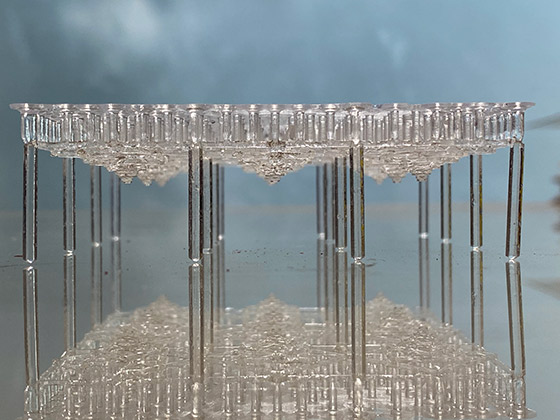
Roof Model
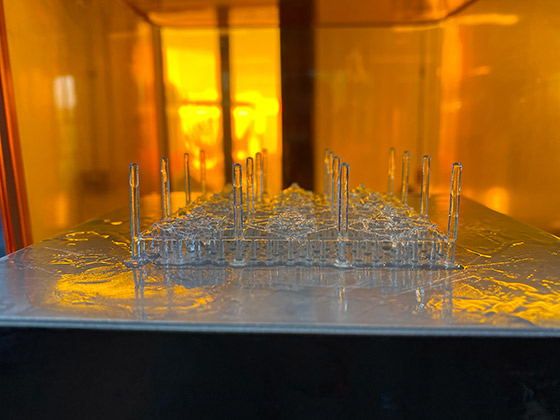
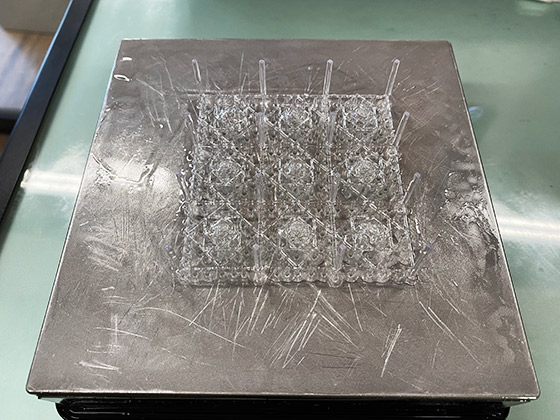
The next experiment is a roof structure witha inscribed pattern made out of squares that overlap 45 degrees each other to create a simple lattice, i decided to print this model in resin beacuse of the complicated traces and at the same time, clean straight forms.
This roof was used for a competition, a large open space with a moorish pattern resembling the geometric figures of that culture, and repeating it 9 times that is a sacred number.
Sadly i lost that one, but the design endured and i wanted to have it for a different purpose.
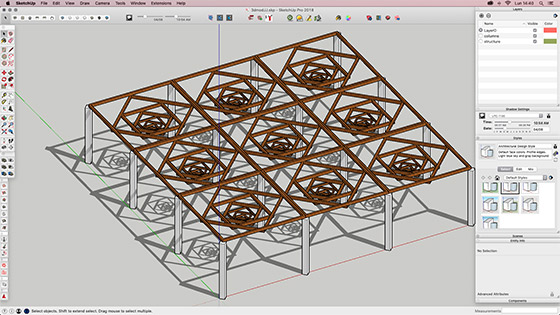
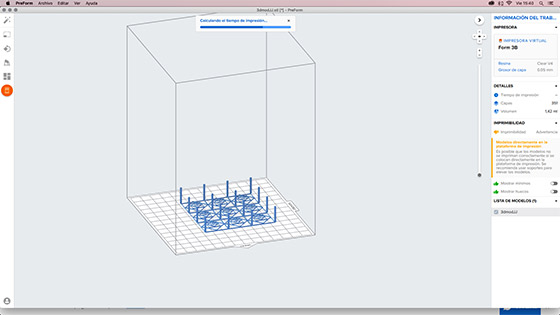
The ROOF file, was exported to STL file then to to PREFORM software, and finally saving the model as a new .form (binary) file.
Formlabs Form 2 has a very accurate options.
This test was done at:
0.1 mm layer thickness
1.00 mm density
Print speed 2.54mm/s
Support base at 0.5mm


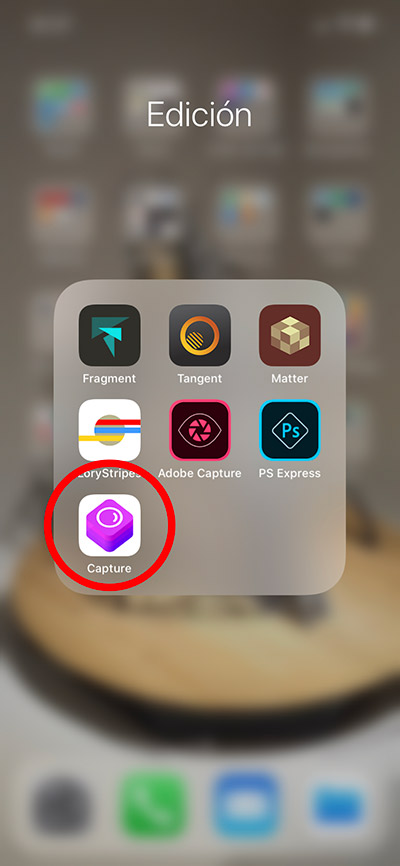
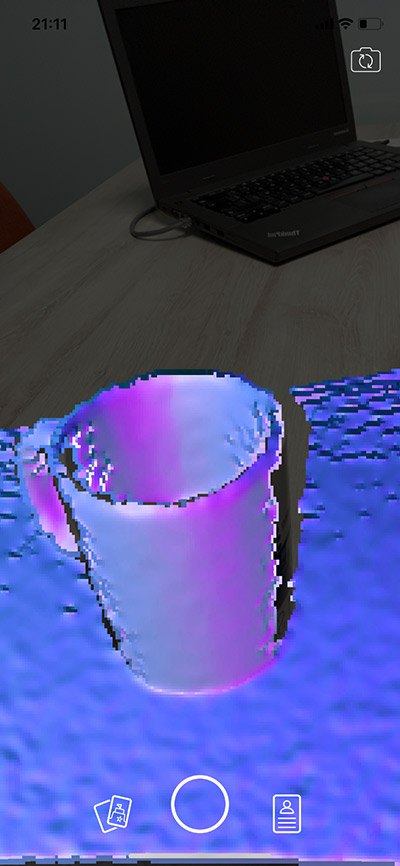
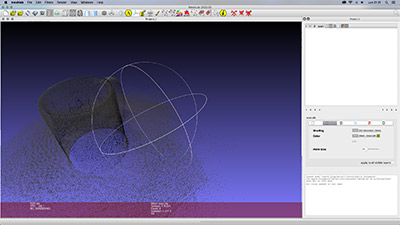
3D Sacanning
I try to use new simple devices, with iPhone front camera face-recognition technology, i use CAPTURE software, mainly to see what will happen if we digitize everyday obejcts.
In this particular case, i decided to scan a coffee mug.
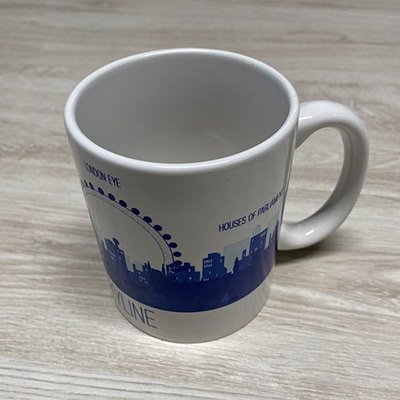

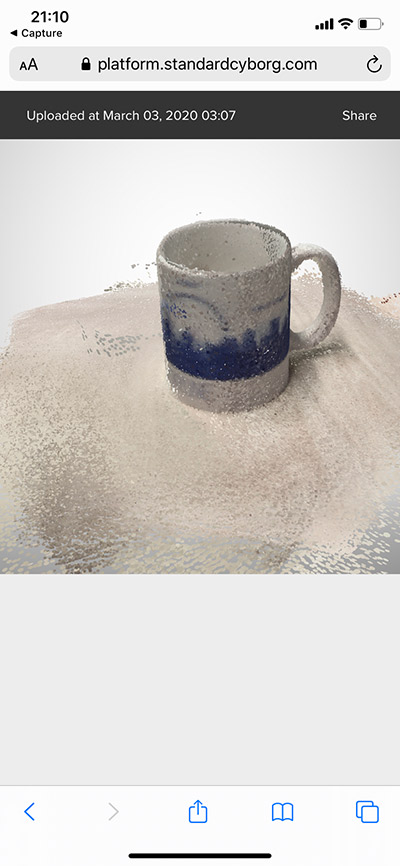
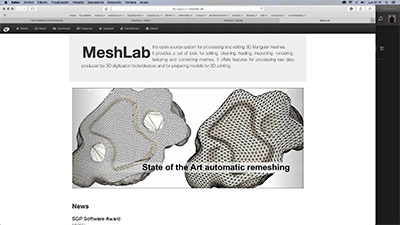
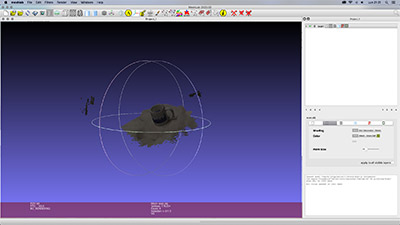
And finally, use MESHLAB open source software to use, clean and transform this scanning.

The main lesson learned with this assignments, is that there are new technologies ready for everyday use. Work environments as workshops are entitled to push and drive creation and innovation for the masses.
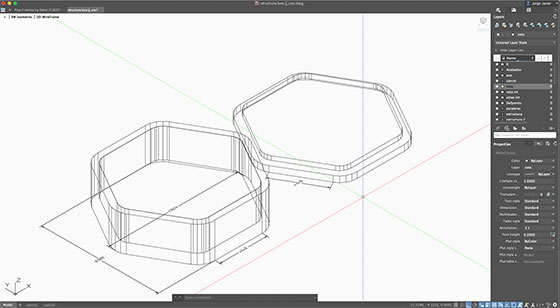
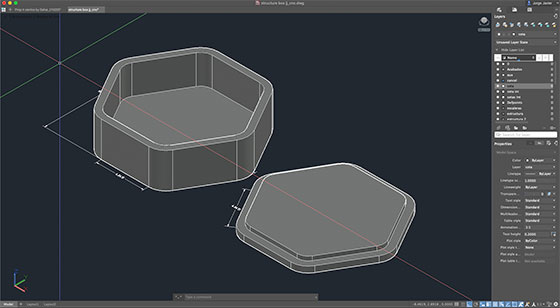
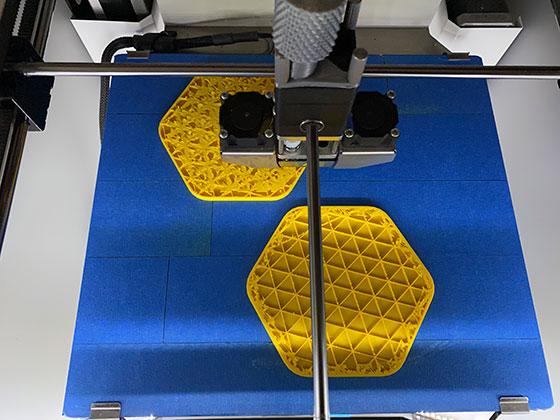
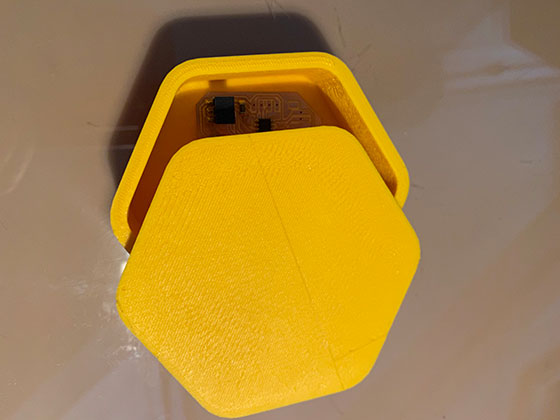
Then i decided to put a test on a simple 3d model for an idea related to my final project, a container to put things in it to avoid cluttering.
box dxl
A solid box following the idea of interlocking hexagons, printed to be uses as a container.
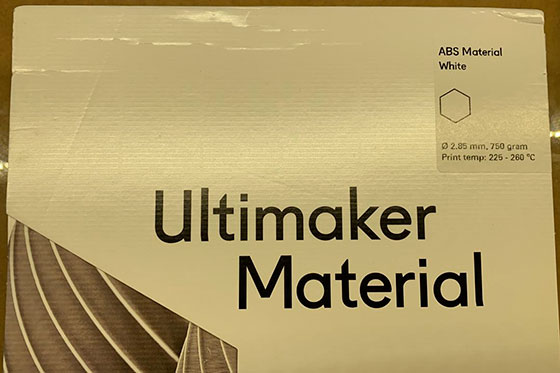
I prefered to use ABS filament from ULTIMAKER to have a reliable print
Then, going to the 3d printing machine to have the proper settings
And then, sending to print.
I decided to use a triangle hollow infill to avoid wasting material but ganing lightness and a solid inner structure.
The overall speed was a 55/s and a regular layer 0.2 mm to 0.4mm to optimize the overall printing without sacrificing stiffness.
This took about 3 hrs to print
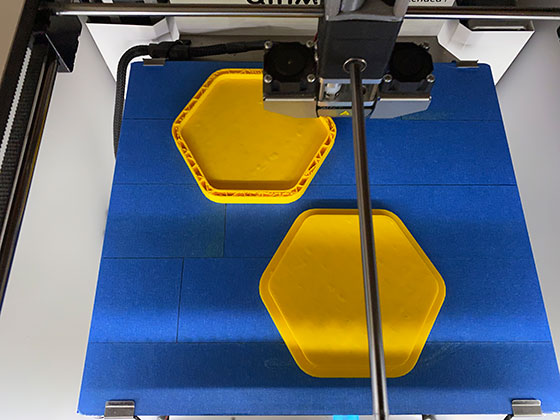
This is the final product!
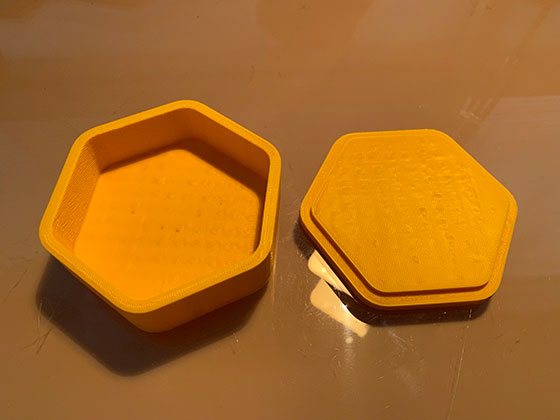
And how this could be used as a container box, even as a desk object.
A nice revisiting assignment to test different things for my final project.
