16.WEEK
For this week assignment was to create an application that shows an interface that communicates with an input and/or output device. That was the task for the individual assignment and for the group assignmet was that we should test some more tools.
INDIVIDUAL ASSIGNEMNT
For the individual assignment I tried Processing. Processing is a flexible software sketchbook and language for learning how to code within the context of the visual arts. So it's ideal for electronic arts, new media art and visual design. In this assignment I'll use the Processing Development Environment to control my Valentino board that I made in my "Input devices", week 11. Working with the Processing was a great experience for me.
With the processing I wanted to try to ligt the LED, but before the Arduino code and the Processing code I needed to instal the Processing and while he was downloading I worked on the Arduino code, so that code will enable interaction between the Processing and my Valentino board using the serial communication.
After codding in Arduino IDE I needed to upload it to my board and be careful which port am I using. It's really important to use the same port, in my case it was COM17.
So belowe is the code for the Arduino that is uploaded to my board.
ARDUINO CODE
boolean state = false;
void setup() {

  pinMode(3, OUTPUT);
  Serial.begin(9600);

}

void loop() {

  if (Serial.available()) {

    char val = Serial.read();

    if (val == 't') {
      if (state == false) {
        state = true;
        digitalWrite(3, HIGH);
      } else {
        state = false;
        digitalWrite(3, LOW );
      }
    }

  }
}
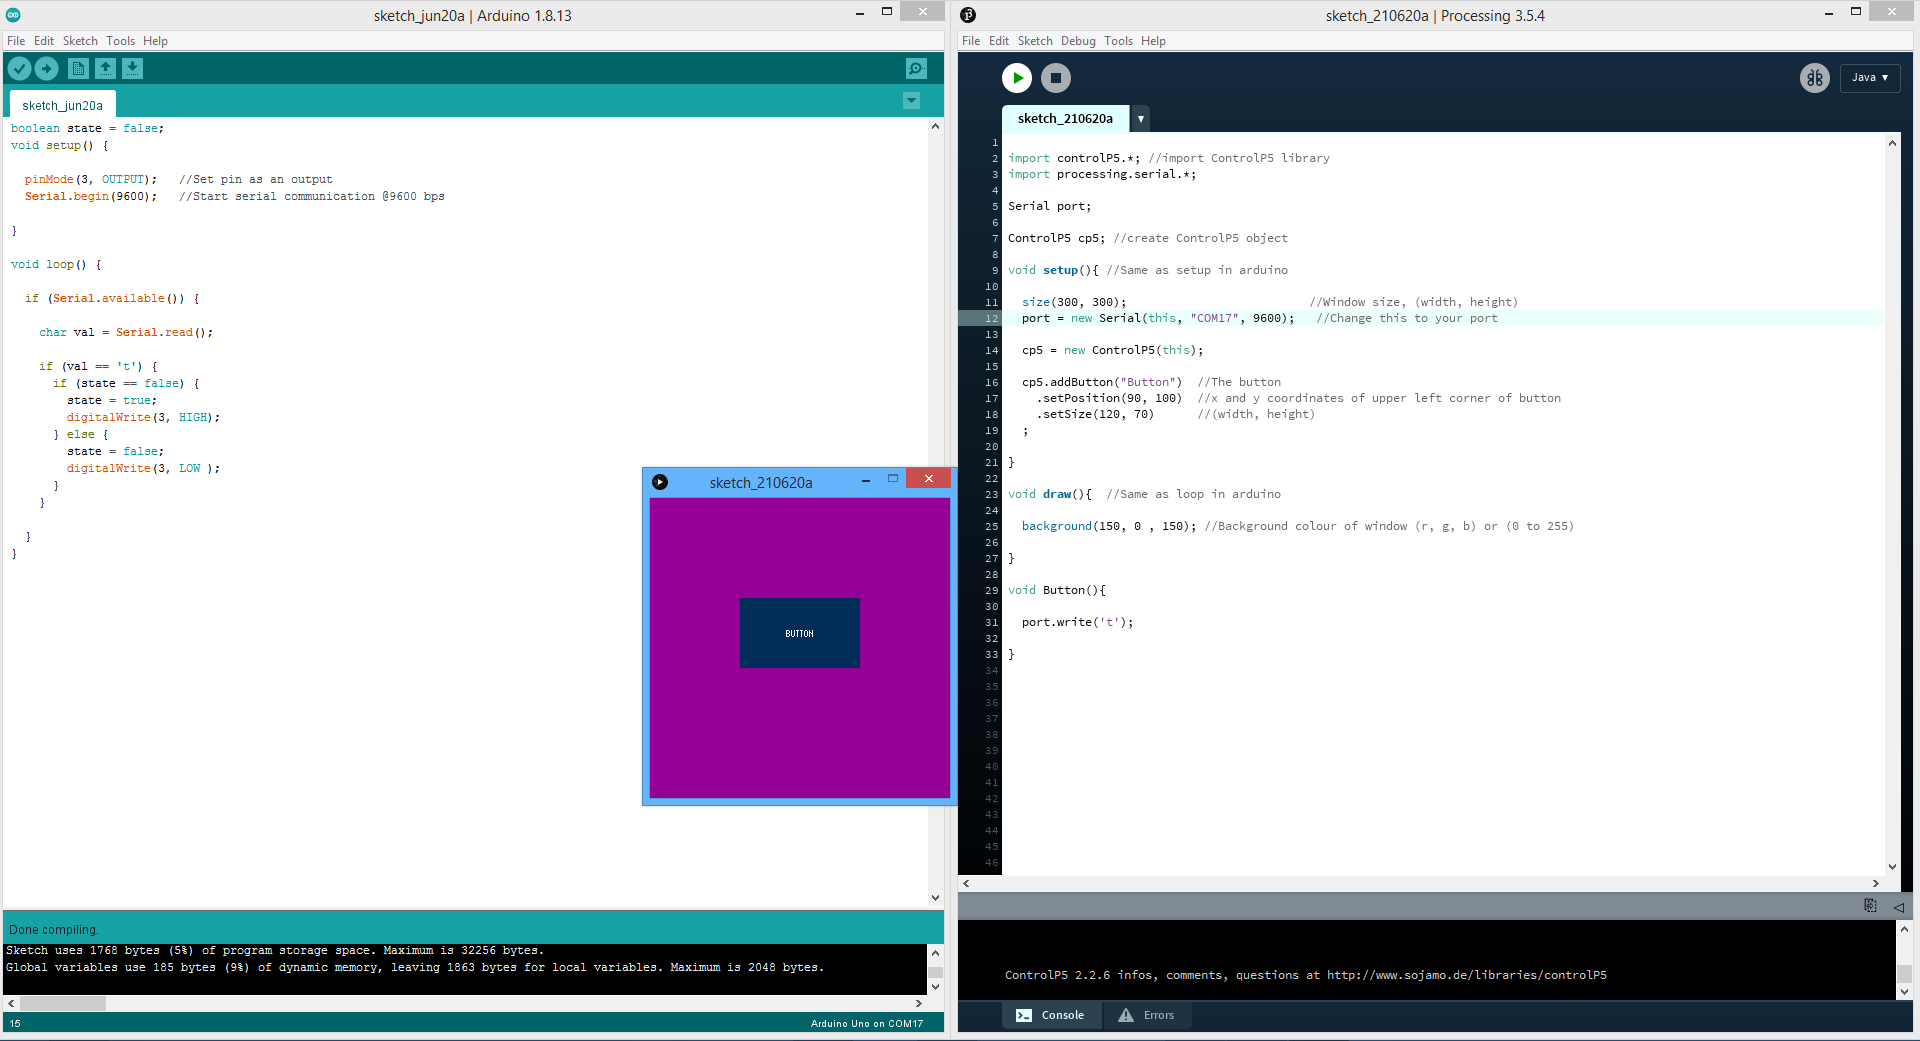
And here is the code for the Processing. In Processing codding I needed to put the COM port from the Arduino that I mentioned earlier. In processing I'm creating an application for controlling my Valentino board.
PROCESSING CODE
import controlP5.*;
import processing.serial.*;

Serial port;

ControlP5 cp5;

void setup(){

  size(300, 300);
  port = new Serial(this, "COM17", 9600);

  cp5 = new ControlP5(this);

  cp5.addButton("Button")
    .setPosition(90, 100)
    .setSize(120, 70)
  ;

}

void draw(){

  background(150, 0 , 150);

}

void Button(){

  port.write('t');

}
After the code in Processing was send, the new little window opened with my button to control the LED light.
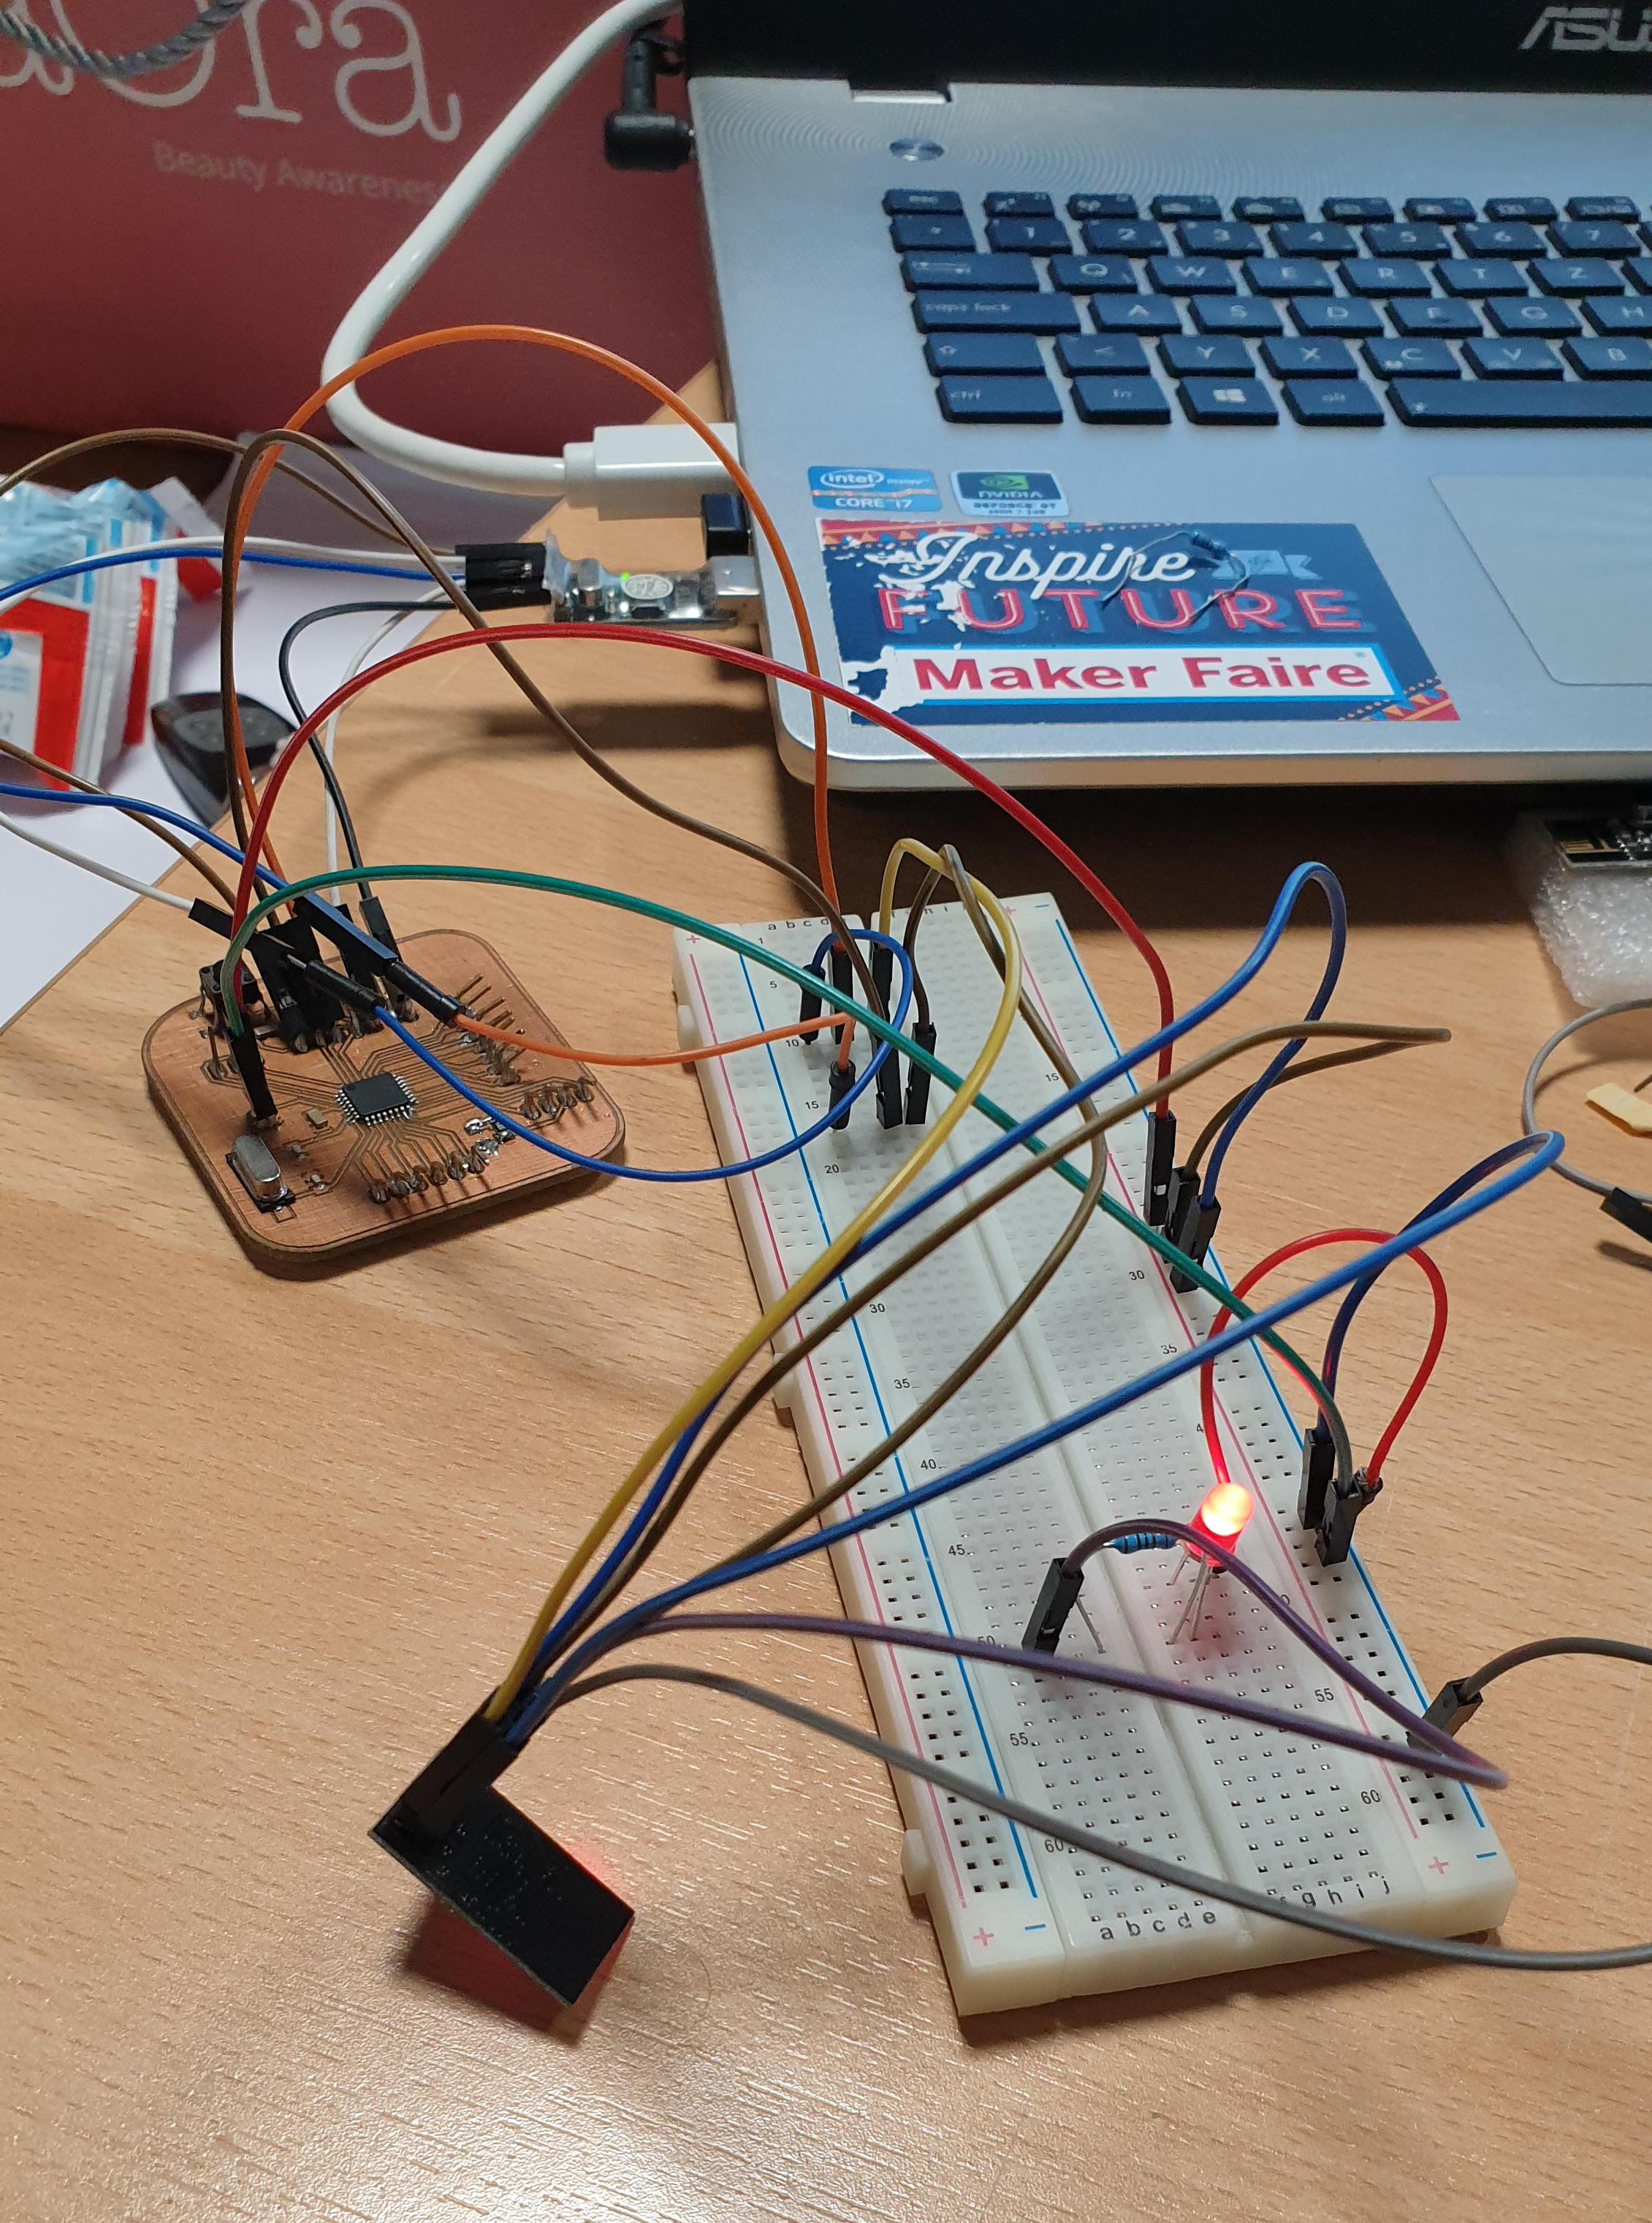
Belowe you can see the wireing of the circuit and the working LED.
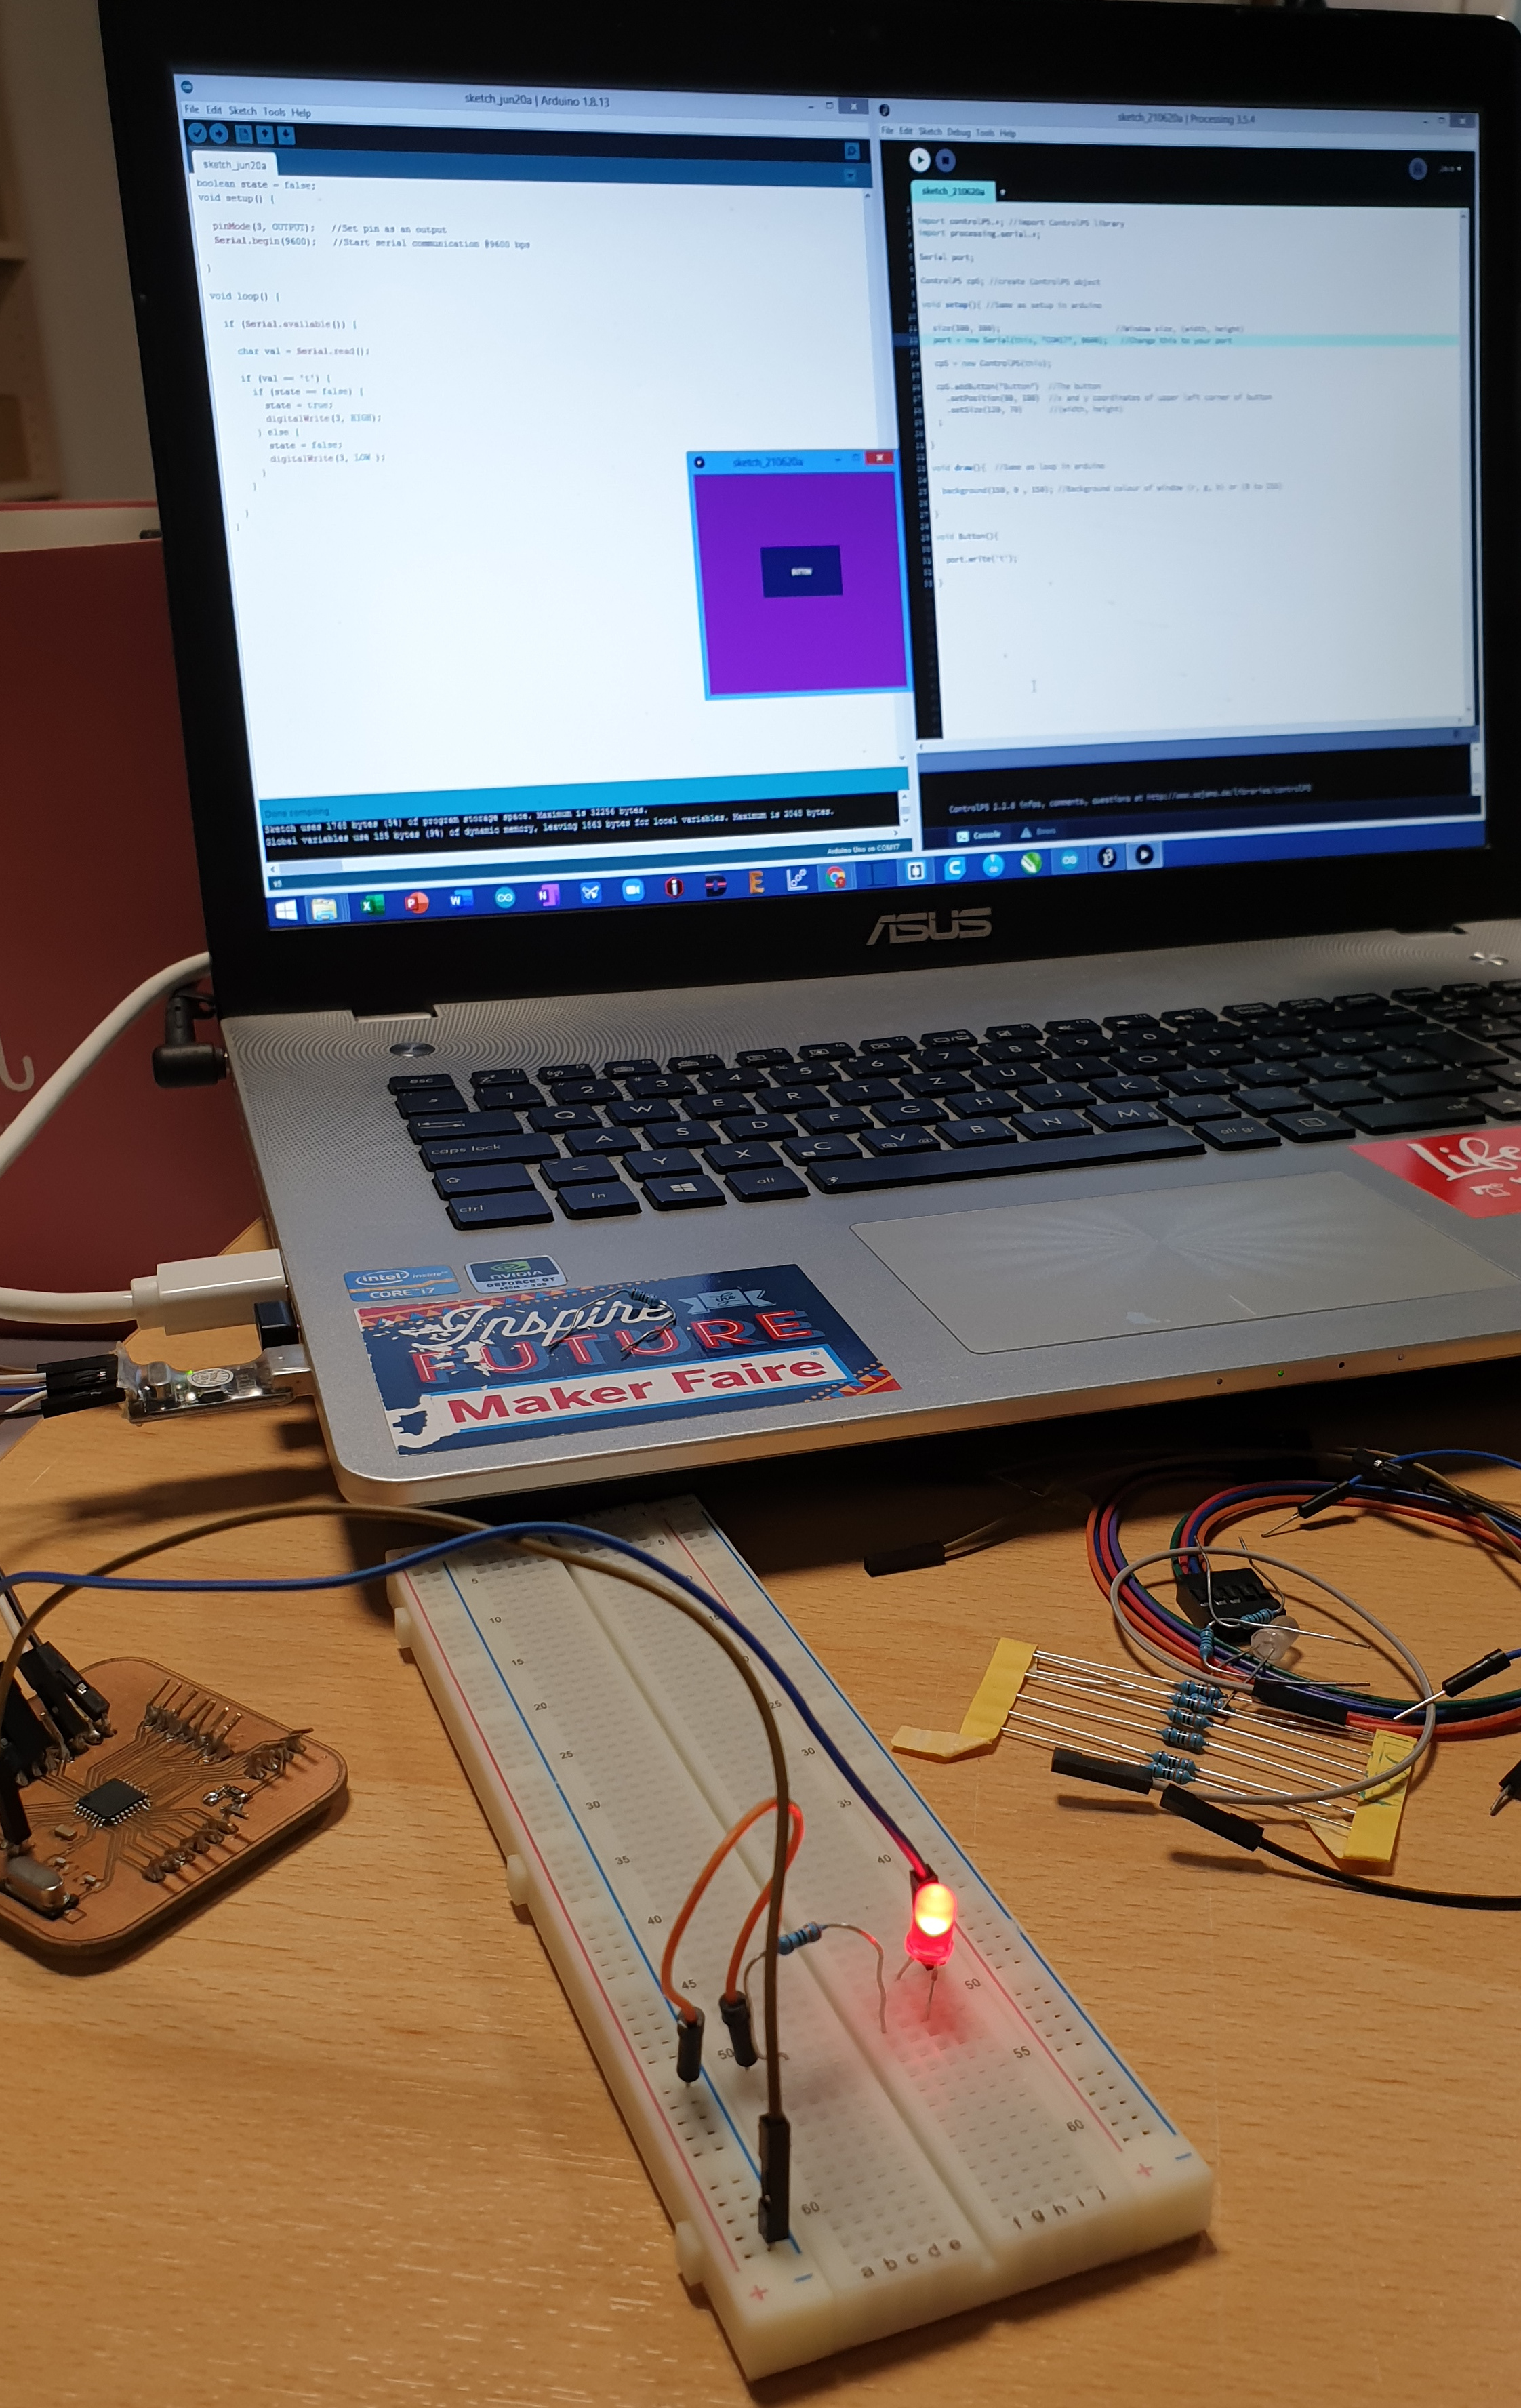
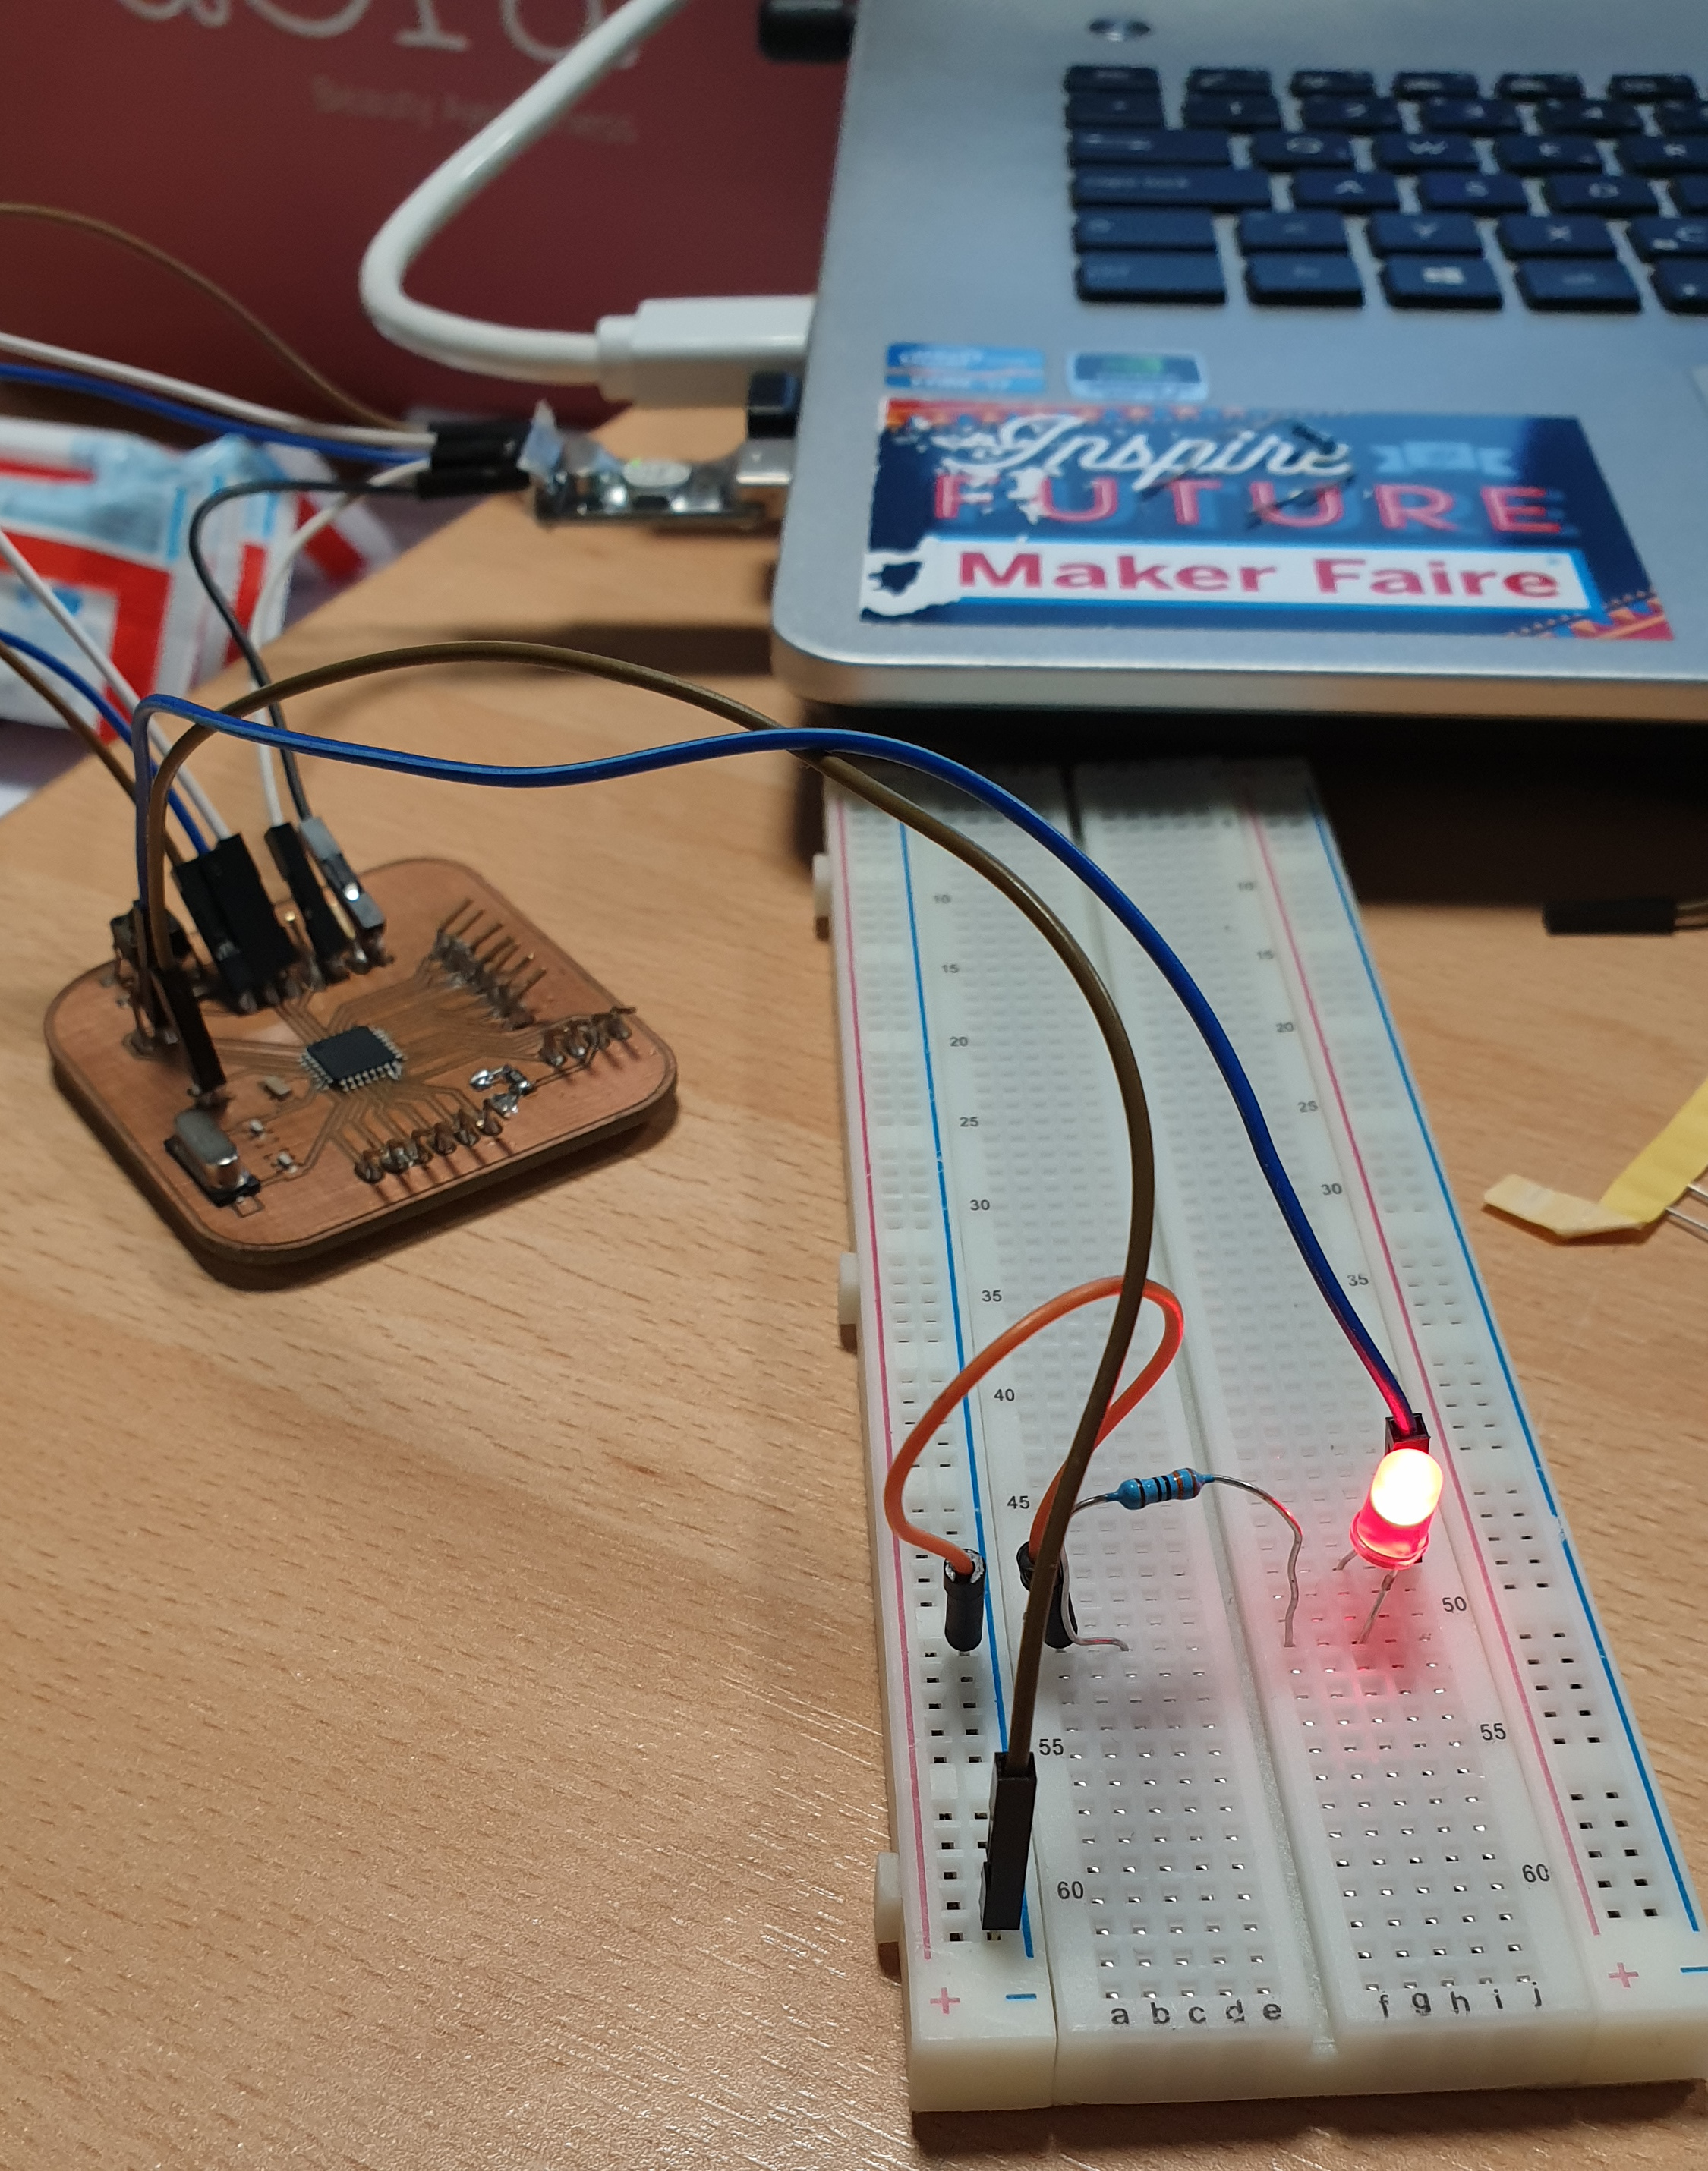
After documanting my Procesing assignment I got note from my Global instructor Santi that I should also add a video clip of this task. Somehow I totaly forgot that we need to have video clip for this task, so I connected my circuit again with my board, but unfortunately she didn't work. I also tried to put some other codes on it, but nothing, without luck. Checked all connectios but nothing.
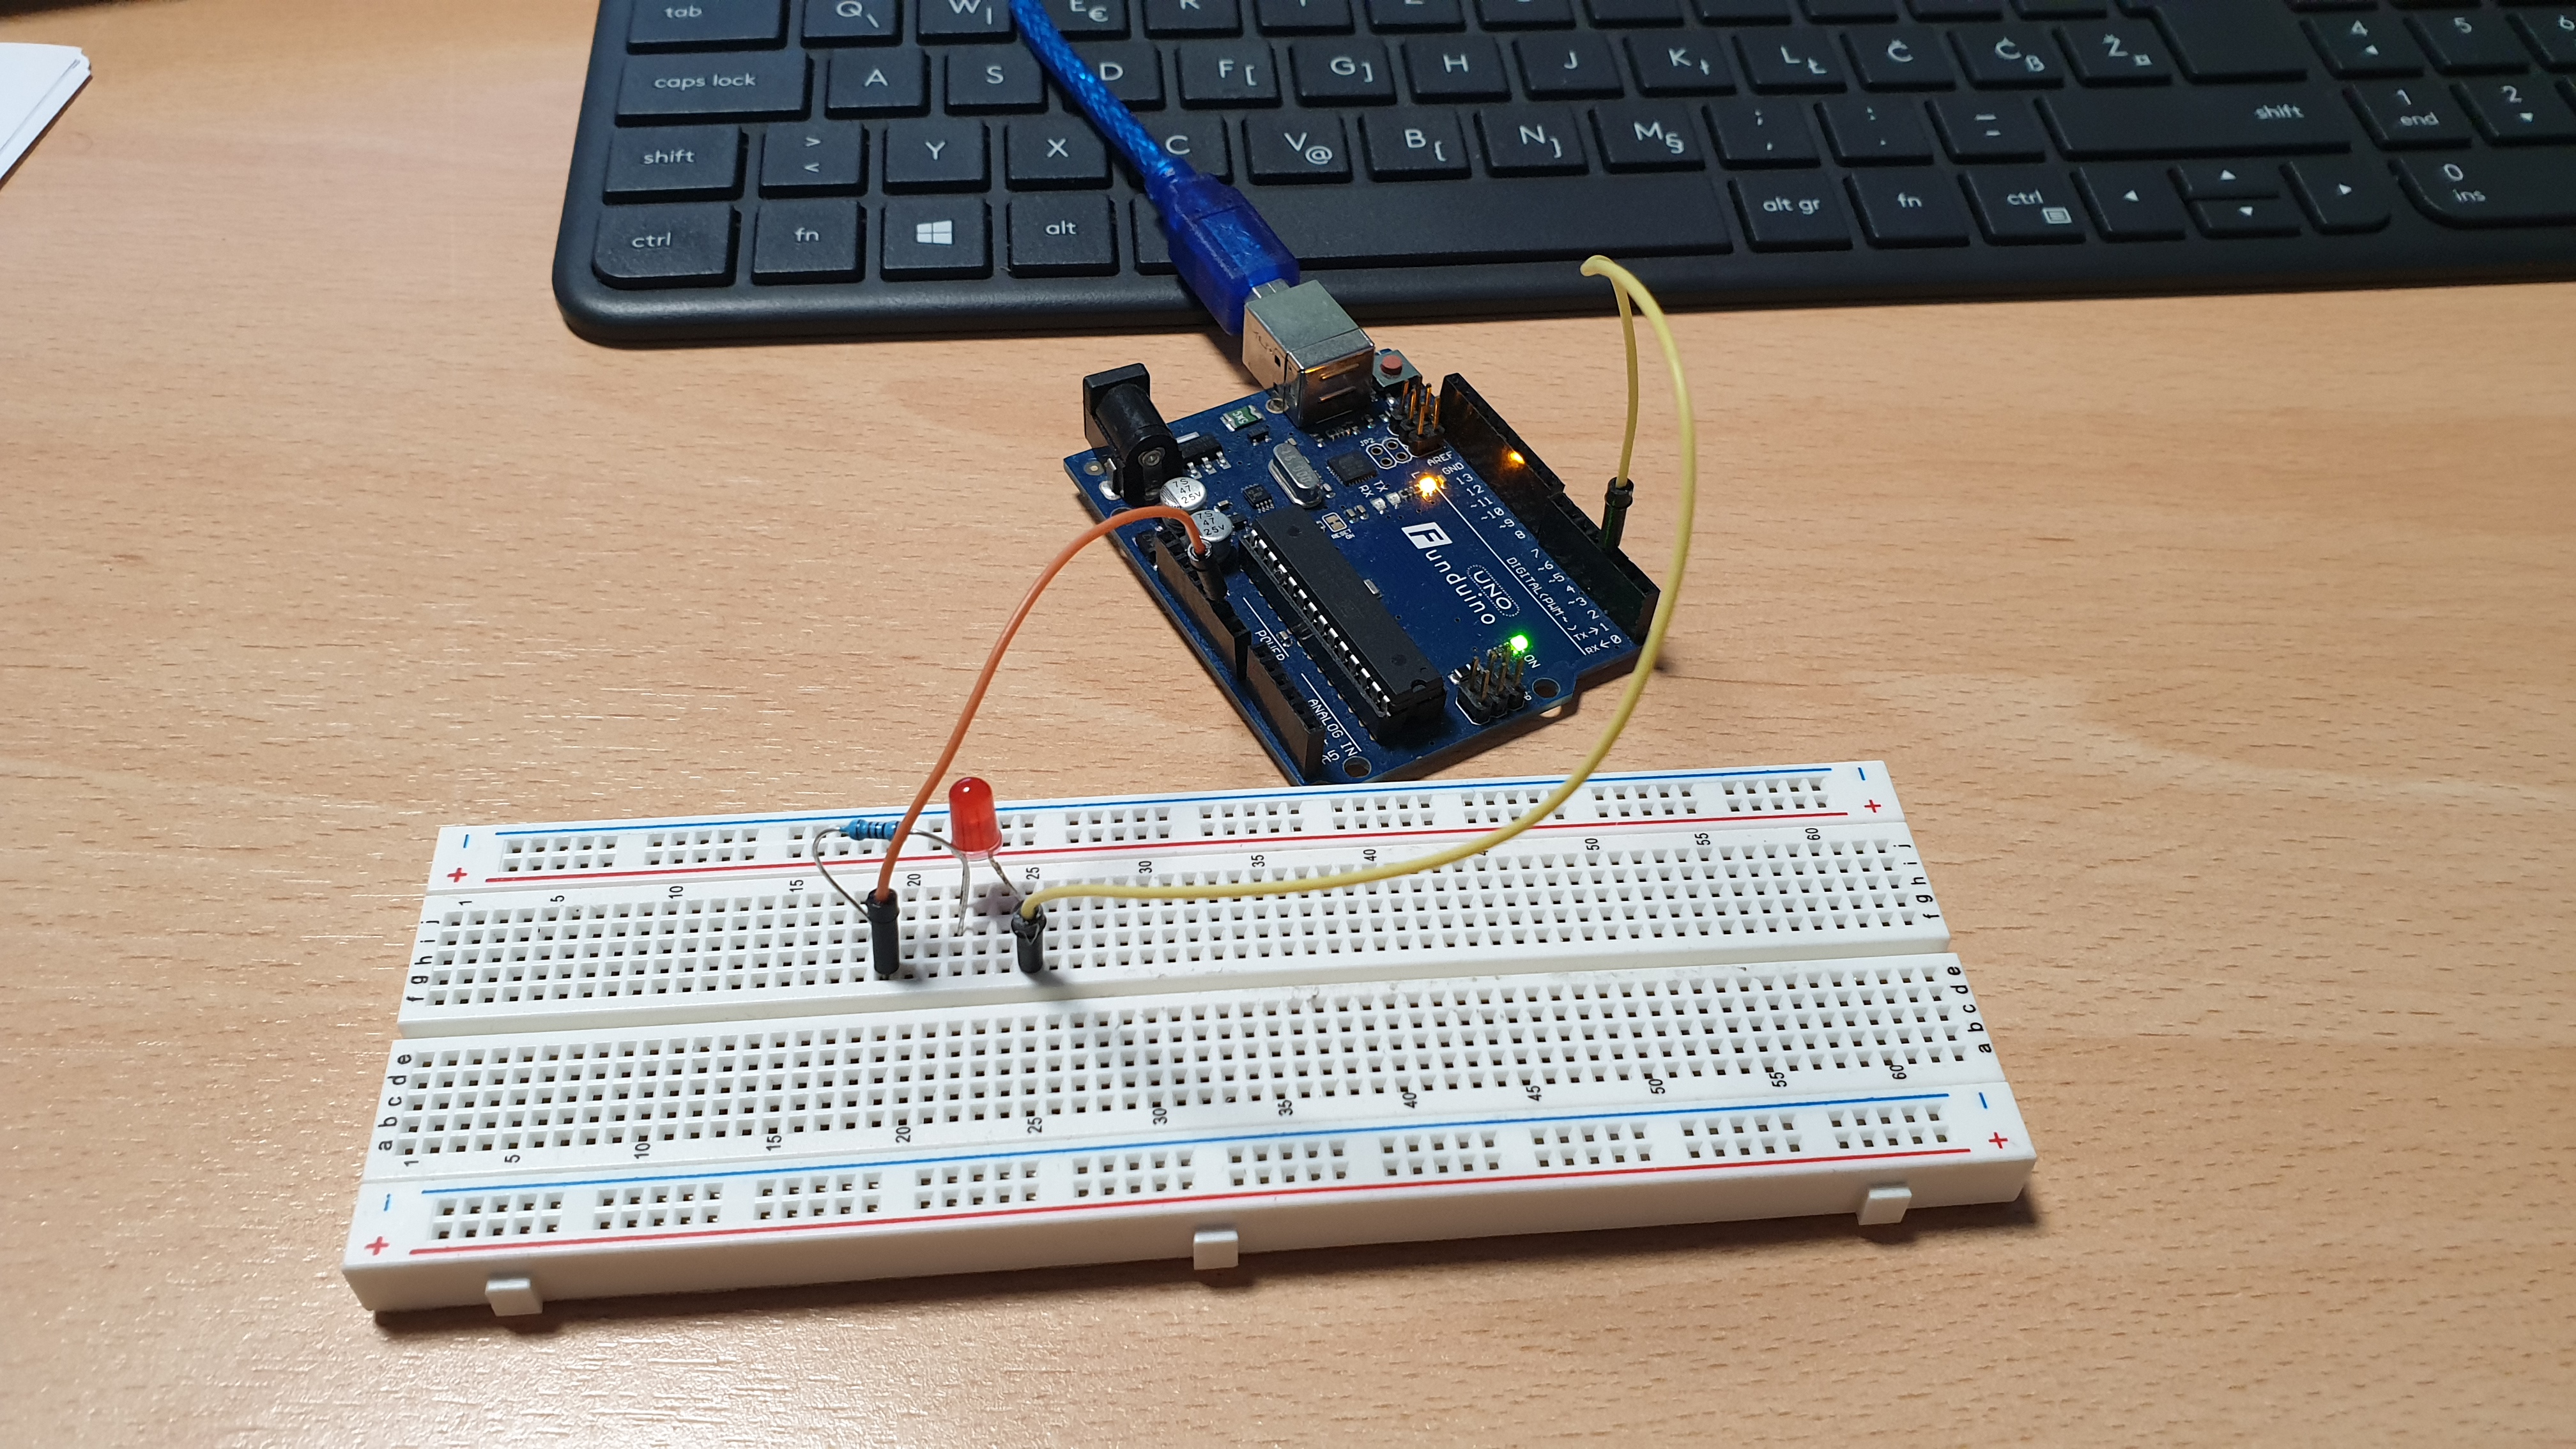
Because of that, belowe is video and picture with the regular Ardino Uno and working task, I used same steps as described abowe and it works, so the only difference is the main board.
GROUP ASSIGNEMNT
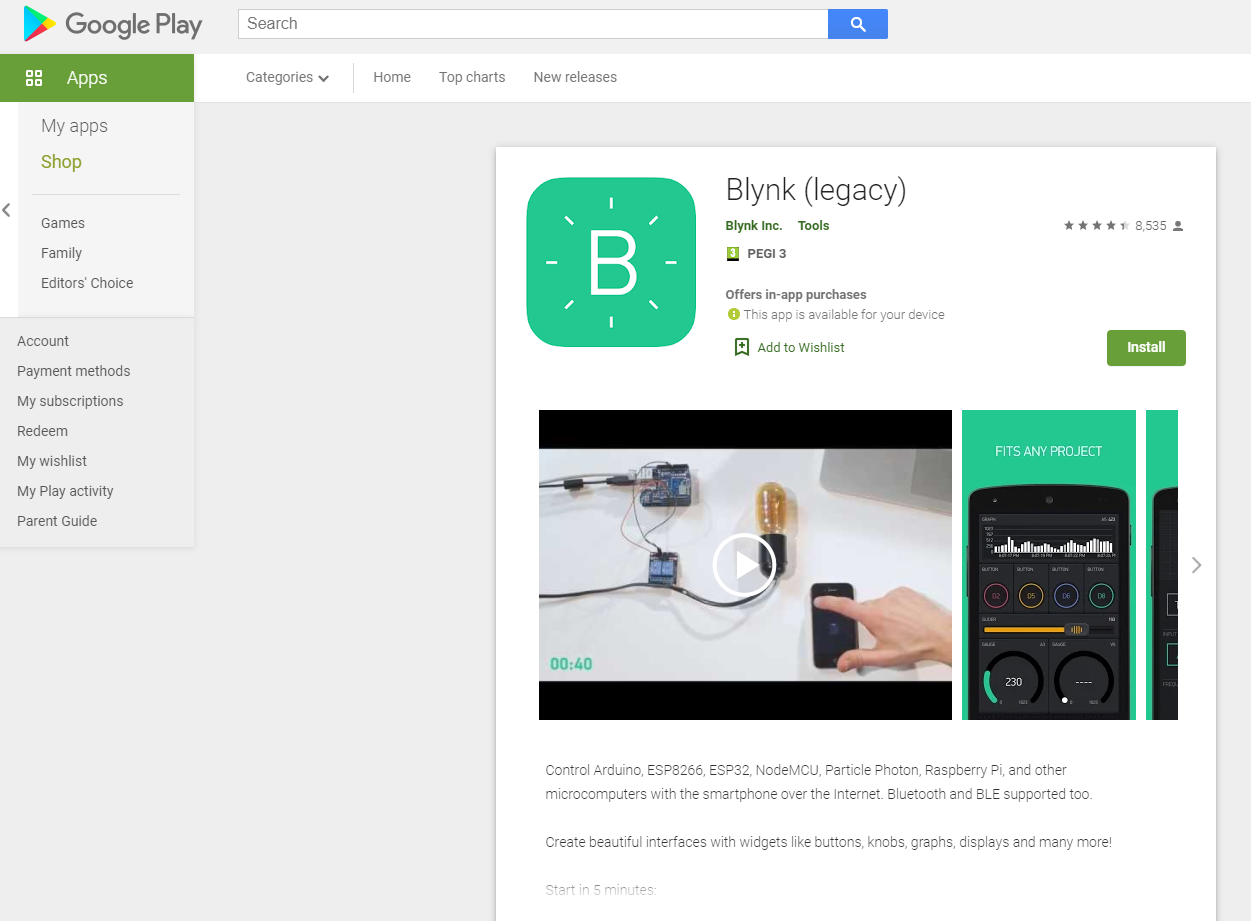
As I said in the begining for the group assignment I need to test some more tools, so I wanted to try a Blynk.
Blynk is an IoT (Internet of Things) platform that offers full suite of software allowing to prototype, deploy and remotely manage connected electronic devices.
For the first step I installed the application on my smartphone from Google play. I will connect it with a ESP8266. The ESP8266 is the wifi module that I used in my week 14 "Networking and communications". That module helps me to connect the phone to the code.
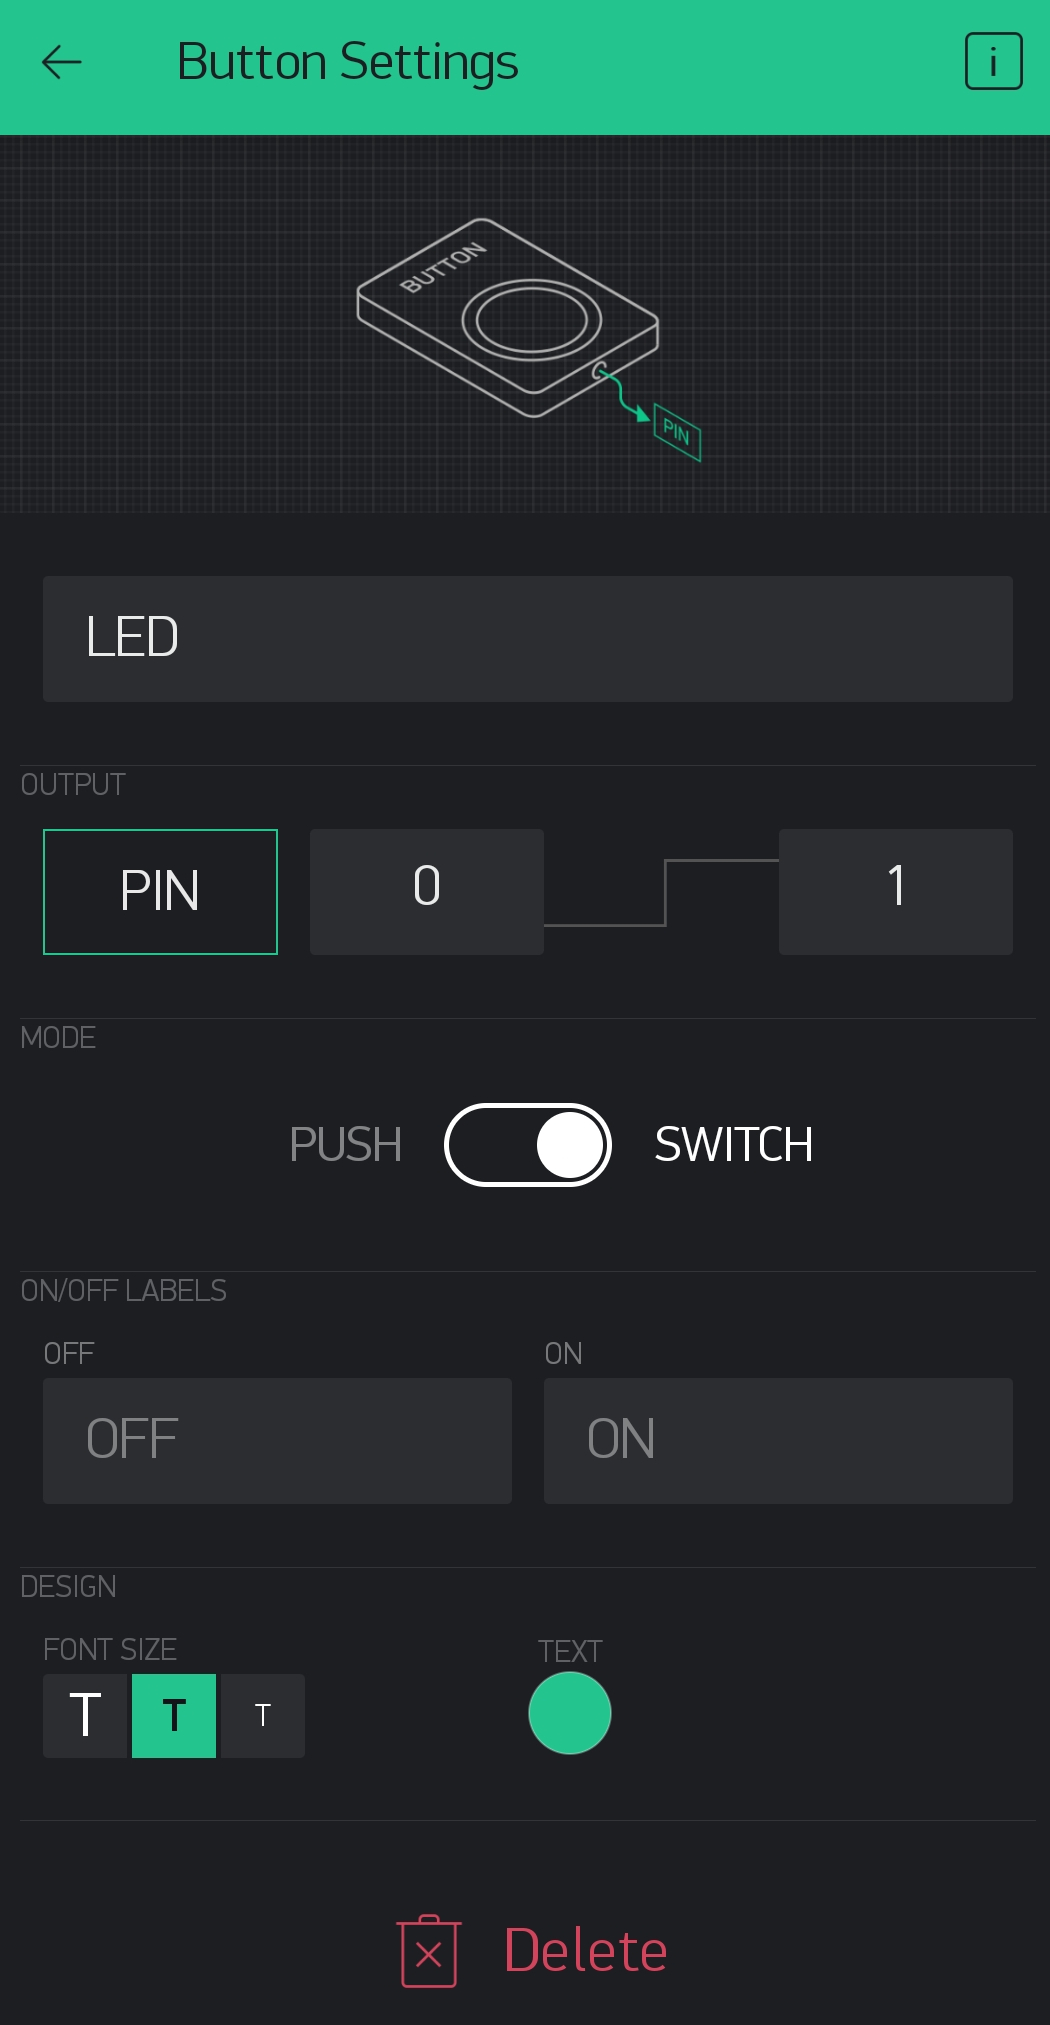
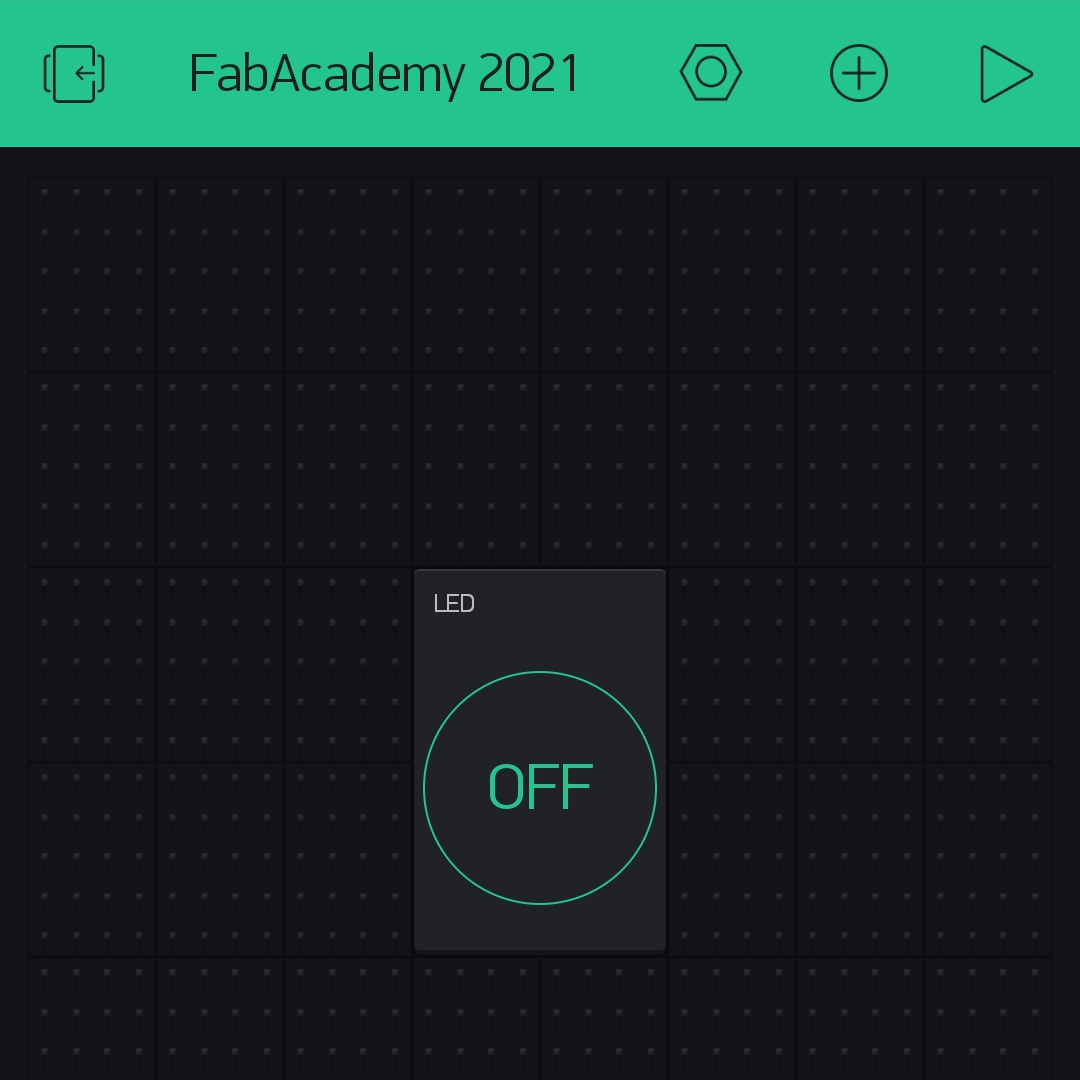
After the instalation of the Blynk application I wanted to explore the application, just get to know it better. I found only one downside of it and that's that I need to purchase the whole application to use all the commands, but thats okay, I have permition for the command that I'm going to use. Application is realy easy to use, you can drag and drop the elements individually.
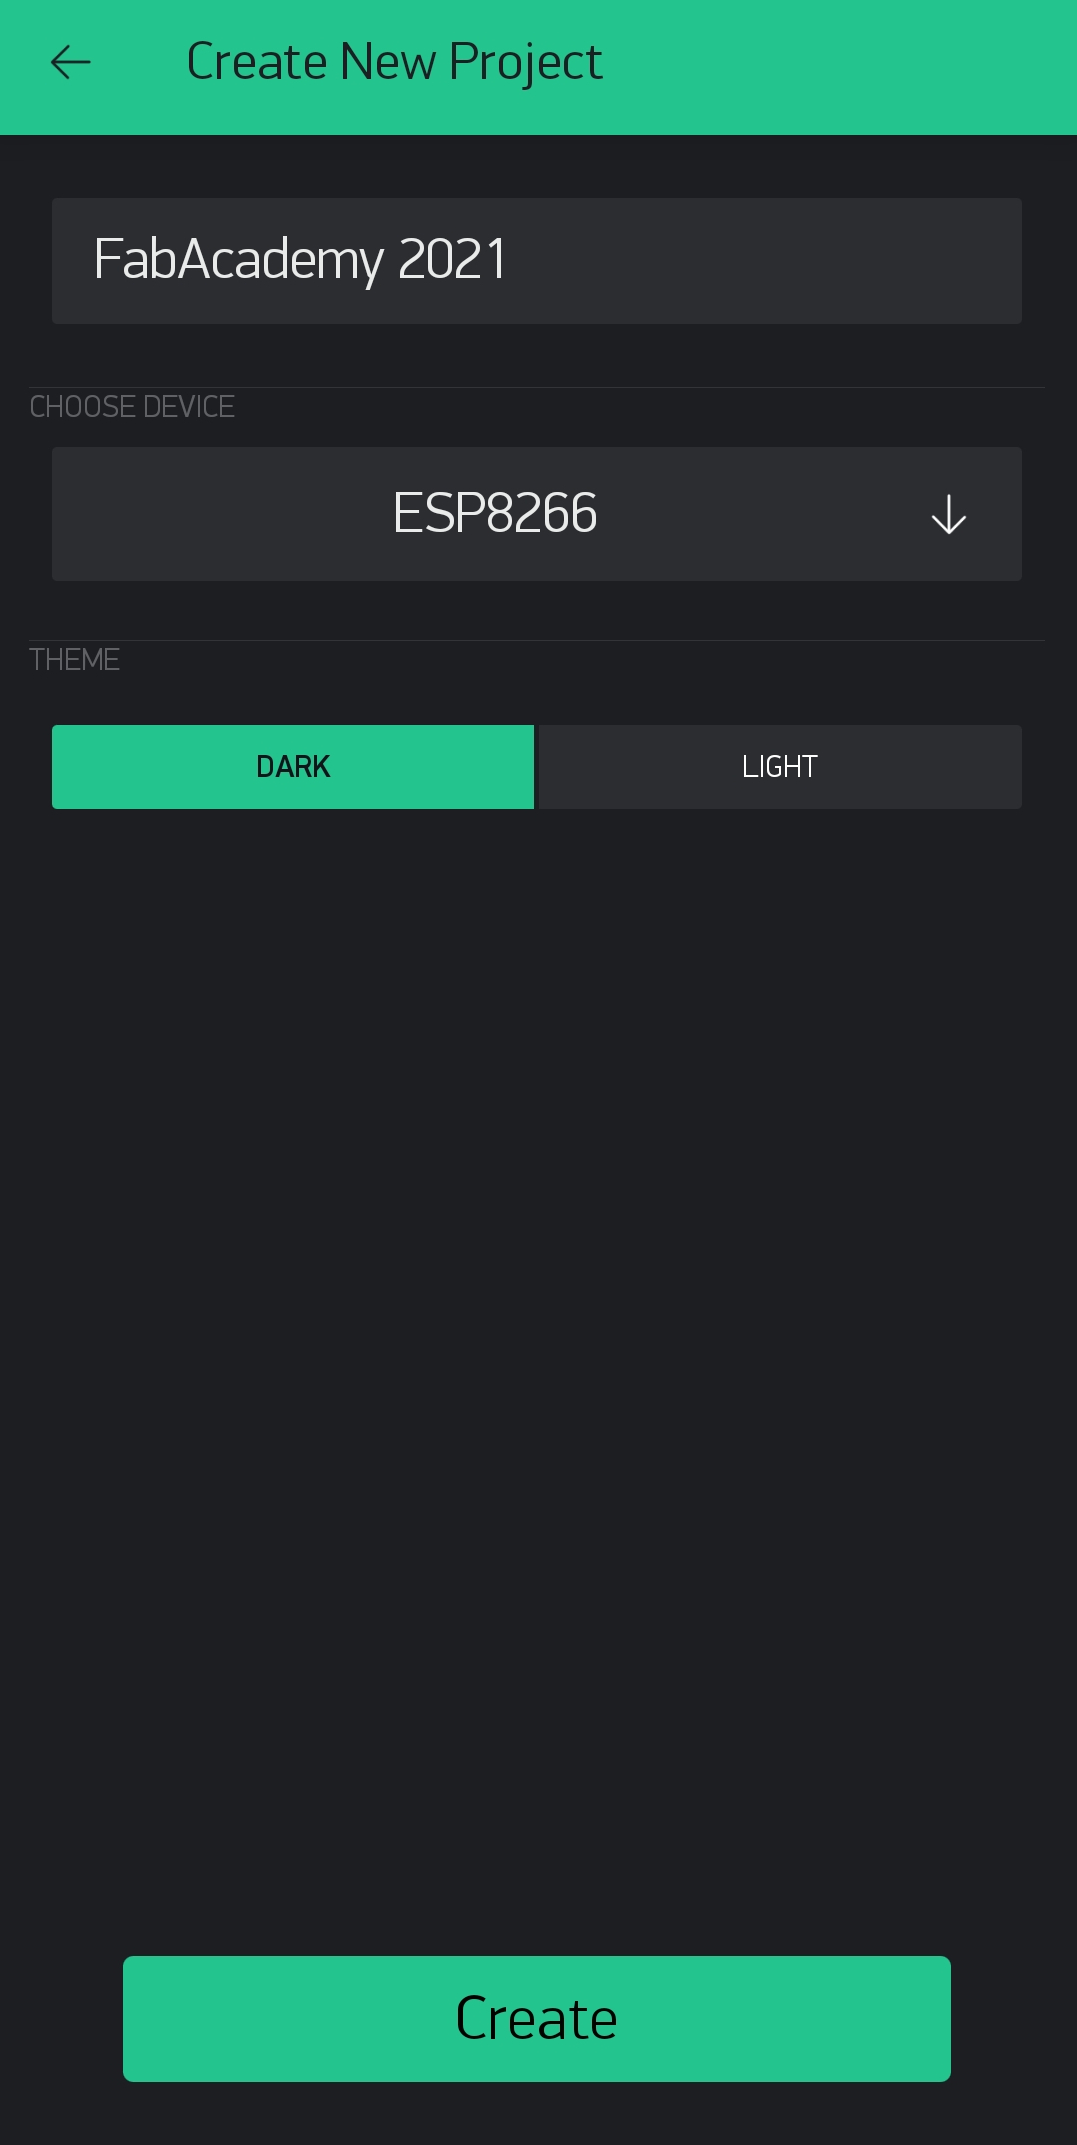
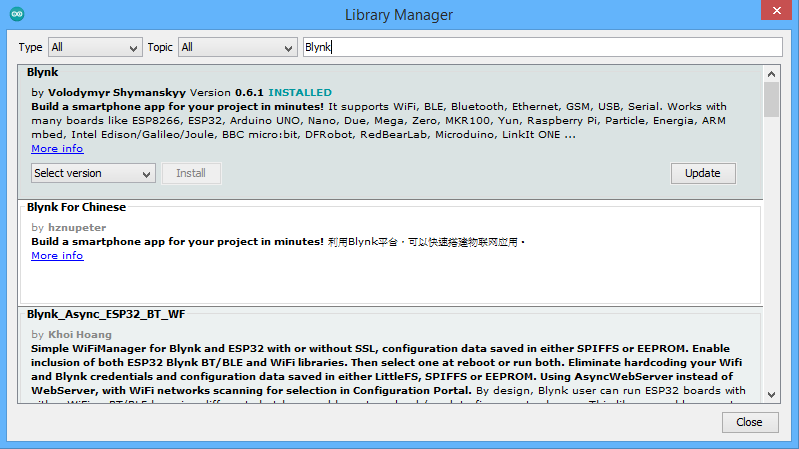
Before I start to write the code in Arduino for my assignment, I need to add Blynk library to the Arduino IDE trough "Sketch-Include Library-Library Manager". And of course it is important to say that when you are starting the new project in Blynk application you are getting the authentication code via email that connects application with the code, but it's also important to include that authentication code in the Arduino code.
I forgot to mentioned that if you don't have a ESP8266 library in your Arduino IDE, you should install it for this. I already have it installed because I added it in my wee 14.
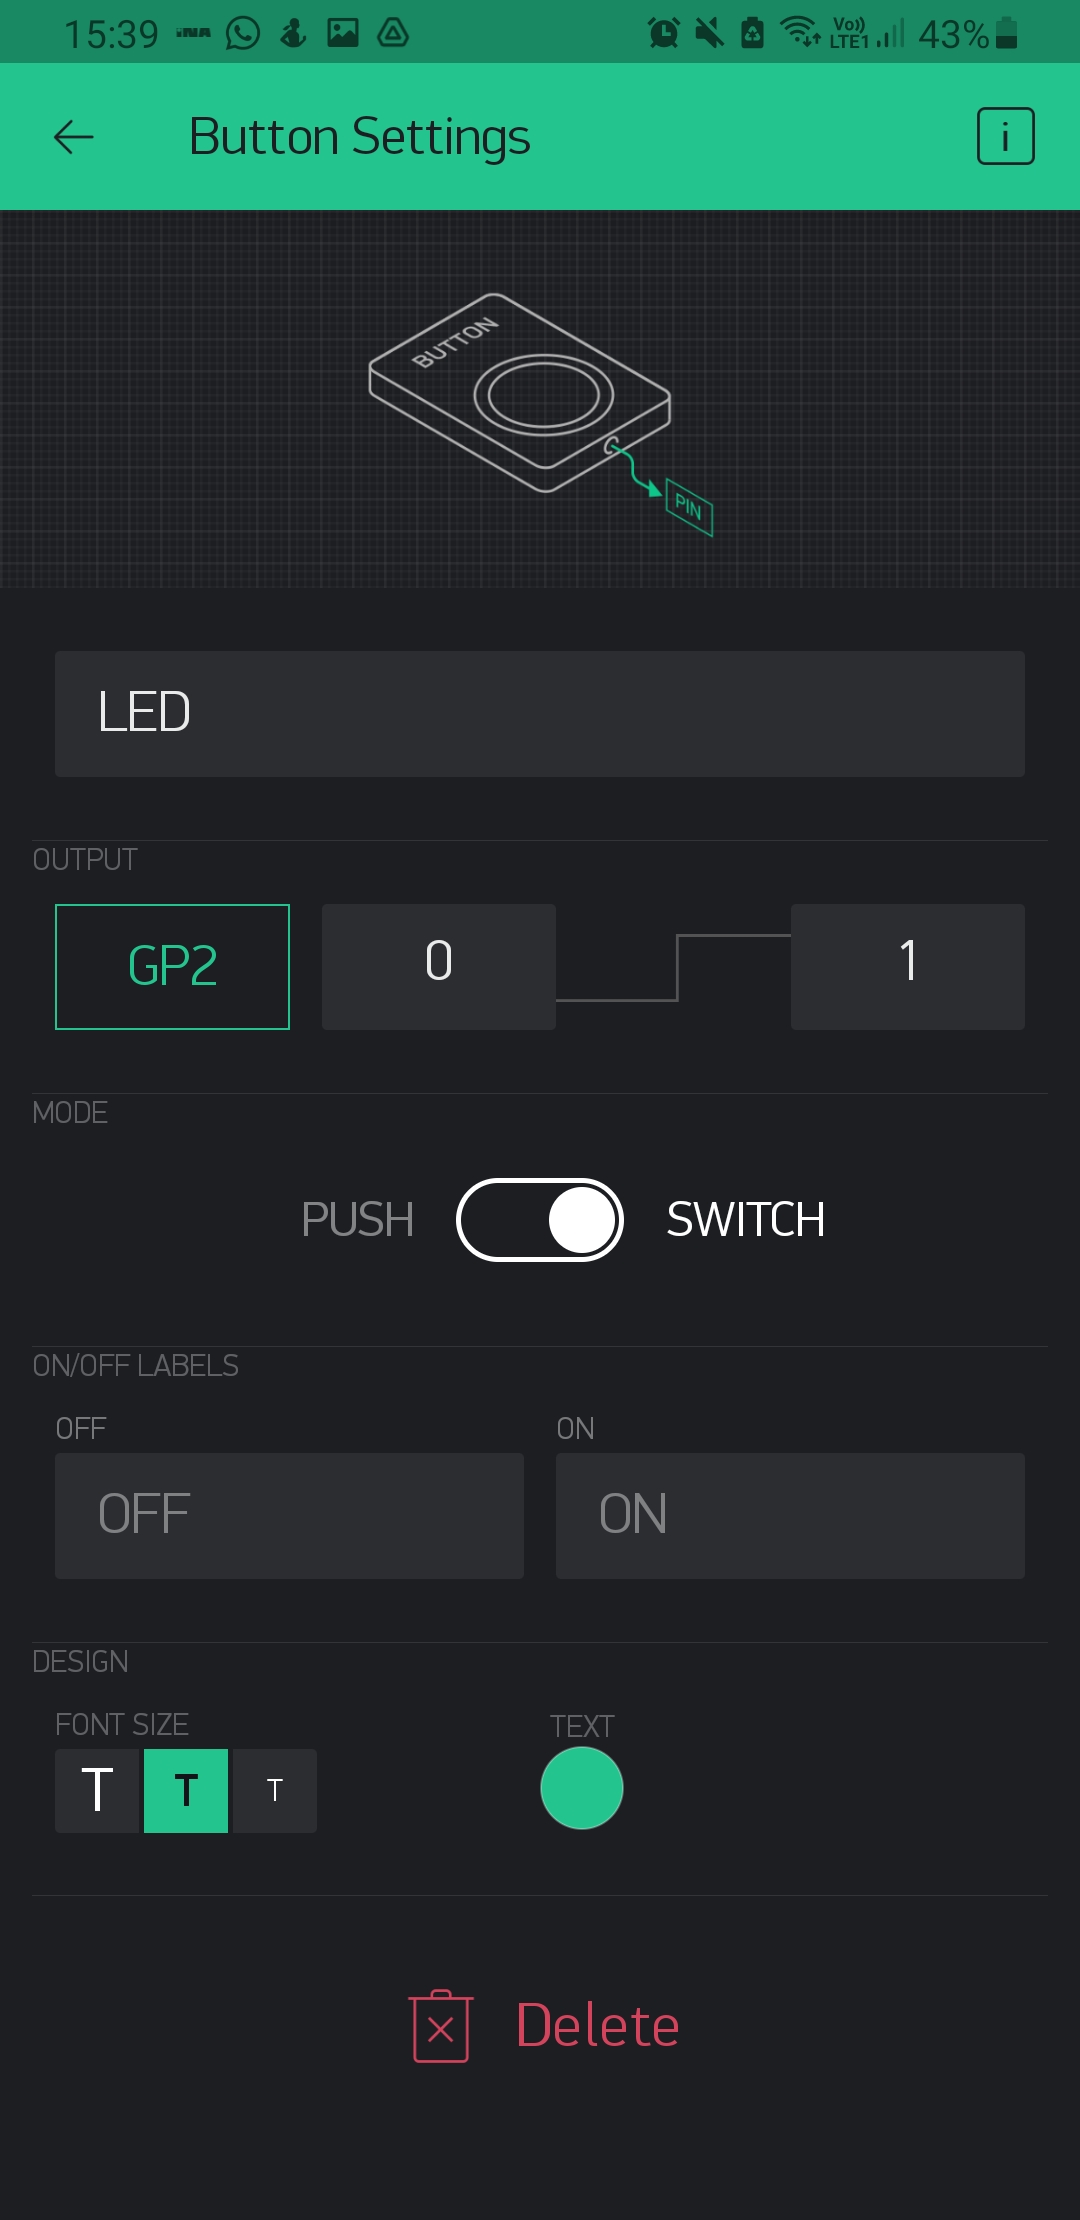
Now is time to write the code that will allove me to control my LED light with the Blynk application on the phone.
SSID and PASS are information from my local network, so if you're using this code you should use your networks information, name and password.
Arduino sketch
#define BLYNK_PRINT Serial


#include <ESP8266WiFi.h>
#include <BlynkSimpleEsp8266.h>


char auth[] = "6coU5M8C99quNmL8UW8tP5ARd_kObU60";


char ssid[] = "ISKONOVAC-047da0";
char pass[] = "INNBOX2944500742";

void setup()
{
  // Debug console
  Serial.begin(9600);

  Blynk.begin(auth, ssid, pass);
}

void loop()
{
  Blynk.run();
}
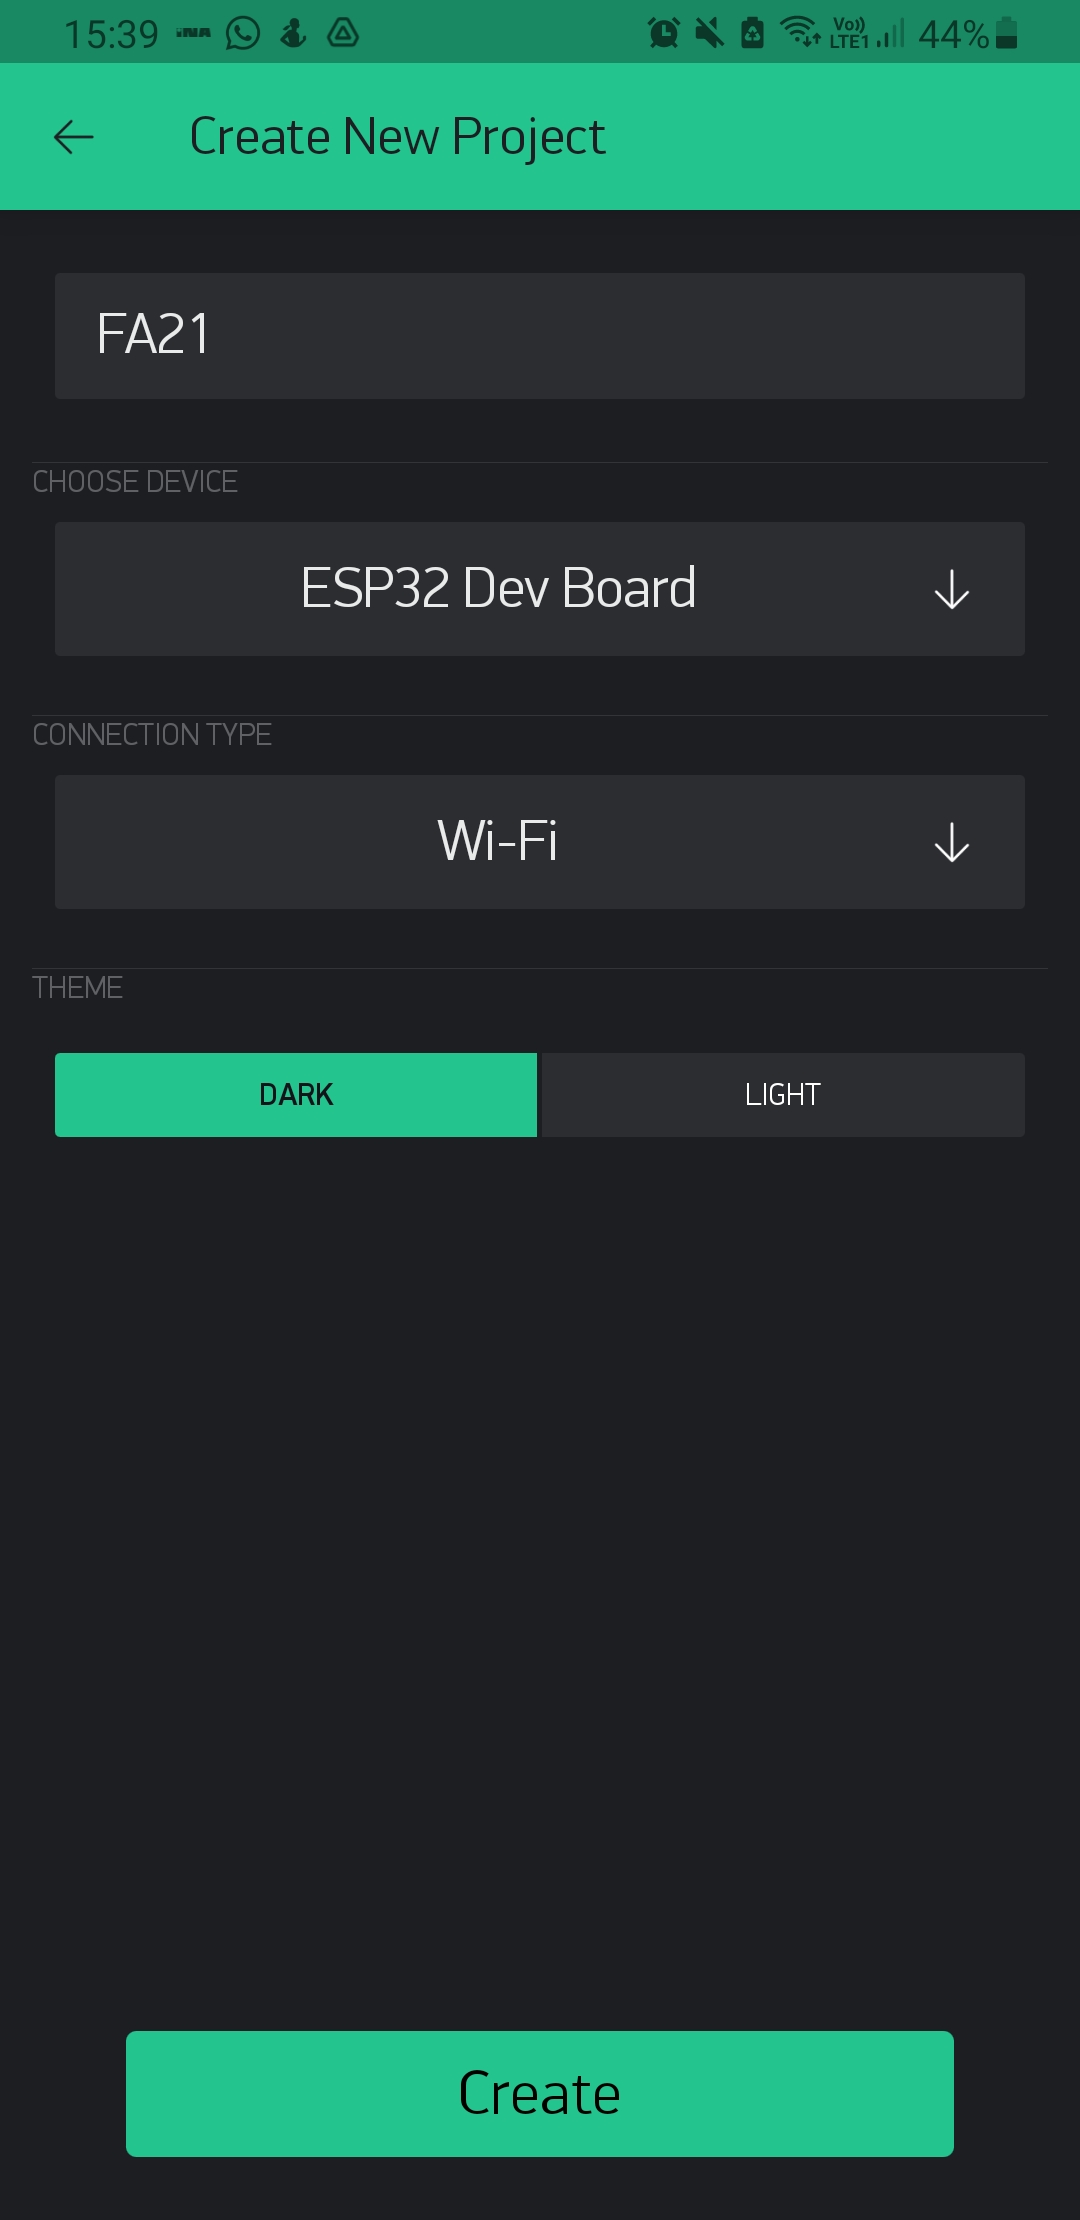
ESP32 Blynk
As I said before, I was missing the videos and also my board stoped working so I needed to go another way to finish this task also. In this case I used ESP32 module to connect with my Blynk application on the phone. So belowe are pictures and video for connecting ESP32 with Blynk.
Really important thing is to have a board ESP32 and library for it installed in the Arduino IDE so the code can work eithout the problem.
Also it needs to be careful to put the correct and whole authentication code that is given trough the email after creaing new project in Blynk.
#define BLYNK_PRINT Serial
#include <WiFi.h>
#include <WiFiClient.h>
#include <BlynkSimpleEsp32.h>
int pin = 2;
char auth[] = " wYd5l25jwkxf0ZIqDQLX3NDTPnYSRZYJ ";
char ssid[] = "ISKONOVAC-047da0";
char pass[] = "INNBOX2944500742";
void setup() {
  pinMode(pin, OUTPUT);
  pinMode(pin, HIGH);
  Serial.begin(115200);
  delay(10);
  Serial.print("Connecting to ");
  Serial.println(ssid);
  WiFi.begin(ssid, pass);
  int wifi_ctr = 0;
  while (WiFi.status() != WL_CONNECTED) {
  delay(500);
  Serial.print(".");
  }
  Serial.println("WiFi connected");
  Blynk.begin("wYd5l25jwkxf0ZIqDQLX3NDTPnYSRZYJ", ssid, pass);
}
void loop(){
    Blynk.run();
}