For this week assignment, I decided to make at least part of the app to control my Longboard. The first decision I had to take,
was which app could be a good tool for a nice and fast prototyping process. I finally decided to work with Blynk, which is
an app available in Ios and Android so you can have very fast a multiplatform app. I had already work with Blynk in the past working with some wifi or ethernet modules,
but this time I tested the bluetooth part, and it is ok, even if there is still a lot of work (it is in beta testing).
Blynk is a tool that looks very well, and that can give you a good view of how your final product will be, but really for microcontrollers, the library is a bit too heavy,
so I would recommend to use it when working with ARM projects where you have much more power.
Blynk basically gives you two options, to connect your inputs/outputs (from the app) to a virtual Pin,
that gives you the advantage that you are "creating a new IO pin", or you can connect inputs/outputs to analog Pins or digital Pins depending of the kind of input or output it is.
Both are nice options but I most the time use virtual Pins because I first want to be able to process (change it a bit) the values before sending it to a PWM signal, or after reading it from an analog signal.
Another characteristics of Blynk, is that when you want to send information to the app, you have to put this variable assignation in a function that will be called every certain amount of time,
because if it is connected to internet, you would be "spaming their servers" and in the case of the bluetooth, you would be saturating the app because a microcontroller goes very fast.

The first step in the process of development of an app with Blynk, is to download the App from the play store or the apple store, create an account, select the device you are going to work with (in this case I selected Arduino Uno), the type of connection (wifi, bluetooth, gsm, ...) and finally you just have to drag and drop the widgets that you want to use (the first time you have 1000 credits). In my case I had some Blynk credit from past project but basically to repeat my app you will need 1300 credits. The first button that you are seeing here, is called BLE and it gives you a way to connect your phone to the BLE device without having to leave the app. (The HM-10 device name can be changed but by default it is JD9-...)

This widget, is basically a slider that can change a value from a range to another. The Servo.h library that I am using to control my ESCs, says that the speed vary when you give it a range between 1000 and 2000. So basically I am configuring the slider to give me value between 1000 and 2000. Finally, I have to say which virtual pin or digital pin (PWM), I want to assign those values. In my case I chose the Virtual Pin 1. Another important detail is that you have to chose between sending always the value of where your finger is, or only send it when you release it from the screen.

For the gauge, the principle is basically the same than with the slider but in this case, you probably want to be able to see the unit of the gauge at the middle of it. For that, you just have to add a slash and the unit (kg,%,$,etc...). The last thing to take care of, is the refresh interval. As I mentioned many times before, you have to have care of the data you send to the phone, because otherwise the app will be saturated. If you select push, it is because you have already create used a function in your arduino code and you have put it with a timer. Otherwise, if you will only send the data without any kind of timer, you can select a time interval. But please, never use the push option without times because it will be very slow.
")
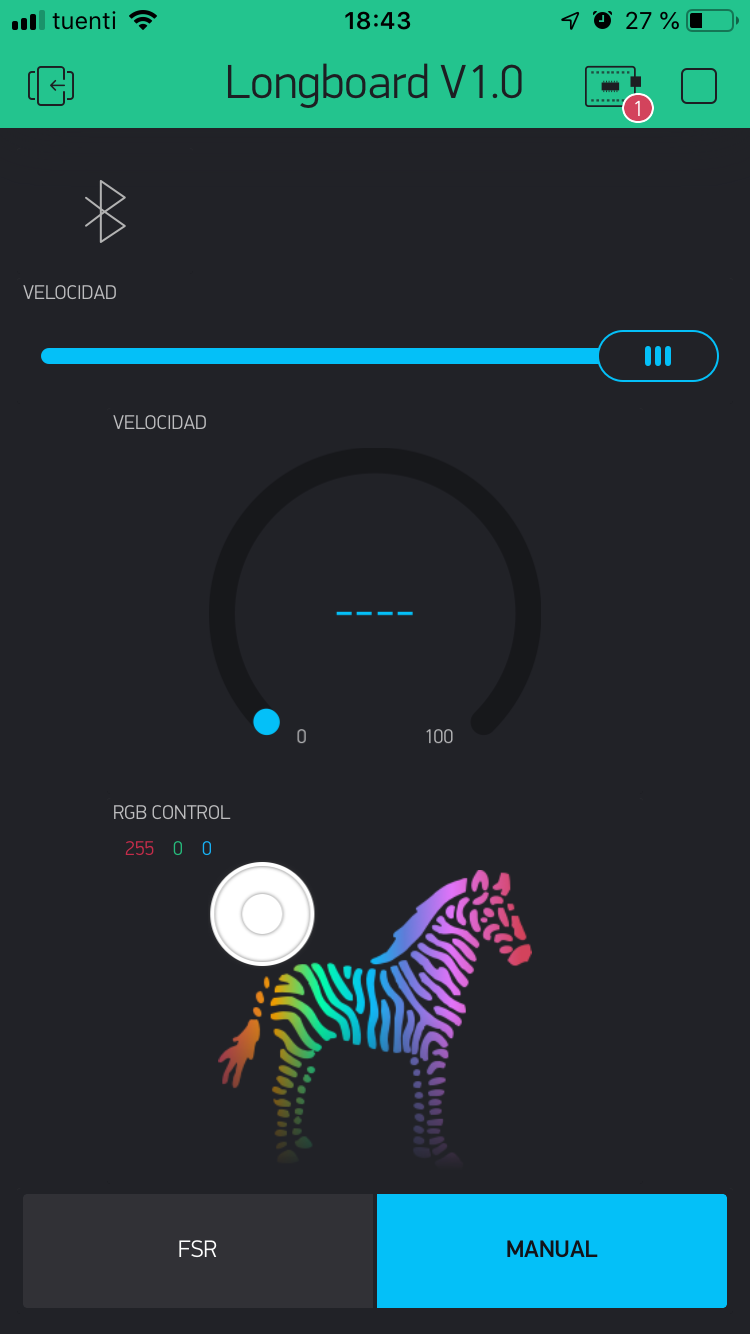
The ZeRGBa is an incredible tool that gives you a way to change the color of RGB LEDs just sliding in a zone with a zebra of multiple colors. Depending of the color, you will have a different pwm value for each color. You obviously have to select the correct range depending of the resolution of you microcontroller. In the case of a 328p, you have to put 0-255. The way you can send the data are three. The first one is to connect each color directly to the PWM outputs connected to your Mosfets. The second option, is to assign each value to a virtual pin (with the split option) and the other want is to use the merge option where you will only use one virtual pin because the values will be in an array. I have tried every option, and for some reason, I am not able to obtain all the colors. Only pure colors like red, blue, white, yellow, orange, purple, but more exotics colors are difficult to obtain.

The selection Button is very easy to configure because it is only a virtual pin that will take the id of the option you chosen. Have care because the IDs start from 1.

This part of the code, is basically the same than the one of last week, but here you can see that I am declaring three variables for each color Red, Green, Blue.
Here you can download the .ino File.

This part of the code is very important, because it is where a virtual pin becomes an Arduino variable. But also, it is where you will create functions to send values to Blynk.

This part will be better explained in the final project part but basically it is a function that I am trying to build to control my longboard with FSRs.

Here you can see that as always I run Blynk, I run the BLDCs control, and finaly I use an analogWrite function to define the value of each color at the their respective PWM outputs.

As you can see in a more graphical way, the connexion made by the App and my board, has first a token check with the Blynk server to see if I am authorised to control this longboard. In case my app token is not the same than the one introduces in the longboard code, I would not be able to send commands to it. In this case, because I am authorised, I can control the RGB LED, and the Speed of my BLDCs. But I wanted to know the percentage of the speed where I was, it is for this reason that I send to the app a percentage that is calculated with a map function that convert the value from 1000 to 2000 sent to the ESC, into a value from 0 to 100%.
Controlling a BLDC and a LED Strip with an iPhone using Bluetooth 4.0 (BLE)
Please Contact Me For Any Collaborative Project