
Fab Academy 2019 - Lucas Lim
03. Computer-aided design
03. Computer-aided design
- Learning on 2D design (difference between vector drawing and raster/bitmap)
- Learning on using raster/bitmap editing software
- Learning on using vector design software
- Learning on using 3D design software
This week, we were introduced with a wide range of design tools that we will be using for our subsequent lessons and for our project, ranging from the freely available online software (also known as freeware) to the commercial (licensed) software.
As a photographer, I am familiar and is currently using the commercial Adobe Photoshop CC (for photo editing) as well as Adobe Premiere Pro CC (for video editing). The school has purchased the Adobe suite of software for staff to use as well as for selected groups of students for their course needs. I had tried out a few of the free design software mentioned during the Fab Academy lesson as well as by my Fab Lab instructors.
Following is a list of software that I had tried.
Raster image editing :
- GIMP (free)
- Adobe Photoshop CC (commercial version)
2D Design Tools :
- Inkscape version 0.92 (free)
- Adobe illustrator CC 2019 (commercial version)
3D Design Tools :
- SolidWorks (2016-2017 Student Version)
- Autodesk Fusion 360 (3-year Educational Version)
Software tried :
- GIMP
- Adobe Photoshop CC
Installation
GIMP (version 2.10.8) is a free software and can be easily downloaded from GIMP website. For Ubuntu users like me, you can open "Ubuntu Software" App and search for "GIMP" and click "Install". Unlike Adobe Photoshop CC, which you need to create an Adode ID account and install Photoshop CC via the Adobe Creative Cloud control panel.
Usage exprience
GIMP is light-weight and fast as compare with Adobe Photoshop CC. GIMP take a few seconds to launch. GIMP and Photoshop both offer similar commonly-used functions, like opening common file types (like png/jpg/gif/etc.), creating new layer, paint tool, cropping an image, inserting text, scaling/resizing an image, exporting to other file format, etc.
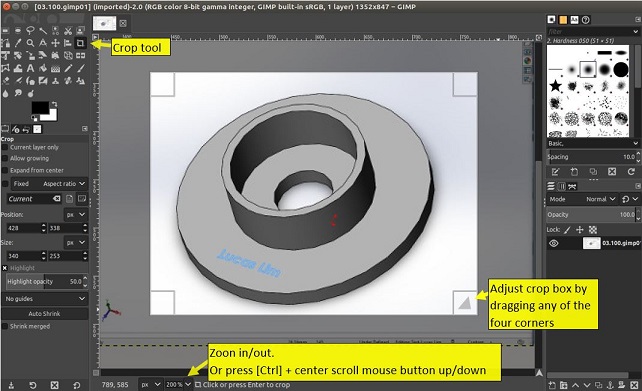
Cropping an image in GIMP :
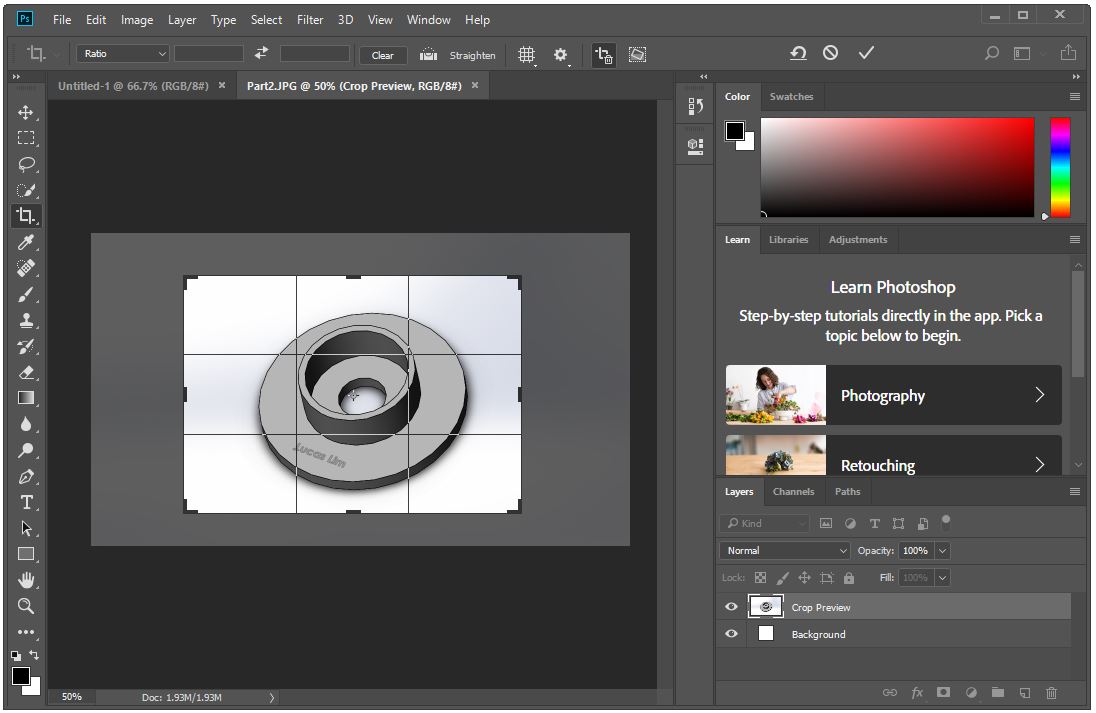
Photoshop CC (2019/version 19.1.7) is a commercial professional photo editing software from Adobe. Photoshop work on a paid subscription model, which mean that the software will cease to work if your subscription period expire. This is unlike other commercial software, which would typically provides a perpetual license key/code that would allow the user to use for as long as he/she want or as long as your Operating System support. There are many online learning resources on how to use Photoshop.
Both GIMP and Photoshop are generally photo editing software. Both software lack the technical capability and accuracy to draw precise or complex technical drawings.
A raster graphics, or also known as bitmap image, consist of many tiny dots (also known as pixels) representing different color to form an image. If you zoom in a few hundred percent, you can see all these coloured pixels. Whileas a vector graphics, in layman term, is drawn using coordinates instead of using tiny coloured blocks. If you zoom in, the line can still be clearly seen without any distortion.
A visual difference or how to tell if a graphic is a vector graphics, is when you click on any portion of the vector graphic, you will likely see tiny dots or known as "nodes".
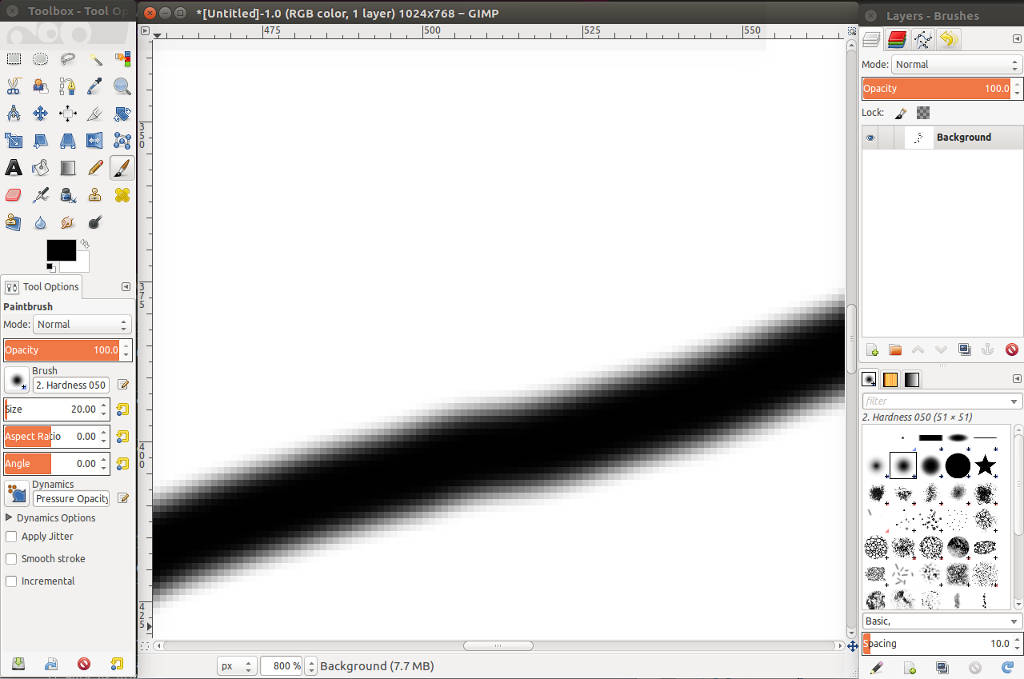
A line drawn using the freehand drawing tool in GIMP and zoom-in to 800%, showing signs of distortion
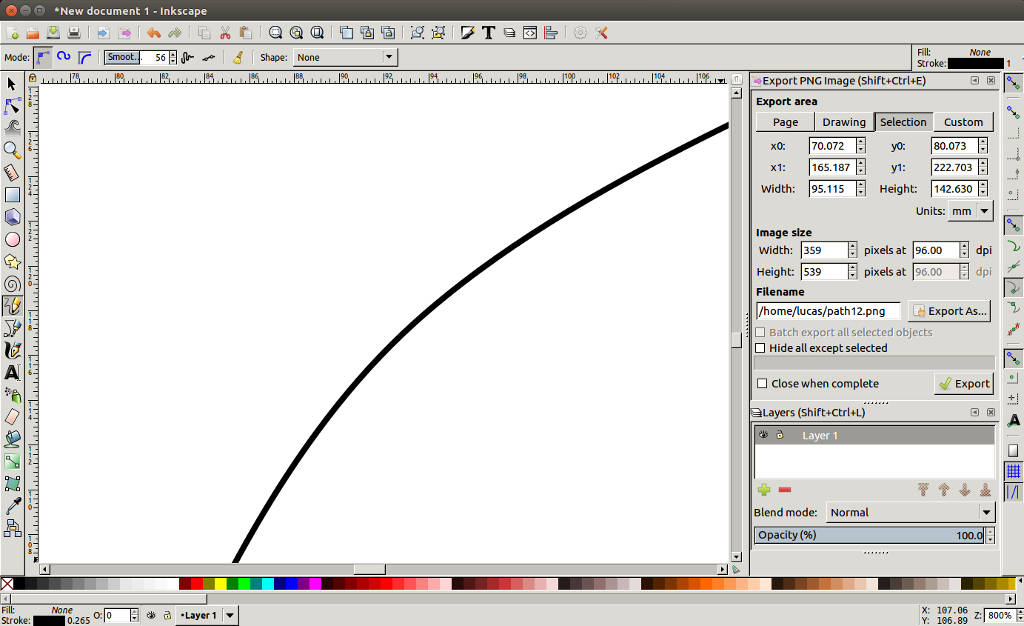
A line drawn using the freehand drawing tool in Inkscape and zoom-in to 800%, still maintaining sharpness and accuracy
Installation
Inkscape is a free software and can be easily installed by downloading the installation file from Inkscape website (for Windows OS/Linux) or simply through “Ubuntu Software“ App for Ubuntu user. One of the equivalent commercial version is Adobe Illustrator and CorelDraw. Adobe illustrator, same as Photoshop, is a paid subscription licensing mode and require to create an Adode ID account to install.
Usage exprience
It offer a range of drawing tools (like freehand drawing of line, drawing of rectangle/square, shapes, etc). Drawing of line is primarily done by the connecting of tiny points call “nodes“.
Customization of Inkscape user interface before drawing
1. Main menu -> View -> Custom
2. Main menu -> View -> Zoom -> select Zoom 1:1
3. At top taskbar -> click on "Edit objects' color, gradient..." icon ->" to call-up the Fill & Stroke window at the right side-bar
4. At top taskbar -> click on "Align and distribute.." icon -> to call-up the Align Object window at the right side-bar
5. At top taskbar -> click on "Layers" icon -> to call-up the Layer window at the right side-bar
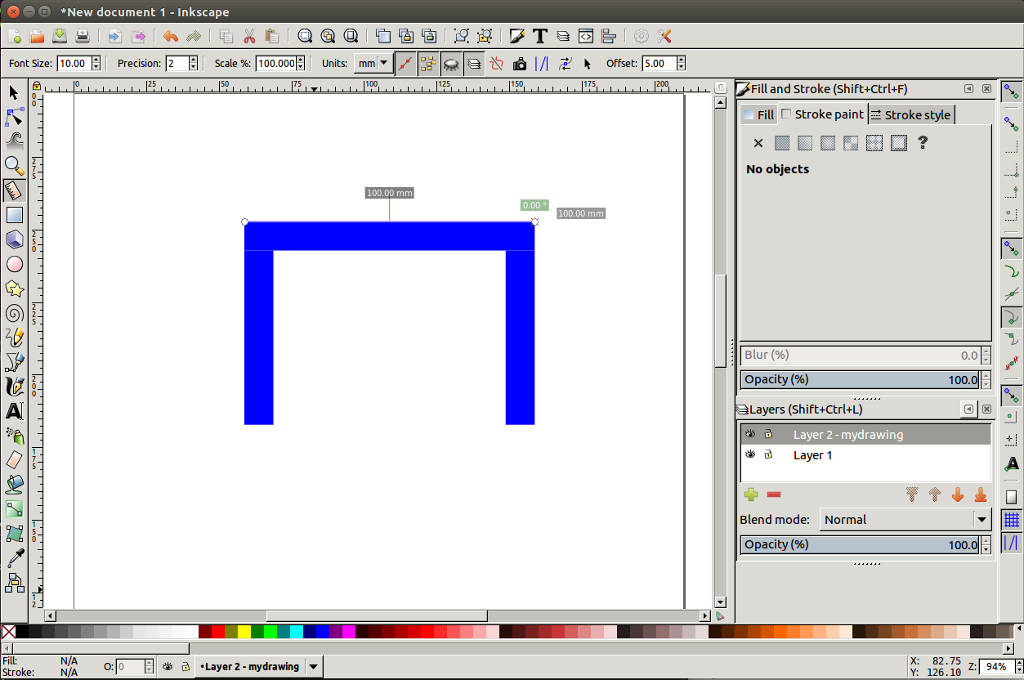
Testing by making a copy of the leg of a table and snapping (one object) to another object in inkscape : :
1. Draw the side-view of a table top of 100 mm x 10 mm
2. Draw the leg of the table (60 mm x 10 mm)
3. Make a copy of the shape of the table leg and move across and snap to the edge of the table top
4. Use the measuring tool to measure the length of the table top (it is correctly shown as 100mm)
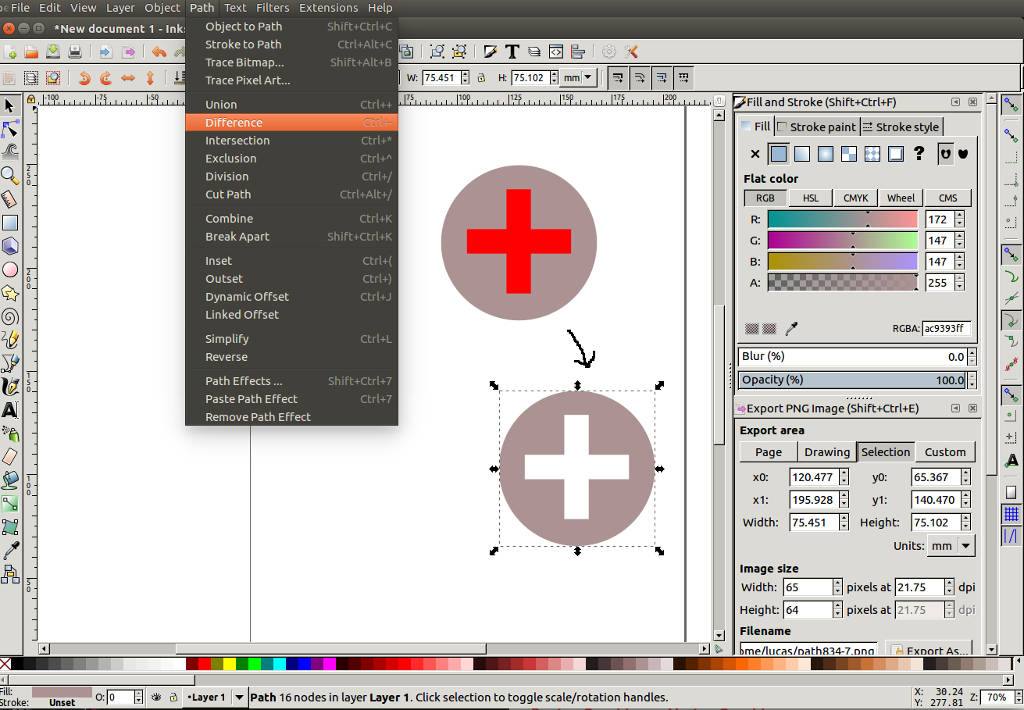
Testing on Inkscape boolean operations by trying to draw a top-view of a 'cross-hair' screw :
1. Draw an rectangle in red colour
2. Make a copy and rotate 90 degree
3. Centre align these two rectangles
4. Select the two rectangles and join them together using Inkscape's 'Union' operation
(path -> union boolean operation)
5. Draw a grey-color circle and place behind the cross
6. Select the cross and circle and perform a cut using Inkscape's 'Difference' operation (boolean subtraction)
(path -> difference boolean operation)
Adobe Illustrator CC is a commercial software which run on a paid subscription licensing mode. Illustrator CC has many features, and there are more buttons displayed on the left side-panel. Illustrator requires some time to learn. I have drawn the "table" again in illustrator, the tools used are similiar to inkscape, like create new layer, drawing rectangle, copy, paste, snap to object, etc.
Testing on Illustrator by trying to draw the same top-view of a 'cross-hair' screw :
1. Draw an rectangle in red colour
2. Make a copy and rotate 90 degree
3. Centre align these two rectangles
( Illustrator has a cool 'snap-on' feature to allow easy alignment of objects by just moving the object over each other)
4. Select the two rectangles and join them together
(Illustrator is easier to join objects togther -> select objects -> right-mouse-click -> 'group')
(path -> union bollean operation)
5. Draw a grey-color circle and place behind the cross
(Illustrator is easier to place object behind -> by selecting the object -> right-mouse-click -> 'Arrange' -> 'Send to Back')
6. Select the cross and circle and perform a cut using operation
(Main Menu -> Window > Open Pathfinder window or Shift+Crtl+F9 -> Select 'Minus front' under 'Shape Mode')
Notificable difference between Inkscape and illustrator from a first-time user :
1. Adobe illustrator seem to be much smoother when performing drawing, and other function. There seem to be no noticiable lap/showness.
2. Iluustrator is much user-friendly in the sense that you can right-mouse click on the object and access more functions from the pop-up window.
3. Illustrator require some learning to get started. It's feature rich, like more feature, filter/effect and tools, which can be overwhelming for new users.
4. Illustrator comes with free templates which you can download from "Adobe Stock" library. Inkscape does not.

Software tried :
- SolidWorks (2016-2017 Student Version)
- Autodesk Fusion 360 (3-year Educational Version)
Practices on Solidworks as well as in Fusion 360 later on :
1. Set "units" to be in mm
2. Draw a circle on the axis
3. Extrude the circle upward
4. Draw another circle on the surface plain of the circle base
5. Extrude it out
6. Draw a small circle in the middle of the base
7. Perform a cut-through all the way through the base
8. Save the file
Solidworks is a commercial professional software and just like any 3D design tool/software will require some time to learn the software. It work by drawing of a primary shapes like rectangle/circle/line/etc. which is known as a sketch in Solidworks. Operation like Exturd/Cut is applied onto this sketch (or drawing) and form an relationship with the sketch. Example as seen on left-hand panel in screen shot below, “ Boss-Extrude1 “ (which is the Extrude operation) is link to “sketch1“.

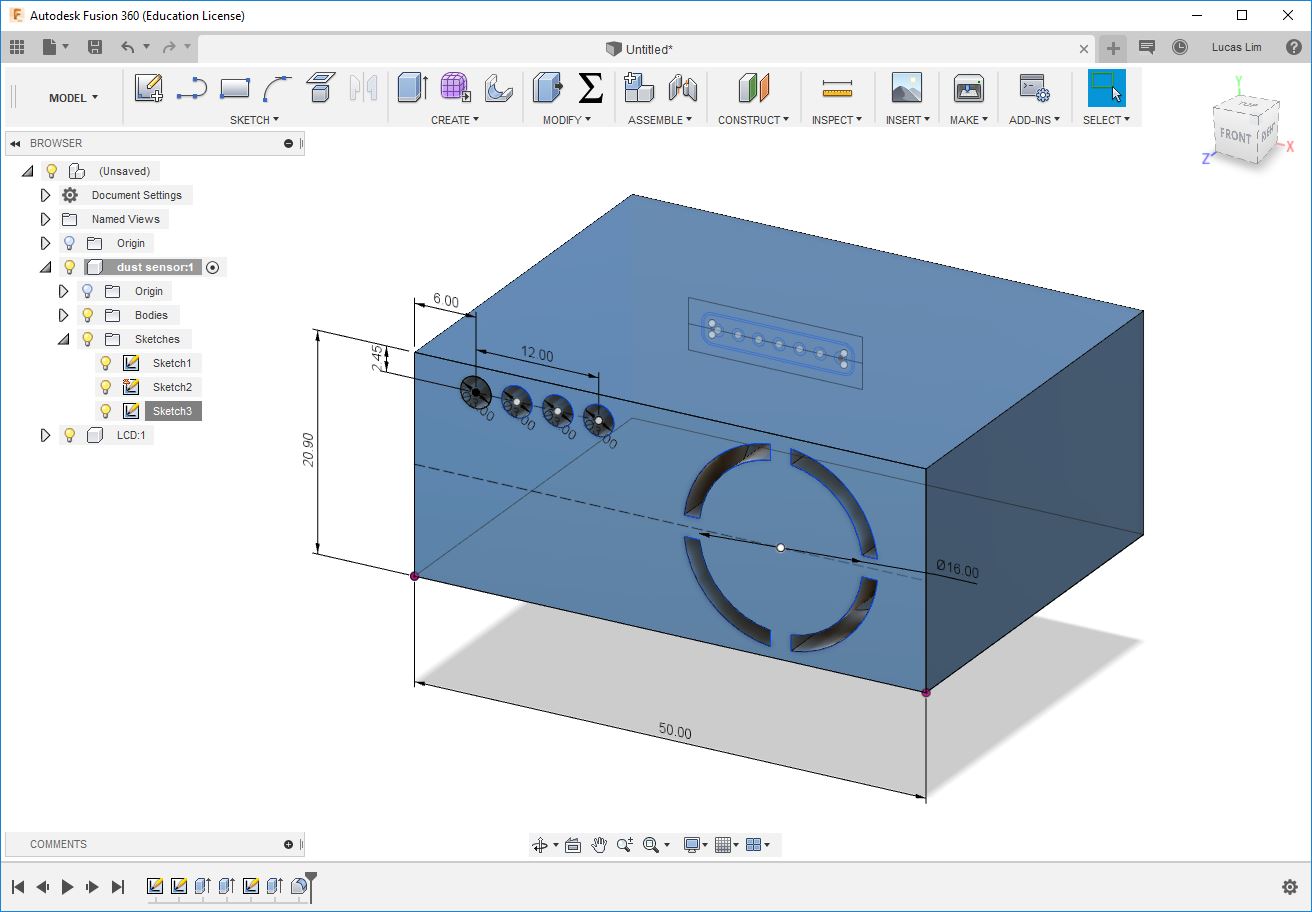
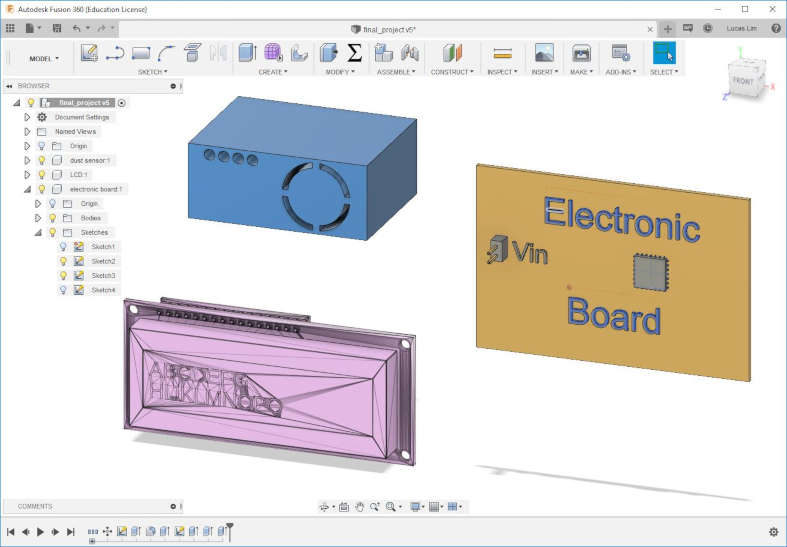
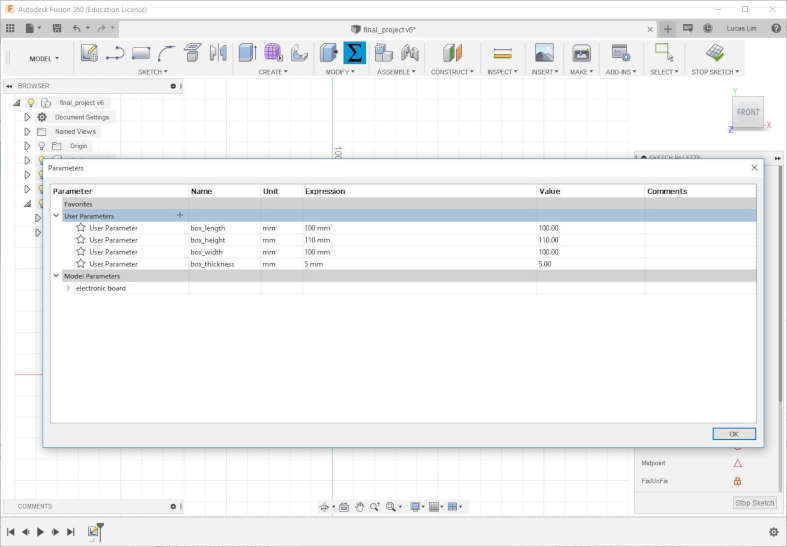
Autodesk Fusion 360 is a free software available for download for educational purposes. Fusion 360 like Solidworks software require some time to learn the software. The drawing tools, like drawing of line, rectangle and circle, are similar to Solidworks. However, one noticiable difference is the sketches do not have a text to shown the relationship/operation performed on the sketch.
Another difference is that Fusion360 files are saved on the cloud, however you can export out and have a local copy of your drawing on your computer.
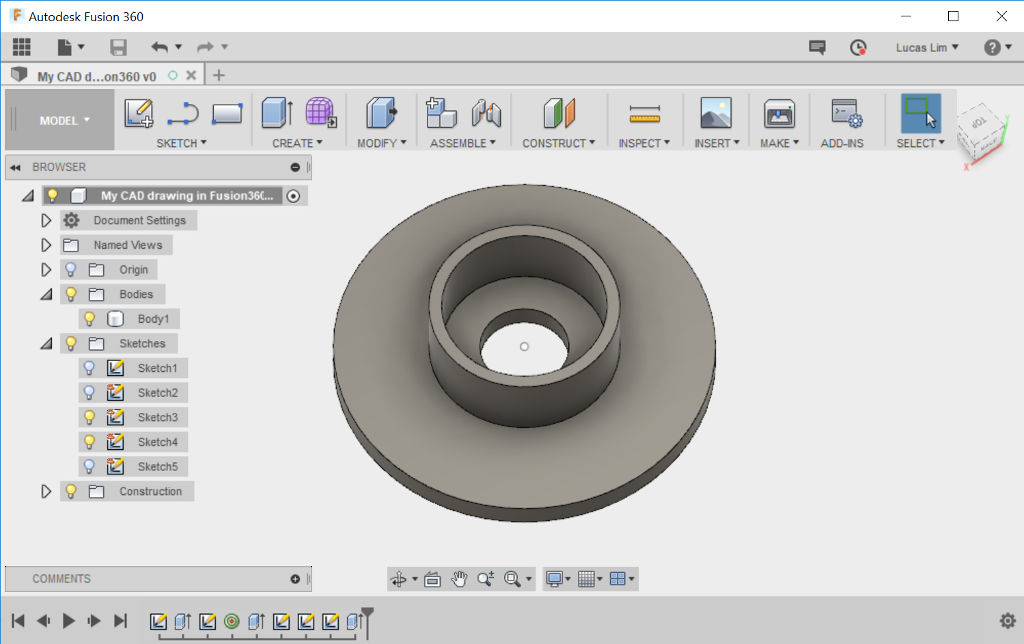
- My CAD file in Autodesk Fusion 360
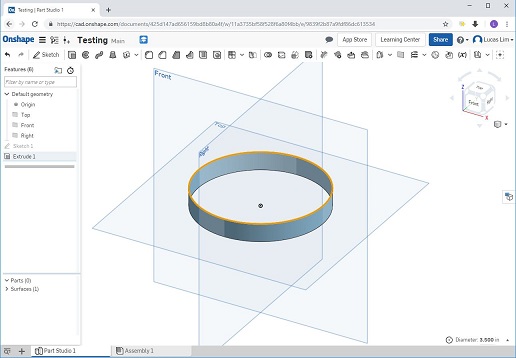
Another 3D Design software called "OnShape" was mentioned in the lession, so I decided to try it out. OnShape runs on the cloud (or Internet), so there is no need to buy special hardware or download and install software. For the best experience with Onshape, recommneded to use Google Chrome, Mozilla Firefox or Opera browsers. I tried out OnShape Education version and found the user intertace to be similiar to Autodesk Fusion 360, but not that user-friendly and operation seem to lag (slow) a bit.
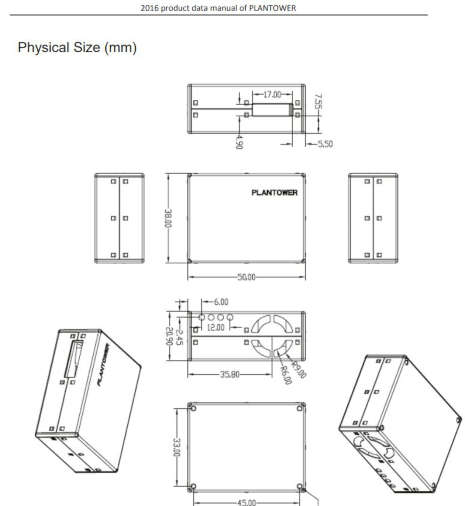
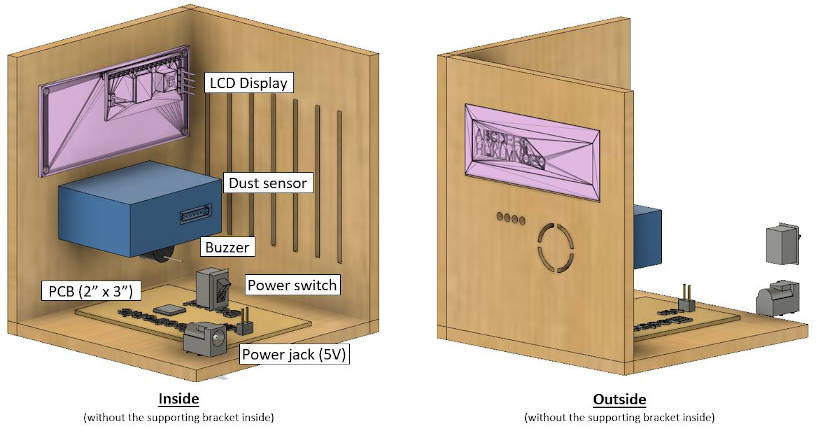
Based on my initial idea and rough sketch of a dust particle sensor as a potential final project done in week 1, I had drawn out a draft 3D model of how it will actually look like using Autodesk Fusion 360.


I am using the following software:
- MS Paint (a built-in app in Windows 10 OS) - for simple resize, cropping of photos/screenshot/images
- Photoshop CC - for advance editing of photos/screenshot/images shots captured as I can do layer, adjustment to colour and other settings
- Inkscape - for 2D design or editing of vector graphics
- Autodesk Fusion 360 - for 3D design, becasue it is free for Academic usage at the moment and much user friendly user interface
- My 2D testing CAD file in Inkscape :
drawing1.svg
- My 2D testing CAD file in Illustrator :
drawing1.ai
- My 3D testing CAD file in SolidWorks :
tutorial_1.sldprt
- My 3D testing CAD file in Autodesk Fusion 360 :
tutorial_1.f3d
- Tutorial found in Solidworks software
- Learning Fusion 360 on Youtube : "How I use Sketch Constraints and Dimensions — Fusion 360 Tutorial — #LarsLive 113"