Project Management Week #2
Working with Git
- To understand the concept of version control and clone my repository to be able to edit it locally, I went through Git tutorial: https://git-scm.com/book/en/v2
- According to the tutorial, version control is a system that record the changes that happen over time on a certain file, and it gives the user the ability to recall any version at any time later.
- Git as a version control system works in a unique way as it thinks of data as a series of snapshots, everytime the user saves the data, Git takes a snapshot of the all files at the current moment.
- Version control systems such as Git, are very essential because it is basically like a time machine! You can make mistakes or screw up your files, yet you always have the chance to correct that mistake and restore a previous state very easily.
- I downloaded Git for Windows from: https://git-scm.com/download/win
- I installed Git on my computer and launched Git Bash, “Git for Windows provides a BASH emulation used to run Git from the command line”, as stated on the Git for Windows website
- I configured the user name and user email
- Then, I configured my text editor of choice, which is Atom. Atom provides an interface to Git, through which I can push and pull projects easily.
- Now, I need to create my local server that can access my student directory on the remote server, this message on my Git repository made it clear that I needed to add an SSH key to my profile before being able to push or pull any projects
- I followed this tutorial to generate the SSH key: https://git-scm.com/book/en/v2/Git-on-the-Server-Generating-Your-SSH-Public-Key
- I checked first to see if I already have a key. If it does it should be stored in .SSH directory, which I can access its contents using the command: cd ~/.ssh
- I don’t have .SSH directory, so I created one by running the ssh-kegen program using the command: ssh-keygen -o
- Now the directory and the key are generated
- I can now access my public SSH key stored in the .pub file using the command: cat ~/.ssh/id_rsa.pub
- Now that I have the SSH key, I copied it, then went to my online git directory>>clicked on the icon in the upper right corner>> settings>>>SSH keys, and pasted the key in the box>>click add key
- Then, I needed to clone my git repo locally. I copied the SSH url in my repository. This url is unique for each student.
- I finally used the command git clone and pasted the SSH url beside it.
- Once the cloning process is done, I now have an exact copy of my repository on the remote server, locally.
- I can access these files locally using my editor.
- Now, I’m ready to develop my personal website!

How did I develop my website?
- Considering that I didn’t have previous experience with web development, this week I had a lot to learn. First, I needed to decide if I’m going to use Markdown or HTML for developing my personal website and I decided to do it the hard way, using HTML. My logic behind this decision is that to appreciate the simplicity of Markdown and needed to experience the messiness of HTML first!
- I went through tutorials on W3school.com to learn about HTML and CSS, which felt very familiar considering that I used to tinker around with my personal blog’s content and appearance on BlogSpot.
- I decided not to start the website development from scratch, and to use an existing front-end framework such as Bootstrap as an easier and time efficient alternative.
- I downloaded a Bootstrap 4 template from: https://startbootstrap.com/template-overviews/3-col-portfolio/
- I liked the 3 columns layout because it will be useful in arranging the weekly assignments in one page.
- After reviewing Fab Academy students’ websites from last years, I planned the website structure to have 3 main pages:
- A home page: which will serve as an about me page
- An assignments page: which will utilize the 3 columns design
- A final project page
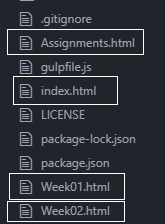
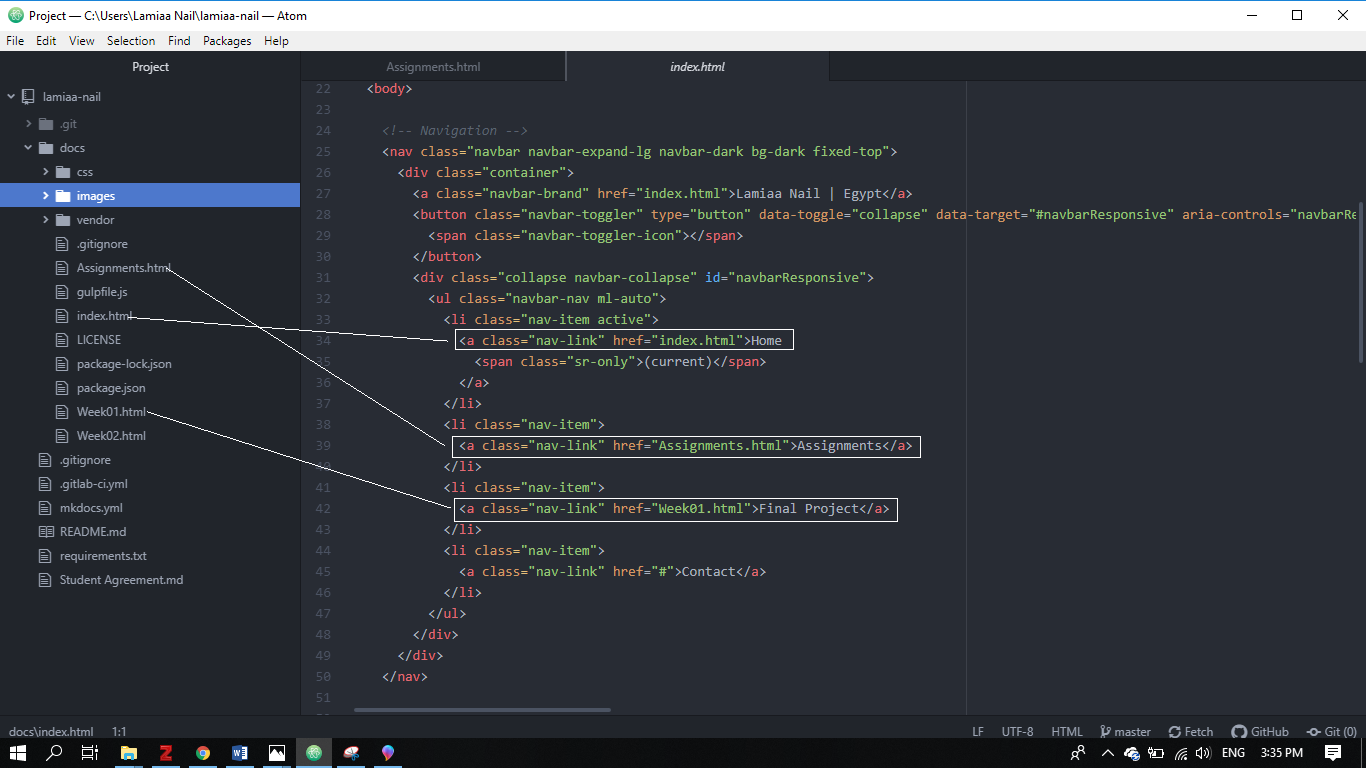
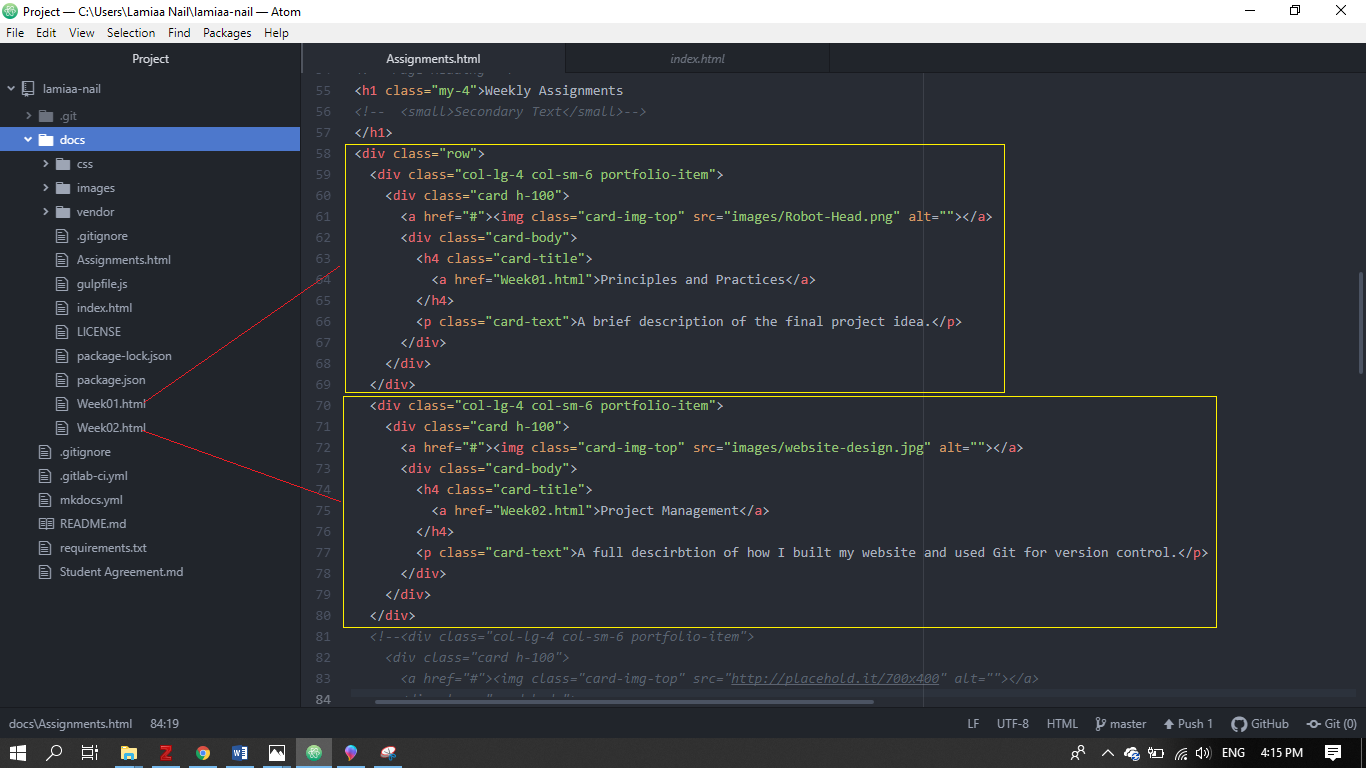
- The current home page (index.html) contains the 3 columns layout, so I renamed it to Assignments.html, and created a new index.html where I will write down my bio. I also created two html pages for first and second week’s assignments.
- I copied the navigation bar codes to the newly created index page, changed the page titles in the navigation bar and linked them to the newly created pages.
- I created the content of the index page using straight forward html tags and CSS styling.
- Then, I edited the assignments page code to contain only two cards corresponding to the first two weeks., containing an image and a brief description of the week’s assignment.
Publishing the website
- To publish my website or reflect any changes I do locally, I first had to delete the Mkdocs template files from the docs folder. Then I moved my website files to the docs folder. All the edits that I did appear in Atom as unstaged changes.
- So, I click stage all and write a commit message, which is a description of the changes that I did to the current version of the website. Finally click commit to master.
- Now, I’m one step away from publishing or pushing my website to my student archive. Just click Push in the bottom!

