Computer-controlled cutting
Assignments
#1 - Cut something on the vinyl cutter
My targets are:
#2 - Design, lasercut, and document a parametric press-fit construction kit accounting for the lasercutter kerf, which can be assembled in multiple ways
My targets are:
- Engrave (on wood) the Lion King project I prepared last week.
- Cut a 100 parts jigsaw.
- Cut and build a flexible hinge .
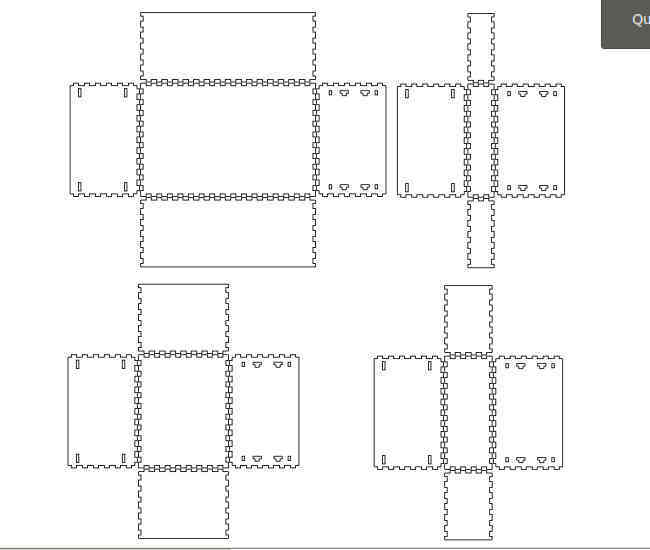
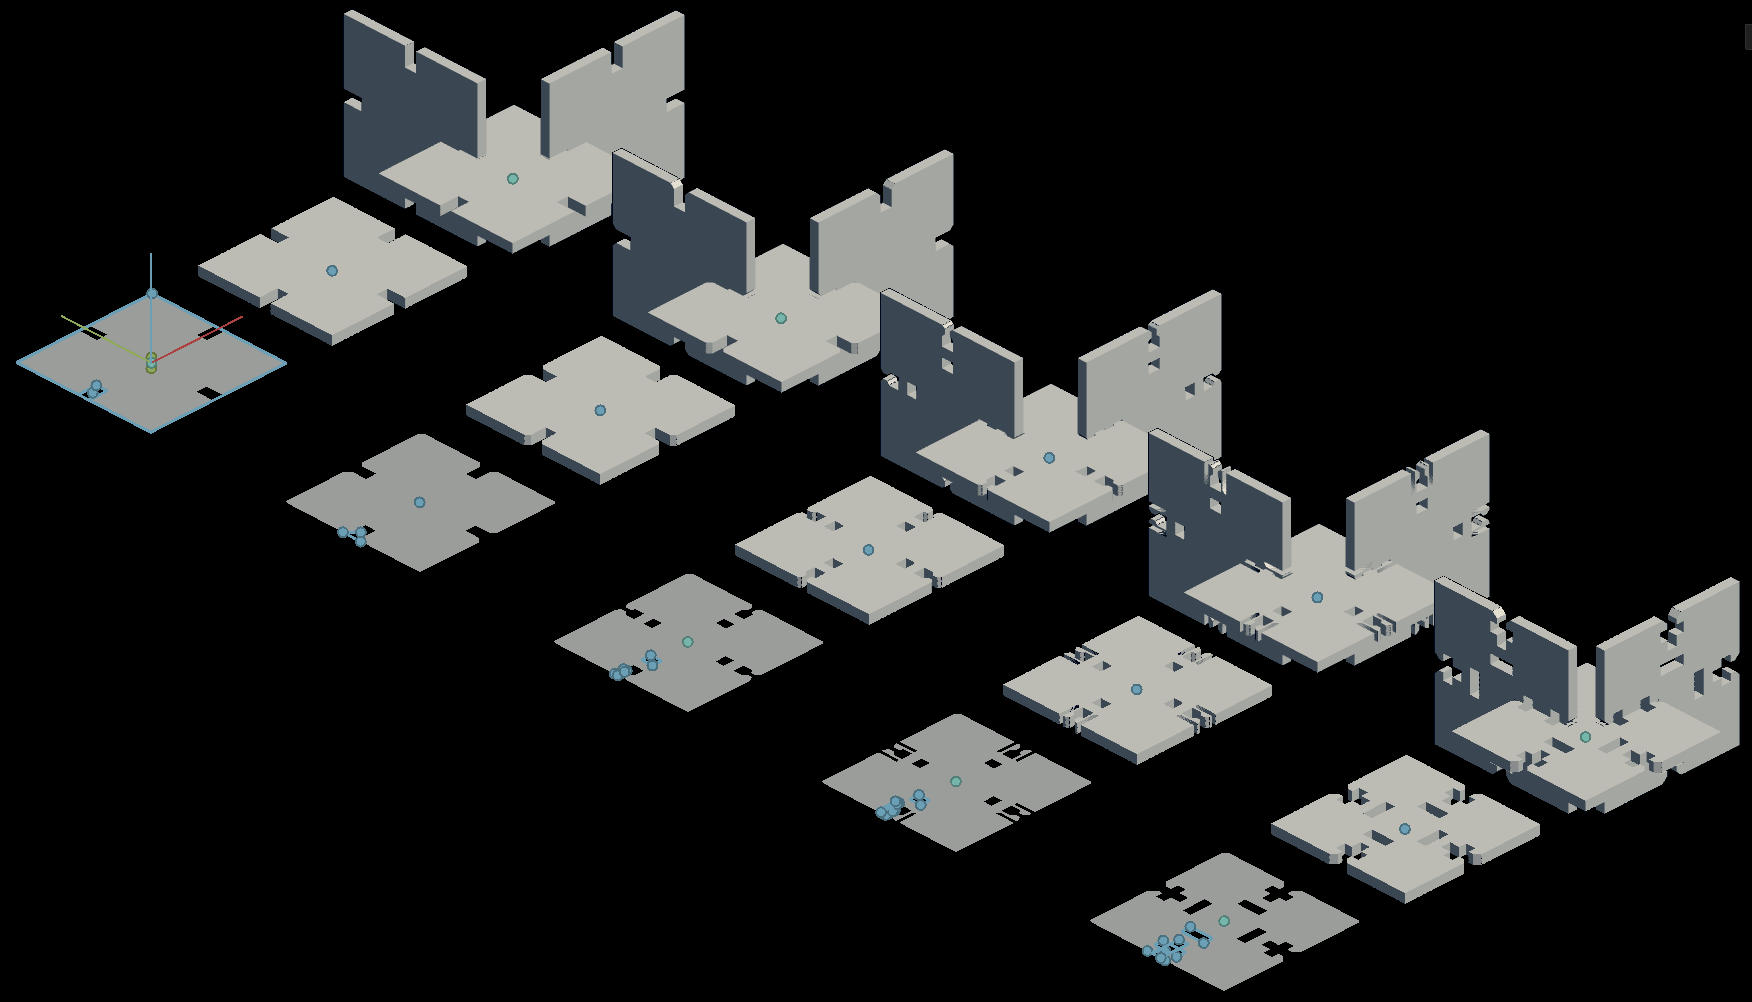
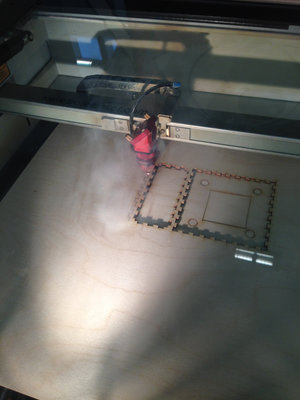
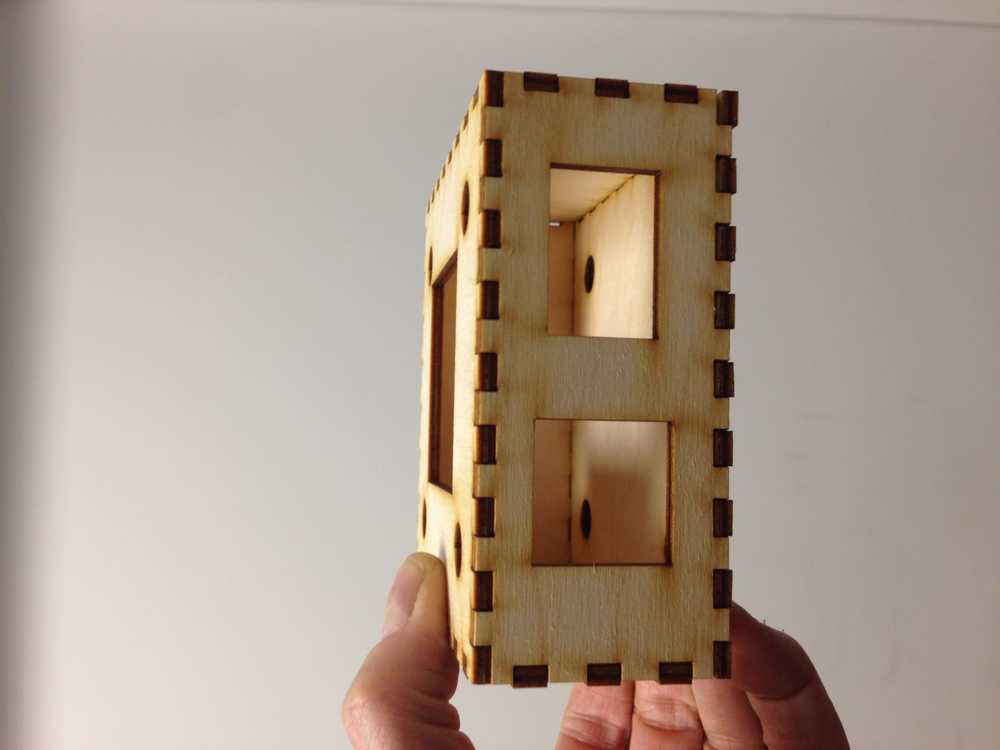
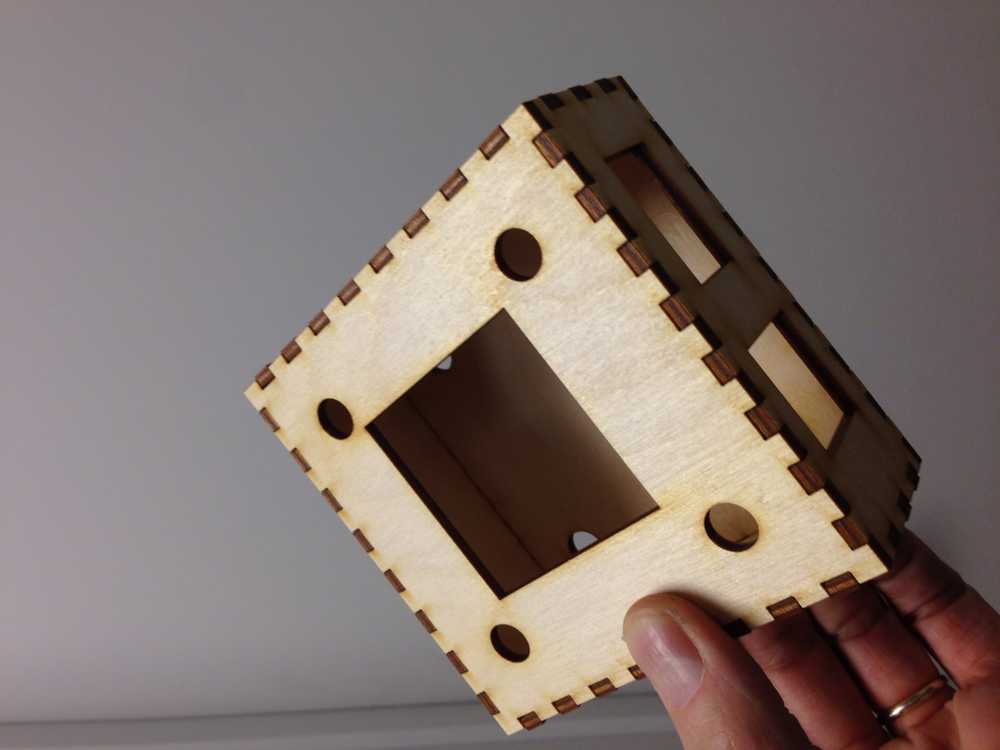
- Cut and build a 3D box for my capstone projet. I started from an existing Inkscape extension and I updated it to make it ever more parametric. I added some features, like optional rectangular openings and optional holes on some faces. It "can be assembled in multiple ways" : using my updated script, you can create a wide range of 3D boxes, with a variable number of faces. The joinery type can be updated as well.
- My "press-fit construction kit" deliverable for this week is a set of 3D box that can be linked together (using wood "keys". The "keys" are the small parts that look like podiums and that specific part fits the "press-fit" requirement) and arrange as per use whishes. According to the instructions, it has be parametric and designed in a way it can be assembled multiple ways.It is "parametric" : the vectors are generated by a script and the script depends on many parameters (box size, type, ..) . There are four different sizes that can be stacked together.
 Click here to download Inkscape file and customized extensions
#3 - Group assignment - characterize the lasercutter, making test part(s)that vary cutting settings and dimensions
References
Lecture
This week is about using the vinyl cutter and the laser cutter/engraver
Important note regarding security
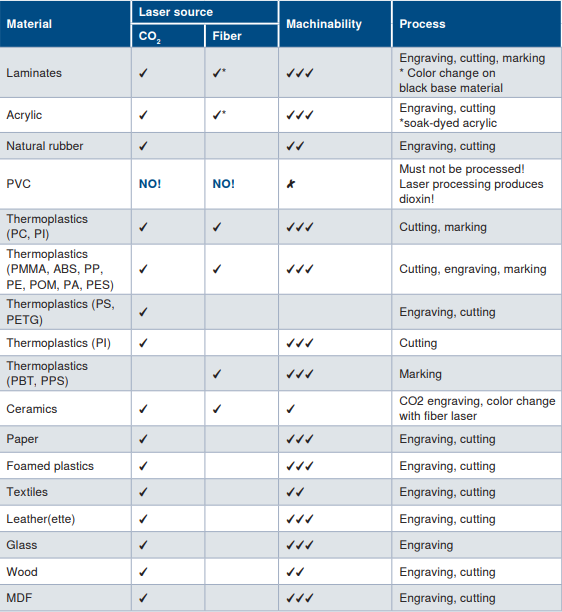
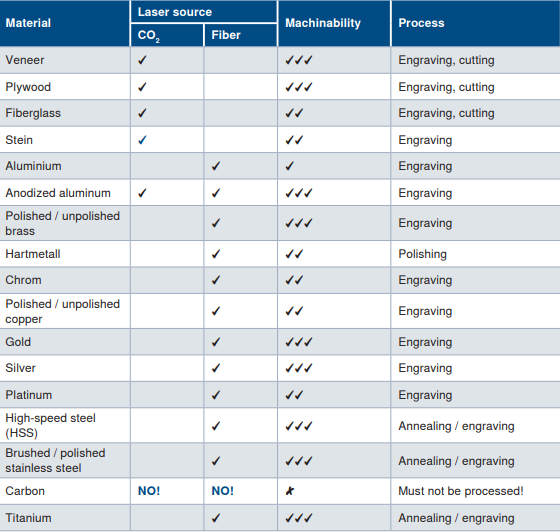
Not all materials are supported on a laser/engraver. Sometimes it may not work but in other cases it will be hazardous. PVC for example is really dangerous, it creates toxic fumes. See here for a list of supported materials.
Laser can be extremely hazardous, depending on power and depending on the way they are integrated in devices. With Trotec devices, we are in good hands. See here for more information on this.
Laser cutting is basicaly a "controlled fire". But it is still a fire.. and if something goes wrong (like a device failure, bad parameters, .. ) there is a risk of propagating the fire to the entire room. That's why laser cutters should never left unattended.
A good exhaust system is essential for the safe and clean operation of your laser device. Dust and gas must be removed from the processing area. Furthermore, an exhaust system filters out smells produced during laser processing. In addition, exhaust systems ensure the quality of your lasered end products. The correct removal of dust and gases protects your materials from contamination.
Vinyl cutter user manual
Click here.
Laser cutter/engraver user manual
Click here to download the Trotec Speedy 300 documentation.
Topics covered (course) Video recording (course) Students and Labs My filesLearnings
Create a colorfull logo using the vinyl cutter
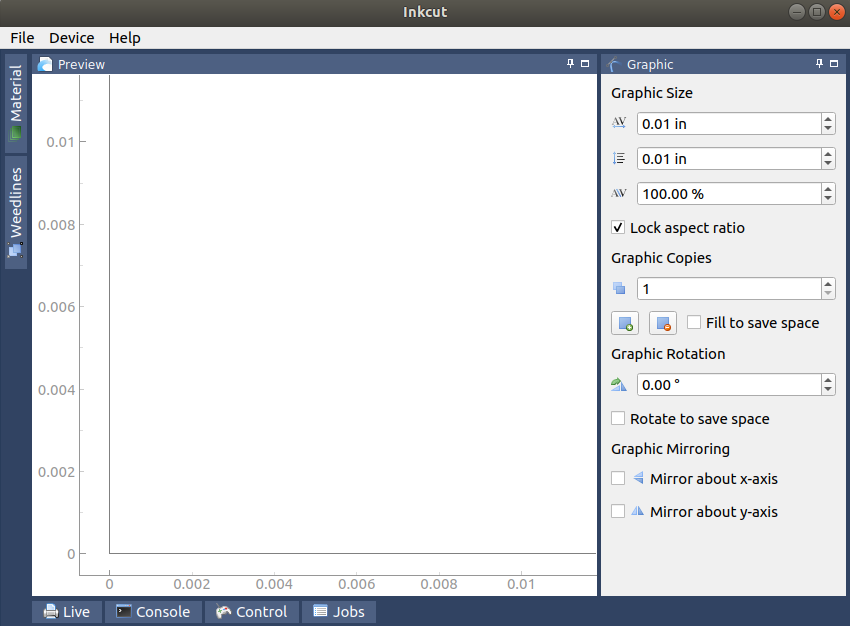
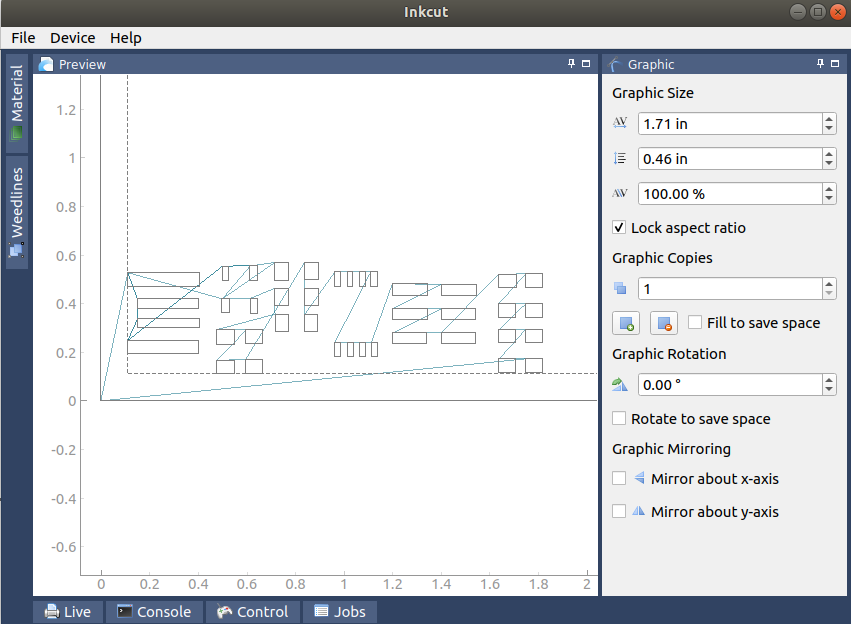
Inkcut (click here for more information) is a nice tool that helps to drive most of the vinyl cutters without the software provided by the manufacturer. InkCut can be installed standalone or as an InkScape extension. To install it standalone, just enter: apt-get install python3-pip python3-pyqt5 libcups2-dev and then pip3 install inkcut. To start the app in a terminal, just enter: inkcut and here it is...
Then open a SVG file. I loaded the one I prepared last week but colors are not separated
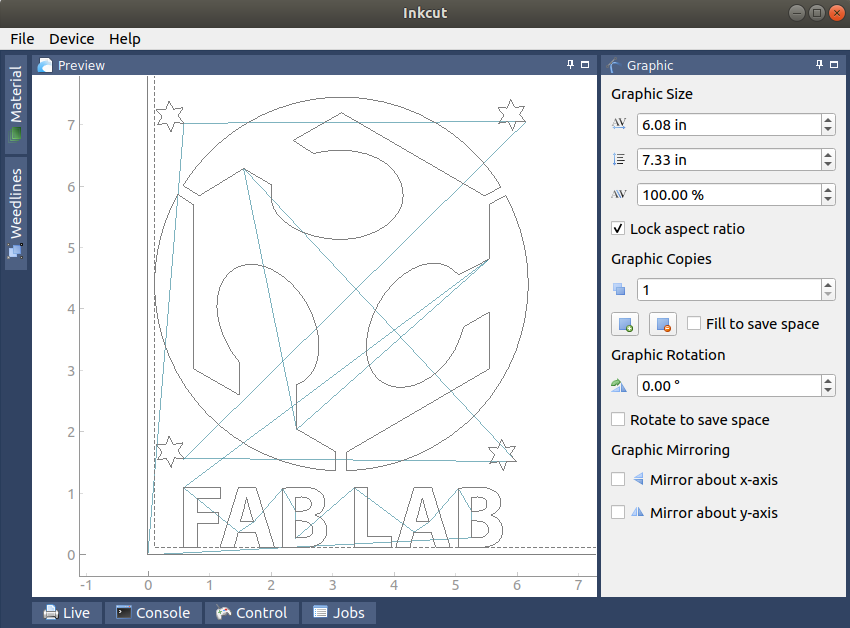
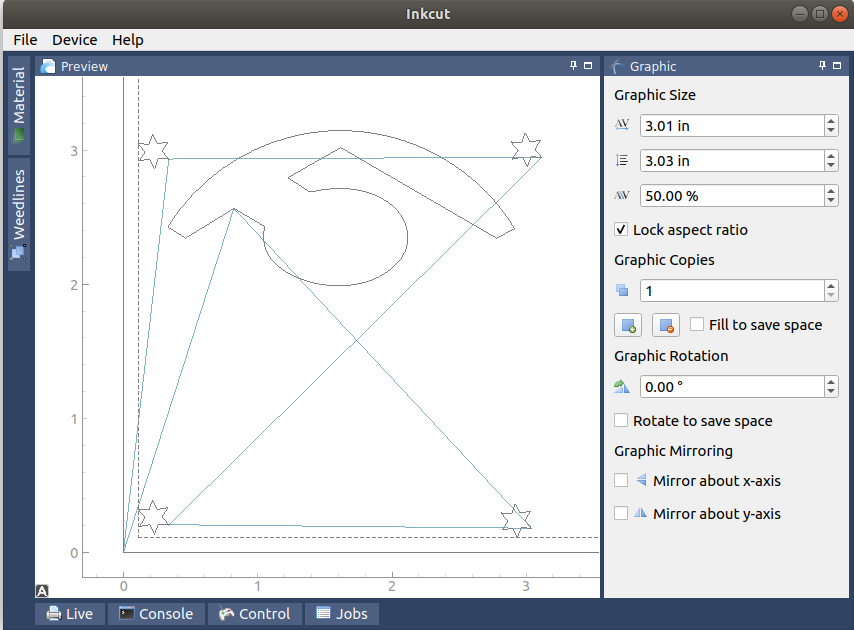
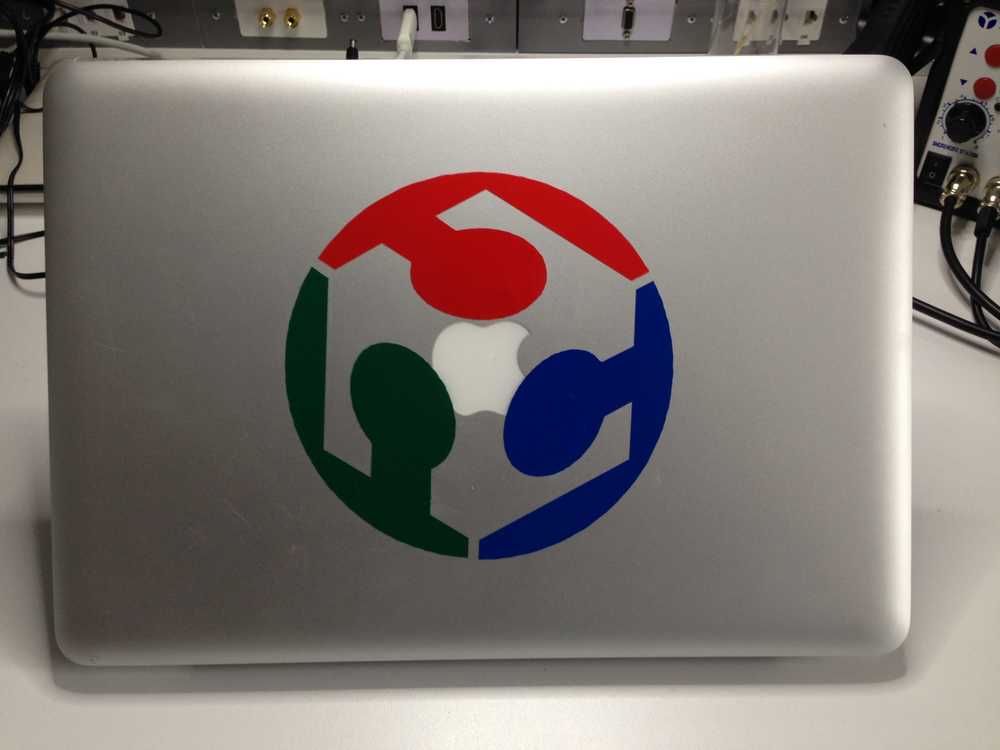
I have to create one file per color I want to feed on the cutter. Here is how it look when I select the red color only (see last week post for more info on how to do it). Note: the original is around 6" width, I scaled it down to 50% to fit to my laptop cover lid.
Then open a SVG file. I loaded the one I prepared last week but colors are not separated, I have to create one file per color I want to feed on the cutter. Here is how it look
The next step is to configure the device/driver. It looks the model we have in the lab is not listed but there is a generic Driver
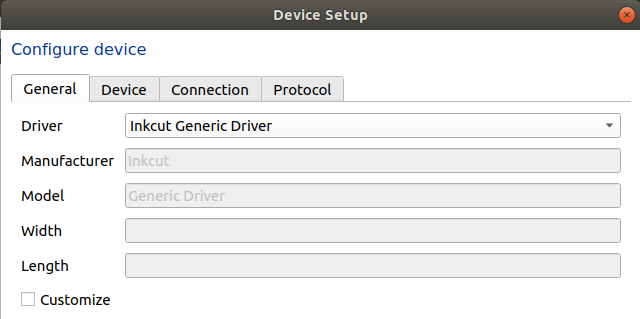
Last step it to send it to the vinyl cutter. And here is when everything started to collapse.. The first issue was the InkCut device configuration. InkCut knows two Roland Vinyl cutter... but not the one we have in the Lab. Using the generic driver did not help. Something was cut.. but not identical to the drawing. Lines that should represent the movements between two points (in color on the picture) were actually cut for real
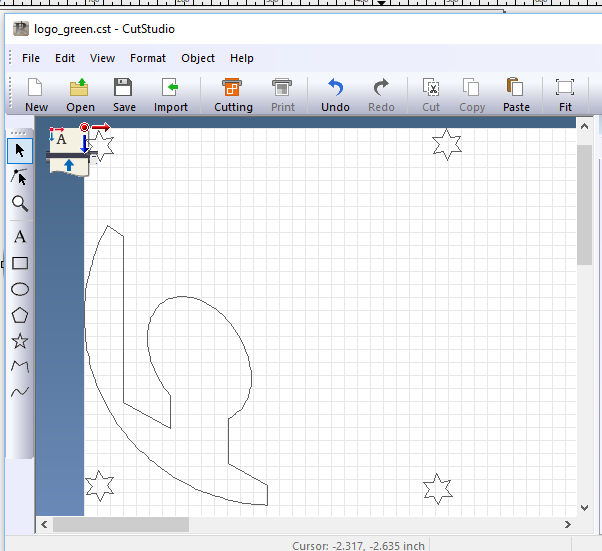
Plan B was to try with the SW provided by Roland, unfortunately it runs on Windows only. I followed the instructions I found here TODO add link to Francois web site .
Under Windows, using the proprietary driver and application, the device GS-24 was detected. But another issue popped-up: my drawings were not pure vectors and I struggled to fix them but finaly it worked.. In fact, I hope it work...
Create a stencil using the vinyl cutter
(from this site) Solder paste stencils are used to apply solder depots on printed circuit boards with a screen printing technique. SMD components (SMD = surface mounted device) are placed within these depots subsequently and soldered with a following reflow- or vapor phase process. The quality of the finished assembly is influenced by the SMD-Stencil used. The size of the apertures (openings), and thickness of the stencil determine the amount and shape of the applied paste. The purpose of the SMD-Stencil is:
- Precise application of the needed material (solder paste, glue)
- Creation of depots defined in shape and size
- Reproducibility of the print
- Effective cleaning of the pads
- Economy
Stencil thikness depends on smallest components used. The standard thickness is 150μm. Stencil are usualy in metal and they can last for thousands of builds. Not practical when you just want to manufacture a few boards.
Next week, we will manufacture our first board. I basicaly plan to follow the great tutorial on Sparkfun site. They suggest "4mil stencils for larger 0805-1206 parts"
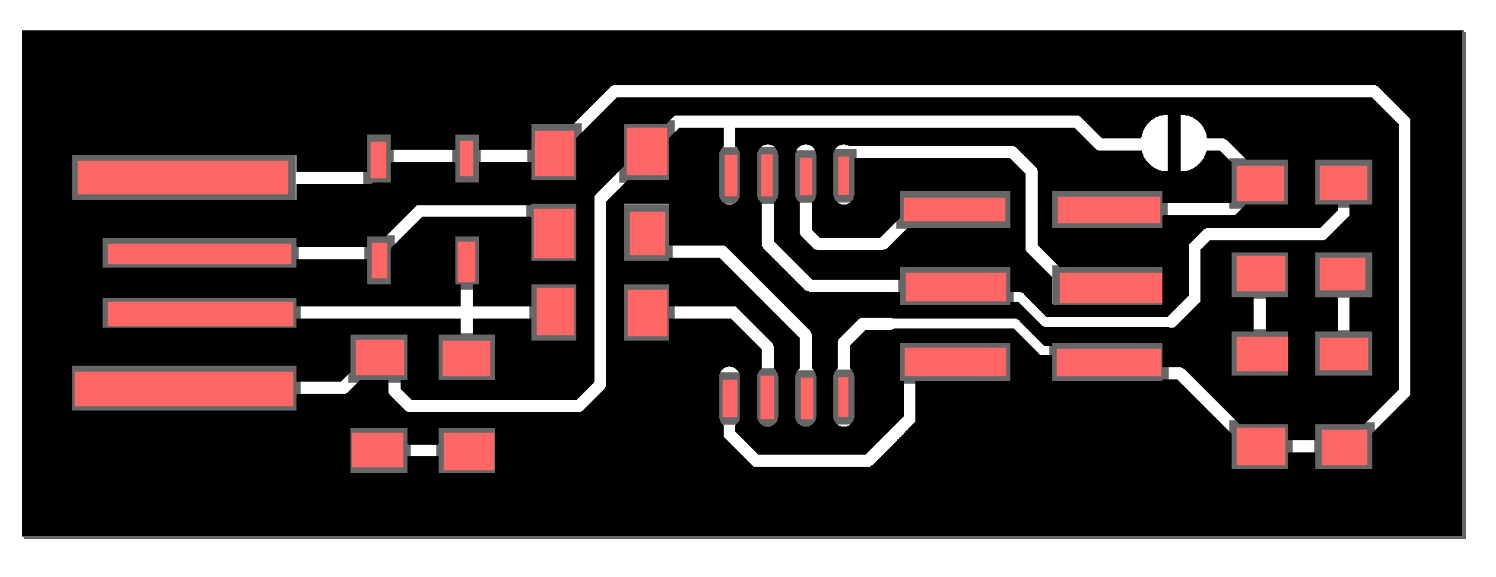
This week, I'm focussing on the stencil only. I found the project files (traces) here and this is my starting point to create the stencil.
After having loaded the file in InkScape (in a layer named "traces", I added another layer (named "cream"). On that layer, I traced (using the rectangle tool) every place I want to put solder. Here are the steps:
- Import
- Edit, Resize to selection
- View, Zoom to drawing
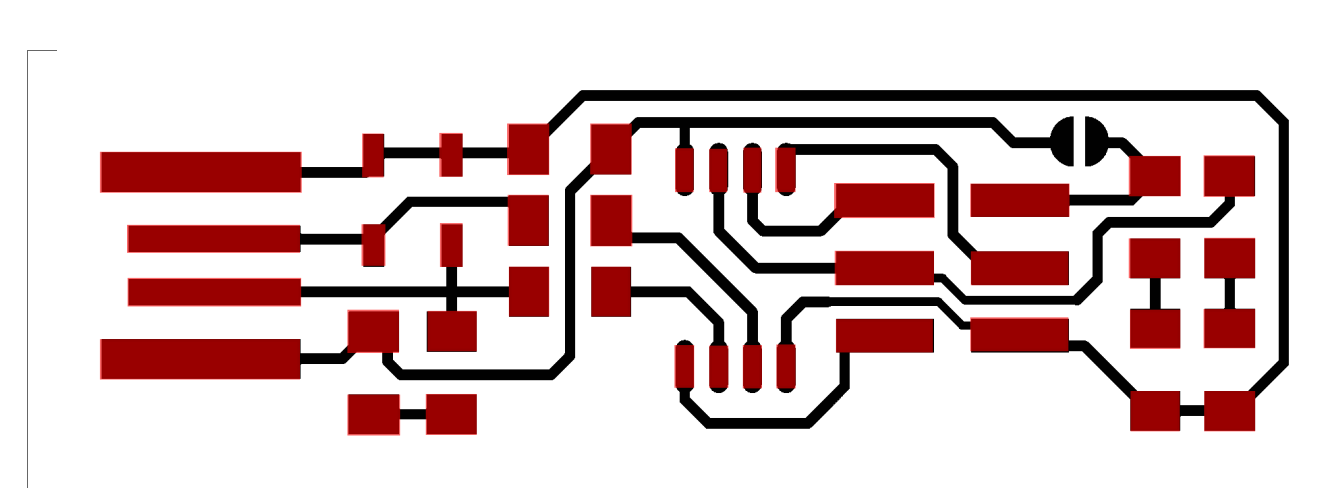
- Filters, Color, Invert
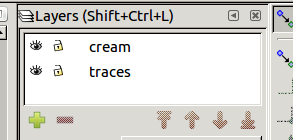
- Add layer (named "cream")
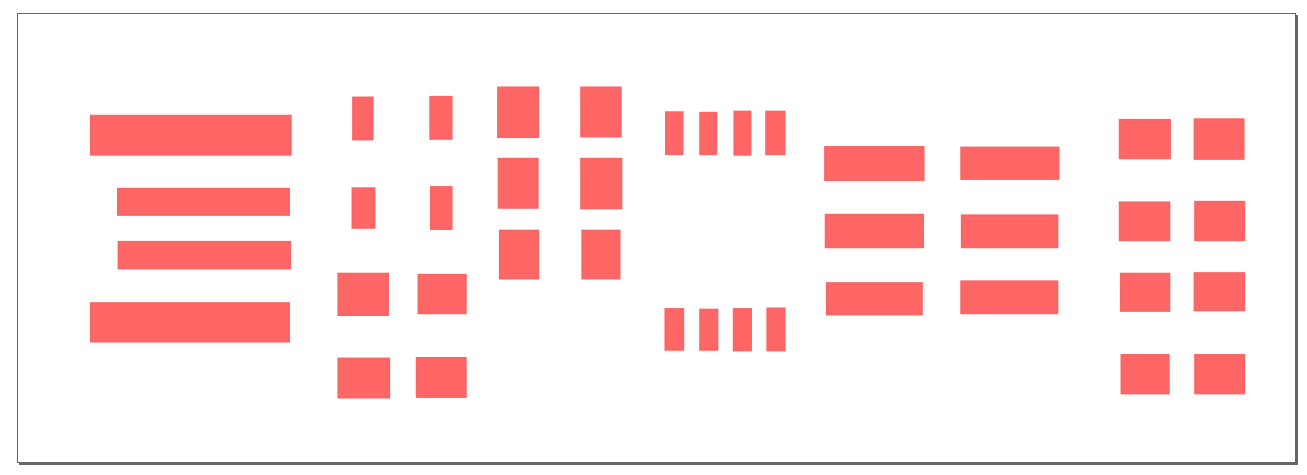
- On the "cream" layer, draw a rectangle for each solder spot
- Save a document that contains the "cream" layer only
- Open it with InkCut
Last step it to send it to the vinyl cutter. And here is when everything started to collapse.. The first issue was the InkCut device configuration. InkCut knows two Roland Vinyl cutter... but not the one we have in the Lab. Using the generic driver did not help. Something was cut.. but not identica to the drawing
Plan B was to try with the SW provided by Roland, unfortunately it runs on Windows only. I followed the instructions I found here TODO add link to Francois web site .
Under Windows, using the proprietary driver and application, the device GS-24 was detected. But another issue popped-up: my drawings were not pure vectors and I struggled to fix them but finaly it worked
The Lion King engraving project
Last week, I prepared a "pixelated" drawing of the Lion King. "Pixelate" means to blur (a video image) by overlaying it with a grid of squares/circles, usually to disguise the identity of a person.
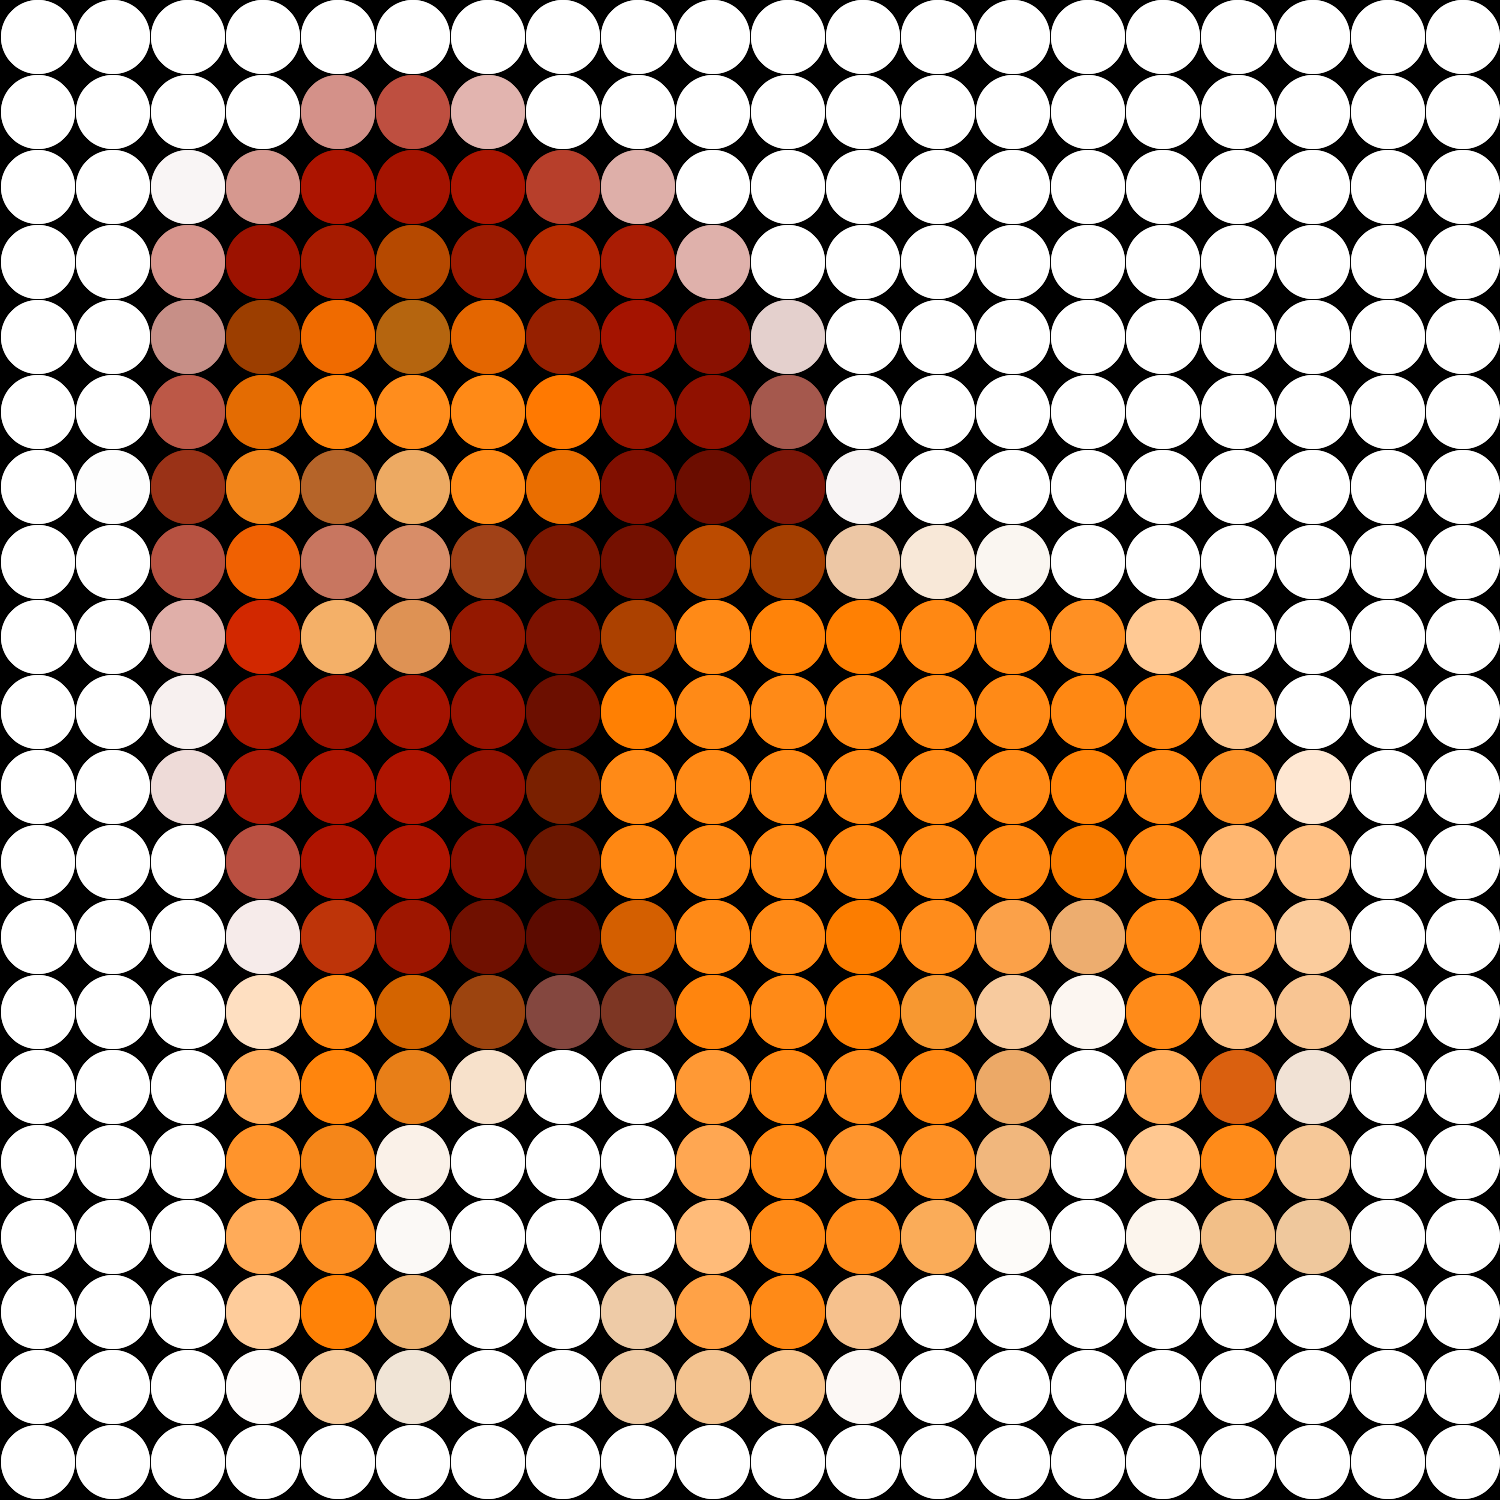
Now, I want to engrave it on wood using the Trotec laser engraver.
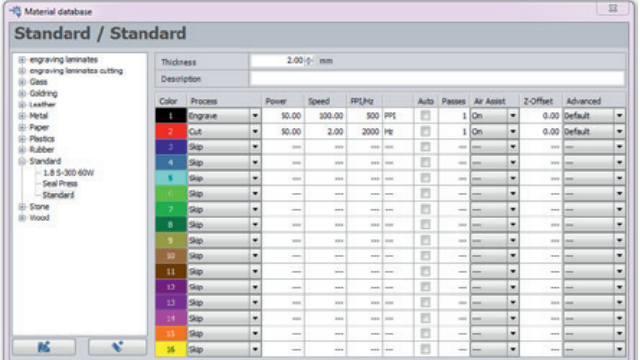
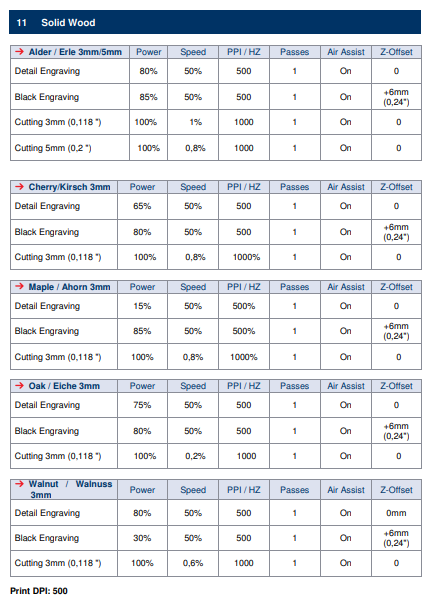
The engraver uses colors to determine how deep it has to burn a given area. Red color, by convention, means "pass-through", i.e cut the material. Here is an example of the settings:
Here are a few advices I found in Trotec user manual (for wood engraving jobs):
- When you engrave soft wood, e.g. poplar, you will achieve a deep engraving with relatively low contrast. Here we recommend that you defocus, which adds contrast to the engraving. In general, contrast levels in wood engravings can be influenced by defocussing, depending on the type of wood and the lens, it should be possible to defocus by 5 to 10 mm without any problems. The finer the details, the shorter the focal length of the lens should be. As a rule 1.5” or 2” lenses are suitable for almost any laser engraving on wood
- Soft woods always have hard and soft growth rings, which influence engraving results. Deciduous hardwood is therefore better suited for engraving than conifers. The more uniform the grain of a wood species is, the better the engraving will show up. Of course, you can consciously choose to use the natural structure of the wood
- Paulownia is a Southeast Asian type of wood and is ideal for laser processing because the wood is bright and has a uniform grain. In addition, it is a very light and stable wood, which can be found in well-stocked hardware stores..
- Applymasking tape to the desired processing surface and you can engrave and cut through the tape without problems. Then just pull it off and remove unsightly traces of smoke residues at the same time.When selecting masking tapes ensure that they are made of PVC-free material and removable. Masking tapes are available from different manufacturers, such as 3M. For smaller areas you can also use commercial painter’s masking tape from your local hardware store. When selecting masking tapes ensure that they are made of PVC-free material and removable.
- Speedy Lasers can be equipped with different lens.A general rule of thumb is: The more detailed the graphics, the shorter the focal length used during laser engraving. The thicker the material to be laser cut, the greater the focal length. By default, here is what is installed on a Speedy 300 model:

- Use the right table for every application: In laser engraving, cutting or marking the evenness of the processing table is an essential criterion for optimal results, since it is a prerequisite to achieving correct focus across the entire surface. Consequently, the processing table is very robust and perfectly flat as well as being ferromagnetic across its entire surface. This means that you can easily fix thin materials, such as paper or foils in place using magnets.
- The laser from the Speedy 300 at echoFab is a 60 watts CO2 laser. See here for more information regarding machine parameters. Here are the parameters for wood material:
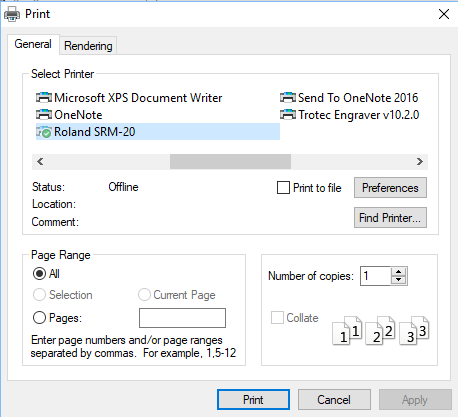
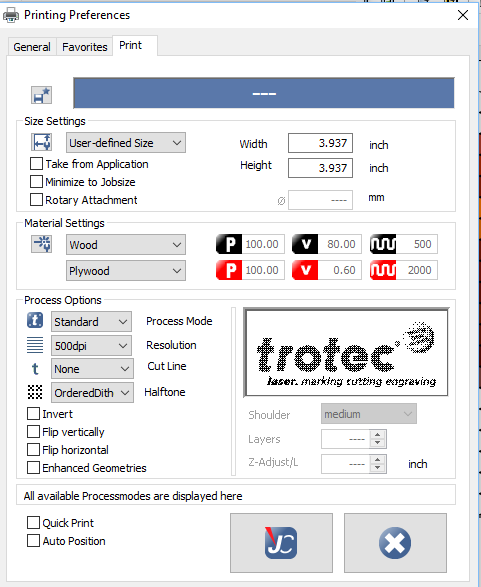
The next step is to send the project (SVG) to Trotec Job Control application. Unfortunately, it runs on Windows only but the good news is that InkScape is multiplatform. After a reboot on Windows partition, launch InkScape and load your project. Then it is as simple as printing to a conventional printer. Here is how the UI looks like
Projects are added to the Trotec Job Control application. Here is an example...
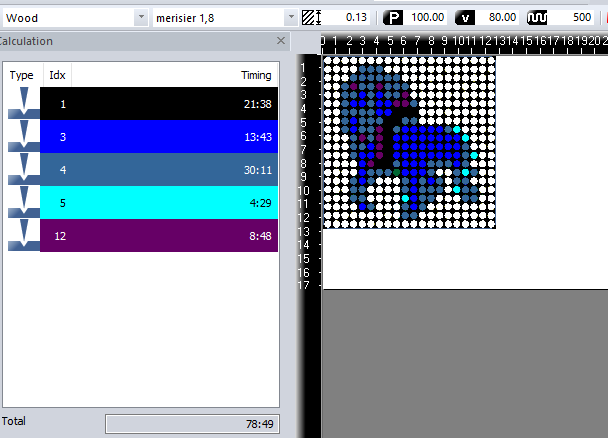
At the time I wrote this sentence, the result was not yet perfect. As you can see on the picture above, Trotec software "interprets" the original colors and "maps" them to the set of standard colors supported in their configuration. Each color has in turn a mapping to a speed and power. The trick is, despite the face that the color looked mapped well, the physical rendering was to great, i.e white and black where well rendered but all other colors were rendered without nuances. I'm still investigating what the root cause could be. Stay tuned ...
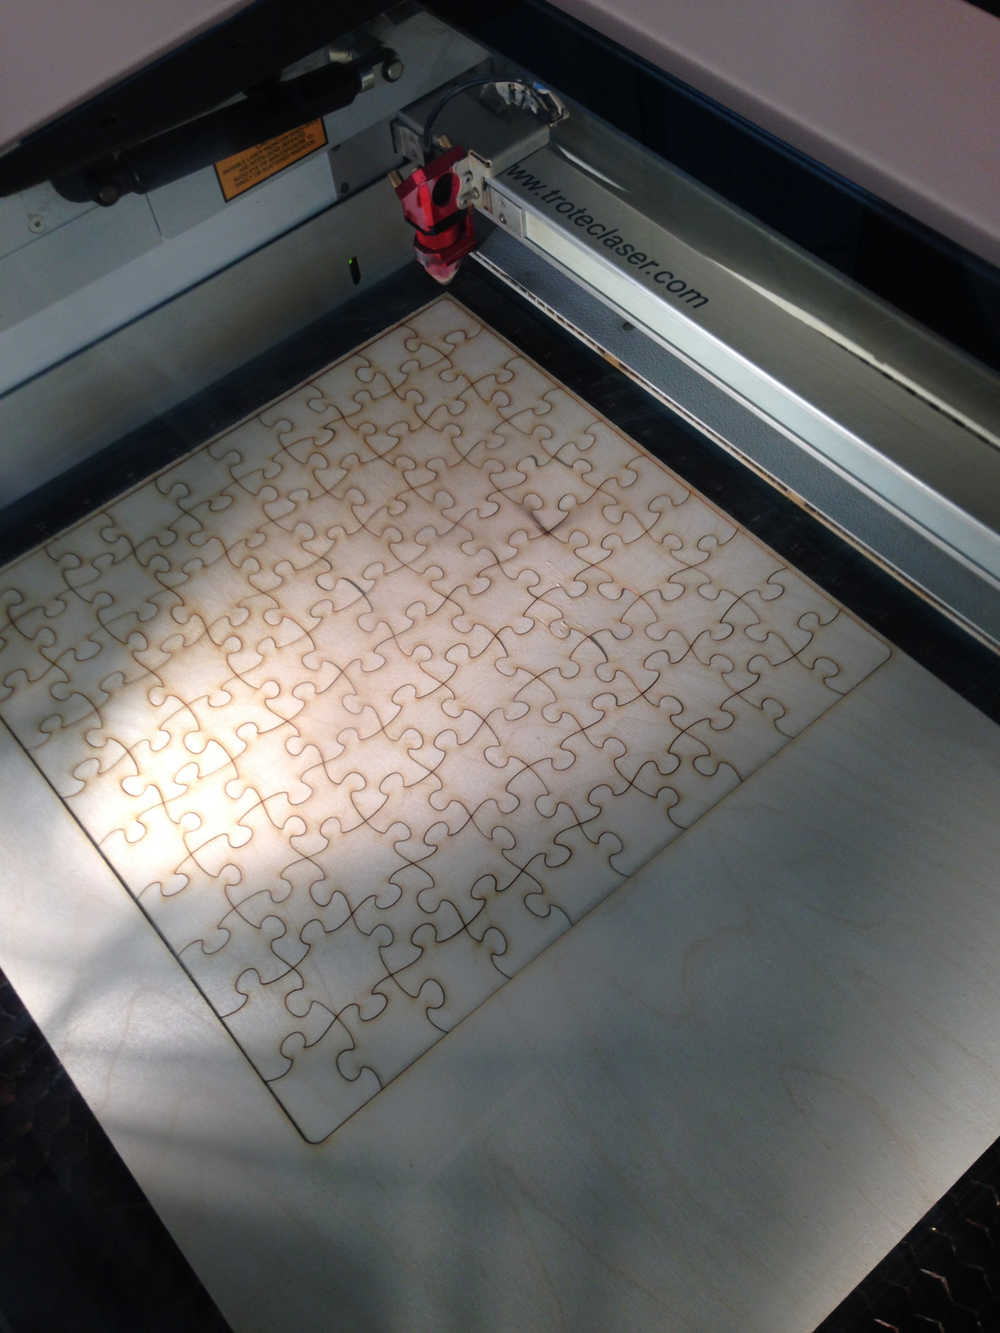
The 100 parts jigsaw
This project is about using the laser to cut, not only to engrave. My intent is not to design something new but more to learn more on the laser cutter. The output will be a jigsaw version of the Lion King project presented just before.
Here are a few advices I found in Trotel user manual (for wood cutting jobs):
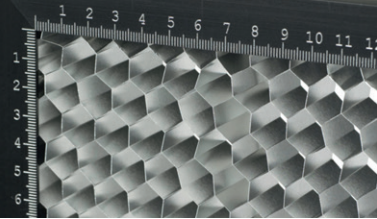
- When cutting wood please be aware that the material tends to get marked easily by smoke residues. Therefore, it is important to work at high speed (about 1-2%, depending on the material). Optimal results are achieved at low frequency, with a small lens and nozzle and activated Air Assist. As for almost all cutting projects, a honeycomb table is required (depending on application size).
- Preparing graphics: it must always be vectors, with a line width set to "hairline" and color set to "red"
- The fine honeycomb table provides greater stability thanks to more support points. Furthermore, very small parts, for example in model construction applications, can be processed more successfully using the fine honeycomb top as parts cannot fall between individual honeycombs as easily.
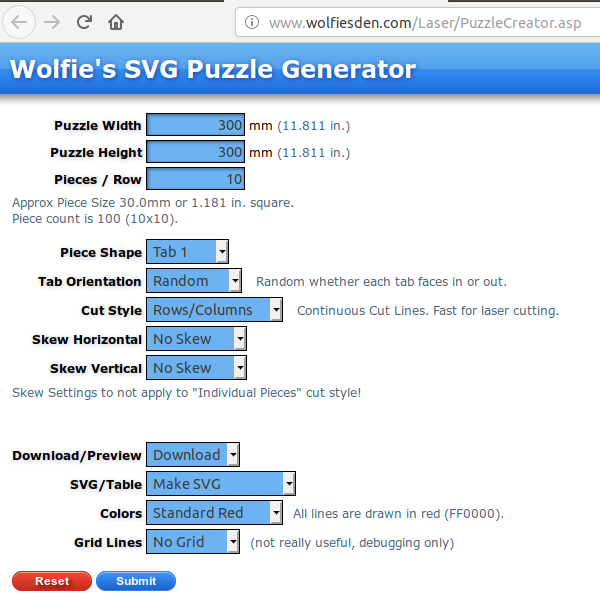
How to generate the jigsaw pattern ? I found out tools that do a great job in generating jigsaw parts:
- The first one is an online tool named Wolfie. The tools generates a SVG file you can use later with standard editing tools like InkScape.
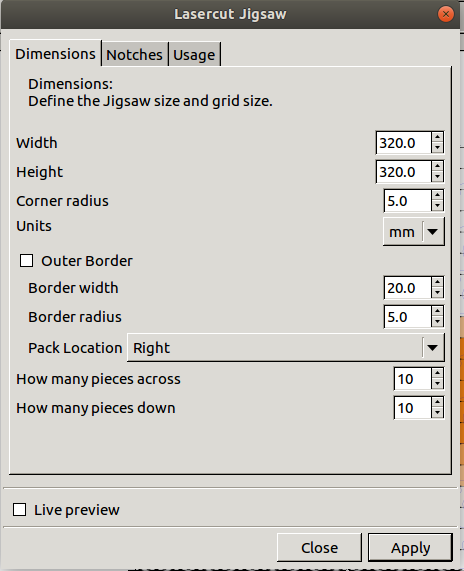
- The second one is an Inkscape extension named... jigswa Inkscape extension
- I found this tutorial as well, only available in french.
I used the InkScape extension. To install it, just get the zip file and save the files to your Inkscape extensions folder.
Using Inkscape, create a new document, with two layers: "engrave" and "cut". Import the Lion King drawing into the first layer. then, use the extension (Extesnions, Render, Laser cut jigsaw) with the following parameters on the second layer to create the jigsaw:
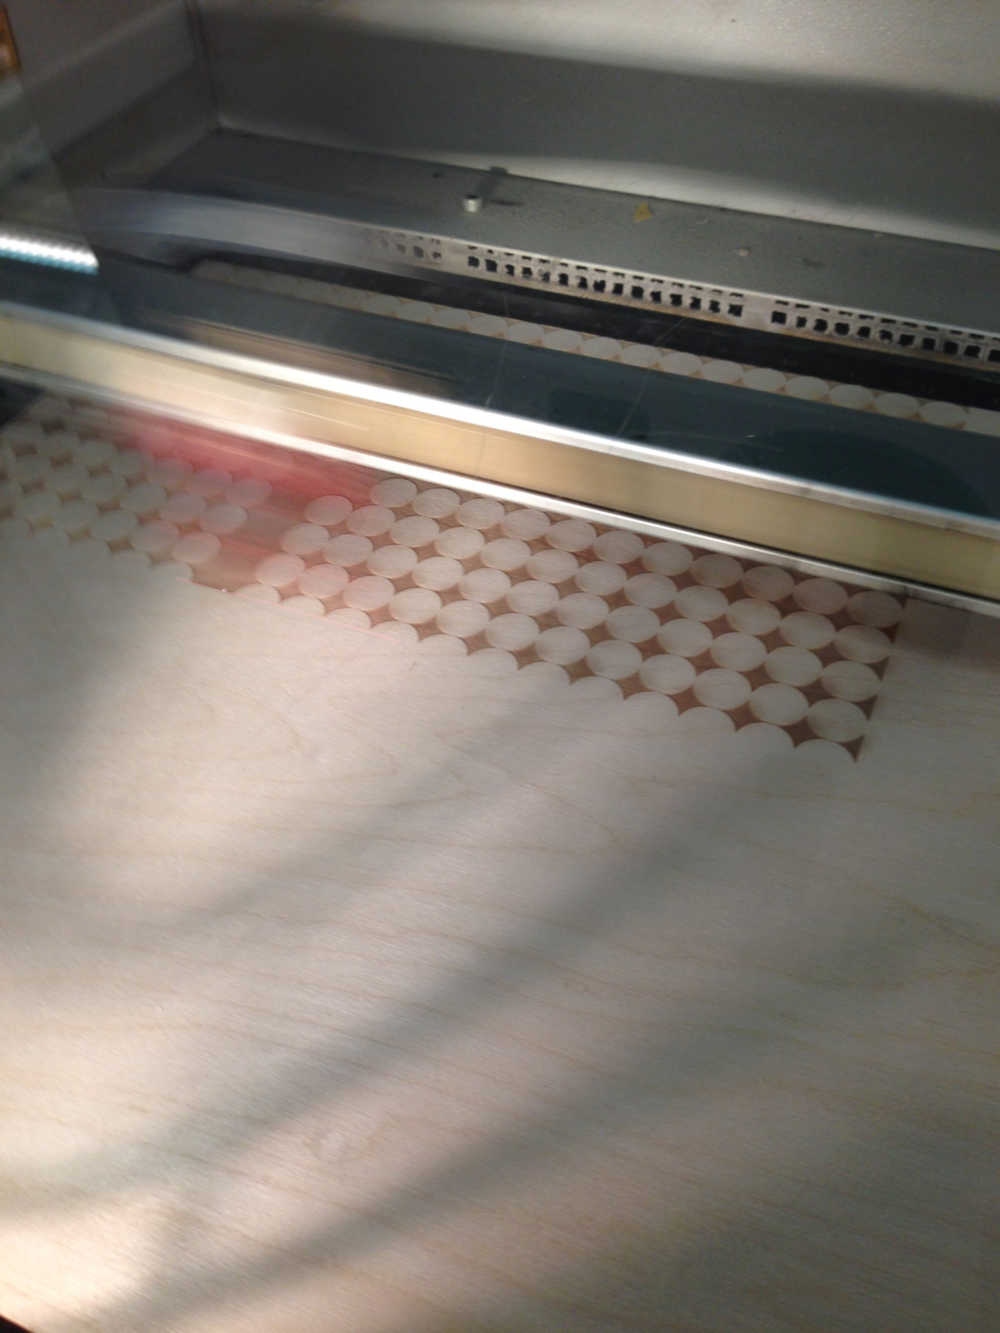
And here is the output (with and without the drawing on the top):

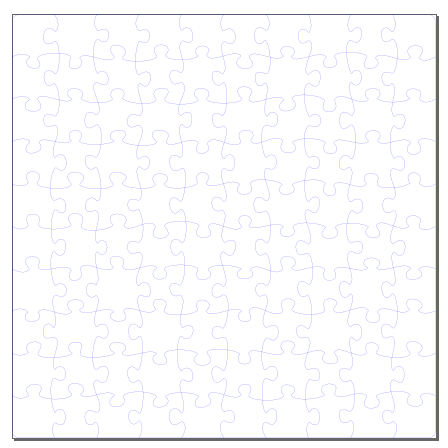
The next step is to set red color for the jigsaw, since it means "cut" by convention on the laser cutter.
Note: there is no so much use to create a jigsaw without any image on it. This was not intentional. I still have issues with the image engraving, that's why I divided the problem in two. Once the rendering will be ok, the idea is to process with engraving first and then to run the cutting job just after.
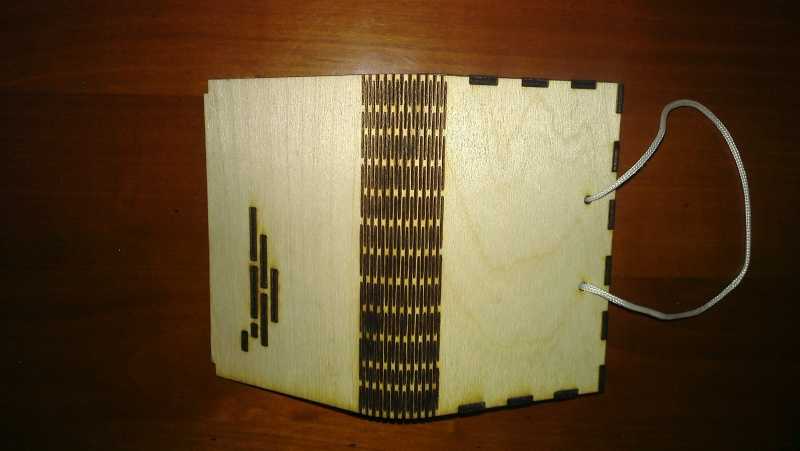
Creating flexible hinges using A LASER CUTTER
I found out another extension that looks promising. This extension creates cut lines to make a living hinge when laser cutting material. Options include the length of the cuts, the separation between sequential cuts, and the separation between adjacent cuts. I missed time to use it for real on the laser cutter but here is an output sample
Achievements
Viny cutter
I learned how to use a vinyl cutter to create a logo
Viny cutter
I learned how to use a vinyl cutter to create a stencil and to use it later in a reflow process
Laser cutter
I learned how to use a laser cutter to engrave on wood
Laser cutter
I learned how to use a laser cutter to cut wood and to create a jigsaw and a wood enclosure
Capstone
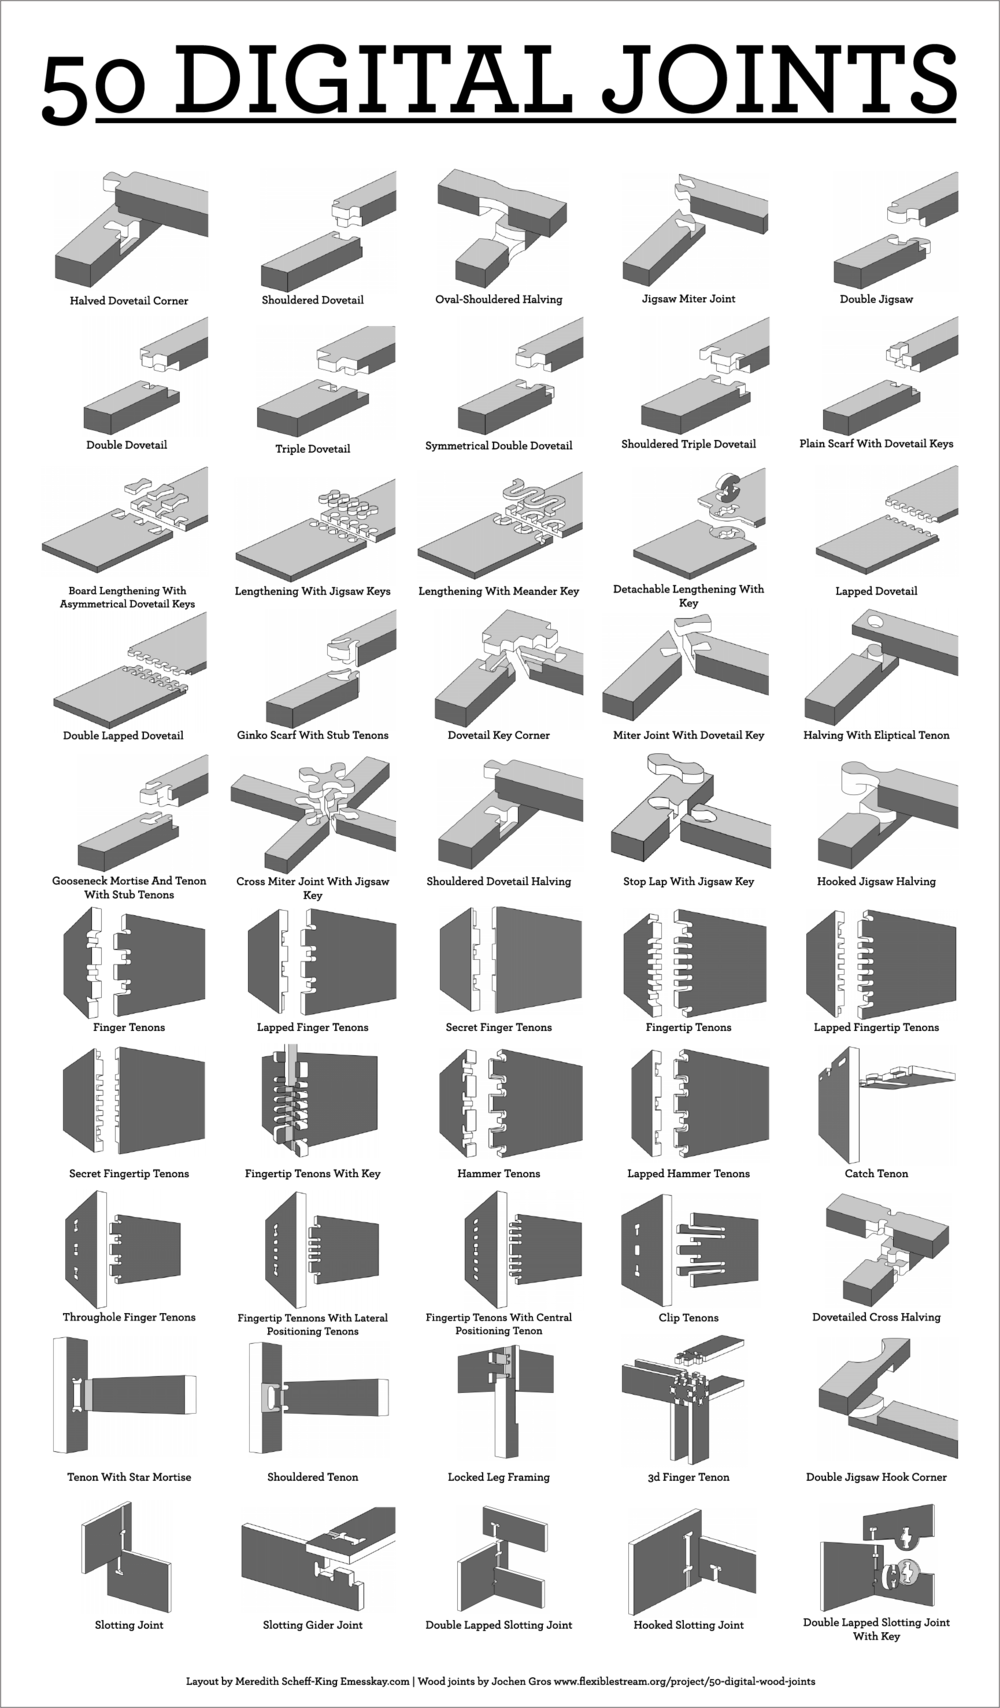
3D boxes and joinery
There are many options to create joints, like shown here:
That guy did a quite impressive job of explaining different options (not only for laser but also for big CNC and, as he wrote, "The secret to good joinery is determining the proper amount of tolerance". And "tolerance" vary from one material to another. Do not even think about forcing steel..
Starting from the design I prepared and explained last week , I manufactured a first version of my parametric enclosure.
Here is my starting point

First attempt: a press-fit wood enclosure TODO : show output
Security
Laser classes
Depending on their performance and the risk of injury for eyes and the skin therein, laser machines are divided into internationally valid safety classes. Class 1 has the highest safety, while lasers of class 4 can emit laser radiation. For these class 4 lasers, it's necessary to wear protective equipment like protection goggles. The closed flat bed laser machines (like the Speedy 300) are in laser class 2. Why only laser class 2? Because laser pointers are built into Trotec devices, showing the user where the laser will touch the material. According to international standards, any laser pointer that has an output of less than one milliwatt goes in laser class 2. Protection from the laser is provided through cladding elements, side covers, a front hood and a protective cover. These covers have interlock safety switches built in. If any interlock-secured cover is opened, a signal is sounded and the laser machine will immediately interrupt the laser process. This ensures that the user is totally protected at all times.
List of materials you can use with your laser cutter/engraver
The model we use in the Fab Lab is a Trotec Speedy 300, with a CO2 laser