
Machine Design.
Personal Contribution
For this week, is time to actuate and automate the machine. My personal contribution was the integration between the software and the CNC board.
Board
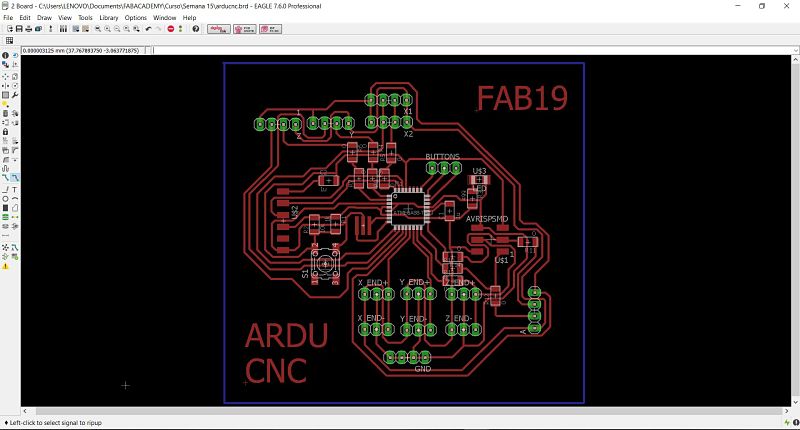
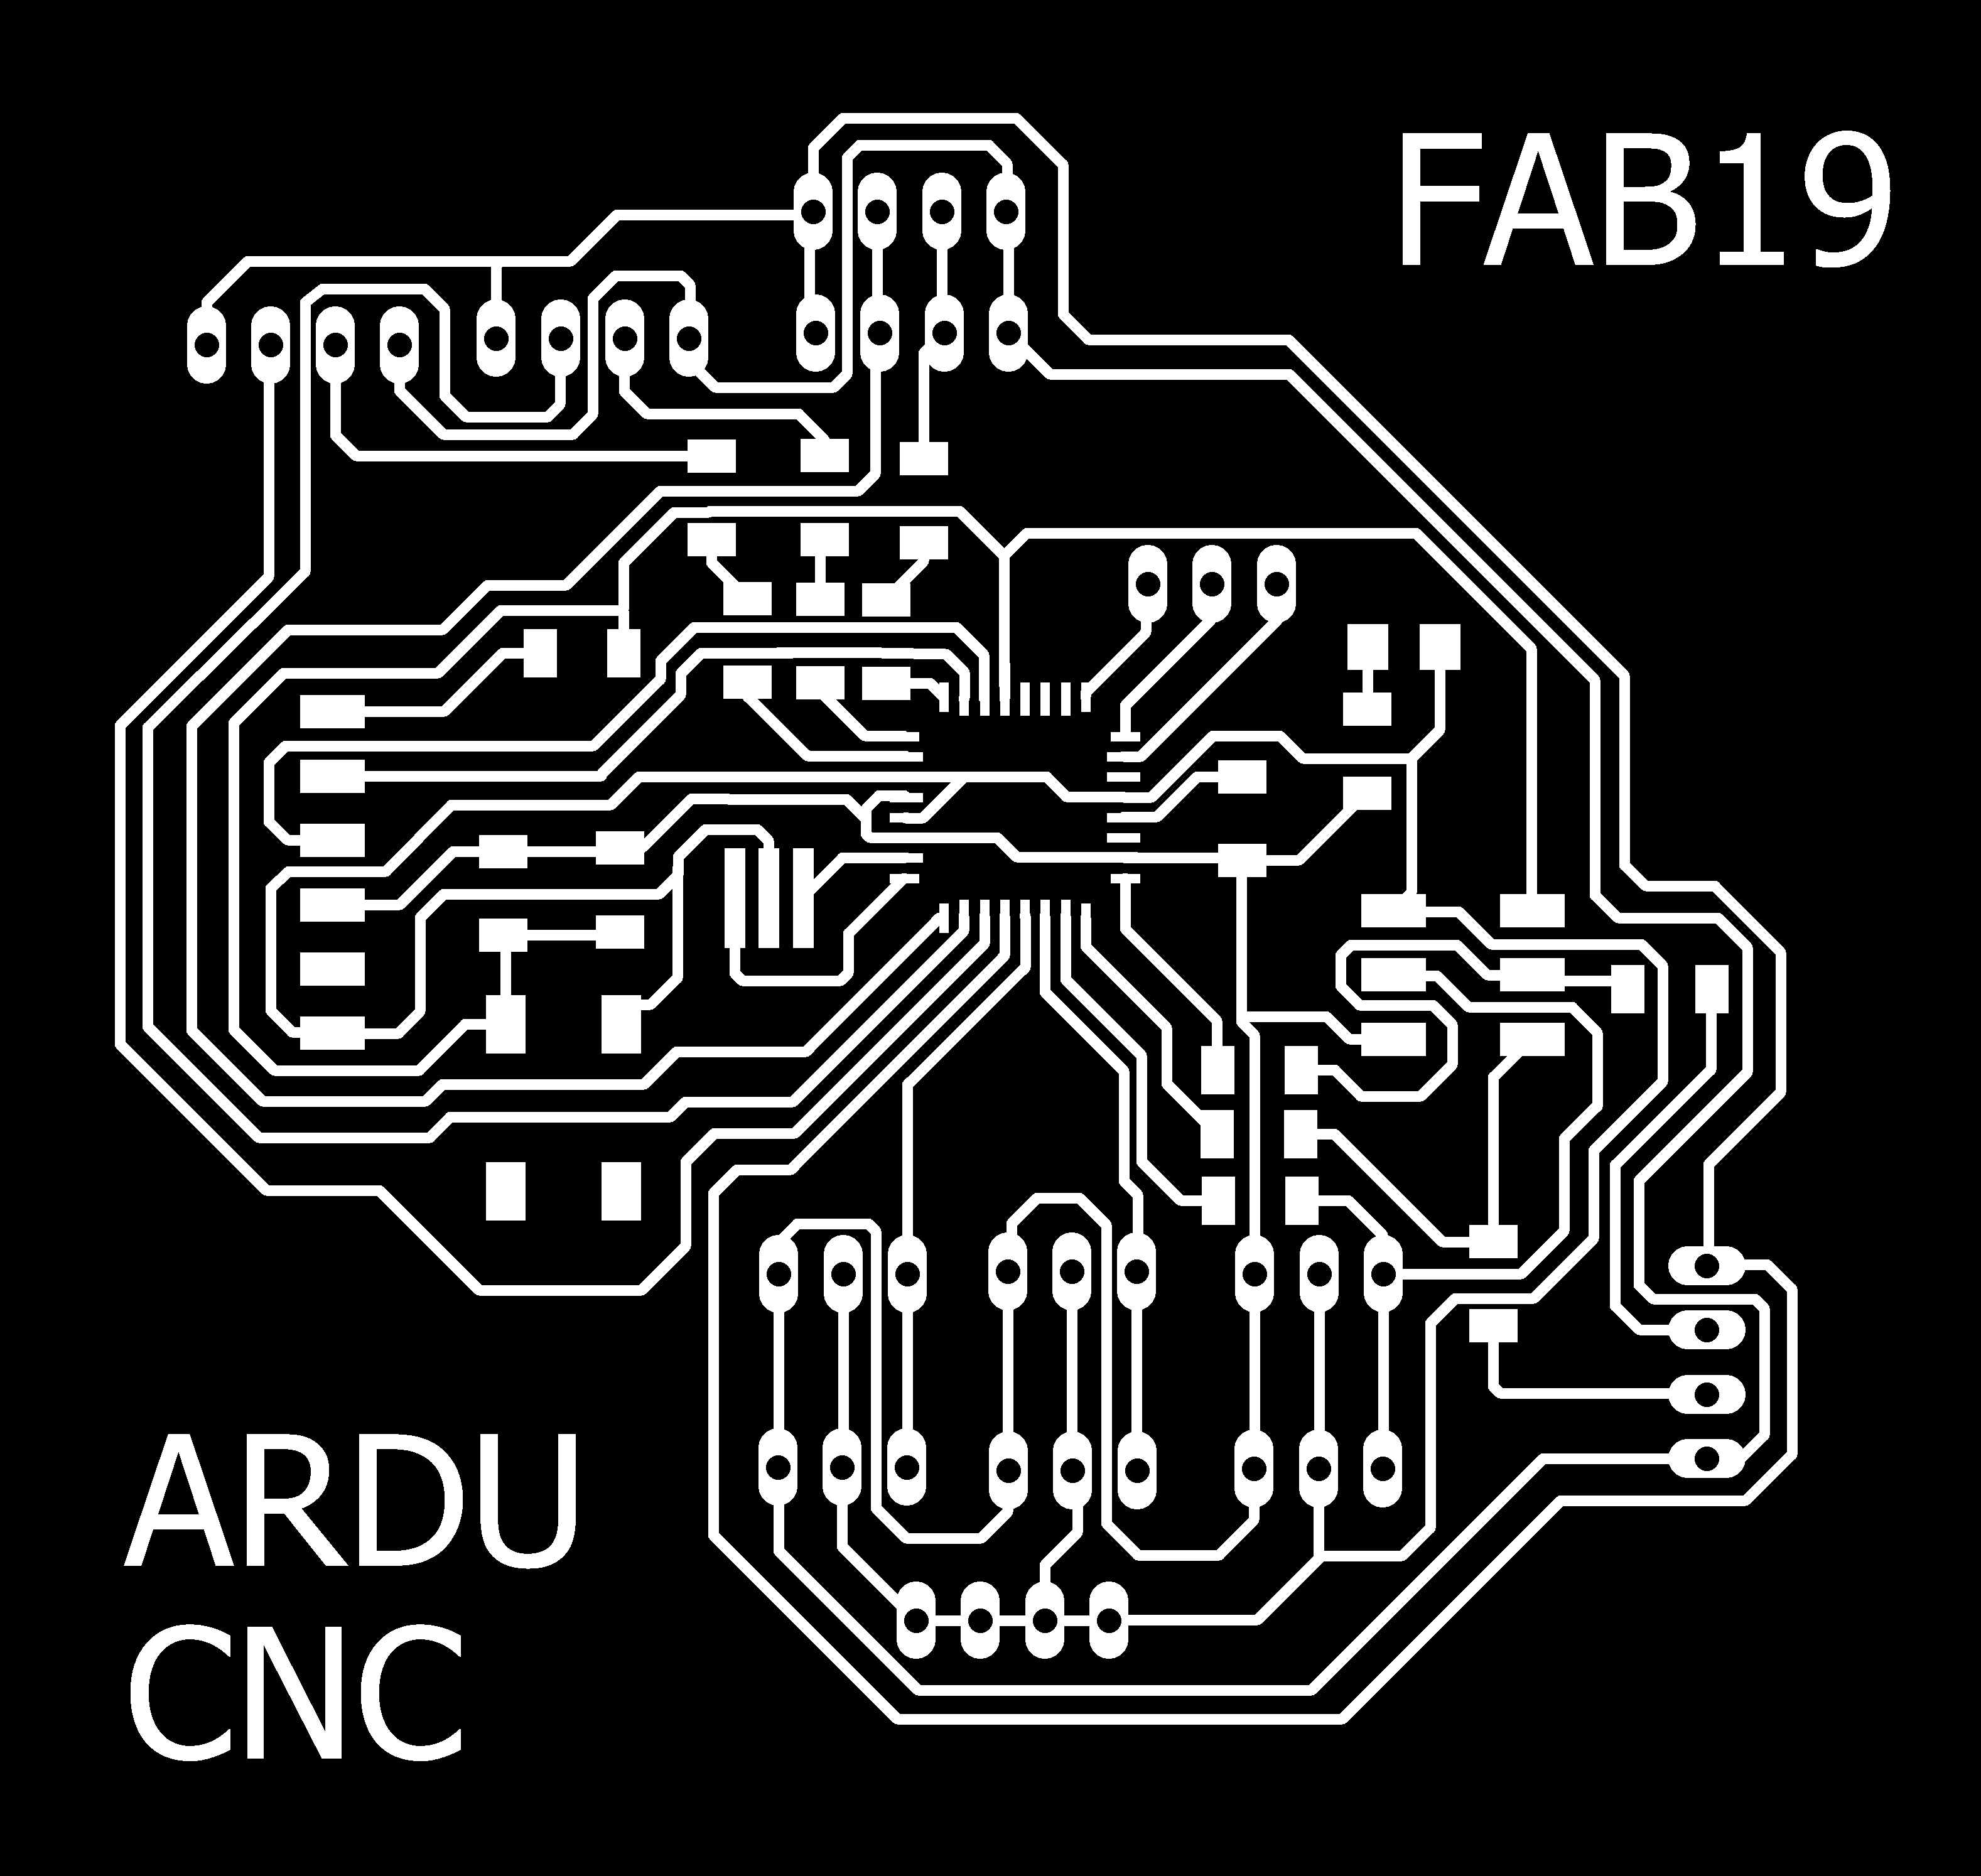
The schematic that was made in week 15 was modified slightly to be able to carry out a routing without problems, for this some resistors 0 were added and to be able to obtain the final board.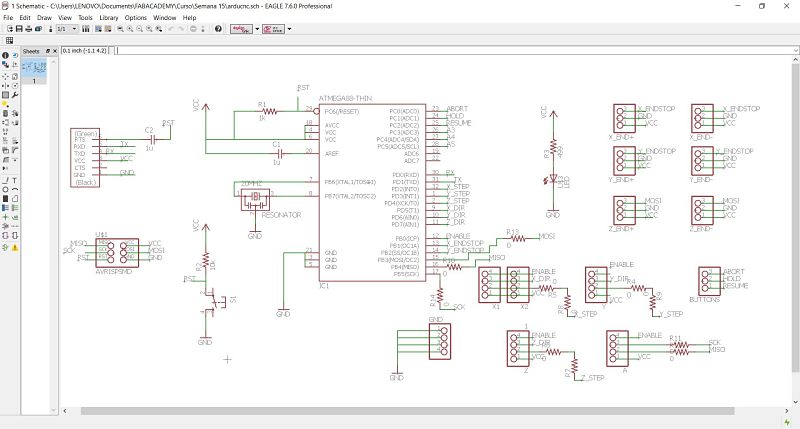 Finally, with great patience the final board is made.
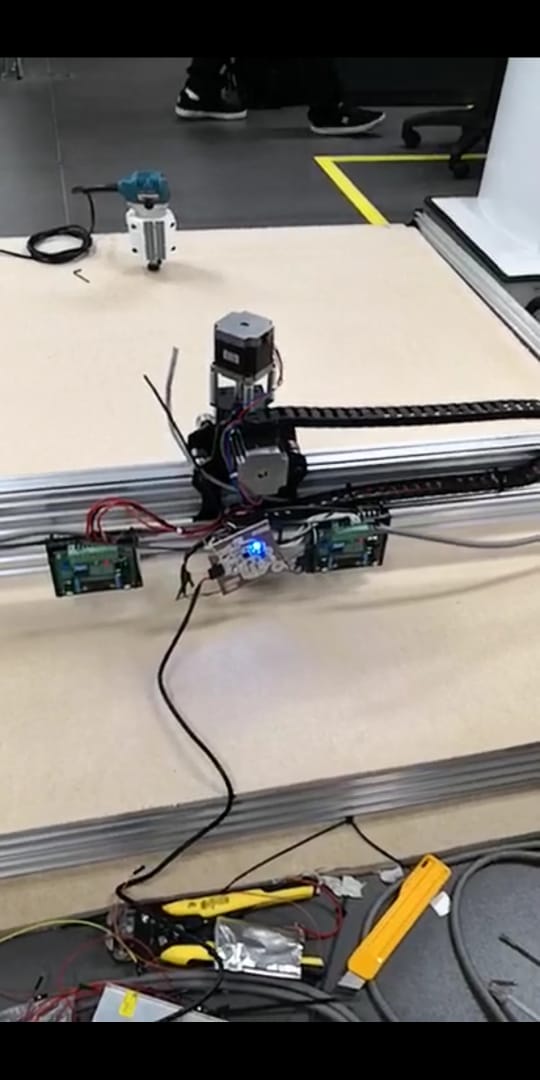
 Once the plate is manufacturing and soldering all its parts, the final wiring is done as shown in the image.
GRBL Software
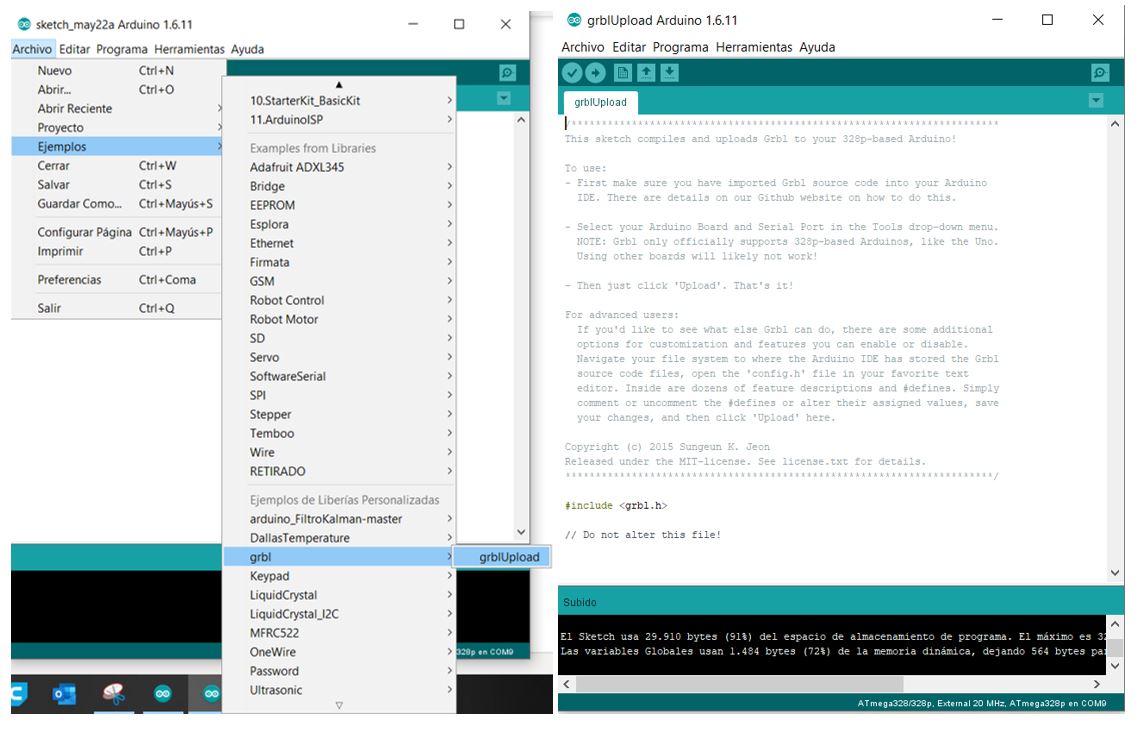
Grbl is a free, open source, high performance software for controlling the motion of machines that move, that make things, or that make things move, and will run on a straight Arduino. If the maker movement was an industry, Grbl would be the industry standard. (Source: https://github.com/gnea/grbl/wiki).After reading several tutorials to upload the GRBL firmwareto the Arduino, we proceed to load it to our board, as shown in the picture.
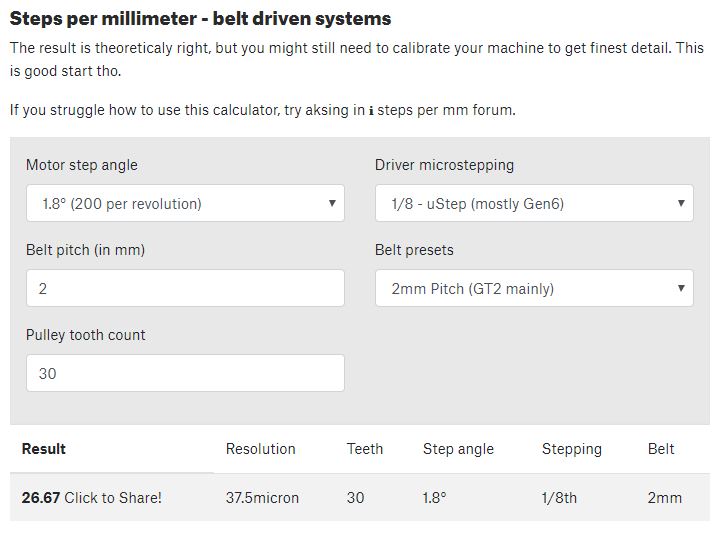
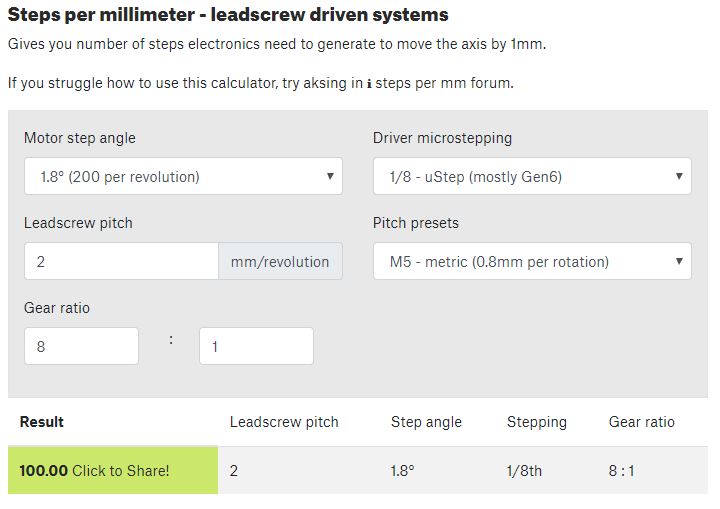
 Once the firmware is loaded, what we must do is load the correct parameters, for this we will use a calculator of the steps per minute that we must consider for our machine.
With the specifications of our components: stepper motors, belt and screw, we have the following configurations.
Belt
 Screw
Screw
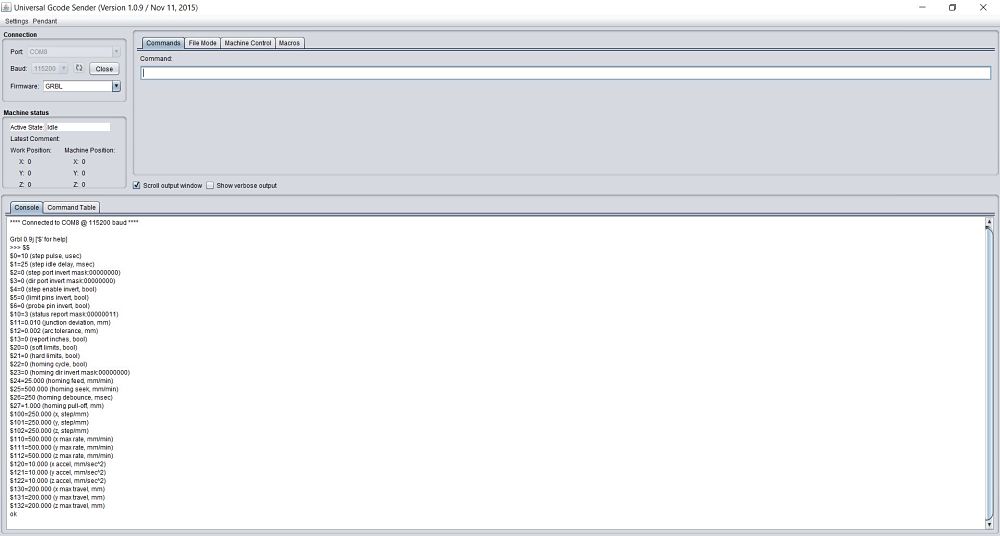
 To add the parameters, we use the Universal Gcode Sender software, once the software is opened, the $$ command is written to see the existing parameters, as shown in the picture.
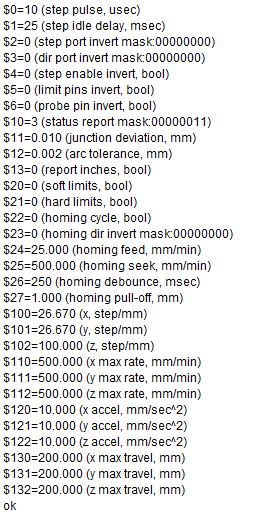
 To modify the previous parameters, we previously wrote the commands
$ 100 = 26.67, $ 101 = 26.67 and $ 102 = 100Write the command $$ and we will see the modified parameters. These parameters can also be modified from the Arduino serial monitor, but with this software we can also move the axes and perform a job.
 Once the parameters have been configured, it is time to use software that can load .dxf files and convert them to g code.
bCNC Software
Our instructor recommended the use of bCNC software, since it is totally free software and works in Python. We can download said software from this link.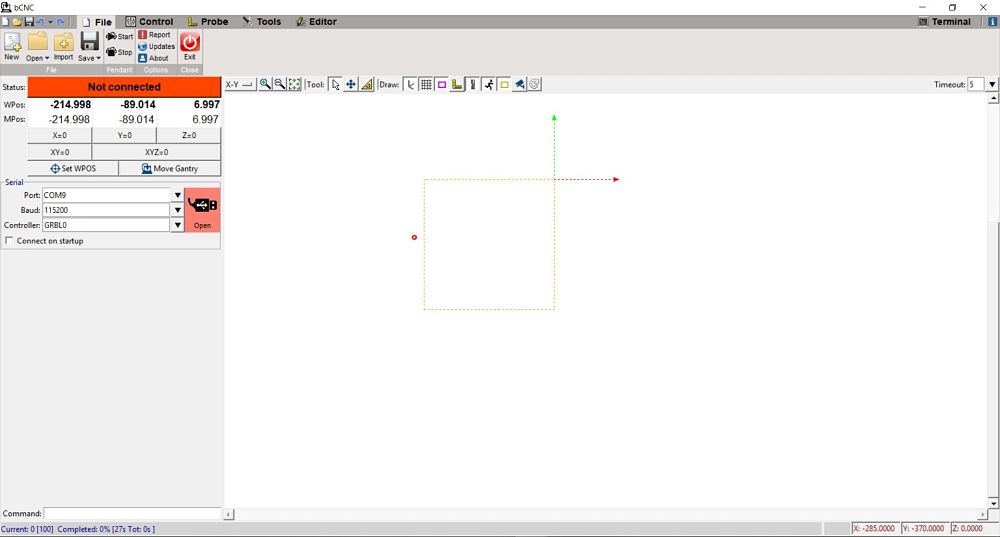 With the installed software, we proceed to connect our atmega with the software using a USB-TTL 5V cable.
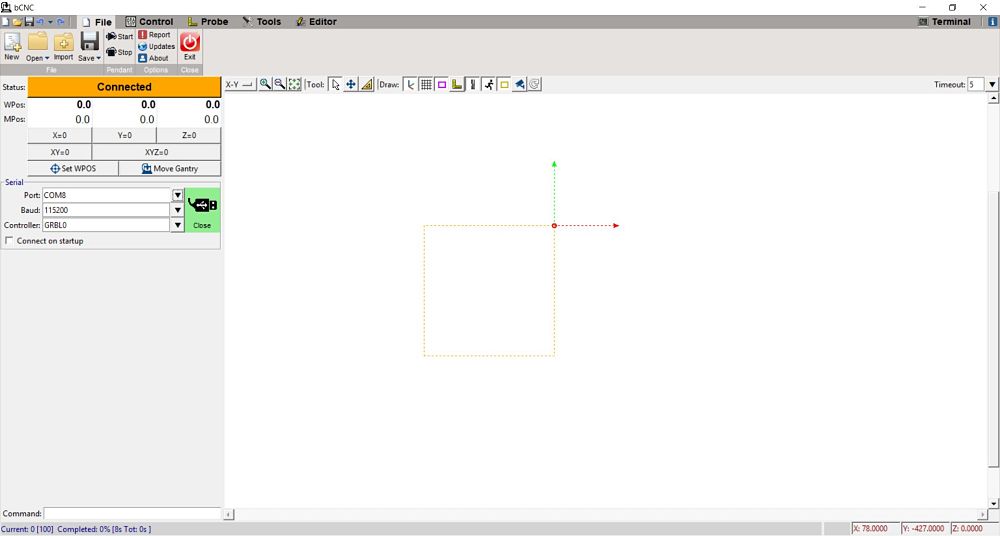 From the control screen we can move the axes manually
 Here is a video of its operation of the 3 axes.
Group
To see all the documentation of the group work, you can visit the CIT page.
Download
You can download this files Here:
Schematic.
Board.
Traces.
Out traces.