experimentation
make it happen
Group Assignment - participants:Josep Marti, Felipe Santos, Alberto Lopez, Diar Amin, Gustavo Abreu
Individual assignment:
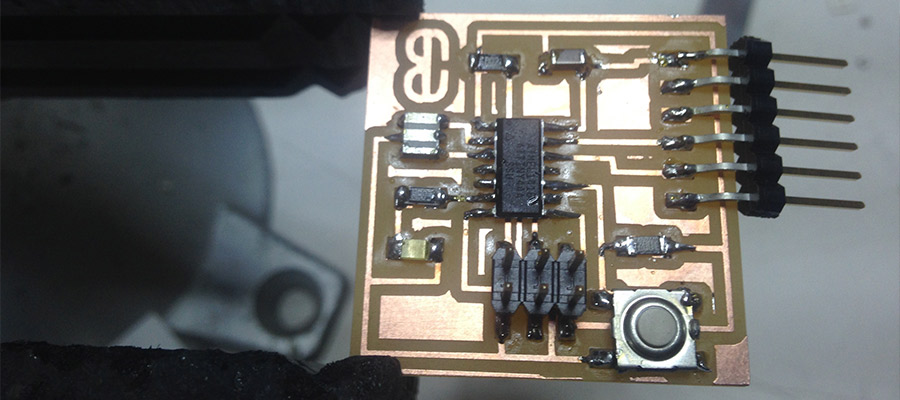
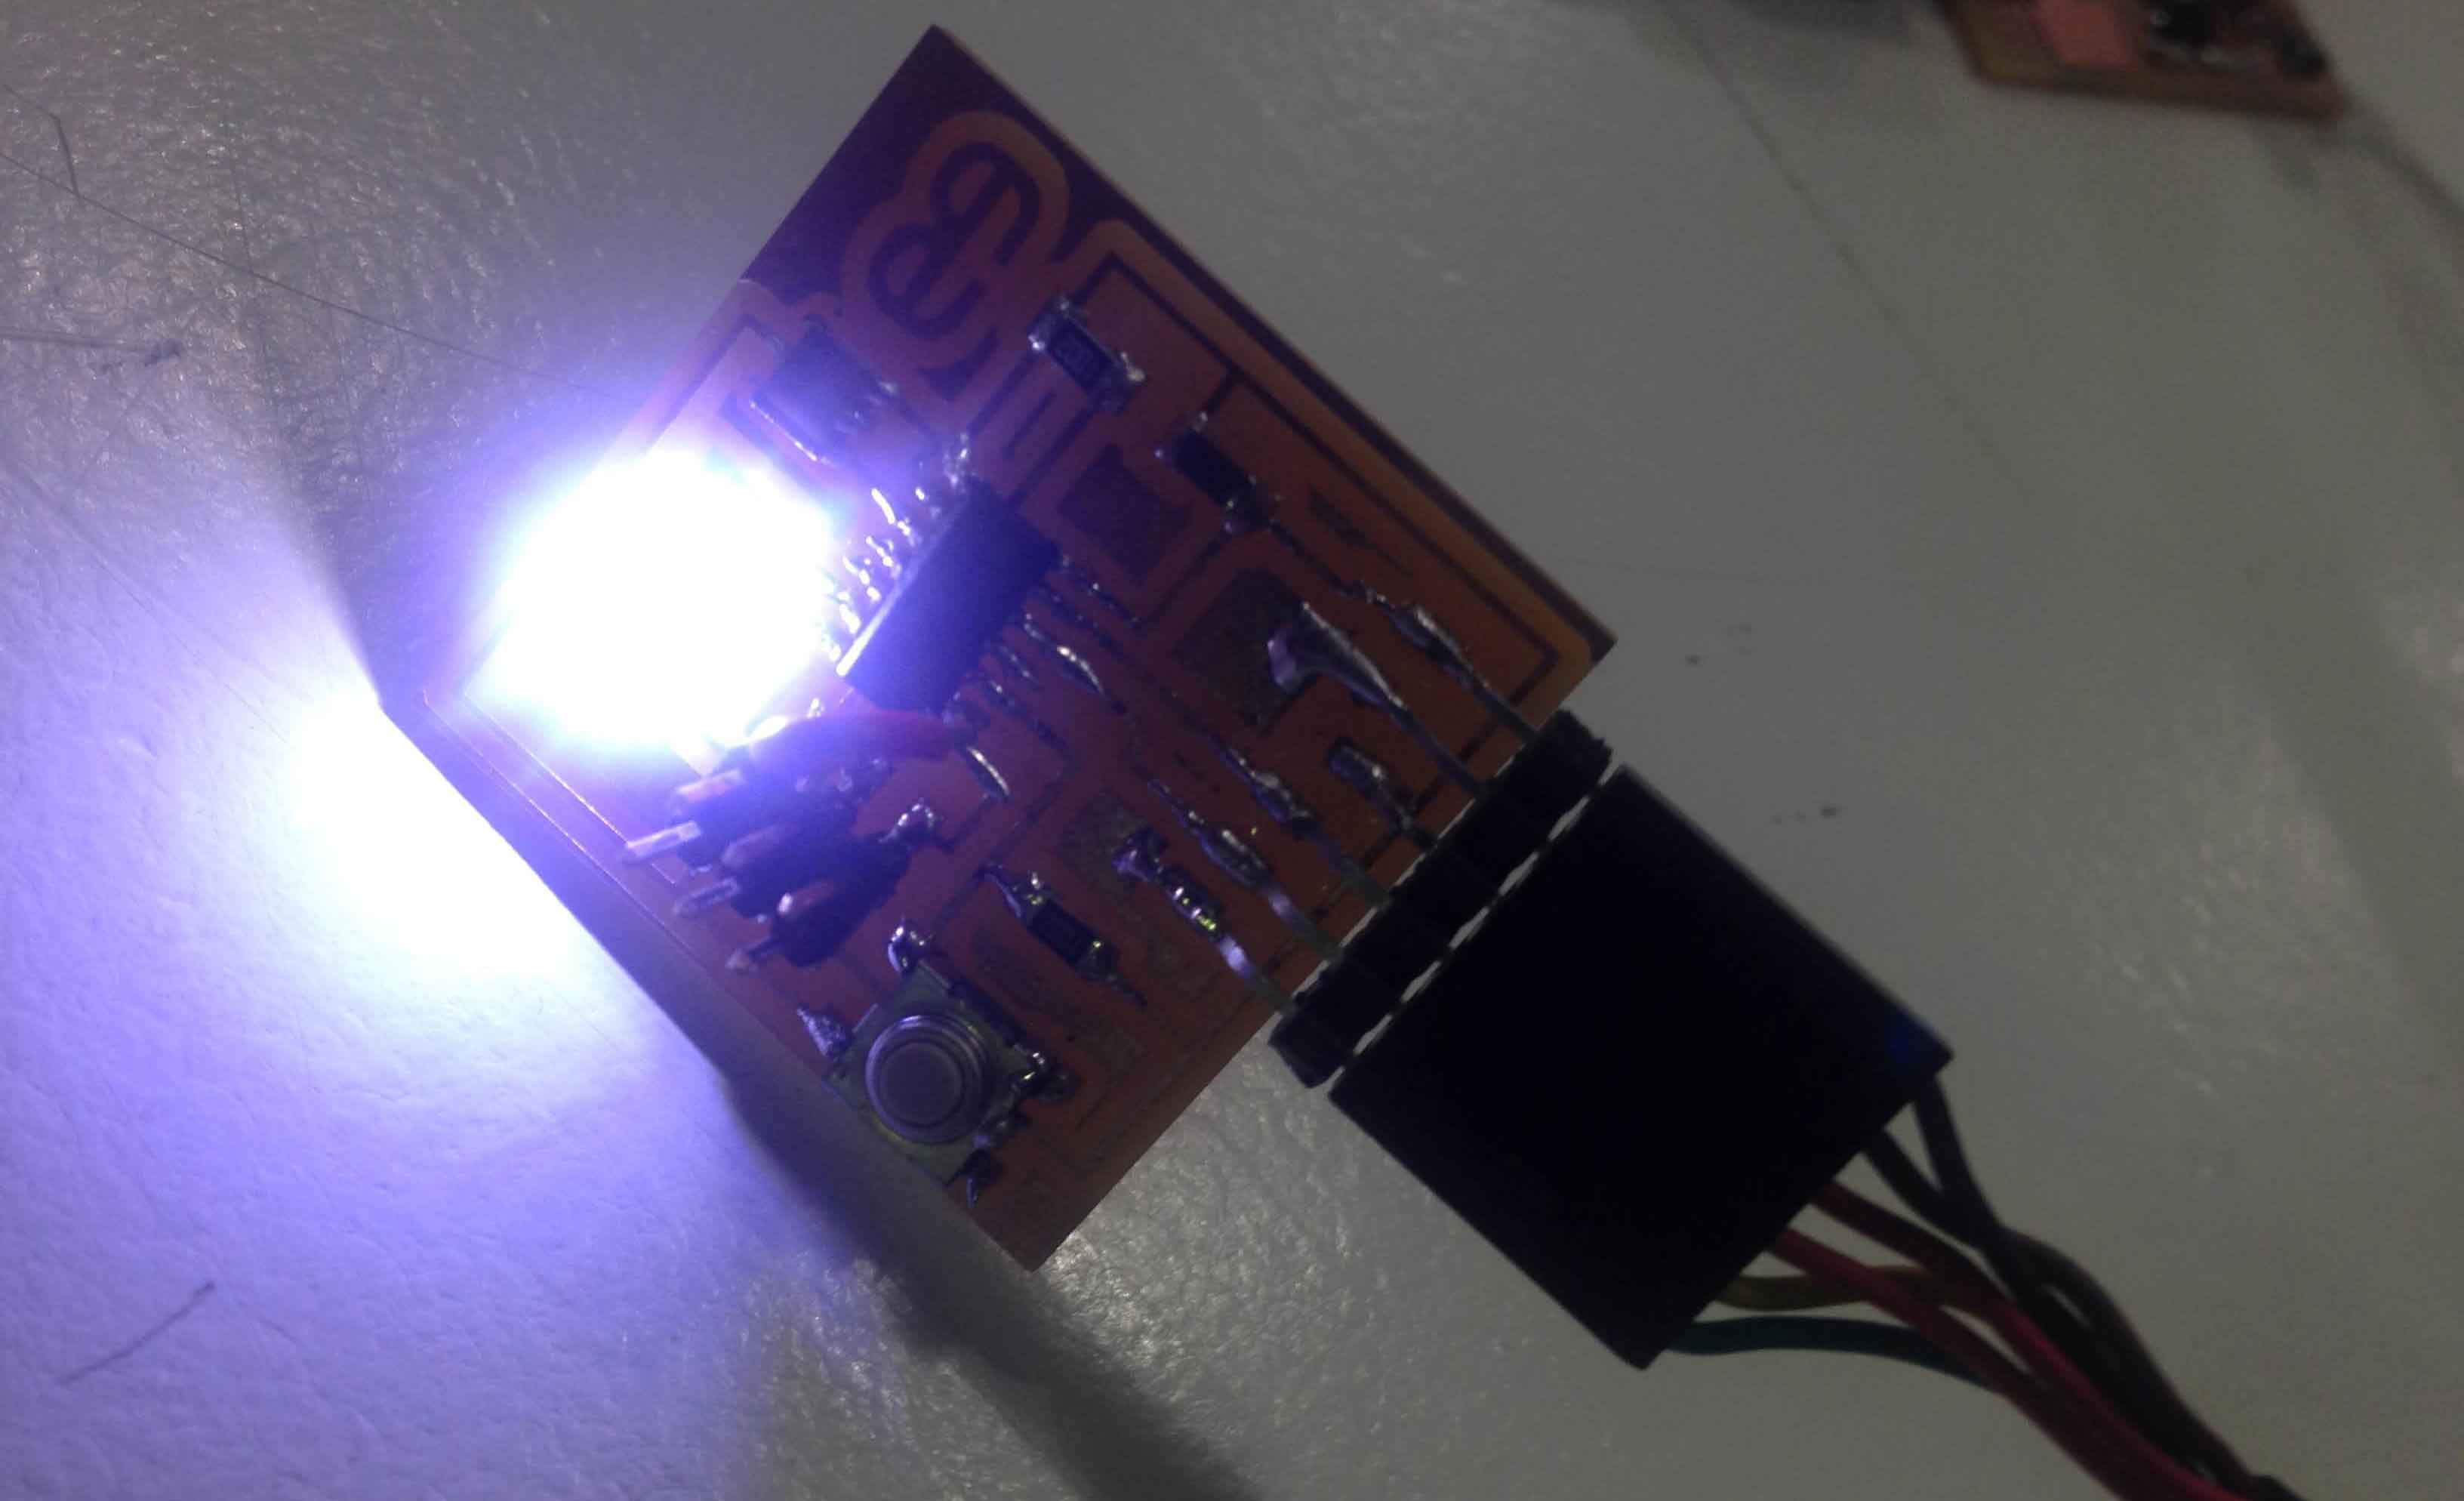
From the previous week 06 we created a HelloBoard with LED and Button, now is the time to programm it. The board now has a jumper, but it works! Now we gonna program it with Arduino. My FAB ISP doesnt work anymore so instead I will be using the ISP programmer what we have in the lab.
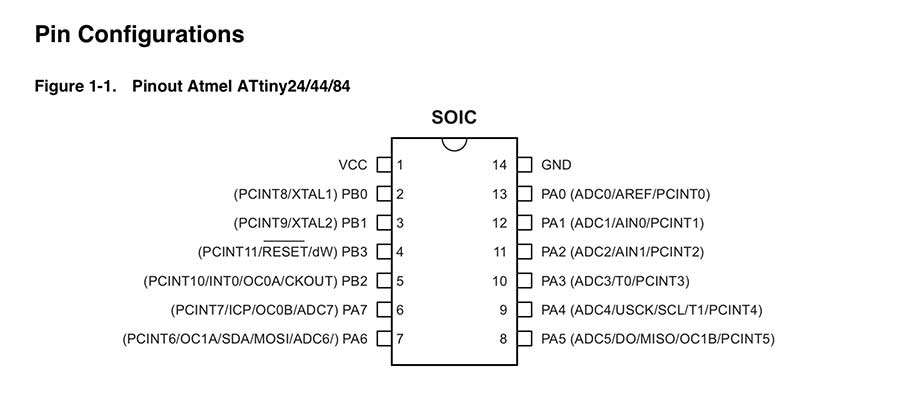
Since we are using ATtiny, it is important to check data sheets and understand pinouts of this microcontroller to know how to work with it.So as a first step Neil recommended to check the data sheets. I browsed a bit and had a look on this data sheet and also this datasheet. dedicated to ATtiny
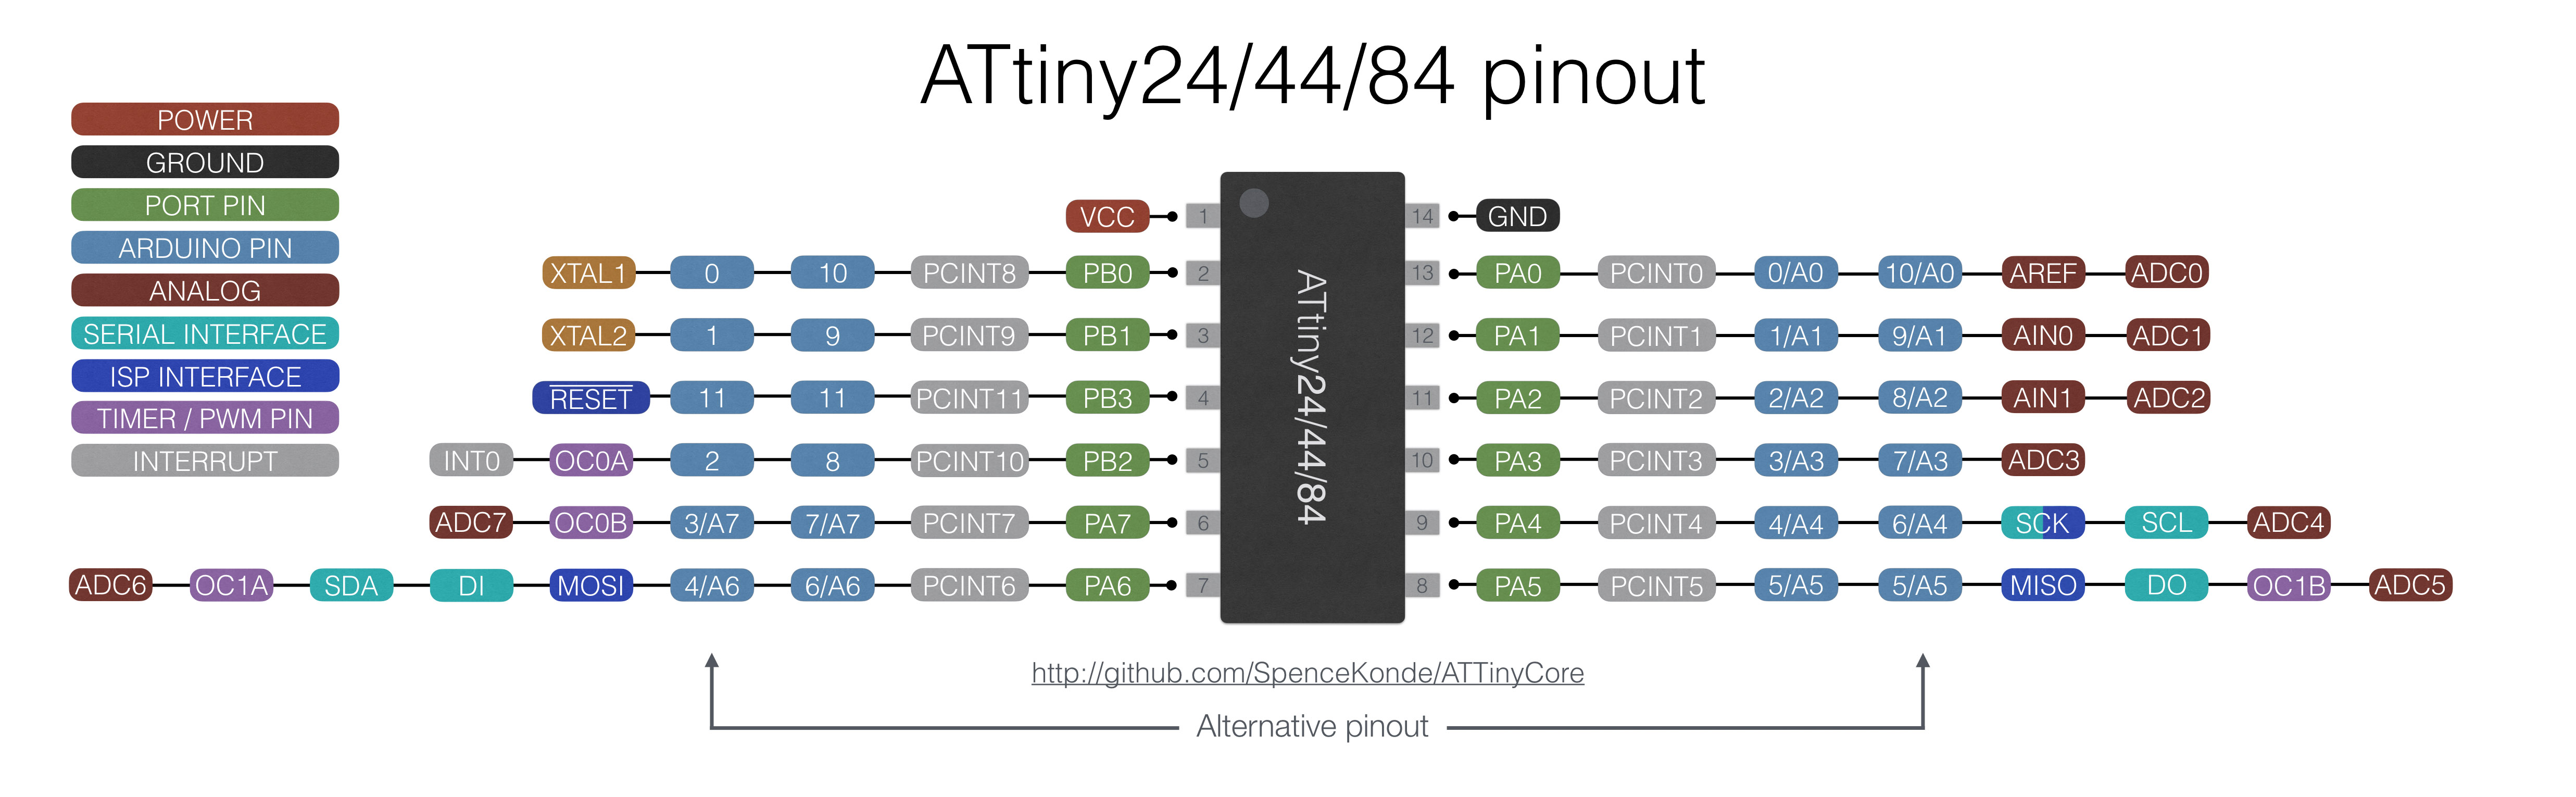
Pinouts for ATtiny and their equivalents for different boards, in our case it will be Arduino.
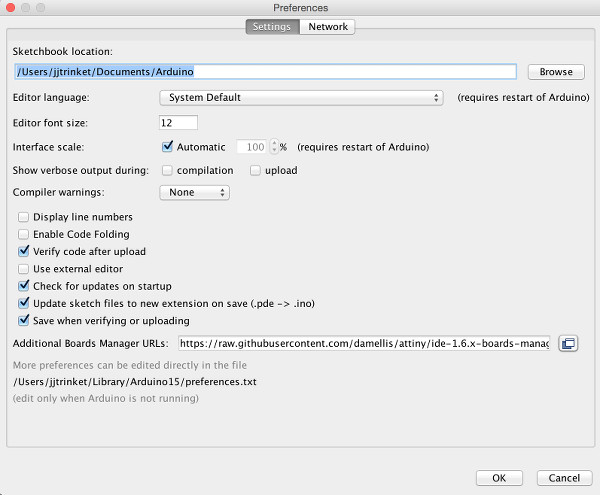
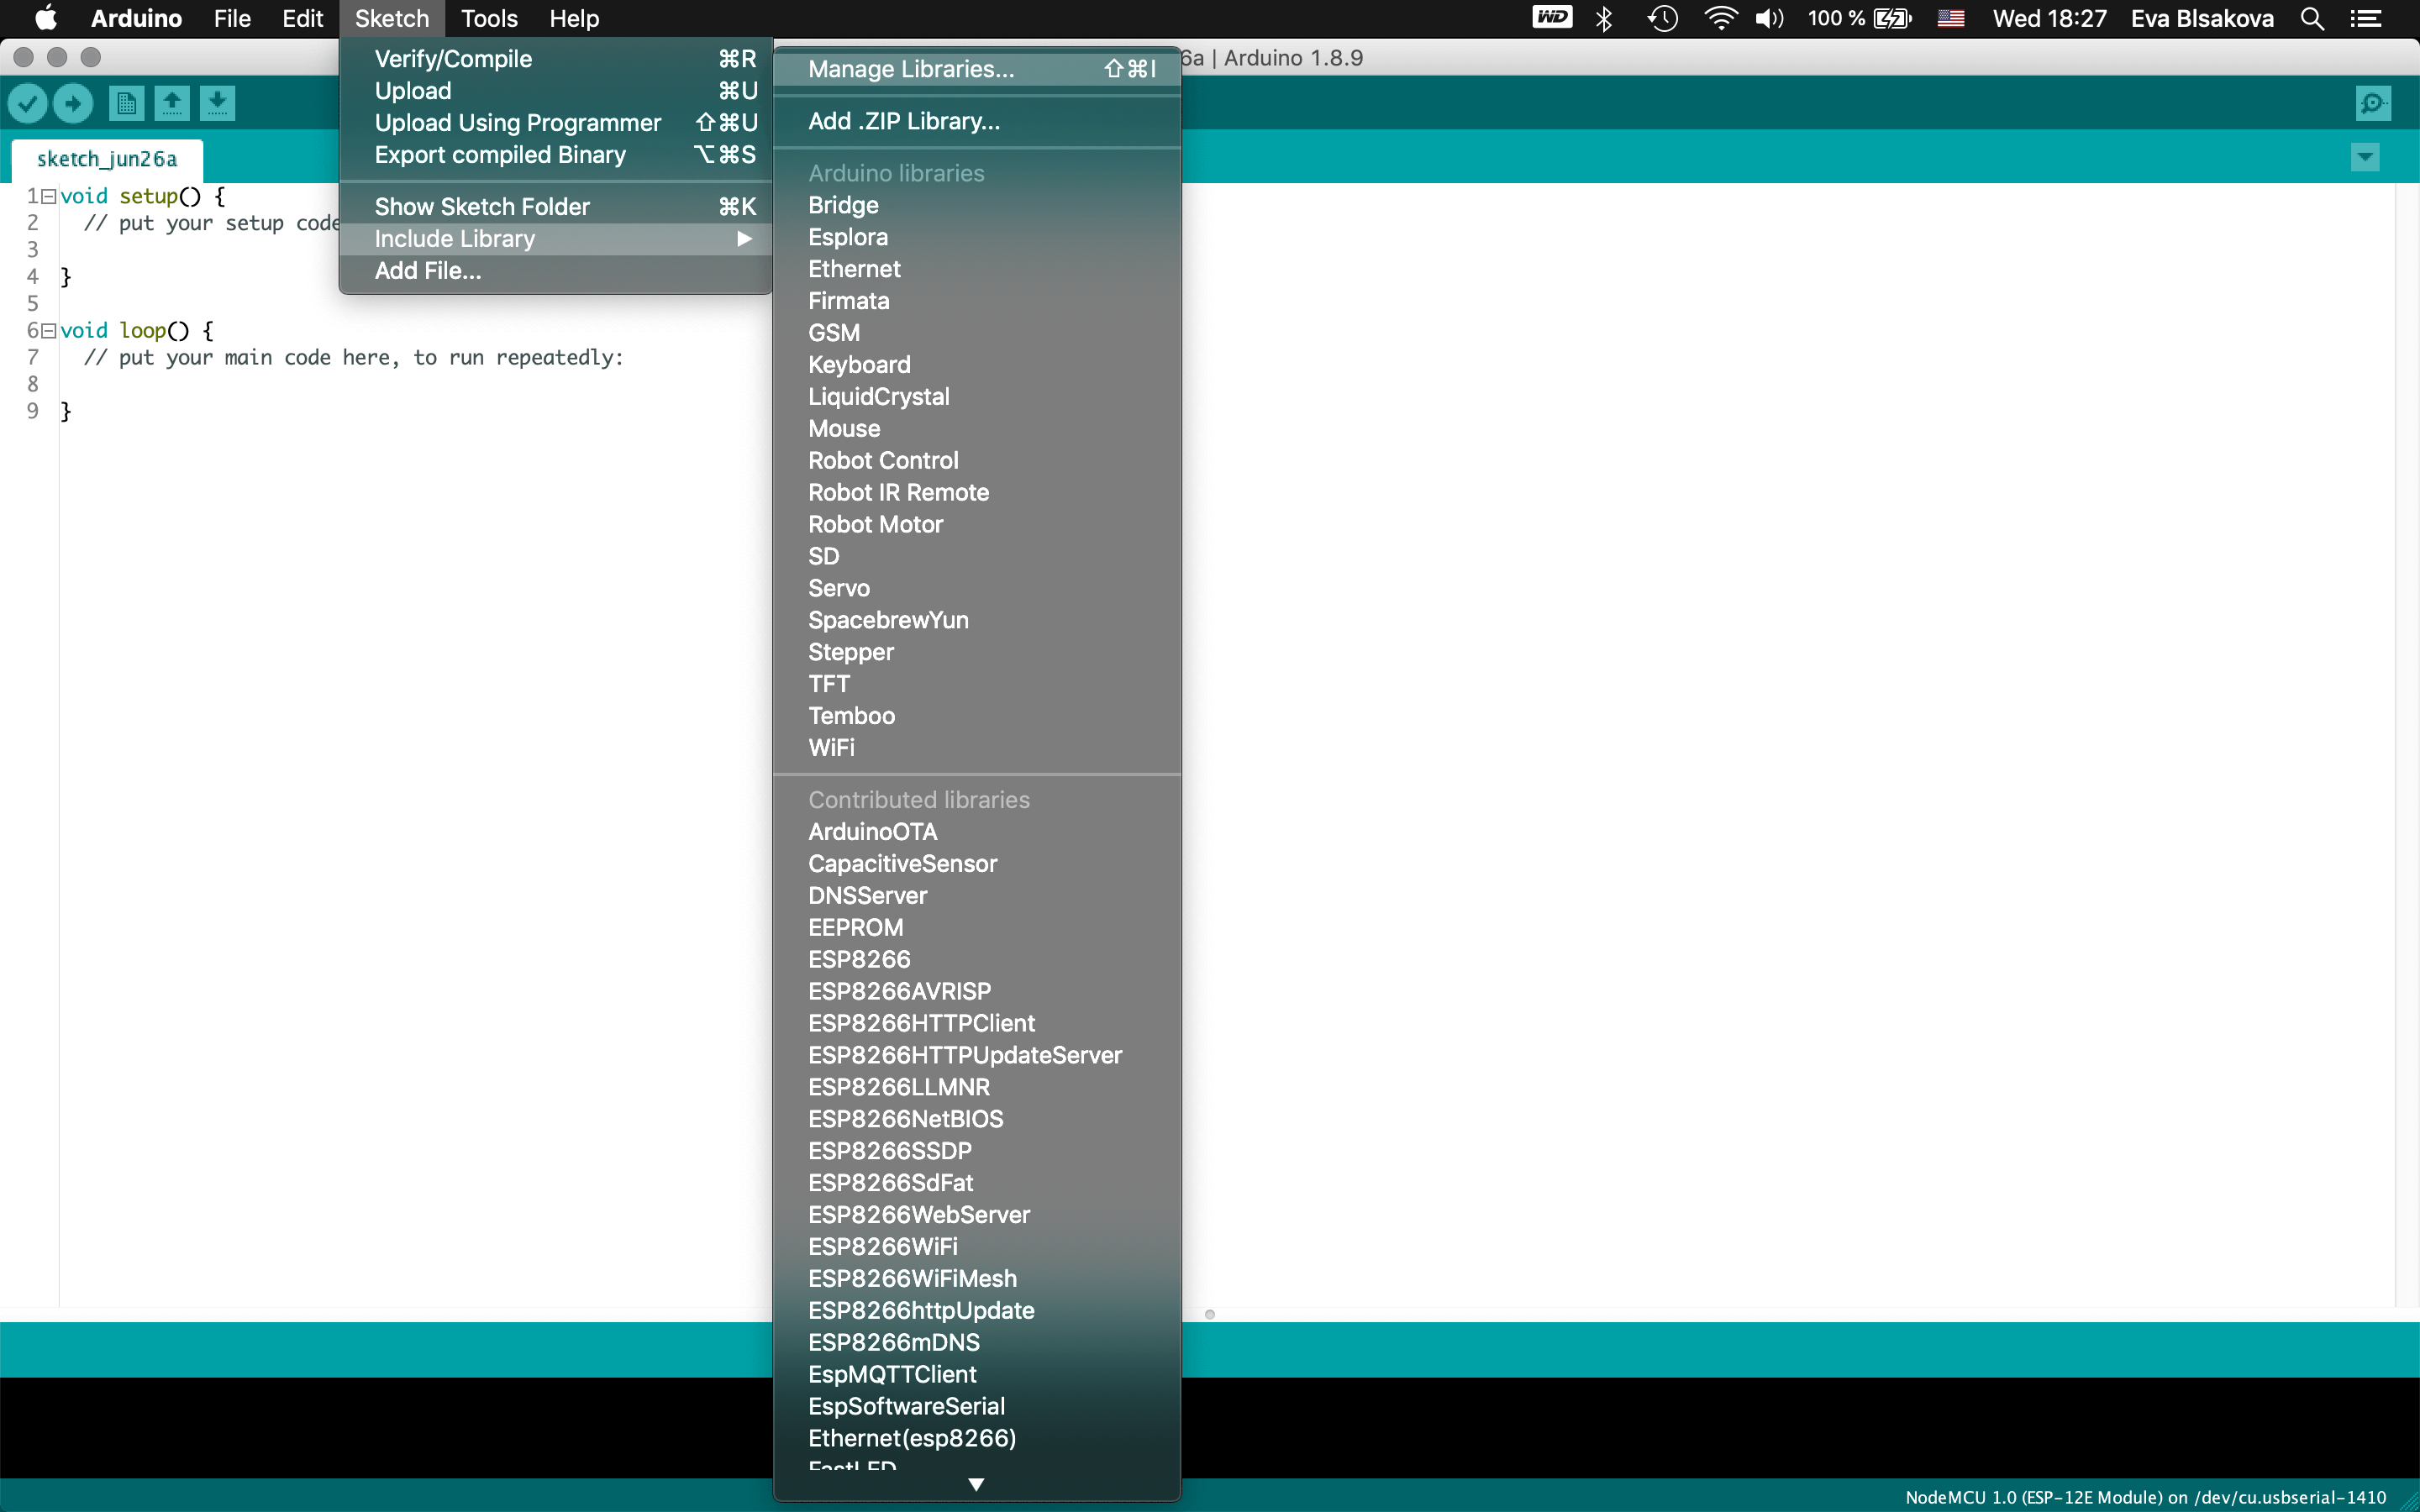
First it is important to install libraries into Arduino. To install a new library into your Arduino IDE you can use the Library Manager. So Open the IDE and click to the "Sketch" menu and then Include Library > Manage Libraries and select wished library. in our case it was Library for ATtiny attiny by David A. Mellis. Than restart Arduino.
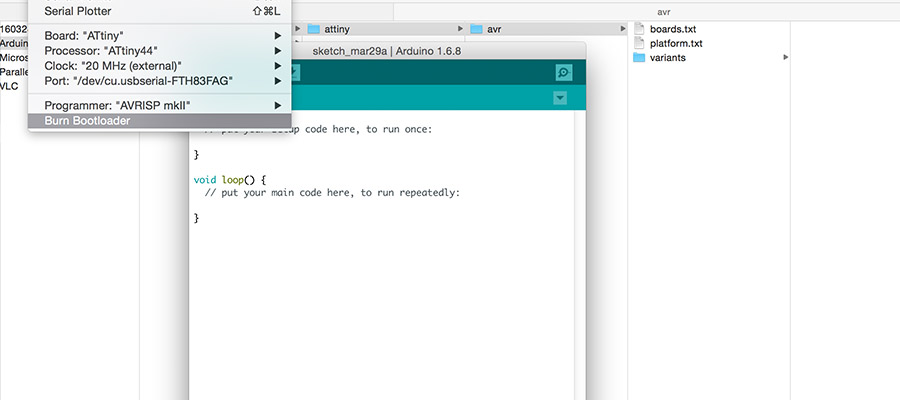
this High low tech tutorial is very useful to check and on that website you can find a lot of good information, help, tutorials for interesting projects… So back to Arduino - following this stpes you will be able to find ATtiny in the Boards menu. In the Tools menu select your board, the clock and the programer you will use. Then, with your board connected, Burn the bootloader to set your configuration to the chip. This step is really important, if the burnloader is not loaded you can have problems with the syncronization of the chip and your programs can have problems to run on it.
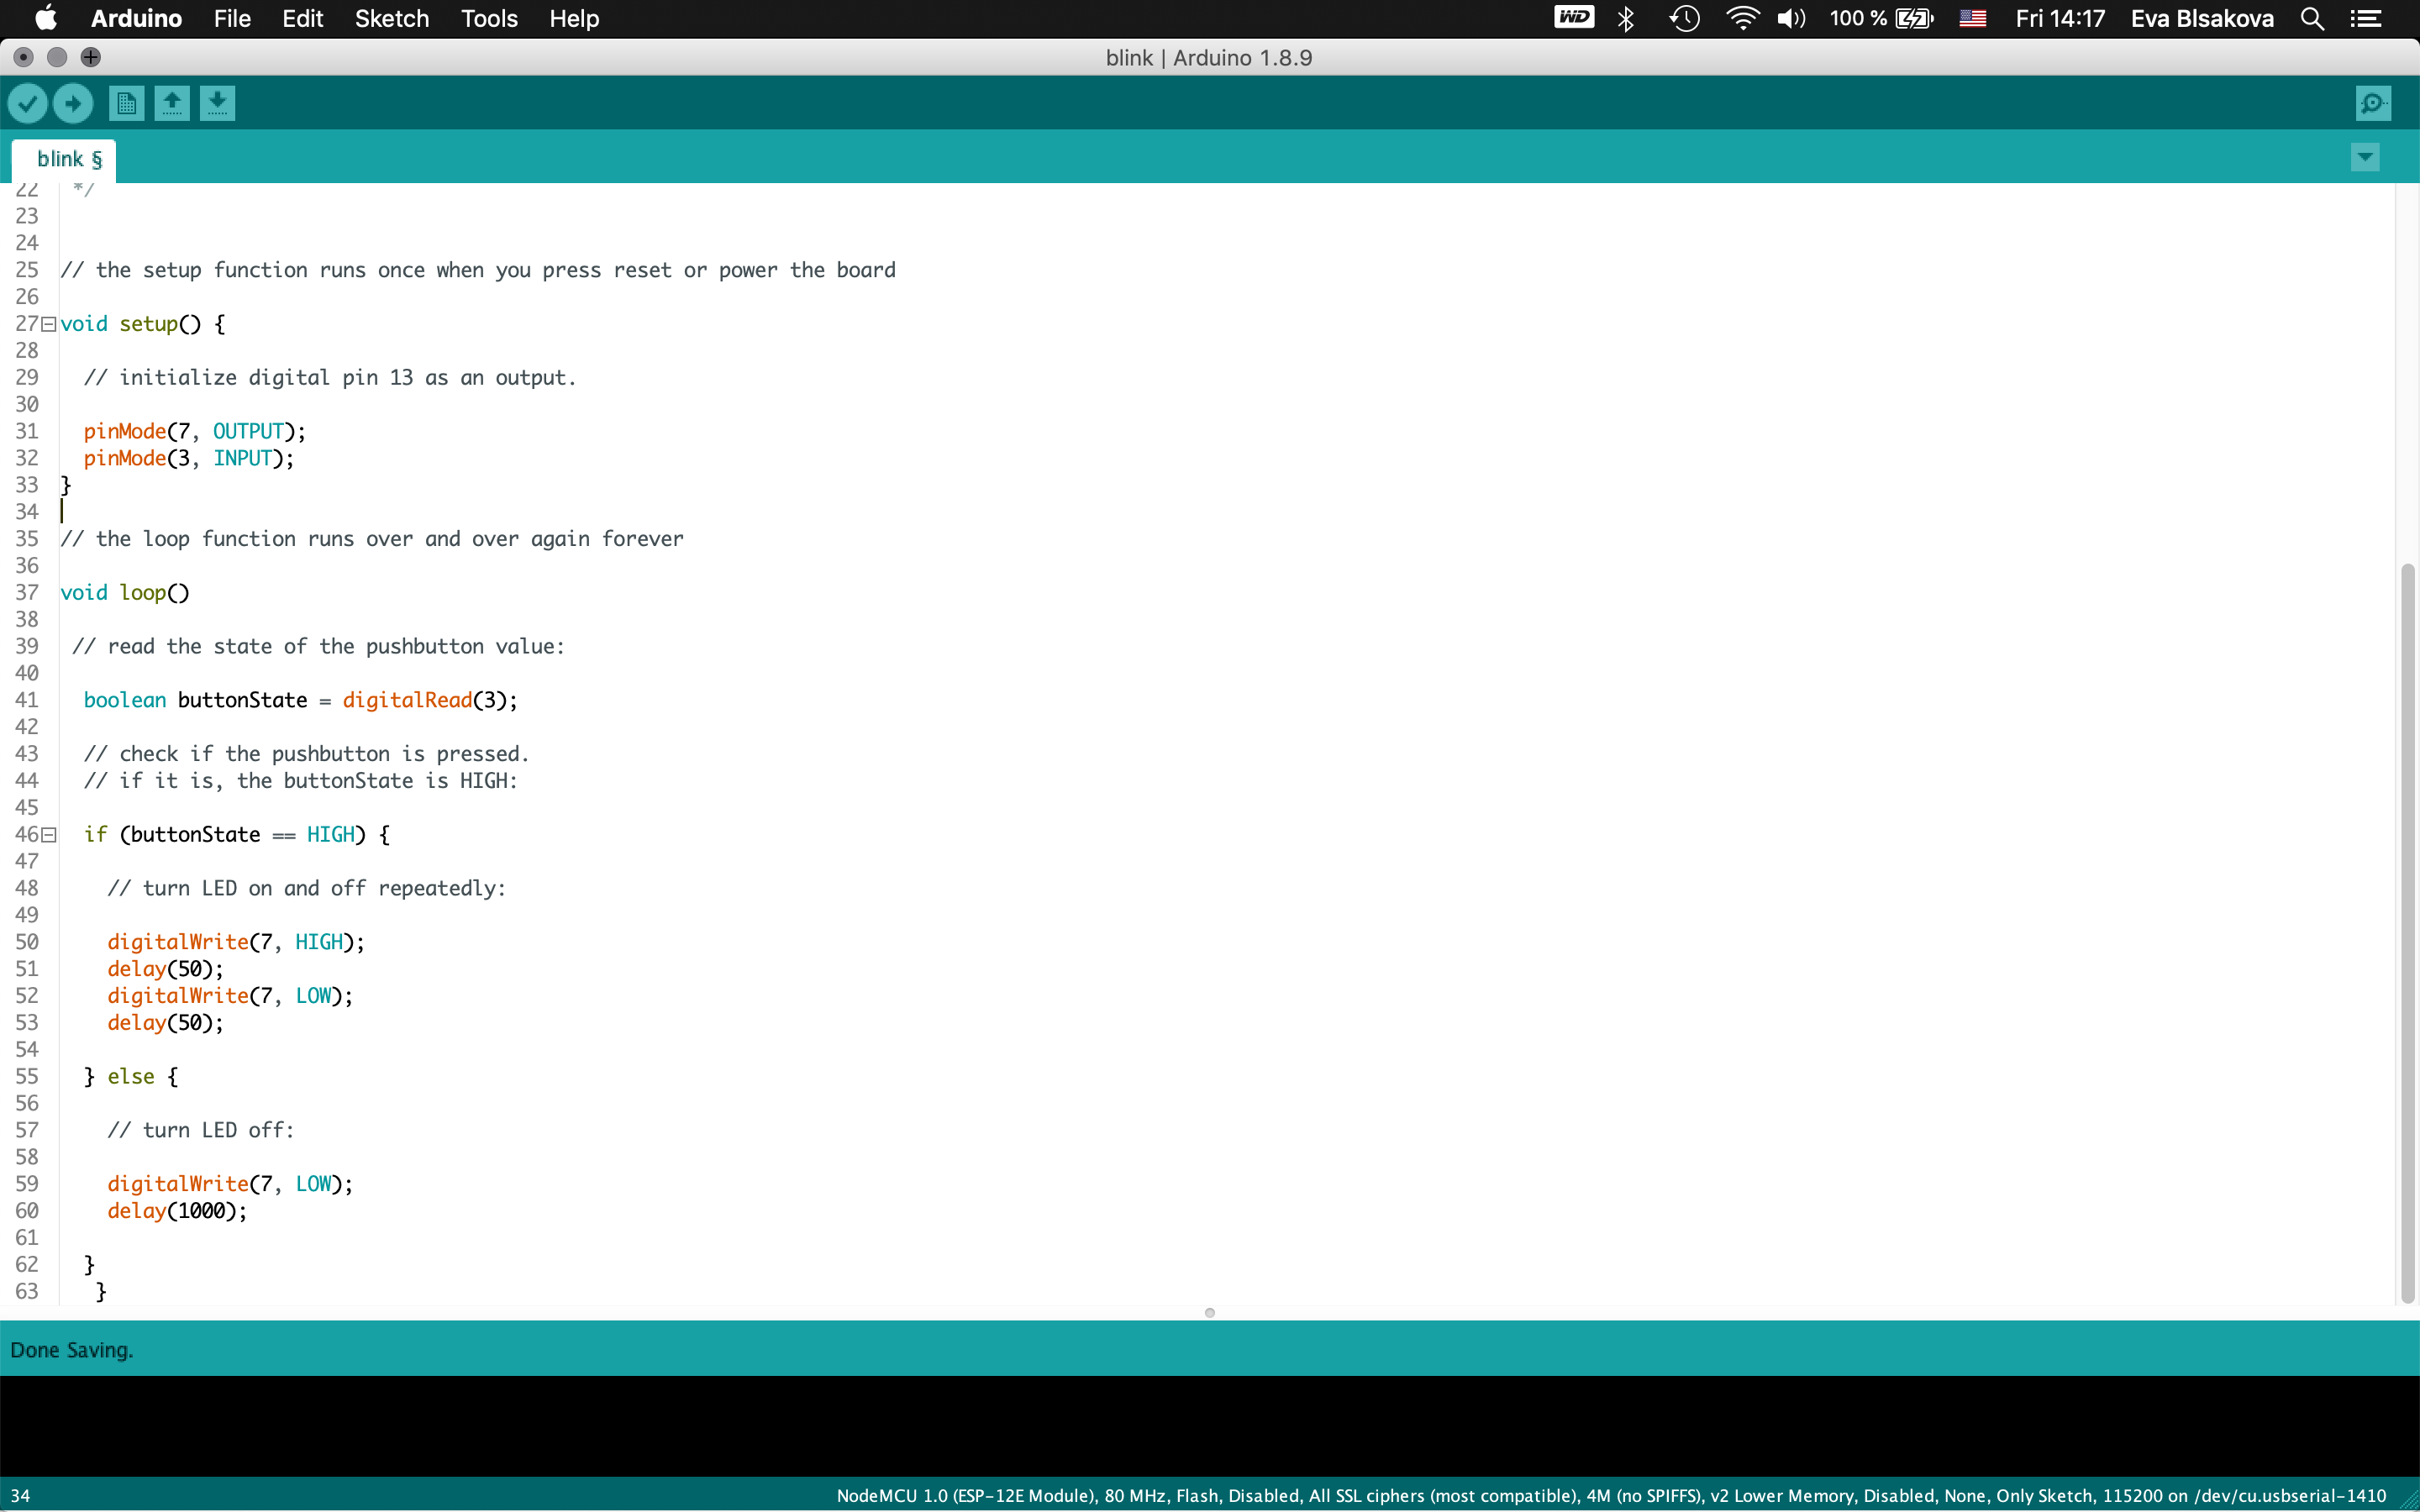
BLINK example from Arduino page. *its also credited in the code part. I had to adjust the pinouts of my input(button) and output (LED). So what does the code does is it turns on an LED on for one second, then off for one second, repeatedly..
Is important to understand what parts of the code are doing what. In general, void setup() is the function that only runs once upon controller reset. Put your setup code there (like serial.begin() or wire.begin()). Loop() is where the code that runs over and over goes (your program). Loop() and setup() are functions. A function with a void in front is a void function and so will not return a value.
Also is good to have basic understanding about the syntax. This website is a good starting point to get familiar with coding syntax. Below see some basic features:
Void setup is technically a function that you create at the top of each program. Inside the curly brackets is the code that you want to run one time as soon as the program starts running. You set things like pinMode in this section.
The loop is another function that Arduino uses as a part of its structure. The code inside the loop function runs over and over as long as the Maker Board is turned on.
The end of a command or statement. The compiler doesn't look for spaces in your code, it looks for semicolons.
A group of code statements. You always need a closing curly brace to match each opening curly brace.
A group of arguments for a function, a method, or a code statement. You can also use these to group math within equations like: random( (10-7), (500 -100)); so that the math will result in: random(3,400);
When you type two forward slashes, the code from that point until the end of that line is ignored by the compiler. Use comments to explain what your code does, help you remember how the hardware is hooked up, or to remove some code from the program without deleting it.
A multi-line comment starts with the /* and doesn't end until the */ characters. When you have a lot to type, use a multi-line comment to make it easier to group the information together.
the #define command is used for a 'find and replace within your code. It is similar to creating a variable to replace a number, but it doesn't take up any memory
This was a very nice introduction to programming and of course I would like to learn more about it.