Molding and Casting
Group Assignment
Class Week 9Thursday and Friday was dedicated to the molding and casting class. We learned about the principles about cutting the mold with a CNC and casting the desired shape with different material:
• Group assignment: Review the safety data sheets for each of your molding and casting materials, then make and compare test casts with each of them.
• Individual assignment: Design a 3D mould around the stock and tooling that you’ll be using, machine it, and use it to cast parts from it.
Setup
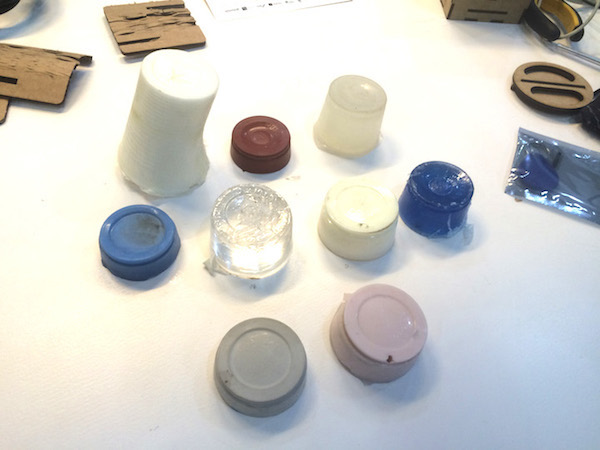
To compare the uses, curing times, mold releases and to have some safety instructions we had a big class where our instructor Eduardo showed us all of our options here in the Fab Lab.
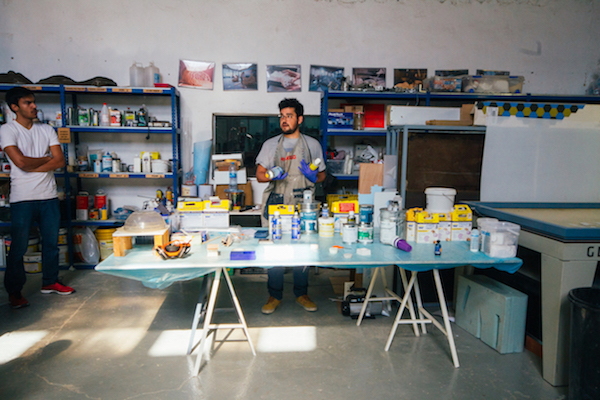
We reviewed the safety sheet, instructions and procedures to be followed with each one of the materials we have available.
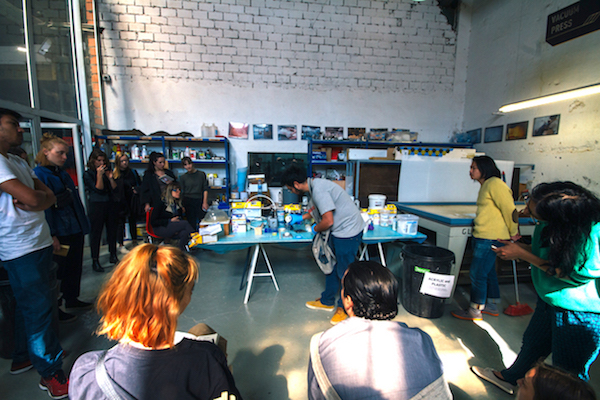
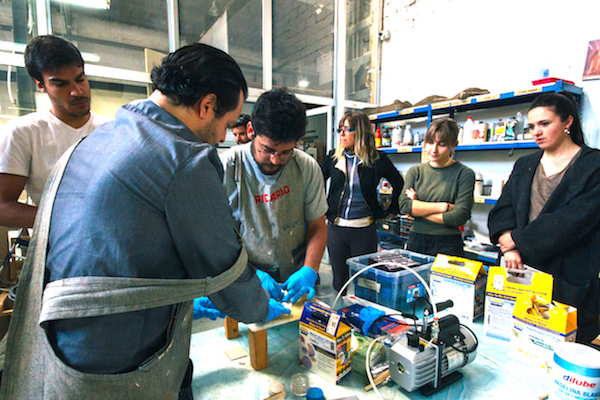
Made some tests with different materials to see how the curing time is really important.
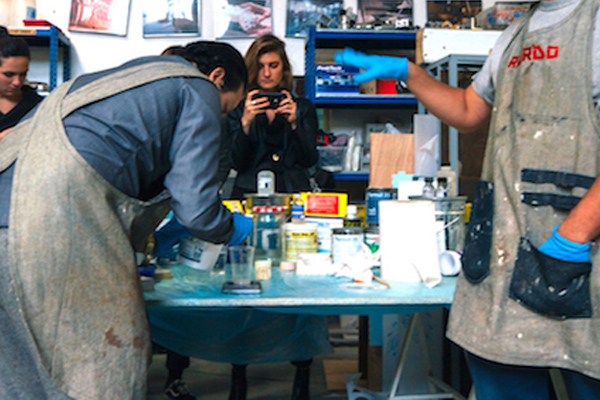
And we learned how to use the vacuum chamber to take the bubbles out of our mixes.
Materials
Then we gathered all the material options and tried to find out what were their characteristics based on their datasheets:
SORTA-Clear 18 and SORTA-Clear 40
Ideal for making prototype, jewelry or other molds of any configuration where model visibility is important. It is also food safe after post-curing processes. The difference between the 18 and the 40 is the final shore hardness.
- Mix Ratio By Weight 100A:10B
- Pot Life: 60 minutes
- Cure Time: 24 hours (18) / 16 hours (40)
- Shore Hardness: 18 A / 40 A
Clear Flex 50
This one is a water white clear urethane liquid rubber compounds designed for applications that require absolute clarity and resistance to sunlight.
- Mix Ratio By Weight: 1A:2B
- Pot Life: 25 minutes
- Cure Time: 16 hours
- Shore Hardness: 50 A
FlexFoam-iT V
It can be used for a variety of industrial, special effects and art & crafts and projects. With several to choose from, uses include making theatrical props (swords, knives, hammers, etc.), industrial gaskets, custom padding and cushioning, and more.
- Mix Ratio By Volume: 1A:1B
- Pot Life: 50 seconds
- Color: White
- Cure Time: 2 hours
Mold Star 30
It results into a soft, strong rubber which is tear resistant and will last a long time, being good for casting wax, gypsum, resins, concrete and other materials.
- Mix Ratio By Volume: 1A:1B
- Pot Life: 45 minutes
- Cure Time: 6 hours
- Shore Hardness: 30 A
Mold Max 15
It has similar characteristics to the Mold Star 30.
- Mix Ratio By Weight: 100A:10B
- Pot Life: 45 minutes
- Cure Time: 24 hours
- Color: Translucent
- Shore Hardness: 15 A
Formsil 25
It a silicone with a low viscosity and pours easily without degassing. This is a budget silicone with good price/quality ratio.
Part A with a 100-to-5 parts ratio of the catalyst (Part B).
- Mix Ratio by Volume: 100A:5B
- Pot Life: 3 hours
- Cure Time: 14 hours
- Color: White
- Shore Hardness: 25 A
MarbleCast
A gypsum mix that is easy to work with and cures really fast.
- Mix Ratio by Weight: 100 gypsum:25 water
- Pot Life: 10 min
- Cure Time: 30 min
Portland mortar
This is similar to the ordinary cement, a workable paste used to bind building blocks.
- Mix Ratio by Weight: 100 mortar:25 water
- Pot Life: 3 hours
- Cure Time: 24 hours
Individual Assignment
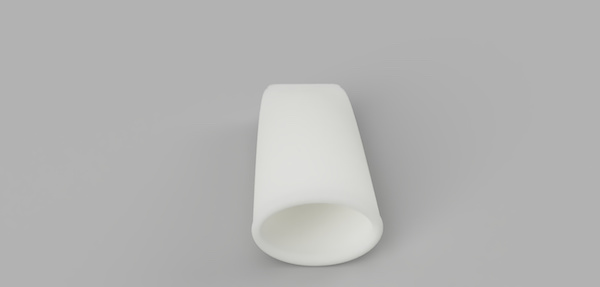
In this week I had the idea to create a silicon tube for making home-made ice cream. A tube form to make healthy fruit ice creams for my children.
Designing the Tube
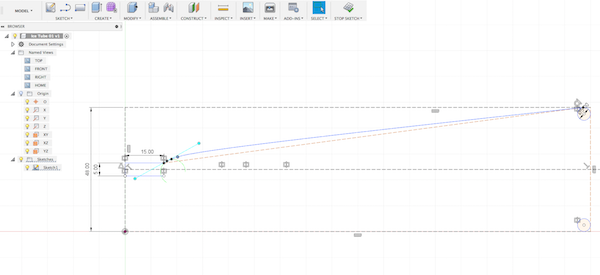
I started with a sketch of the ice tube form and then went over to design it with Autodesk Fusion 360.

My first difficulty to manage was, how to combine the round end with the rectangular finishing on the opposite side.
First Attempt
I started spontaniously and draw the outline of a cross section, on which I later wated to apply the Sweep tool. But this way was too longwided and almost impossible to maintain the exact material thickness "by hand".
Second Attempt
In the second attempt I began from the midpoint of a circle, then draw an iconic curve, using the Offset tool.
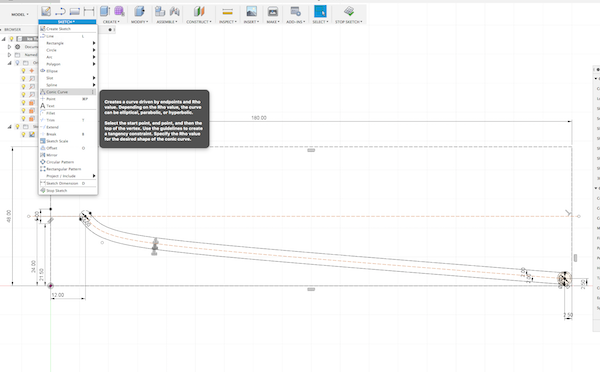
Once the shape was finished, I made a full Revolve around the main axis to get the body in its iconic form. But then I couldn't figure out, how to flatten the shape at the other end.
So tried it again, but before doing this, I had to change the dimensions of the hole object, because it diddn't fit in the Roland milling machine. Besides this, I changed the round end and made it elliptical.
Final Attempt
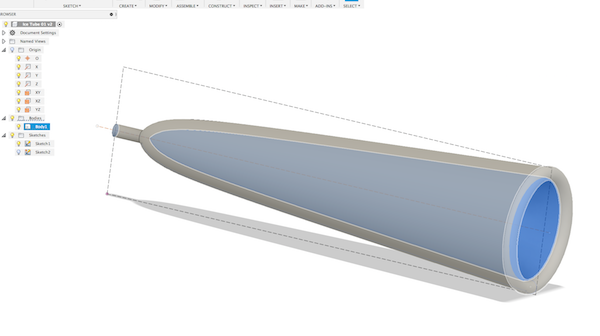
In the third attempt I sketched the profiles of each ending, one ellipse an one rectangular. Then I used the Offset tool to reduce the ellipse by 4 mm and also the rectangular. Here now I applied the Loft tool, but this time instead of joining I did cut out the inner part.

I made the tube's open end a little bit thicker, in the way of adding a kind of a ring to it. For this I sketched a circle on top and used this profile to apply the Sweep tool. To applicate the tool, the program asked for a guide line (path), which here has been the outline of the ellipse.
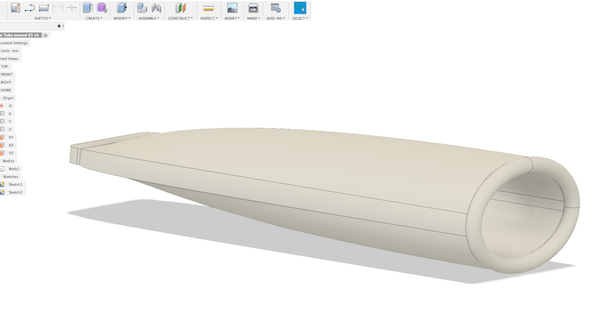
Now the form was finished:
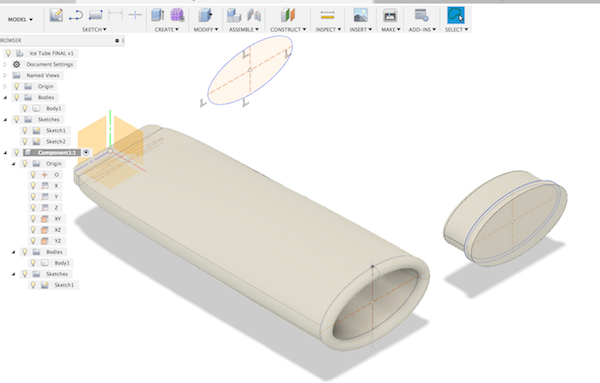
Later also, I designed a cap for the ice tube, and opened for this a new component in Fusion 360. I made up a projection of the inner ellipse and used this for modeling the cap.
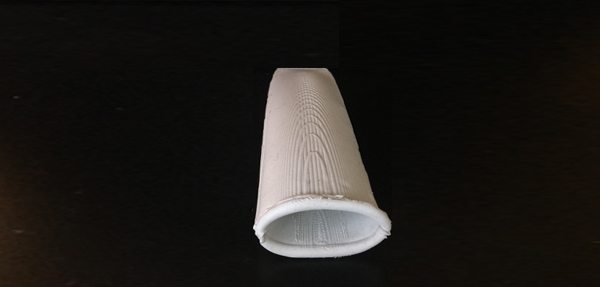
Manufacturing the Wax Blocks
After the tube design was finished, I made two boxes, that served as containers for the melted wax. The box was a simple finger joint construction, made by Plywood with a thickness of 4 mm, produced with the laser cutter.
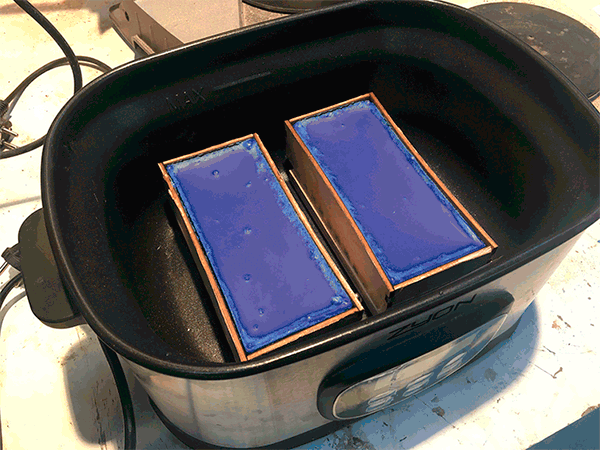
After sticking the pieces together and I tapes the edges of the with crepe paper. Then I spread white Vaseline to the insided partitions, and filled the melted wax into it.
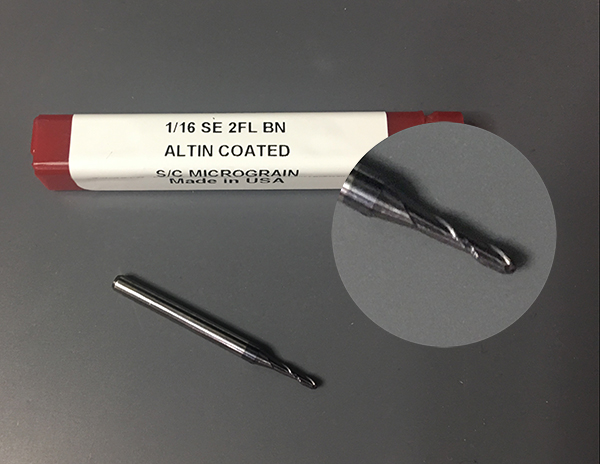
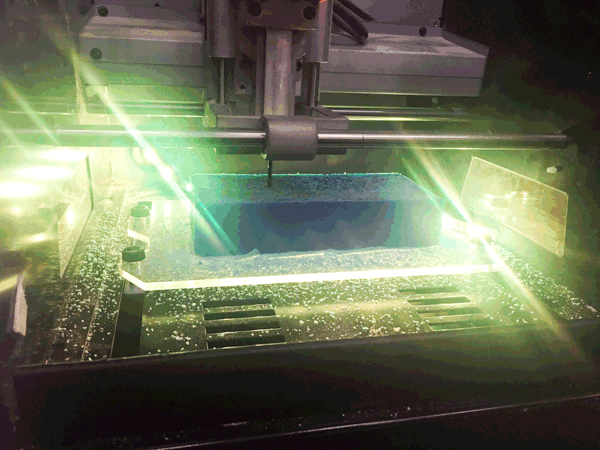
Wax Milling: Components 1 and 2
To mill the wax blocks I used the Roland SMR-20, the same machine as in assignment Week 4 - Electronics Production. But this time I had a different Carbidge End Mill with the specification of:
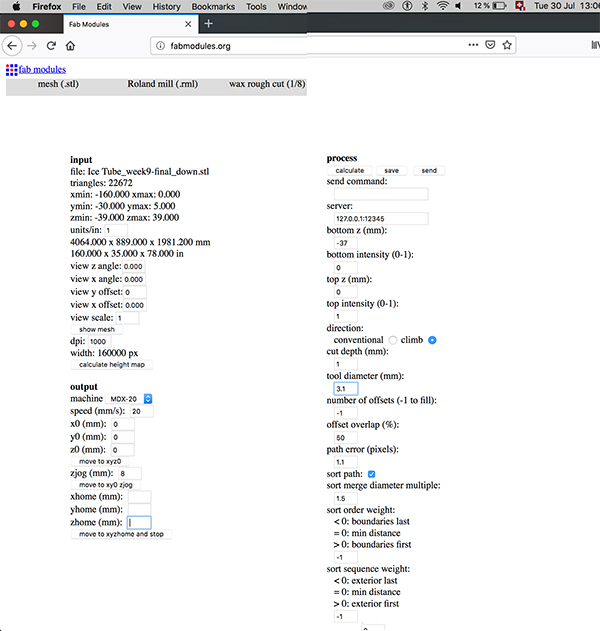
Then I opened the fabmodules.org to generate the RML document for the machine.
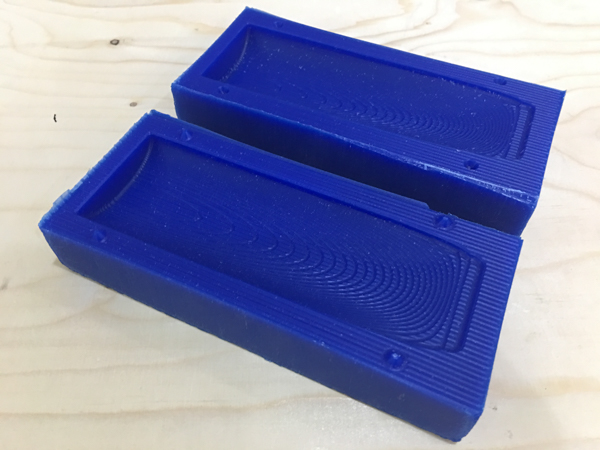
The milling job was good, and I decided not to make a finishing cut. I liked the structure on the surface, that resulted from the mill's paths during the rough cut.
And last but not least, I cleaned up the machine and took out the milled wax, which was going to be recycled. Then I vacuumed rest of the wax, which was left under the plate.
3D Printing: Component 3
For the inner part of the Ice Tube I had to produce a third component mold. I decided to 3D print this piece and prepared the FabLab printer by:
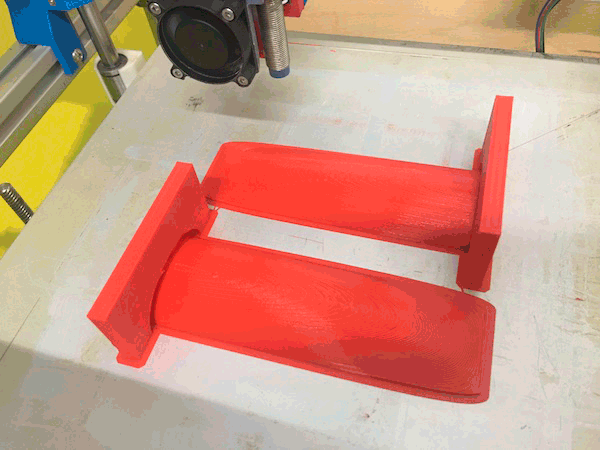
Here, there were also no support or bridge printings needed. By printing it into two parts, I avoided overhanging parts.
Silicone Application
To fill up the mold with sillicone, I calculated the amount by testing it with water. I stroked a line on a plastic cup and used this quantity of silicone, that was needed to get the mold fully filled up, when the third part was going to be mounted.
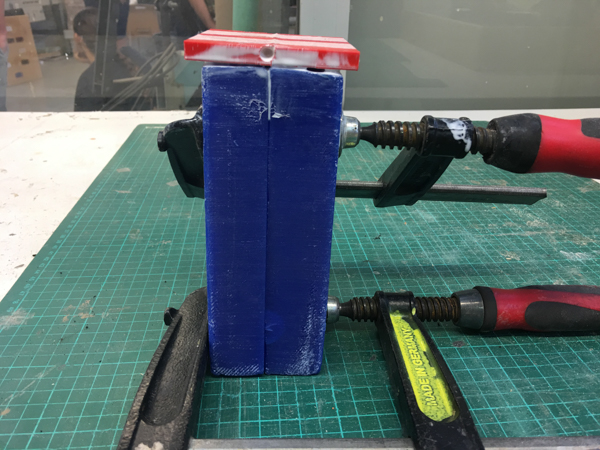
By giving it a last pressusure, the left over could squeeze out of the mold, through two holes in the third component. I had to drill these holes with a drilling machine, they were not considered during the design of the third mold.
Then I also had to cut the wax blocks at the upper ending, to fit them to it's third component. For this I used a long knife, that I heated up with a hot air gun before cutting.

Remove Molds from Silicone
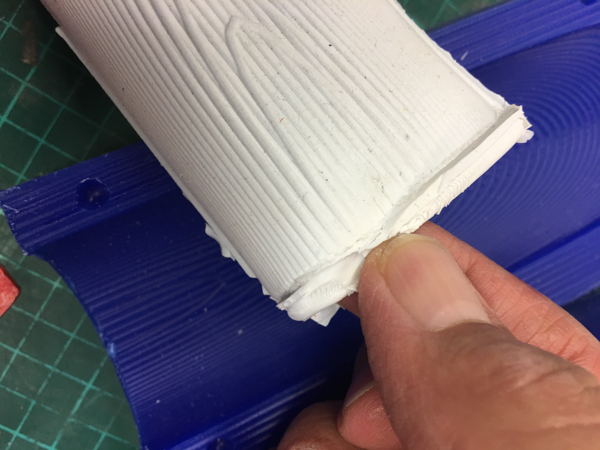
I seperated the sillicone from the mold by removing one piece of the third component first.
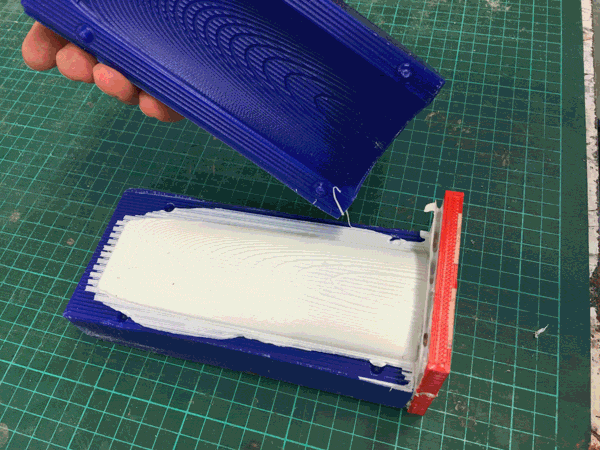
When I examined the silicone ice tube a little bit closer, I noticed some inconsistancies. The Ice Tube was on one side thinner than the opposite side. This occured, because the third component of the mold did not fit well to the other blocks. I tried to fix it, because the component was even more inclined, as shown in this picture.
But at the end the inner part of the mold was still slightly inclined. As a consequence of this, the ring on the top end could not fully filled up, or, it did, but parts of the sillicone did run out afterwards.
Conclusion
The result of this molding experiment was satisfactory. As shown here before, only a few corrections have to be done. Then I will repeat the sillicone application, but this time with and food save sillicone.
The fabrication of the Ice Tube was more complex, than I originally expected. The mold with three components was quite a challange, but I enjoyed it, and surely my kids are going to enjoy their Ice Tubes as well.