Exercise 10. Molding and Casting
After the lesson about Molding and Casting, on Wednesday 21 March, the assignment for this week was to:
		GROUP ASSIGNMENT:
						_ review the safety data sheets for each of your molding and casting materials,
						then make and compare test casts with each of them
		INDIVIDUAL ASSIGNMENT:
						_ design a 3D mold around the stock and tooling that you'll be using,
						machine it, and use it to cast parts
PREVIOUS CONSIDERATIONS
The material which we are going to use to mill molds will be a machineable wax, in this case a blue Ferris File-A-Wax you can see below:
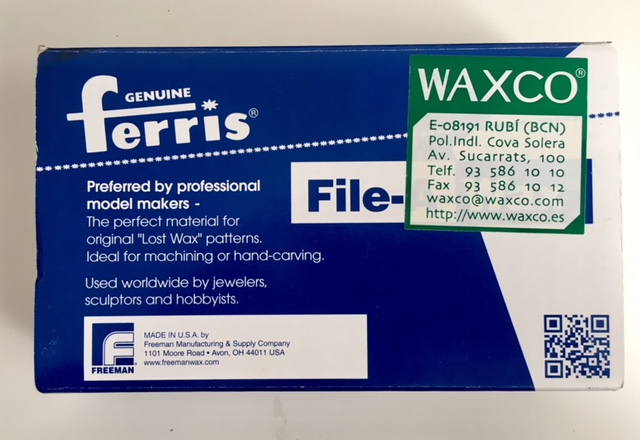
Machineable wax is an extremely hard wax with a high melt point that has been formulated to deliver exceptional machining properties with high resolution detail.
There are small but important differences in machining waxes for certain applications. In our case, we are going to use blue one, which has 52D Shore hardness, the softest one in those Petroleum hydrocarbon wax blends in block Ferris has.

It is a 454 g wax block, and it will be enough to learn how to work with this kind of materials and get our molds to cast.
Both, Javi and I, will have one block each.
GROUP ASSIGNMENT
Once we knew basic material for our work this week, Javi Vicente and me have analyzed all casting materials we could use to cast our molds.
We have available:
			_ Smooth-Sil 940 and its catalyzer
			_ Form-Sil 25 and its catalyzer
			_ Form-Cast Rhino and its catalyzer
			_ Cogelsa Ultragrease TF spray
Although, at the end, we have used only Smooth-Sil silicone in combination with Cogelsa release agent, we have read all materials datasheets, which can be downloaded here.
SMOOTH-SIL 940
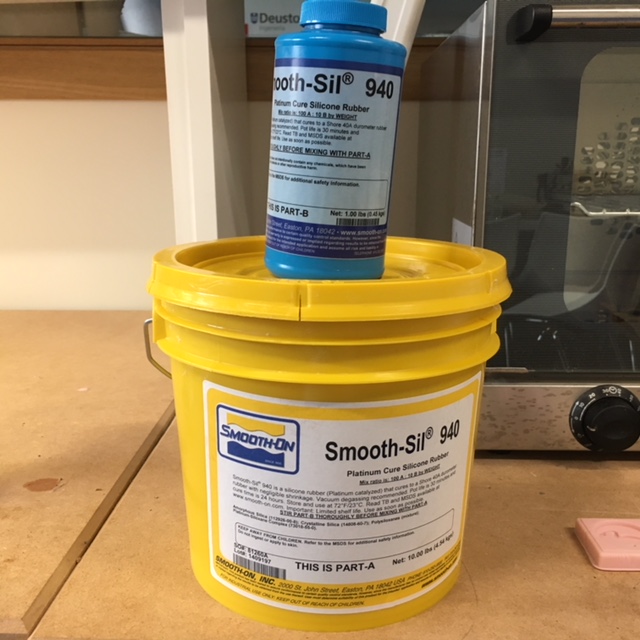
Also known as addition-cure silicone, platinums exhibit the lowest long-term shrinkage and have the longest library life of all mold rubbers. While good for making molds for casting a variety of materials, platinums also have application and physical properties that other rubbers do not. As a result, they are used for other applications. For example, some are certified “skin safe” and can be applied directly to human skin. They are also used for making prosthetic and orthotic devices, skin safe appliances and effects, etc. Some are certified “food safe” for culinary applications.
And it is for this reason Javi and me have selected it, we need “food save” silicone to do chocolate sweets. Smooth-Sil 940 is suitable for food related applications.
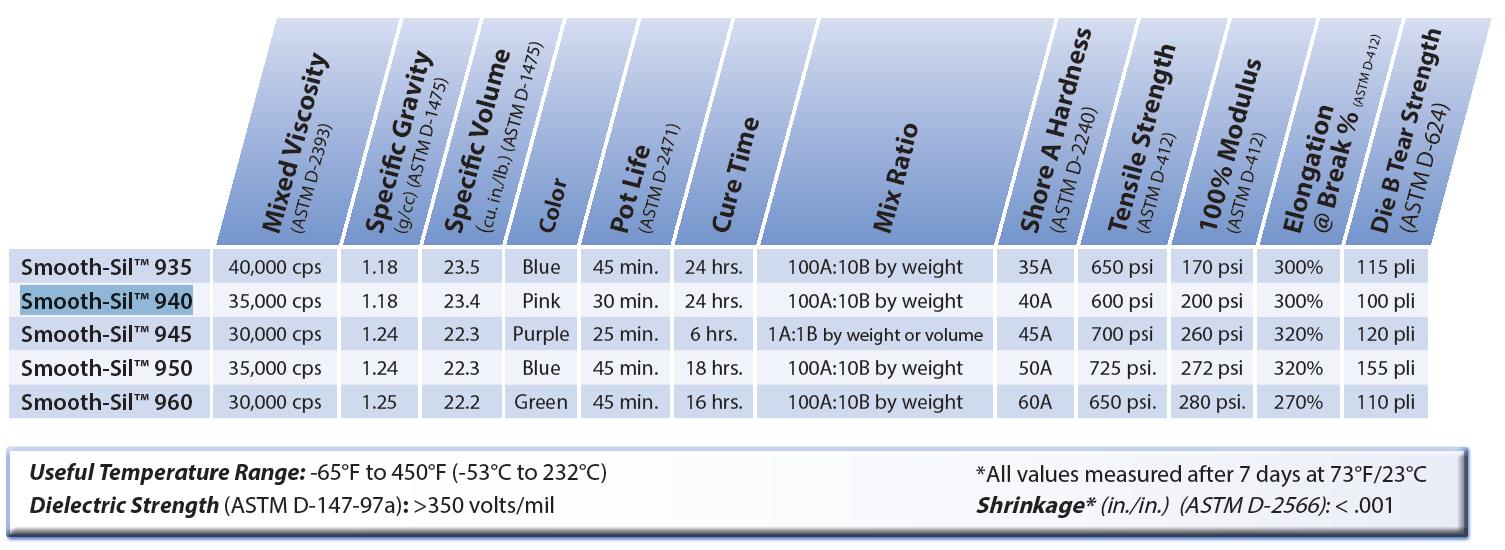
Smooth-Sil Platinum Silicones cure at room temperature with negligible shrinkage. With 40A Shore hardness in our case, as you can see below:
These silicones exhibit good chemical, abrasion and heat resistance. Materials such as plasters, concrete, wax, low-melt metal alloys or resins (urethane, epoxy or polyester) can then be cast into these silicone rubbers without a release agent.
Smooth-Sil Platinum Silicones are used for rapid prototyping, wax casting (foundries and candle makers), architectural restoration and for casting concrete.
For more info: link.
It is important to understand safety considerations too: It is necessary to use in a properly ventilated area, wear safety glasses, long sleeves and vinyl gloves to minimize contamination risk.
The mixture that should be done is: 100 silicone (part A) + 10 catalyst (part B), and be careful with its pot life: this mixture working time is 30 minutes only.
Although not usually necessary, a release agent will make demolding easier when pouring into or over most surfaces.
The only inconvenient would be that we have not degassing systems and vacuum degassing is recommended to eliminate any entrapped air. We will see.
FORM-SIL 25

It is a flexible silicone for pouring molds. If it is needed can be thickened with THi-Vex thickening agent. Its hardness is Shore A25 and its colour is white. FormSil 25 has a low viscosity and pours easily without degassing.
The mixture that should be done is: 100 silicone (A component) + 5 catalyst (B component).
We have not found any data-sheet for these two components, so for more info go to: link.
FORM-CAST RHINO

FormCast Rhino is an easily pourable, thin-flow polyurethane cast resin that is suitable for many applications such as: decorative objects, prototypes, vacuum drawers, support caps, etc. Can be obtained a pasteous resin by adding fillers.
For this material, the working method is: Stir the individual components well before use. Weigh or measure both parts accurately and assemble in a clean and dry container and mix for 30 to 60 seconds (for the mixing cup, best use PP or PE plastic cup). Avoid contact with moisture as this will cause foam formation of the resin.
It is important to understand safety considerations too: Avoid contact with skin and eyes. It is recommended to wear protective clothing such as: a long sleeve shirt, laboratory gloves, safety goggles and carbon foot mask.
For more info: link.
COGELSA ULTRAGREASE TF SPRAY

Teflon and non-toxic spray grease. Great resistance to water, steam and high temperatures (tips up to 200ºC). NSF H1 certification for accidental contact with food (this certification PDF is also into data-sheets RAR file).
We have used it as release agent when we casted Smooth-sil into Wax machined mold.
As said before, documents and data-sheets of these materials can be found here.
INDIVIDUAL ASSIGNMENT
I have made two different works for this individual assignment:
		1_ Final project Concept 1 physical trial
			a_ Mold machining first
			b_ Mold casting later
			c_ and Testing to finish
		2_ Chocolate flowers
			a_ Mold machining first
			b_ Mold casting later
			c_ and Testing to finish
MOLD MACHINING
1_ FINAL PROJECT: CONCEPT 1
The most common working flow in molding and casting process is:
		> Milling POSITIVE part (machine wax)
		>> to get a NEGATIVE part in silicone (cast flexible material)
		>>> to get POSITIVE part replicas (final material)
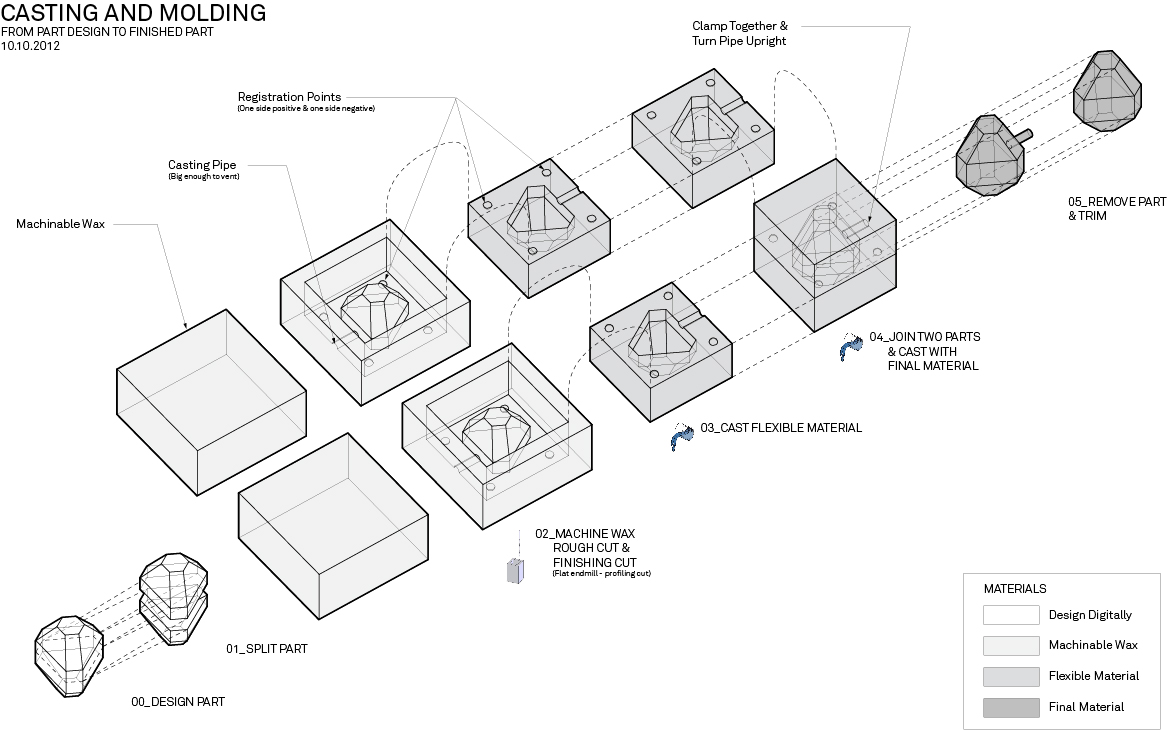
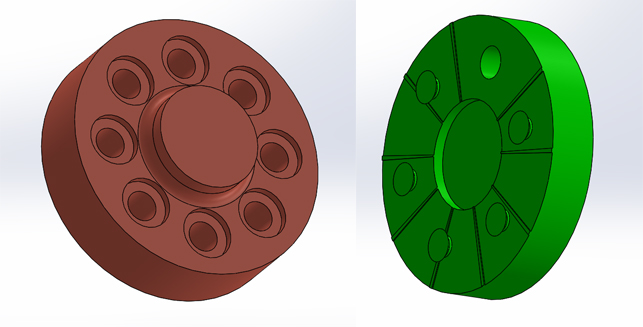
But, in this particular assembly (image below), the final part is a silicone part which would, theoretically, allow product to be watertight. And, as an engineer, I need to make trial with it.

First of all, I 3D printed those two main parts. It is important to have, at least, Mobile part, because later it will work as an insert into the silicone casting.
You can find this two main parts in 3D (STL format) here.
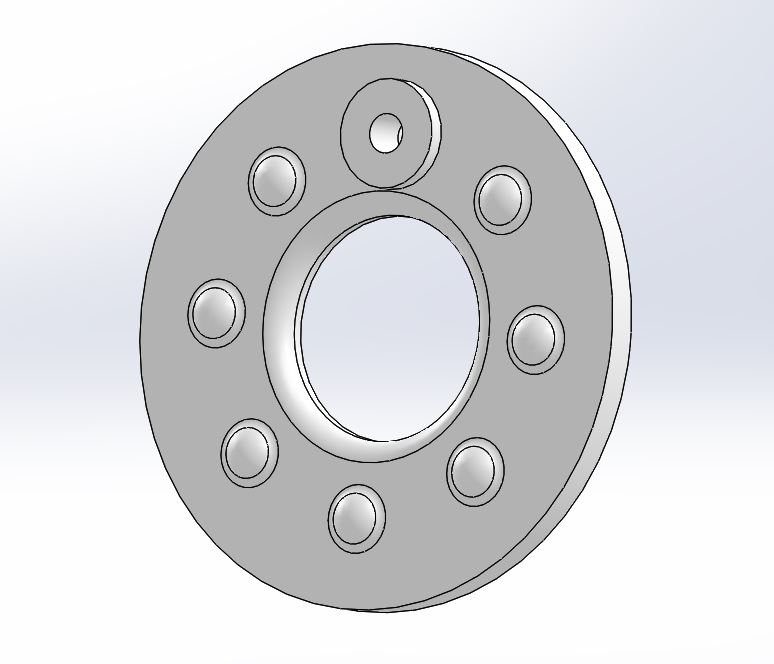
And this is the positive part I would to get after the casting in silicone:
For preparing well what we are going to mill, is important to know which end-mill are we going to use. We have to take in account its Diameter (for letting some space between part zones, bigger than the diameter, where end-mill needs to pass) and its Cutting Depth (obviously, it cannot go down and cut over this distance).
I am going to use a 3-6-12 end mill: diameter 3 mm and Cutting Depht 12 mm.

I prepared the mold, on Negative, using SolidWorks:

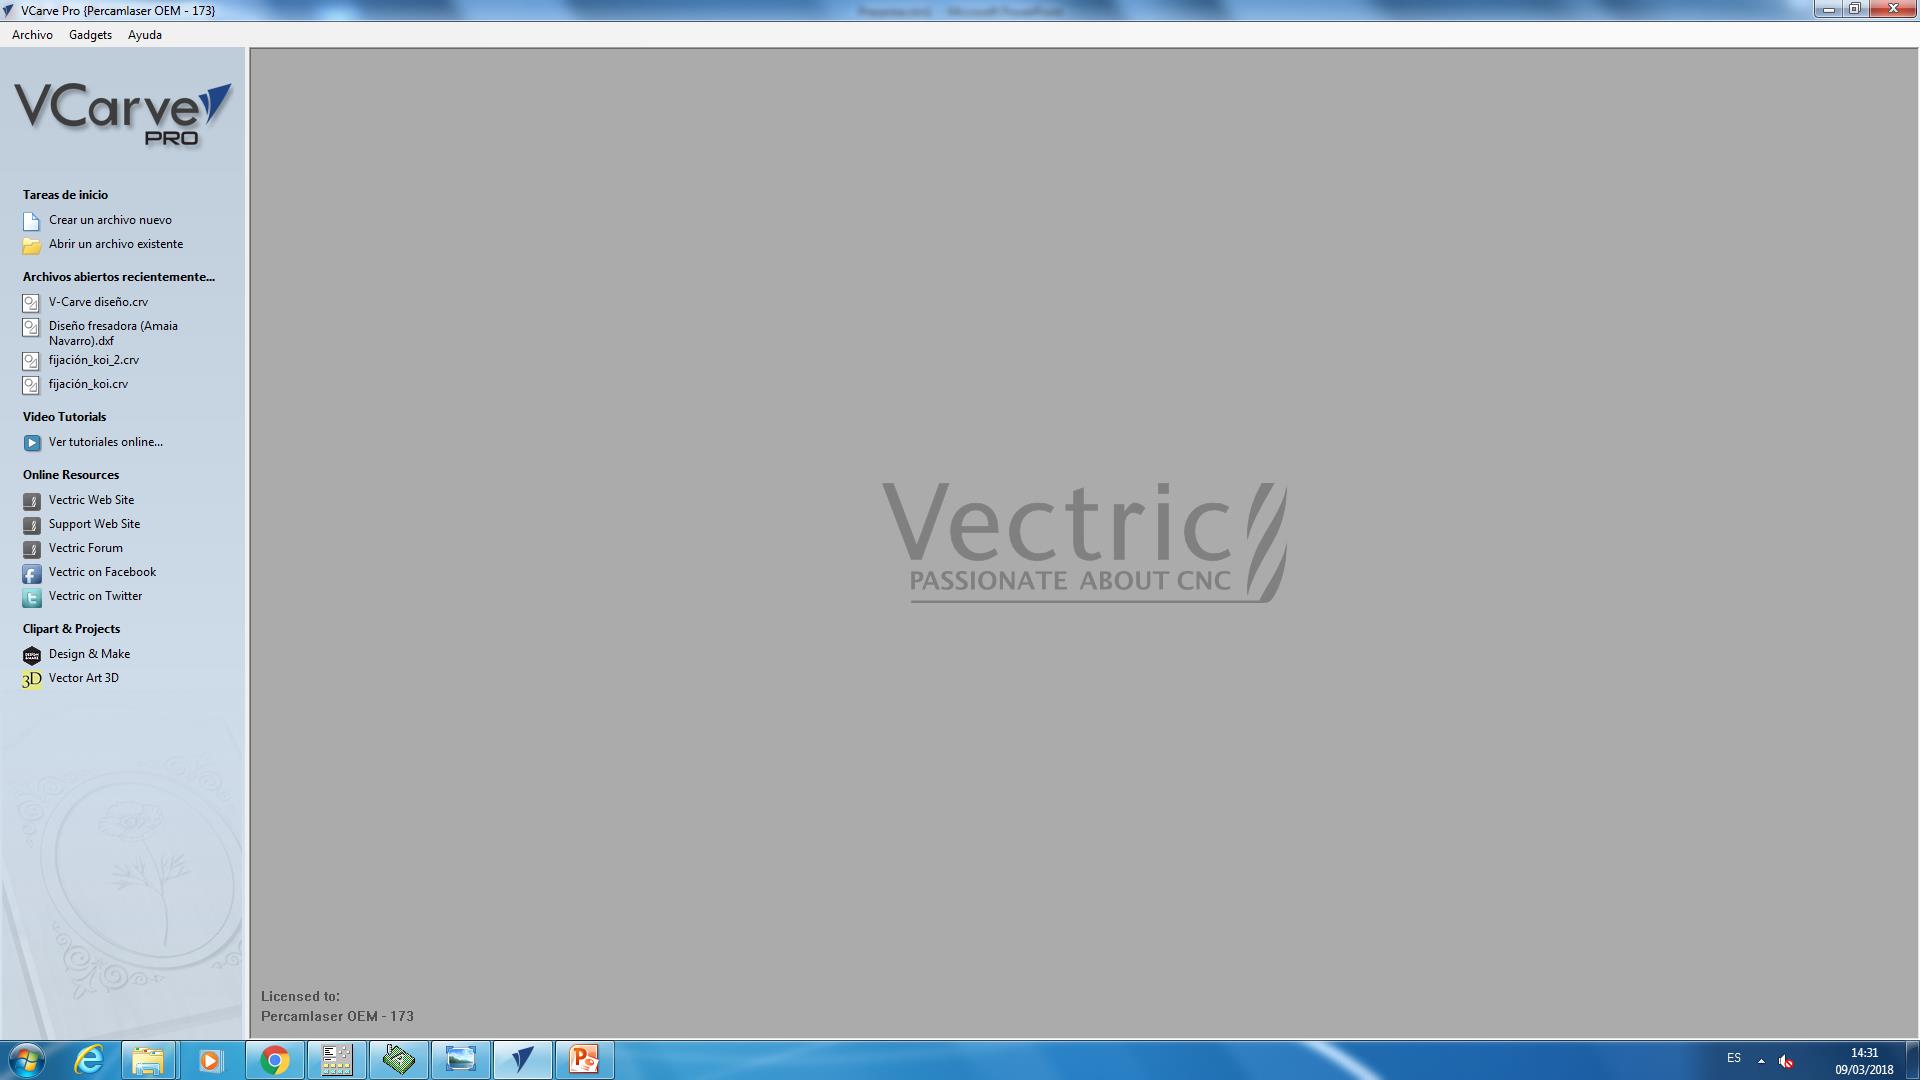
And after that, I exported it in STL format to go to Vcarve software. As in the exercise 08 I used this software for machining, but in this case I used it with Roland MX40 machine.
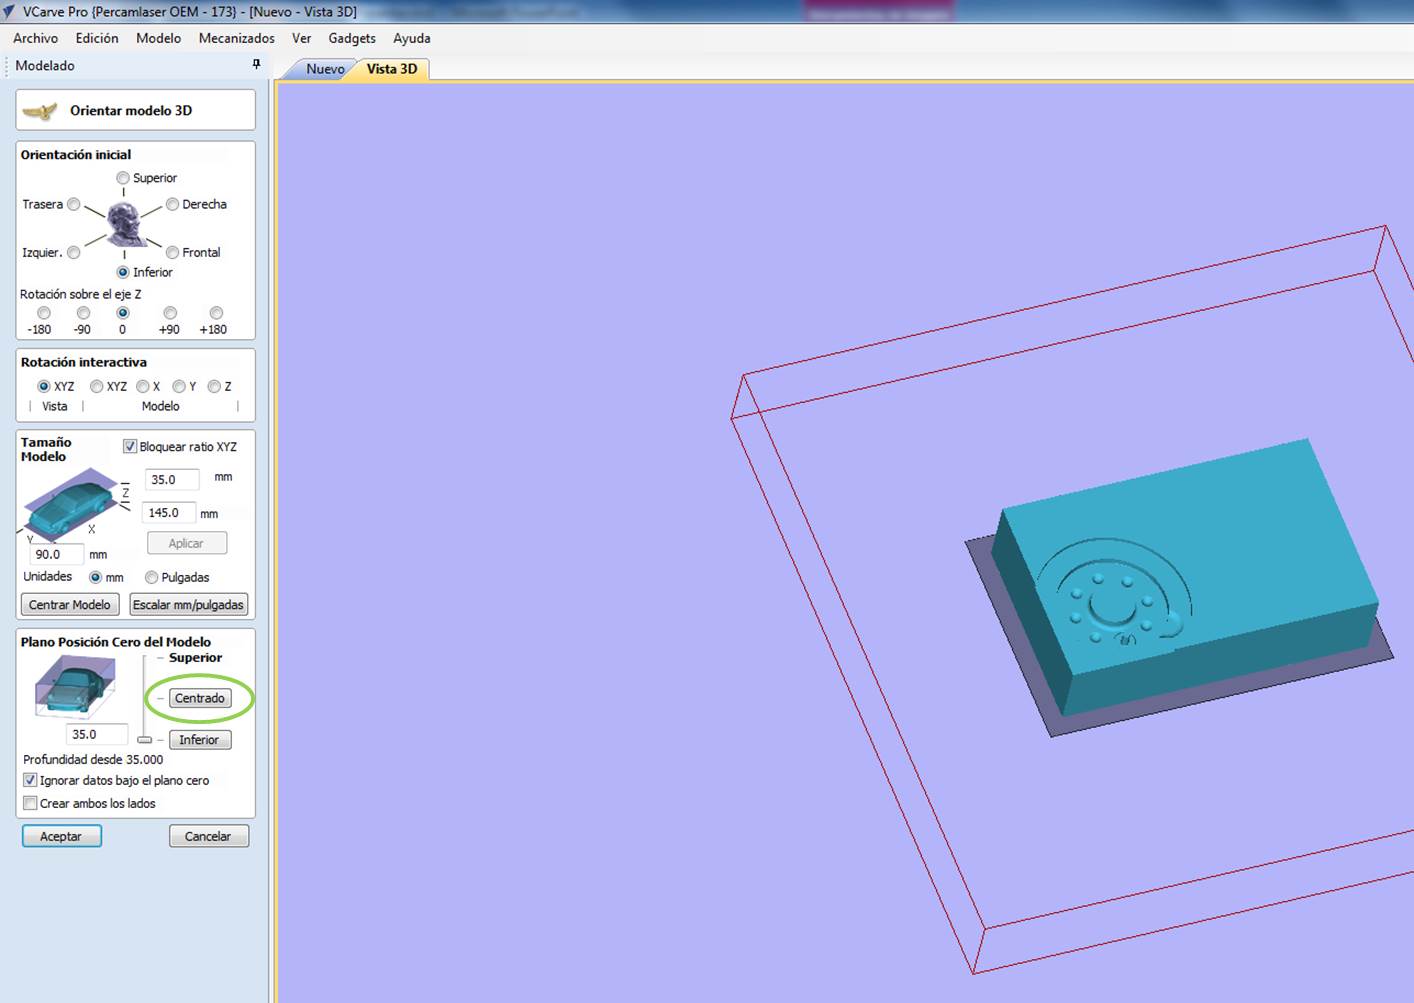
I imported 3D model (in STL format):

And then I placed it in the correct position and orientation.
It is important to:
_ Have, in the 3D mold model, the same thickness of the main material block: In this case 35mm. Vcarve work place, 3D model and the material block are 35mm height.
_ Place the 3D model in the middle plane, to have the surface we have to machine in the upper side, but just aligned to the block surface.
Then, if we go to Drawing view, we can see in grey code what and how deep is going to mill the machine: the more black the deeper.
Using this view, move the model near our (x,y) origin.

We use Vcarve 3D Toolpahts:
_ First of all 3D Rough Toolpath, to remove most of the material_ Then finish surfaces using 3D Finish Toolpath


Configure tool trajectories:

And select the tool for milling, in this case, as I say before, 3mm end-mill:

I created in this way two machining works: Rough and Finish. For the Finish I configured it in 45 degrees. The best way is to do two finishing millings, one with 45 degrees angle, and the other with -45 degrees angle, but this first time I did only one. I did not need a fine surface; it is an internal part, not visible and aesthetics.
Once I had these trajectories, I realize that if I have done the 3D model only for the surfaces I had to machine, and not with dimensions of the entire block, it would be a faster work, so I redesign the 3D model, and I repeated the process with it.

You can see the reduced model below:

And yes! First of it, theoretical times were about an hour, now they were about theoretical 15 minutes. (See image below). You can download Reduced 3D model here.
In Save Tool Trajectories >> Select Roland MX40 and I was ready to send it to the machine.

But I realized that there were differences between Vcarve Tool and printing dialog speeds.


So, I made a little speed proof using Roland VPanel, and I checked that the machine was following the speed specified in Tool Database for X and Y axis moves, but it was following Spindle RPM from the printing dialog. I create a new 3 mm diameter end-mill tool, special for WAX, in Tool Database, to combine differente speeds.
		Speed used:
			_ From new Tool Database: XY axis 15 mm/s and Z 10 mm/s
			_ From printing dialog: 7500 rpm
And GO! I prepared machineable WAX into the machine using double-sided tape, I configured the (X,Y,Z) origin of the tool in the Roland, and I send Rough first, and Finish after, to work.

They went well! :)
2_ CHOCOLATE FLOWERS
In this case it is a conventional Molding and Casting process. I made the flower 3D model using SolidWorks and I prepared it to be a mold; taking in account 3mm diameter and 12mm Cutting Depht of my end-mill.


You can download Flower mold file in STL here.
I import it in Vcarve software and I have configured a Rough and 2 Finish works for it, using the procedure I have done with the precedent model. (See images below).


You can download the CRV machining file, where there are all Rough and Finish works, for both molds >> here.
As I have done it a day after the other one, I've taken off and stuck again the block in the machine, and…UPS! The double-sided tape I used in the first machining was not sticking well now! I realized about it in the first 10 seconds of the machine work, so I stopped it, and I stuck it again with new double-sided tape.

After it, everything went well, and this is the result:

We keep all the leftover chips of the material, to melt them, and create new blocks in the future:

MOLD CASTING
We have selected, as I said before, Smooth-Sil silicone in combination with Cogelsa release agent.
First of all, we measured and mixed A and B components carefully:
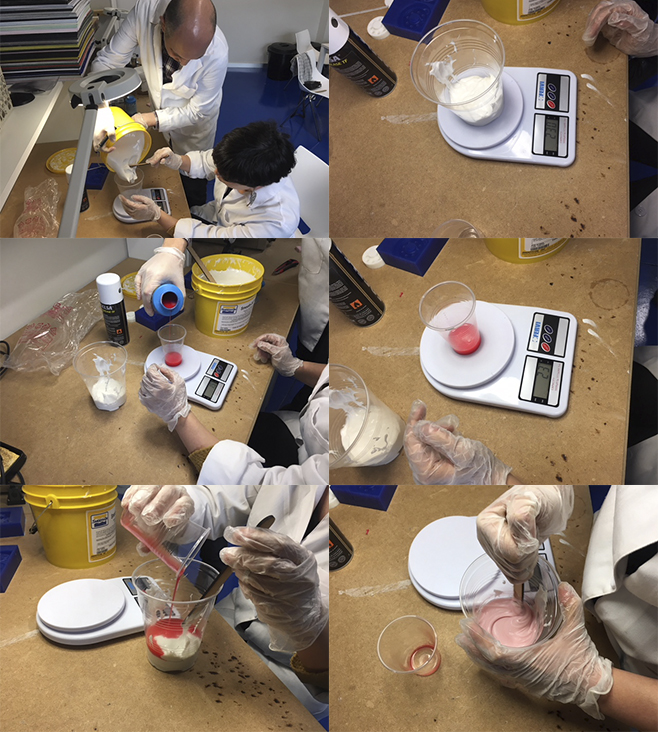
We used, as you can see, vinyl gloves for safety conditions.
The detailed process has been:
		_ Pre-mix Part B thoroughly to re-disperse pigments that may have settled.
		_ Using a gram scale, dispense required amounts of parts A and B into a
		mixing container and mix for 3 minutes. Scrape the sides and bottom of
		the container several times.

		*(After mixing parts A and B, it is recommended to make a vacuum degassing to eliminate any entrapped air, but we haven’t got one.)

		_ Apply a Release Agent to the mold, in my case Cogelsa Ultragrease TF spray:
		a release agent will make demolding easier when pouring into or over most surfaces.
		Let it some minutes to dry.

		IMPORTANT! Remember that the mixture of A+B has a Pot life of about 30 minutes.

As you can see in the image above, our silicone is not as fluid as it should be, because it has been opened about a year before, so it has been difficult to control its dumping into the mold.
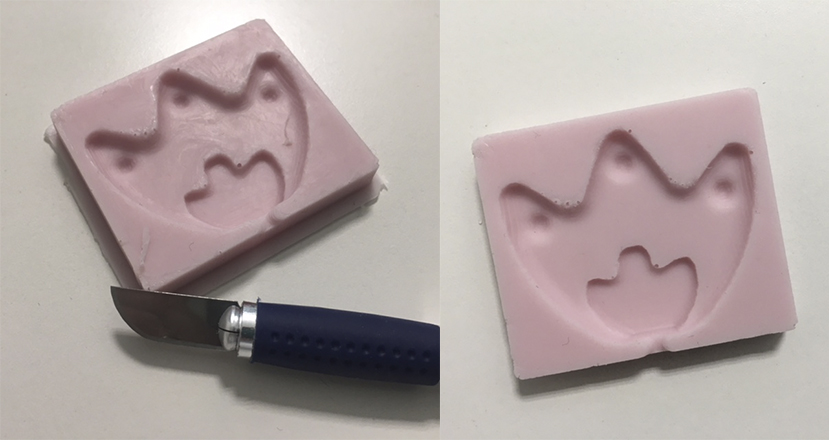
I wait 24 hours, and I unmold them carefully. They have some little bubbles that would have been eliminated in the case we had a vacuum degassing, but they are good!

Now, it is time to use them and make trials to see results!
TESTING
1_ FINAL PROJECT: CONCEPT 1
It has been a little bit difficult to unmold it together with the insert (3D printed part I have inserted when silicone was liquid) but it fits perfectly with the other pieces.

Remember the concept sketch I have done in Project Conceptualization:

So I mount it, and you can see its water-tightness proof in this video:
As I predict, it needs a big force of closing, to be totally water-tight, and it would need a big force also to push the water through the system. This is not useful for my final project.
2_ CHOCOLATE FLOWERS
I unmold easily the silicone part to cast chocolate and little candies, as you can see in the images below. In this case, I needed to use some butter to make the chocolate unmold step easier.

DOWNLOADS
_ Concept 1 3D printing parts (STL).