Assignment 9: Embedded Programming
Assignment:
Group assignment:
- Experiment with other architectures
Individual assignment:
- Read a microcontroller data sheet, program your board to do something, with as many different programming languages and programming environments as possible
Reading the datasheet
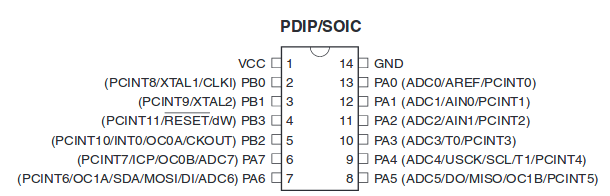
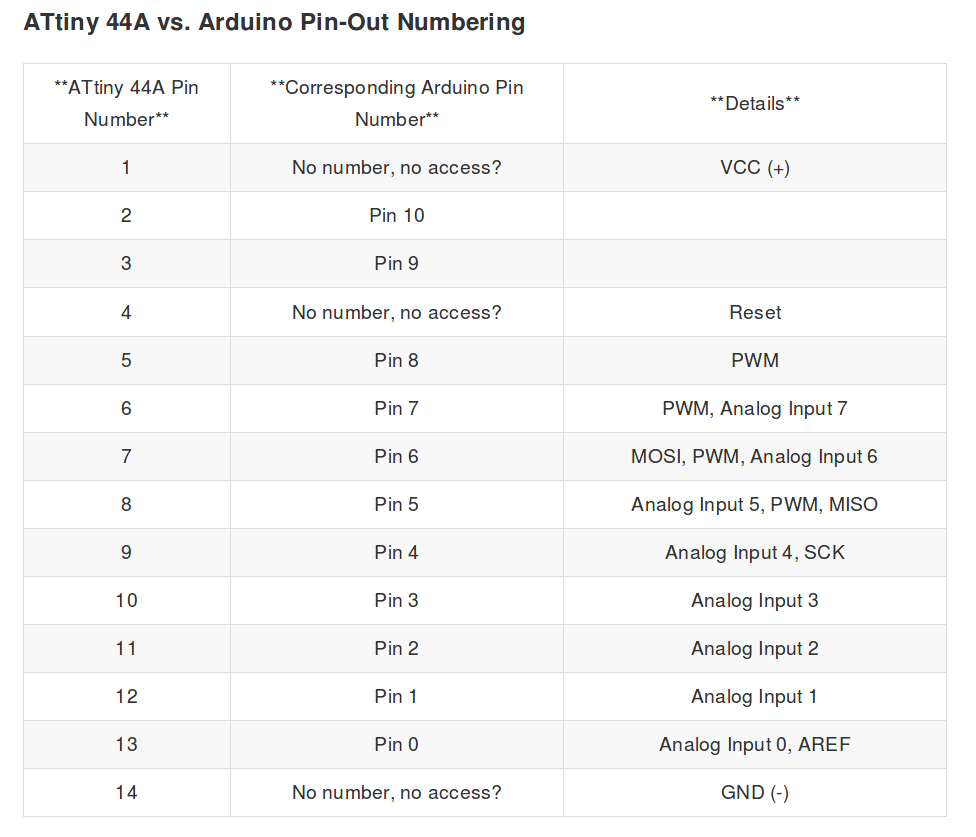
Reading a microcontroller datasheet was a task this week. I chose to read datasheet for ATtiny 44A. It is the microcontroller we use in our boards. The datasheet is 286 pages long and contains all the necessary information for its use and the programming. Datasheet is divided in 27 chapters, which are clearly named and divided between its key properties. The first three chapters give general overview of the microcontroller including the pin configurations. ATtiny 44A pin configuration looks like:
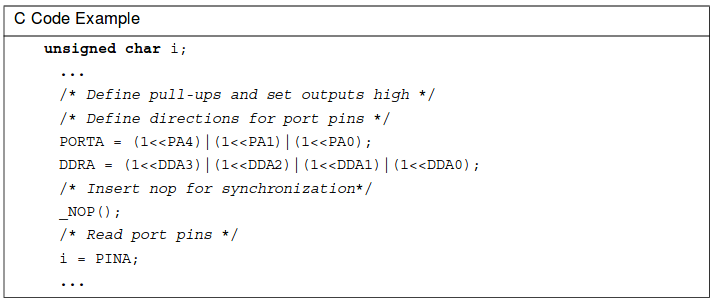
There can be found several code examples in Assembly and also in C, which are used to clarify the programming of the different features on microcontroller.
Embedded programming
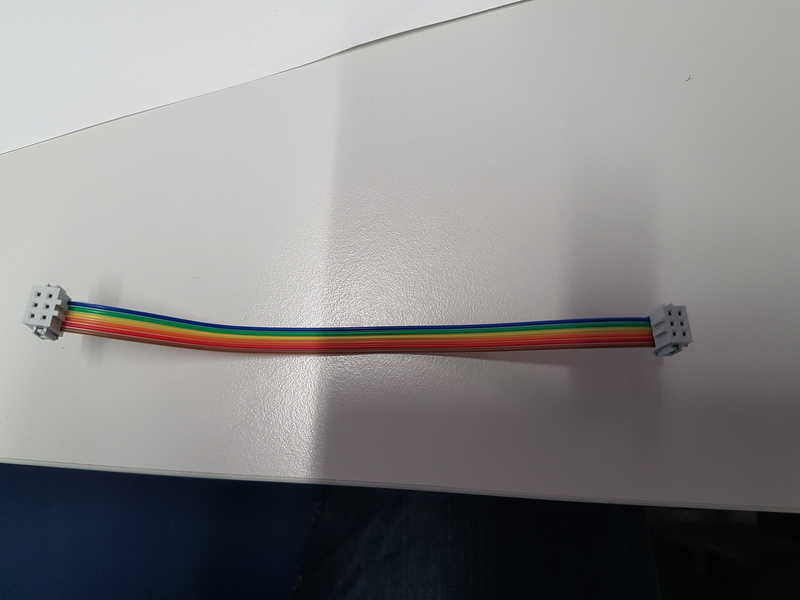
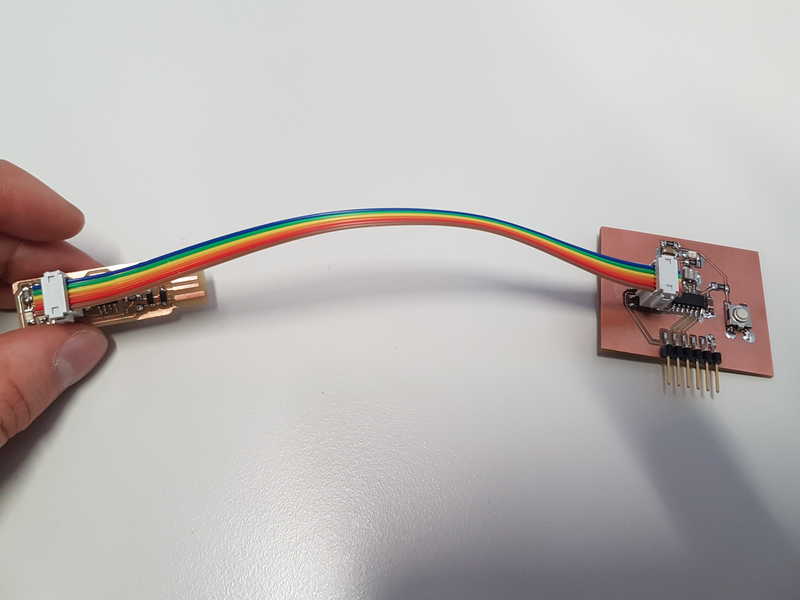
We started to learn about embedded programming with our local instructor Juha-Pekka Mäkelä at 15.3.2018 at noon. We went through the basics of the embedded programming and the answers were given to question what, why and how. Microcontrollers are typically dedicated to specific tasks and embedded programming is used to give the microcontroller the specific task. In the Fab academy it is necessary to use embedded programming to use different types of sensors and to be able to communicate the measurements. I made my own for 2x3 pin headers. It required a ribbon cable and 2 pieces of 2x3 female connectors. I just pressed the connectors into cable to make connection and it was done.
DDRA |= (1<<PA7); Pin 7 of port A is an output
PORTA |= (1<<PA7); Pin 7 of port A is high
PORTA &= ~(1<<PA7); Pin 7 of port A back to low.
DDRA &= ~(1<<PA7); Pin 7 of port A is an input.
This is not the actual code but used to demonstrate operations. Since I programmed the hello board and documented the flashing process already in the Week7, I won’t go into detail, but show all the steps made here to program the button and led to work. At first, hex file is needed for the flashing. The command to create it is:
>make -f hello.ftdi.44.echo.c.make
Because I had already flashed my board, I only had to flash the microcontroller by running command
>sudo make -f hello.ftdi.44.echo.c.make program-usbtiny
Depending on your c-file name you can change the first row in the make file to your c-file name without the .c ending.

#include <avr/io.h>
int main(void){
DDRB = DDRB | (1<< PB2);
while (1) {
PORTB =PORTB | (1<<PB2);
}
}
This turns the led on and it remains on as long as the FTDI cable is connected. Then I moved to get button operated led, where pressed button lights the led and it gets dark, when the button is released. The connection for programming looks like this:
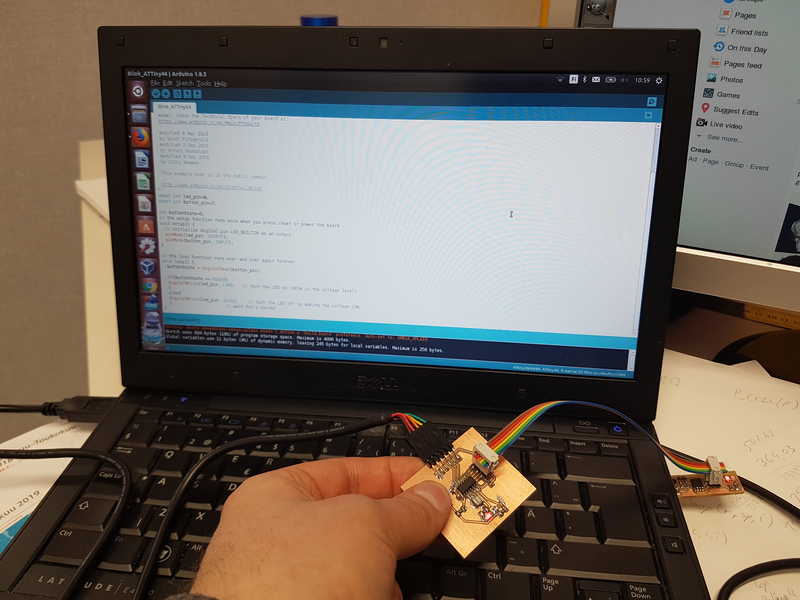
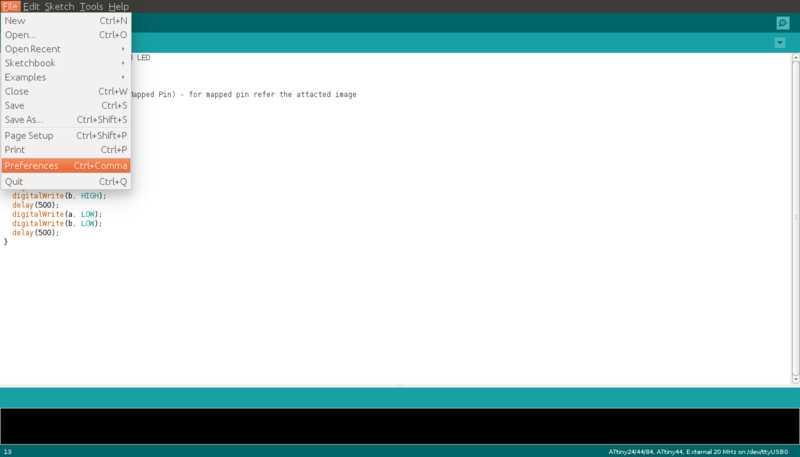
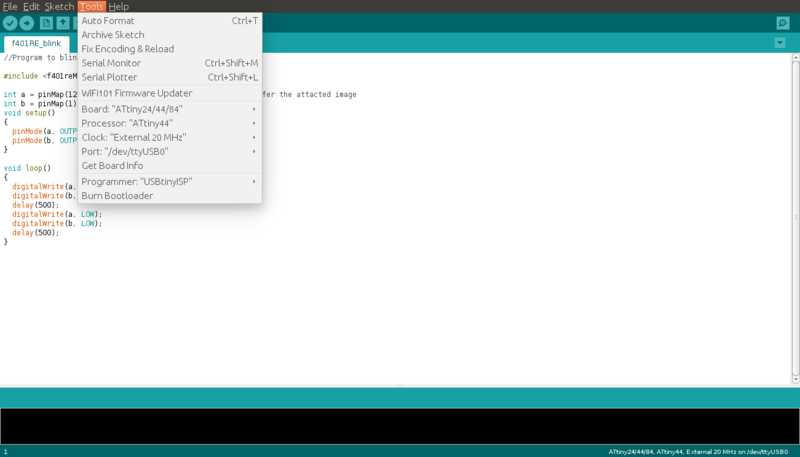
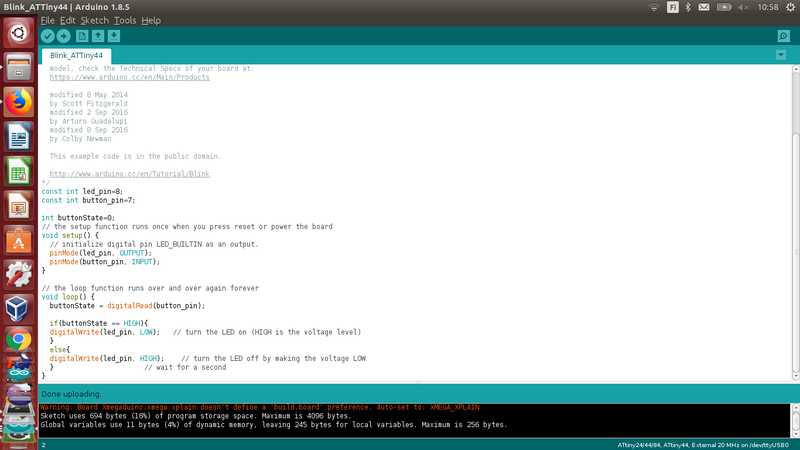
Then I moved to Arduino IDE 1.8.5. I installed ATtiny microcontroller boards for the Arduino with a guide and link from was Fab academy tutorials . It was easy and worked exactly as it was instructed . I forgot to run Arduino IDE as root at first, but I quickly noticed the error and that was the end of problems. Steps to program ATtiny 44, with Arduino IDE are as follows:
- Open Files -> Preferences and there is Additional Boards Manager URLs:
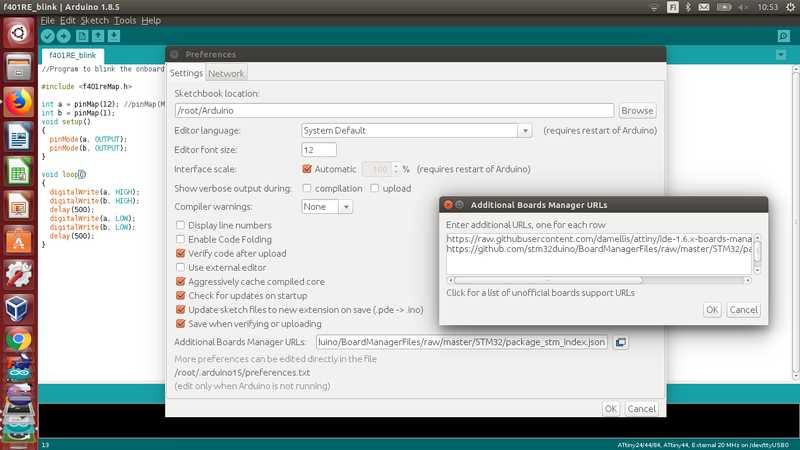
- Select Board: ATtiny24/44/84, Processor: ATtiny 44, Clock: External 20 MHz, Port: /dev/ttyUSB0 (case related) and Programmer: USBtinyISP.

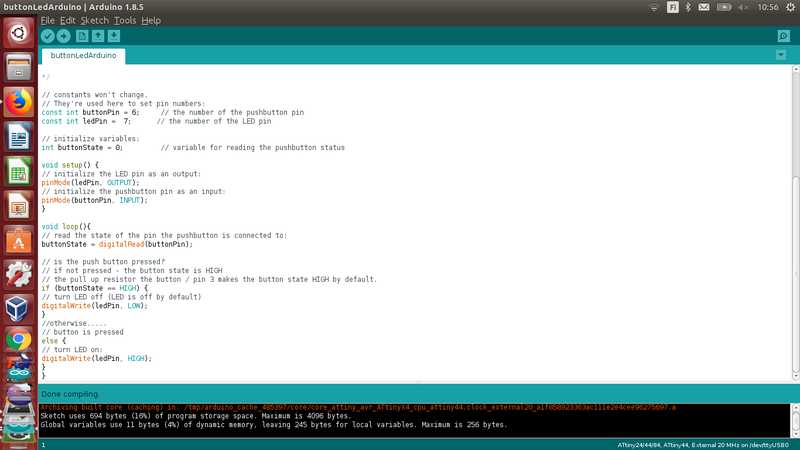
I learned a lot about embedded programming this week. I find the subject really interesting and to be in the core of the whole course. What I would like to learn more about is using interrupts in the microcontrollers. Several times there is some routine running all the time in a machine and something needs to be used to interrupt that routine immediately (for example pressing a button). If one loop is relatively long, there is lots of lag in the reaction and I think it would be a very useful skill.
Group assignment
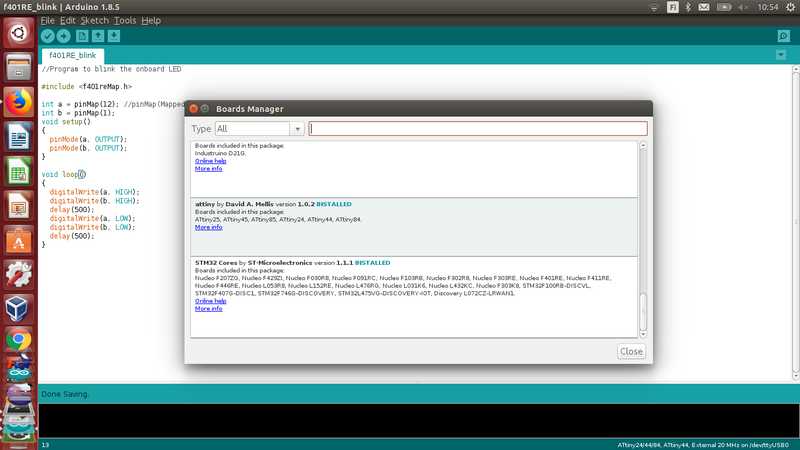
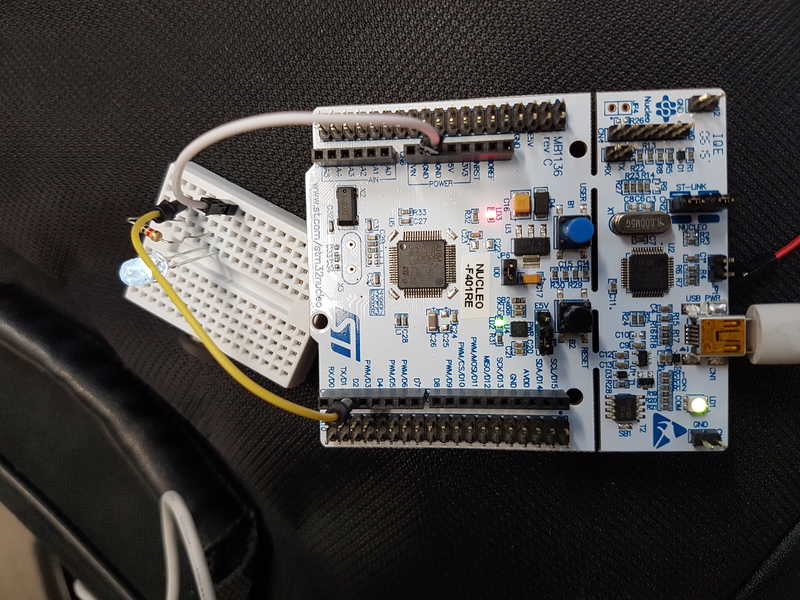
The group work consisted of testing different microcontroller architectures. We tested Rasberry Pi 3 Model B, STM32 Nucleo-64 development board with STM32F401RE MCU and we tried to work with Atmel XMEGA-E5 Xplained, but failed to get it to do anything. The progress and testing is presented in embedded programming group page. We chose the boards together and searched information related on them, but my computer was used program the boards, so I made most of that work. It was a lot harder than I thought to get the boards to do anything (except Rasberry Pi), but luckily Arduino IDE has extensions for different boards.
led.c Led on
buttonLed.c Led blinking based on Ivan's code
hello.ftdi.44.echo.c.make Makefile for buttonLed.c
buttonLed2.c Led blinking based on Neil's code
buttonLedArduino.ino Led blinking Arduino code
References
Atmel Corporation (2018) ATtiny24A/44A/84A datasheet, Retrieved from http://ww1.microchip.com/downloads/en/DeviceDoc/8183S.pdf , cited 23 May, 2018.