Discovering Various Computer Controlled Cutting Mechanisms
We had a Group Assignment and an Individual Assignment this week.
- Group Assignment The group assginment was to characterize the laser cutter we have in the lab and make test parts that vary in the cutting settings and dimensions.
- Individual Assignment The individual assignment was mainly two parts:
- Cutting something on the vinyl cutter
- Designing, Laser CUtting, and Documenting a parametric Press-Fit Construction Kit
You can check the Group Assignment on the following link: Group Assignment
Machines Used
The main two machines used in this week's assignment are the Laser Cutter and the Vinyl Cutter.- Epilog Fusion M2 120 Watts was used for laser engraving and laser cutting in this assignment. This Epilog Fusion M2 uses the CO2 Laser Technology to cut and engrave. The laser source is guidged by 2 axis (X and Y) that guide the focal point of the laser where cutting will occur.
- GCC Puma III was used for Vinyl Cutting in this assignment. The Vinyl cutter is a CNC machine that controls a blade that cuts into different soft material, based on a digital design.
Software Used
The following software were used for 2D Vector Design in this week's assignment:- Adobe Illustrator was used for laser engraving the Berytech Fab Lab logo in various DPIs,to check the output of the Laser Cutter.
- CorelDraw was used to make fast 2D designs mainly for testing the different capabilities of the Laser Cutter. It is an easy software that could be used for color mapping.
- AutoCad was the main software used for 2D design. I used it to design the Press-Fit Kit.
1- Characterizing our Laser Cutter
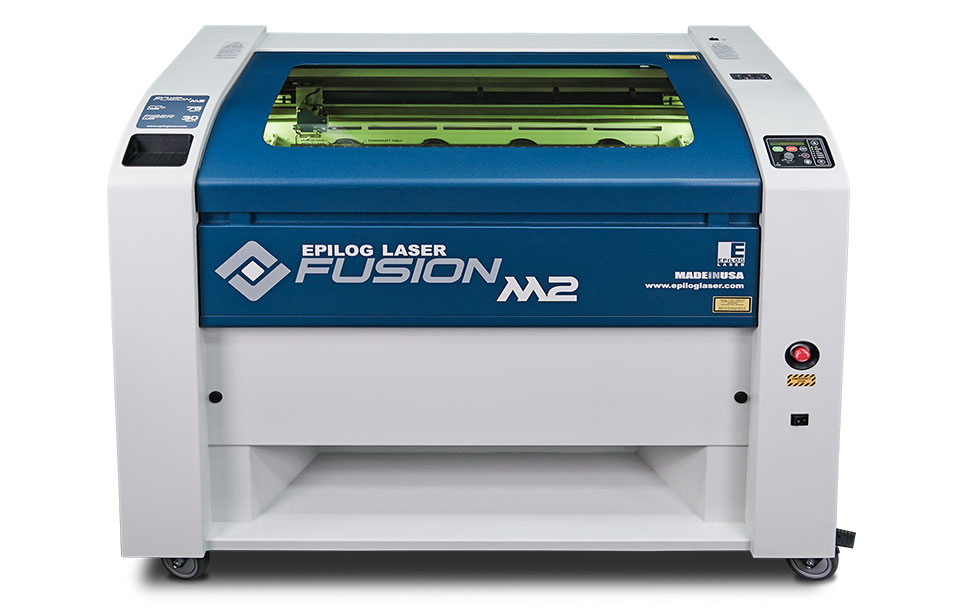
In order to discover the power of the Epilog Fusion M2 Laser cutter we have in our lab, and the various capabilities we could achieve using it, we decided to make various tests. To undergo the tests, we had to prepare the test documents first and then know how to control and change the settings of the Laser Cutter.
Preparing Files and Laser Cutting
The laser cutter usually recieves a 2D vector file that could be done on any 2D Vector software.
To cut and engrave on our laser cutter, the follwing procedure was followed:
- Building the Design The shapes that I want to cut or engrave were first designed on different software such as CorelDraw, Adobe Illustrator, and AutoCad.
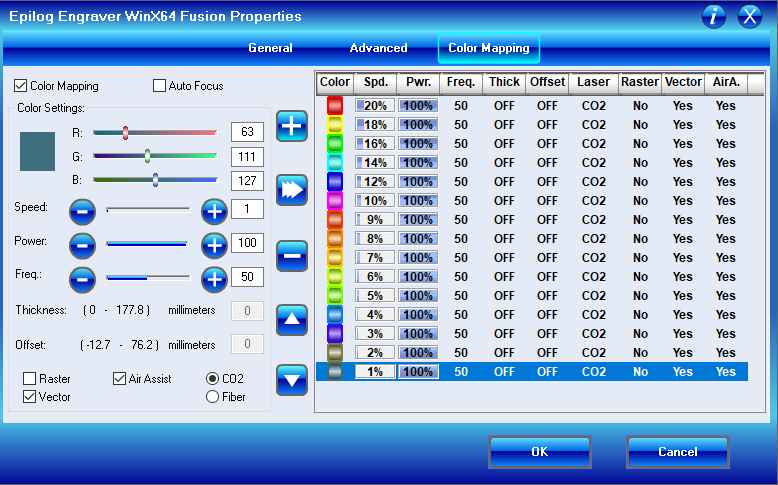
- Choosing the Laser Cutter's Settings After the design is ready, the next step was to choose the settings we need to have the best result. There are different variables that affect the final product coming out of the Laser Cutter. Among those variables are the Power, Speed and DPI. We can also use Color Mapping to choose various settings for objects on the same Digital Design. Using color mapping allow to choose different settings for objects having different colors.
- Forwarding the Job Order After choosing all the variables, send the order to the laser cutter.But before pressing Play on the Laser cutter, we have to manually set it up the printer with respect to the material we intend to use.
Setting Up the Laser Cutter
After preparing the file and the relative settings we need, the next step is to place the material we want in the laser cutter and set it up according to the thickness of the material.
To cut and engrave on our laser cutter, the follwing procedure was followed:
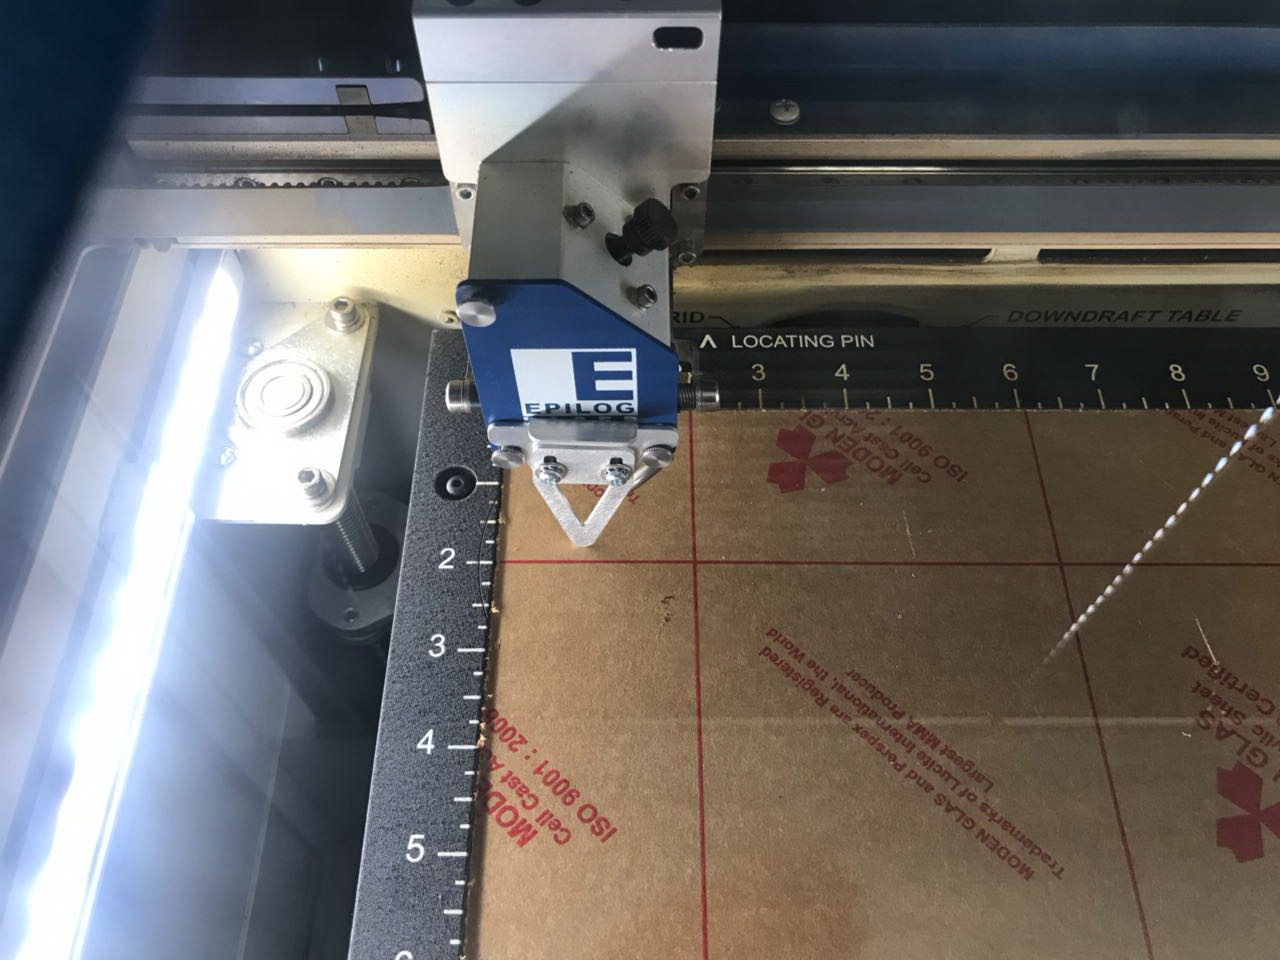
- Setting the Laser Focus: Using the “V” shaped manual focus gauge, we determine the correct distance from the focus lens to the top of the material we intend to cut or engrave. Place the manual focus gauge on the carriage and place the object to be cut or engraved in the upper left corner of the machine. Use the arrow keys on the control panel to highlight the light next to the word Focus. You can now move the Joystick up or down to move the table appropriately until your material just touches the bottom of the gauge.The speed at which the table rises or lowers can be controlled by applying varying pressure upwards or downwards on the Joystick. Once the focus position has been established, remove the gauge. Press the Reset key.
- Manually Changing Focus Anywhere on the Table: If you wish to focus at a point on the table other than in the upper left corner, you can do so by activating the Jog feature of the machine. Press the Arrow keys on the Control Panel until the light next to Jog is illuminated. This now activates the Joystick to allow you to move the lens carriage of the laser to the desired position on the table. Again, varying the pressure applied to the Joystick will vary the speed at which the lens carriage moves to the desired position on the table. Once the lens carriage is located over the desired portion of the table, use the procedure above for raising and lowering the table until the focus gauge touches the top of the material. After you have focused, press the Reset key to send the carriage back to its Park position.
- Performing the Cut After setting up the Focus and Location of the Laser with respect to the material, we can now easily go forward with cutting or engraving our file. This step is very simple, Close the lid of the laser. Click the Go key on the keypad to start the job. The laser will then start the job.
Test 1 - Engraving using Various Settings in Different Material
So the idea was to understand the different settings of the Laser Cutter that could affect the output products.
There are three main variables in the laser cutter setting that could be changed and respectively affect the output of the machine. Also the same settings could have different results between various material or various thichknesses of the same material.
The settings are:
- Power is the variable that controls the power of the laser emitted by the machine.
- Speed is the variable that controls the speed of the laser passing over the material we are cutting or engraving.
- DPI is the variable that controls the pixels of the engraved image or shape. Higher DPI means higher number of pixels. Low DPI causes a highly pixelated engraving.
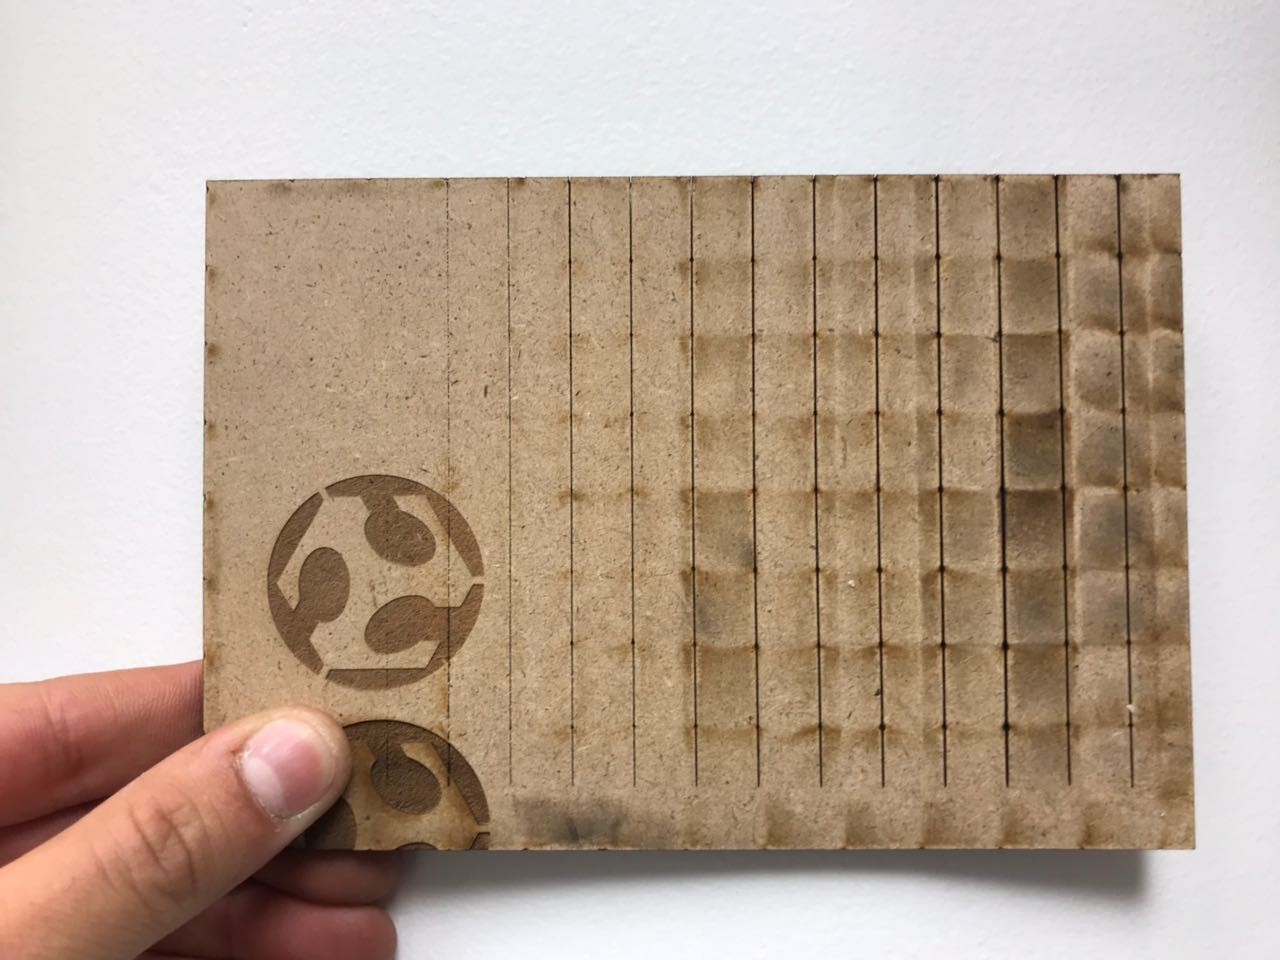
Saying that, we prepared a Test File on CorelDraw, that has the Fab Lab Logo with various colors and many 2 x 2 cm squares (hairline thichness) . Different settings were assigned to the different colors used, variating both the Power and Speed of the Laser.
Both the Power and the Speed was variated from 20 to 100. A table was done that represents the various settings used.
After that, a test was done with various DPIs to check the various results we could reach by changing the DPI.
You can download the original files used for our tests from the following links: Laser Engraving Test File
Test 2 - Cutting Various Material with Various Settings
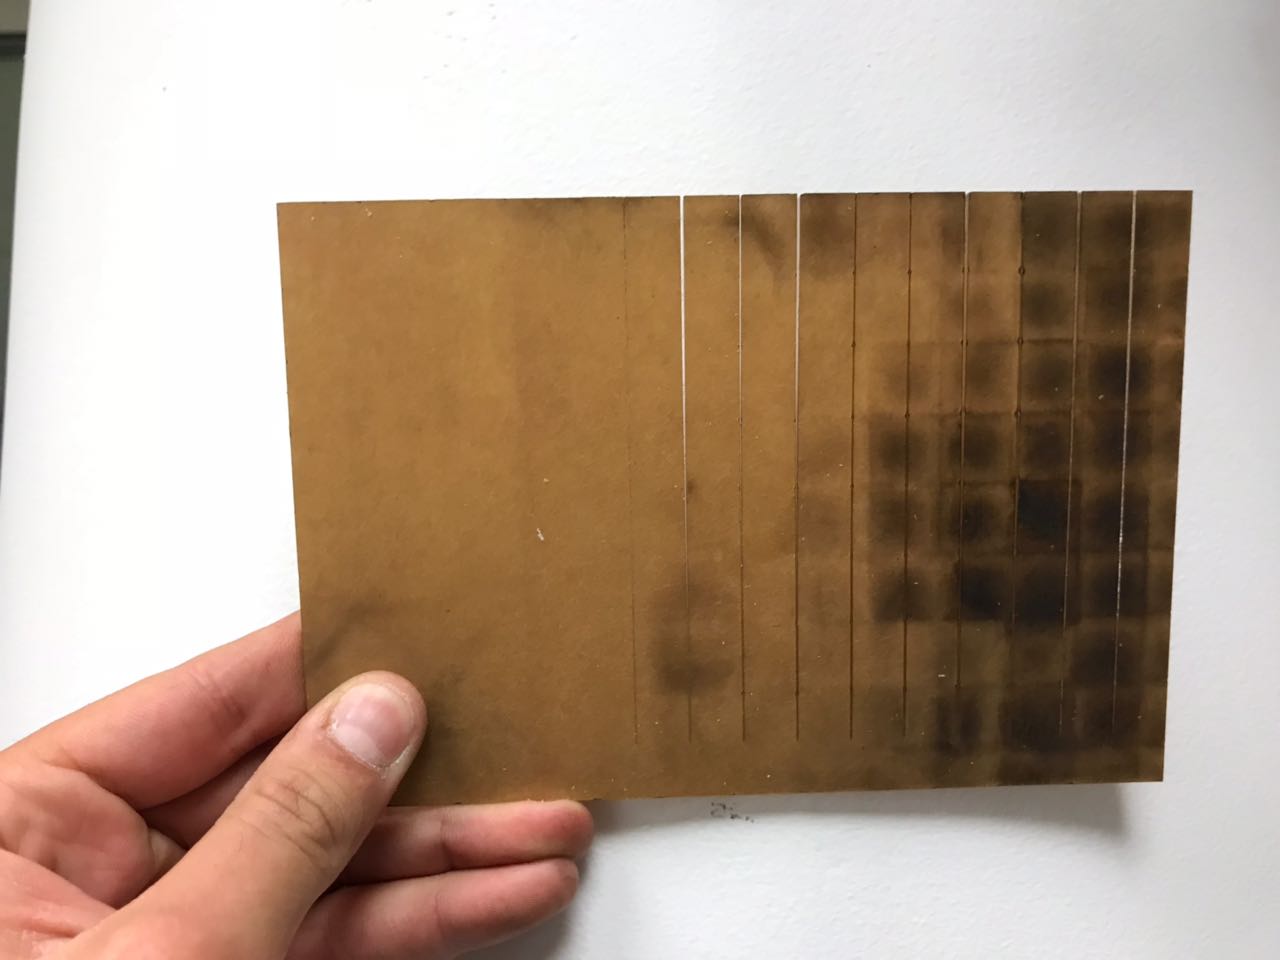
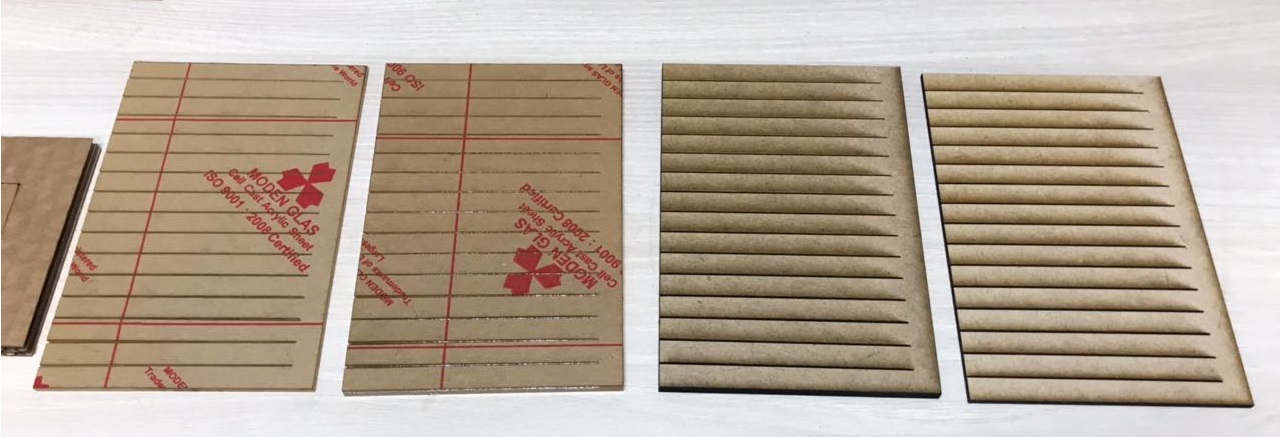
After testing the engraving and cutting using various settings, we noticed that not all squares were cut and we couldn't check the depth of the cuts. The squares that were set at a 20% Speed with Power more than 80% were the only ones that were cut.
Thus to check out the various depths of the cuts caused by the Laser, we chose to do another test specific for Cutting. This test was done with a constant Power of 100 % but with variable Speeds, less than 20%. The table below summarizes the various settings used for the various lines of different colors.
This test was performed on the following Material:
- Acrylic of Various Thincknesses (3mm and 5mm)
- MDF of Various Thincknesses (3mm and 5mm)
Below is a list of all materials tested and the optimal setting for a clean cut:
- MDF 3mm: P=100 F=50 S= 1-20, All speed settings cut through with different kerfs.
- MDF 5mm: P=100 F=50 S= 1-12, Only a Speed of 12 and below made clean cuts.
- Acrylic 3mm: P=100 F=50 S= 1-20 All speed settings cut through with different Kerfs
- Acrylic 5mm: P=100 F=50 S= 10-20 Only a Speed of 10 and below made clean cuts
You can download the original files used for our tests from the following links: Cutting Test File
Test 3 - Calculating the Kerf of Different Material
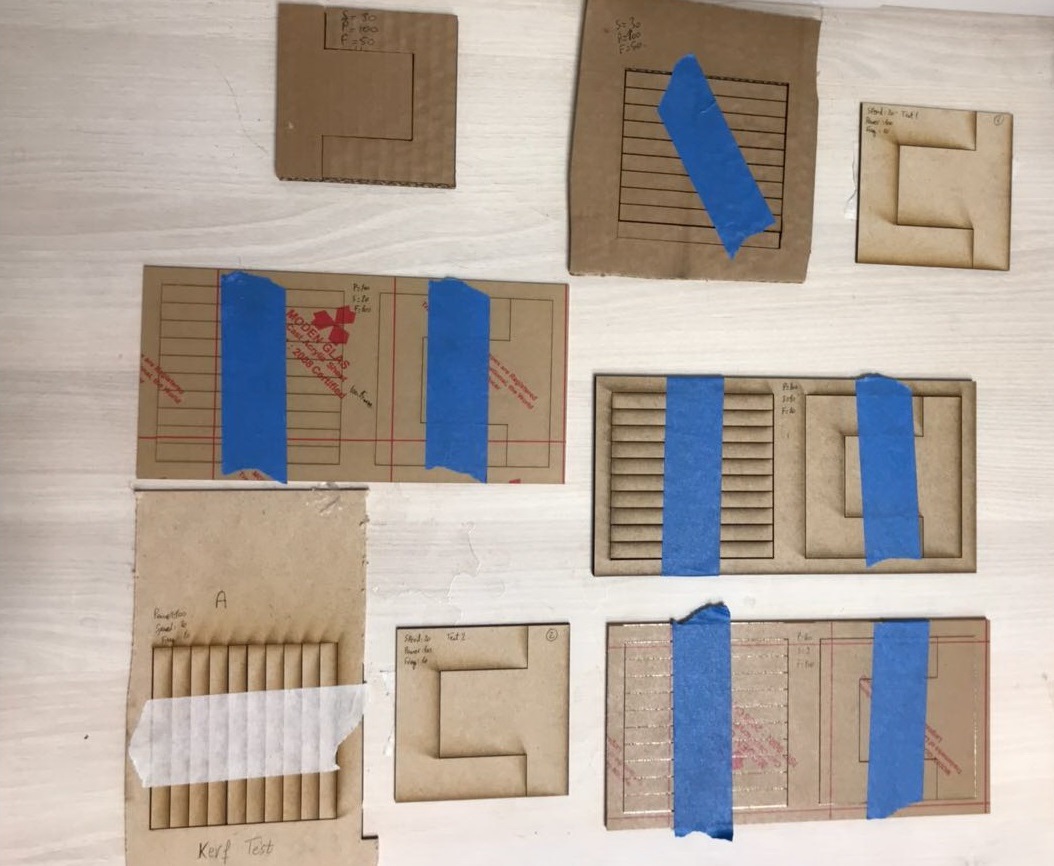
After doing the cutting test for the different material, we noticed that not all settings lead to clean cuts in the different material and thicknesses. So we decided to calculate the Kerf of the various material based on the best settings we deduced in the previous test.
This test was performed on the following Material:
- Acrylic of Various Thincknesses (3mm and 5mm)
- MDF of Various Thincknesses (3mm and 5mm)
Details about the results will be shown in the next section below.
You can download the original files used for our tests from the following links: Kerf Test File
Test 4 - Cutting Joints of various Widths
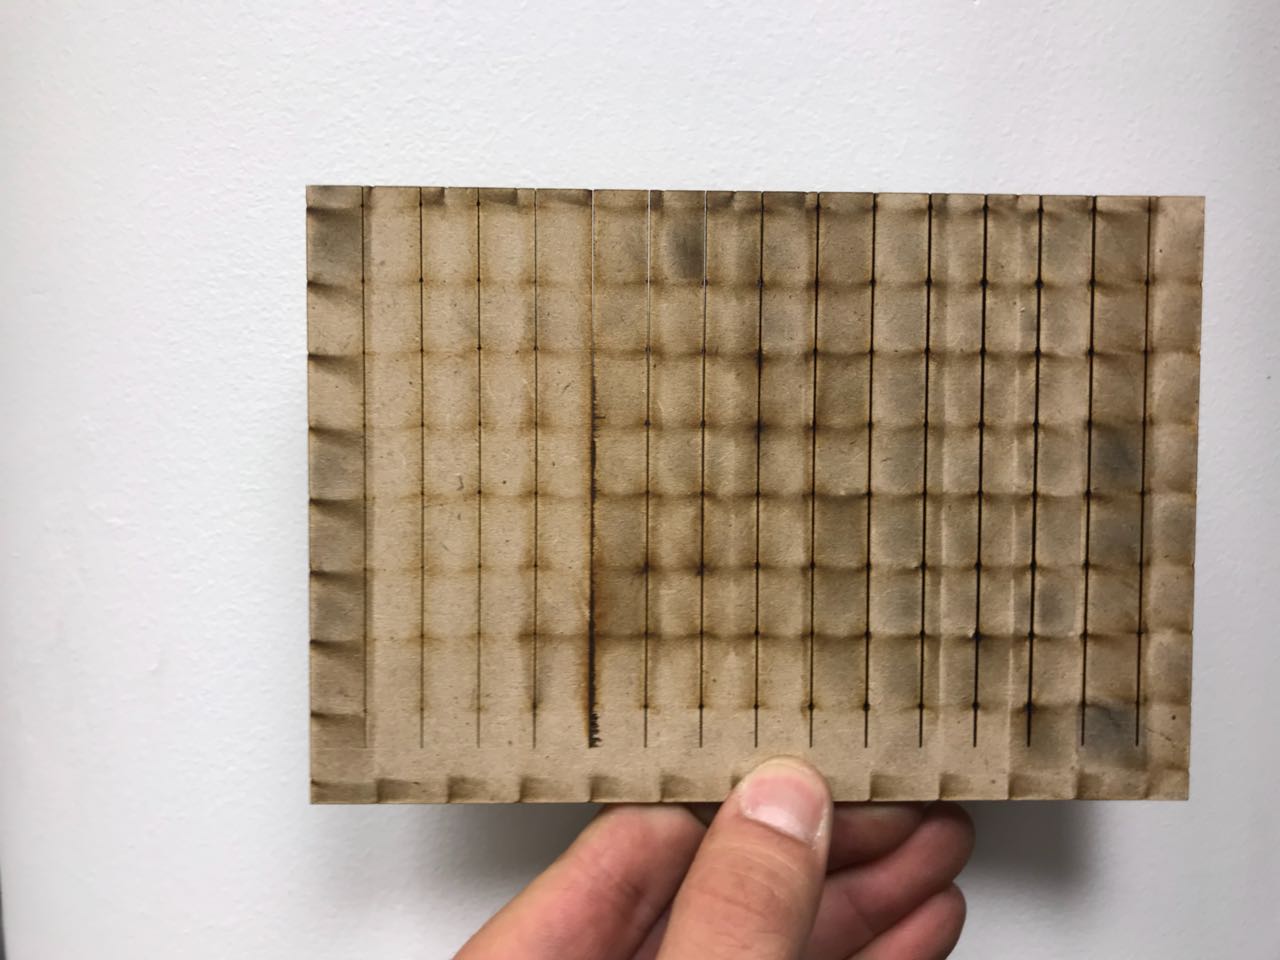
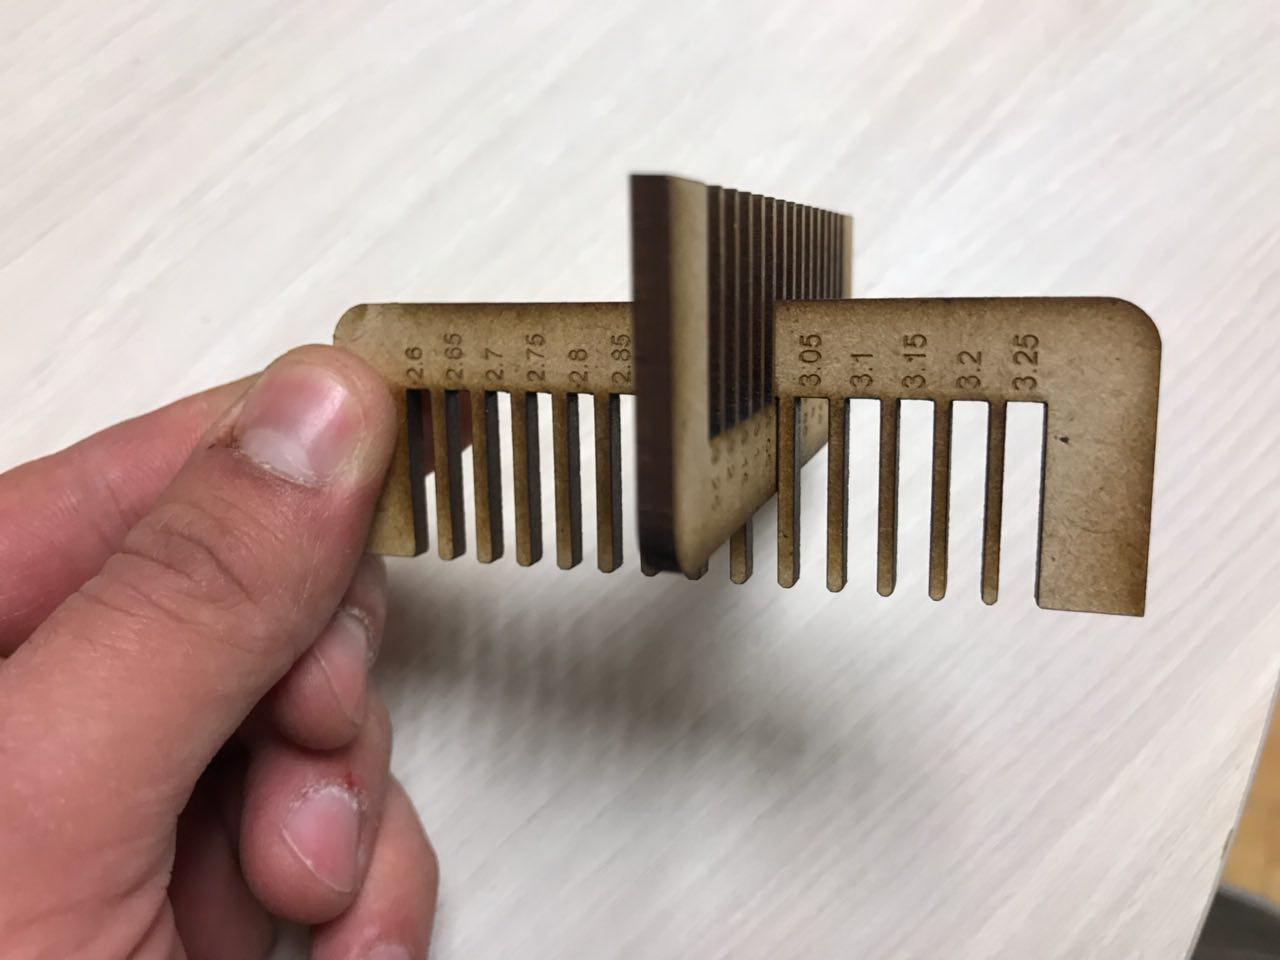
After doing the Kerf test, we noticed that the dimensions could vary a bit from the design we have in mind. Saying that, and because i chose to build my press-fit kit using MDF having a thichness of 3mm, i wanted to test what is the best dimension that i should use in the design to have a clean press-fit joint.
Thus a test file was designed having joints of different dimensions, an then it was laser cut.
Based on the result, we noticed that the distance between the two joints is very small, causing them the wood to bend, thus the results were not very precise. To solve that, we did another Joint Fitting Test using another design.
You can download the original files used for our tests from the following links: Kerf Test File
Test 5 - Cutting Joints of various Widths using a different design
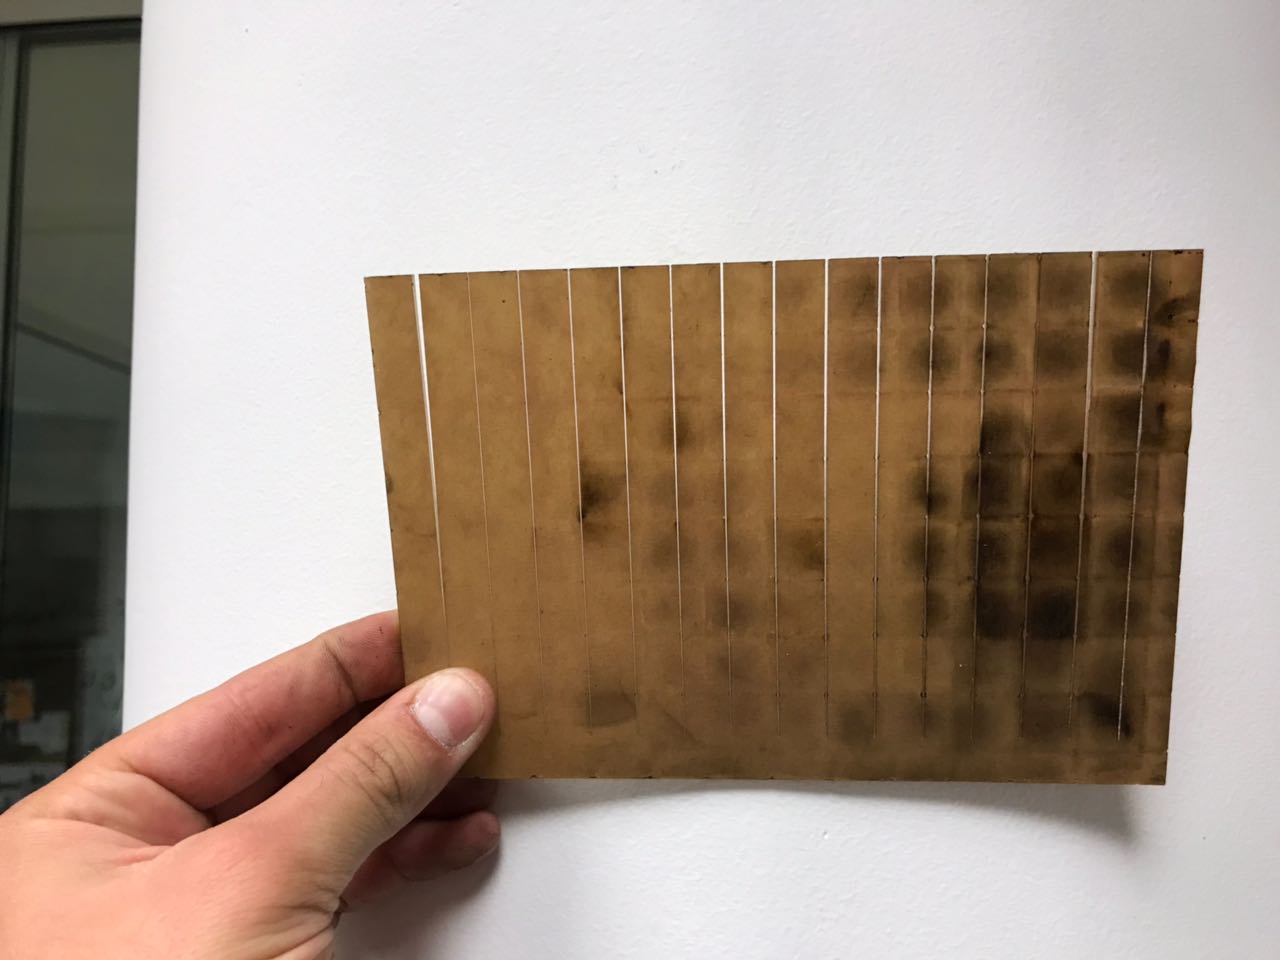
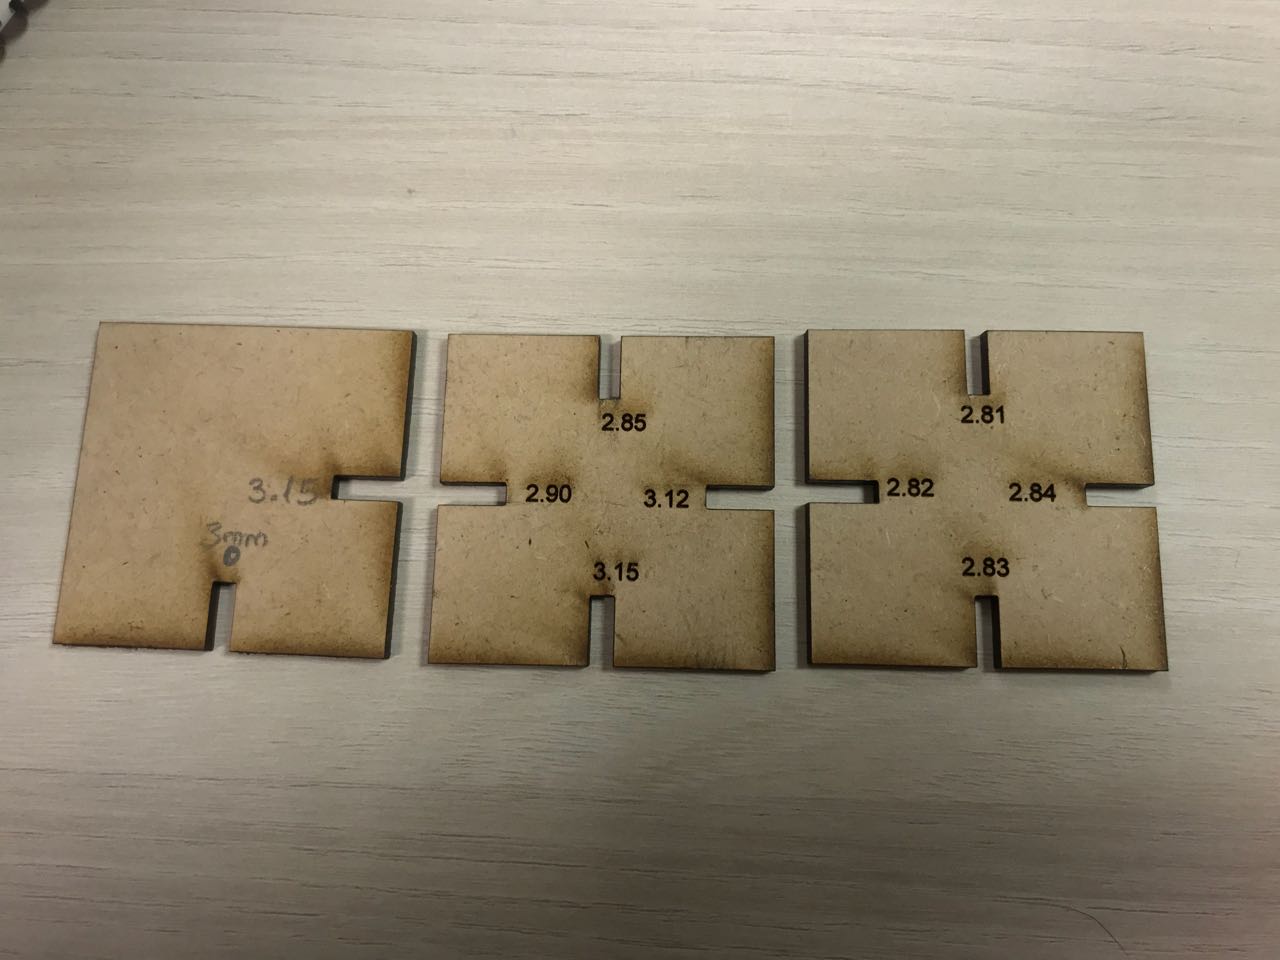
After doing the First Fitting test, the results were not convincing. Thus we made another test using a differnt design. We tested various cut widths, and the best fit was for the cut having a 2.76mm Width.
2- Calculating the Kerf of Different Material

After checking the best settings that are used for cutting, the next step was to calculate the Kerf caused by the Laser Cutter at those settings.
For the kerf test, we used the data collected above to have the lowest kerf. So the minimum speed with a clean cut, we used the same template for all materials which consists of a square with 11 cuts inside.
To calculate the Kerf, a test file was made. It constituted mainly of a Square (10 x 10 cm) divided into 10 equal columns, having a width of 1cm.
After cutting the file, we measure the width of the square and the width of the peices combined and we compare both. The difference between both peices is caused by the Kerf. To calculate the kerf we used the formula of deducting the width of the stacked cut bars (A) from the interior width of the square they were taken from (B).
The Kerf is calculated using the following equation: Kerf= (Intial Area-Final Area)/(No. of Cut Lines)=(A-B)/11=0.1263 mm
You can download the original files used for our tests from the following links: Kerf Test File
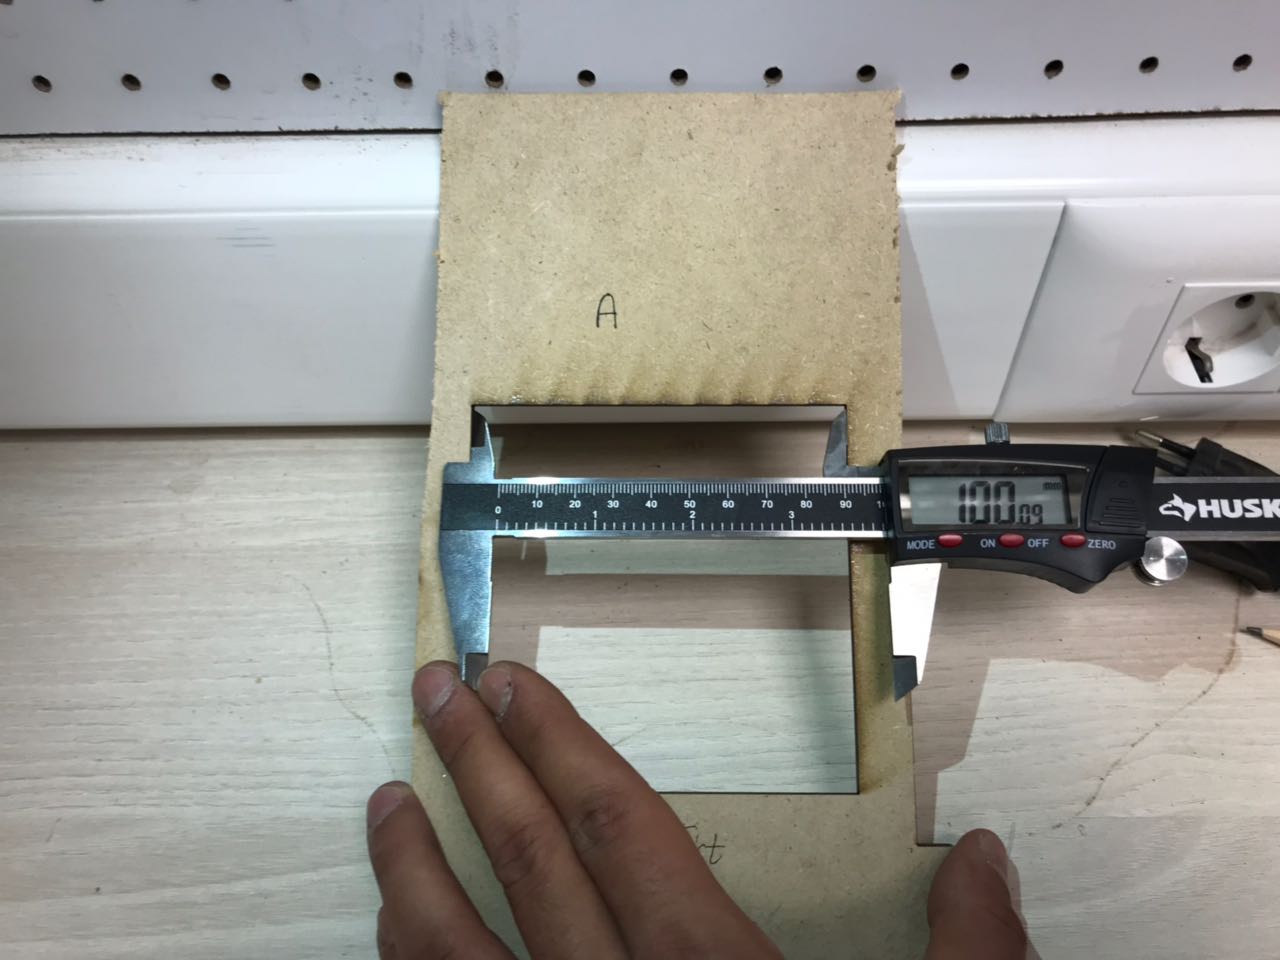
Test 1 - MDF 3mm
The results of the Kerf Test for the MDF 3mm are the following
MDF 3mm: P=100 S=20 F=10 Kerf= 100.28 - 98.79 / 11= 0.126
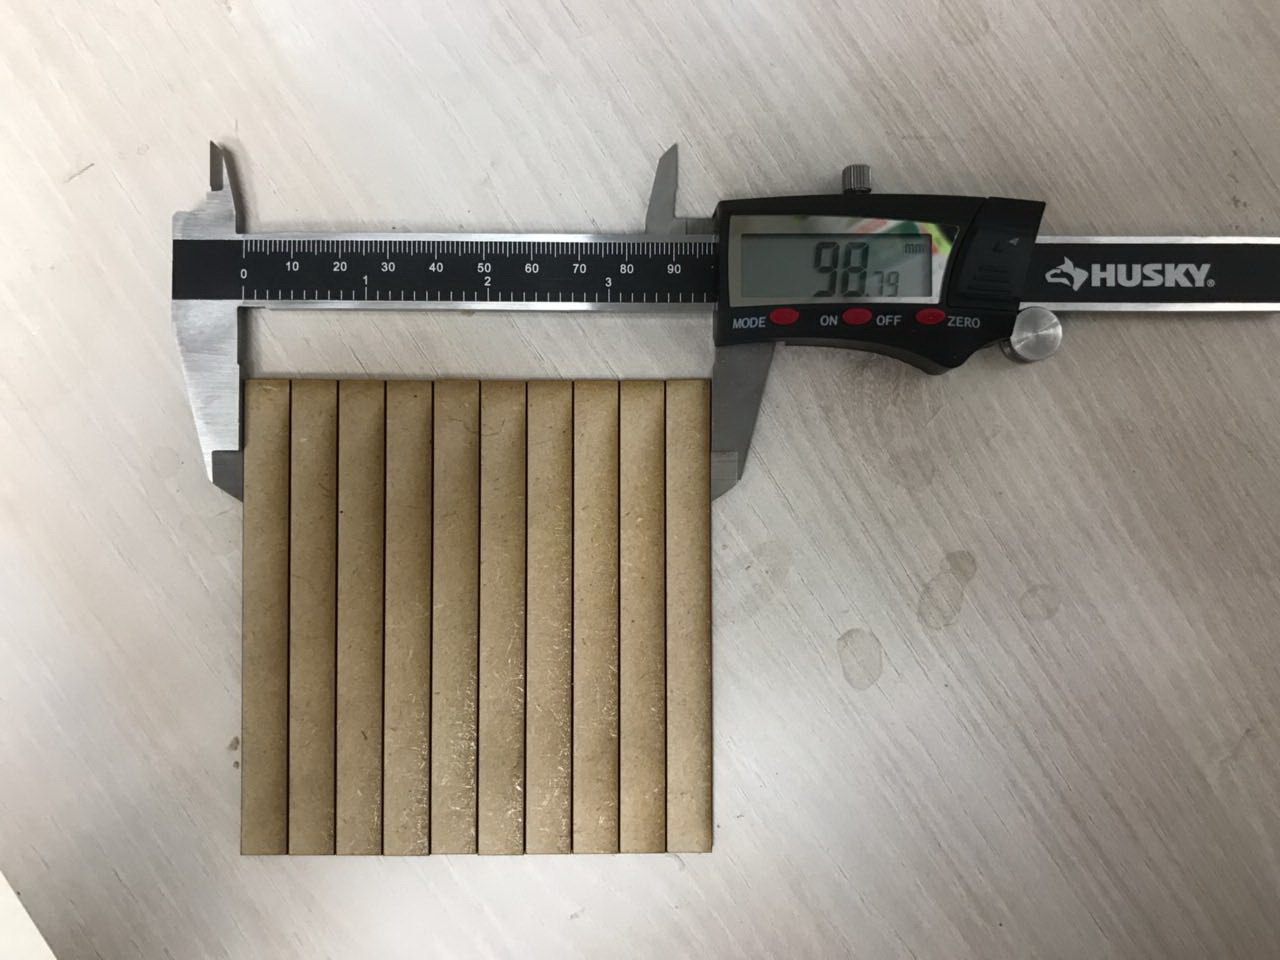
Test 2 - MDF 5mm
The results of the Kerf Test for the MDF 5mm are the following
MDF 5mm: P=100 S=10 F=10 Kerf= 100.18 - 98.91 / 11= 0.11
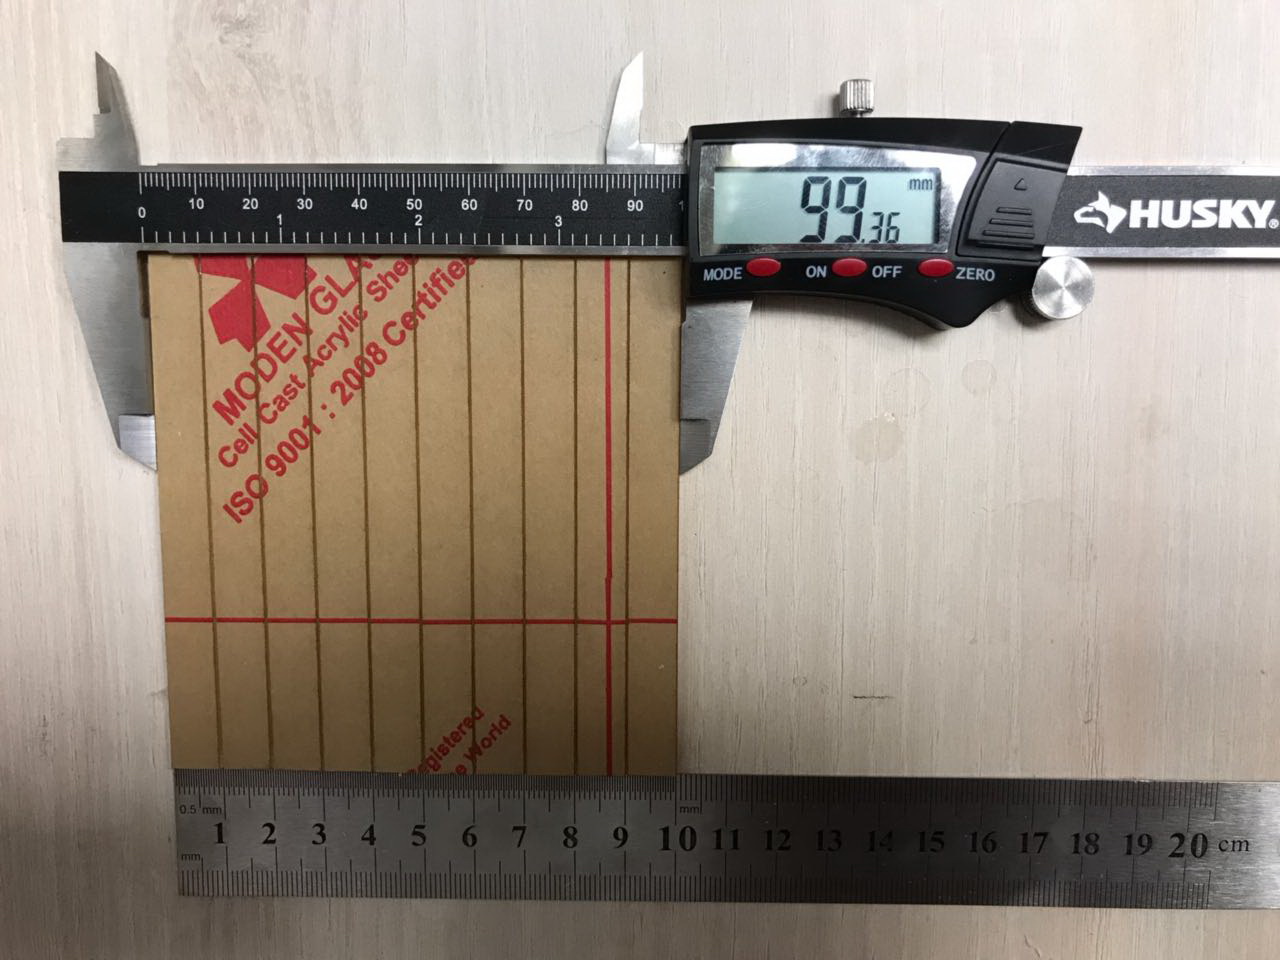
Test 3 - Acrylic 3mm
The results of the Kerf Test for the Acrylic 3mm are the following
Acrylic 3mm: P=100 S=20 F=100 Kerf= 100.15 - 99.37 / 11= 0.07
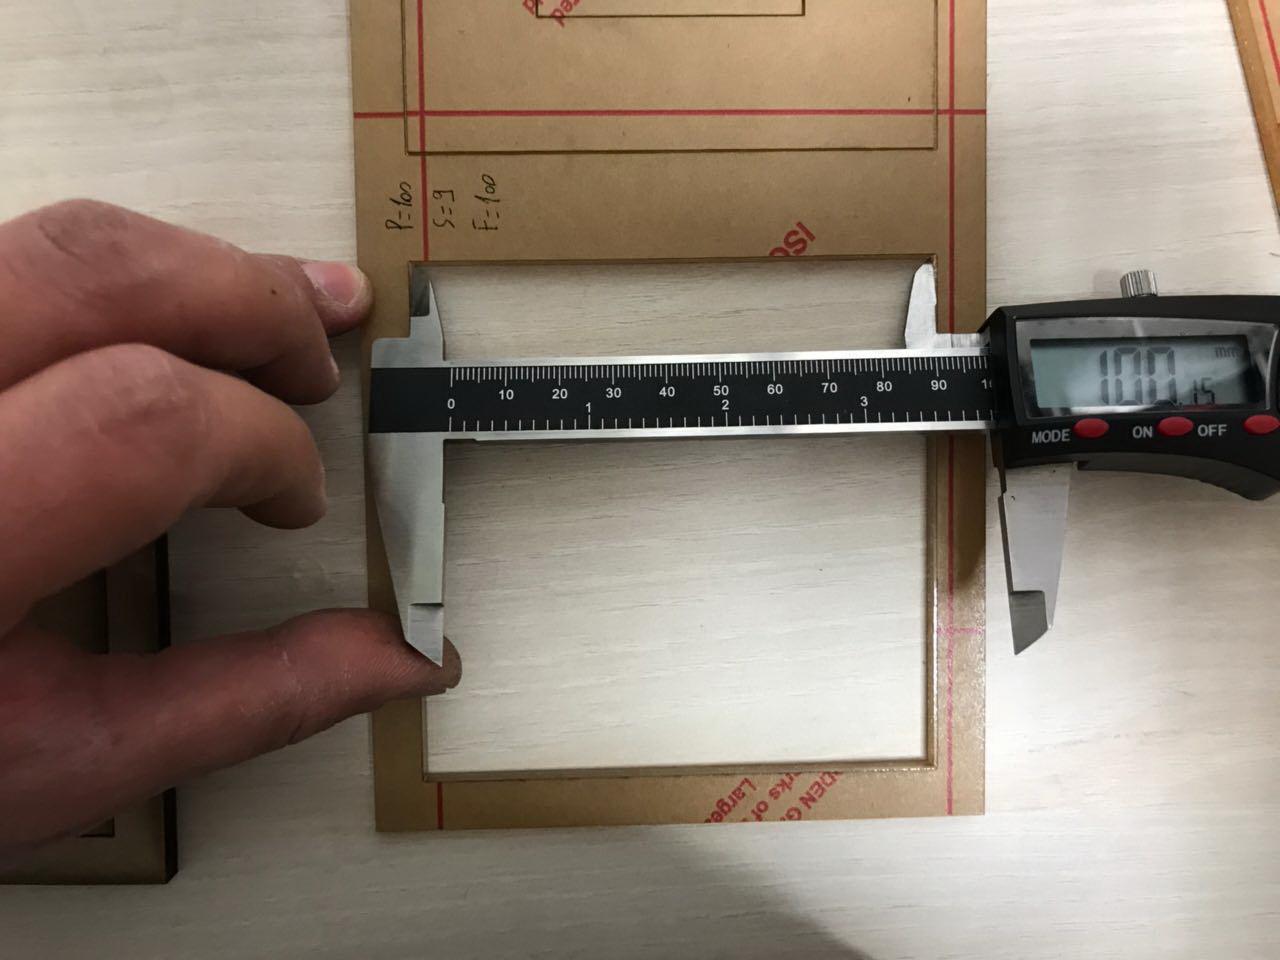
Test 4 - Acrylic 5mm
The results of the Kerf Test for the Acrylic 5mm are the following
Acrylic 5mm: P=100 S=9 F=100 Kerf= 100.12 - 98.87 / 11= 0.113
3- Design and Constructing a Press-Fit Kit
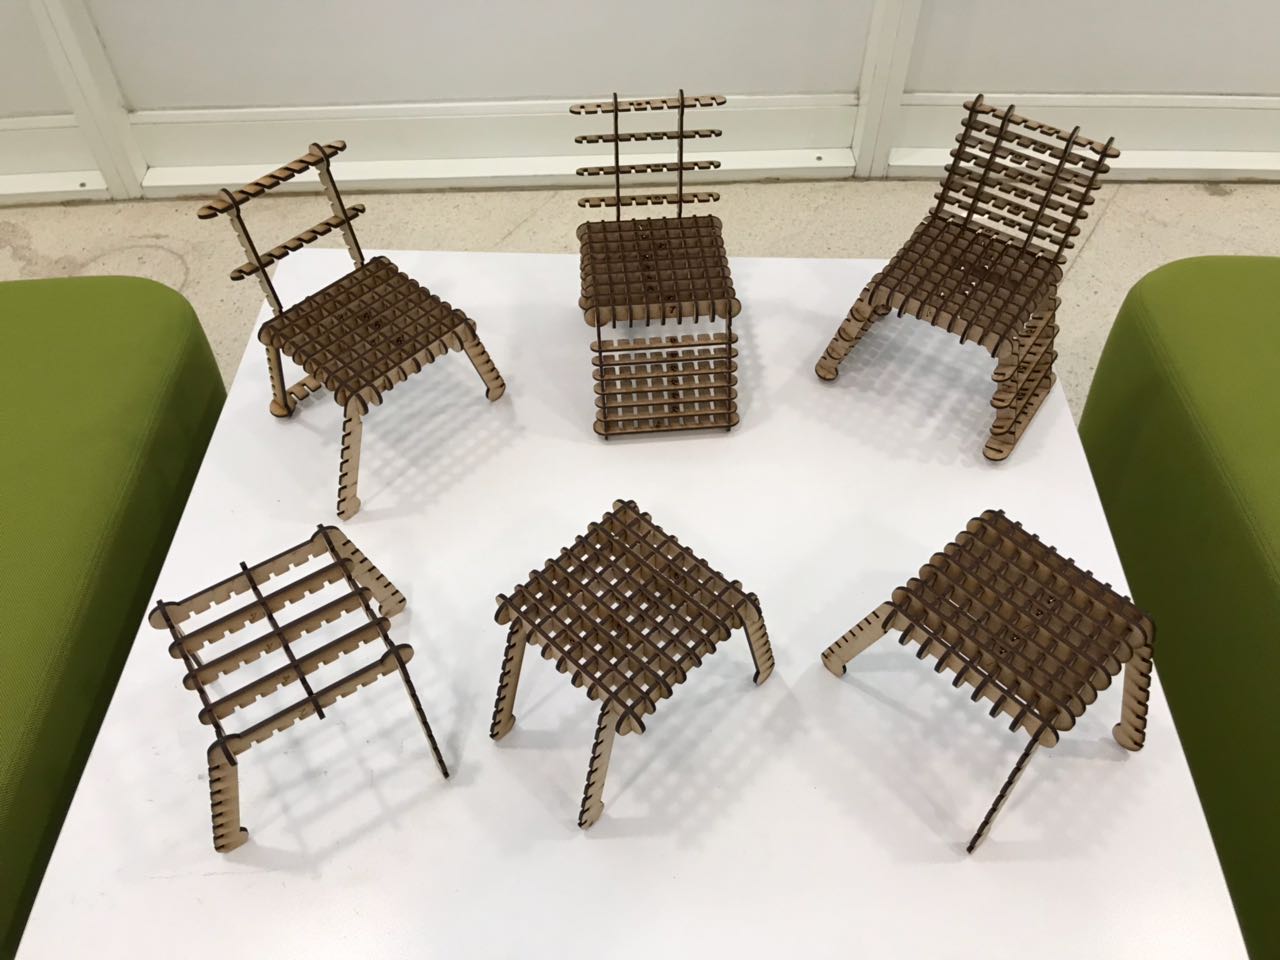
So the assignment of this week was to design and contruct a press fit kit. I wanted to design something that could be useful and that could be scaled up later and be contructed on a CNC machine. So the idea was to build a kit that could be assembled into Chairs and Tables of different designs.
In order to have the best results, I designed the kit based on the results of the Kerf test, thus all the cuts had 2.76mm width.
You can download the original files from the following links: Press Fit Kit Peices
Step 1 - Designing the Press Fit Kit
I used AutoCad as the main software to design my press fit kit. The peices were designed in a way that assembelling different peices will lead to a different furniture peice. Unfortunately, Autocad is semi-parametric, and by that we mean that we cannot control dimensions of parts. What we can do is assign parts relative to another in terms of directions and offsets (parallel, perpendicular, tangent ...)
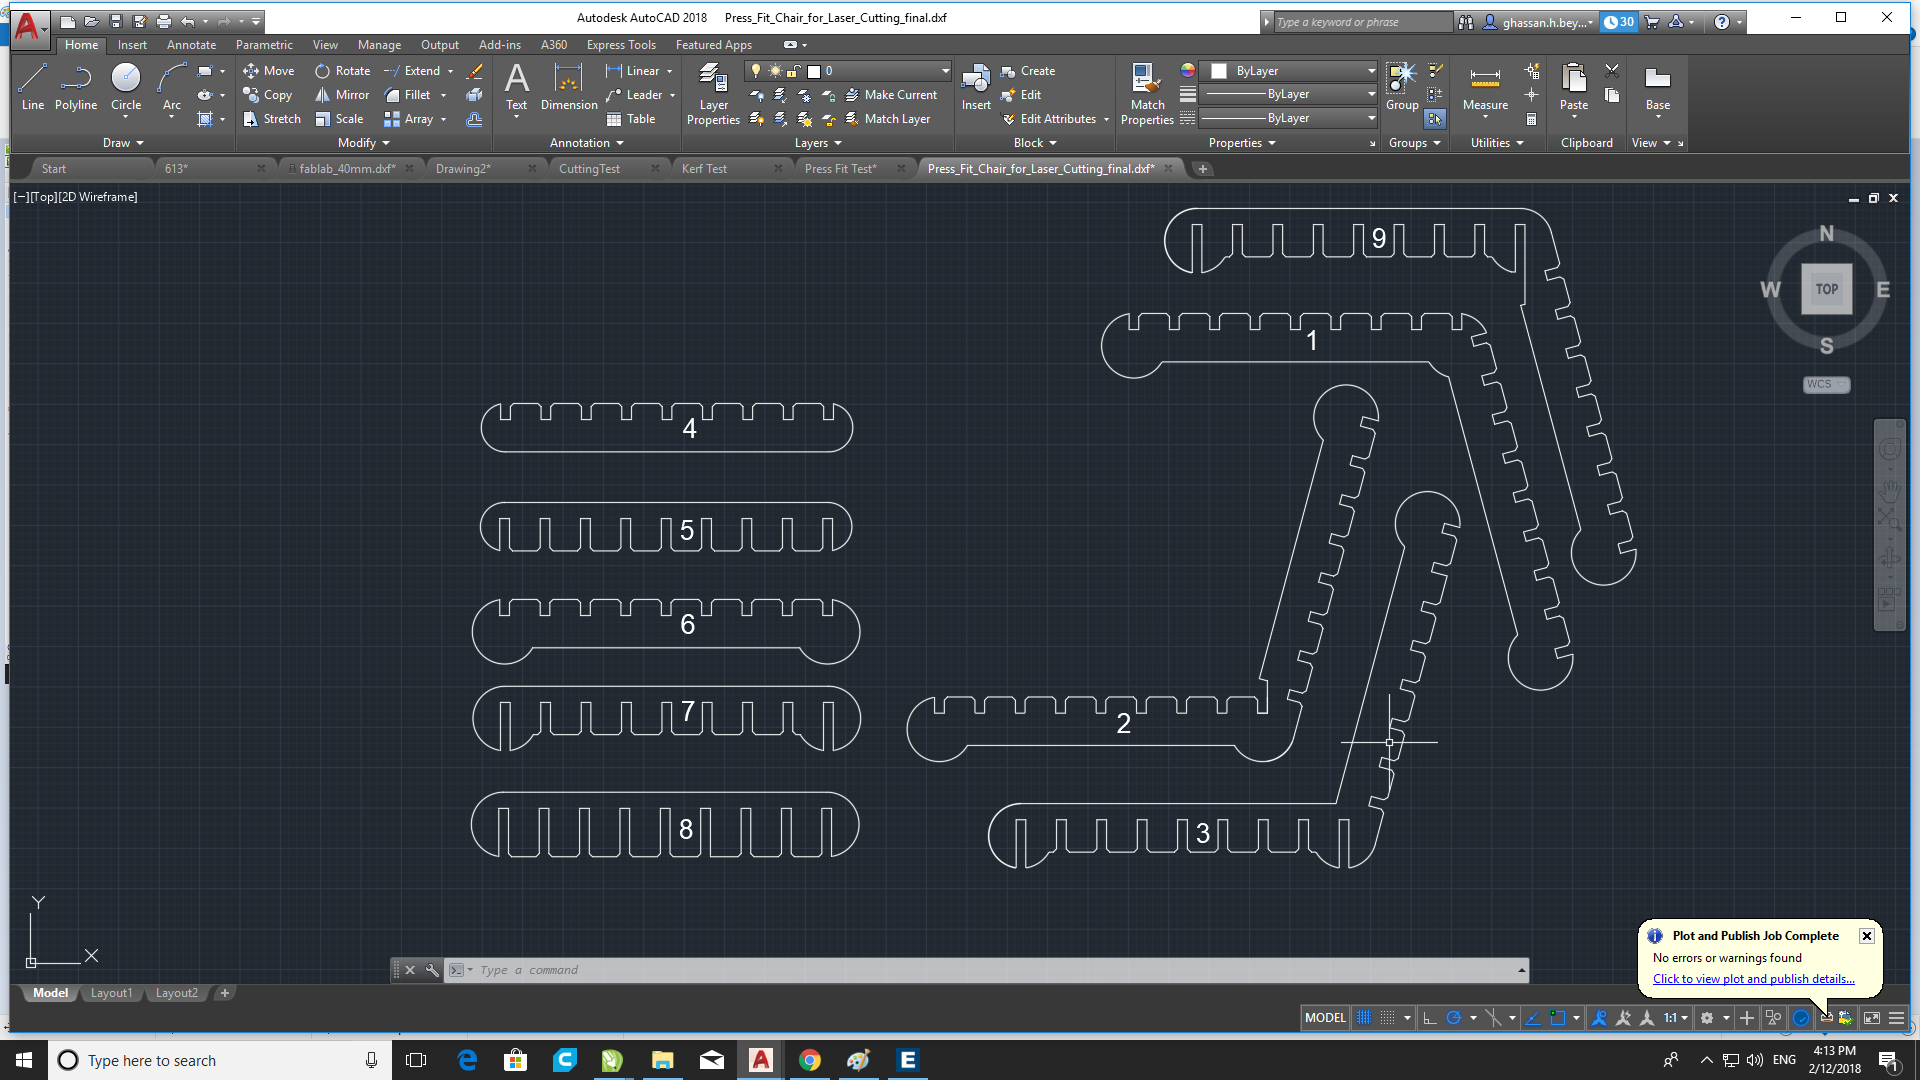
Step 2 - Building the Laser Cutting File
After Designing the different peices of the press fit kit, i prepared a file that contains a multiple of those peices on a rectangle of size 800mm x 500mm, which contitutes the bed size of the laser cutter.
You can download the original files from the following links: Press Fit Kit for Laser Cutting
Step 3 - Importing the Design to Corel Draw
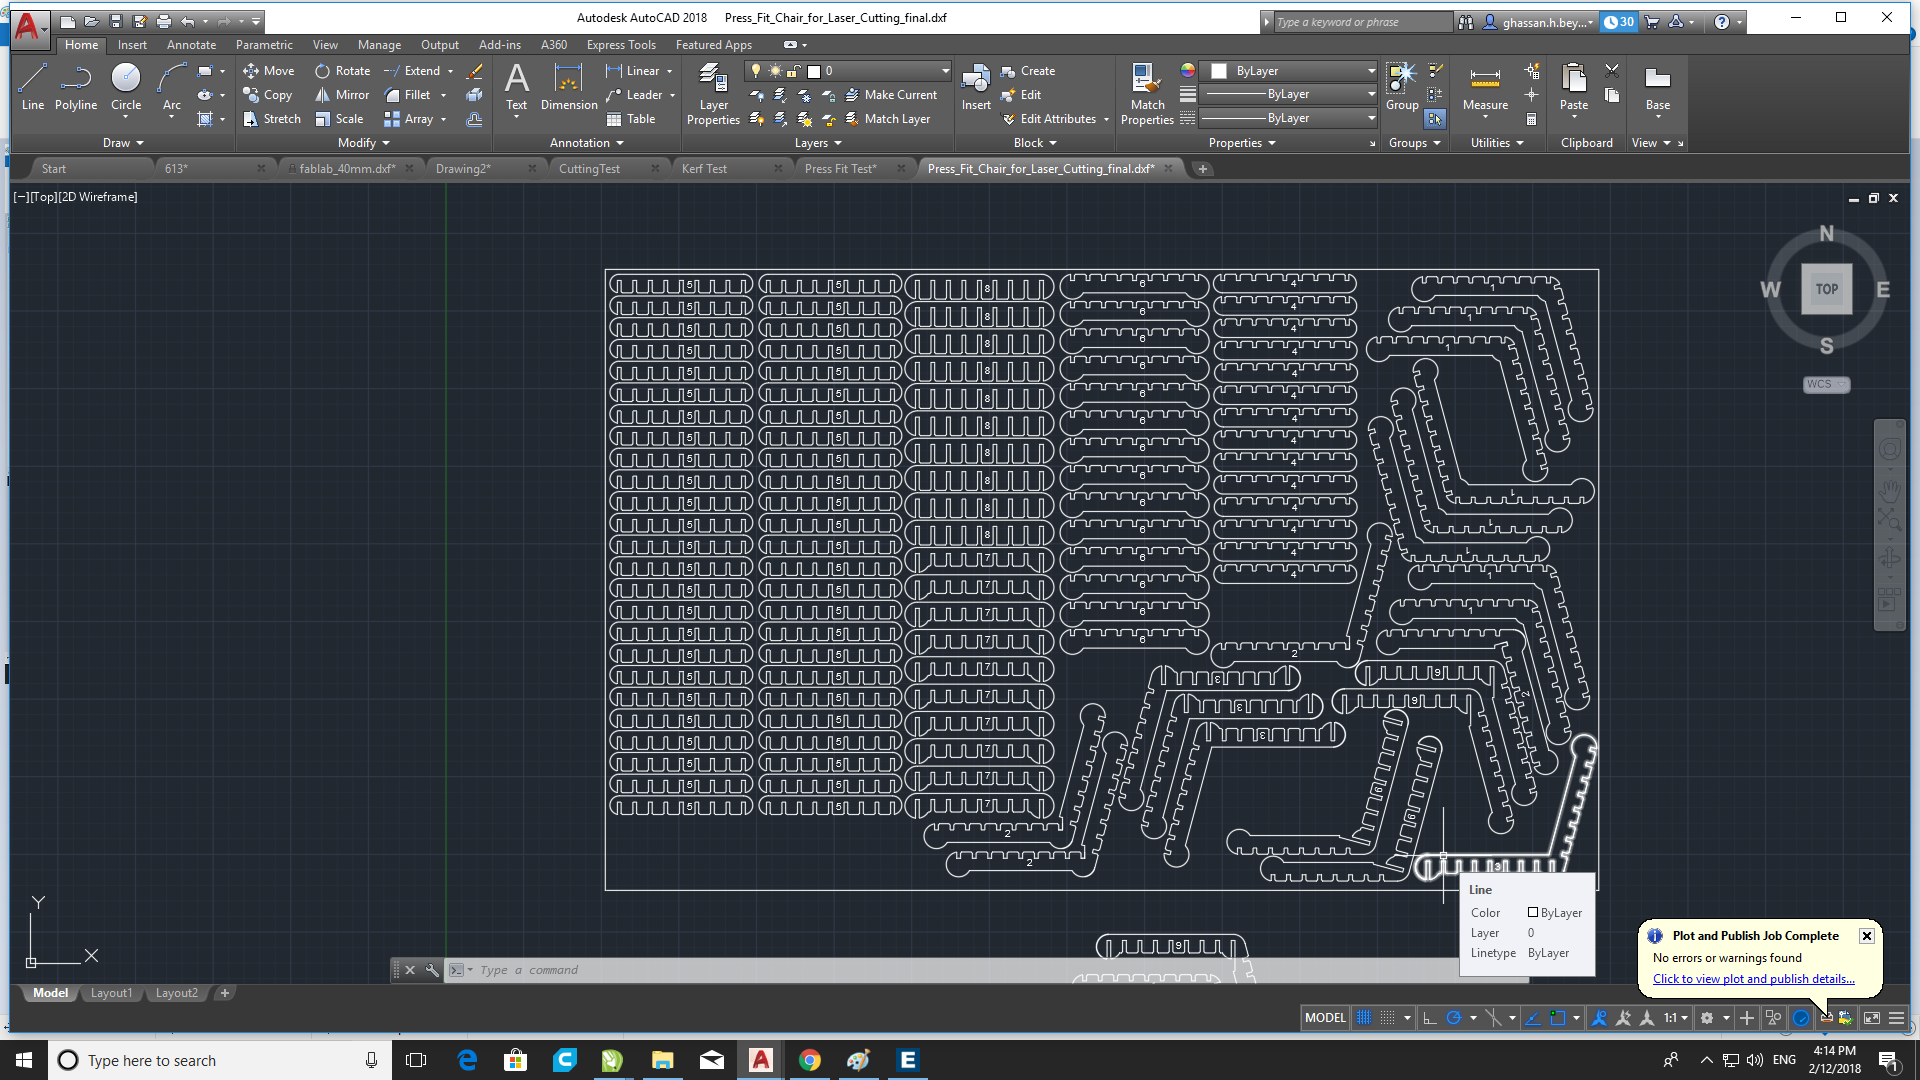
I had an issue printing directly from Autocad, as it was hard to achieve a product according to scale. Thus to solve this problem, i saved the AutoCad File in DXF format. Then the file was imported to Corel Draw and printed directly from there.
Step 4 - Cutting the design on the Laser Cutter
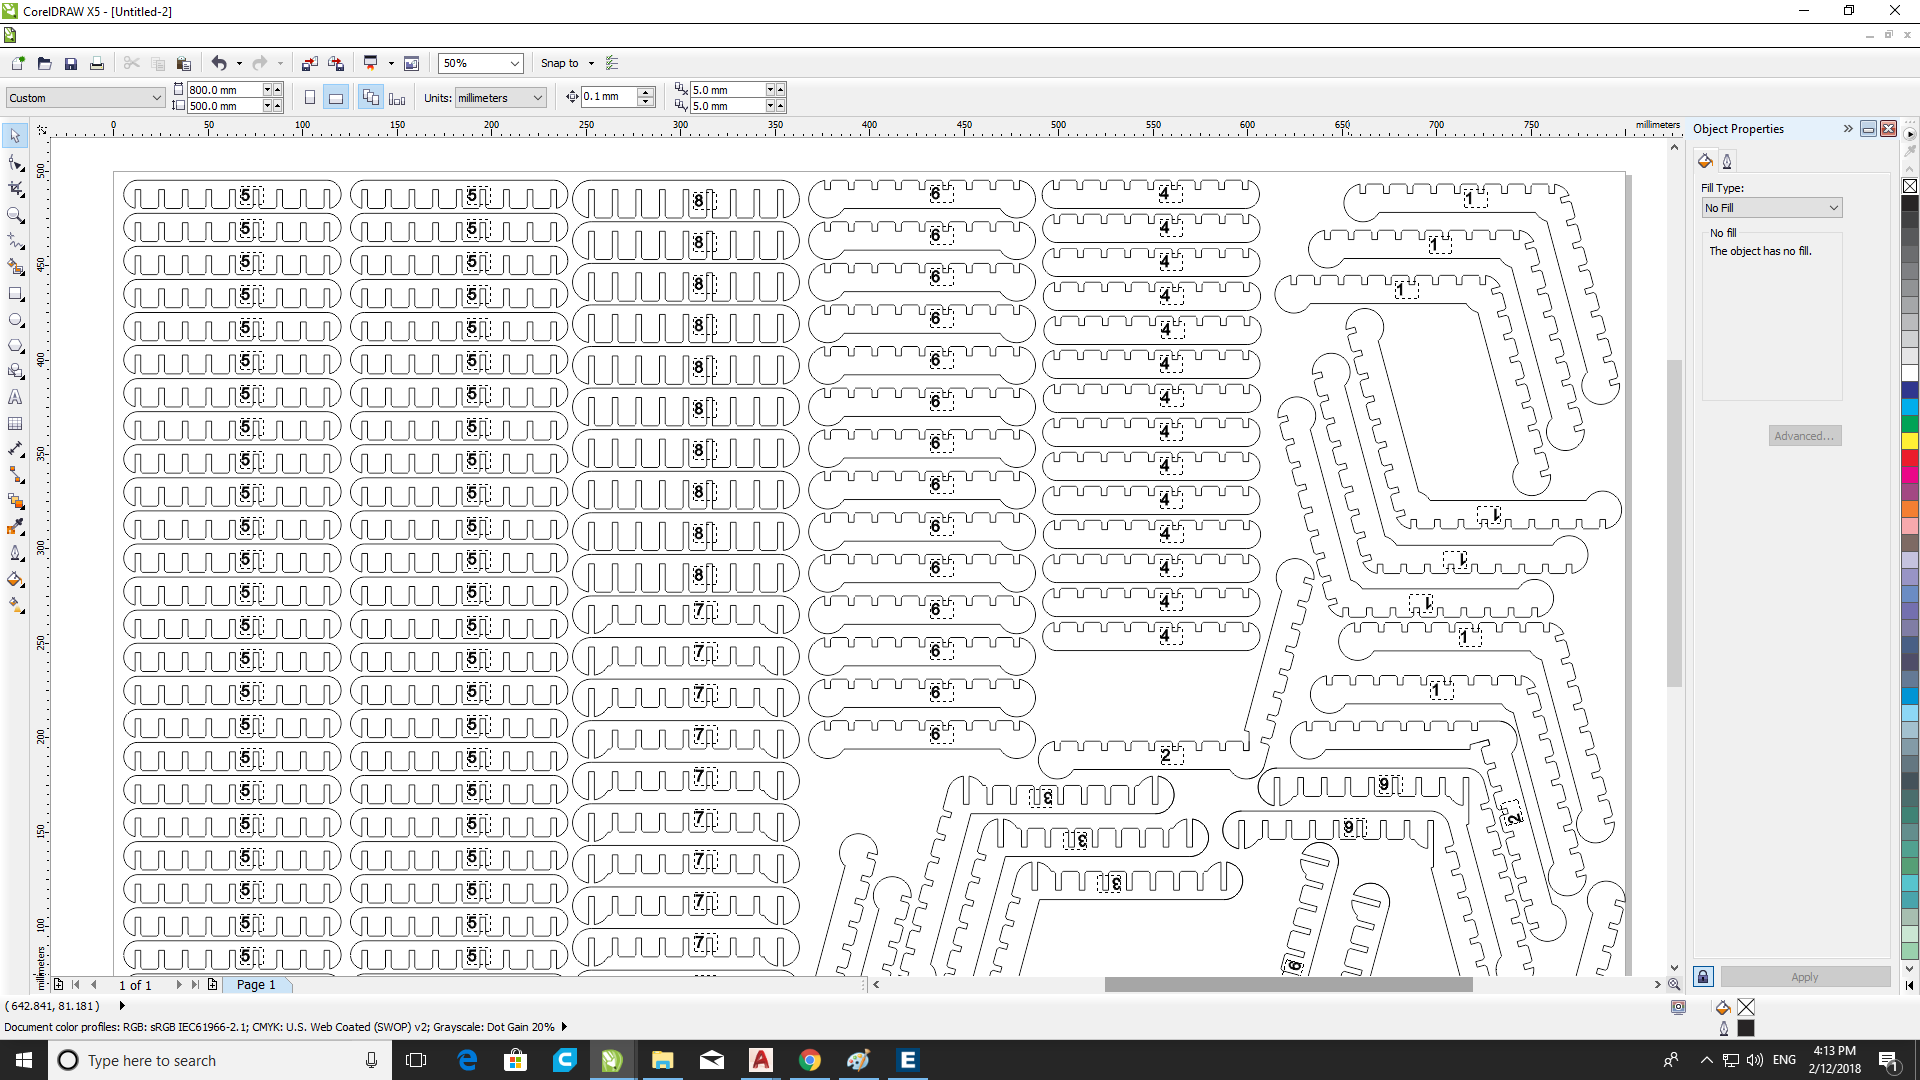
After sending the job to the laser cutter, the next step was to make the cute. To do so, first I set the focus of the laser using the V shaped Gauge. Next, the zero position of the laser was assigned on the top left corner of the MDF sheet. Next the Air compressor and ventilators were turned on. Finally, I pressed the play button on the laser cutter, and voila, it started cutting. The final result is shown in the image.
Step 5 - Assembling the Press Fit Kit
After cutting the press fit kit, the next step was to assemble the pieces to form the various shapes that it can form.
Step 6 - Re-doing the Parametric Design Using Fusion 360
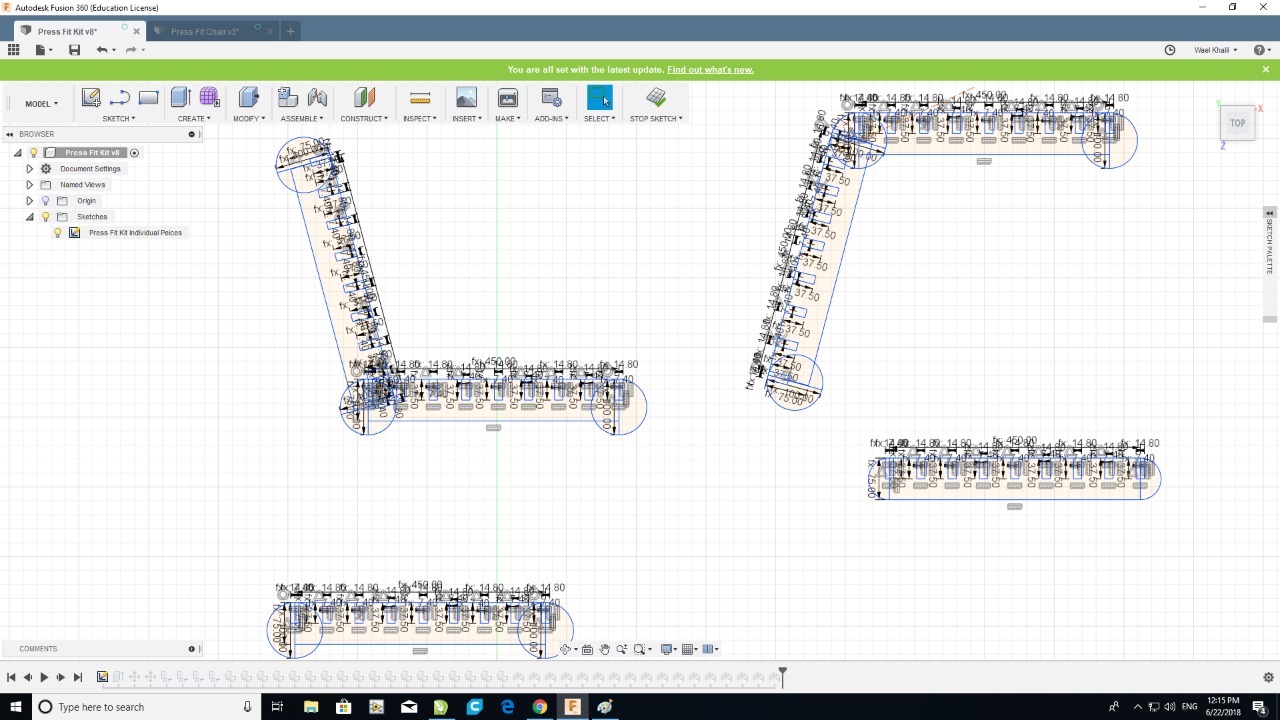
After finalizing the design on Autocad, it was very annoying to edit the design in case we wanted to change the material used. So in order to make things easier for the furture, the same design was re-done parametrically on Fusion 360.
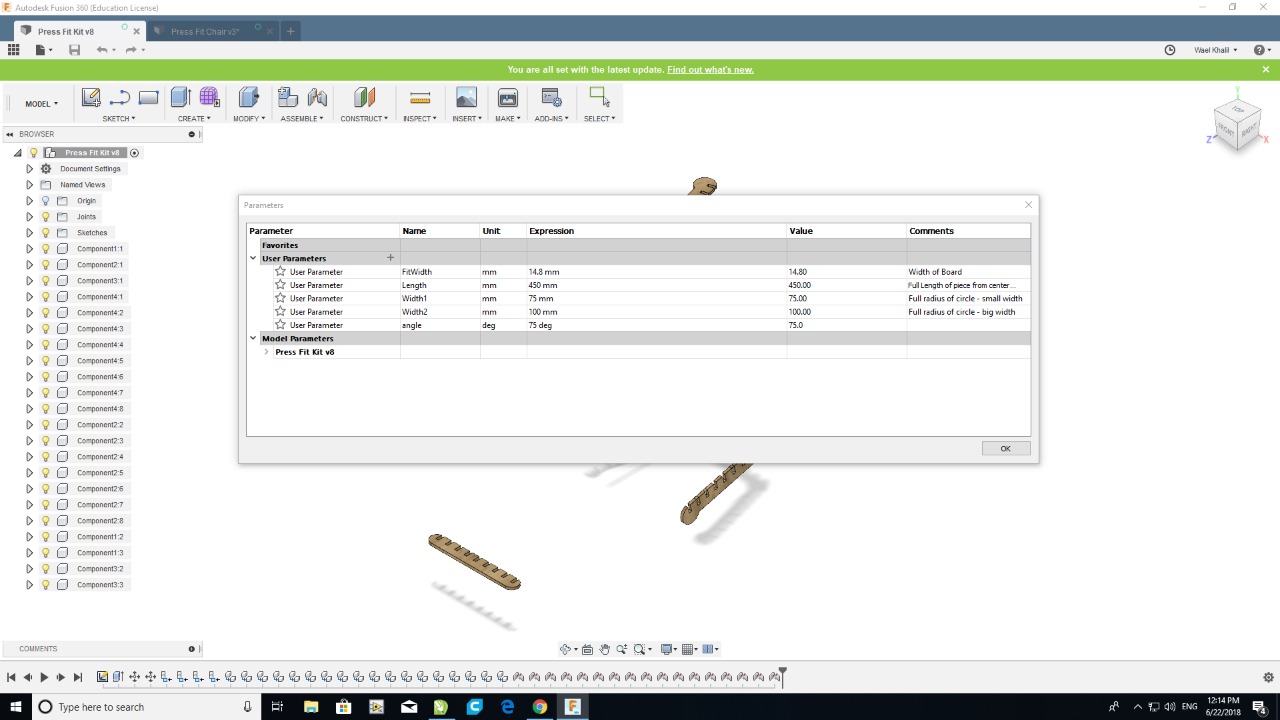
To do a parametric design, go to "Modify" > "Parameters" and set the parameter you want to use in your design and that you are palnning to change later. Thus those parameter will be later easily edited.
Step 7 - Editing a Parametric Design
The best thing about designing parametrically, is that you can set names for the distances that you are planning to make as variables, and the values of those names can be changed whenver you want, as per your request, in order to edit the design according to the production requirments.
4- Design and Construct Anything on the Vinyl Cutter
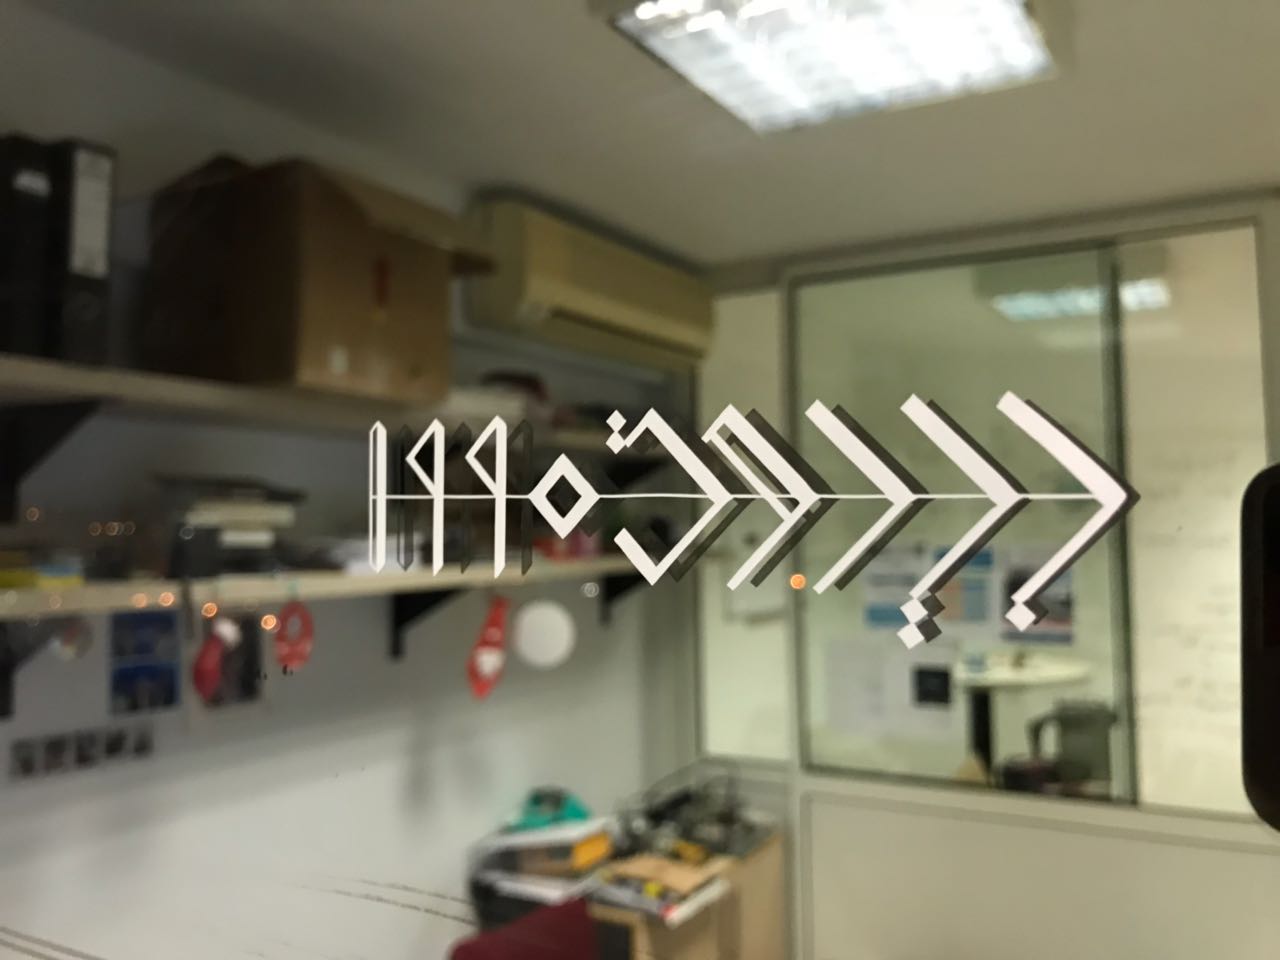
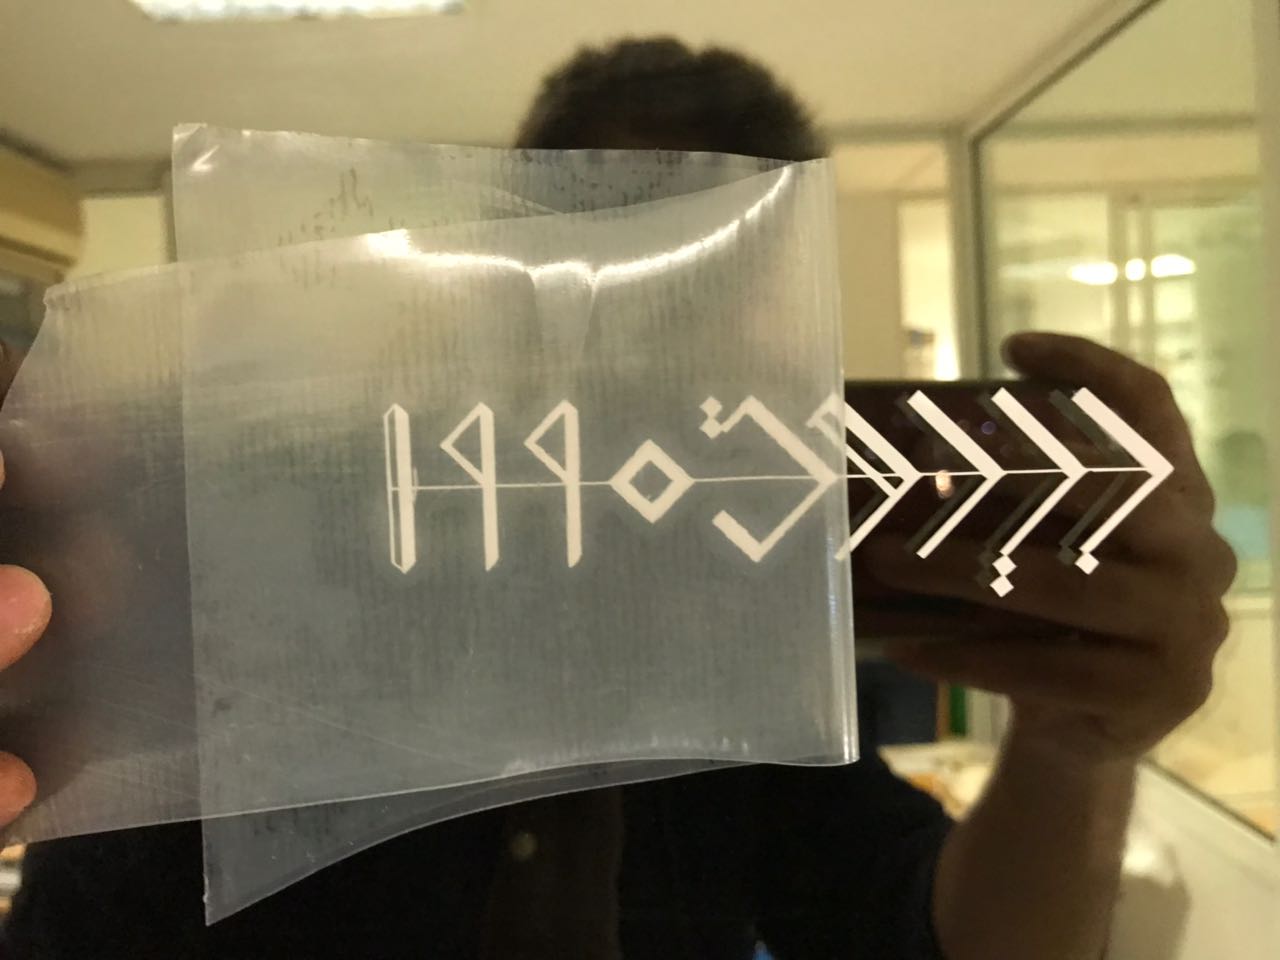
So the assignment was to design and cut any shape on the vinyl cutter. So the only thing tht came to mind is a logo that i previously designed and have it as a tattoo. It mainly represents the City i was born in and the Year. Thus i made a sticker of a personal logo
You can download the original files from the following links: Sticker File
Step 1 - Designing the Sticker
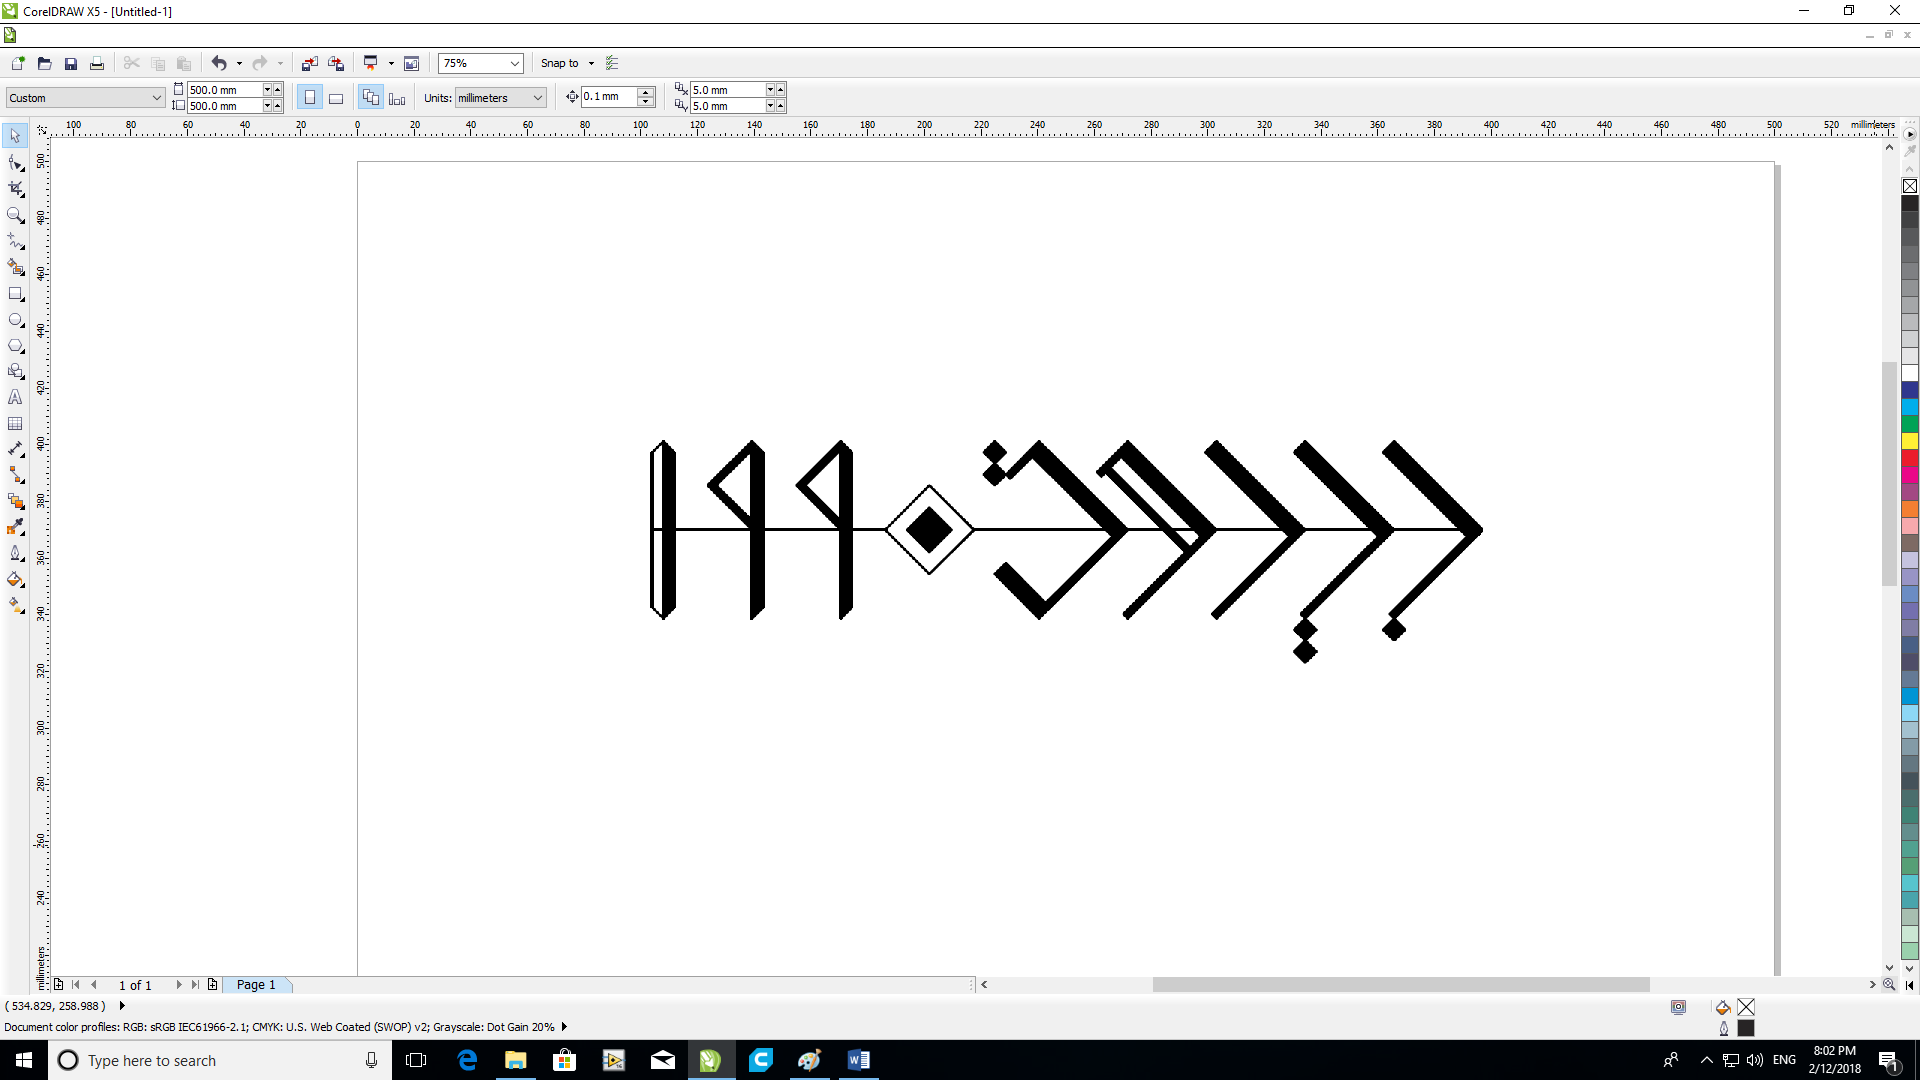
I have the design i want to make a sticker as an image. So the first thing to do was to export the image to CorelDraw.
Step 2 - Tracing the Image
THe next step was to trace the image i have to get the vector files that will be mainly used for cutting.
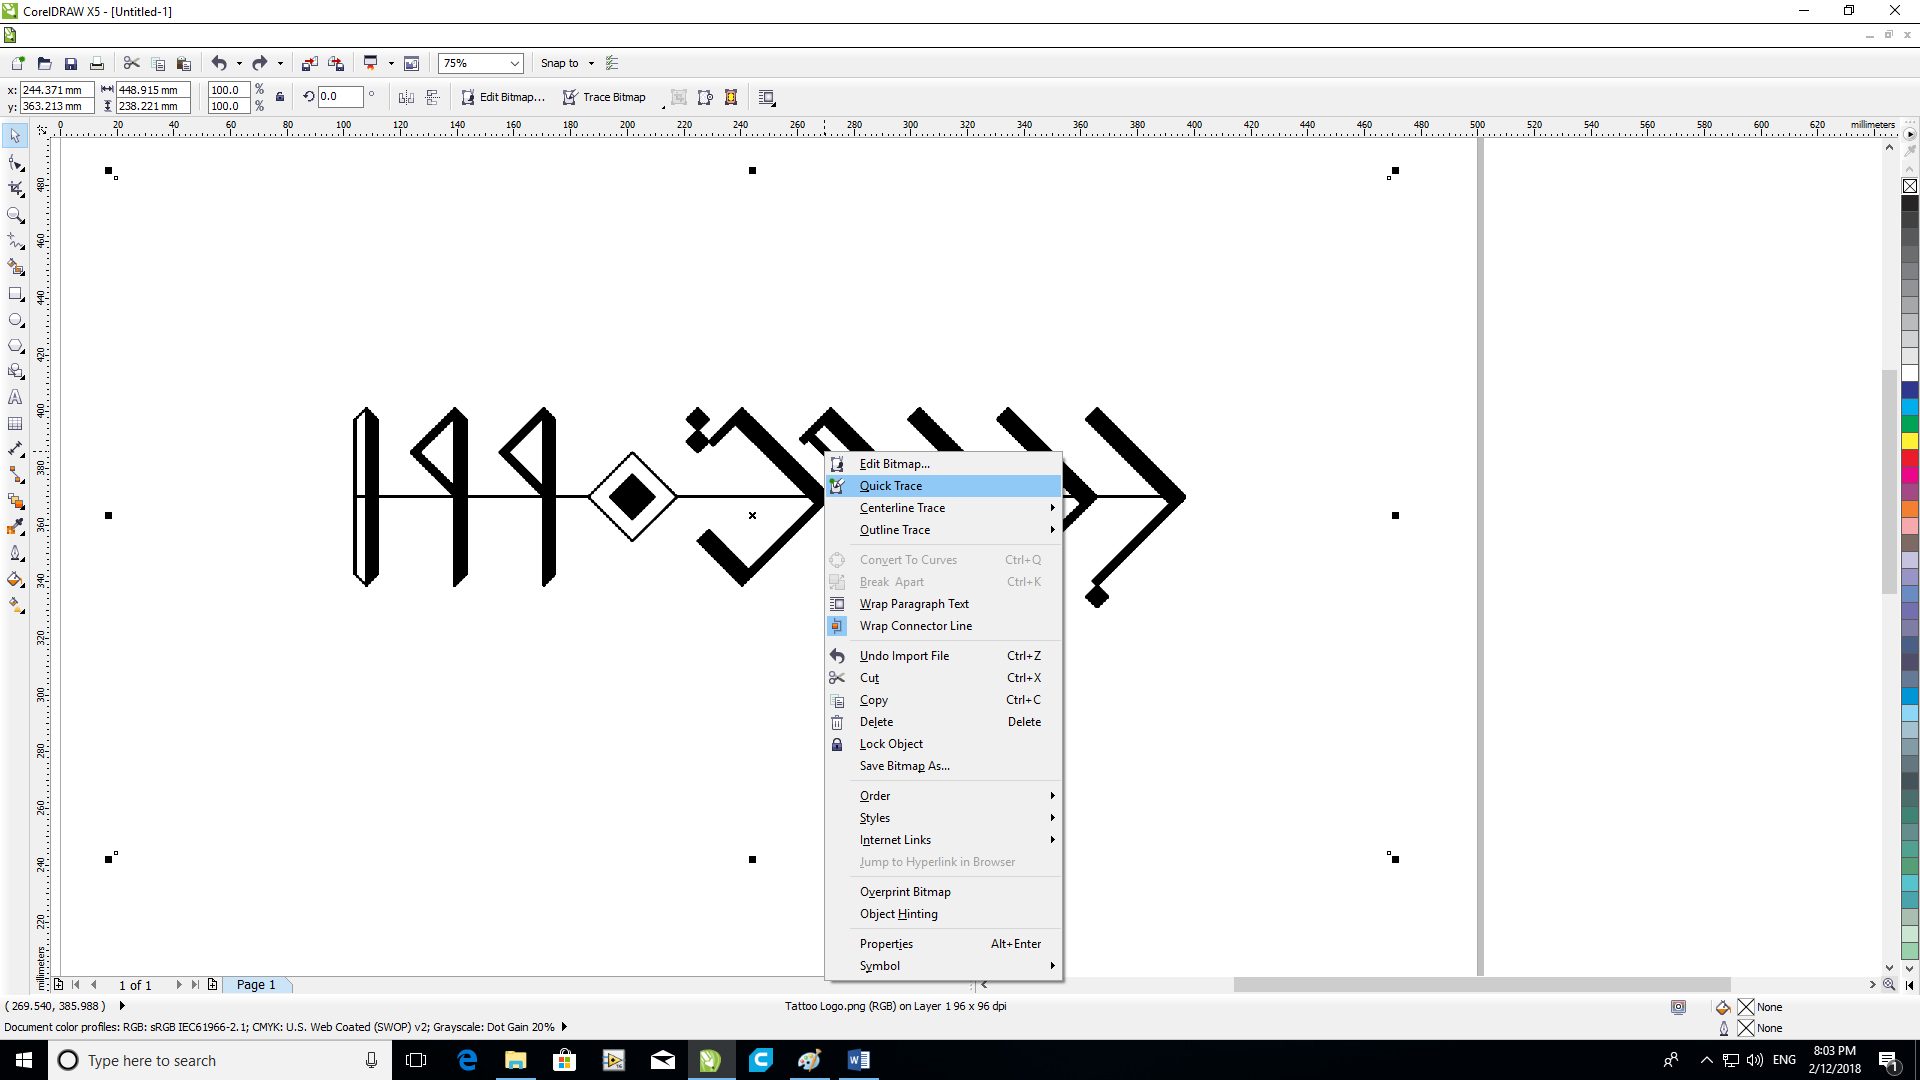
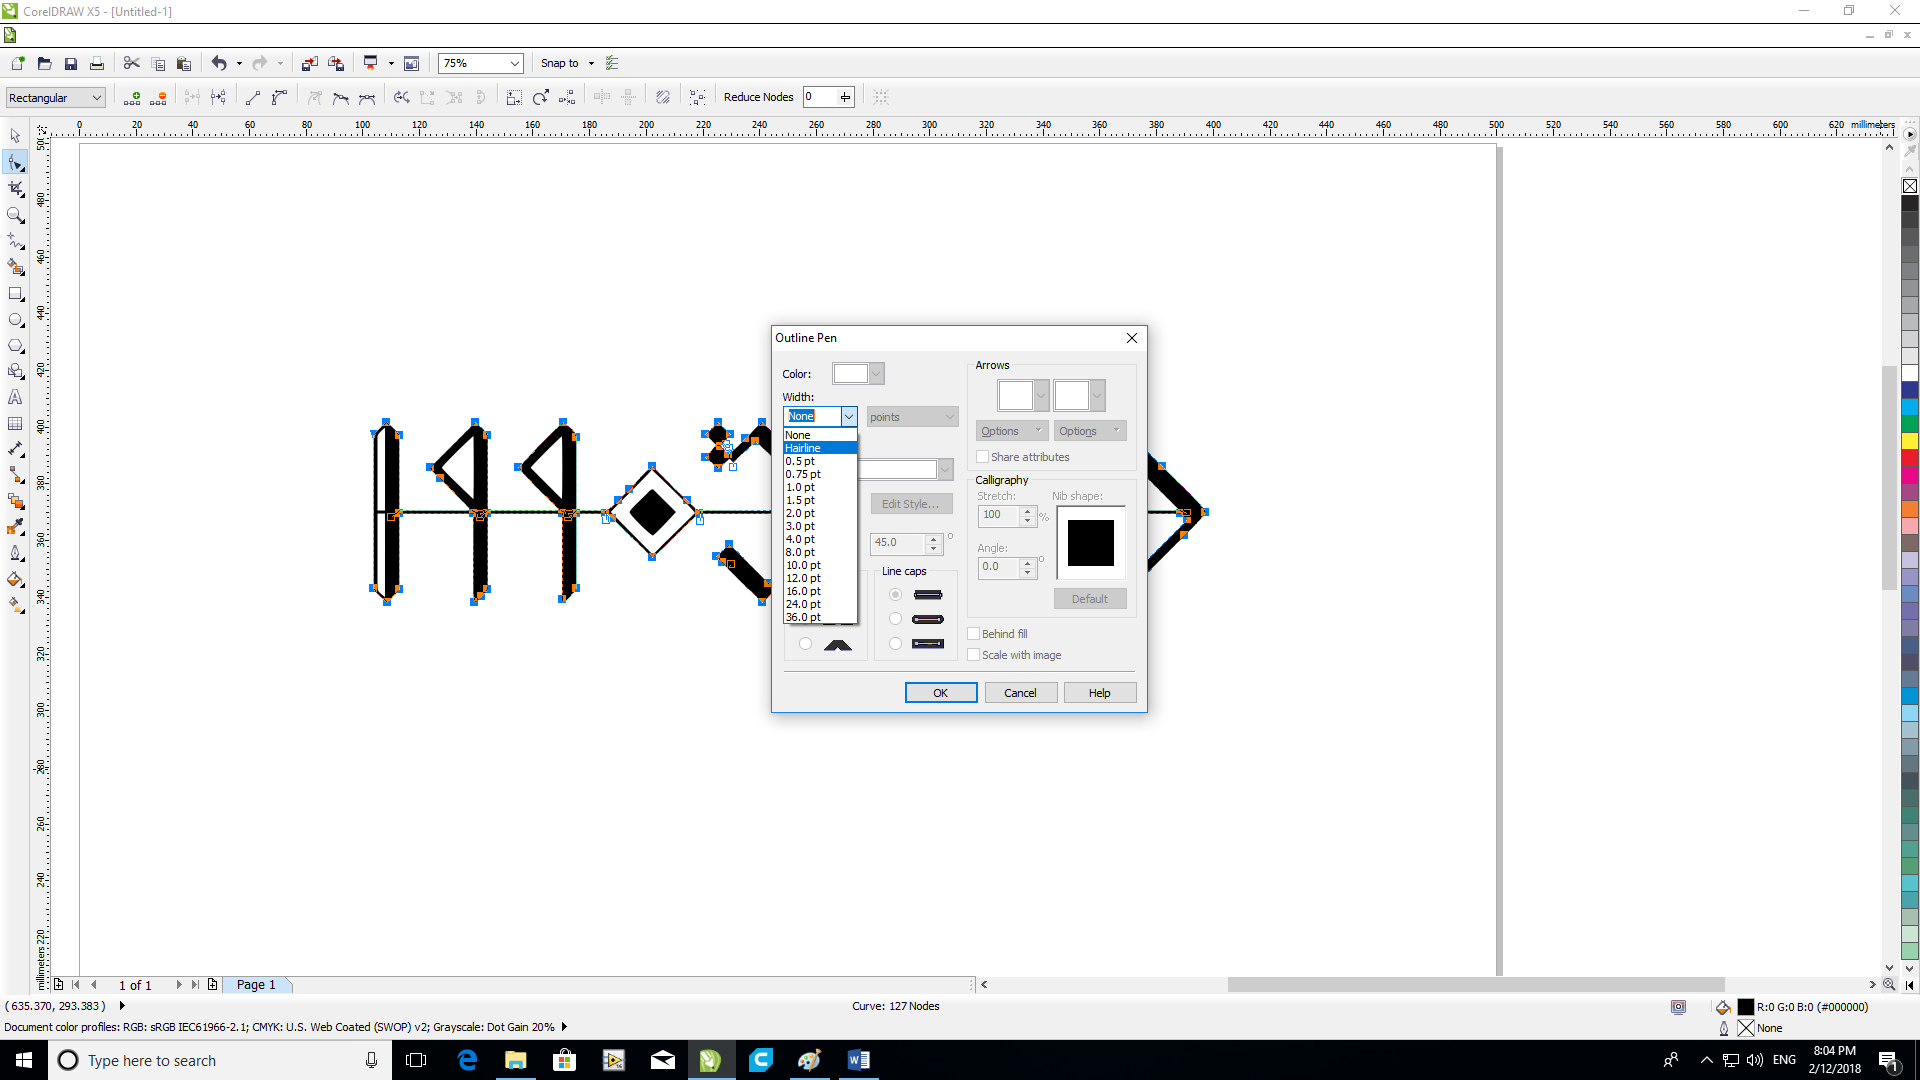
Step 3 - Setting all vectors to Hairline
Note that the vectors must have a "Hairline" thickness to be read by the vinyl cutter as a vector that requires cutting. Thus i had to mark all the vectors that i wanted to cut and set the thickness to be "Hairline"
Step 4 - Cutting the design on the Vinyl Cutter
Next i cut the file on the vinyl cutter. This step is very simple, just press print on CorelDraw, and set the position of the cutting on the vinyl. Before doing that, we need to press the "edge" button on the machine to check the dimensions of the vinyl used, and thus the machine checks if the file fits on the sheet or not. Once the the design finishes cutting, cut it using a cutter.
Step 5 - Sticking Adhesive Transparent Film
After cutting the sticker remove all the extra parts that are not needed in the final sticker. Then stick a transparent adhesive film on top of it to help us convert the sticker onto the surface we need in one peice without distroying the design.
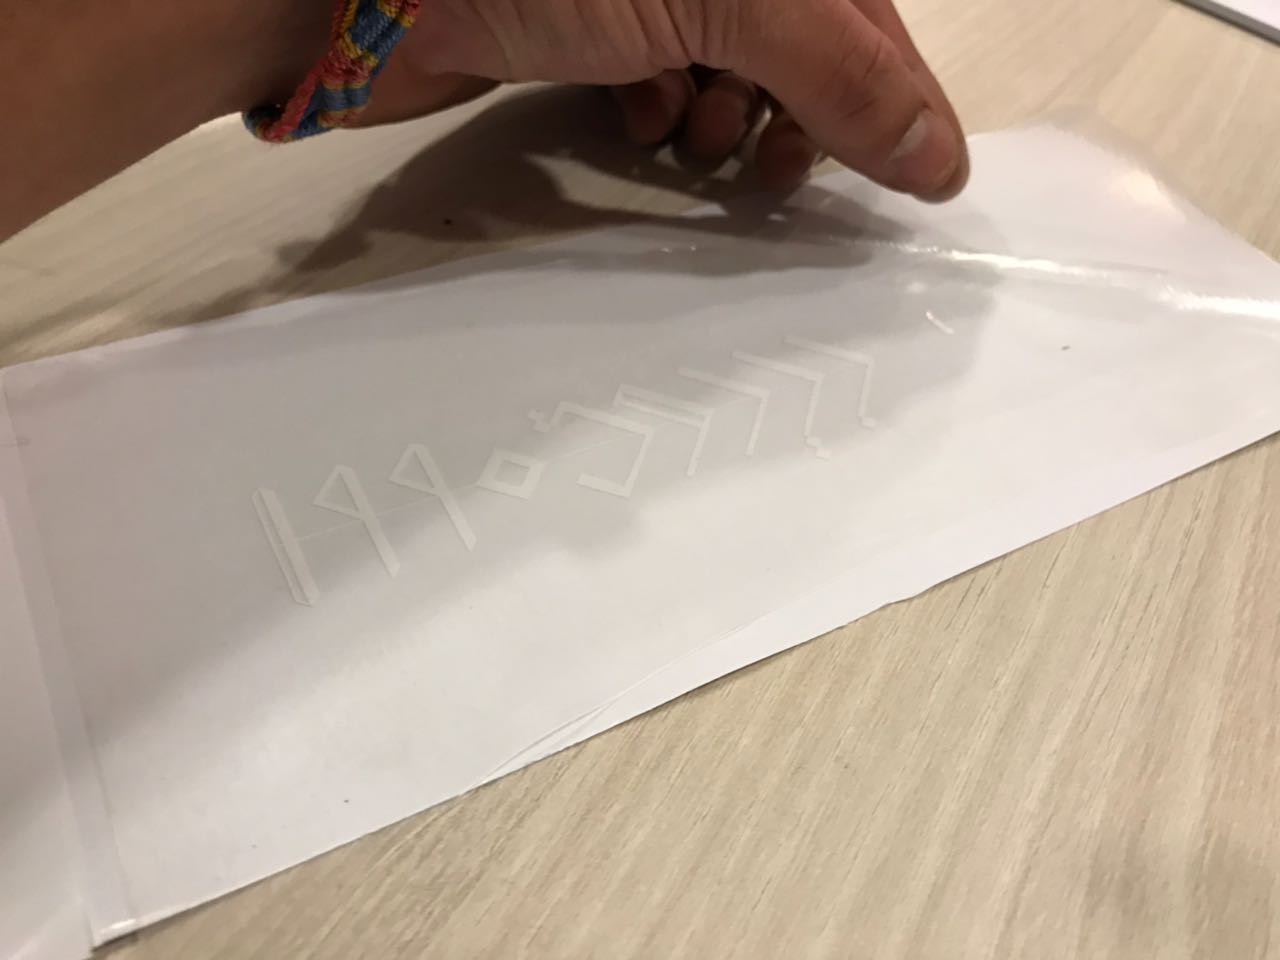
Step 6 - Sticking the Sticker with the Adhesive Film onto the Surface
Next, I removed the back, non-sticky layer of the vinyl, and sticked it onto the glass in my office. By hand push the sticker to make sure that it is well stuck.
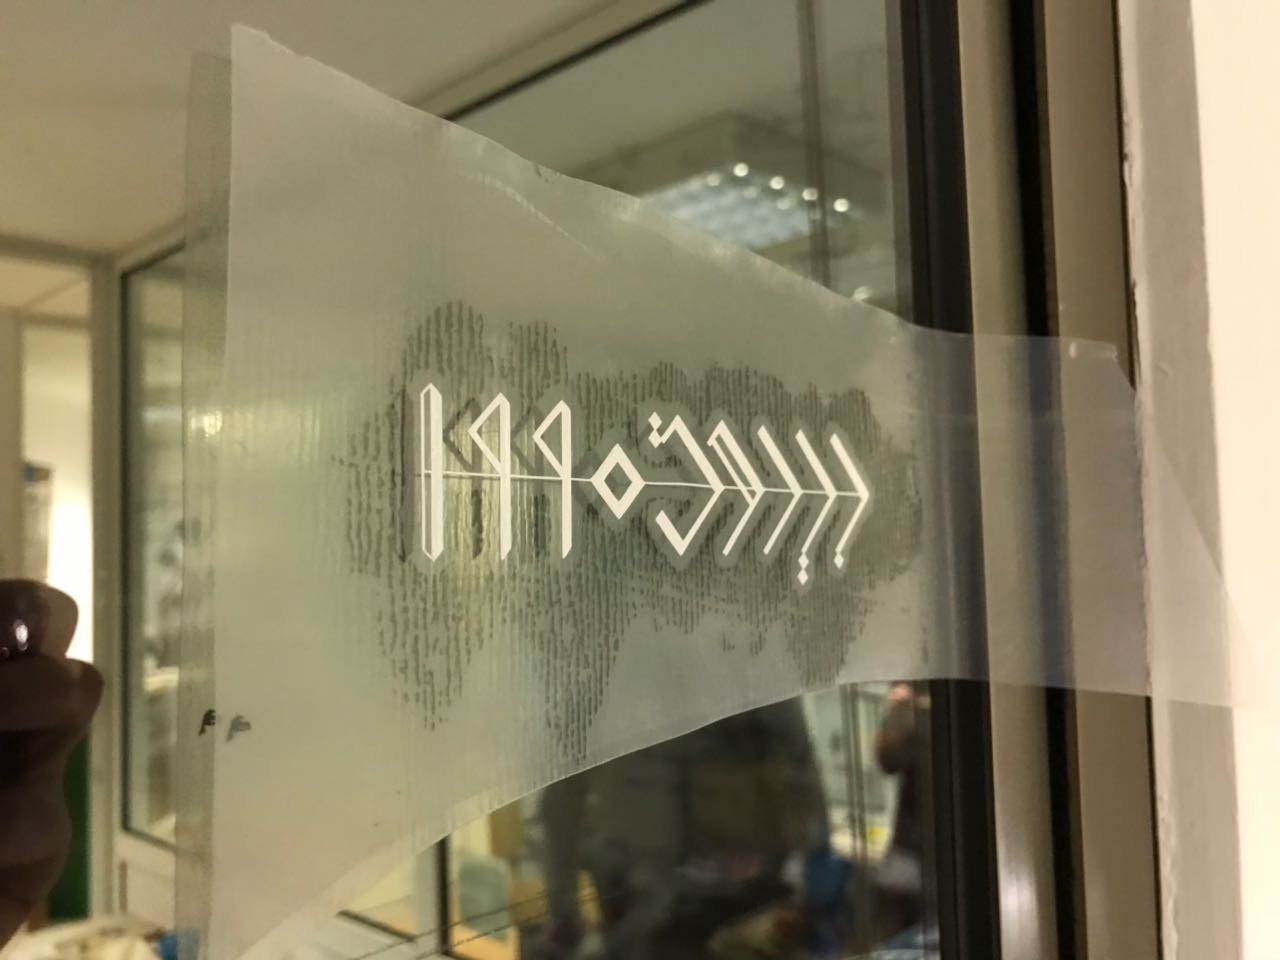
Step 7 - Removing the Adhesive
The final step is to carefully remove the adhesive thus having the sticker sticking on the glass surface.
