COMPUTER CONTROLLED CUTTING
CUT VINYL
In this part , we worked with the cut vinyl material, for which the following procedure was followed:
An image is loaded , in my case use an image with an extension ".jpg ", which later changed to another format that can be uploaded to the vinyl cutting machine . The parameters of the machine fits: Force 75 grams and a speed of 5 centimeters per second. The material is placed in the machine and is subject to proceed to the cutting procedure.
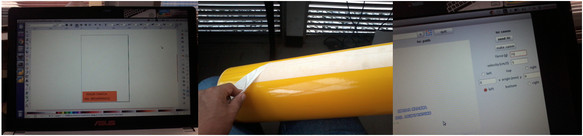
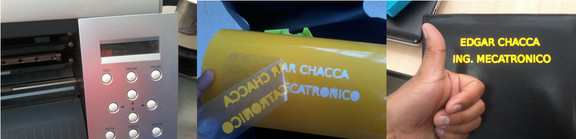
Parameters is verified on the screen of the machine , and proceed to court. Once finished tape over the cut portion is positioned to withdraw the portion of interest. After the image is moved to an area where you want to place the image. As you can see I put the image of my name in a folder , I did this because I have several of them, and placing my name makes it easier to locate .
LASER CUT CARDBOARD
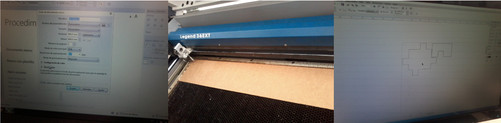
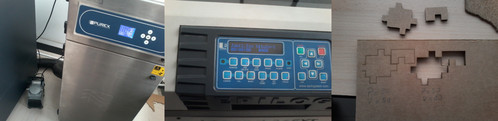
For this part we were asked to perform work our prototype laser cutting final project we are doing. To do this initially perform some tests to become familiar with the use of the machine " Epilog Laser Cut , Legend 36EX ". We carry out a simple drawing, which also helped us to know the tolerance of the machine.
The drawing done in my case "AutoCAD" was changed to "COREL DRAW" to position the drawing. After the material was placed in the cutting machine . The cutting parameters were obtained from the data plate of the machine. Power = 50 , Speed = 30 Frequency = 500: With the parameters of the machine according to the material parameters of the machine to adjusted(Were initially other values, which were not enough to cut the material, the values mentioned were optimal for cutting ). At the time of cutting were put into operation the exhaust gases. Finally the cutting result is shown.
CUTTING PARAMETERS
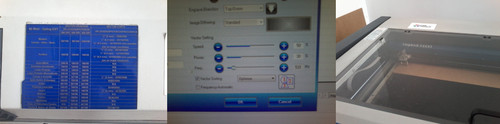
Vector Setting
- Speed = 50%
- Power = 30%
- Frecuency = 531 Hz
COREL DRAW
- Type of line = fine line
- Color = RGB
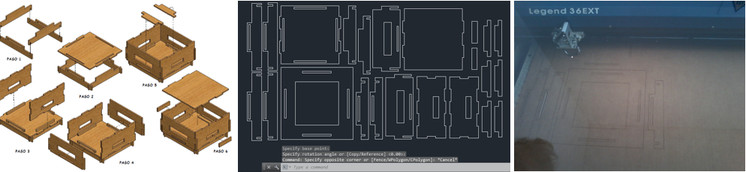
For cutting our prototype was necessary drawing solid pressure by unions as a condition of the activity performed. Use the "SOLID WORKS" program for this activity, this allowed me to make a sketch of armed as shown in Fig. Then perform the drawing of the parts in two dimensions in AUTOCAD , I did this to see the presentation of the pieces , in addition to sort. Then he proceeded to cut with the above parameters tested.
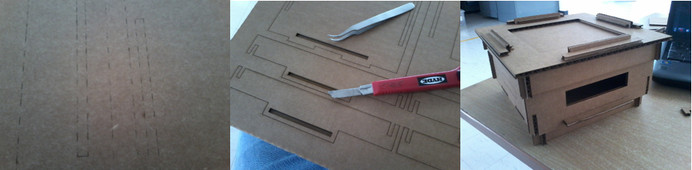
As can be seen in the images in the rear of the carton , there were portions where the cut was not performed completely. This was an error in the values of the parameters cutting machine, cutting had been done better if it had increased the laser power, but freezes experience.
As the parties that were not completely cut, use a knife to finish cutting. Finally perform the assembly of the prototype.
I should mention that I was very pleased to see that the pieces fit correctly, so I 'm glad the day and increased my desire to want to do more.
 Download
- Laser cut cardboard:
Download here
