Assignment: Plan and sketch a potential semester project
Programs:Dreamweaver, Free Bootstrap Themes & Templates,Codecademy.
Lessons Learned: Base HTML coding can be learnt for beginners when templates have the possibility to be modified.
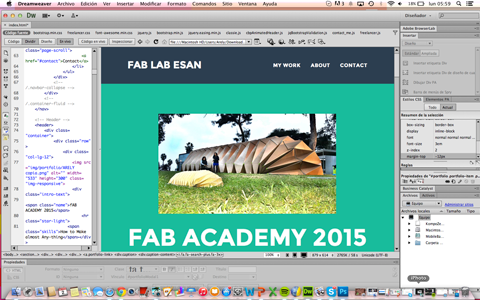
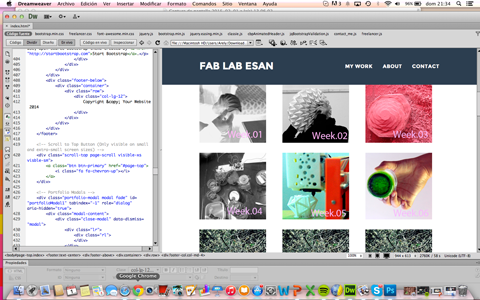
This was the first time I have come into contact with website coding, but was very useful to begin development of a personal website. My goals for this website were first; function as very organized representation of me, secondly; I wanted to be able to easily manipulate it after Fab Academy in a way that it could become a more personal portfolio. Also now after learning base HTML coding I want to learn about the future language of programing with arduino/processing. As I am completely new to coding websites this week's lecture was really important for me, but it was like open my mind to new of communication. As well as having to understand new terms within coding, I am starting to understand that open source programs have very odd names. Nevertheless I am excited to continue to develop my website. For this first exercise I learn about KompoZer, but I choose the software dreamweaver and working from a Bootstrap template and change aspects within the design and code of the site.I could do it after do a Codecademy tutorial. The workflow of my site would be as follows:
The page would be comprised of the template entitled freelancer
The web organization is divided in 3 items "My work" for the weeks assignment" and as well as my "Contact" and "About Me"
Assignment: Plan and sketch a potential semester project
IN PUT:
Social:People capacity of interact with new species and the potential of learning new ways of re-create our city.
Nature :Use patterns of nature geometry into my Project
Tecnologic: Bio_structures that use alternative energy
My projetc: Desing a Bio_structures
The idea that I have as a final project is to make a Bio Structure that will use alternative energy to move and interact with people.I want to bring technology to the public spaces maken installations that interact with people especially with kids so they will learn , and create their own urban interventions .I have already prove the kids capacity to be an active citizen.
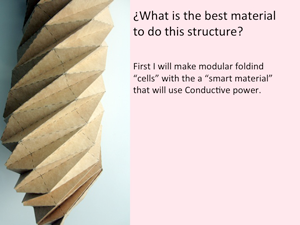
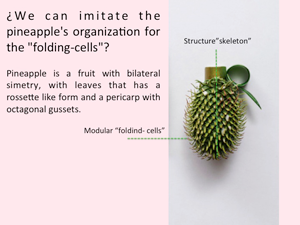
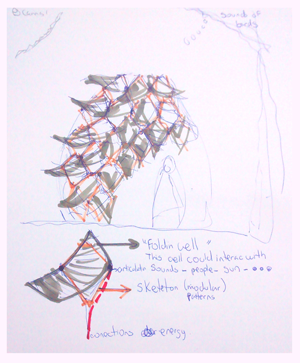

Responding to the answer about ¿Which is the best material for this folding structure?
My answer is that I have to create it, the way is preparing the best recipe for what you want to generate with it.
In my project I want to create is a compound material which I could design its dynamic by a folding pattern following the nature patterns and how it could interact with our body dinamic.
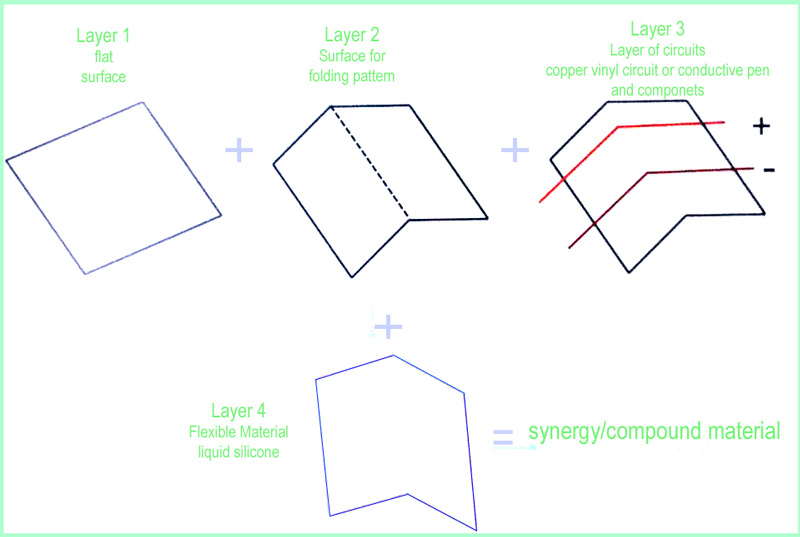
This are the materials I will need. For my project I am planning to create a compound material for the electronics board.
I will add this to my folding structure, I want to make a prototype in scale.So the material for this structure might be cardboard .

The other issue we have to learned this week was to use the Mercurial.
Here you will see how I put and change my personal folder into the local Mercurial repository. For this I used my / ACADEMY TUTOR TUTORIAL /
1.Installing the Local Mercurial repository:
Paso 1: Instalar Mercurial:
en Ubuntu:
$ sudo apt-get install mercurial
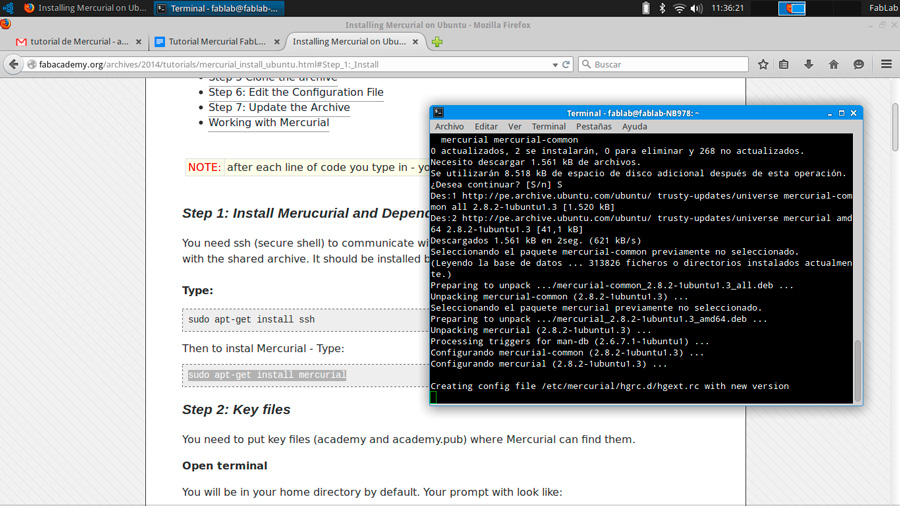
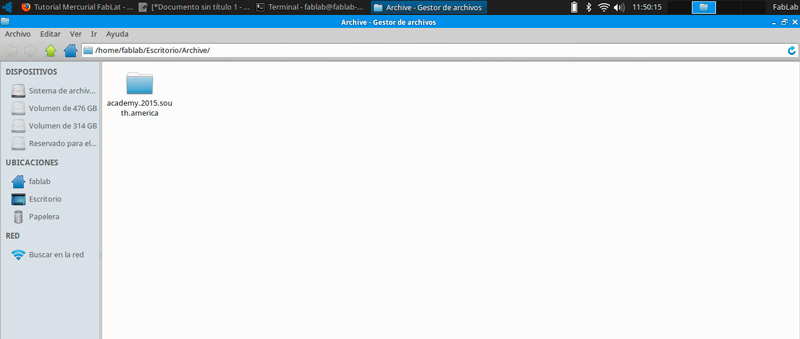
Once the software is installed you need Clone Original repository, for this will create a folder on your desktop (in this case the call Archive)
~ / Desktop / Archive
We need to enter to the new folder "Archive"
It will look at your screen as follows:
~ / Desktop / Archive $
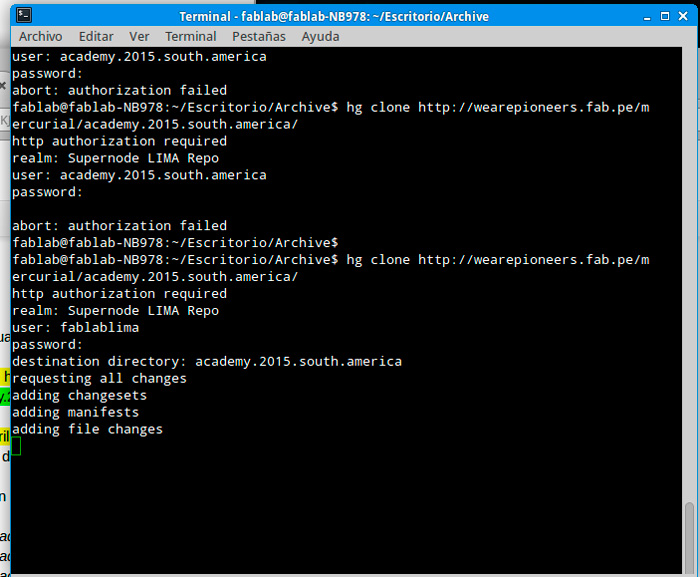
Now we need to clon the repository:
write this ,
hg clone http://wearepioneers.fab.pe/mercurial/academy.2015.south.america/
academy.2015.south.america
Now yo will see the folder and information inside.
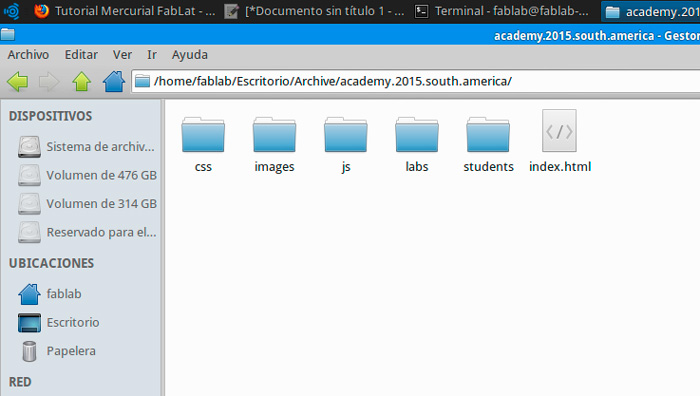
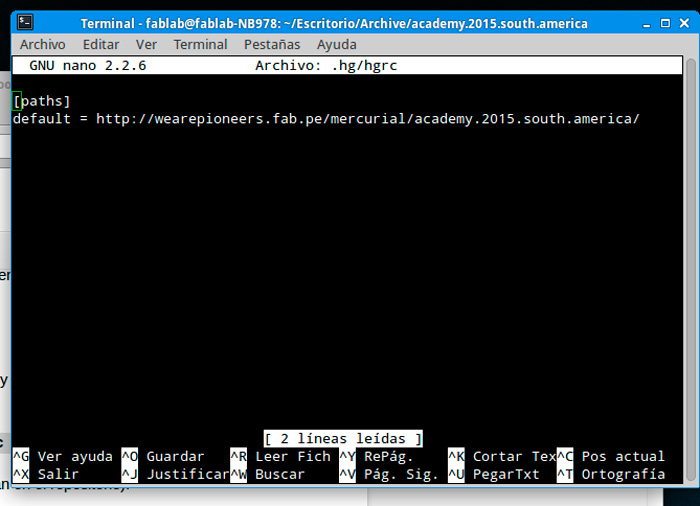
We entered the destination folder, look for the ".hg" folder and edit the "hgrc" file with a text editor
/ Desktop / Archive / Academy2015-lat $ nano .hg / hgrc
hgrc in the file (which is the way they identify in the repository):
[paths]
default = http://wearepioneers.fab.pe/mercurial/academy.2015.south.america/
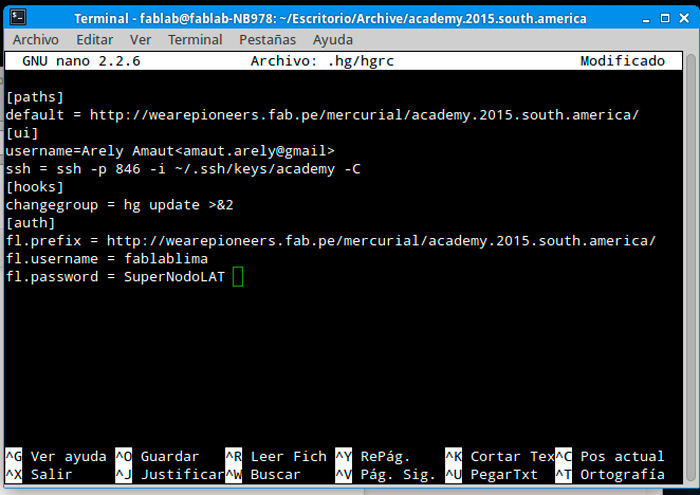
Add this:
[ui]
username = Nombre Apellido < usuario@dominio >
ssh = ssh -p 846 -i ~/.ssh/keys/academy -C
[hooks]
changegroup = hg update >&2
For my case I put as username: Arely Amaut and amaut.arely @gmail.com
We need to change username and password
[auth]
fl.prefix = http://wearepioneers.fab.pe/mercurial/academy.2015.south.america/
fl.username = fablablima
fl.password = SuperXXXX
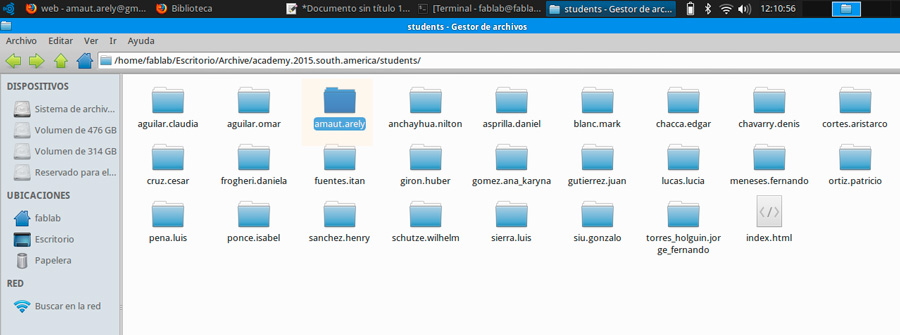
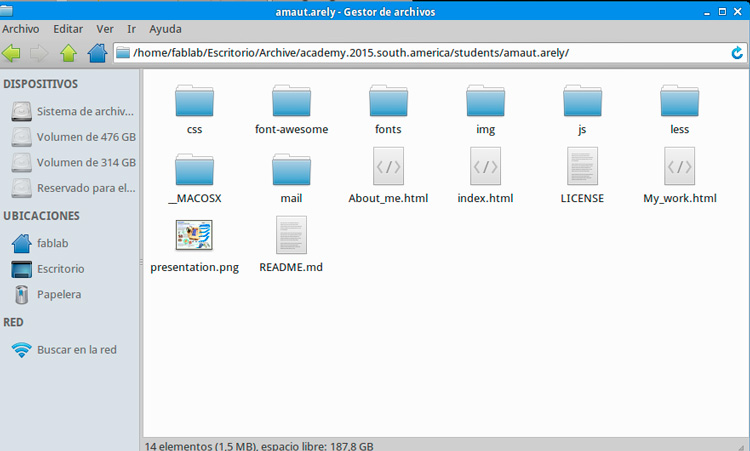
Now I eraser everything in my folder and add my new web.
Finally:
the workflow repository
hg pull - >
hg update - >
hg addremove ->
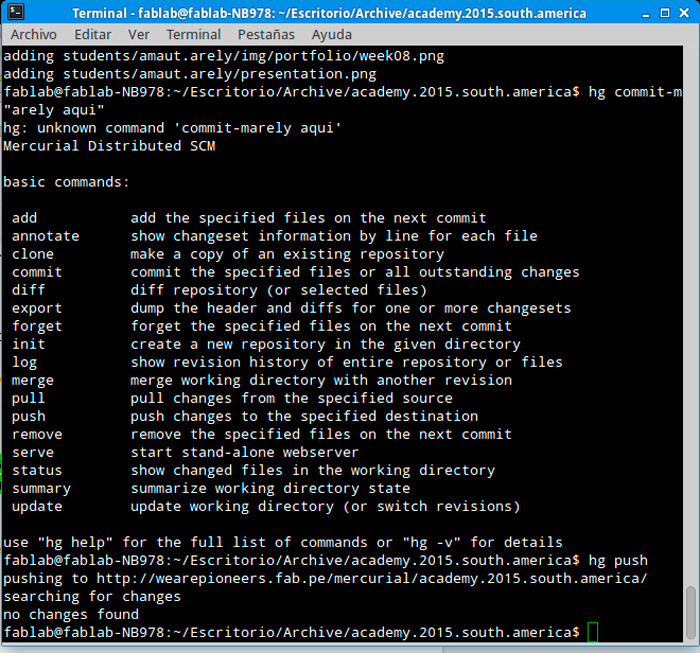
hg commit -m “mensaje” ->
hg push ->
to send the new data upload I put a Message " arely aquí"
Assignment:model (draw, render, animate, simulate) a possible final project, and post it on your class page
Softwares:RHINO 5,INVENTOR
My Final Proyect: Bio_Structure -FOLDING .
This weeks lecture was an overview of different 2D/2.5/3D design software options (Open Source & commercial). The idea is to experiment with the different design software to find the best option that fits the purpose of the designer. I tried to get comfortable with and combine an array of tools in which each excel at different things, to design and visualize my idea. Above I make a list of the programs which I tried:


For the past week I have been digging for information about different folding and deployable structures.First, I desing the map fold using AUTOCAD 2D and then I did the scale model.


Second, I tried the 123CATCH which is a free app that lets you create 3D scans of virtually any object so I took about 37 photos of the scale model and uploaded to the software.I have considered the uniform ilumination and the size of photos.


Third, I tried INVENTOR , for my final project I need to design mechanical joints so I started to learned this program

PROCESS
Conclusion: Durinig this week I confirm my final project: is about finding a compound material that itself describe his dynamics which I could desing applying the nature folding patterns. Moreover while I learned more about mechanics and drawing in INVENTOR I realized that the joint that I was serching is very difficult and not necessary to my project.
LASER CUTTER-Epilog
Aplications:RASTER-VECTOR(grayscale)/--PRESS-FIT.


Assignment:Electronics Production "The FabISP"
Machine: Roland Modela MDX-20 milling machine .
Software: FAB MODULES OF LINE VERSION
Materials: Copper plate, Microcontroller ATTINY44A, Crystal 20MHz,USB connector,Ribbon connector, Zener diode, Jumper,Programmer AVR
The FabISP is an in-system programmer for AVR microcontrollers, designed for production within a FabLab. That is, it allows you to program the microcontrollers on other boards you make, using nothing but a USB cable and 6-pin IDC to 6-pin IDC cable. It's based on the USBtiny and V-USB firmwares, which allow the ATtiny44 to perform USB communication in software. Programming can be done through avrdude. The schematic (PDF) is super simple: USB connector, ATtiny44, and 6-pin ISP header, with assorted passive components. I started with the Eagle files for the USBtinyISP, although there's almost nothing left of it. Most of the parts for the FabISP are in the FabLab inventory. Exceptions include the Mini-B USB connector (SparkFun, Digi-Key), 12 MHz crystal (Digi-Key), and 18 pF capacitors for the crystal (Digi-Key).

For this week we have to fabricated the first PCB board with the Roland Modela. This board use a small microcontroller, the ATinny44
Im going to follow 7 simple steps for the production of my FabISP in-circuit programmer:


 My experience:
Once I have the board with the traces.I started the welding process, for me was very interesting learn about the adequate quantity of tin for each component, also not to put the station welding too much time at each component.
For example the first welding my board didn't work and after checking a lot with the multimeter everything seems to work well so maybe the ATTINY44A was burned .
Finally the second FabISP worked.
And if you are lucky you will have a succefull, built and programmed board and recognized by your Computer when you plug it into the USB port.In my case I had to do a second one.And finally it works.
Before programming make a visual inspection of the board and check any solder joint that look cold (not shinny and smooth). Also use a multimeter to confirm that every connection track are connected and that "ground" and "power" are NOT.If everything is ok and once you connected the FabISP to the programmer AVR and you have a green signal, proceed to next fase.

I used LINUX- UBUNTU TO PROGRAM THE BOARD. Downloading and installing firmware, editing the "Makefile" Xcode Launch terminal and move to firmware folder to type commands: make clean make hex sudo make fuse sudo make program If all its OK a message will appear "avrdude done. Thank you."

EXPERIMENTS FOR FINAL WORK
As this week we started to learn more about circuits I had the idea to use paper and Flexible Copper to understand more.So one of my friend of fab academy help me. I think that silicone could be the material similar as our skin where inside we coukd have different layers of configurations as you want.For this experiment I will use paper - flexible copper - components - liquid silicone rubber.I would add nitinol but I did not figured out how does it works. First I tried with a heat gun nothing happens. Second I tried with a 9V Battery: it deformed and also burned . I am very curious with nitinol because this could give the movility the my compound material. I will experiment more with nitinol and flexinol. I make a circuit with LED and VARIABLE RESISTANCE (LRD100k). 1)Then I make a simple folding pattern and it works. 2)I welded the components to the cooper. 3)make a cardboard mold for the "folding paper circuit"and put it inside. 4)Put the liquid silicone rubber inside the mold with the folding paper circuit .

Technical Information:


Description of the project:
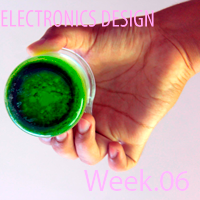
This week's assignment is to: -add a button and LED to the echo hello-world board, -check the design rules, -and make it. You can download the "fab. lbr" from the Fab Acedemy electronics desing class and load to the EAGLE library.


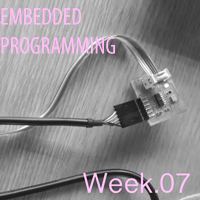
Description of the project:The assignment for this week is to read a microcontroller datasheet and to program yourHello Button + LED board from week 6 to do something, in as many different programming languages as possible. There are many tutorials for this week that will show you how to program your board using the Arduino IDE, C and how to make an Arduino for the final project.
Heres a very usefull tutorial for the assigment.
ATtiny44 DATASHEET

TUTORIALS
AVR
how to make (almost) anything
embedded programming page:
1: the c-filehello.ftdi.44.echo.c
1: the c-filehello.ftdi.44.echo.c.make

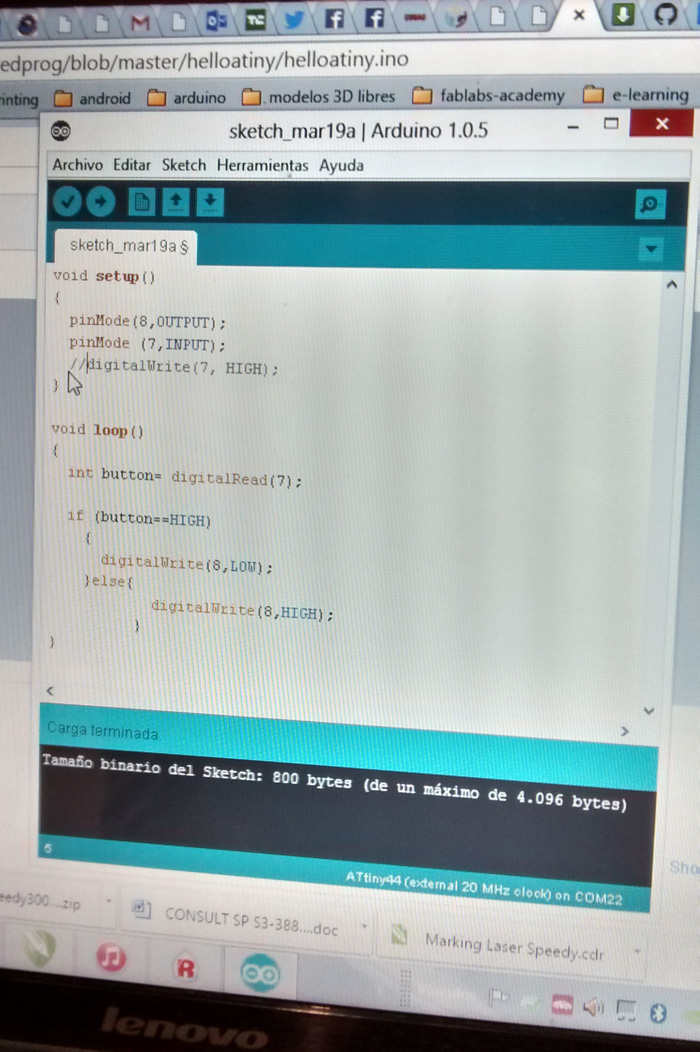
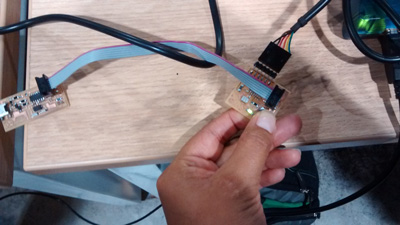
 I finally could programm my helloboard with my own FabISP. The problem that I had before was that I didn't take out the bridge from Isp.Onnce I took off everything work I made a simple program that used the button to control the led. So I coded a simple blinking program from examples in arduino IDE, in which the led is blinking at a certain speed, and when the button was pushed, the light started blinking faster.

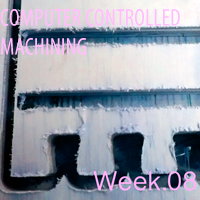
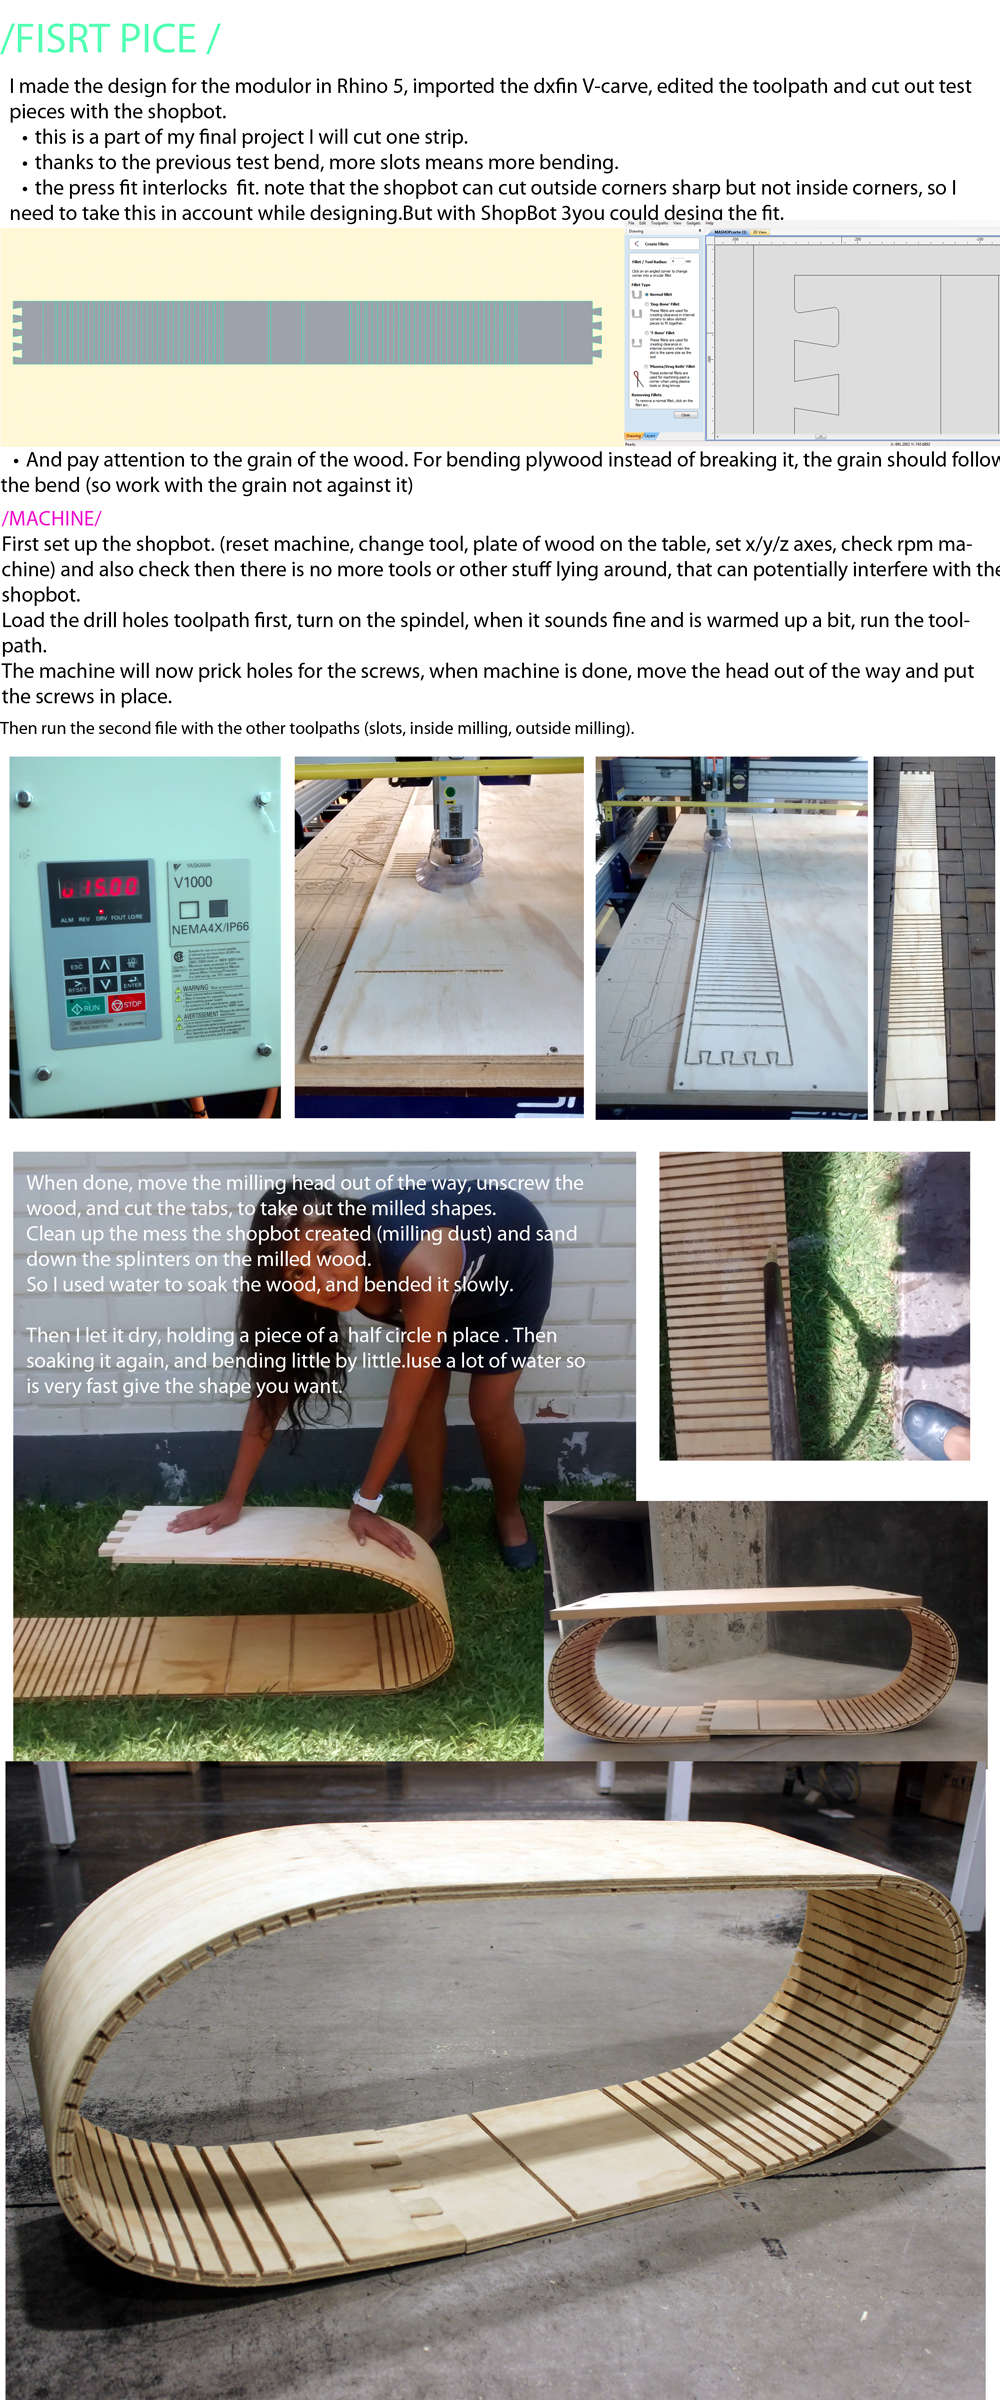
My inspiration for this weeks was my exploration on assignment 3 and how to make structures form folding. The technique used for that design, for bending the wood, was wetting it and bending it slowly over a mold. I found a different approach using slots and plywood, and decided this would make the project for learning to work with the shopbot and flexible wood.
Machine: Shopbot
Softwares:
-Rhino 5
-ShopBot 3
-PartWork 3.0
Process .



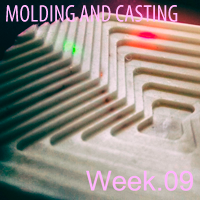
This week's assignment is comprised of a four-part process to fabricate a 3D object:
1. Use a CNC mill to digitally fabricate a mold out of wax
2. Create a negative of the mold with a flexible rubber
3. Use the flexible rubber as the mold for the final part
4. Cast the Final Part
Machine: -Roland Modela MDX-20 milling machine
Softwares:
-Rhino 5
-Modela
-Fab modules
MOLDING .
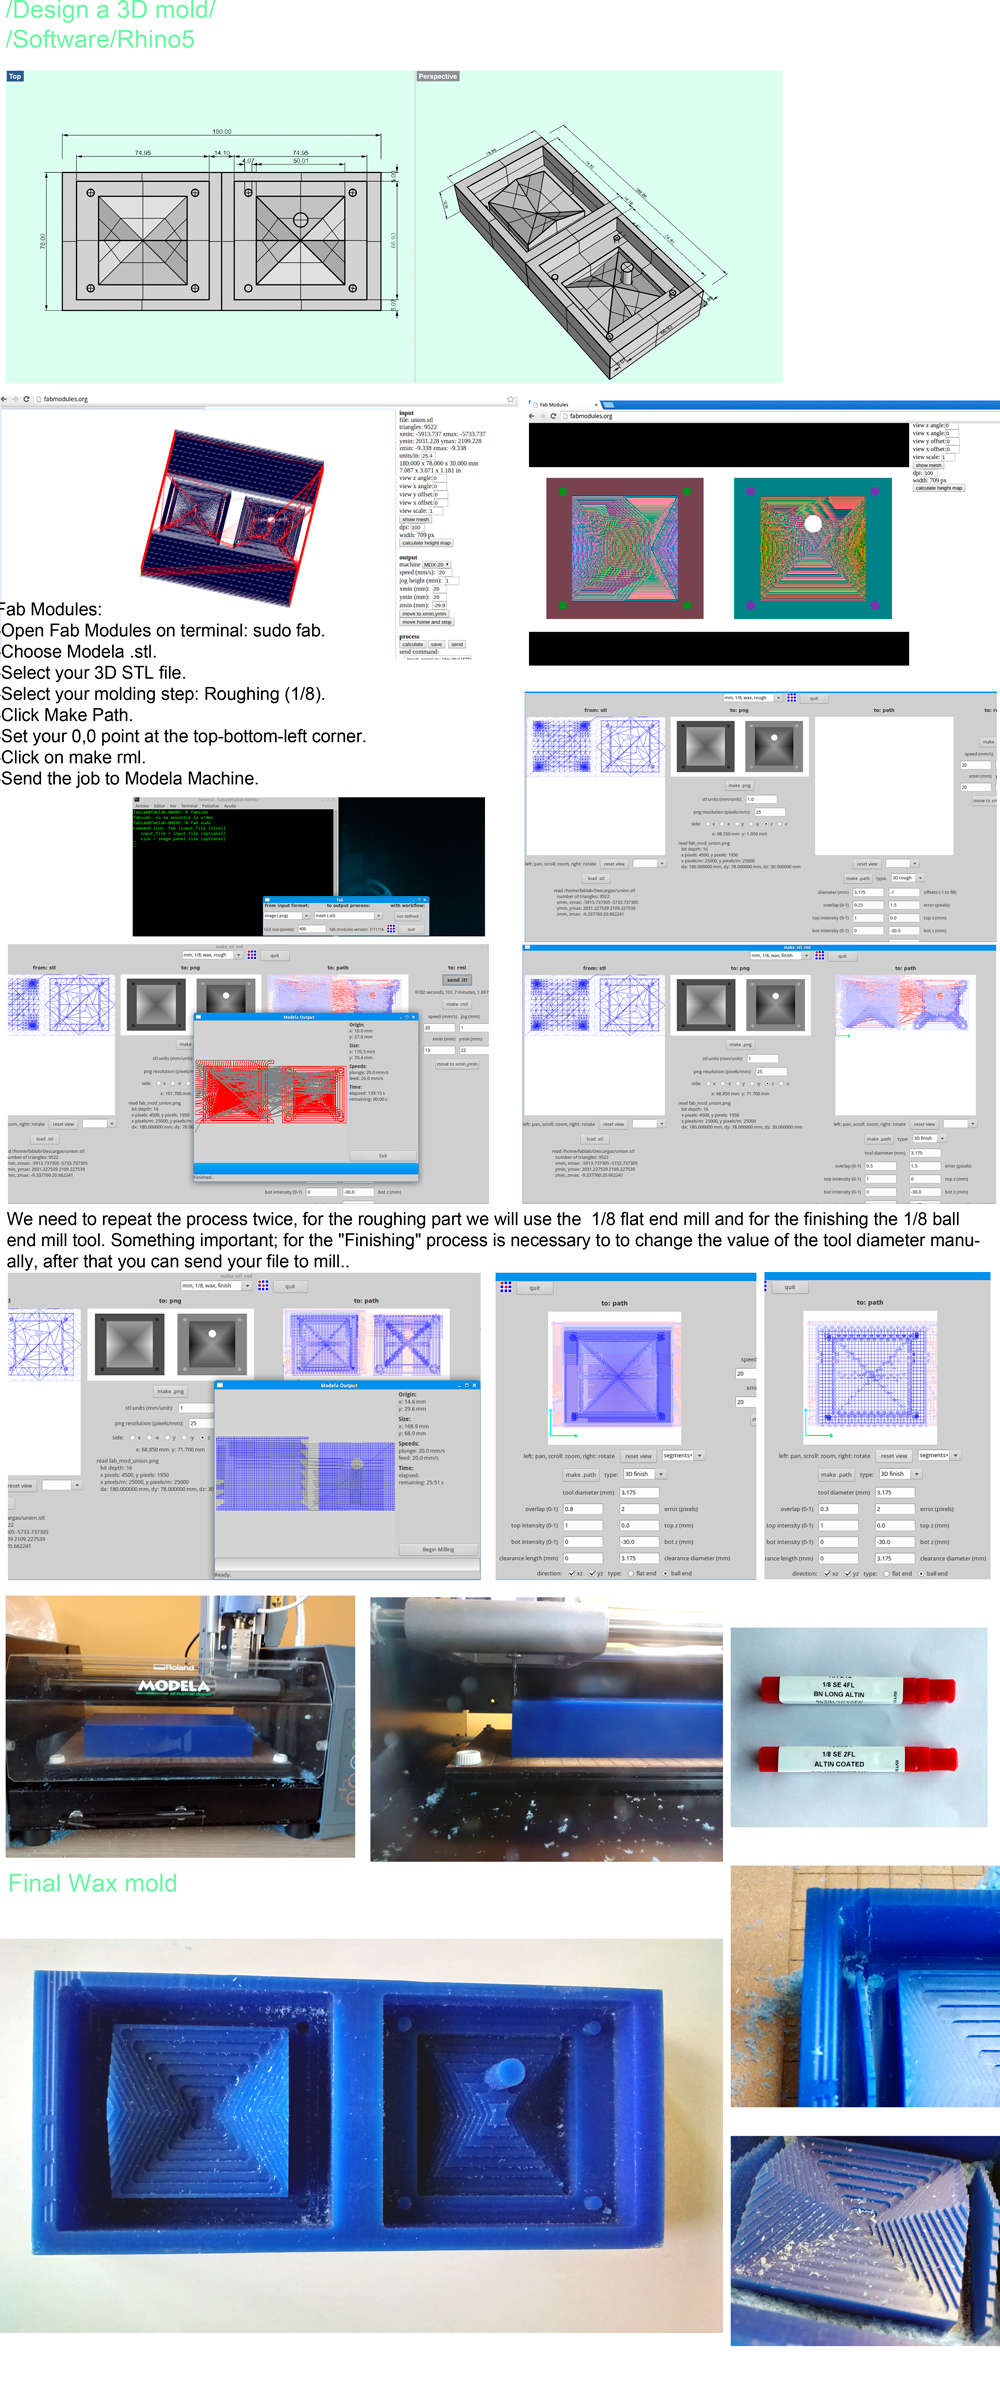
SOFT MOLD
For the project of "modulo cells "I will use a soft mold so we need to follow the next steps:
MOLDING-TIPOLOGIES
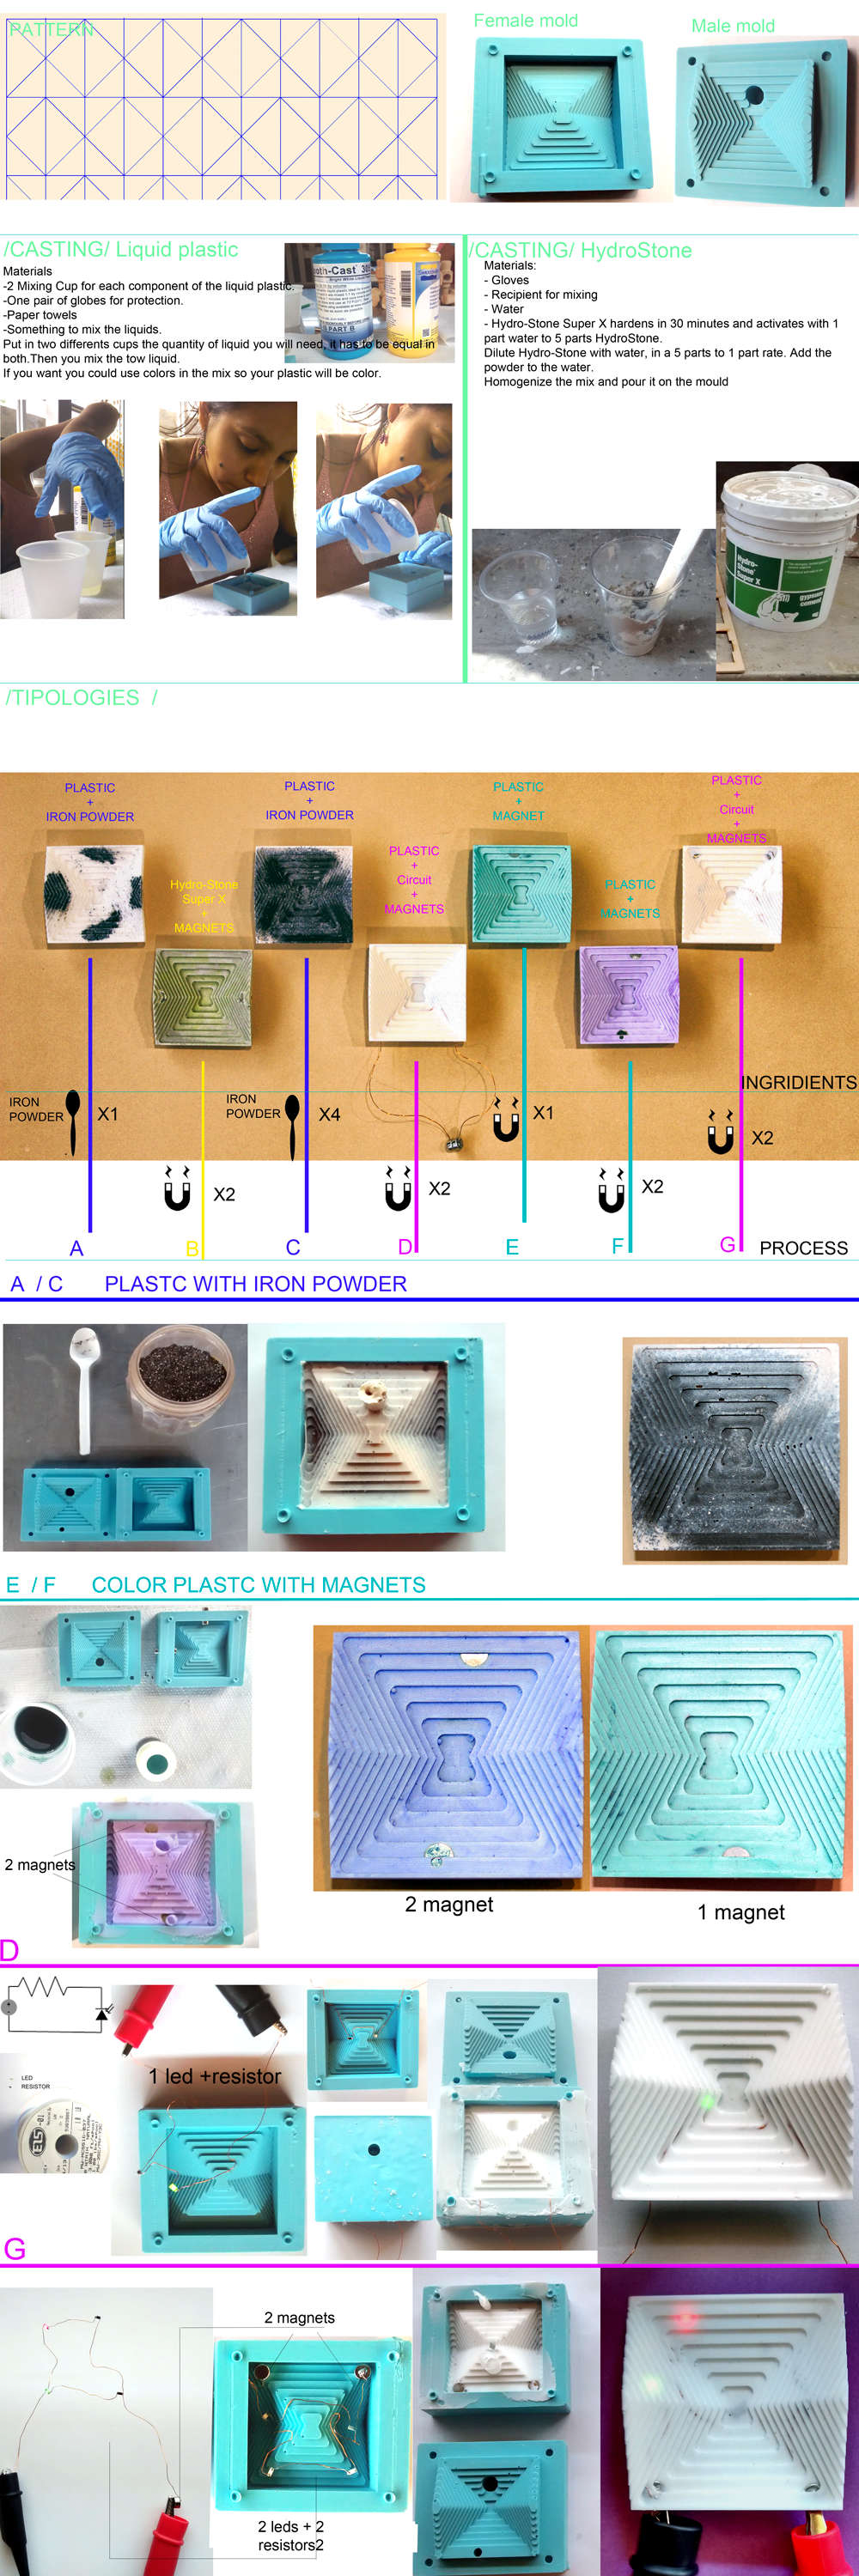
modulo ludico plus from Arely Amaut on Vimeo.
This week's assignment is :
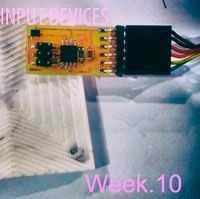
measure something, add a sensor to a microcontroller board that you've designed and read it.
As we already know fisrt
Sensors:
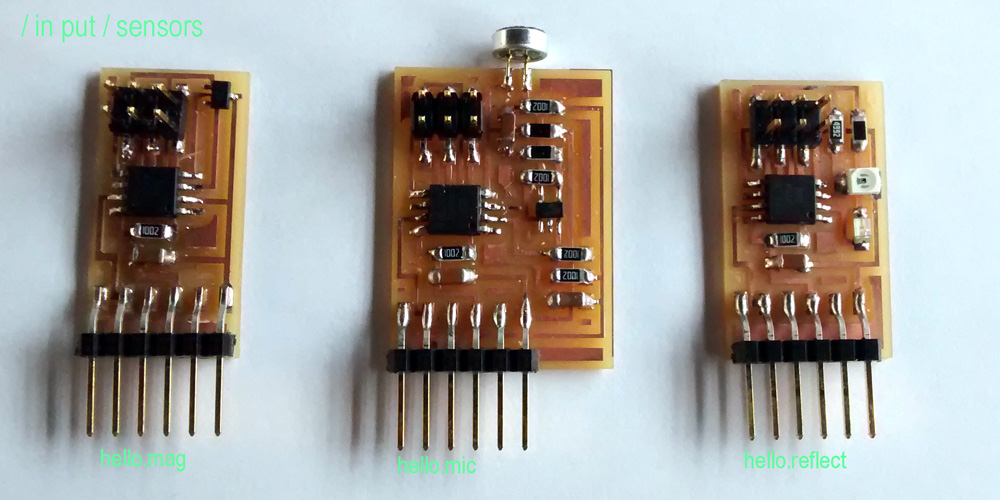
A sensor is an electronic device that takes data from the real world and transforms them into electrical quantities. In total we will fabricate 3 btw sensors, then we will appointing and detail the list of components for each one.
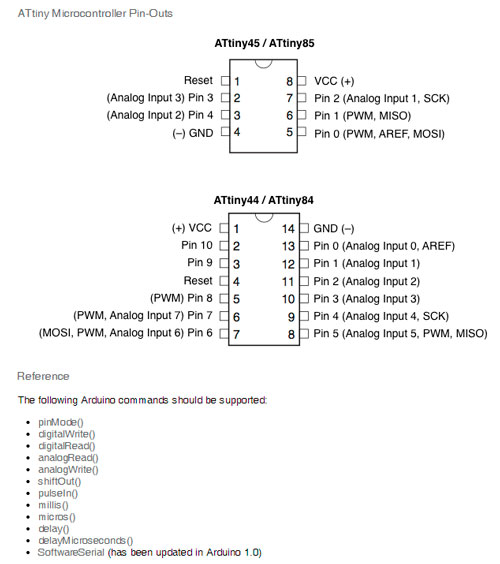
This chart shows the equivalence of AT Tiny 45 and 44 Microcontrollers Pins with Arduino UNO pins. It will be helpful when developing the code to program the microcontrollers by using the Arduino IDE.
Machine: -Roland Modela MDX-20 milling machine
-Soldering Iron
Softwares:
-Arduino
-Fab modules
-Python
You have to go to input devices class week 10 for all the fyles input devices
You need the PNG files to fabricate yours boards.
1.- LIGHT-REFLECT SENSOR
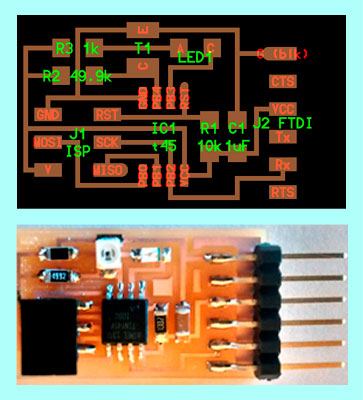
2.- SOUND SENSOR
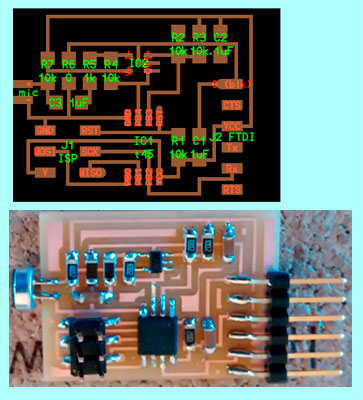
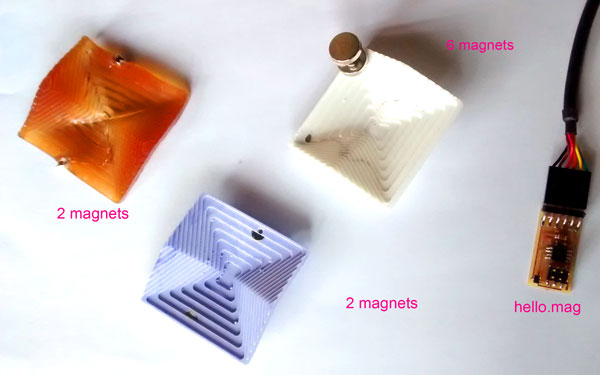
3.- MAGNETIC SENSOR
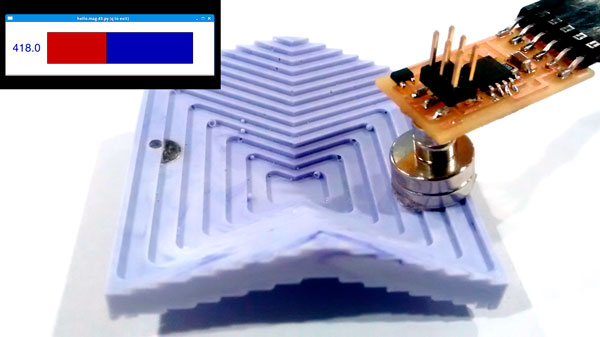
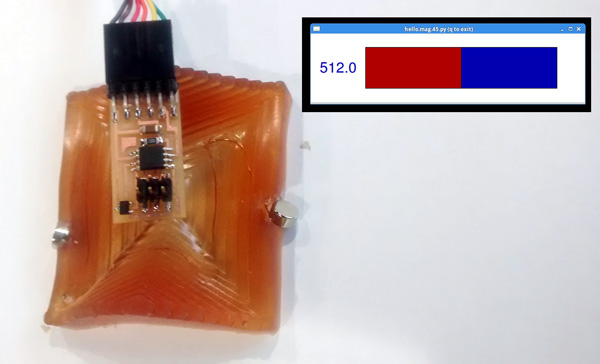
PCB Hello MAG, magnetic field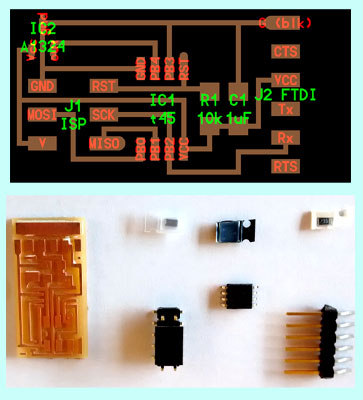
4.-VIBRATION
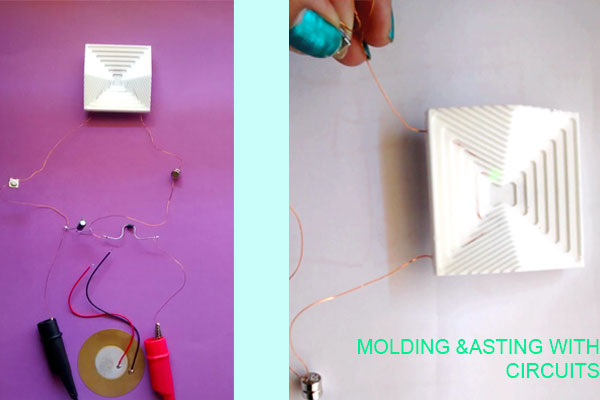
PIEZO For the project of "modulo cells "I create differents tipologies of plastic folding pattern .Also I use Molding and casting with Circuits. So I turn on the led with the vibration in the piezo.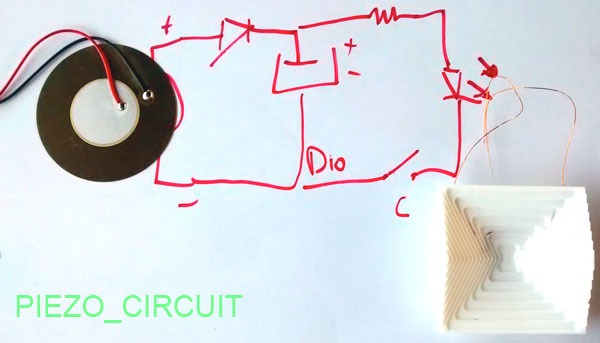
Tutorial for week 10 input devices
FIRST I USE ARDUINO IDE TO PROGRAM the microcontroller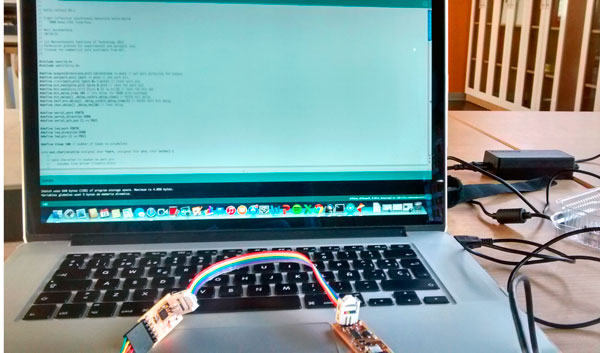

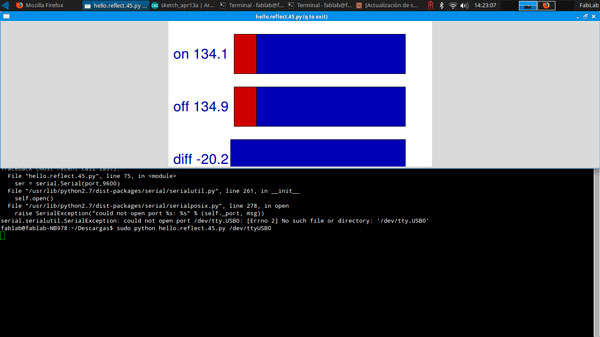
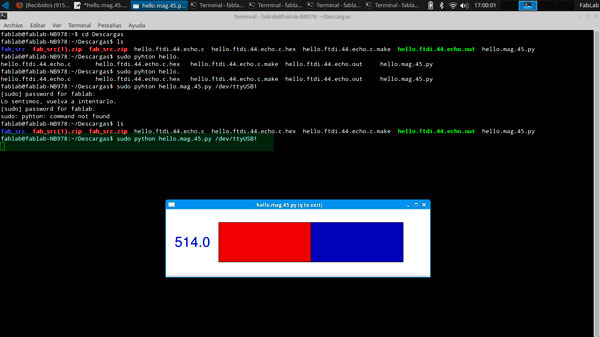
Your serial port may be different depending on your computer. You need to find the port for your computer. To find your serial port, with the board attached:, in terminal - type
ls /dev/tty.usb*

Then use the port you are given to run the python program. For example - when I type "ls /dev/tty.usb*", I get "/dev/tty.usbserial-FTF53NJC". So I would type:
week.10 Fab Academy 2015 fablab Esan from Arely Amaut on Vimeo.
WORK IN PROGRESS
For our group project we want to make a interactive Fab Lab paint wich active with the sound of the ambient sound and music , this will use the /Hello.Mic board/ . We will multiple the 3 pins out of the ATtiny45 to generate different combination of the light.
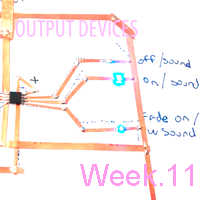
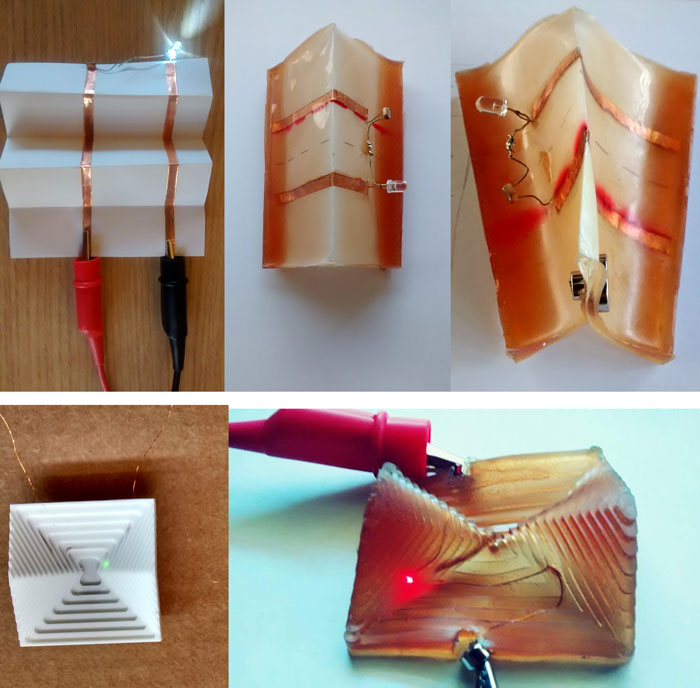
The idea of this week is to create a board that I can use for my final project. Now the main goal is desing a flexible circuit board -molding & casting circuit.
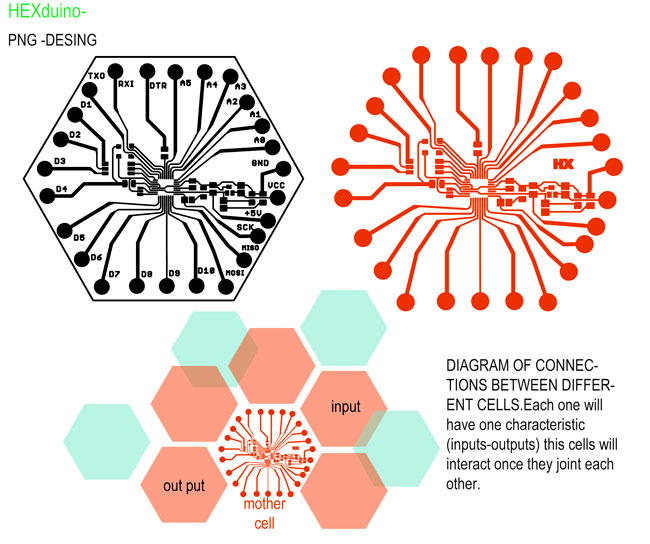
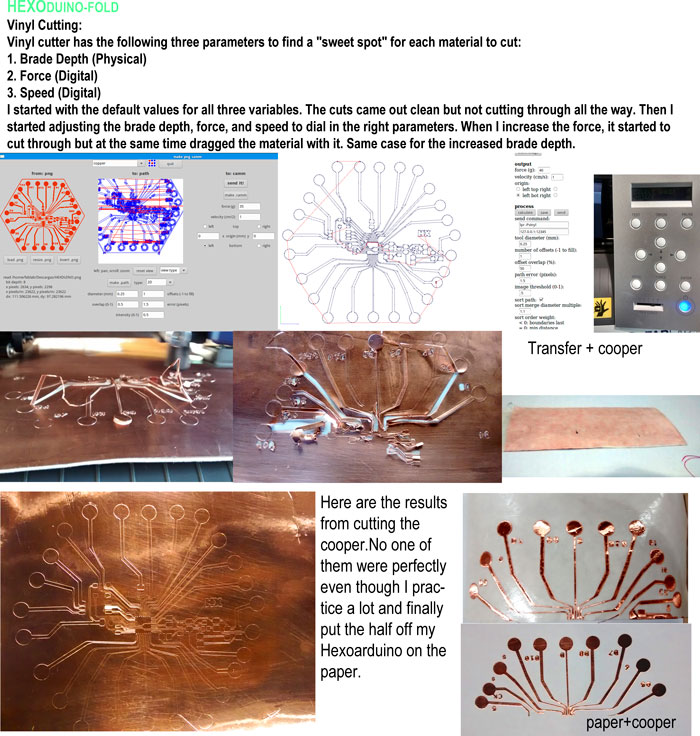
I need to try with the vinyl cutter (ROLAND) the idea is to create an Arduino in the paper and all the board that I will nedd, inputs and outputs.So I started with my HexoArduino. I took reference fro PaperArduino they use conductive pen and a special conductive glue for the components.But I will use copper vinyl for this week.

Machine:
-Roland Modela MDX-20 milling machine
-Roland Vinyl
Softwares:
-Rhino 5
-Modela
-Fab modules
-Eagle
DESING HEXODUINO
VINYL CIRCUIT.
Paper Circuits
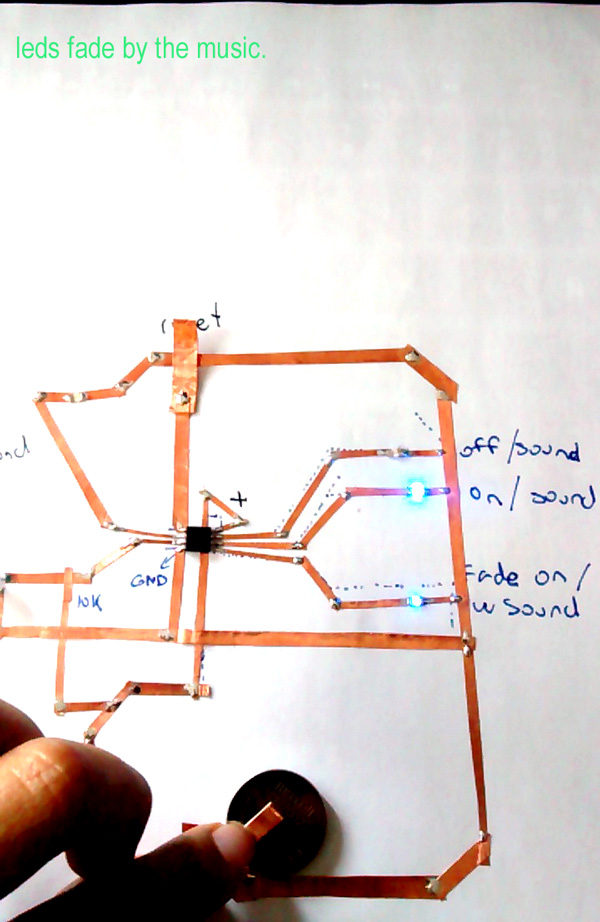
I use this example from electret-microphone.Because was I week full of learning this circuit is in progress. To program ATTINY45 I design a board in Eagle after programming I will take off and put on the final paper circuit .
Here is the example that I use from JEI QI.
COMPONENTS(MICROPHONE CIRCUIT-LEDS(OUTPUT)
attiny45 or attiny85 microconttroller
electret microphone (available here)
10 kOhm resistor (not the 50k specified in the photo!)
LEDs
3V coin cell battery (CR2032 or CR2016)
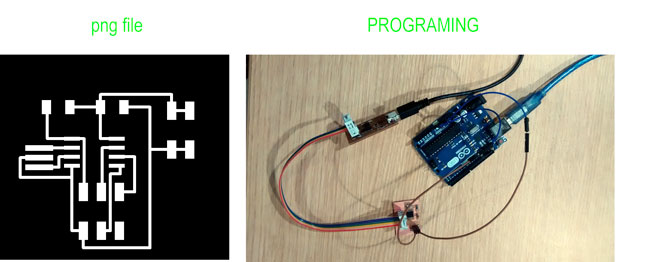
Then I try a different way for programming.I use this tutorial.
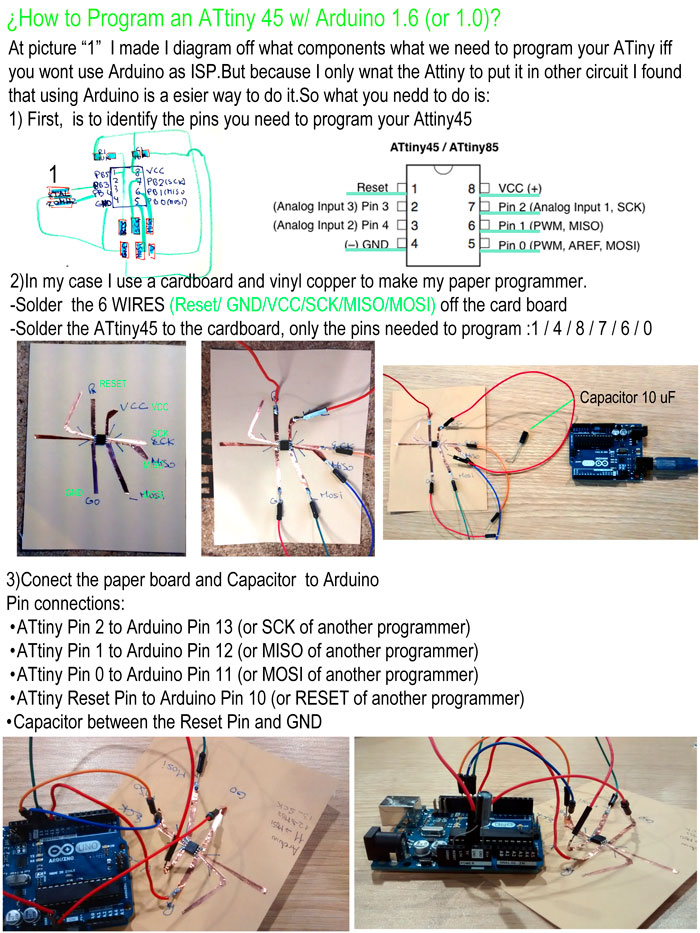
programmin with Arduino IDE, you have to follow this steps to use the arduino as isp.
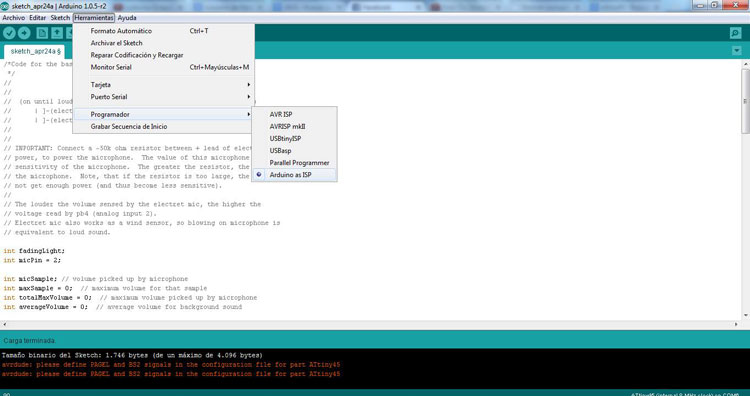
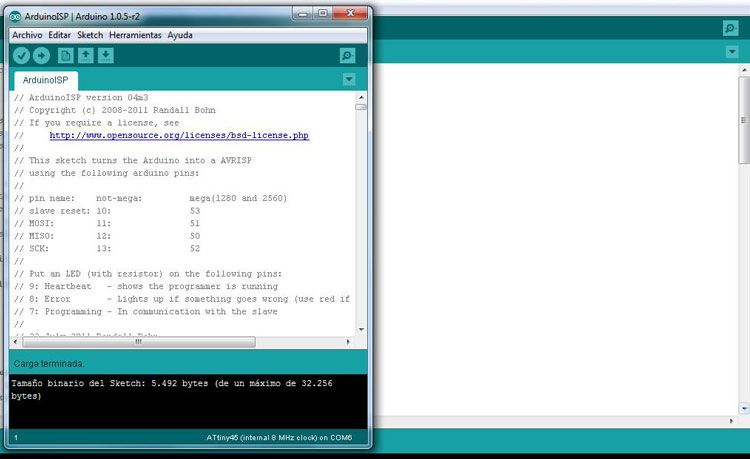
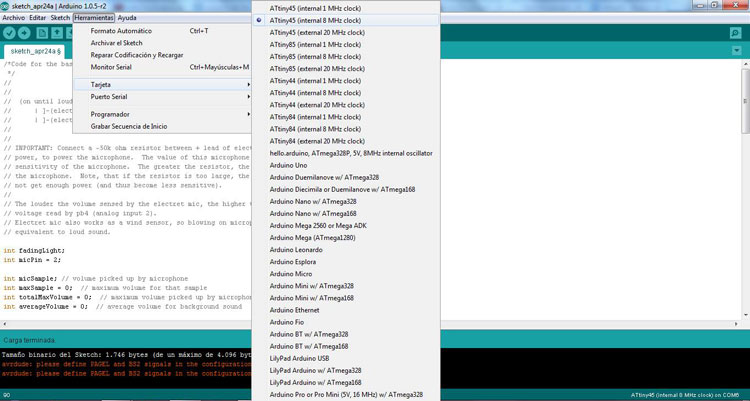
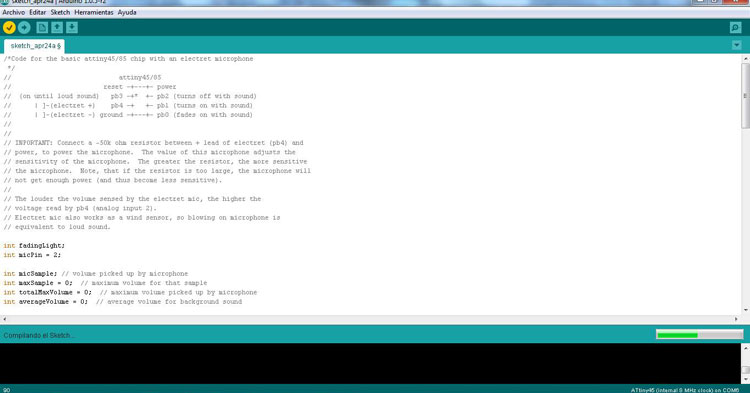
I recomend you to prove with a blink if you microcontroller is alredy program.Then I program with the code "Electret microphone card"
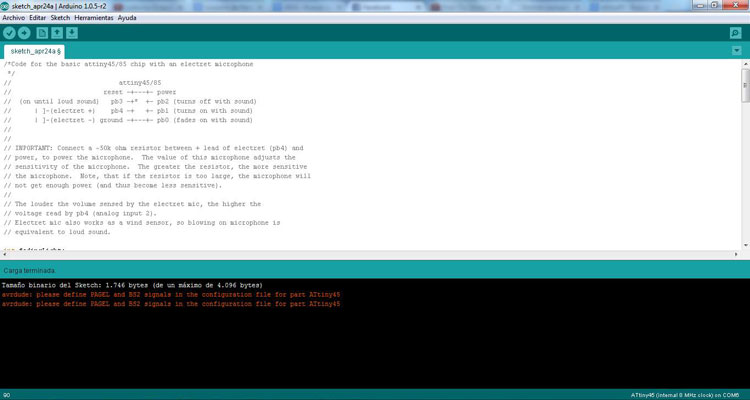
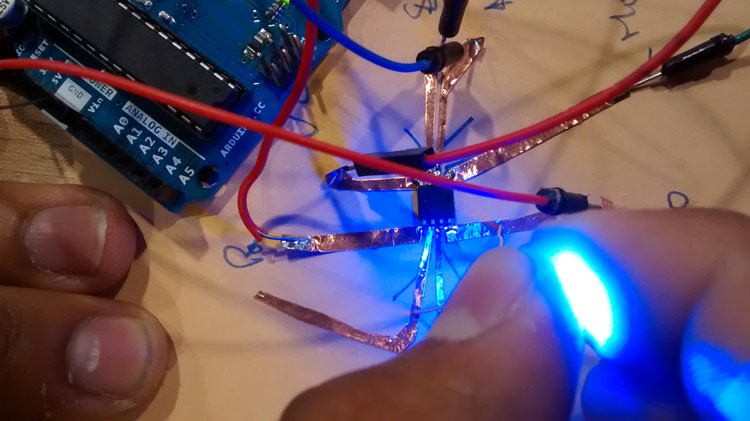
After programming the ATtiny I solder into the my paper circuit


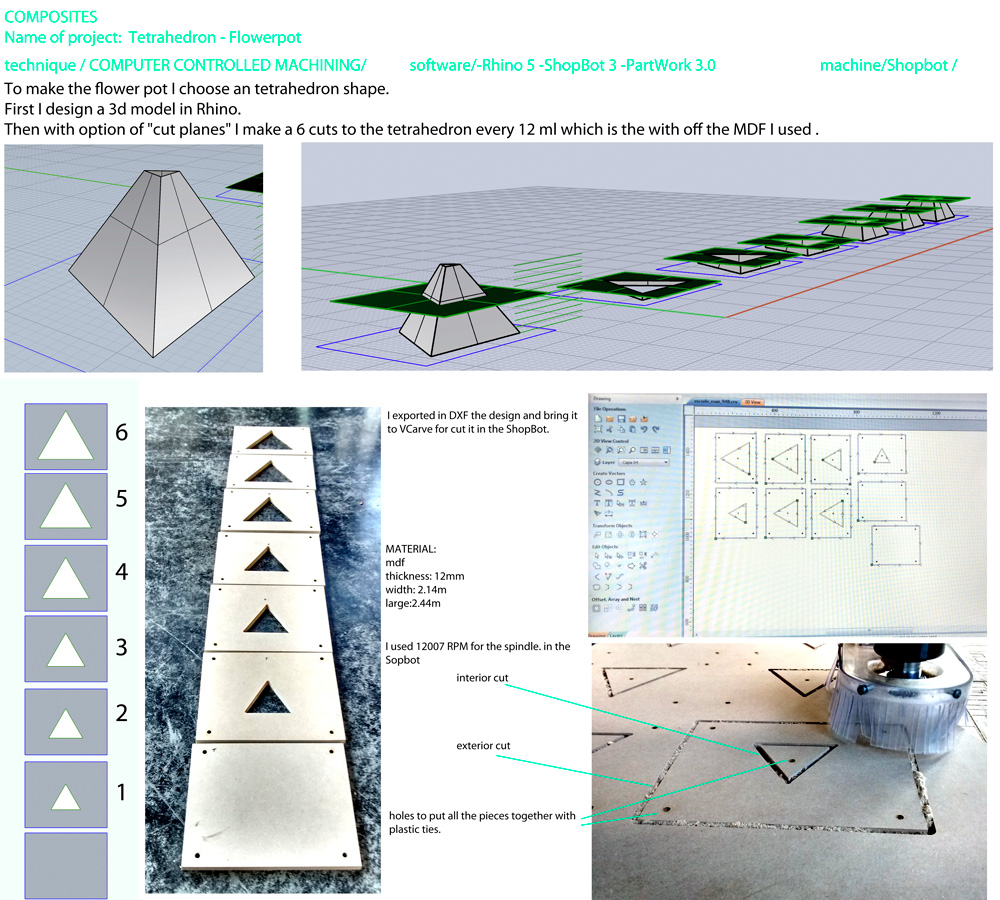
The idea of this week is to design a mold for the composites. For this assignment I would like to make a flower pot.
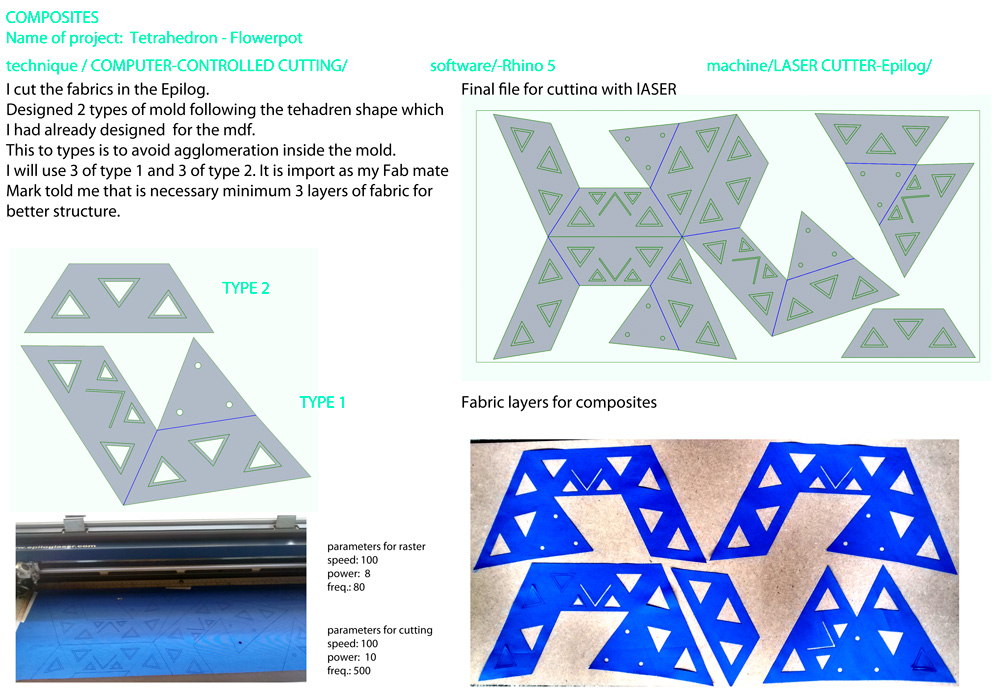
2. It is necessary to use fabric for structure your composite. As I want to make a container.
3. FINAL PROCESS : here you need the fabric and the mfd mold.


The assignment for this week was to build a wired &/or wireless network with at least two nodes. There are a lot of kind of communications but at this moment I am especially interested in the communication wireless by bluetooth.I would like to see:
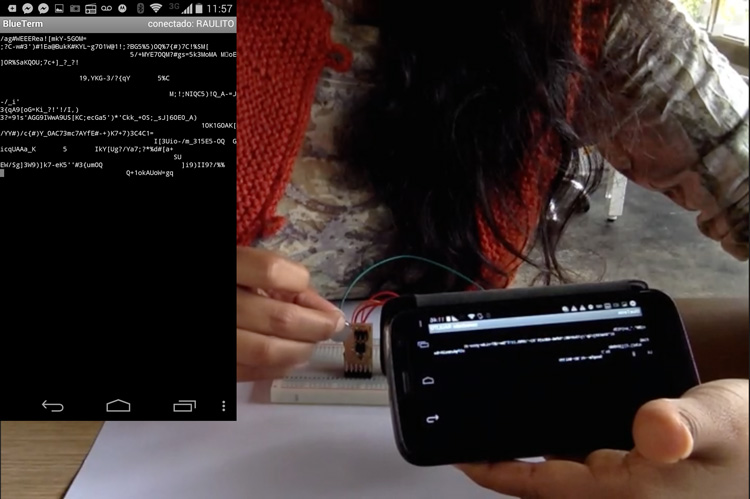
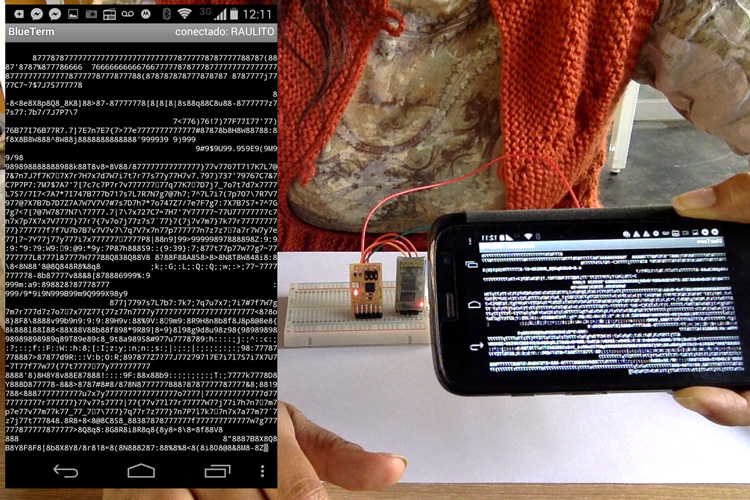
-The data of our input sensors of week 10 by the Bluetooth.
-How we can interact with our cell phones to Bluetooth and ATtiny45
-How we can interact from our cell phones to Bluetooth and an output like a Servo Motor
So for my final project I want that people could interact with my installation by controlling the movement of the "fold cells" and this will produce the communication between them.
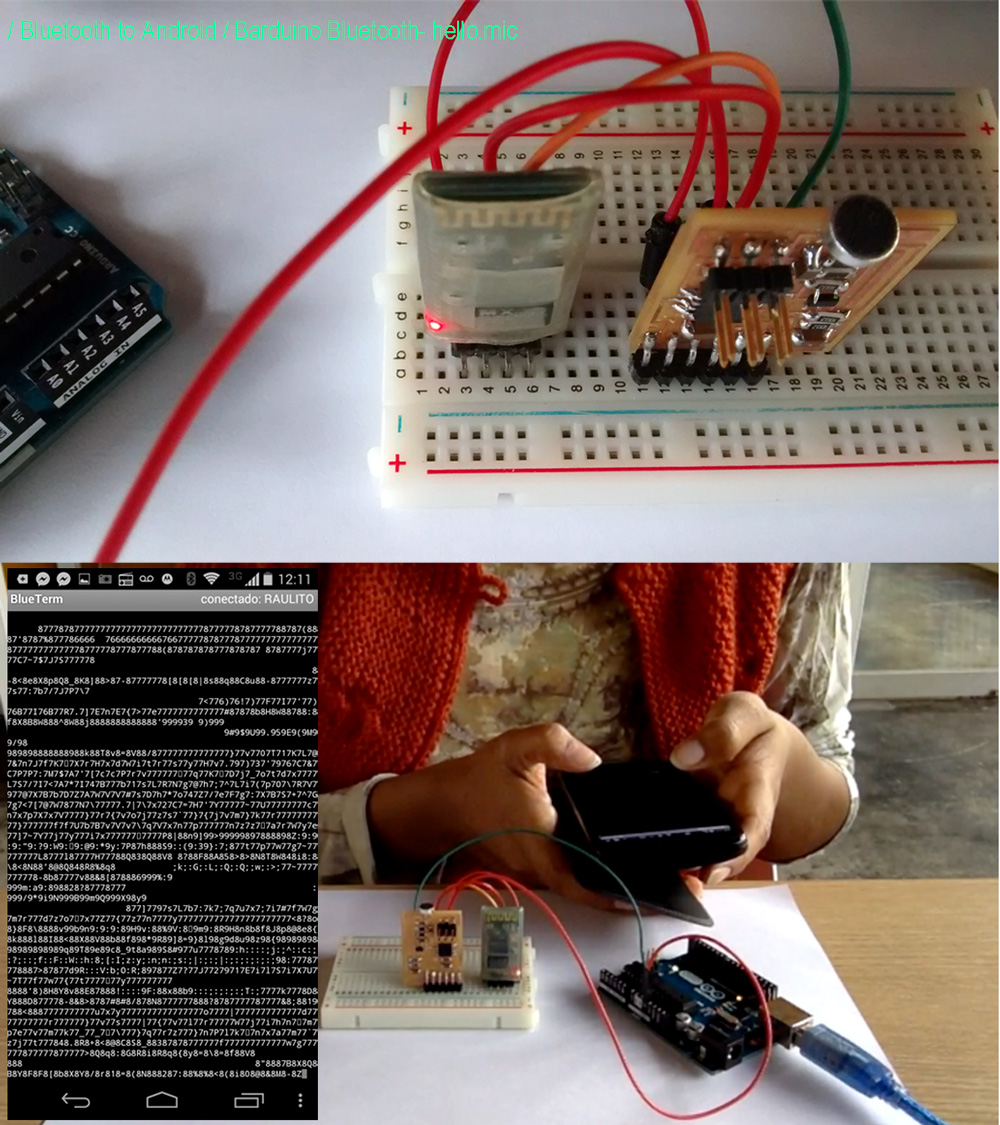
DATA FROM BLUETOOTH TO CELL PHONE
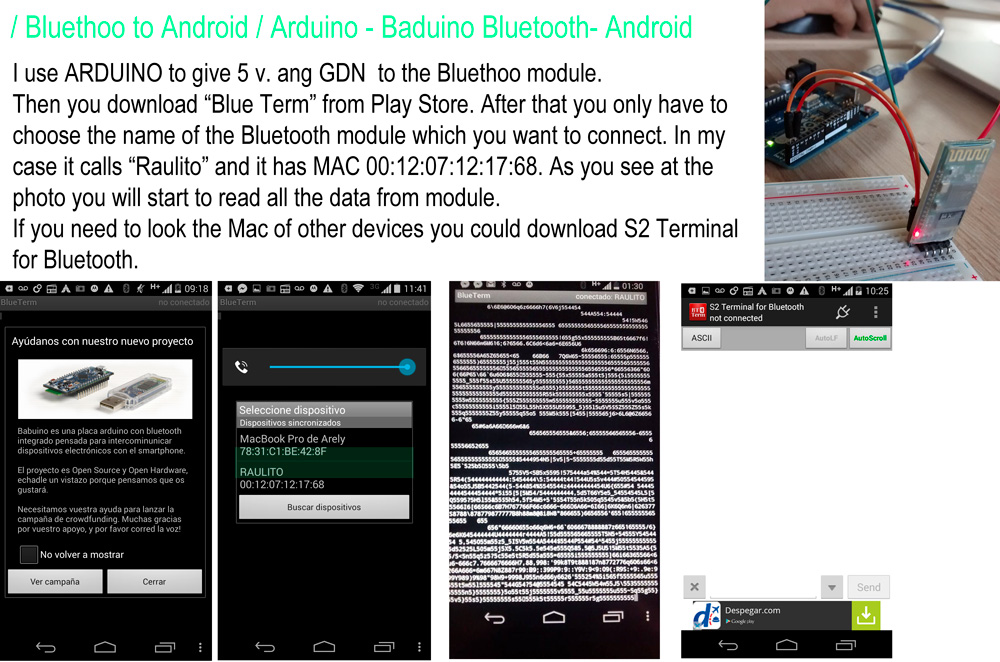
The module I used is Barduino board. Is a small board with the same Arduino Uno microcontroller, Atmega328P.

The application I used to see the data from the bluetooth is:
BLUE TERM_Terminal emulation (VT100 terminal emulator) to connect to any device with a serial port using a Bluetooth-serial adapter.You need a Bluetooth-serial adapter.


SERVO MOTOR APPLICATION
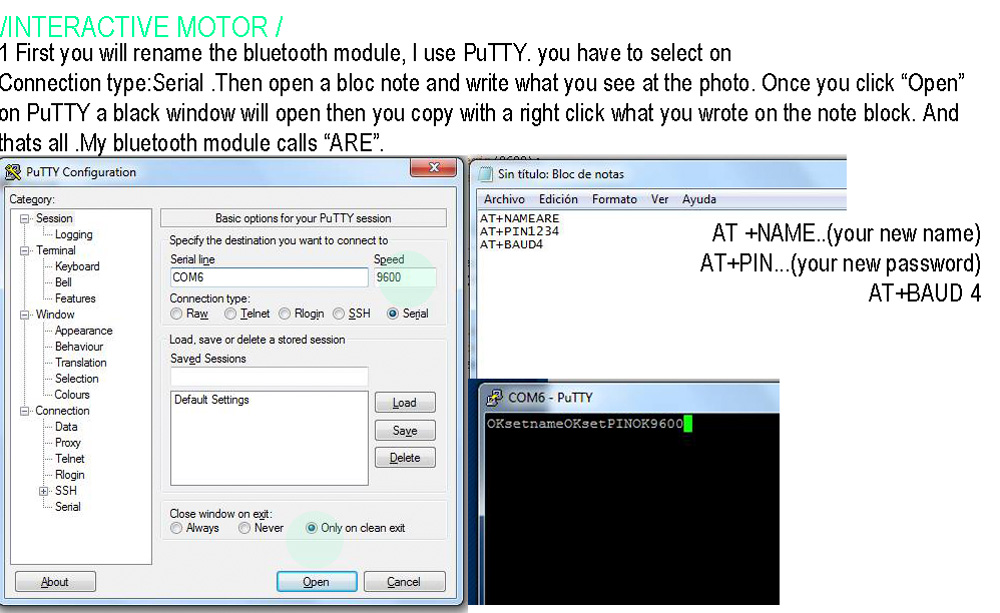
I recommend to rename your Barduino. Follow the next.
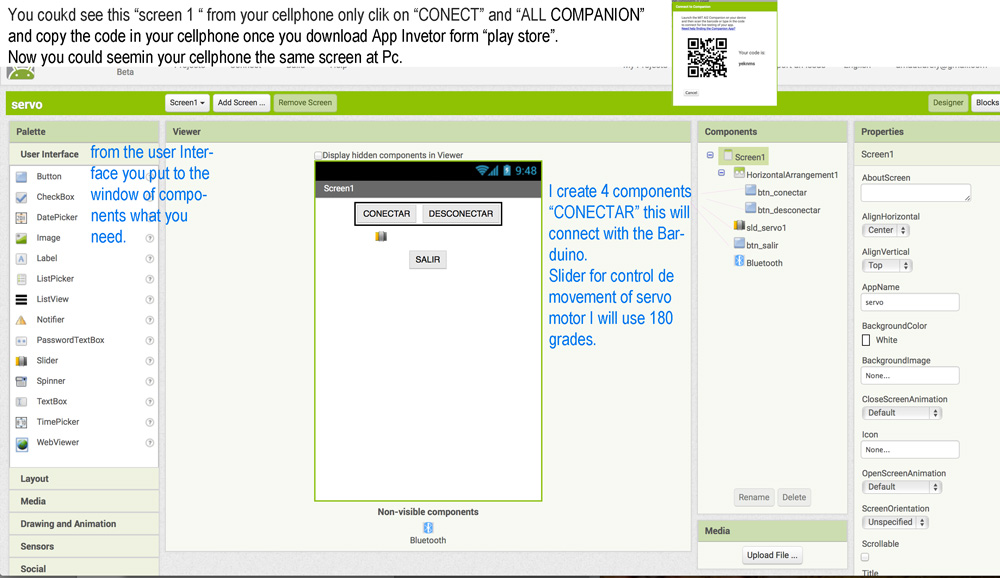
My idea is to make an application to control the movement of the servomotor this will give the possibility of interaction to my installations.So now How to do it?
Really it was nice to learnd this free program calls
Tutorial for week 10 MIT APP Inventor
"MIT App Inventor is a blocks-based programming tool that allows everyone, even novices, to start programming and build fully functional apps for Android devices. Newcomers to App Inventor can have their first app up and running in an hour or less, and can program more complex apps in significantly less time than with more traditional, text-based languages."
As you see, it is a good way of learning programming.
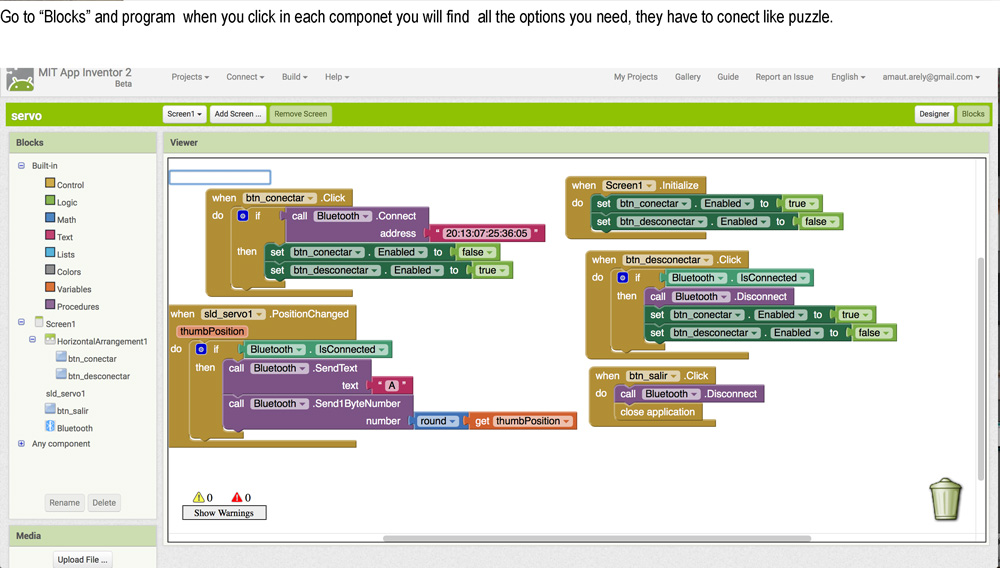
Here I show you my program, as I see it woorks like puzzle.
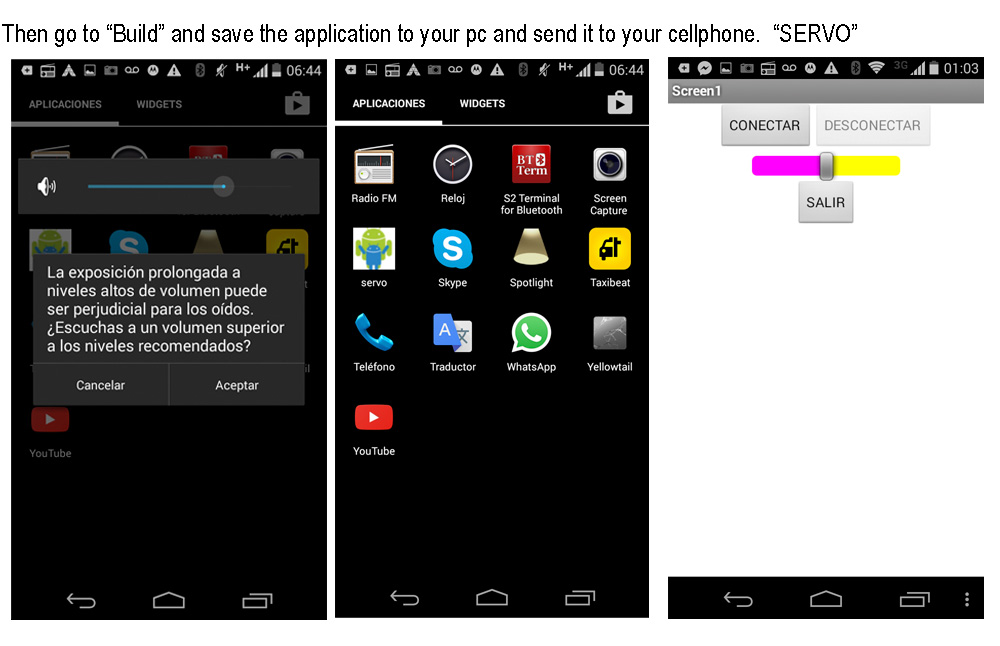
2.Second, program yoUR arduino or fabduino.I use Arduino IDE.
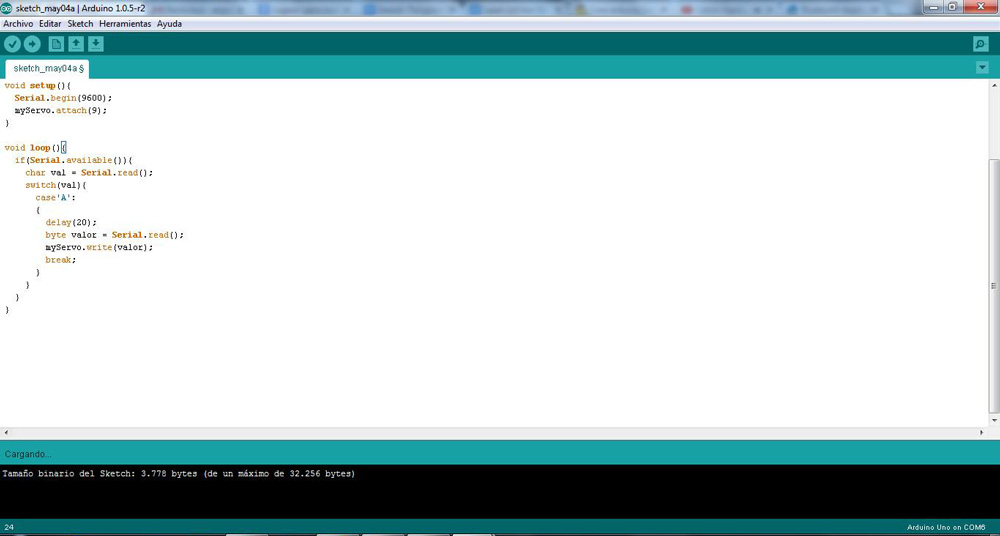
3.Finally here are the diagram of connections between the /arduino-bluetooth-servo motor /you need to make everything communicate correctly.

interactive from Arely Amaut on Vimeo.
Finally I was wondering if I could use processing on my PC and connect with the Barduino and read the information in put of hello.mag.
Because I am just learning programing I see this tutorial and try with the examples here.
Interface & Application Programming - Processin
I change the stroke and fill.
So if you see at the numbers and color one I put the magnet near to the sensor the circle pits in one color and stayed there also the the quantity number is higher.
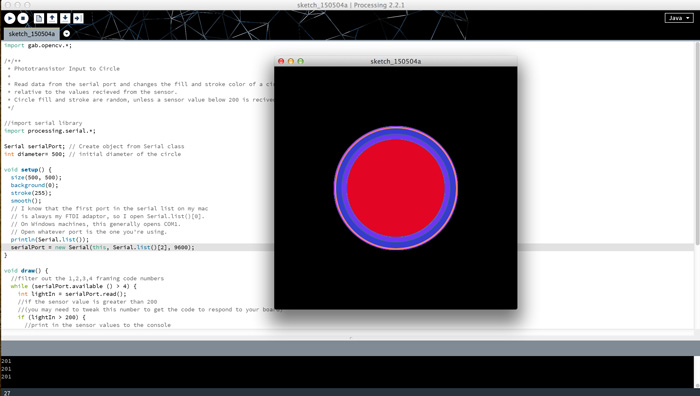

Serial Communication
As I have already experiment and learned differents ways of communication.
I decided to do something that is recommend in the week assignment, in this case the serial communication.
For this, I followed Anna Kaziunas tutorial.
The first thing is to mill and solder the boards (1 bridge + 2 nodes). Then program 3 boards.
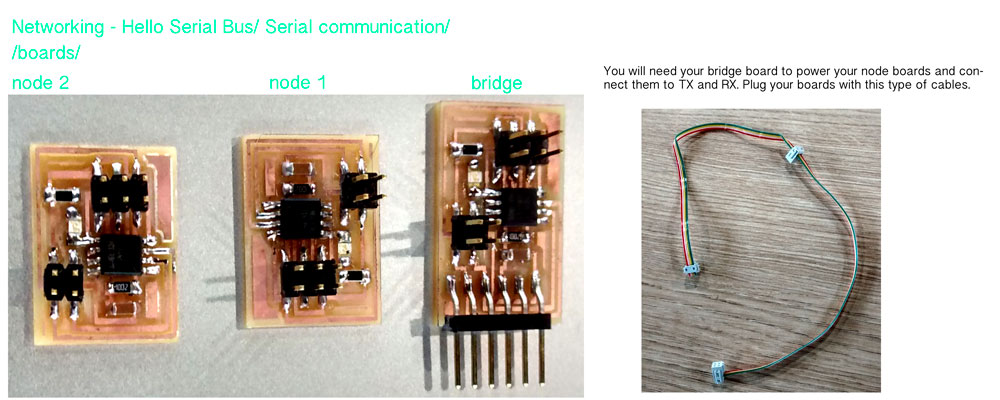
I used LINUX - UBUNTU to program the 3 boards

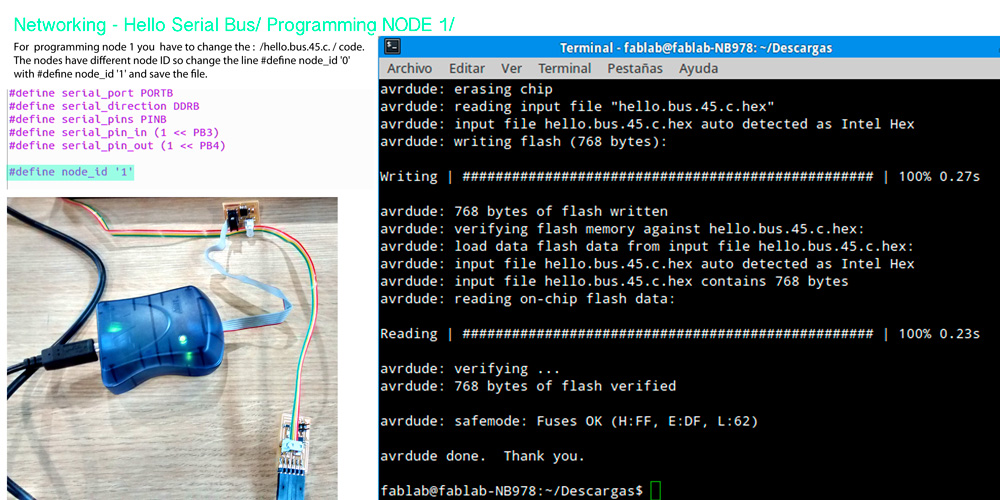
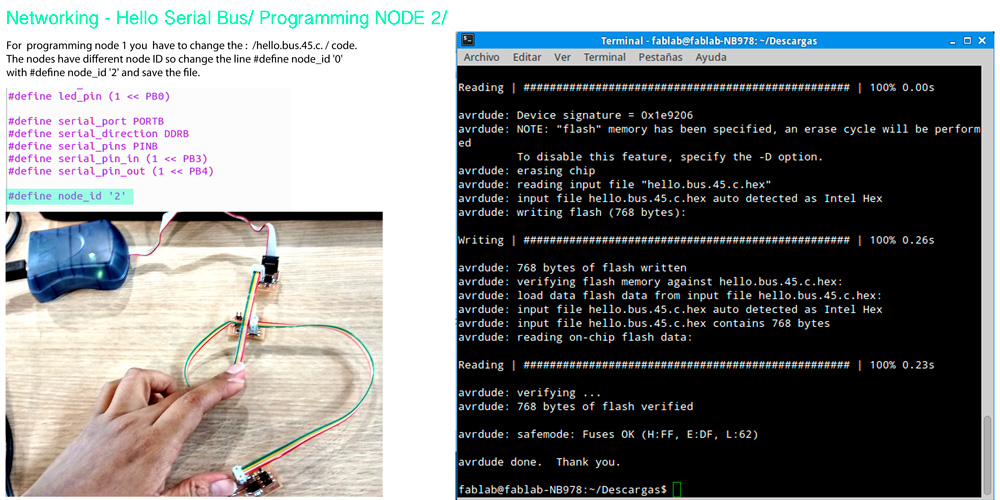
Finaly I trying: Use the Serial Monitor in Arduino. After flashing boards with 3 different node numbers: Plug your bridge into your computer (with the nodes attaches). Connect the nodes with a cable as shown in the picture.

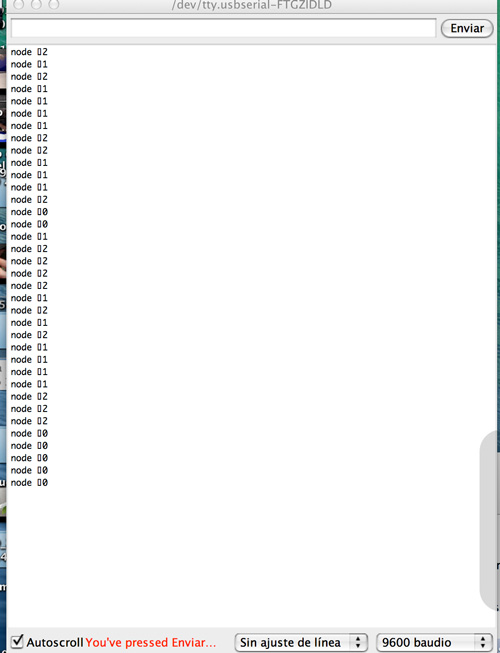
Open a Arduino IDE Open the serial monitor from the "Tools" menu > serial monitor Make sure the baud rate is set to 9600. Enter number any number into serial monitor - press the "enter". The LEDs on all the boards should light up once. After all the boards light up, the board with the number you entered into the serial monitor should light up again. The node name (ex: node 1) should also be displayed on the serial monitor. like this:
Here you will see a video of my Serial Communication. I enter different numbers and check that serial connections was working. So everything was OK ! The nodes and bridge turn on. Once I put "1" in the serial monitor every node flash then I enter different values to see the response.
The assignment for this week is about:
Serial Communication is the process of sending data one bit at a time, sequentially, over a communication channel or computer bus. This is in contrast to parallel communication, where several bits are sent as a whole, on a link with several parallel channels.
So now I will try from two types of inputs:
- My desing hello.light
-Microorganisms and human beings
HELLO-LIGHT PAPER
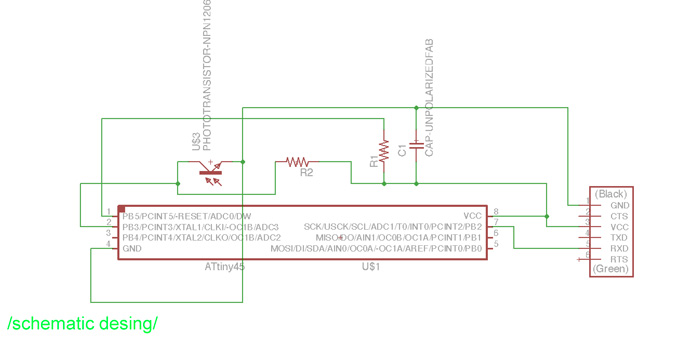
I use Niel's design and take out the ISP because I want to design a flexible circuit and have the less components in it. So I program my ATtiny 45 on my paper programmer with and Arduino IDE as the week 11.
Here is the process of programing the ATtyni 45

.
EAGLE DESING
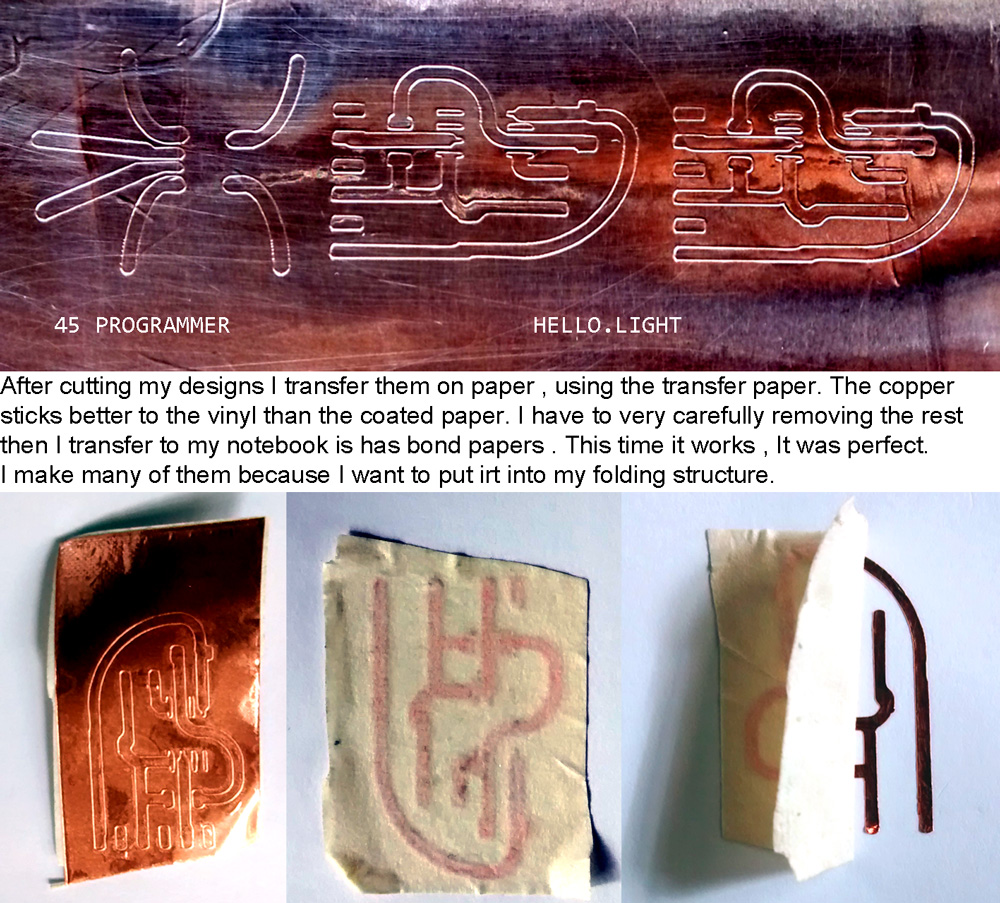
I used 0.5 mm as width of the traces . I didn't use the auto-router function in Eagle, so I was in full control of the routing. The copper foil tends to twist and come loose when you have sharp angles in the design for the vinyl cutter. My design is all with round corners, to do this I placed the components a bit further apart than is usually . After finishing the lay out in Eagle I edited the traces in Illustrator to round the corners of the pads and eraser some possible short circuit.

CUTTING
I managed to pull the copper from the vinyl with the transfer paper.
Settings on the vinyl cutter: force 40 and speed 0.8cm/s. and the pen force of the cutting is between 0.5 and 1.
Our vinyl cutter model is Camm-1 Servo




Microorganisms and human beings
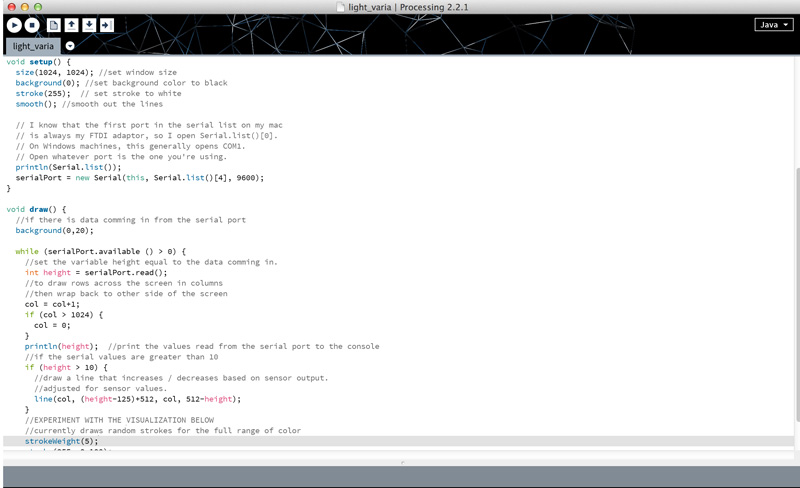
This is my second exercise I want to learn how to read and heard the microorganisms input by Processing and Max.
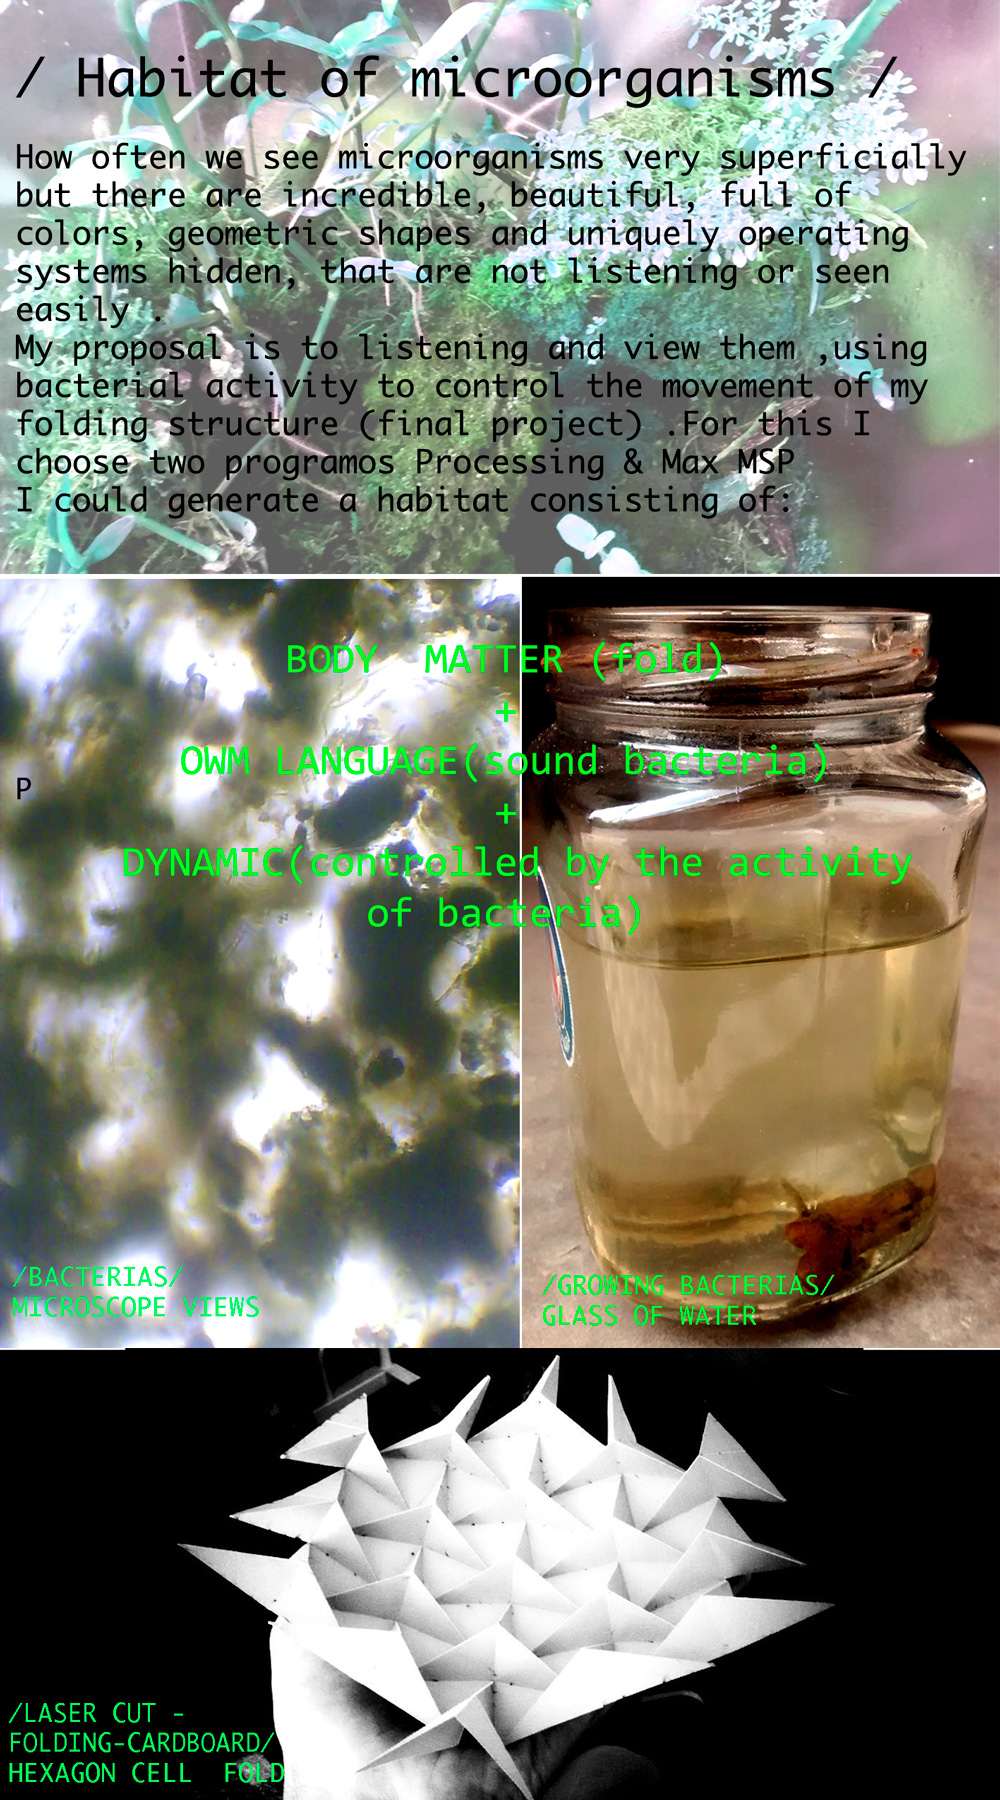
1.First you need to make a sensor of the bacterial activity so there are many ways, what I used was carbon fiber . I make a roll and put a wire as a knot then insert the two sensor into the water as you see in the photograph one is the ANODO (+),it has to be at the surface and half inside, the other is the CATADO(-) it should be at the bottom of the water.
You could see that there is electrical activity using the multimeter.
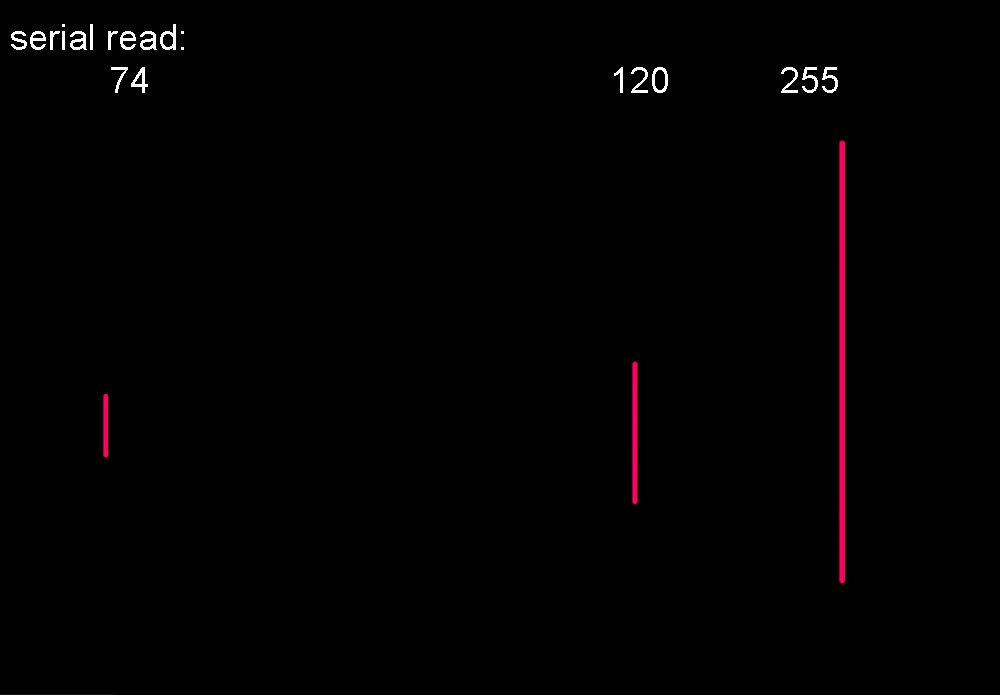
Now with an Arduino I will see the information of bacteria by serial read.
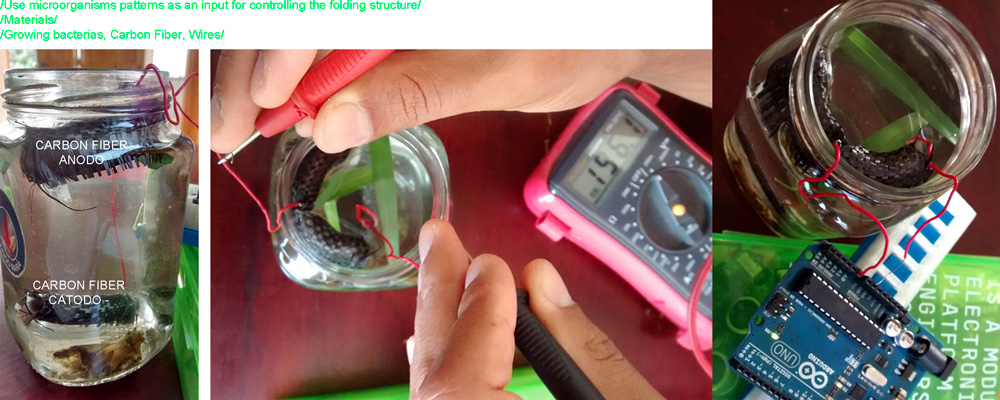
For this at firsT I could´nt see significan varations from serial read.So I lock in the web for a simple circuit that will amplifier my reading this was a "SOUND AMPLIFIER".For this circuit I use a OP-AMP and to resistance of 100k.
circuit

2.Now with an Arduino I will see the information of bacteria by serial read.
FILES OF MAX- ARDUINO CODES, ALL THE EXAMPLE I USE IN MAC
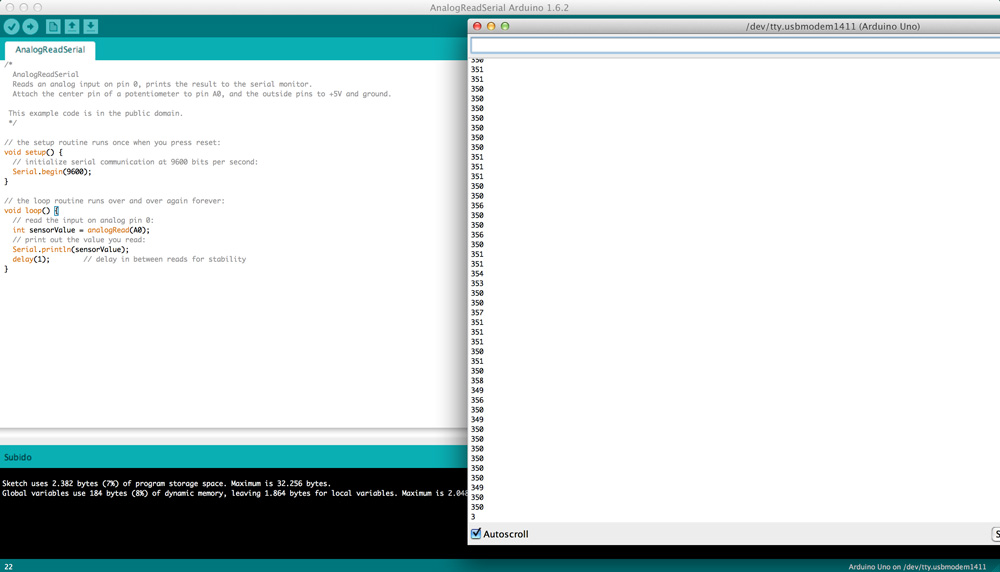
CODE FOR ARDUINO
void setup() {
// initialize the serial communication:
Serial.begin(9600);
}
void loop() {
// send the value of analog input 0:
Serial.println(analogRead(A0));
// wait a bit for the analog-to-digital converter
// to stabilize after the last reading:
delay(2);
}
